Search the Community
Showing results for 'overhead rebuild'.
-
 Finally got my shower project done, the back wall was wavy from what I thought was a leak from the shower, turned out to be a screw through the seam of the top and sides. Much brighter than wallpaper now anyway and looks sparkly clean.
-
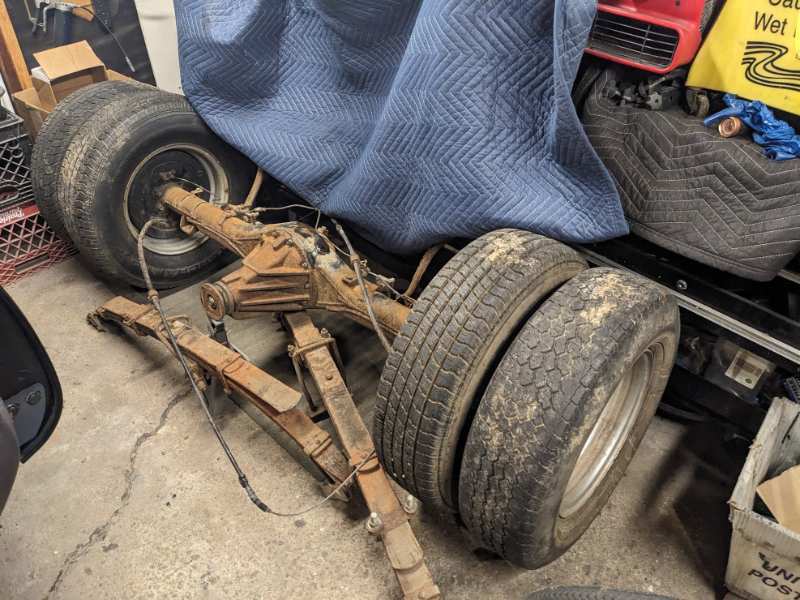
 Got a 1990 Toyota motor home I’m planning to rebuild the rear end, it’s got the 6 lug dually rear end. Just wondering if anybody knows a kit I can buy that includes all seals and bearings and I’ll probably do brakes and hardware. Or part numbers. Thank you.
 -
 I was able to score a 1 ton 8" axle out of an old Dolphin from Facebook marketplace and plan to swap my G082 diff for the full floater. I'd like to rebuild it before installing it, but I can't really find any resources on specs. While I'd imagine the center section is basically the same, does anyone know if there are any resources for rebuild procedures, torque specs, etc. for the 1 ton?
-
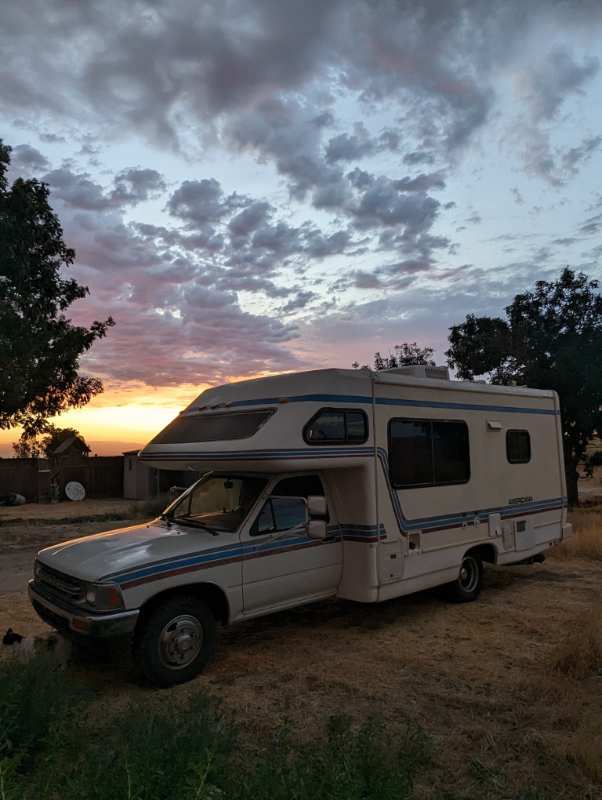
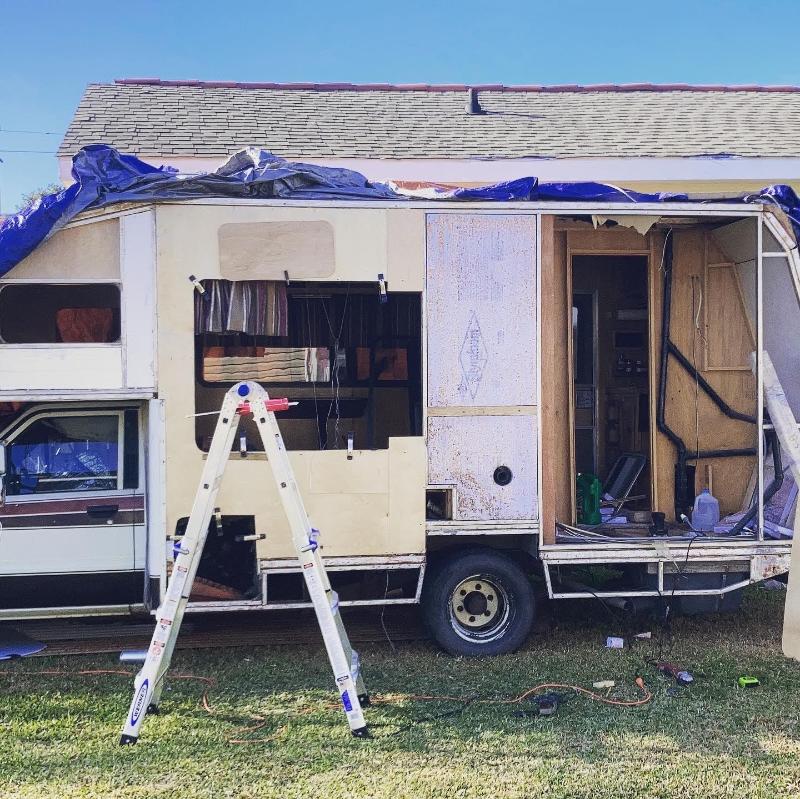
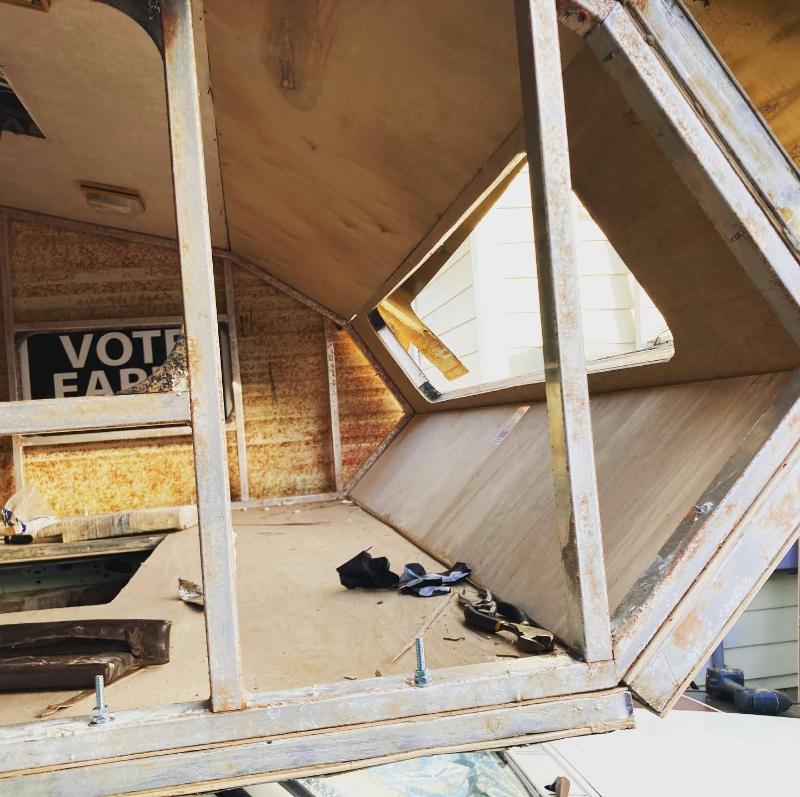
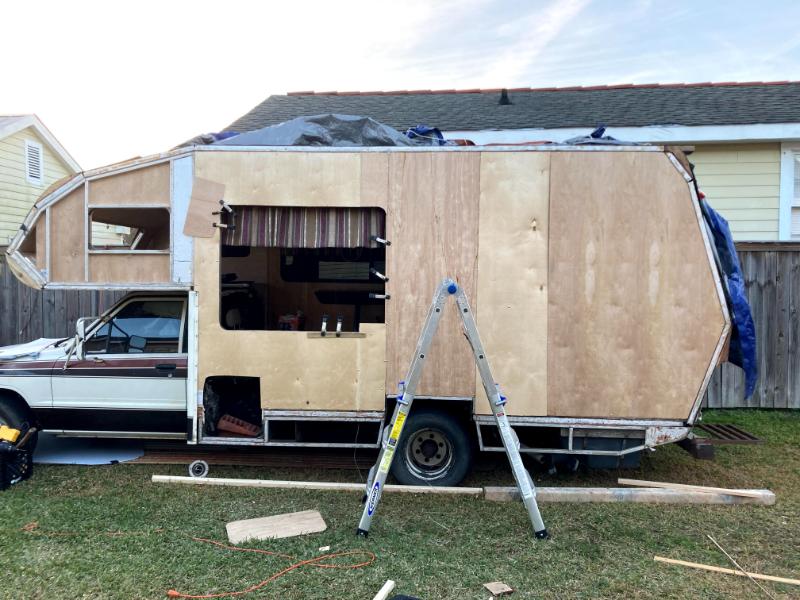
Good Morning my new friends, about a month ago I was able to pick up my first Toyota Camper! We had been looking for a long time and the timing lined up right for us to get this 1990 Americana. It looked like it had been re-modeled well with some nice addition like solar and a deiseal furnace but some other area where more just patch up, band aid jobs like the over cab section. I didn't take any before pictures but when we got it there was a piece of plastic siding covering up the front window. Once I got it home and took off the siding I was able to start seeing the water damage and mold, not a nightmare amount but enough to warrant a remodel. After looking around the forums and watching every youtube video that came up when I searched "Toyota RV Remodel" I found out that there was not a lot of info on this particular model. I am about half way through rebuilding the over cab floor and walls and wanted to start posting the progress in hopes that it may help someone in the same situation as I am. One question I have is this, I was going to just copy what was originally installed for the side walls (two layers of plywood with a thin layer of veneer) but I was thinking about changing it and doing two layer of insulation board with a layer of veneer. Any thoughts?
-
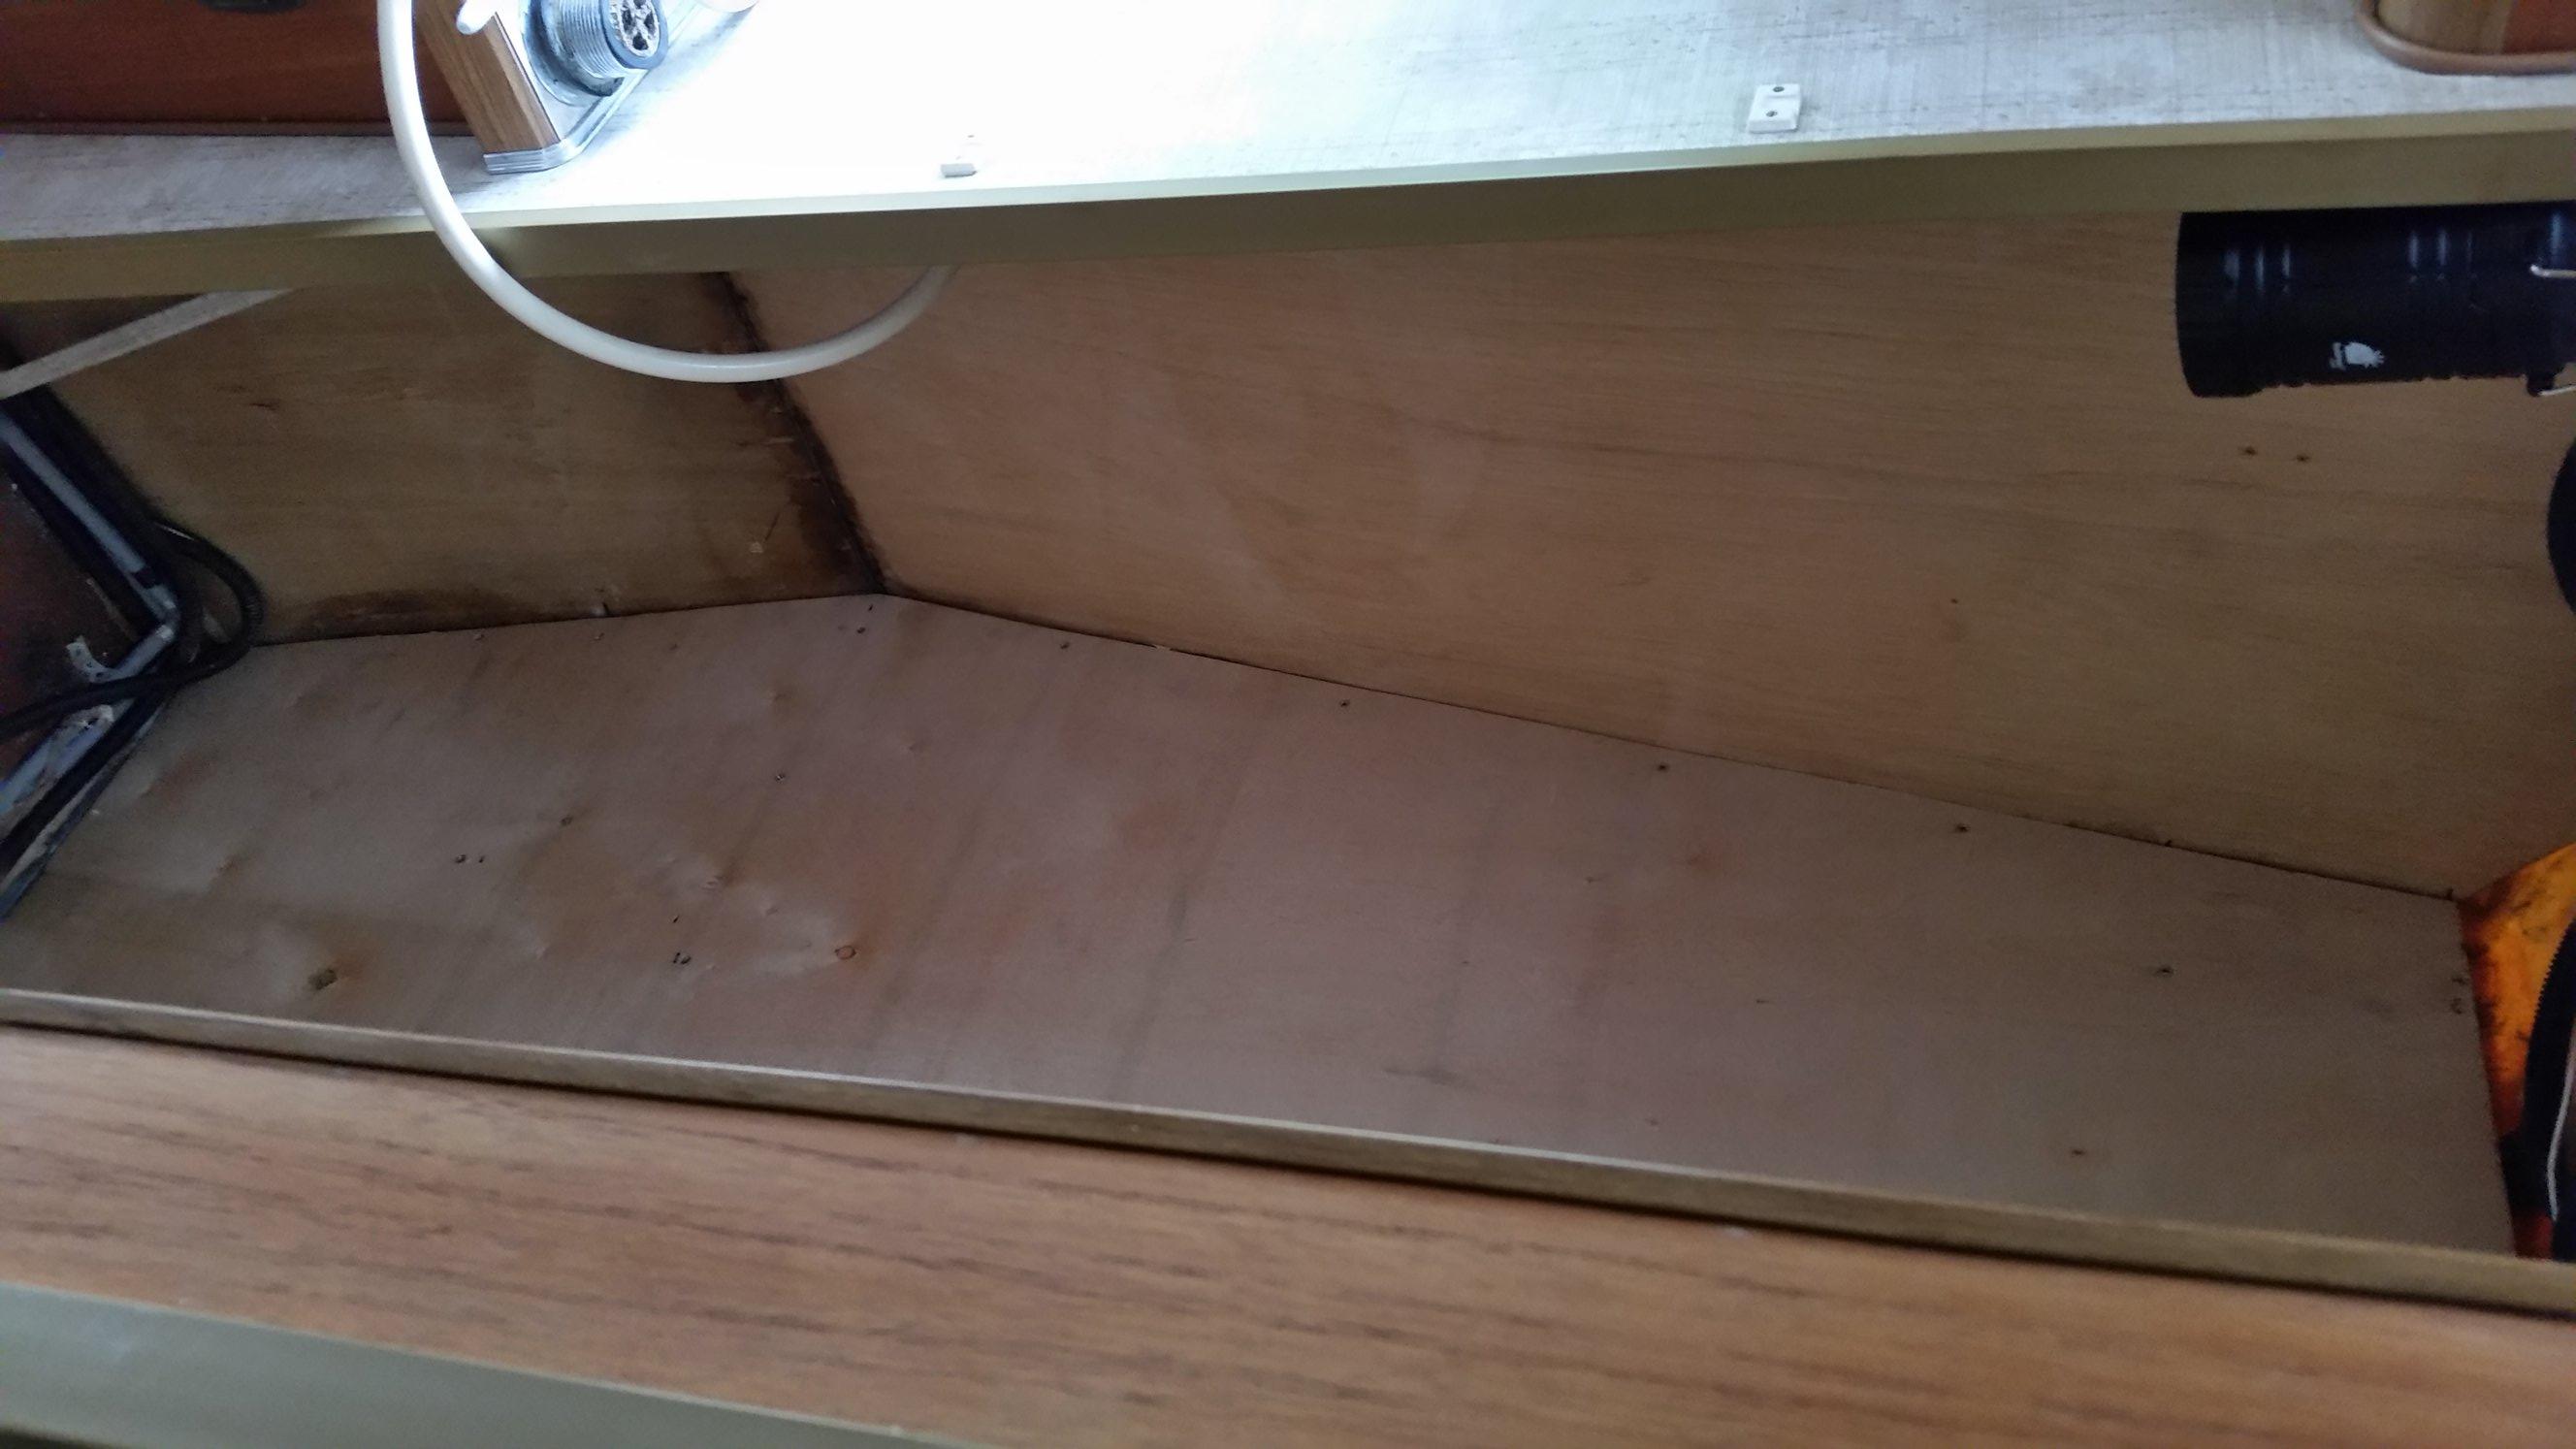
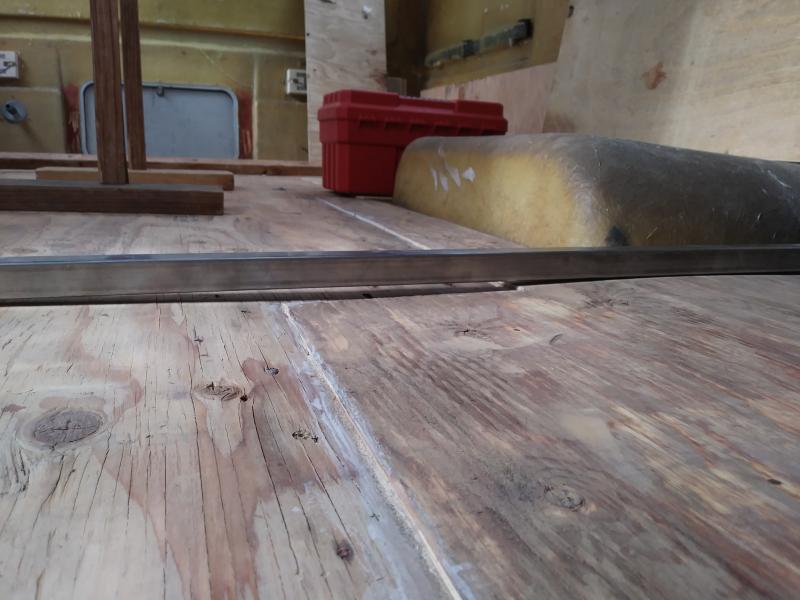
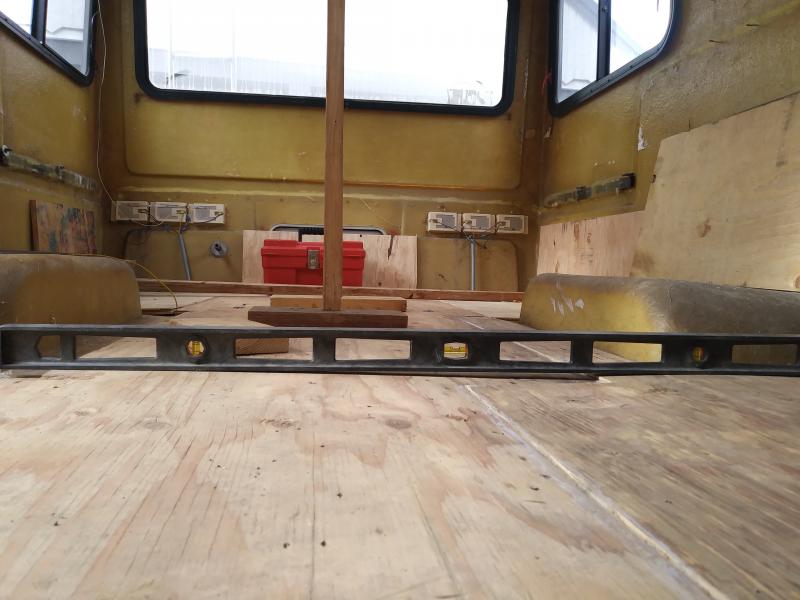
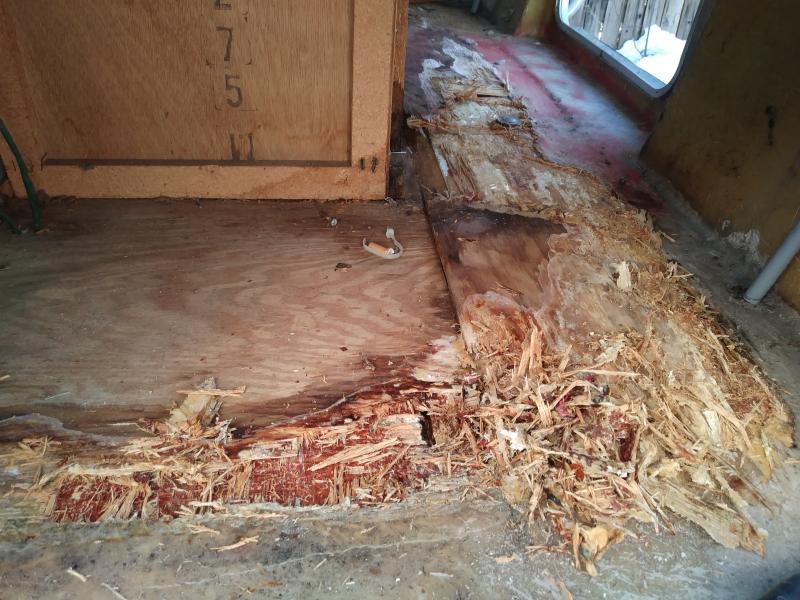
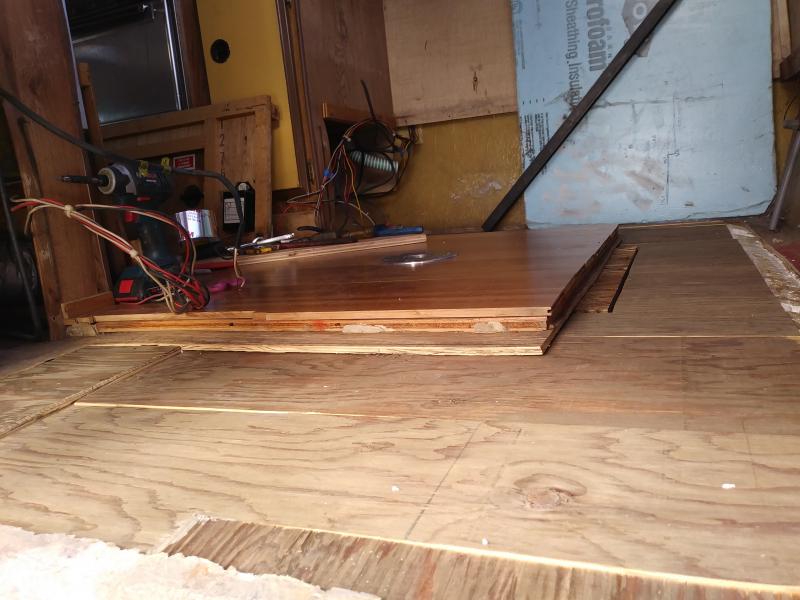
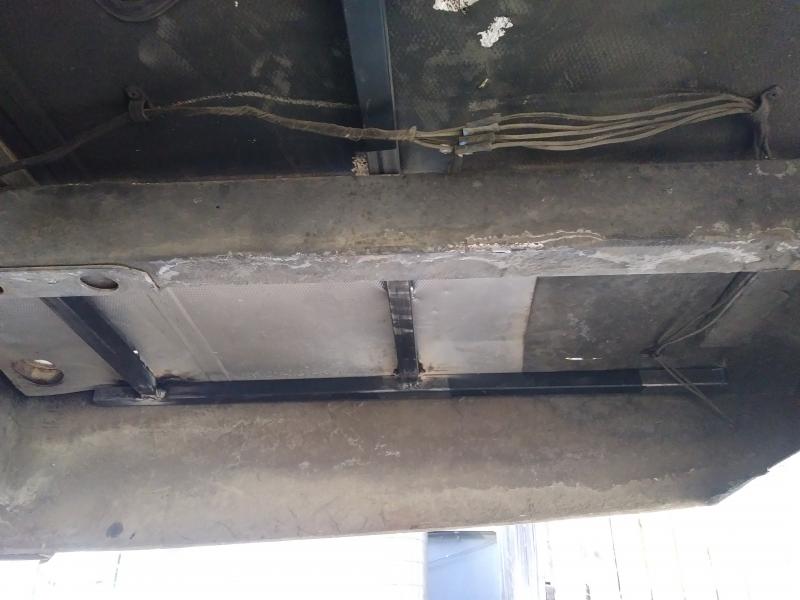
 Edited 4/3 to add some pics of the floor damage and initial repair I did so all of the project is in one thread. Found a rotten floor under the propane tank and the fresh water tank in the 1985 Sunrader I just purchased in December. I cut out all the rotten wood, replaced with 3/4" PT ply and then built up from there. I also added 1" square tube wings underneath welded to the frame to add support to the sides in the back. From there I rebuilt the floor with new plywood, glued and screwed the layers together and finished with some primer on top and the edges. And so began the process of the rebuild of the sunrader. I recently repaired the floor in my 85 Sunrader, but the plywood pieces I added do not line up flush and the floor is not flat. Does anyone have a recommendation on how to level and flatten the floor? So far my ideas are to glue and screw down more wood, build up the low spots and then plane it back down to flush and flat, but that seems like a lot of work. My other idea is to use a epoxy fairing compound to build up the low spots and then sand flat and level but am concerned about the vibration and movement from driving down the road. I'm trying to flatten this surface as opposed to adding another layer of ply to even it out because head room is a scarce commodity! I want to just lay peel and stick tile on top of this surface. Any advice or suggestions will be greatly appreciated! Thanks, Jay
-
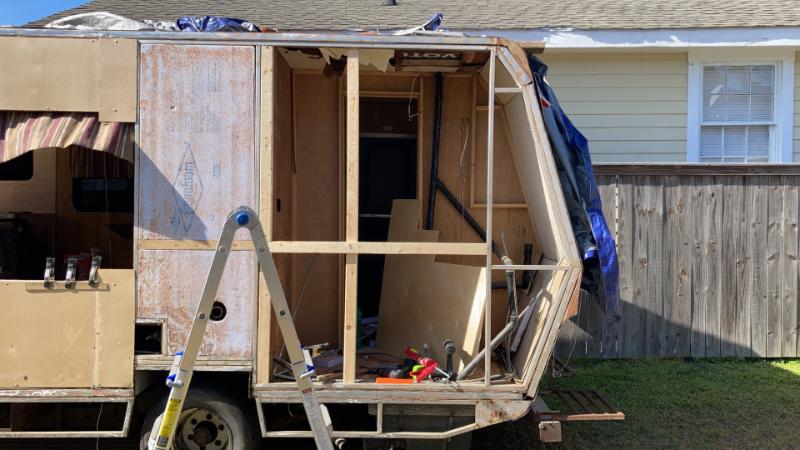
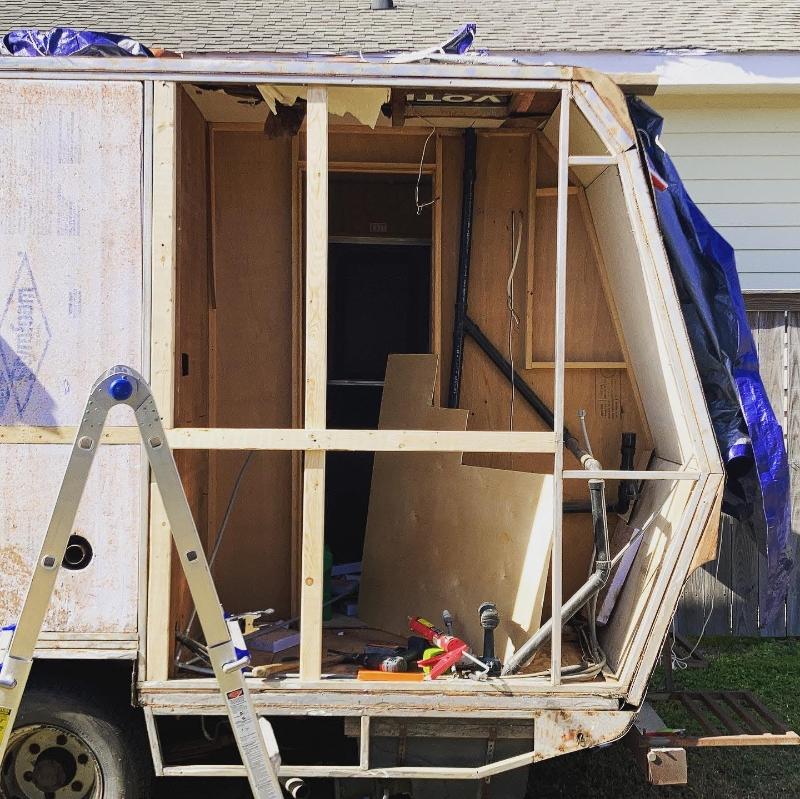
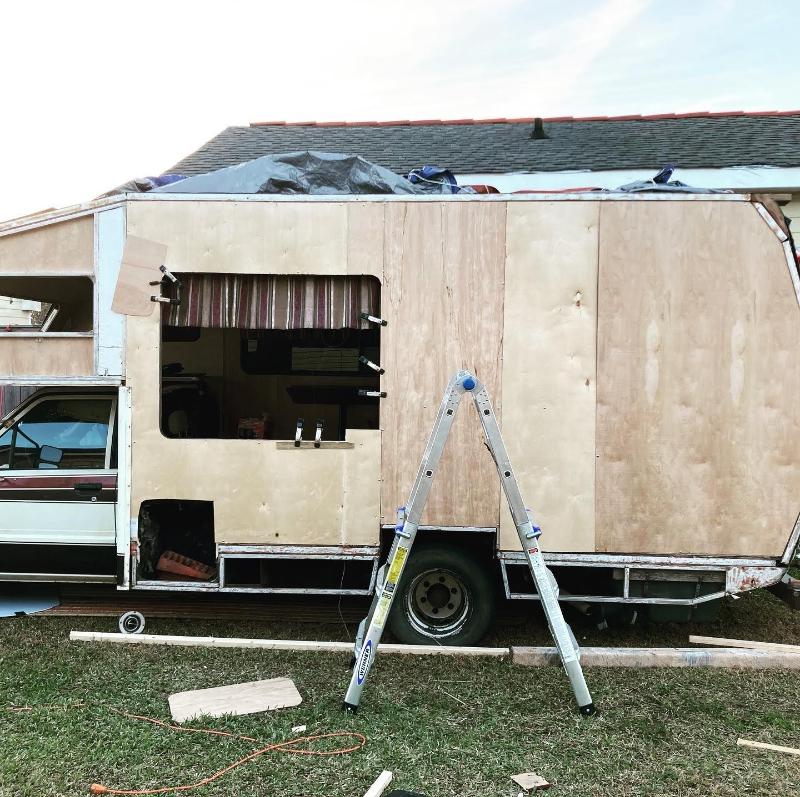
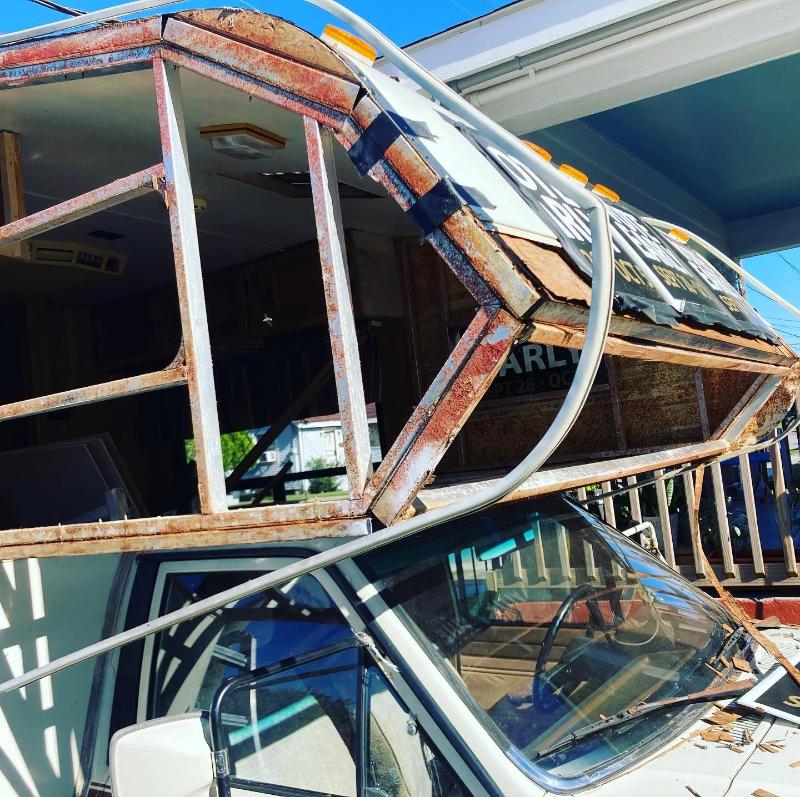
 Hey all, I have a 1985 Dolphin with 60,xxx miles that I've owned for a couple years and I put half of that mileage on. This rig has been the most reliable vehicle that I've owned and have driven it coast to coast 6 times. I am an experienced tradesman and I recently endeavored on some minor repairs. Well you can guess what happens next...I have totally gutted this vehicle to find that practically every popsicle stick they put it together with is going to need to be replaced, and I was hoping to elicit some inspiration from stories of recovery from the brink of death, or when it was finally time to put an end to a motorhome's suffering. By the way, it wouldn't ever go to the junkyard, it would be turned into a badass flatbed truck. If anyone has done the latter, have you had any issues registering the MH as a flat bed?
-
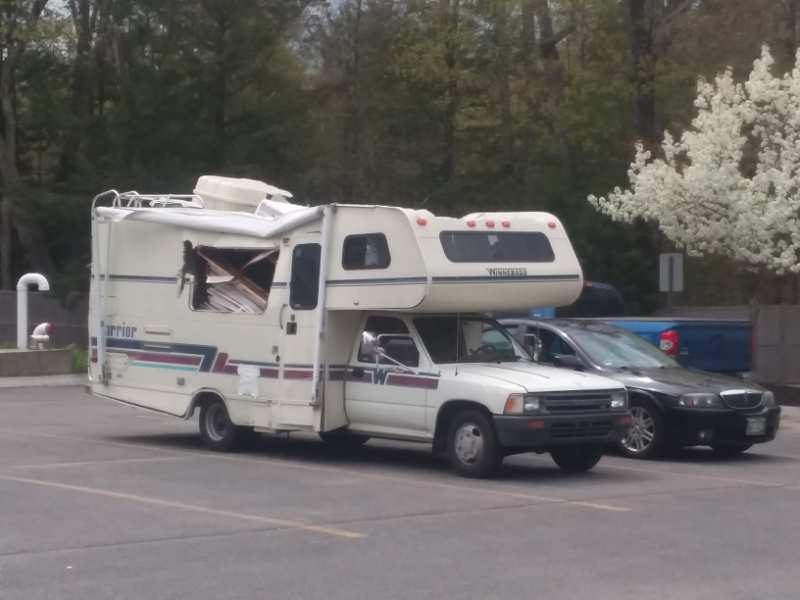
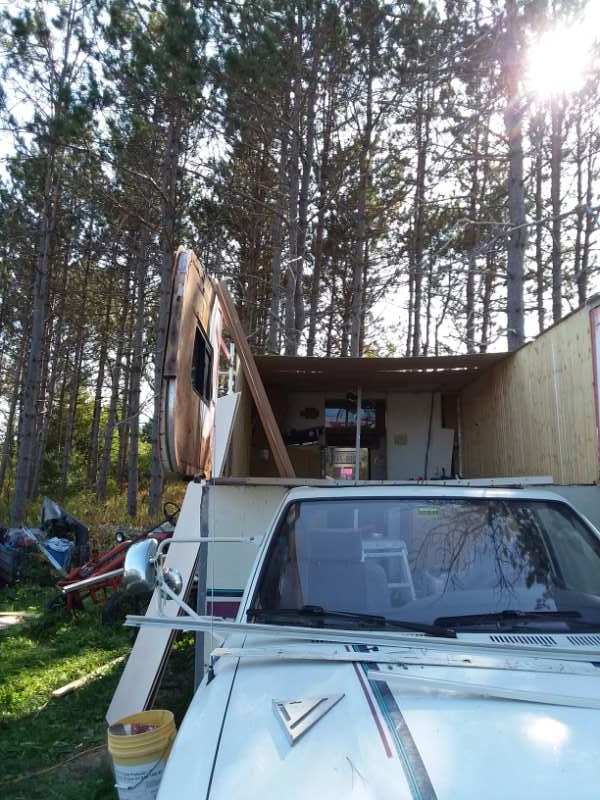
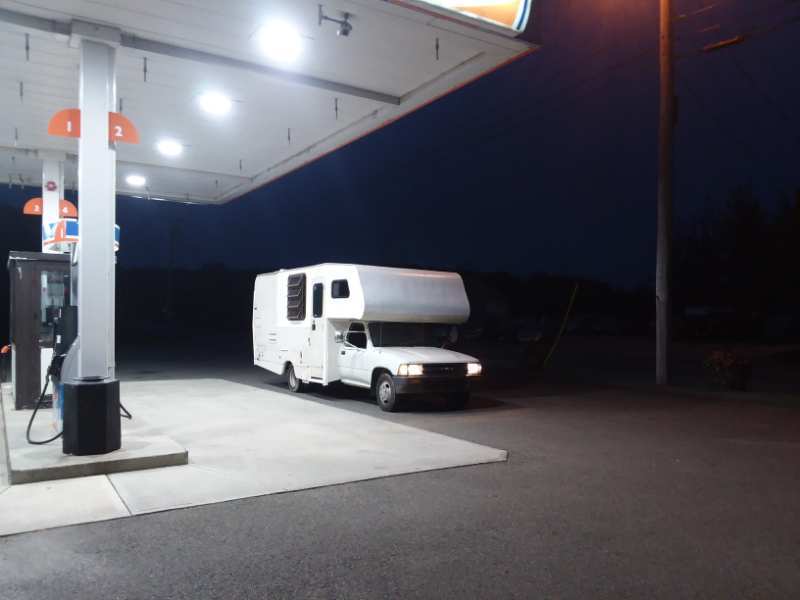
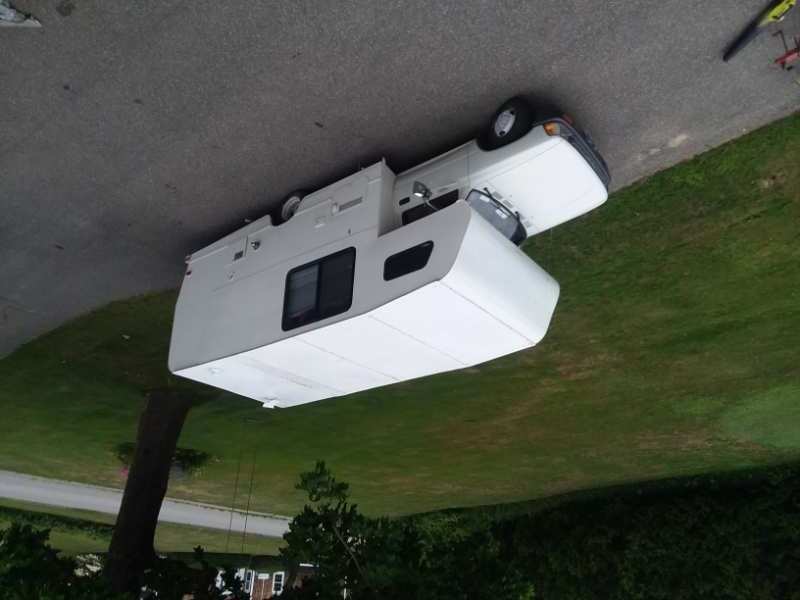
Been spending time going through 10 plus years of Digital Photos of various projects I have done. The 1991/1992 Warrior while still a work in progress is well worth sharing with others. A few pictures to start with then I will add more with some commentary.. When I purchased the 1991 it had just come from an Insurance auction. It had been declared a total loss from an encounter with a pine tree. There was a branch 5 inches around driven through the floor just missing the fuel tank. It had staked the rig to the ground and someone had used a chainsaw to free it from the ground so it could be towed away.
-
Hello Everyone! I have been searching and can't find a real answer to my dilemma of wood thickness in the overcab. Can I use 1/4" plywood (instead of the thinner 1/8" lauan plywood) to rebuild my overcab side walls and sleeping area? If I can, do I just glue and staple the roof area that has the curve leading up to the front overcab window? Is there some sort of preparation I need to do to the 1/4" plywood to help it bend and fit snuggly into the curved roof - front wall area? Could I use 1/2" plywood for the bottom bed area? I ultimately want to paint this whole area white (research shows that the lauan typically absorbs moister from the primer and paint, which in turn causes the lauan to delaminate and bubble). Any and all advice for me is very much appreciated. Thank you everyone that contributes to this amazing and informative forum.
-
 Here is some of the progress:
-
Thank you to all the active posters in this forum!!! I have been learning a ton from each of you, including what tires to buy the value of my 22RE engine, and how not to totally panic as I work to bring my 87 Seabreeze back from almost 2 years of neglect during Covid, and a ton of damage my RV suffered in a "secure" storage this year. It is now in a new lot, thankfully. (Pic below is before the 7 new Nexen tires I just put on, alignment, etc.) I could use help in locating any California Bay Area companies willing to repair dry rot or rebuild a wall on a Toyota motorhome. I have been trying since the Summer, but many companies seem not to want to work on this type of older motorhome because it takes "a lot of work to repair dry rot or do any amount of rebuilding of the structure". It is confusing to me because I'm not asking for the work to be done for free, and there seems to be a push from the vendors to get me to sell my RV. I'm not interested i selling it, currently, but I am interested in repairing the passenger section of wall from the door to the back (I may be over-estimating the scope of the repair, because I am adding 3ft in each direction from where I noticed some damage... I wish I had a place, the tools, enough time and level of skill to do the work myself for this phase of my renovation journey, alas... If anyone has a solid company for RV structural repairs, please advise. 💗Thanks so much and now that I've finally joined this forum instead of just reading and learning, and I'll also start posting a list of great resources, and products that I have been discovering on my renovation and improvements journey...💗
-
I have a 1991 Odyssey that I'm thinking about driving around the country. It's in fantastic mechanical shape, but the driver's seat is pretty shot. I've put up with it for shorter trips, but now that I'll be driving more I'd really like something more comfortable and more healthy for my body. I'm a pretty fit 5'9" 180lbs, but I've had three hip replacements on one leg and want to be able to do 6 hour days in relative comfort (and without hurting myself). I'm looking for suggestions on either rebuilding the seat (upholstery is in good condition), or buying a replacement that is relatively easy to drop in. I have a great mechanic who could probably retrofit anything in there, but I'd rather not spend a ton, and he's $125/hr... Oh yeah--budget is basically as little as I can spend while still having a comfortable & supportive seat. I once looked into rebuilding the driver's seat on a Volvo 240 and it shocked me, like $400+. So: I'm looking for the most cost-effective ways to get a quality supportive seat under me. Thanks!
-
How much should the space between the doors when opening and the overhead bunk be?
-
 Ok...been lurking here since this past July when I bought this 84' RBR Mini Cruiser. I got it pretty cheap, had a lot of water damage and was missing a lot of stuff. Never owned an RV before. I bought it so that I can go on a fun road trip with my dog, Lulu. So far it has been a labor of love, but also a labor of hate...burning...seething HATE. But at least it's starting to look like an RV again. Almost wrapped up with the outside, here's some pictures of the progress so far: Look at that nasty ceiling this was after I tore a layer of whiteboard out that was held up with 1x2 screwed to the walls/cabinets IMG_20170707_110338 by jettaphile, on Flickr More kuckiness IMG_20170707_110305 by jettaphile, on Flickr Missing lots of stuff: IMG_20170707_110343 by jettaphile, on Flickr Tore that OOOOO open like a can of sardines IMG_20170723_122000 by jettaphile, on Flickr Making roof frame with 1x4's IMG_20170729_130902 by jettaphile, on Flickr IMG_20170729_130906 by jettaphile, on Flickr Used this Protecto wrap stuff as a gasket on top of the aluminum frame IMG_20170729_174257 by jettaphile, on Flickr Halfway gutted IMG_20170804_161422 by jettaphile, on Flickr The shittiest pile of shitty old shit I've ever shat: IMG_20170805_110652 by jettaphile, on Flickr 1/4" birch for the roof IMG_20170806_180645 by jettaphile, on Flickr Floor was drilled, injected with epoxy, and dowels hammered in/cut off IMG_20170808_200449 by jettaphile, on Flickr A rarely seen view of a Toyhome! IMG_20170810_182625 by jettaphile, on Flickr New wall panels IMG_20170812_181335 by jettaphile, on Flickr Frame for the bunk area IMG_20170813_161934 by jettaphile, on Flickr Got rid of this one piece bathroom closet thing...Don't like the idea of having to sit on the toilet while having a shower IMG_20170814_113956 by jettaphile, on Flickr Easy to panel the walls when nothing is in your way! IMG_20170815_173943 by jettaphile, on Flickr Laminate flooring installed IMG_20170816_182752 by jettaphile, on Flickr Frame for the couch, and new 6gal water heater and 12gal water tank IMG_20170817_185259 by jettaphile, on Flickr Tent city IMG_20170818_130726 by jettaphile, on Flickr I think this is from Wendy's or some other fast food restaurant. Insanely heavy IMG_20170818_130738 by jettaphile, on Flickr First piece of filon laminated! IMG_20170820_173407 by jettaphile, on Flickr Insulated IMG_20170823_151912 by jettaphile, on Flickr IMG_20170826_150702 by jettaphile, on Flickr Look at that shine! I used a universal gasket for a truck tail gate as the seal IMG_20170826_150721 by jettaphile, on Flickr Panels got the edges coated with fiberglass epoxy resin IMG_20170827_193250 by jettaphile, on Flickr IMG_20170829_113622 by jettaphile, on Flickr Roof! With no holes in it mwahahaha IMG_20170831_173210 by jettaphile, on Flickr Front panels were framed with poplar to be a little more sturdy IMG_20170831_131244 by jettaphile, on Flickr More laminating IMG_20170904_155042 by jettaphile, on Flickr Old panels: IMG_20170915_111300 by jettaphile, on Flickr Yay progress IMG_20170905_123015 by jettaphile, on Flickr Insulated: IMG_20170905_164425 by jettaphile, on Flickr Cedar planking, which I had to install twice...because the first time I forgot to run wires for the clearance lights IMG_20170907_200223 by jettaphile, on Flickr More insulation IMG_20170908_115049 by jettaphile, on Flickr IMG_20170908_133146 by jettaphile, on Flickr IMG_20170908_190441 by jettaphile, on Flickr Looking good: IMG_20170913_182511 by jettaphile, on Flickr Rear panels installed, moved the window up 4 inches IMG_20170915_144232 by jettaphile, on Flickr I laminated a 1x4 to the filon, then it was butted up against the roof before I cut everything to size IMG_20170915_144244 by jettaphile, on Flickr IMG_20170915_144255 by jettaphile, on Flickr I drilled 5 holes in it for the clearance lights and use the holes to sandwich some boards together while laminating IMG_20170915_182319 by jettaphile, on Flickr Had to add a seam here, the filon wouldn't be able to make that angle and stay put IMG_20170916_181858 by jettaphile, on Flickr The rear almost finished. It took me 3 days to grind all the layers of sealant off the aluminum corner trim and clean it up/paint it black The bottom piece of the rear is a 1x5 piece of clear board, that stuff made of pvc. The filon hangs over the bottom panel which is held to the clear board with double sided eternabond, then regular 2" eternabond in a "U" shape around the bottom of it, and then a piece of aluminum trim with butyl tape. The top piece overhangs the lower piece and the seam is filled with marine 5200 IMG_20170923_173857 by jettaphile, on Flickr Edges on the inside have a seam of marine 5200 and the holes where the wiring for the lights is filled with 5200 through hull adhesive IMG_20170917_191100 by jettaphile, on Flickr Everything fits...barely IMG_20170825_170803 by jettaphile, on Flickr Used up some of the leftover flooring, and put a piece of carpet in there as well, to keep the floor in decent shape while under construction IMG_20170926_182731 by jettaphile, on Flickr New water heater, added an access panel for the propane tank, and made a little panel with water inlets, and vent for the battery box IMG_20170926_182804 by jettaphile, on Flickr Need to make a box around the propane tank so that it's sealed off from the rest of the interior, it barely fits out the door! IMG_20170926_182824 by jettaphile, on Flickr Testing out some rope lights, I'll probably have them under the cabinets IMG_20170926_185616 by jettaphile, on Flickr And those last few pictures are how it sits as of a few hours ago...will add more as progress continues. I'll be painting the outside with this oil based tractor paint I got (similar to rustoleum paint jobs, that you can roll on) I painted around the windows and stuff before installing them with the same paint but in spray form, so this way I don't have to mask anything when I roll the paint on. Tons more pictures on my Flickr page if anyone is interested: https://www.flickr.com/photos/jettaphile/
 -
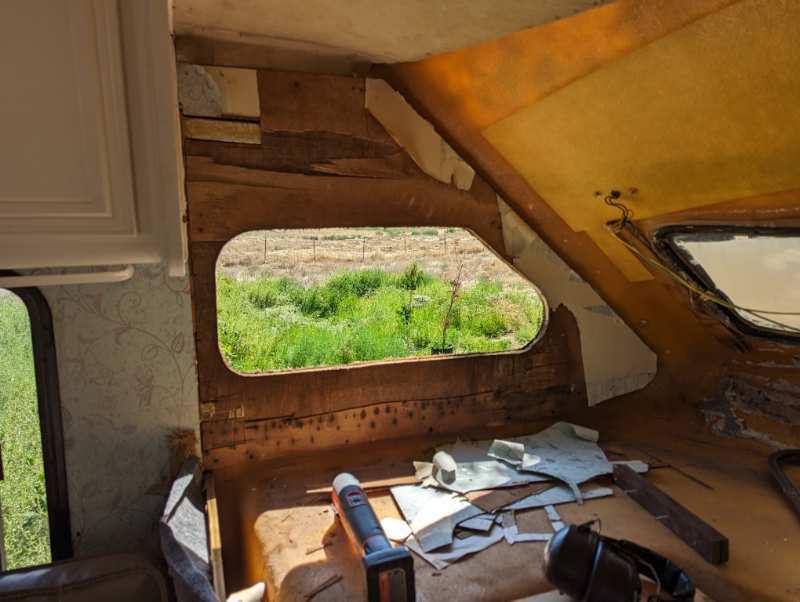
I have a 1991 Warrior For those who have undertaken this project: When rebuilding the overhead cab, how did you guys put the fiberglass back together--particularly under the cab. Did you just "glue it directly to the new plywood and then create a new seal where the two pieces of fiberglass meet? Did you reuse the metal bar along the bottom? Also, if there is a good resource or message thread to use, please point me in that direction. Thanks for any help.
-
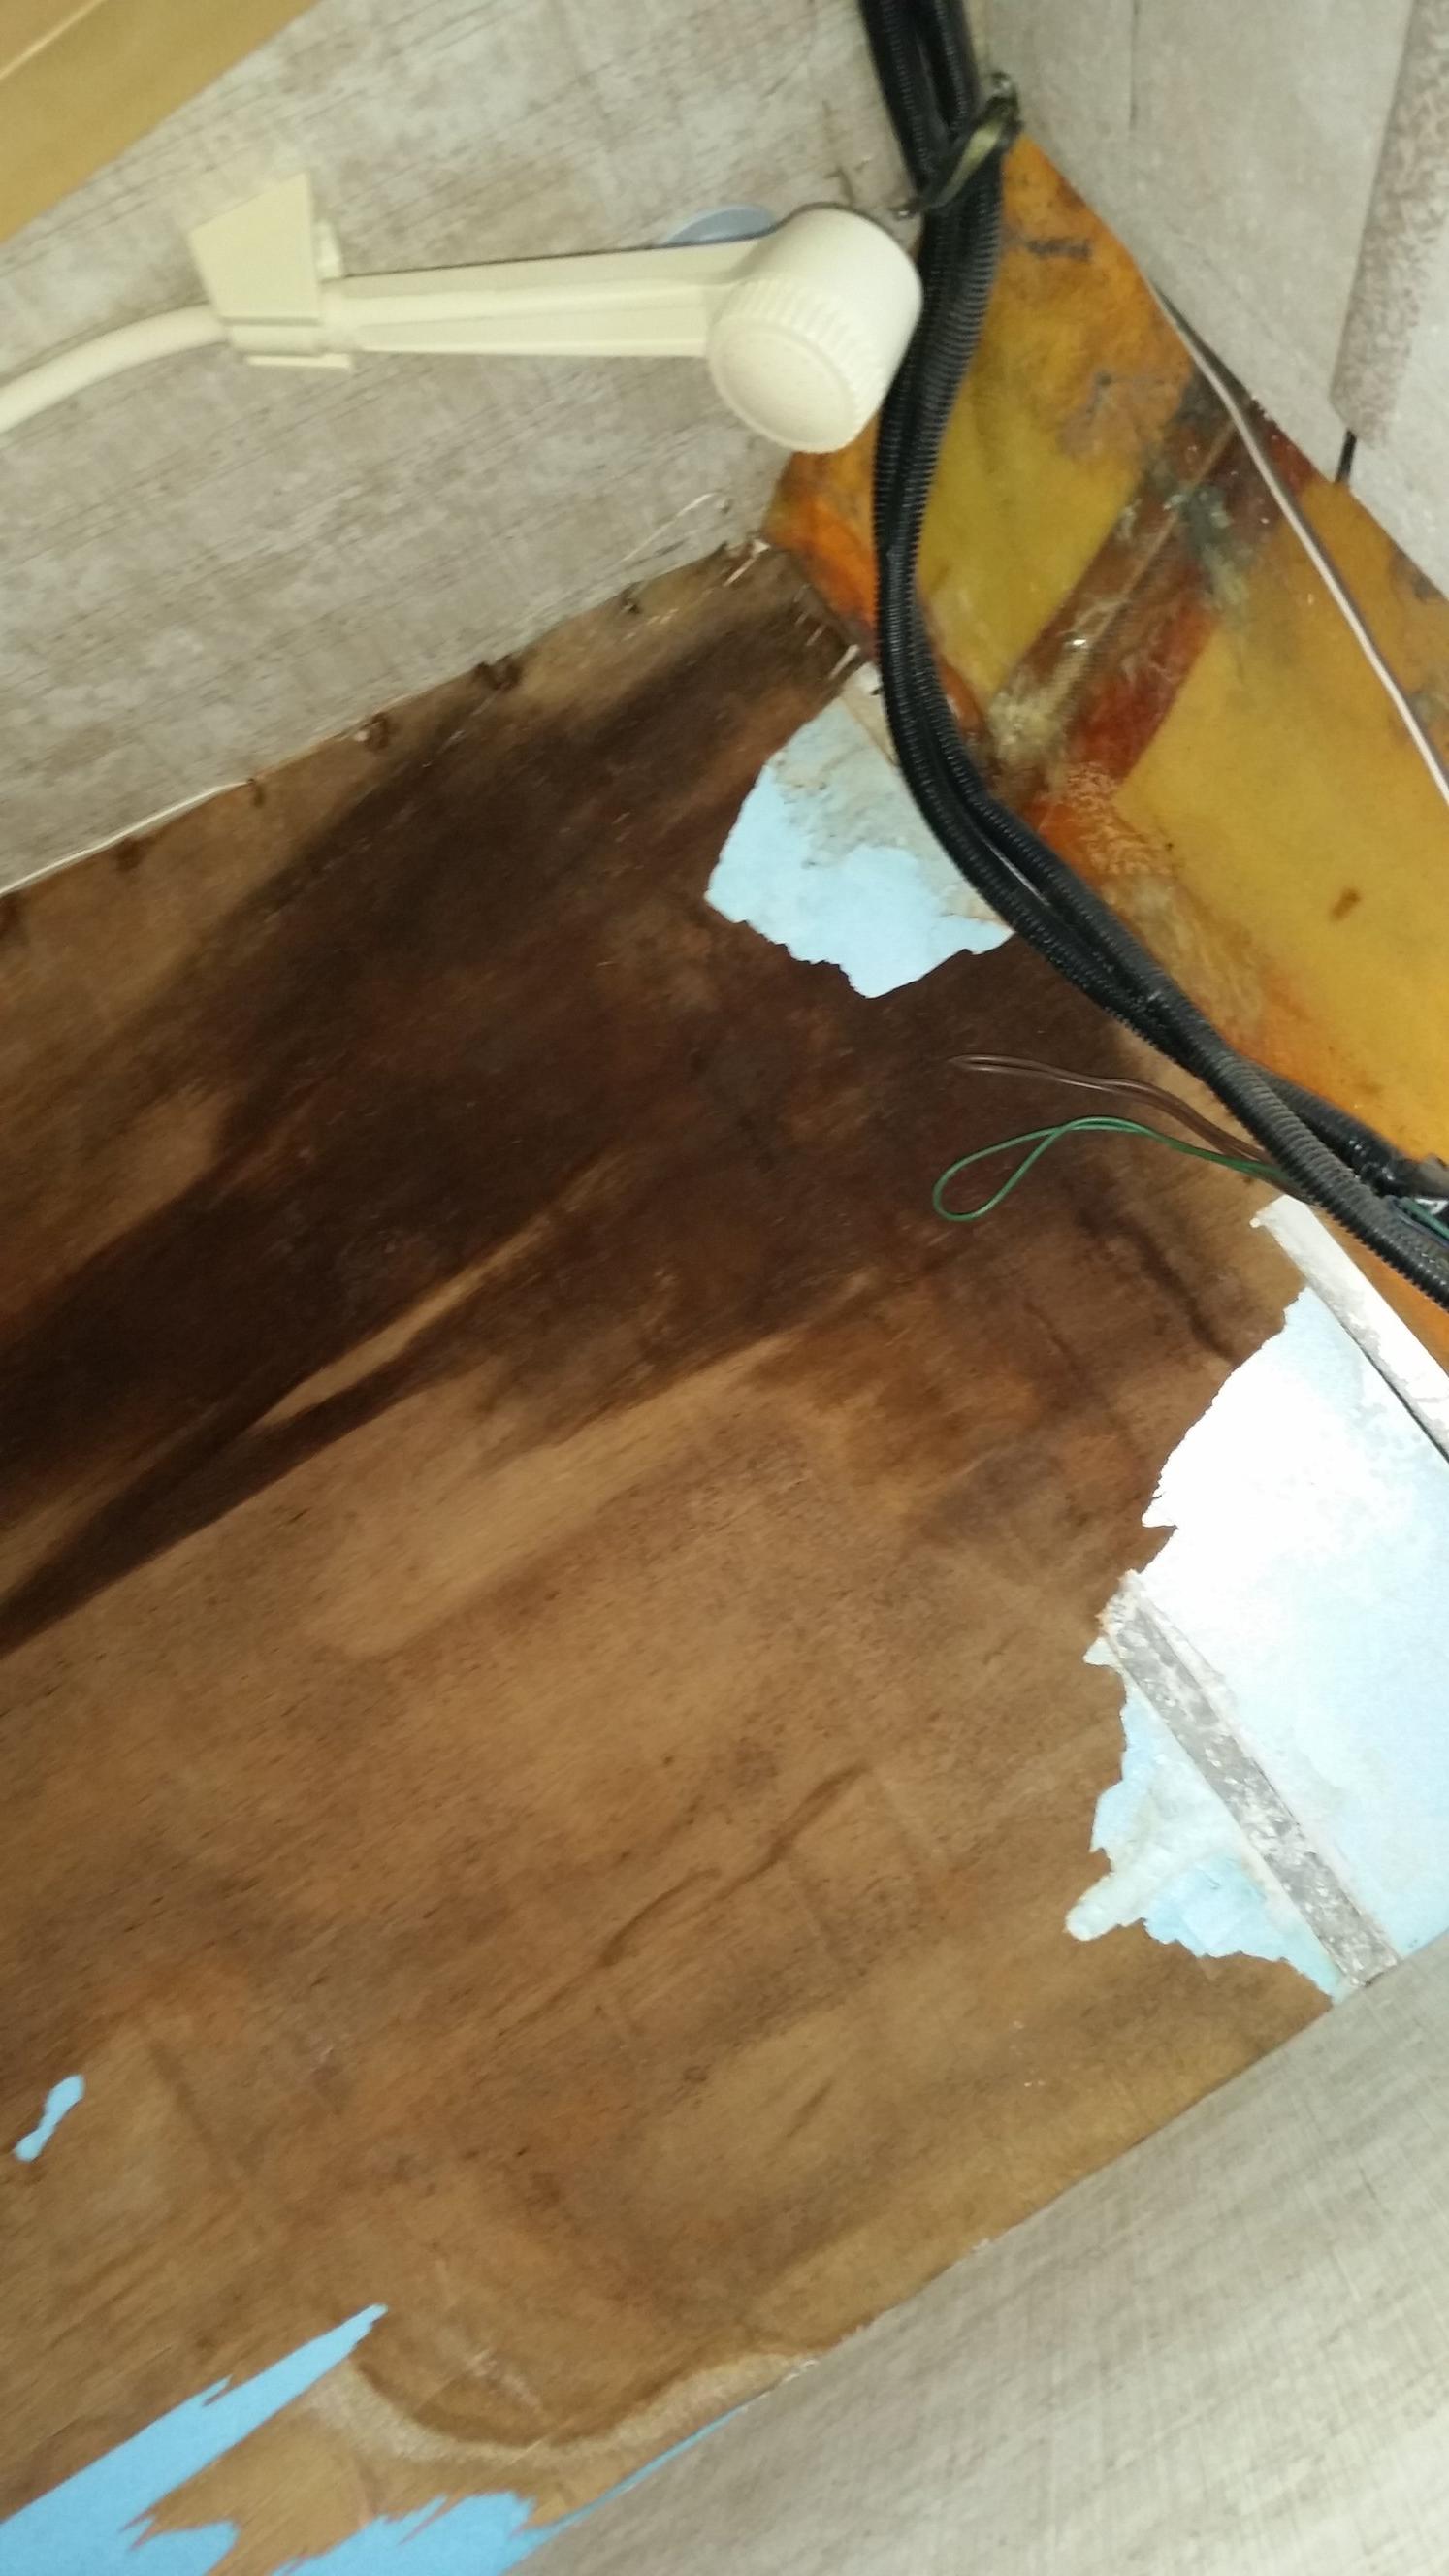
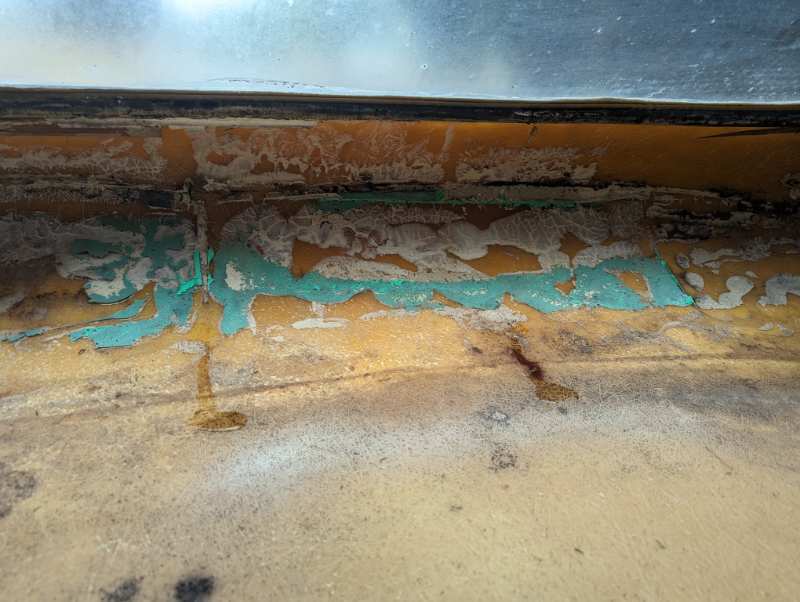
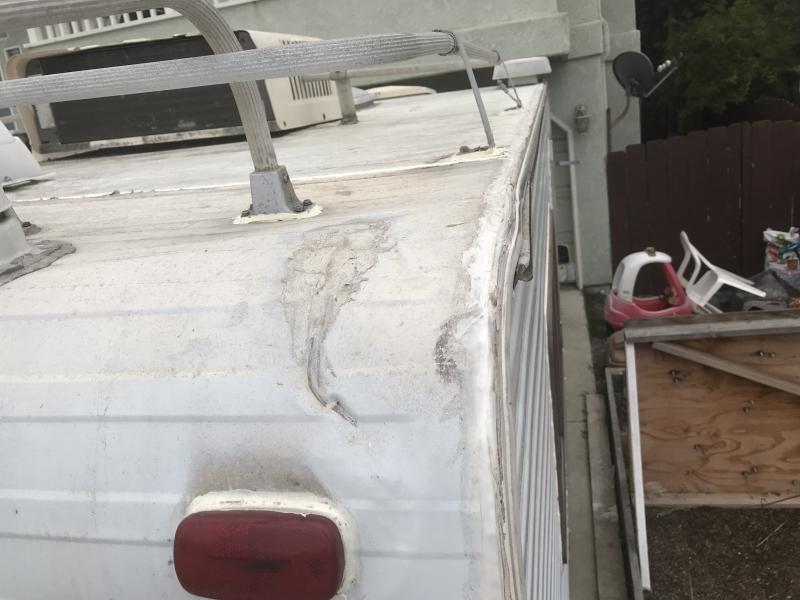
 I am trying to replace the trim/molding/seal between the front side of the coach and the underside of the overhead. It's the disintegrated plastic trim in the photo. Any ideas of where I might find this part and how to replace it?
-
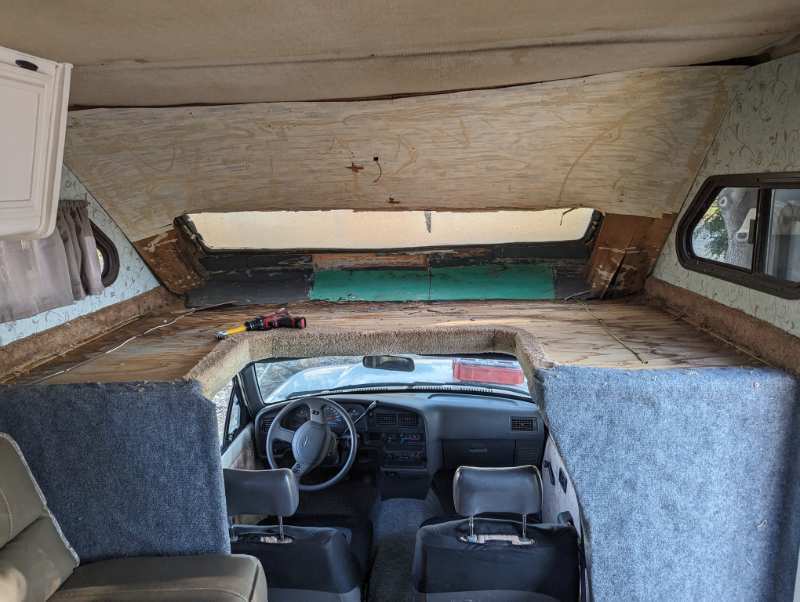
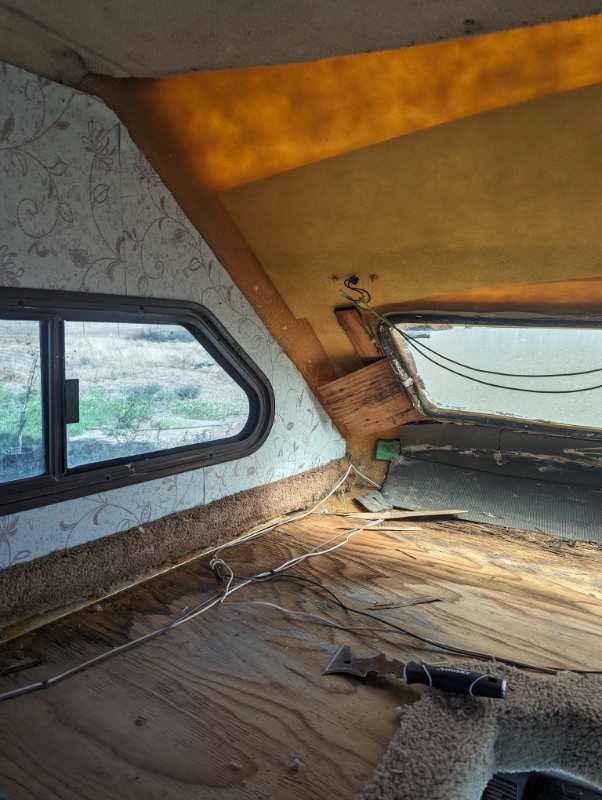
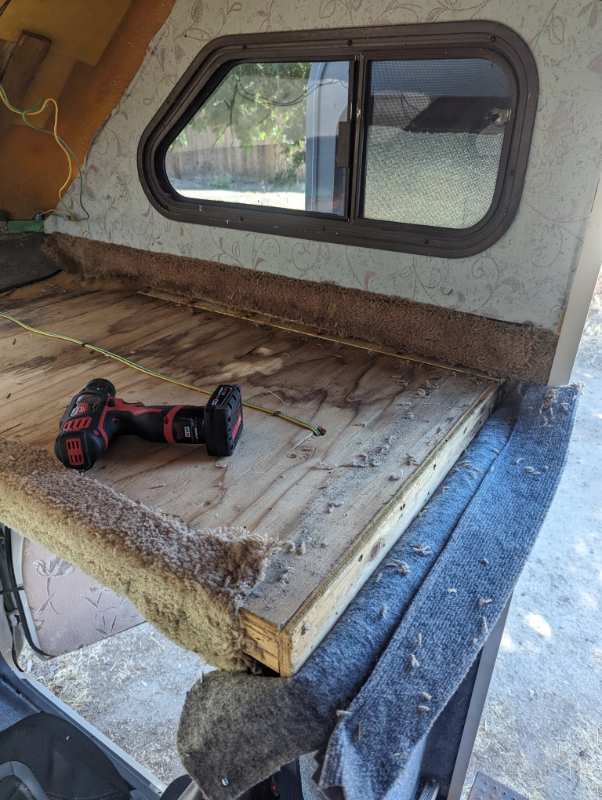
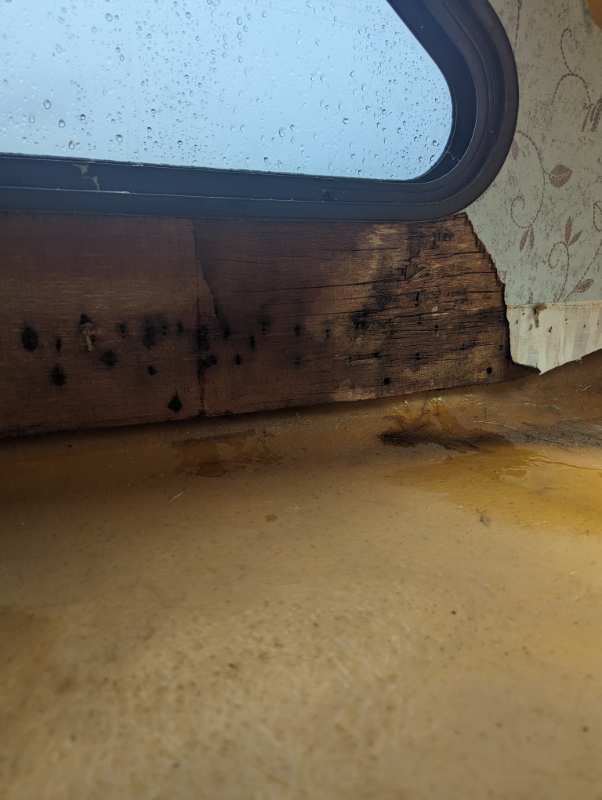
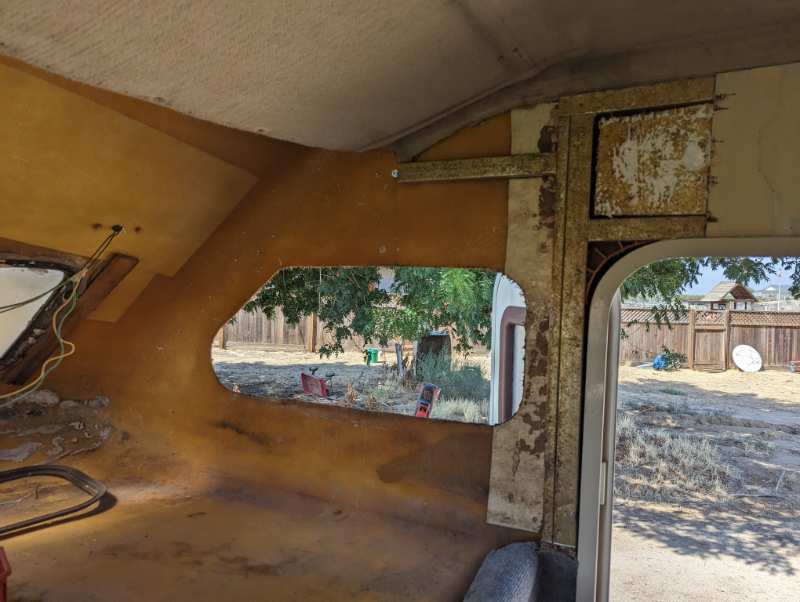
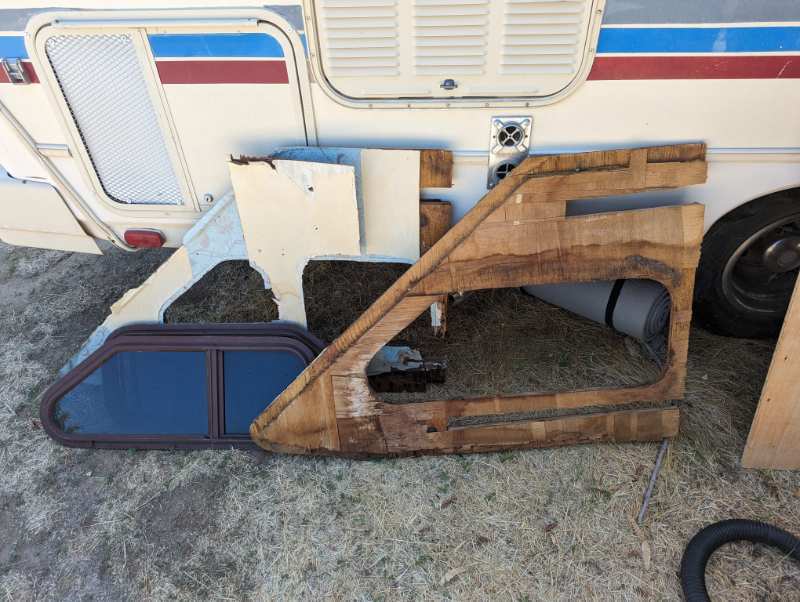
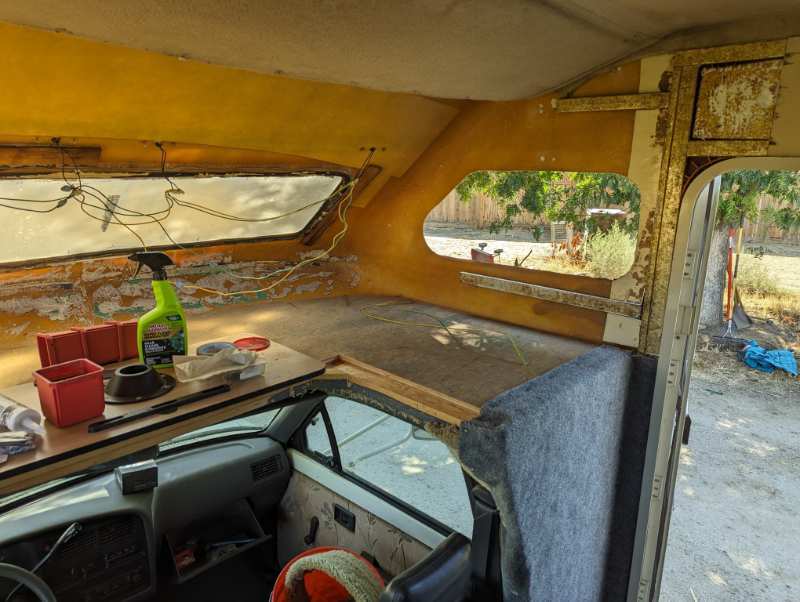
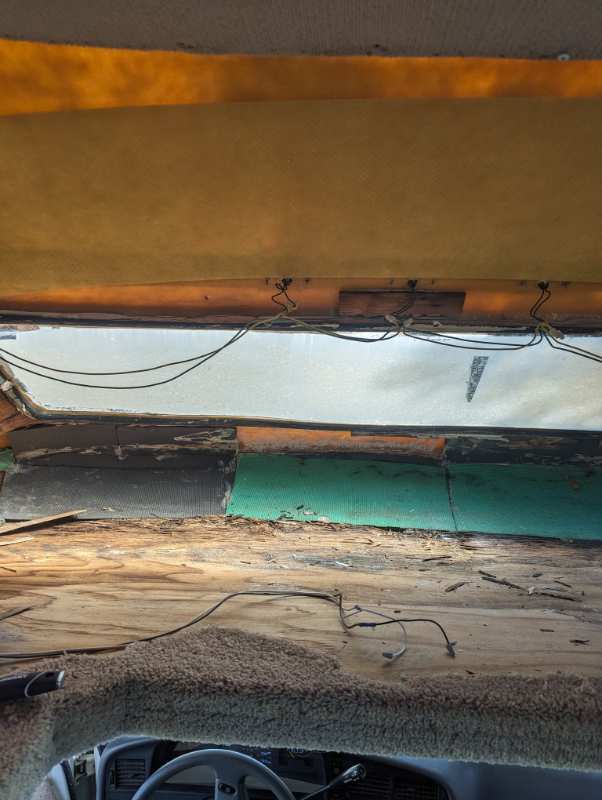
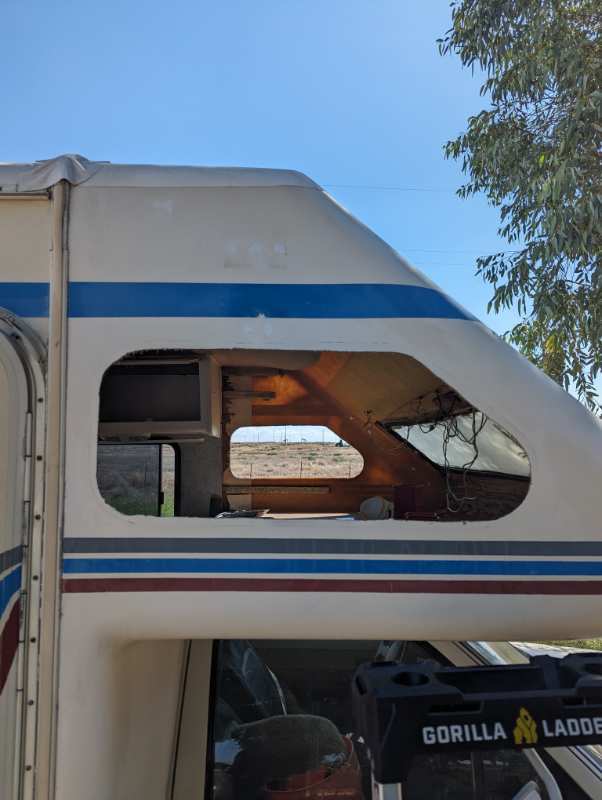
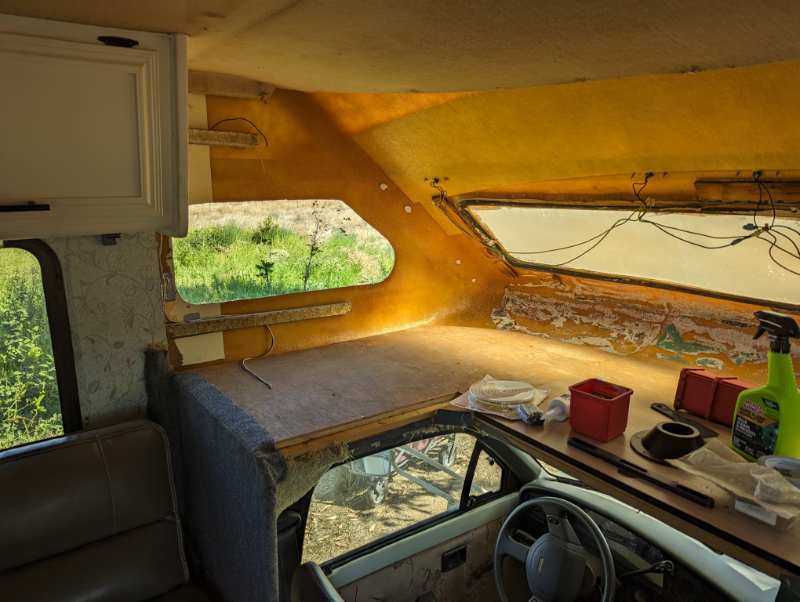
My cab leaks water from the space between the overhead bed and the top of the cab. It drips onto the seats if I drive in the rain and I wasn’t sure why. I have to replace most of the wood upfront, because of water damage anyway, so I have been getting to it and I finally found out why exactly it leaks. This looks like a design flaw and I’m wondering if anyone else has run into this, if so, what did y’all do you remedy the issue?
-
 Just had my 22r rebuilt in 21' Sunrader. Rings, valves, bearings, head, timing chain, oil and water pumps etc etc. checked mileage after 75 miles city highway mix 8mpg wtf?
 -
 Finally finishing up my front-end suspension rebuild on the Warrior. Which has been a heckuva serious job. Anyway, while tearing things apart under the drivers side, I noticed a lot of fluid leakage over just about everything below the frame rail (actually, kind of a good thing, in that those areas seem to be less rusted than expected). Looks like the steering gear box is leaking from one-or-multiple orifices, and I'm wondering if anybody's had experience rebuilding that thing? New/reman boxes are pricey. Rebuild kits with all the seals and stuff are available, but it looks like a fairly complex job. I guess some people will start with one of the stop-leak products, but I'm not much of a fan of that approach. Thoughts?
 -
Hello there. I am currently rebuilding a gutted 21' 1986 Sunrader. It was the rear dinette model. Originally I planned on simply rebuilding the dinette, but after seeing odysseybernard 's double jackknife set up I am intrigued and nearly sold on this idea instead. My question however is how did you actually build it in? And did you keep all the storage area underneath and if so how do you access that storage underneath the two sofas? Thank you so much. Rick
-
Hi all! I just purchased a Sunrader that was already gutted. I want to start designing my rebuild. I was curious if people could lead me to old threads or info on the best ways of reinforcing the walls and roof structure. I am tending to believe my roof is sagging, but not sure. From floor to ceiling it measures right at or just shy of 72 inches. Does anyone know the correct measurement? I have seen the way the Bound for No Where used cut down 2x4s as studs and fiber glassed over them on the walls for support. Is this the best method? Also Why not use aluminum studs? Thanks again!! Glad to be part of the community and learn as much as possible during this journey!!
-
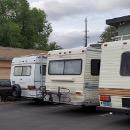
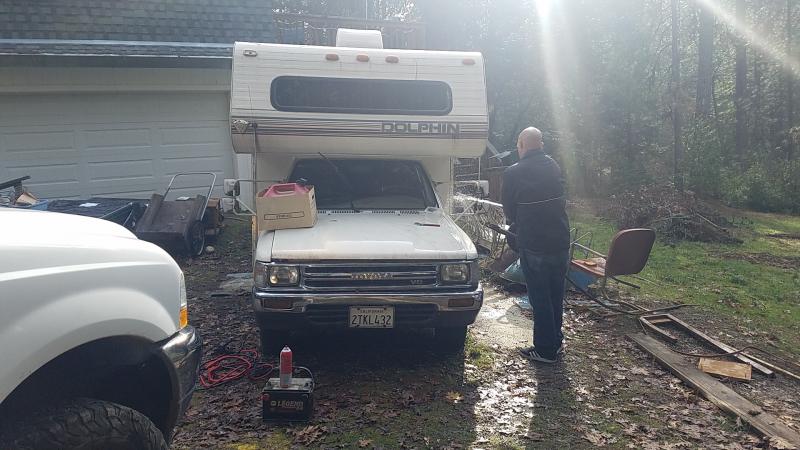
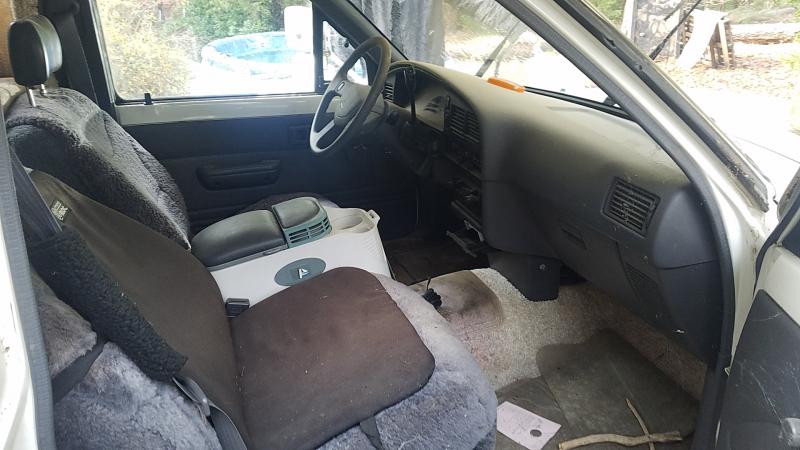
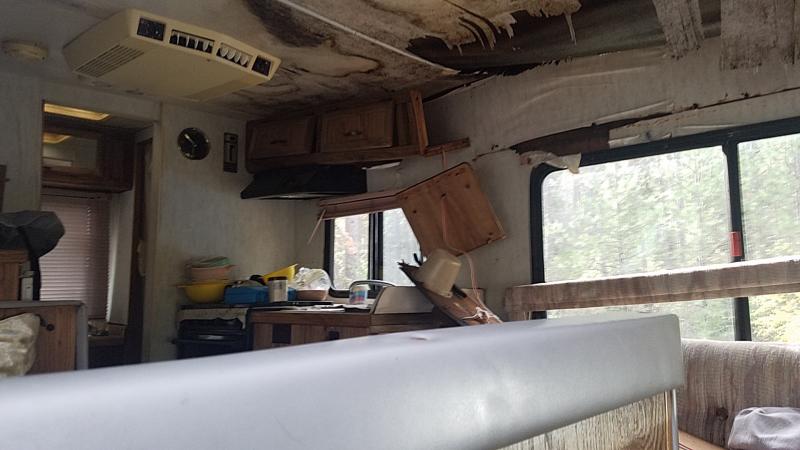
I thought I'd share some pics of my brothers purchase. He picked up a 1990 Dolphin with the v6 has roughly 70k miles. He paid 900. Its been sitting for years but it did fire right up. Runs good but like usual coach is shot. He wanted a project lol and he got one.
-
 Hey everyone- Been meaning to post this for a while but here you go. We bought this 1989 dolphin (103K) for a good deal from a friend to take out to burning man. We discovered it had some rot and made the call to rebuild it in about 5 weeks before we left... over all it came together pretty well I think. check it out- http://imgur.com/a/YOVGO trying to embed this.... <iframe class="imgur-album" width="100%" height="550" frameborder="0" src="//imgur.com/a/YOVGO/embed"></iframe>
 -
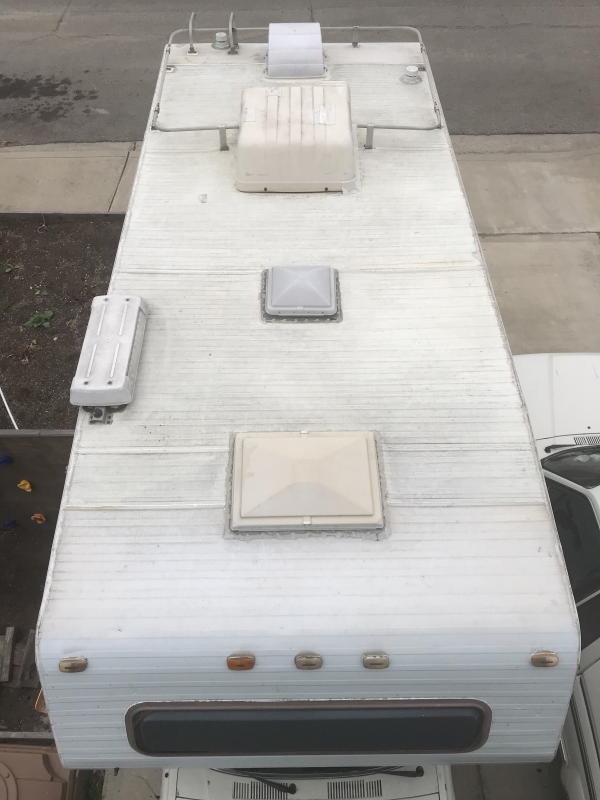
1986 Dolphin. Rear bath. Aluminum roof. ok. It leaks. The rear below the window is wood dust. Roof leaks at least the drivers side cabover area. Looks like it’s been leaking from all 5 running lights across the top of the cab over. And sagging roof with leaks at some point around the 2 vents (cabover escape hatch and vent in the middle between the cabover and AC. Question: one suggestion was to remove the aluminum roof, rebuild rotted wood and glass it over with fiberglass.... no more seams! Sounds good to me.... flex issues maybe? This would be done for the rear and cabover as well. The only seems left would be on the bottom which will eventually have to be taken care of. (If I do this I will be having the guy slightly curve the roof in the middle so water runs off. If this is a bad idea.... what are your suggestions?
-
Has anyone here tried to rebuild their coach entrance door? Mine is coming apart near the bottom and is sort of "loose" when its open. It flexes in every direction. I suspect the interior is gone.
-
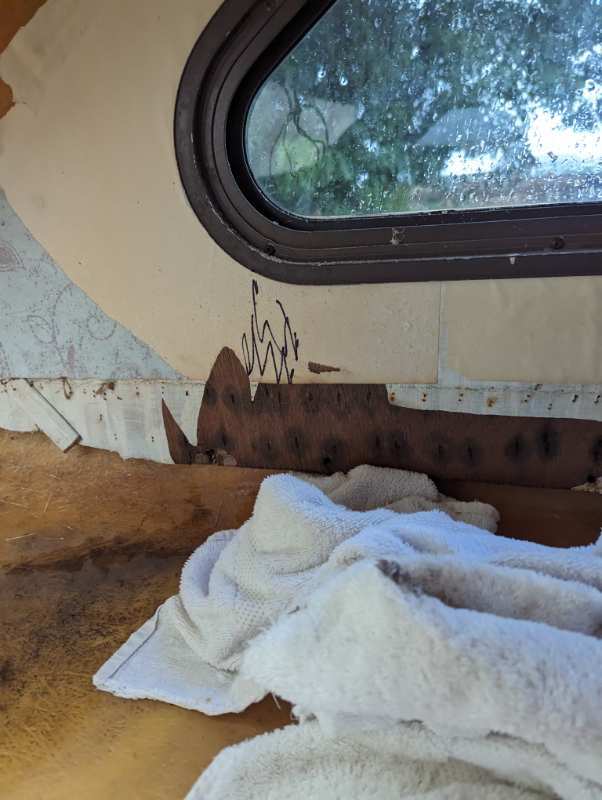
I have been perplexed by an on again / off again leak in my overhead cab area - specifically the front window (91 Toyota Winnebago). I have sealed and resealed all the lights, and have taken the window out twice and used butyl tape - also twice. The leak seems to get resolved, then some time later reappears. I checked and sealed the overhead hatch and looked for any small holes that may have been the source. The leak was definitely coming from above the window, but I could not find it - UNTIL YESTERDAY! In removing the excess butyl tape and looking to go around the window/fiberglass joint with some high quality silicon, I found that in the upper corner of the window on the outside, the fiberglass panel was "soft". With a little pressure, it would actually push in away from the front glass aluminum frame. I am assuming that while traveling, the force of the air, would eventually push enough to open up the area enough to create a leak source. I am assuming that whatever supported the fiberglass panel, is not longer doing it's job, or may be non-existent in the curve of the upper window area. I have fixed it temporarily, but in the near future, I plan to remove the window again and use something to prevent the fiberglass panel from pushing in. I do not think that putting a lot of extra butyl tape in the area will be a long term fix. Has anyone encountered this problem, and if so, what would you suggest to use to support / reinforce this area. I thought about using some shims, or even cutting out a piece of wood to the proper thickness and matching radius as a support device for the frame to exert enough force to seal the butyl tape, but thought I would ask you folks about your experience. Thanks and safe travels.