Search the Community
Showing results for 'overhead rebuild'.
-
I rebuilt my 1988 toyhome overhead with thin tongue and groove cedar from home depot and glued it with 3m 5200. It was a relatively easy rebuild and I stopped and enjoyed the rig for a few years before digging deeper.

-

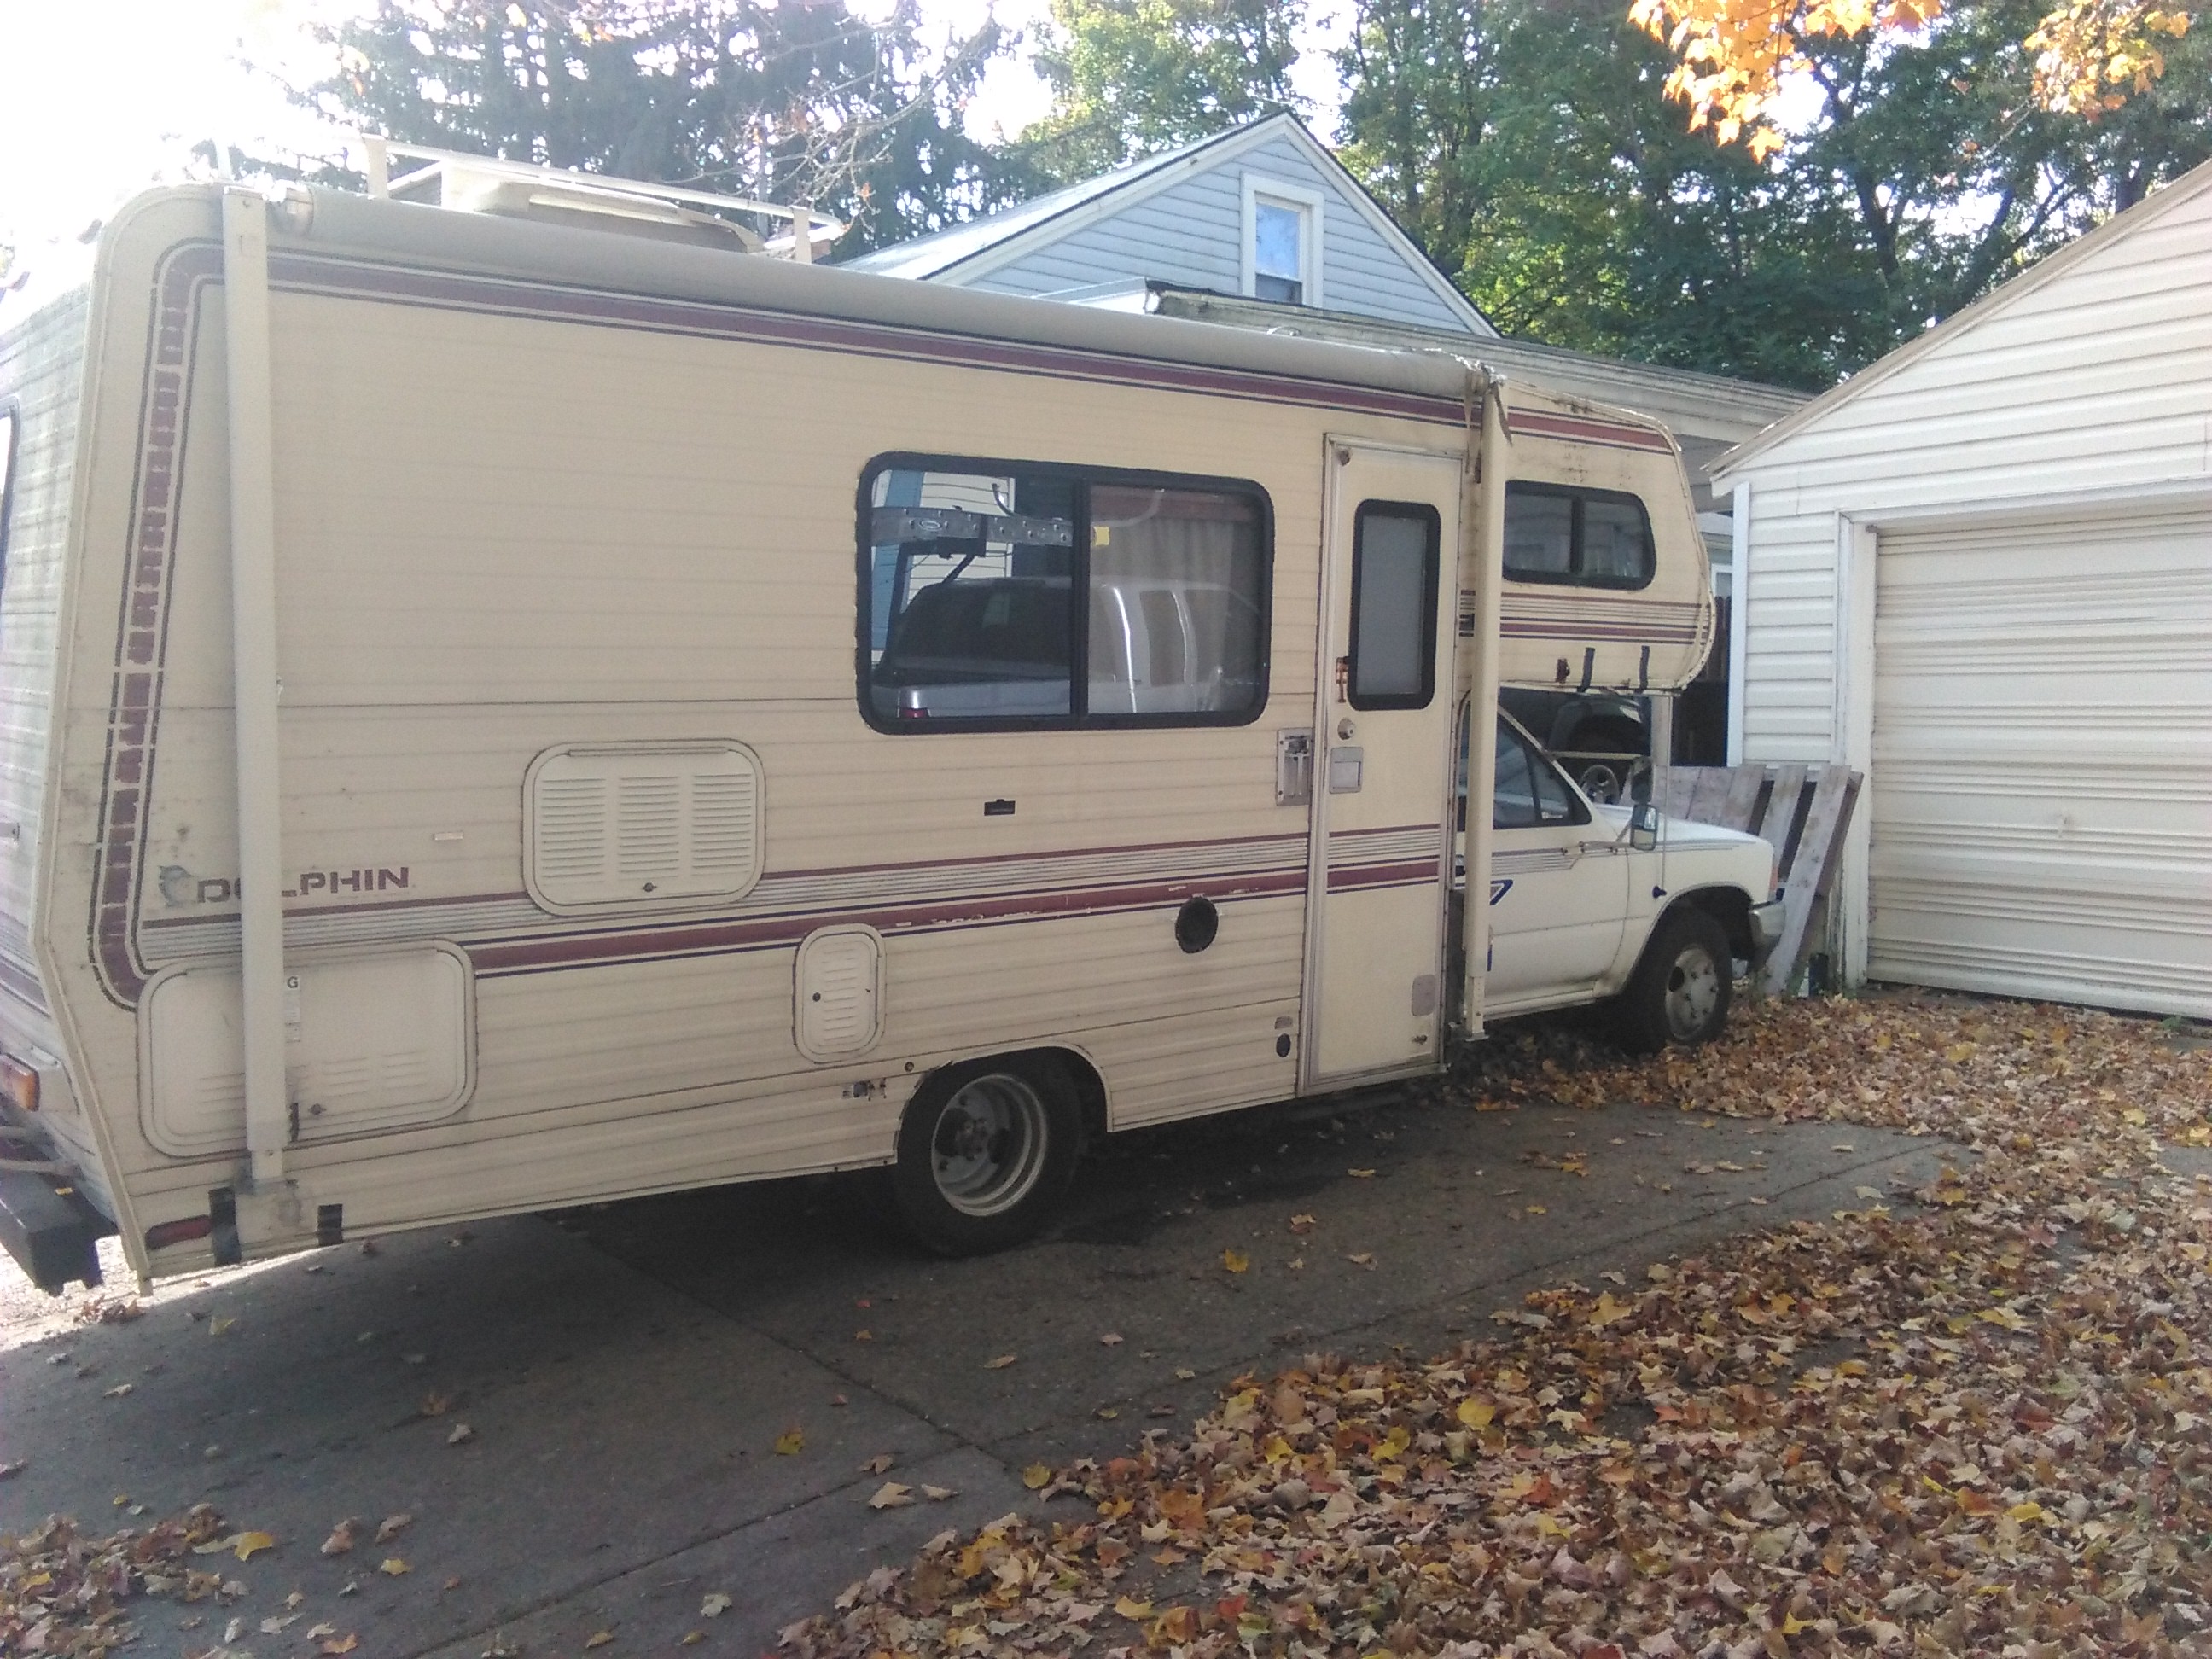
Just bought a 1992 Dolphin To bring home to Austin!
xxMSAxx replied to xxMSAxx's topic in General Discussion
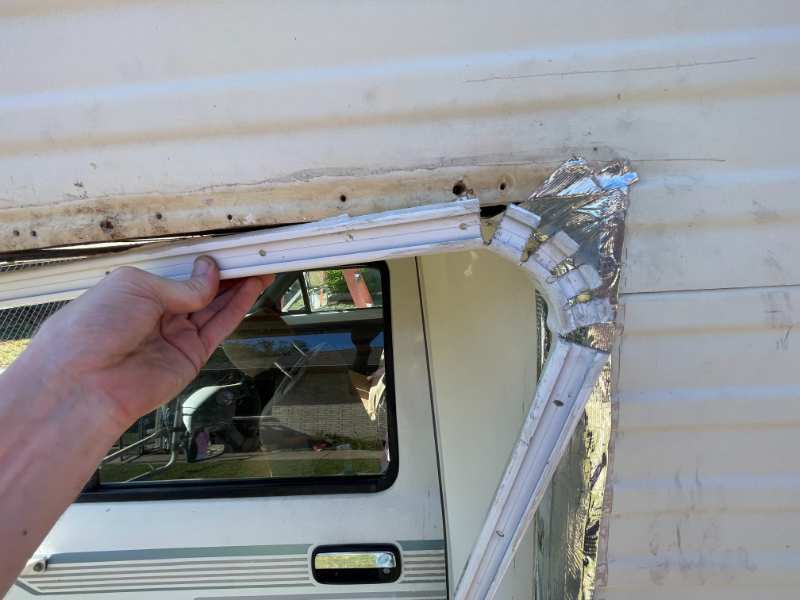
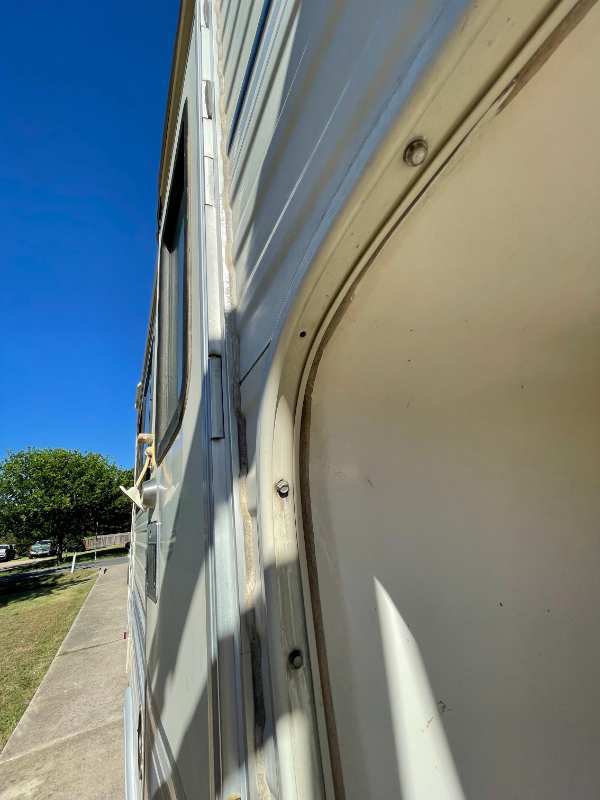
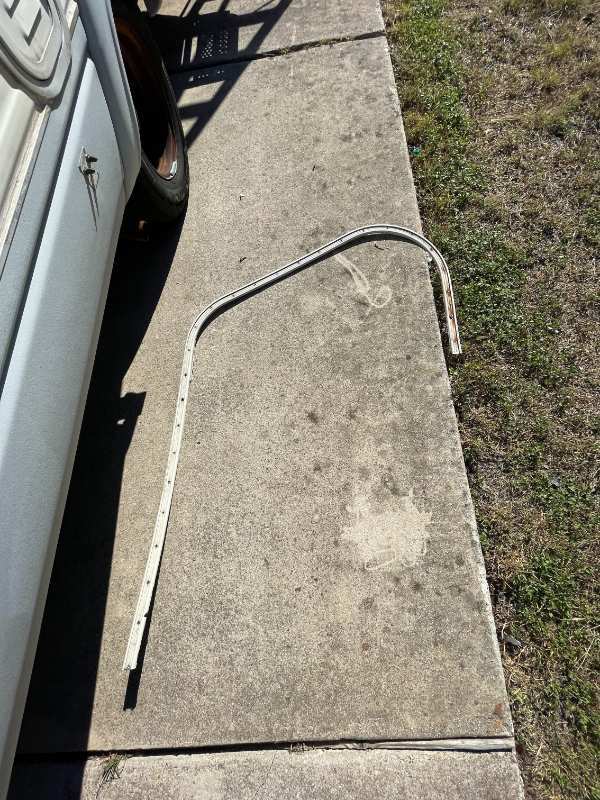
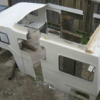
So I have lots of stuff cleared and the seam exposed. I did some looking around but came up short on the projects page for a problem I have. Where can I get a new piece of trim? I saw some links on line but they were for small sections, when what I want would be one contagious piece. Is there some aftermarket trim that others have used or re-purposed? I am talking about the metal piece that molds around the overhead cab and and ties the bottom to the top and the sides as one. The guy who replaced this use a crap piece of some kind trim that he cut wild like. In this rebuild I want to get a good seam as well as I can. I have began to rebuild the inside wooden structure to attach to. I added a few pics for reference . The first is the janky piece on the drivers side that was put in place . The 2nd is the factory one. The third just shows how the bottom piece runs along to the cab split section. The fourth is the piece that travels along the side and around to the top. This last picture seems to be what I need to find and then bend into shape.
-
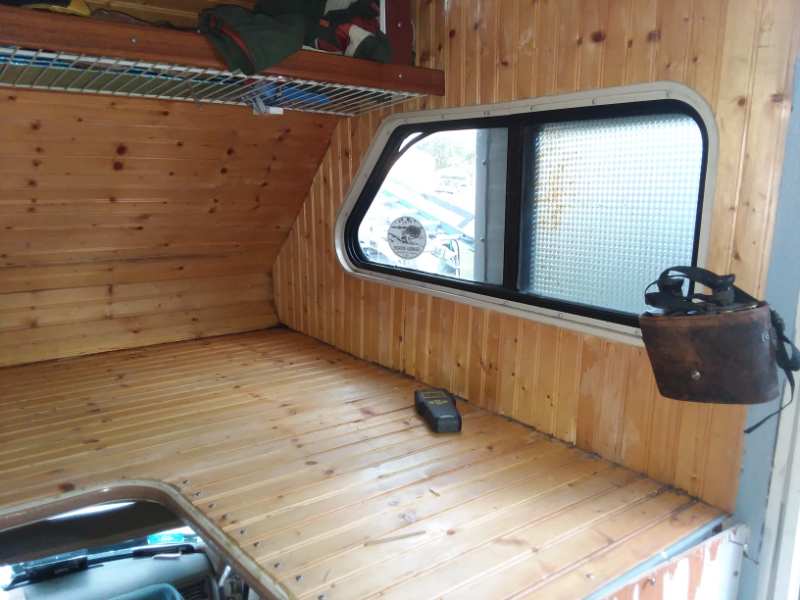
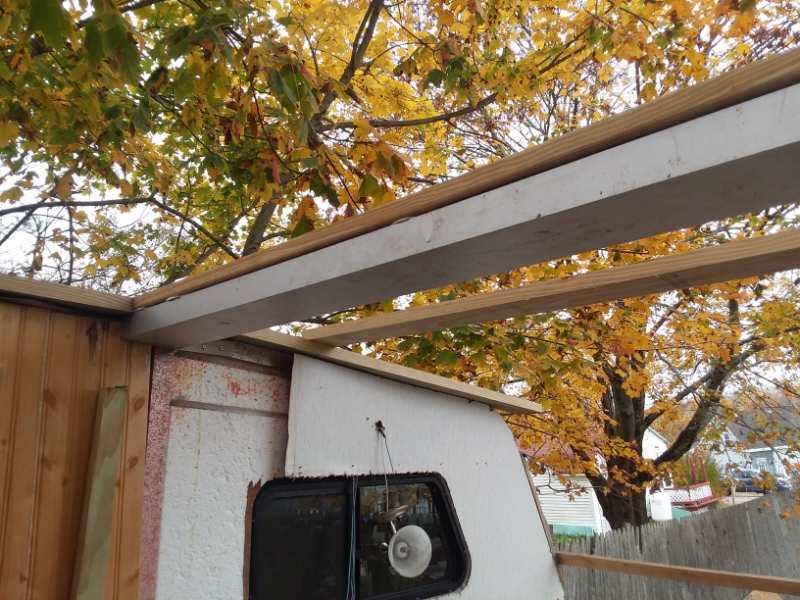
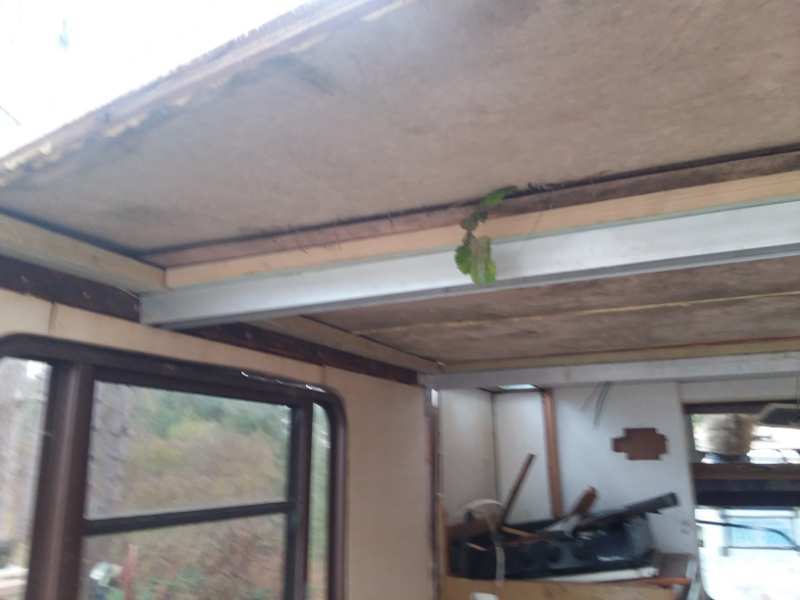
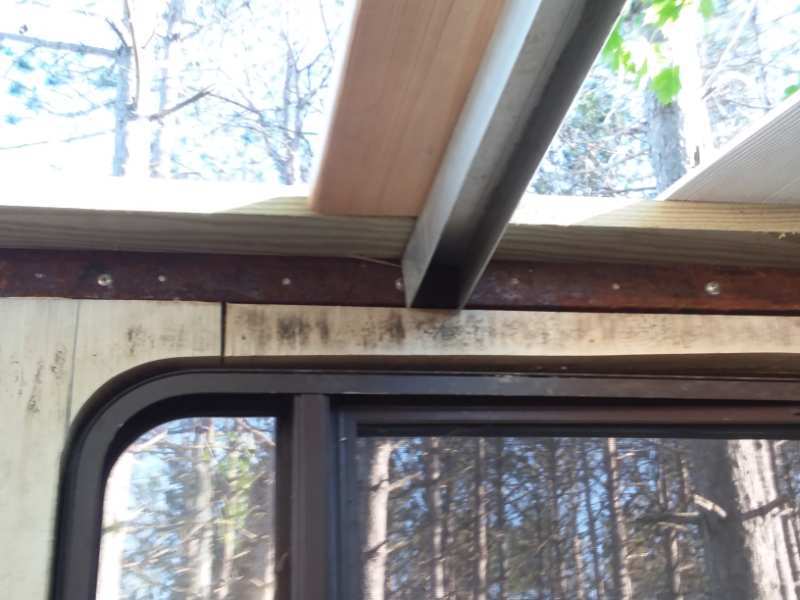
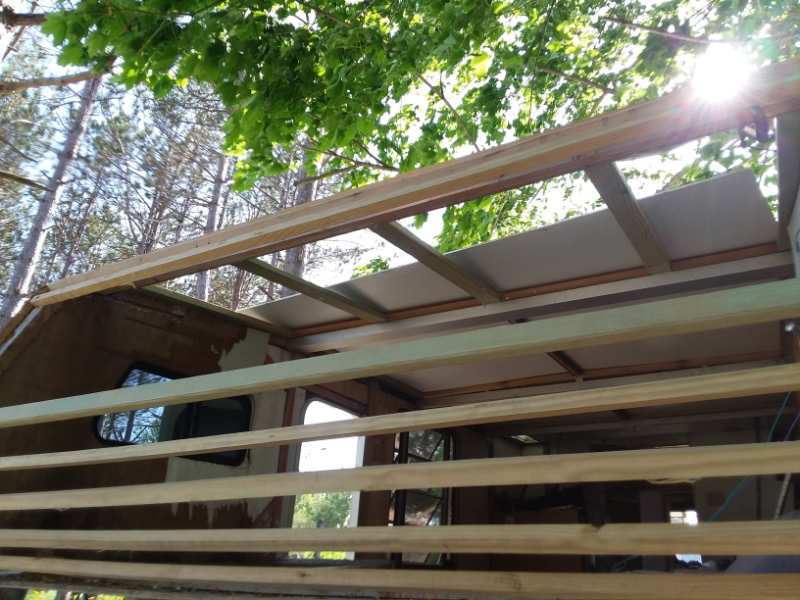
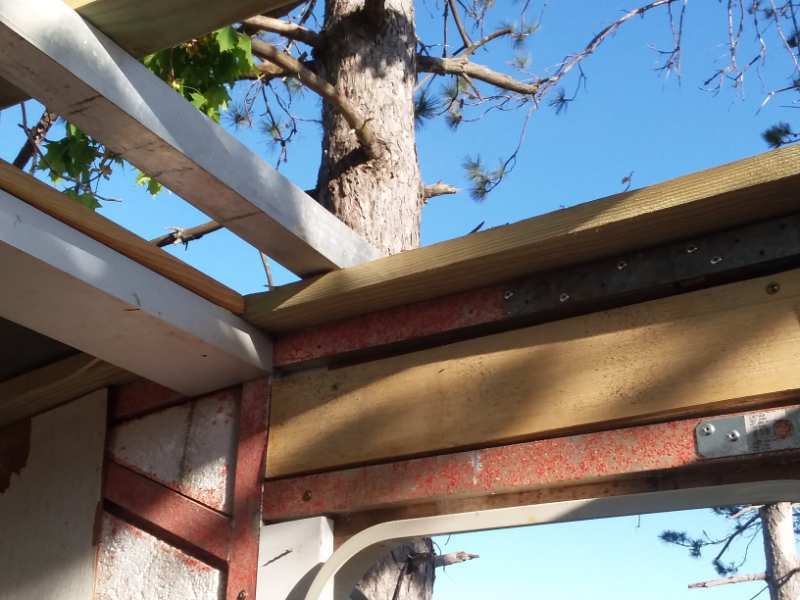
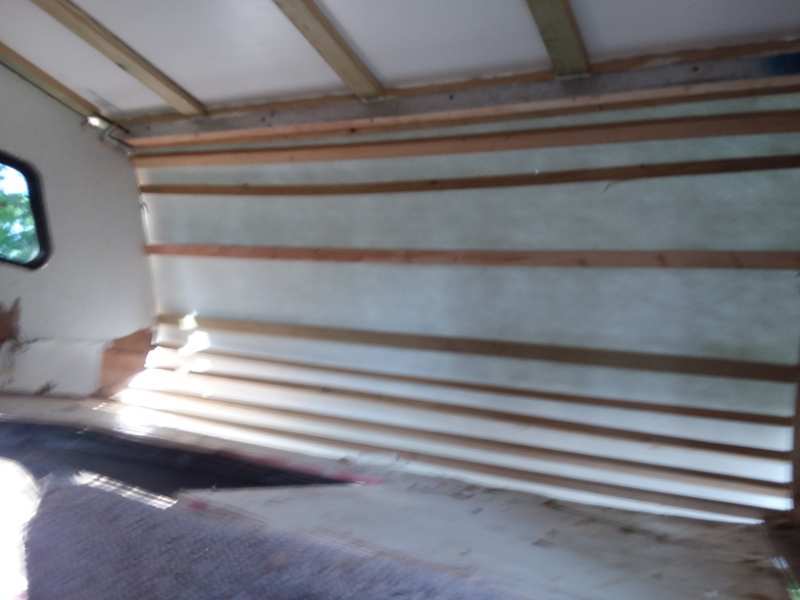
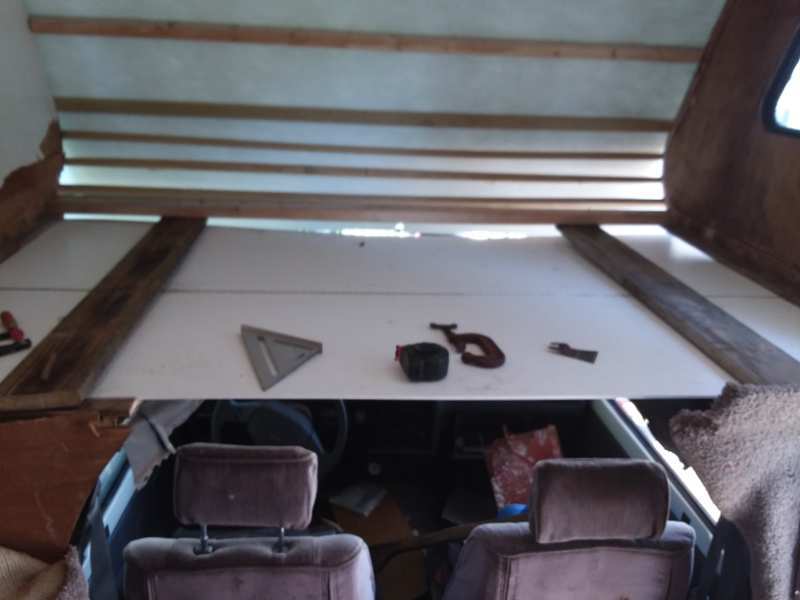
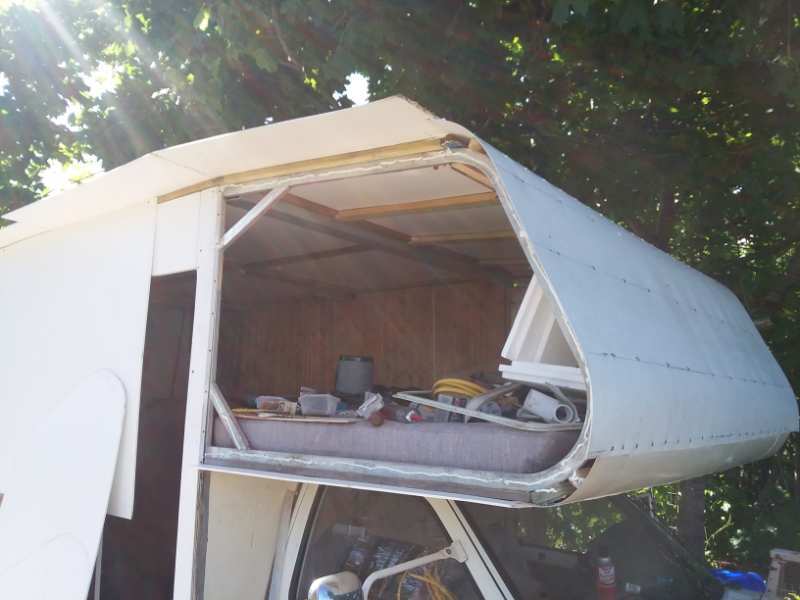
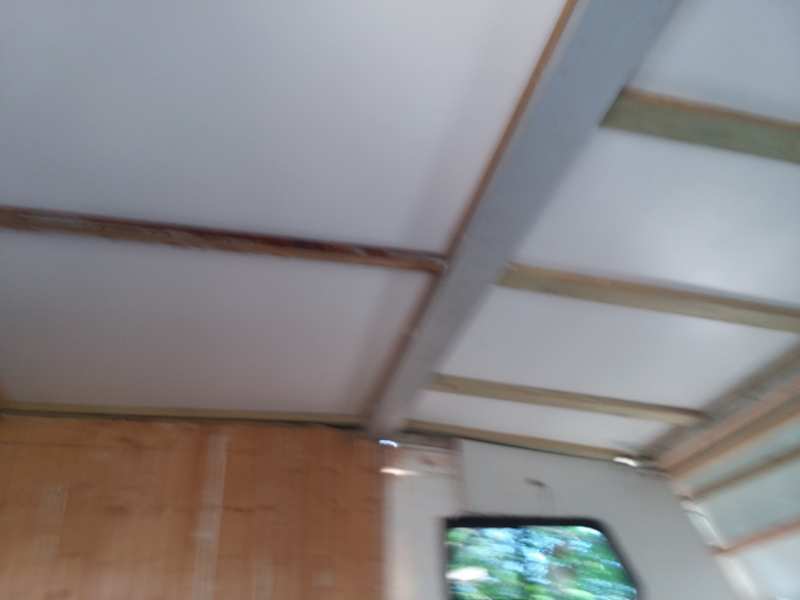
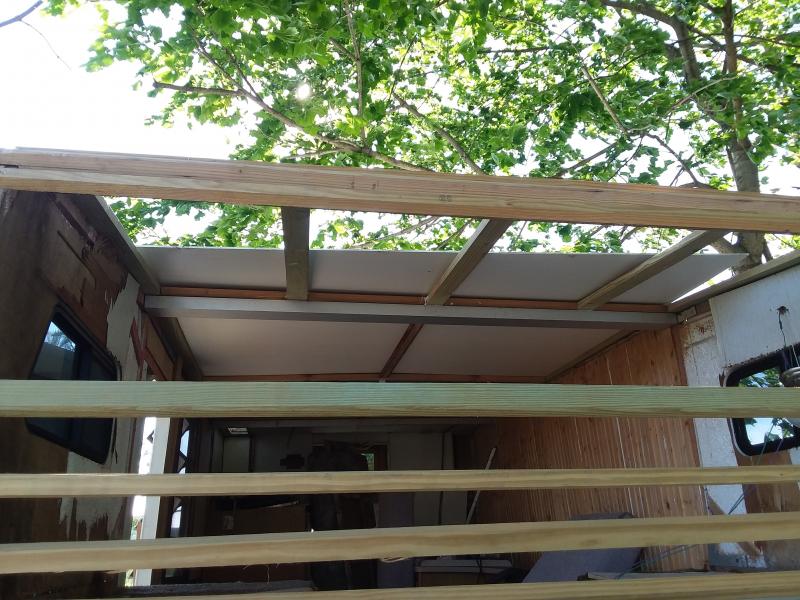
Back to the rebuild. My first attempt at rebuilding the roof was using 1/4 plywood. I made side to side support with 1x2 oak and glued and screwed together. It did not look bad but I had to travel out of state for work so I covered it up and came back a year later. Upon starting again it was obvious that picking up where it was left off was not an option. Enough moisture had got to the 1/4 ply and other plywoods used to make them moldy and de-laminating.. So I tore everything out and choose pvc boards and panels for everywhere wood was before except for structure like the top plates on the wall. I used pressure treated 5/4 decking held on with3 inch long by quarter diameter deck screws I picked up at Fastenal great screws. I used aluminum channels for the side to side roof support. I built it so that I can stand in most places on the roof and can add more strength down the road. I was going to use the original filon on the overhead and front but backtracked on that and went with pvc everywhere on the roof except the front. I used 1/16 FRP there and it worked out well and was easy to make the curves. The camper wall on the drivers side is tongue and groove pine and has worked out fine. If I was going to do it again it would be pvc panels then select out of the millions of patterns of wallpaper for a finish. I screwed and glued the roof. I used a marine adhesive that has held up well.
-
When I picked this up at the salvage yard the transmission was slipping in forward as it had been towed in neutral from where the tree fell on it to the auction then from the auction to the salvage yard. Towing in neutral cooks the forward clutch pack as it has no lubrication and this clutch pack is the only section that always turns with the output shaft (more on that later). I flushed the transmission and added some Lucas to it and got it working again (it may well have kept working if I had driven it every day after. But it was parked for over two years before put back on the road}. Upon getting it home I tore it apart to inspect and assess just what I had gotten what myself into. AC unit was trashed, I cut the roof just about 2 feet forward of the bathroom, I still find pieces of the broken windows, door frame badly bent, .. Turns out what had been a nice looking Toyhome (61 thousand miles) that had been cared for and just had an insurance claim and been through that process. It had just as much rot behind that vinyl wallpaper as any of these you find. The overhead had extensive rot and needed a rebuild even before the tree fell on it. The rear wall in the bathroom was the same. Leaks around the openings in the ceiling had compromised the wood in that area. Before the tree fell this rig was a nice looking rig that anyone who did not know to scratch the surface would be really excited to purchase. The systems all worked, super clean, maintenance records, new tires, no rust it had everything one could want and would have gone a few more years before the rot really got the best of it. Point is that any 20 year old camper is going to have those types of issues. The original owners purchased it to go camping and did not know how water gets in through every nook, cranny and screw hole. After tearing it apart I went looking for new windows and started rebuilding the skeleton. The skeleton is aluminum extrusion 3/4x2. I found that Tractor supply in their junk pile has a constant need to dispose of 3/4 x 2 steel extrusion and will give me all I want (something is shipped in the framework). I lucked out and found some used windows at a place in Chelsea Maine that had just opened as a new and used RV supply. 175 bucks for the windows. More later.....
-
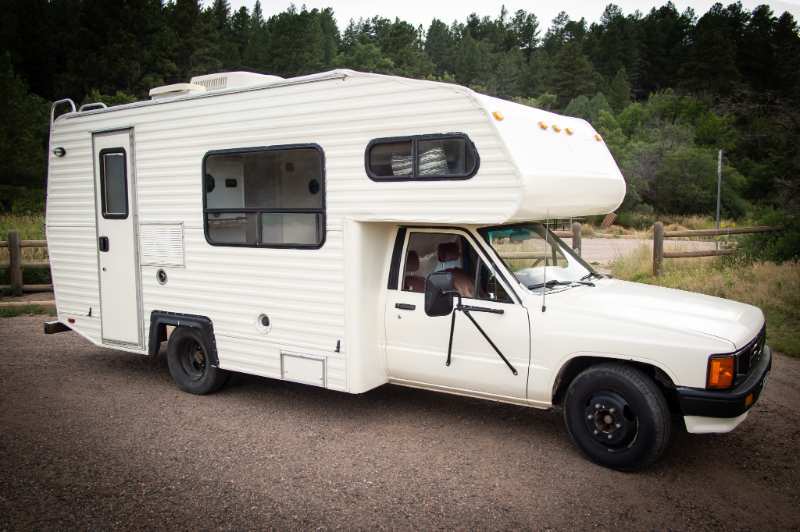
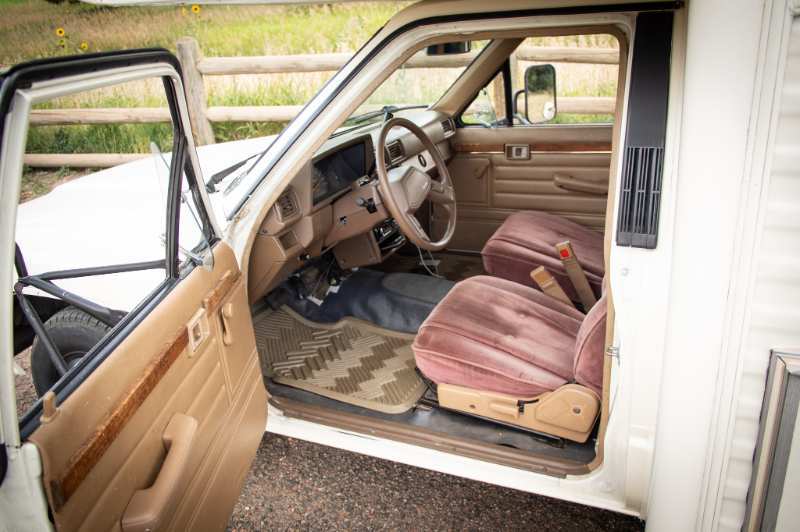
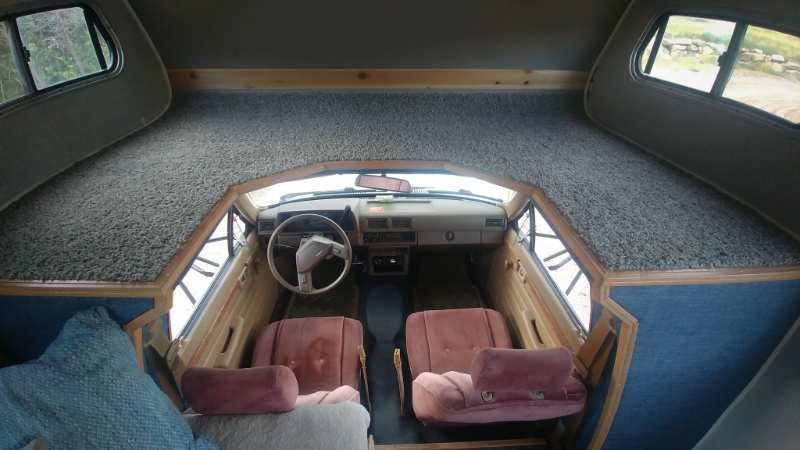
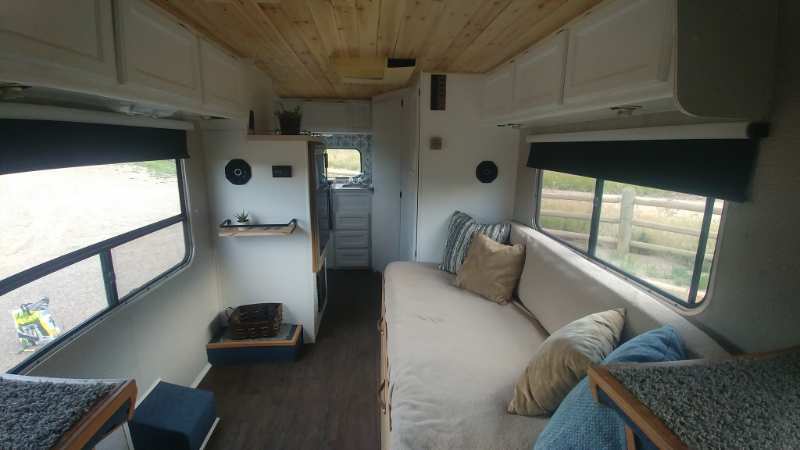
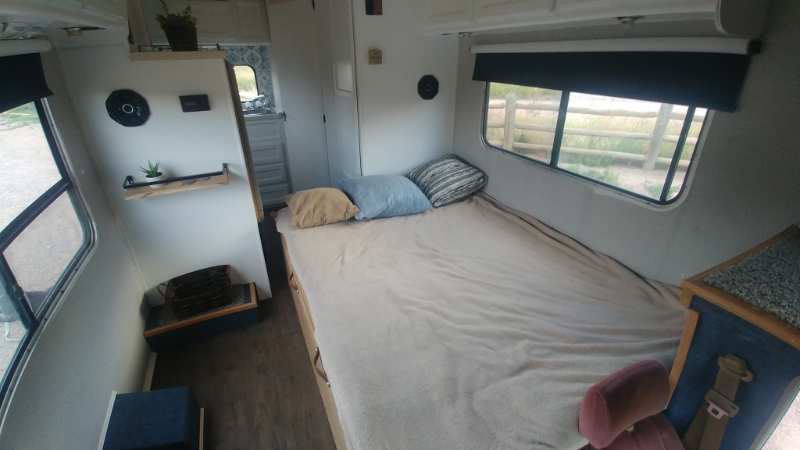
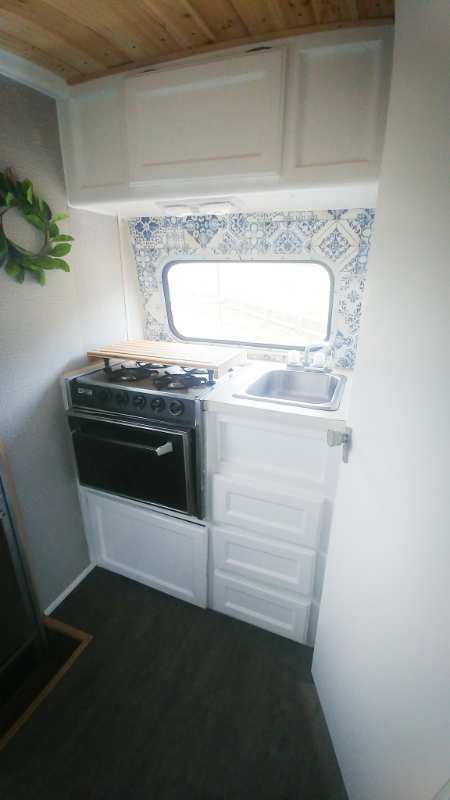
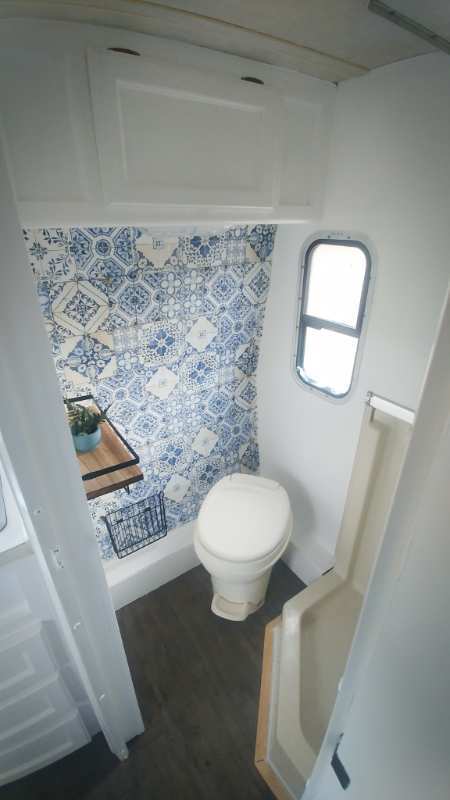
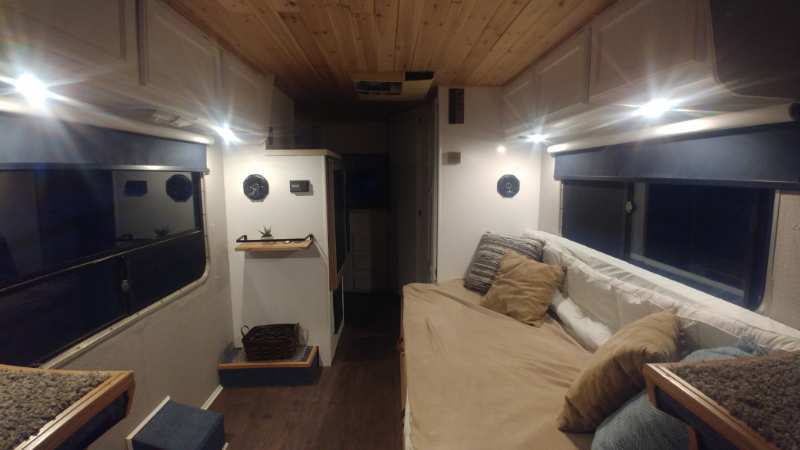
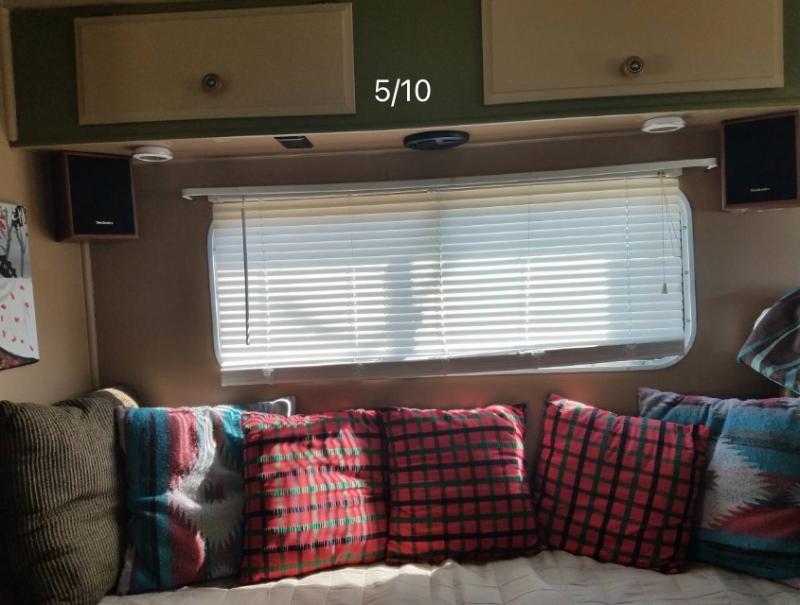
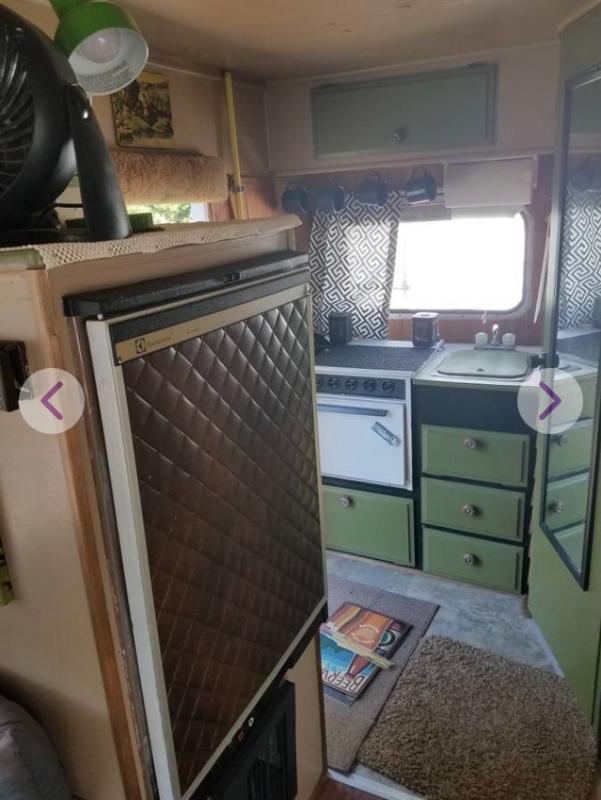
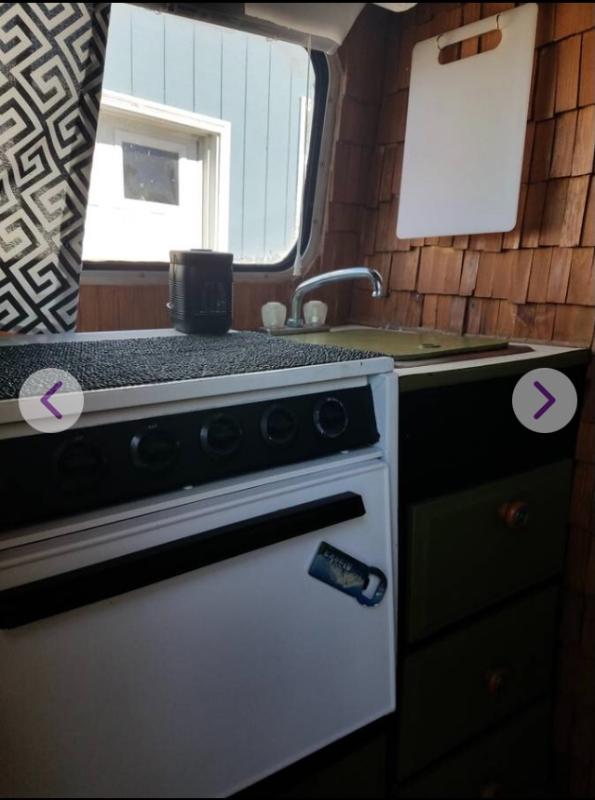
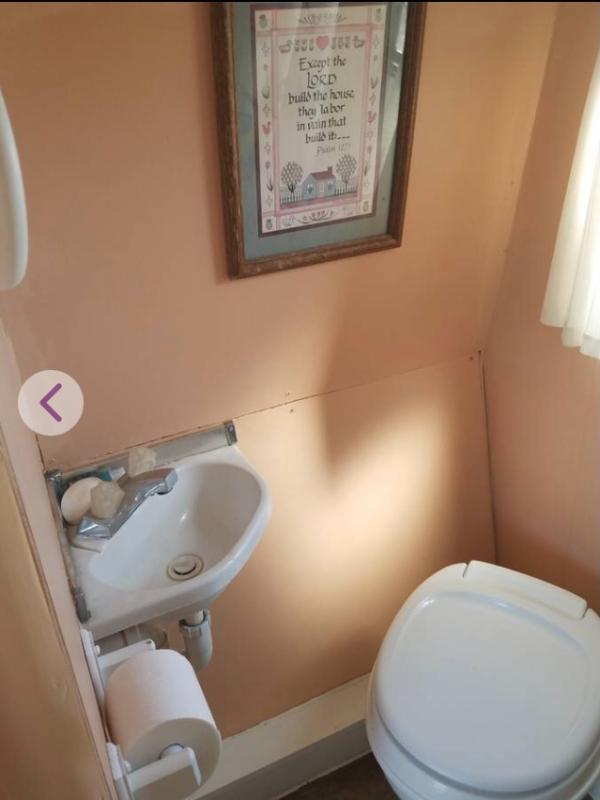
So turns out I am horrible at documenting any work done, ha! Well the time has come to give this awesome camper a new home. Below are some pics of how it looks today! Definitely not perfect, but many hours of hard work were put into this camper. Let me know what y'all think or have any questions! Still debating on what I should list it at, any thoughts? Sad to see it go, but my wife and I have had quite a few great adventures in this camper! It's been to West Virginia, the Grand Canyon and a few dispersed camping sites around Colorado. We just bought a house and now we need to focus on home renovations! The camper is located near Denver, Colorado. Thank you again for all the awesome information found on this site and shout outs to thewanderlustking and Modocmade for helping out with the overhead cab rebuild! Cheers! Jonathan
-
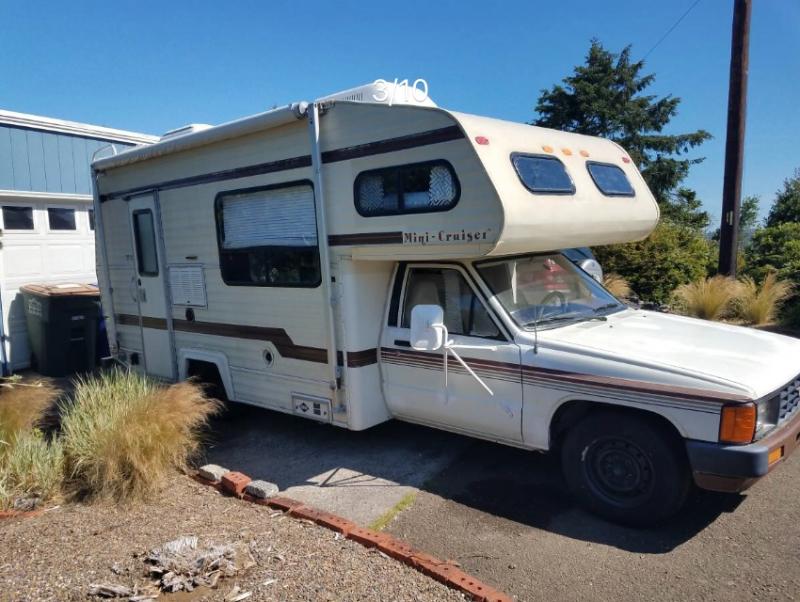
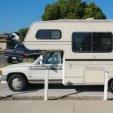
 Hi all! First a huge thanks to everyone who contributes so much helpful info, advice, and general enthusiasm on this forum! 🙏 🙌 In November of 2020 I purchased a 1986 Minicruiser with the a blown engine. The interior had been somewhat redone and the cabin is pretty livable. It was priced appropriately (IMO) and I figure after the engine replacement it's still a decent deal. The rig (photos from CL add)- Pros: -The interior is pretty cozy already -New water heater less than a year ago (found the receipt in the glove box... $1000+ professionally installed 😲) -I have a dry place to store it through the winter (in my home town, about 2 1/2hrs away from where I live currently) -all original appliances (or is that a con?) -Its a Toyota Motorhome! Cons: -Blown engine threw a rod through the block so not a rebuildable core... I've gotta find a rebuildable core or pay a core deposit. -Normal water damage on the corners... previous owner said leaks were fixed and water damage repaired, but it looks like a quick fix with eternabond/dicor tape and a lot of caulk. -AC unit doesn't blow cold and the type of freon is uses isn't legal anymore (or so said the previous owner) -all 12v lights have been removed... previous owner ran everything off of 110v or rechargeable LED puck lights The Plan: -get it running by summer -get it water tight -paint the exterior (any suggestions, dos/don'ts are welcome... I'm just going for a clean white, DIY) -get interior more suited to my needs -add solar at some point What's been done since November: I was originally planning to work on the engine replacement myself, with all this new found free time thanks to COVID. I ended up getting some part time construction work where I have it stored so I've just tinkered a bit and stayed in it when I'm in town for work. In the meantime I sourced an engine which is local here in Oregon. https://www.oregonengines.net/ I went with their 22RE Super Stock. I figure a slightly more robust engine will be a good way to go with the extra load. They also recommend a mechanic that can to the install for a reasonable price and I'm going to have it professionally installed. I was able to keep the RV plugged into 110v where I was parked and soon realized the converter and battery charger were cooking the battery, so I installed a new electrical distribution panel which has 12v converter and charging wizard all in one unit. I should add a picture, but here's the link to the unit. https://www.etrailer.com/Battery-Charger/Progressive-Dynamics/PD4135K.html I traced some of the 12v wiring and added an LED reading light for the sleeping bunk, an LED light over the cooktop and a wired LED puck light. What I've learned so far: -As cute as the rear cook nook is, I really want more space to cook. Just a little bit of counter top and having the counter higher than they are now.... might move the cook area to be galley kitchen along the driver side wall under the window -These RVs were designed for hobbits. I'm 5'10" and can sometimes feel my hair touch the ceiling. The little corner shower pan is a slight step up so I have to hunch over a bit to shower. I definitely want to create more shower space. We'll see what I come up with. -In my tinkering I found that the walls are aluminum framed (yay!) Here's hoping there's some of that incorporated in the roofing as I dig deeper. -the overhead bunk is goin to need some attention/possible rebuild -I need to replace the roof membrane...Just received the EPDM membrane -I keep hitting my head on interior AC housing.... that thing has to go... Maxxfan will replace that -The termination rails on both sides are installed upside down? Shouldn't the gutter be on the bottom and the awning track be on the bottom? -The awning anchor points look to be a main source of water penetration. -THIS GOING TO BE A BIGGER PROJECT THAN ORIGINALLY PLANNED.... but I'm really enjoying getting into it. That's all for now. I'll add more when there is more. Thanks!
-
I have a 1991 Warrior For those who have undertaken this project: When rebuilding the overhead cab, how did you guys put the fiberglass back together--particularly under the cab. Did you just "glue it directly to the new plywood and then create a new seal where the two pieces of fiberglass meet? Did you reuse the metal bar along the bottom? Also, if there is a good resource or message thread to use, please point me in that direction. Thanks for any help.
-
I don't think so. The collapse on your overhead is caused by rotted wood. You would need to rebuild the structure to make it sound. I can see the boards that support the overhead drooping. Only rot can cause that Linda S
-
Oh and no we didn’t rebuild the overhead cab...but we did work on that area with the window (not the best in engineering for light and durability) - we reinforced it and covered it for sound sleep and privacy.
-
Nice job; I am working on my second Toy Home it is a 1991 Warrior so it is nice to see the pictures. Did you have to rebuild the Cab Overhead? Welcome to Maine!!!! We have two sayings here for newcomers to Maine: 1. If it is free it is for ME. 2. It does not take much money to move here. But you will never make enough to move away..... I think you can fit a couple more Children in there. What a fun and worthwhile project. Welcome..
-

Feeling discouraged - roof/wall reframe
REALLYRURAL replied to iamblakeh's topic in General Discussion
Thanks Jed. I reread my post and which was trying to encourage Blake and ended up talking about my projects.. So Blake... Having rebuilt an aluminum shell 88 Itasca 8 years ago I believe your instincts are spot on. For your situation I would pull everything out of the inside. once you see how these were/are put together you will see the wisdom of just getting everything out of your way. With the proper power tools and a hundred dollars of cutting tools anyone could strip the inside of any RV. Everything was put in after the walls and roof. Carefully pull everything out and you can remove every piece of stinking carpet. If you do not get every piece of carpet it is like a yeast starter for mold. If you want to do it in stages the rebuild the cab overhead pull the bathroom and rebuild it from the inside then drive the wheels off it. Please take a good look at your electrical system. It is very easy to get lit up with an RV. Bad grounds... Reversed neutral... Hot to frame.. An older rig is not only going to have some wiring issues. It will have a subscription... Always touch an RV with the back of your hand. This will repel rather than make impossible to let go. TTAFN Dale -
Overhead needs to come down to fiberglass for a complete rebuild of the bed area. Before you put any wood back seal the camper to the cab with fiberglass epoxy and mat. Should seal up nicely. More pics of camper to truck would help. Show outside where it connects behind the doors. Think the wood wall from truck to camper needs to go too but can't tell Linda S
-
Welcome to the Forum. I am currently on my second toyhome rebuild. The first is an 1988 that I had to rebuild the cab overhead and the rear wall. It has since taken me up and down the east coast from the Canada border to middle of Florida. I have in the eight years I have owned it I have actually lived in it full time 3 and a half to 4 years while working away from home or just out on an adventure. It now has 153 thousand miles needs a center bearing and rear end seal but that is it. Once those two things are done and a valve adjust I would not hesitate to head out on a many thousand mile journey. I have a full coverage policy from State Farm (with a stated value of 10,000.00) that includes towing. Cost of the policy is just under 400 per year. I blew a head gasket and incurred 750 dollars in towing and upon submitting the bill to my Agent i was fully reimbursed. The Second toyhome is a 1991 toyhome that was purchase from an insurance auction. It had a pine tree fall on it during a storm and i call it the Tramper (trashed camper). I have been tinkering with this one for the last two years and have had to rebuild both sidewalls and the cab overhead and a new roof. Engineering as I go. I am on the second rebuild of the passenger side wall and decided to use 3/4 plywood for multitude of reasons. The roof I am constructing to be able to hold a load and my full weight in certain sections. It is finally coming together and I am pushing this project over many others at this time and hoping for initial completion in a month. Your project is more like my first project. I found rebuilding from the inside easy with just basic skills and tools needed. I left the ac unit for the first couple of years then pulled it off and installed a vent and a fantastic fan. The ac unit weighs to much for what it provides (my opinion) and the weight of it is in the wrong place. That weight , gravity and the rigors of the road are more than any rv roof can stand (have been thinking rv manufacturers put them there so the rv has a limited lifetime). There are other ways to cool an rv. When I rebuilt the interior of the 1988 I used thin tongue and groove planks from Home Depot. Gluing and screwing as I went. This made it easy to make a composite of the old skin foam and the planks that has lasted eight years and has stood up very well. I did remove the front window and the clearance lights as I they were holes that were hard to keep the rain out at 70 mph. I am making use of pop rivets and flooring / decking screws to put the 1991 together. I have also pitched the roof of the 91 from the center up one inch so the roof will not puddle. i have added aluminum extrusions to the roof for strength and secure anchor points for future projects (solar panels, ladder rack kayaks, ect). While you have it apart check all your electrical connections and make sure you do not put any fasteners through the wiring in the rebuild. In the 1988 I removed the old circuit breakers and installed a small sub panel with more breakers. In the 1991 will do this also but the breakers will all be arc fault breakers and the twelve volt will go through go through a marine twelve volt breaker panel. (if you get any tingles when touching the rv when it is plugged in you need to address that issue immediately as stray current and bad grounds can and will shorten your whole camping experience).... When I rebuilt the 1988 I trolled this forum extensively without having to log in or add any content and it was an unbelievable resource. If only to see if what I had been thinking was off base or had been tried before. I am grateful to everyone who has taken the time to add their experiences here and am hoping to return the favor by just getting up to speed with posting skills. One thing I found is that the whole interior is removable. Rebuilding a Toyhome is a whole series of tiny projects. Every hole drilled or screw placed was for me fully thought out before making the move. Once your done you are off on an adventure in a rig that inspires curiosity among curious people wherever you travel. Best of Luck. Dale
-
Takes some time but search the site for old posts about rebuilding the overhead section. Then you have to go through them to find post that will help http://toyotamotorhome.org/forums/index.php?/search/&q=overhead rebuild Linda S
-
New Brand Of Plywood
ModocMade replied to snail powered's topic in Reviews - New Products - Campgrounds - Links of Interest
Hi Linda, I'm overwhelmed with how I want to rebuild my overhead walls and bed. Do you have top 5 threads you recommend or particular member that is great go-to for this? -

Introduction of my 1981 Toyota Vader and Order of Repairs?
linda s replied to texanaussie's topic in General Discussion
That is so cute. Just looking at the front overhead it doesn't look like a complete loss. Siding is expensive and I bet you could just rebuild from the inside adding new structural support where the old is rotted. Linda S -
Hi, thank goodness for this site! My husband I and recently purchased a 1991 Toyota Dolphin. We think we got a good deal at $1000 and 80,000 miles. Mechanically we think she.s in decent shape, but needs some fixing up. Our concern is with the seemingly entire rotten wood frame of the living quarters. So far we pulled out the couch and eating area and pulled out the overhead cabinets and the whole left wall (drivers side) is rotten. The roof seems to be in OK condition and the sleeping area needs total repair. We plan to finish gutting it and rearrange the space with our own much lighter setup. My questions are - where do we start reframing? What materials are ideal to use and do we have to remove the fiber glass or can we rebuild from the inside? Did we get a good deal? Any thoughts or suggestions would be really appreciated
-

18 Ft Sunrader Camper Onto A 1St Gen Tacoma Chassis?
zero replied to TacoRader's topic in General Discussion
Back in 1969 when I got sent to my first "small engine" service school, I had a rude awakening. This was put on by Briggs & Stratton, Kohler, Clinton (newly taken over), Onan, Wisconsin, and Tecumseh/Power-Products. We were shown two separate versions of engines. Those for the North American market and those for the rest of the world. For "the rest of the world" - all engines had to be rebuildable. No "all aluminum" engines like many were in the USA market. I asked why and was told by reps that only people in the USA will accept "throw-away" products. So with many - those sold here had an all aluminum piston bore. When sold in the rest of the world - a cast-iron liner was added. Kind of disappointing. Then sometime very early 70s - an engine shop I was working in in the New York City area got a visit from reps from Honda Motors. Why? They were looking at the competition and coming up with new small engines to compete. At that time - the biggest self-propelled prof. mowers we sold used one of two engines. Either a vertical 10 horse Briggs & Stratton that was all aluminum and had a life-span of one summer season before it was thrown away. That on Bobcat mowers. Or - on Bunton mowers - a vertical cast-iron 10 horse Tecumseh which oddly - did not last any longer then the Briggs. Mostly due to severe ignition timing problems that could not be adjusted. Most to these Honda guys did not speak English (as far as I could tell) but seemed amazed at how crude our shop and engines were. Not long after - Honda came out with a 10 horse, vertical replacement engine for the Briggs and Tecumseh. It cost less and we later found out was lasting four seasons before a first rebuild. Note - it not only lasted four times as long - it could be rebuilt. Kind of amazing at the time. That was the beginning of the end for American small engines. Kawasaki and Subaru followed. Wisconsin motors started using Japanese made Subaru engines instead of their own and calling them Wisconsin-Robins. Tecumseh went bankrupt. So did what was left of Clinton. Kohler mananged to hang on and made their engines better. Onan pretty much went belly up. And Briggs started pushing their foreign-designed Vanguard series. Now - I don't know who makes what. I DO know this. I can buy a brand new Chinese engine from Harbor Freight for $100 and it has a cast-iron cylinder-liner, overhead valves, etc. and is MUCH more durable then any of those older American engines. Kind of a shame. I don't see the Hilux versus Tacoma thing as much different. Tacomas are for Americans and seem to be fine for what most people buy them for. Not a great choice for something meant for full time abuse and heavy commerical work like the Hilux is meant for. I wonder how many terrorists have their big guns mounted on Tacomas instead of Hilux trucks? Of course if they steal them - maybe they don't care about longevity. -
shibs should have mini done by spring. finishing up outside.just welding on new 4 inch sewer bumper sunday. only thing left on outside is new airbags one e brake cable and then seal mini. then over the winter do inside completely. new ceiling,complete carpete .new lights kitchen and bath vanity. bathroom and kitchen paneling. have compete rebuild of inside of the overhead cab done. only about 6 feet of wood on mini is factory.funny thing 95% of the wood was either gone or rotten on mini .only a small 8"x10" spot was bad on entire floor. everything above the floor was rotten or gone. the back was the worst had to use the stains from were the wood was for patterns. I have 125 pictures of every step on rebuilding it. guess working 30 years in a rv plant came in handy lol
-
$2000 sounds excessive to me but I don't know what all is being done. If it was in my shop - first I'd find out WHY one cylinder is low. Is it a burnt valve or just a valve being held partially open? If the latter, it might be repairable without removing the head. Modern valves and seats are very durable. If an exhaust valve gets held open too long, it will eventually burn out. If that IS the case, and the engine only has 109K miles on it - removing and repairing just one head is an option. Furthermore - the one valve if burnt could be removed and replaced instead of an entire valve job. Often even with a burnt valve - the seat can still be fine. Just a matter of popping the valve out, doing a light resurface of the seat, and putting the new valve in. I can understand if the engine had over 200K miles and was pretty much whipped all-around - that you'd want a rebuild of some sort. I'd also understand the want of a valve-job if all the top end was worn. But with a fairly low mile engine that did not burn oil and ran pretty good? I be apt to think otherwise. Also excuse me if I missed something in all the posts. I did not read them all. Not so long ago, many shops did their own valve work. I still do much of mine "in house." I suspect your mechanic will just pull the heads and send them out elsewehere. Modern soft-metal heads with seat inserts and overhead cams have gotten pretty complex. Rebuilt heads will result in you paying for a lot that you may not need.
-
Hello, I also have a 1990 Odyssey, brought it 7 years ago with 82,000 miles on it and now have 106,000. Be sure to check the overhead cab in the corners and around the side windows for water damage, I ended up having to rebuild both sides. The Odyssey is the biggest Toyota motorhome out there, a few inches taller and a few inches wider, the strongest roofs, but as a result the heaviest model. If you end up getting new tires, due to the weight I would recommend 195R14 load range D or 185R load range D. At around 95,000 miles I needed to replace the bushing in the rear leaf springs (about $500) and also new shocks. Check to see if the timing belt has been replaced, the schedule is either at 60,000 or 80,000, either way the Odyssey you are looking at is past due.
-
 Okay, so here's the report for the W50/ 1 ton rearend. The older semi full floating rearend (I assume semi full floating) had a lower gear ratio than the newer, full floating rearend. This made me nervous, because it seemed the engine was already spinning pretty quick at 55MPH with the standard 4 speed trans. I tore down the W50 to clean it out (A LOT of sludge in it. So glad I cleaned it out.) and check the bearings. The input and output bearings were a *tiny* bit wobbly, one more than the other. So, i filled it with Royal Purple 75/90 after running it for a few miles with fresh, clean non synthetic oil. One the rear axle, I put new brake shoes on it, and thoroughly greased the bearings with Green Grease. I like Green Grease because because it is tenacious, it's almost impossible to get fully off, and it's synthetic. I try not to run nonsynthetic anything if I can help it. I used the entire 14 oz tube for both bearings. Perhaps I overdid it. But I was hauling a lot of weight. My 1982 19' RV was gutted years ago by me. It was stored by the ocean and is in pretty bad shape. Walls are coming apart, and the gaps are almost 3/4" in some places. Before I left, I greased the front wheel bearings with Redline CV grease. I also tightened up the steering to a minimal amount of play, and greased the ball joints in front. Without the tightened steering, I believe the trip would have been more difficult, if not dangerous. The manual steering proved to be quite useable, even from a dead stop. The engine is fresh, bored 50 over. I traveled from 92356 area code to 86312. When I selected the mapquest route, I chose the least amount of miles... Big mistake. It took me through Wikenburg, and 20 miles or so of steep climbs and sheer drops, with twisty mountain roads. Even with these adverse conditions, and the fact that I was carrying a bunch of heavy stuff (A small metal lathe, a 4x4 quad, lots of other things including an air conditioner, things like that) I still averaged 18 MPG. It cost me around $70 in fuel to come up here to my mother's horse ranch in Arizona. In fact, that's better than my father in law spends on his full size Ram truck (With the hemi, automatic) to come *down* to see me. Something curious as well. I was concerned about not being able to use 5th gear, with my load, and the fact that I was increasing in altitude. Well, it turns out, I used it about 80% of the time. Some times were 4th gear, and going through the hills, I used 3rd, and once even 2nd to climb some of the twisty roads. I stopped after about 200 miles to check the rear wheel hubs with my laser thermometer. I was concerned I might have made the passenger side nut a little too tight. That side measured 112 degrees F (Warm to the touch) and the driver's side was barely warm at 93 degrees F. I have felt hubs that have gotten this hot with *no* load. So considering all of the weight, I'd say I was doing alright. But in the end the old girl made it, safe and sound. And with some great fuel mileage stats as well. Some people tell me that i spent too much money on this RV, given it's condition. Or, they tell me I am putting too much time and effort into it. Why rebuild the engine? It's falling apart. Why invest in a 5 speed? Why put that nice axle under it? Well, I'd do it all again. I slept in the overhead sleeper portion, and I slept very soundly. Maybe it's because I own the vehicle, and it's like being inside of my own little house. Nobody can make me feel bad about putting so much into it. I plan on re- doing the entire shell, rebuilding it and making it more liveable. I love to write, and look forward to repairing my laptop so that I can sit in my little RV with a cup of coffee, looking out the large rear window, and periodically looking up, seeing the rolling hills of Prescott, AZ. I love my little RV and don't regret a single effort I put into it.
 -
That looks pretty ugly. Sorry to hear. Can't really tell a whole lot from picture and am not familiar with that rig, but looks like you need to pull off some more stuff both on the inside and outside such as that white piece of trim. The wall needs to be put back into place so you can refasten the roof. You might be able to use a strap and pull the wall from the inside using your overhead cab cutout as an anchor or maybe push it back into place from the outside using a brace of sorts. Looks like the roof was stapled at one time judging by those rusty looking slots. You'll prob want to use something else such as flathead screws and some construction adhesive. Question is do you have anything to fasten to? You might have to tear into the wall a bit to rebuild some framework, possibly add some sort of block or maybe even use some galvanized sheet metal brackets commonly used in framing. After all that, you might investigate into some of the metacrylic tape they use on mobil home roofs to wrap that seam before putting the trim back on. definitely get some more pics up so others can chime in.
-
You and I have identical Toyhomes, right down to the upholstery pattern. I've had mine for about 15 years and have done a lot of rebuilding and repair. Most of the work involved rot repair in the overhead bunk, both wheel well areas and the rear wall from the big window down to the bottom. Looks like yours might be in better shape than mine was, although if I had jumped on the repairs when I got it, the work wouldn't have been quite so extensive. The last major job on mine will be removing and replacing the entire roof, including the framing and outside metal, though that'll have to wait until late Spring. Montana Winters make it tough to work outside since epoxy, paint and, mostly fingers, don't work like they should. I've posted lots of pictures on the toyota-campers@yahoogroups.com website if you're interested. They're under 85 DOLPHIN REBUILD in the photos section. Good luck with yours and keep posting those pictures. John
-
 Idaho- I did the overhead bunk repair a couple of years ago. You can find pictures of what I did on the Toyota Campers site on Yahoo in the photos section under "85 Dolphin Rebuild." By the way, if you have rot now, don't wait a couple of years to do the job. It'll be much worse in a couple of years.