Search the Community
Showing results for 'extension housing'.
-
 I posted this in the Yahoo group, but since all things Yahoo are wholly lame, I like this forum much better. I've learned a lot about the A43D tranny in the last couple of weeks - I have two broken down in, uh, my kitchen undergoing overhaul. It's actually not difficult at all, and I'll have two excellent rebuilds for $600, including all the tools and reference. There's a good kit on eBay right now for $45, vs. the $250+ plus that's normal for a master kit with steels. My failure, which I wrote about in detail on an earlier post about the saga of picking up my 86 Sunrader, was a loss of gears from OD on down. Made it from St. Pete FL to mid-LA when I started losing gears. Got home to Texas with occasional 3rd gear operation. Maintained the unit, test drove it a bunch, and it was fine. Worked very well, actually. So, being completely nuts, we drove it to Denver to see a concert, then all through the mountains and even some steep, snowy stuff in March. Performance, for a MH, was excellent. We got to commandeer an entire CO state park that hadn't opened yet. Awesome trip. Then, on the way home, we ascended the steep pass east out of Angelfire NM. Near the top, we were almost rolling backwards (and laughing like oooo). That was the only oddity, though, and we made it over the top. Shortly thereafter, it started slipping out of 3rd. The worst part is that it happened while listening to Pink Floyd's Echoes, one of the greatest works in history. How utterly uncool. We pulled over and spent the night with about 100 loud cows (which was pretty fun, really) and limped about 650 miles home. We only got one shift from 1st to 2nd per fluid warm-up. That made for an interesting trip - coundn't go fast enough for the interstate, but lost 2nd gear every time we slowed down. It was like a less-trying version of the film Speed. Too bad Dennis Hopper didn't come with us. Every time I coaxed her into second, we yelled "gooooooooooaaaaaaal" like at the Mexican soccer game. Finally we just said "ta oooo wid it" and jumped on I-20. The 22RE likes being wound up, and we managed 50mph and some of middle fingers from our kind fellow citizens. After the last fuel stop, 100 miles from home with no more slowdowns to cripple us, a TX DPS trooper left his speed trap position and chased us down for not having mudflaps on a dual axle. My understanding is that a MH is not required to have mudflaps, and installing them on a Sunrader is an interesting proposition in itself. Sheeeesh. So we had to sit on the side of I-20, watching The Simpsons on the laptop, waiting on the fluid to cool one more time. Our desire to get home to a city which (on a good day) we loathe was overwhelming. We got underway again and made it home, the last 20 miles being pure insanity, battered by the worst thunderstorms in many years. 3 times now Toyotas that shoudn't have made it have gotten me home. The transmission autopsy was a big event in our home, 'cause we like stuff like that. It's the only part of one of these rigs I've not dismantled and reassambled - I have 89 and 87 4Runners too. What went wrong in my 70K tranny? My 89 4Runner has 168K, towed another 4Runner from MA to TX, and shifts like silk. Being 0-for-6 in major drivetrain repairs from the sleazy mechanics that rule this area, we knew well that we'd do a better job than a rebuilder who gets fired if he takes too much time examining and cleaning parts. I can't tell you how many atrocious tranny rebuilds I've seen. I got one once that lasted less than 100 miles. Stuff like that made me abandon all vehicles outside of the 1st generation 22RE Toy pickup class, build a home workshop, and say goodbye to car payments and outrageous repair bills forever. 3 vehicles heades for the crusher restored to glory for less than half of what my 2001 Chevy cost. An? one of ?em has this rather splendid fiberglass house on the back. The fluid was dark, especially for so little mileage on it, but wasn't full of metal. But, before I originally left FL with the rig, I changed the tranny fluid and had no way to examine it. Subcomponents kept coming out looking good. Valve body looked good. Then, the rear parts group and output shaft didn't want to pull out by hand like they should. Spent an hour coaxing it, then slept on it before putting it on the press. It popped out with a tiny amount of pressure. Woo hoo. I looked at the tailshaft and in my best surly blue collar voice, growled "there's yer problem". On the last inch of the output shaft inside the case (not the extension housing, but the case itself), there are 3 metal interlocking oil sealing rings. Two of them had broken and gouged the bore at the rear of the case. It was pretty nasty. The rings were shaved across their diameter like a deli slicer worked 'em over. I've never seen anything quite like it. The bore looked like it was supposed to be grooved, but got chewed up too. Yes, a worst "case" scenario - the case is the most expensive hard part, but I quickly found a $100 donor unit at the junkyard just 6 miles away. I efficiently broke her down in just a few minutes, and this time the tailshaft group slid out with no problem, but..... TWO OF THE THREE AFOREMENTIONED OIL SEALING RINGS WERE BROKEN! So now we're zero for two trannys with sound sealing rings. Only these had not come out of the grooves to wreak havoc - thank goodness the rear case bore was smooth. But, the rings were shaved down like mine were - one is about 1/4 its original thickness. My original case was gouged so badly that I didn't realize the rear bore was supposed to be smooth until I examined the donor unit. These rings separate fluid passages to the governor, which controls shifting based on fluid pressure and centrifugal force as it rides on the tailshaft. Disrupt pressure to it, and it wreaks havoc on upshifting. Nowadays, the governor is replaced by electronic speed sensors and solenoids on most cars, but the A43D's only electronic control is the OD system. Amazingly, the pieces of metal were mostly stuck to the side of the center support and did no other damage. Hard parts look great, and the clutch discs had plenty of life remaining (but were replaced anyhow). So that solves the mystery of the shifting problem, but what caused this with so little mileage on a pretty durable tranny design? Toyota sez that if a bushing is out of spec, you replace the whole subassembly. Yeah, nice work if you can get it, but I wasn't born yesterday and, consequently, can change bushings. When looking at my nice new extension housing ("asscone") bushing from the A43D kit, I remarked on the apparent design improvement - a big X-shaped oiling groove in the bore. But, when looking closely in my asscone, I saw faint marks of what was once those same oiling grooves. Wowzers! The bushing was so worn that it appeared to be smooth inside! I measured it - 1.536", far in excess of the 1.4996 spec. TOAST. 36 thou might not seem like a lot, but it might as well be a mile in this application. The picture becomes clearer still.... See, the bushing wear was caused by the shaft wallerin' 'round in my asscone. No, really As the wear increased, the rear case bushing began to grind out of spec (only .009" over max, but still bad). What sits between the asscone bushing and the rear case bushing? The three oil seal rings that seem prone to coming apart! The rings are metal and have right-angle claw ends that interlock to make a kind of smooth unit that spins freely in a groove. Many of these in different sizes are found in the A43D, and now they scare the freakin' crud outta me. I theorize that on the first trip, the rings came loose and caused moderate problems. On the second, they held up for 4 days, then came really, really loose and ate up the case. The heat from that malfunctioning comprimised the torque converter which, after we got home, was performing poorly. No surprise there. The junkyard case donor I broke down looked fine too, other than those bleepin' rings. I wonder how many crappy rebuilds certain chain tranny shops have sold when all that was needed was a new TC, oil sealing rings, and two bushings? I wonder how many of those times the victims were told they needed a bunch of hard parts, too? I've seen people almost taken for THREE THOUSAND FROGSKINZ when all they needed was a throttle cable adjustment. So, the last part of the mystery...why did the extension housing, or asscone if you prefer, bushing get waller'd out like that? Research indicates it's not uncommon for Volvos running the same tranny (with a different asscone and bushing) to need the bushing done at 120K. A 21' Sunrader is obviously stressing the drivetrain a bit more than a Swedish turbobrick, so that likely accounts for some of it. I marked the driveshaft, of course, but since I'm not the original owner I can't be sure that my marks mean anything. Some of the work I've found on the rig is below even goober standards. I'll closely examine the driveshaft, center bearing, and probably change the likely-20-year-old U-joints while the shaft's out and pay special attention to good driveshaft phasing. Our recollection is that, especially on the second trip after adding new tires and Bilsteins, the ride was pretty sweet. No strange noises or vibrations, but a long shaft like that can get freaky if installed out of phase. I know why the tranny went nuts now, but can't tell if it was just normal wear or if an imbalance behind the tranny accelerated the wear. Again, we noticed no evidence of such a problem. Sometimes, problems like that are indicated by a leak at the rear seal, but the Toyota is very well sealed - a rubber metal-clad inner riding against a metal-clad felt-lined outer. That's awesome if you hate tranny leaks, but it will help a bushing wearing out of spec go unnoticed. So what in the name of tow trucks are you supposed to do? I'd pull that asscone every few years as part of routine maintenance. Drop the driveshaft, pull the speedo, six bolts holds the tail on. The bushing only costs a few bucks, cuts out easily with a hacksaw blade (large oil channels under it make damaging the bore a nonissue), and presses in easily. Make sure you line up the oil hole just right. A shop shouldn't dream of charging more than $100 to do the whole thing, or $20 to press the bushing. If the bushing looks really bad, check the driveshaft and u-joints. This can save transmission that should have run for many more years. Unfortunately, you can?t access the three oil seal rings without disassembling the transmission. You might have to tap the cone some with a rubber mallet to separate it. The housing gasket, which goes on dry, is likely to be a real nightmare to deal with, especially while under the vehicle. Scraping off the old gasket at the kitchen table was very time-consuming. Actually, it was the worst part of the rebuild so far. I guess that's, in a way, great news. I've always applied a light coat of grease to most gaskets to make future disassembly a snap. All my 22REs are assembled with grease instead of RTV (except a few special spots like half moons, oil pump bolt, etc.) and have never leaked a drop. The tranny is a pain to pull from the vehicle. Unlike on my 4Runners, the crossmember does not pull out. It's welded in. ACK! Getting that thing out from under that low-sitting vehicle is the stuff nightmares are made of. I think, actually, it might be impossible. It's easier for me to pull the motor. Pop the mounts and move the engine/tranny forward and you have easy access to the infamous two upper 17mm bellhousing bolts. Yoink the motor out, then tranny comes out easily through the hood. By watching eBay I was able to equip my home shop for absurdly cheap. Got a rebuild kit on there for $60, then another for $45. Shop equipment was accumulated by watching local auctions for heavy stuff. Got a two ton engine crane, two engine stands, and a load leveler for $100. And, got stuck in the mud in a national forest with all that stuff in the back of my Blazer as a game warden gave me an undeserved ticket. It?s a long story?? Disregard the $400 Toyota SST tool kit. Almost everything I needed was already on the workbench, and I fashioned most of the rest. A clutch spring compressor, $36 eBay, was the only tool I had to buy. Compared to the cost of rolling the dice on a half-assed rebuild, doing it yourself, even if you have to buy a lot of shop gear, is a blast. And, you get to keep the tools. The 1993 A43D Toyota manual is excellent, with much more information than the '80's FSM's. We supplemented the 4 manuals used with lots of notes and dimensions, plus over 1000 photos. What was once the greatest mystery on the vehicle I now know like tha back of my hand. Our attention to detail in measuring, examining, and cleaning was fanatical - much more than any shop would use - and no repair we've done has ever failed. If you can work efficiently and follow directions well, there's no reason why most can't rebuild the A43D. And so goes my strange tranny story, so far. I'm going to rebuild and soup up a spare 22RE for her, so it will be a little while before I'm rolling again. It?s too hot outside to go boondocking anyhow. I'll post more info and photos shortly.
 -
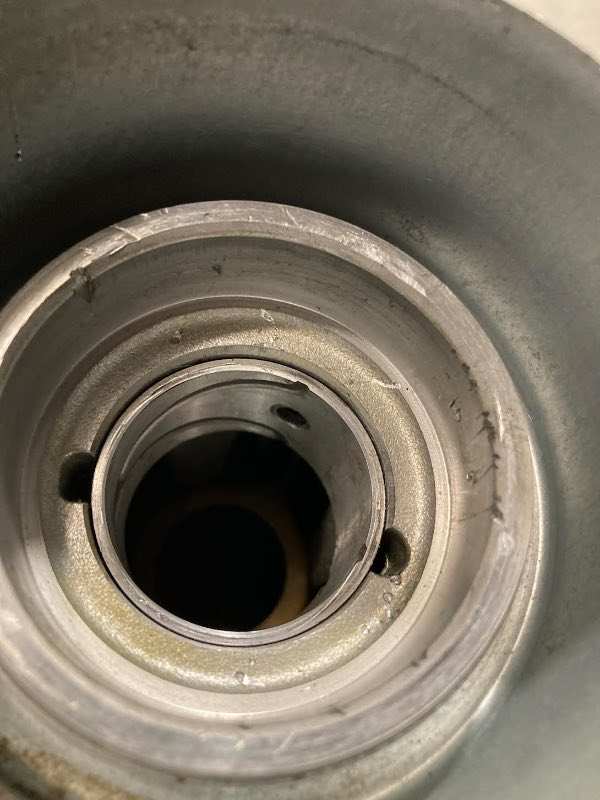
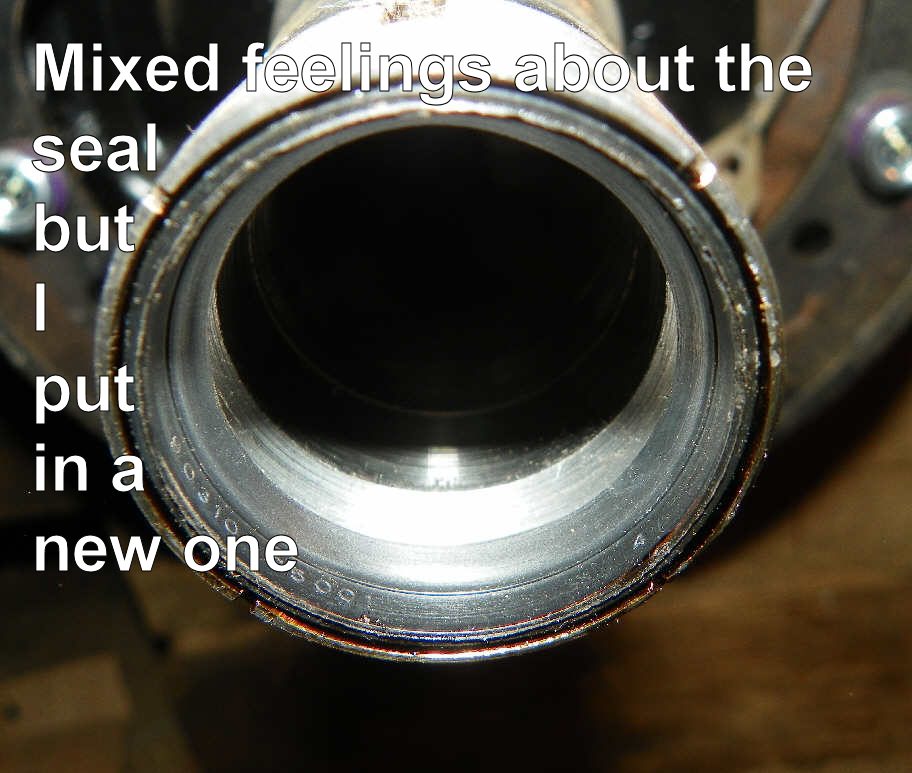
 Ok, I took the yoke and housing with new bushing to a machine shop. Turned out it was just a small burr keeping it from sliding in easy and moving smoothly. I reassembled everything. The play in the yoke was gone and all looked good. Took it for a test drive and a much smaller leak was still there coming out from where the output shaft/extension housing meets the yoke. Not as much but still a pretty decent leak. Can't see anything because of the large metal dust covers on both pieces. I'm wondering about my technique installing the seal itself. I pounded it in the first time and it seemed to cave in in the middle and the spring fell off inside the housing. I pulled it and tried again but did not install it as far to hopefully keep the spring in place and prevent an uneven install. Guess I could have damaged the seal when pulling it back out with a puller but I'm worried I din not push it in far enough? I didn't take a pic but the metal dust ring (behind the felt washer and rubber seal) was flush with the lip of the extension housing it fits in, but I think it could have gone in farther. I plan on dropping the driveline again and putting in a new seal so just looking for some pointers for that part. Thanks!
 -
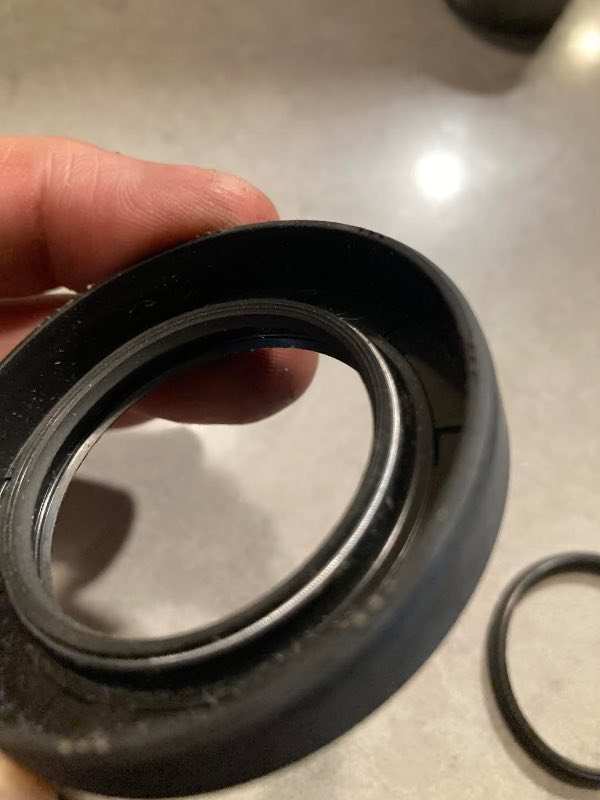
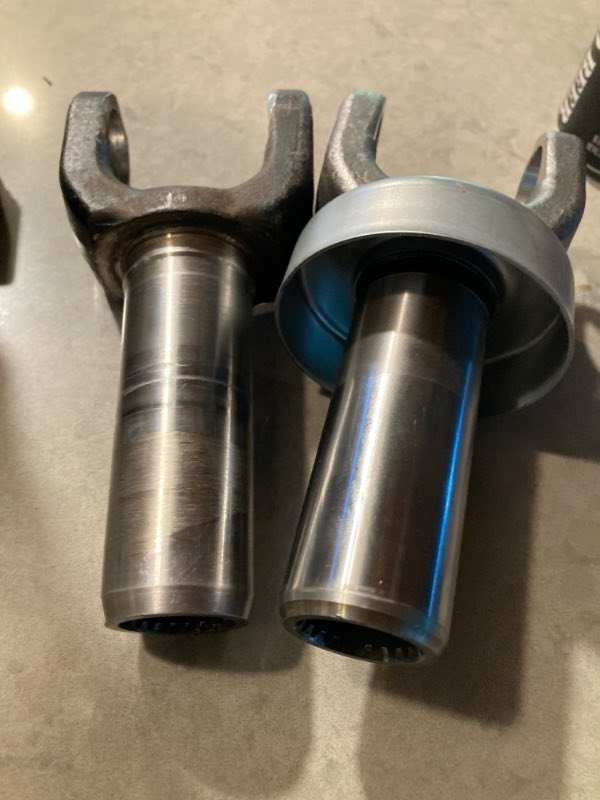
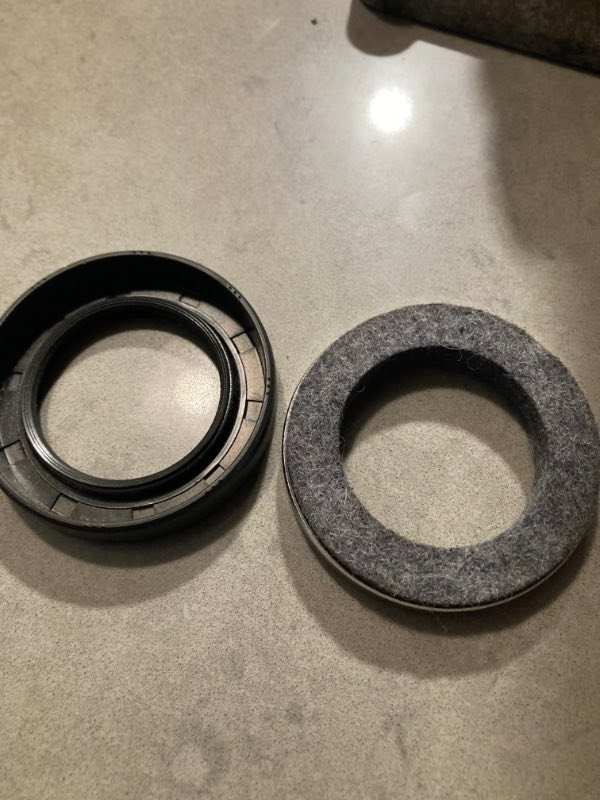
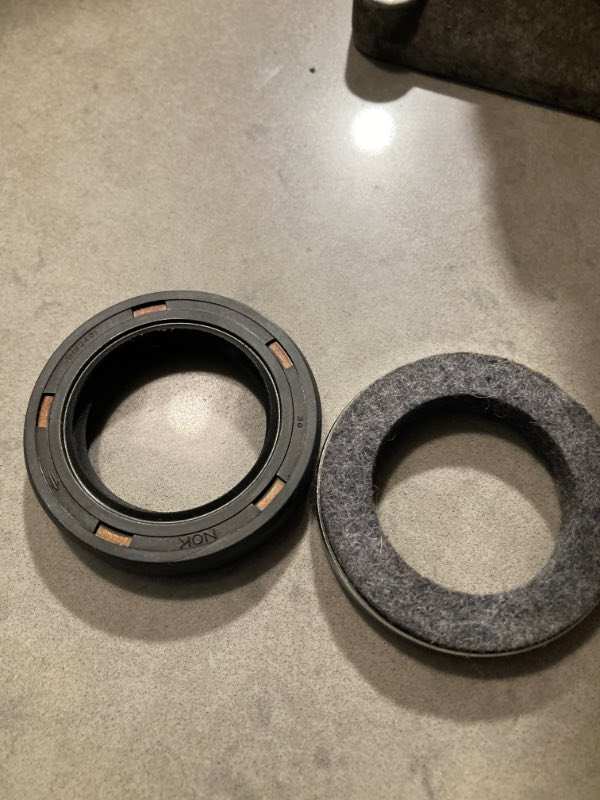
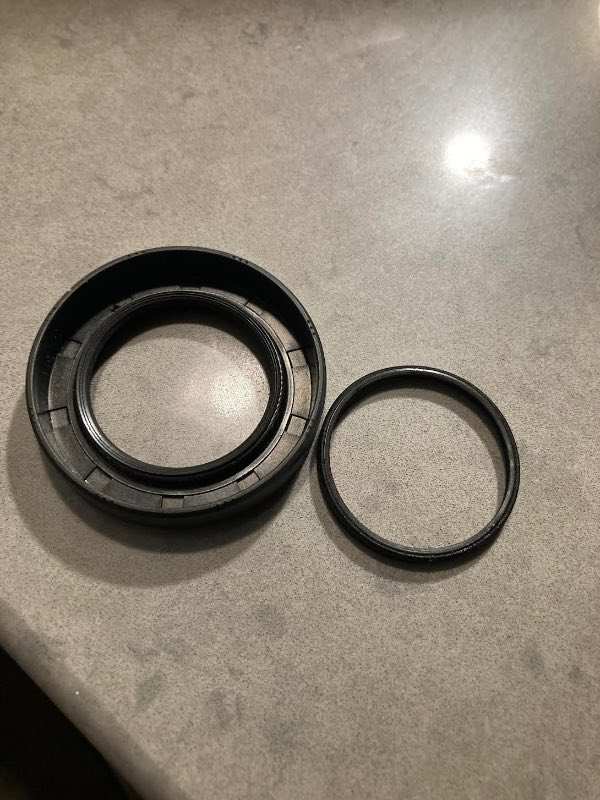
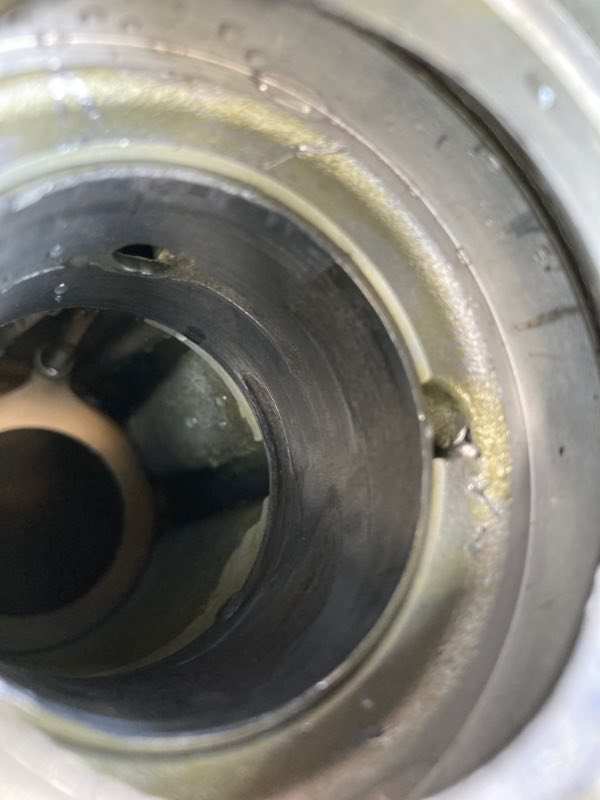
Ok, I received the parts and everything actually matches as far as I can tell. Now looking at the new seal, it looks like the little rubber part with the spring was the remnants of the old seal which must've fell out and off. the only thing remaining attached was the metal dust shield. TONS of play when jiggling the old yoke in the old bushing and pitting at the yoke. But new yoke and bushing are much tighter. In fact, too tight to insert the yoke when I installed the new bushing. Questions: 1. I plan on bringing the new yoke and the extension housing with new bushing to a machine shop to hone the bushing so the yoke will slide in (it currently won't go in). Is that the proper thing to do? Are there specs somewhere for this? 2. For the rear seal, I don't have any reference as to how the seal is to be put in (since the old one was destroyed). There's 3 pieces- a rubberish seal, a felt seal, and a dust cover. Which orientation does the rubber seal go in to the extension housing? Left one is the rubber seal. Does it go in the housing this way? Or this way? Thanks for all your help! Abe

-
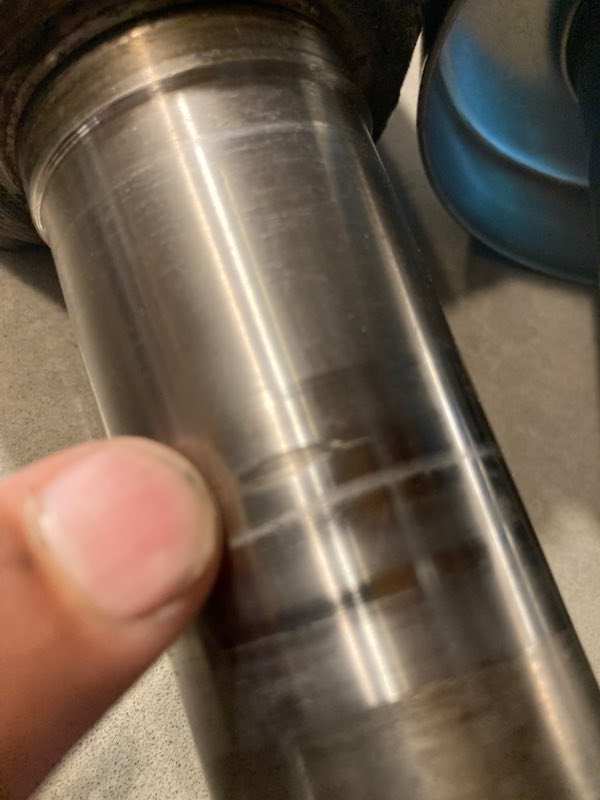
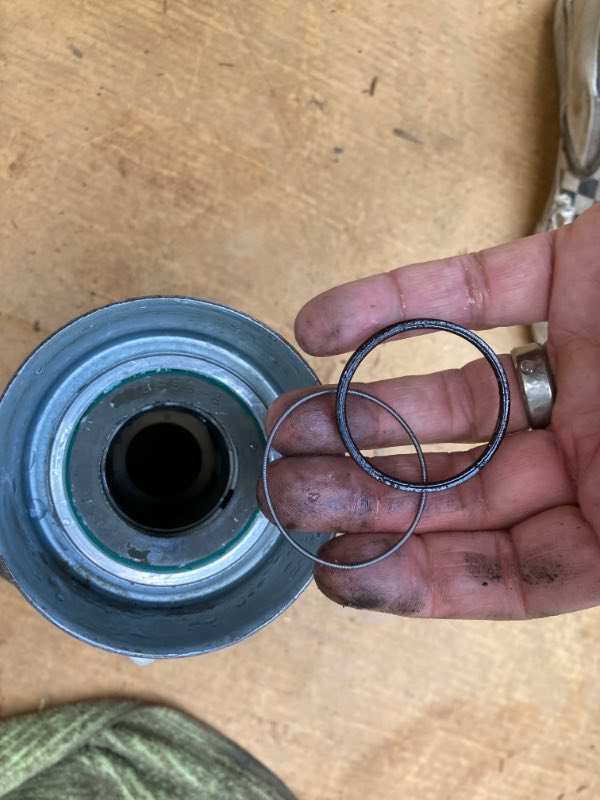
Ok, I decided to go for it and replace the yoke and u-joint and the extension housing seal and bushing. I removed the extension housing and noticed there was a loose rubber seal/spring inside the housing (loose around the tail shaft). Does anyone know what that is? Is it a part of the seal that came loose? Or perhaps the shop that put the seal in for me last time added it to help stop the leak?? My new seal and other parts are shipping so I don't have anything to compare it to yet.
-
 Bodybagger - you said "The thing I would do before your trip is get under it and yank side to side on the yoke coming out of the transmission and check for a worn extension housing bushing! If it wiggles side to side even a little bit, DO NOT go on your trip until you get the simple fix" Did I find The Simple Fix in the sticky for The A43D Automatic Transmission? Spungo says: "I'd pull that asscone every few years as part of routine maintenance. Drop the driveshaft, pull the speedo, six bolts holds the tail on. The bushing only costs a few bucks, cuts out easily with a hacksaw blade (large oil channels under it make damaging the bore a nonissue), and presses in easily. Make sure you line up the oil hole just right. A shop shouldn't dream of charging more than $100 to do the whole thing, or $20 to press the bushing. If the bushing looks really bad, check the driveshaft and u-joints" I just replaced a bad front u-joint, and I Do have some slop in the output shaft. Obviously needs the bushing. Is this bushing located in the extension housing itself? We are not talking about the oil seal, are we? I have no oil leaking. The diagrams in the Toyota manual do not clearly show any bushings for the extension housing. Just looking for a bit more info before I tear into the housing. It may be obvious when I get there... Thanks. John
 -
 Well there are apparently a lot of threads referring to the extension housing. I'd rather not have to scroll through them all so if you type extension housing into the search box you can go through them and see if you can use the info there. Looks complicated. Sounds like bushings inside the housing need to be replaced and extension housing needs to be removed to get to them. I also see a comment that a tranny shop has the tools to do it without removal Linda S This should take you right there Showing results for 'extension housing'. - Toyota Motorhome Discussion Board
 -
 Yes, extension housing, Thanks.
 -
Or do you mean driveshaft to transmission extension housing. There is a thread here somewhere that addresses that fix. Linda S
-
 It can be done in the back yard but you will need things like a bushing driver. You could remove the extension housing an take it to a transmission shop and let them replace the bushing. If there is any ware on the yoke replace it. They are actually very good transmissions but they did have some quirky problems one of them was the way the output shaft was supported by the yoke and the bushing I can't stress how important that could be to your bank account if it's ignored.
 -
 usually the bushing is worn since it is a softer material than the yoke. likely you won't be able to swap it out youself. the part it goes into is called the extension housing
 -
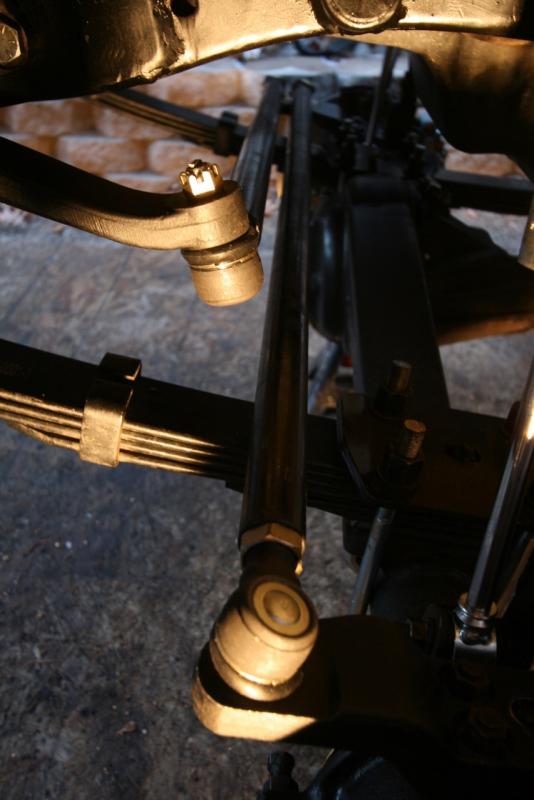
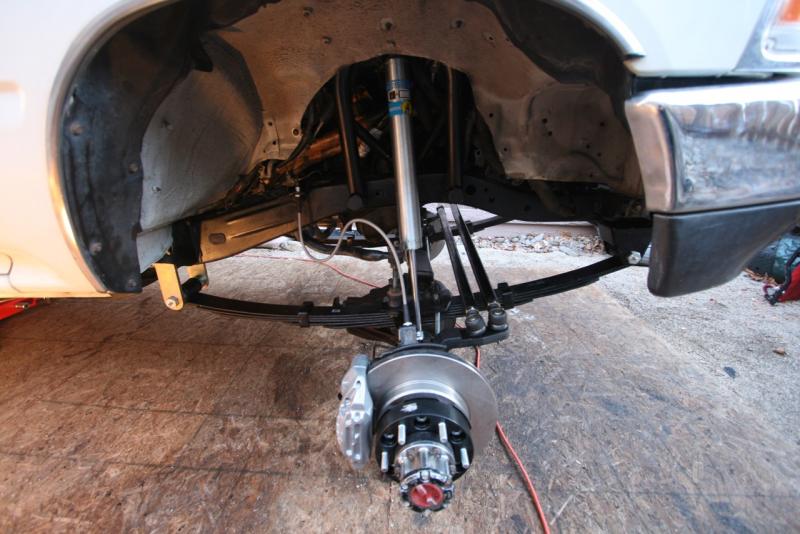
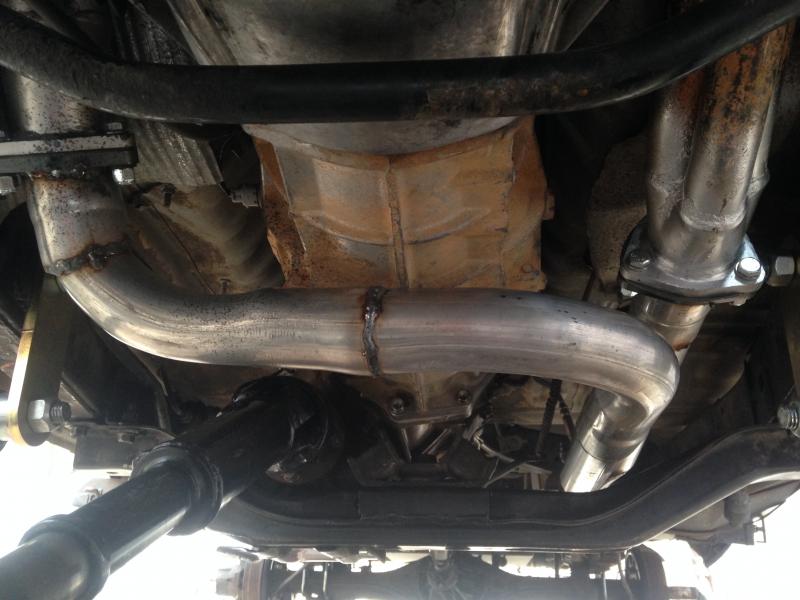
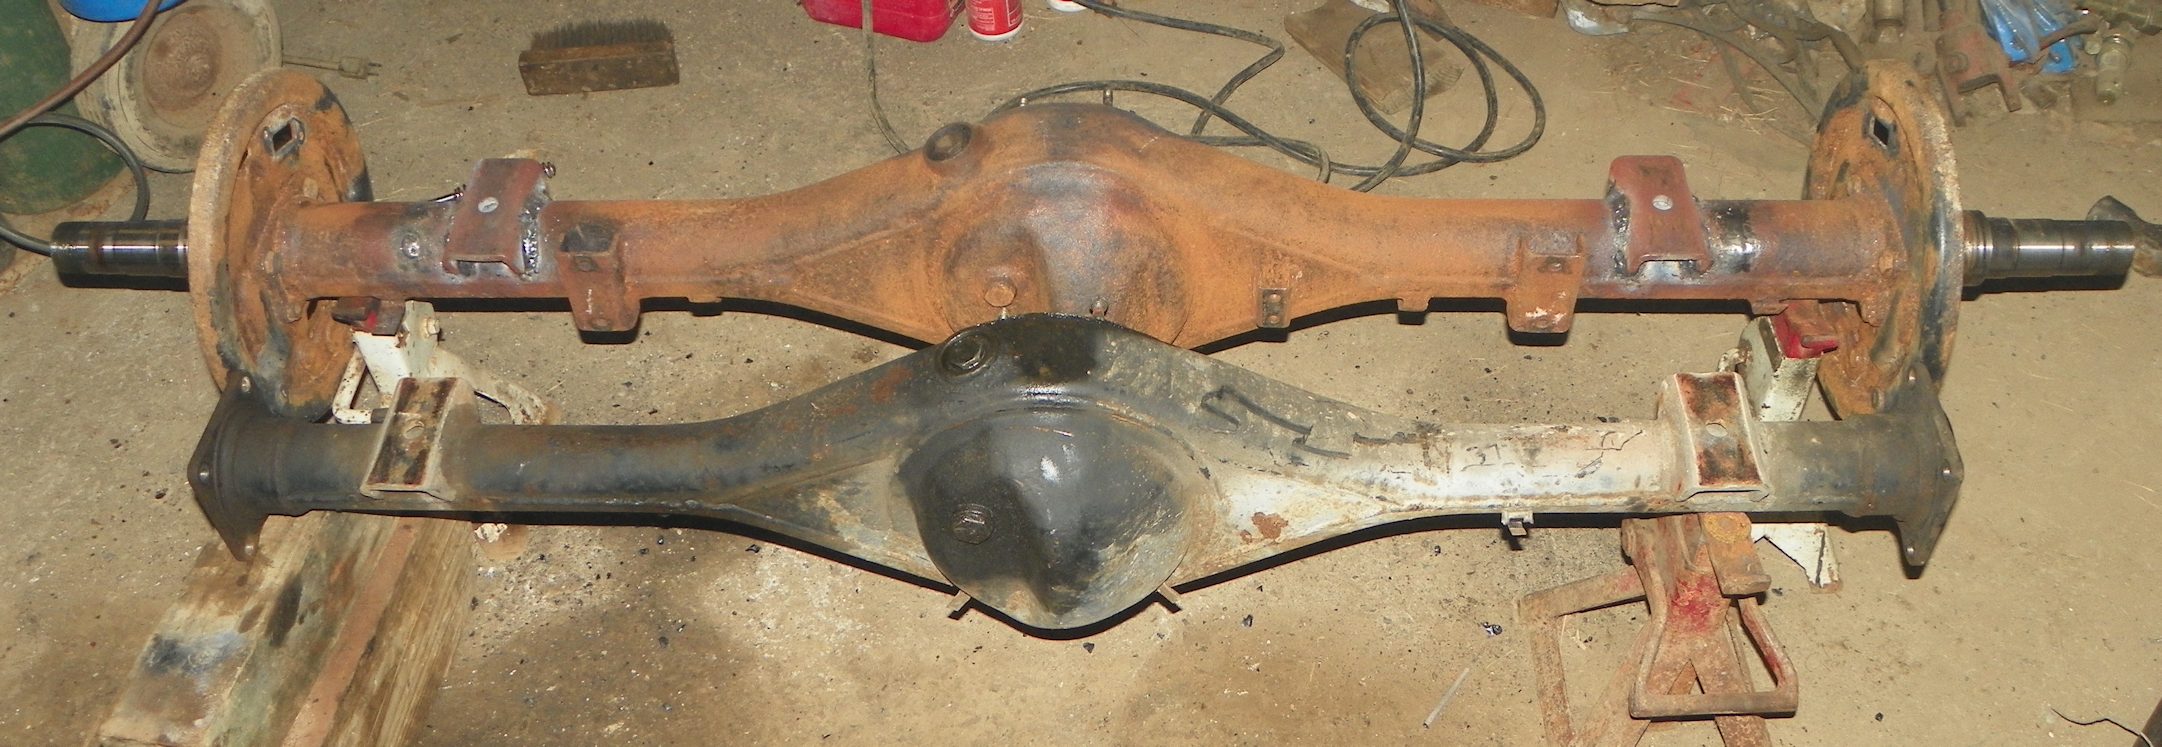
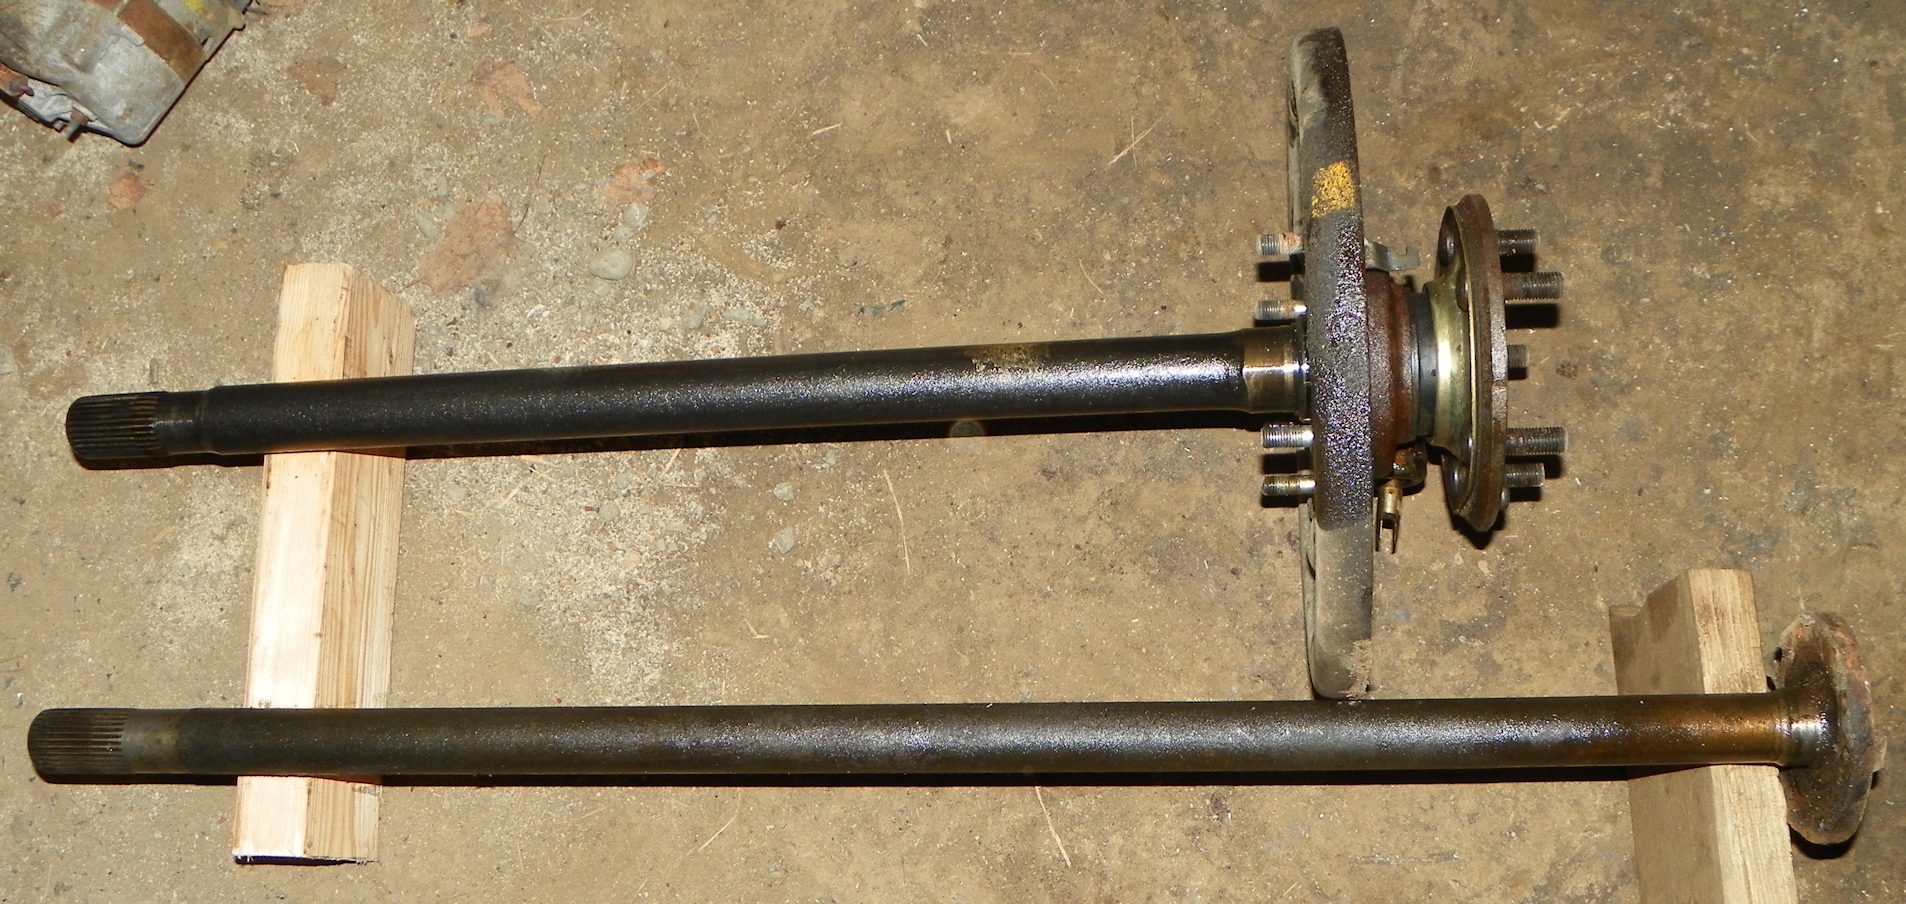
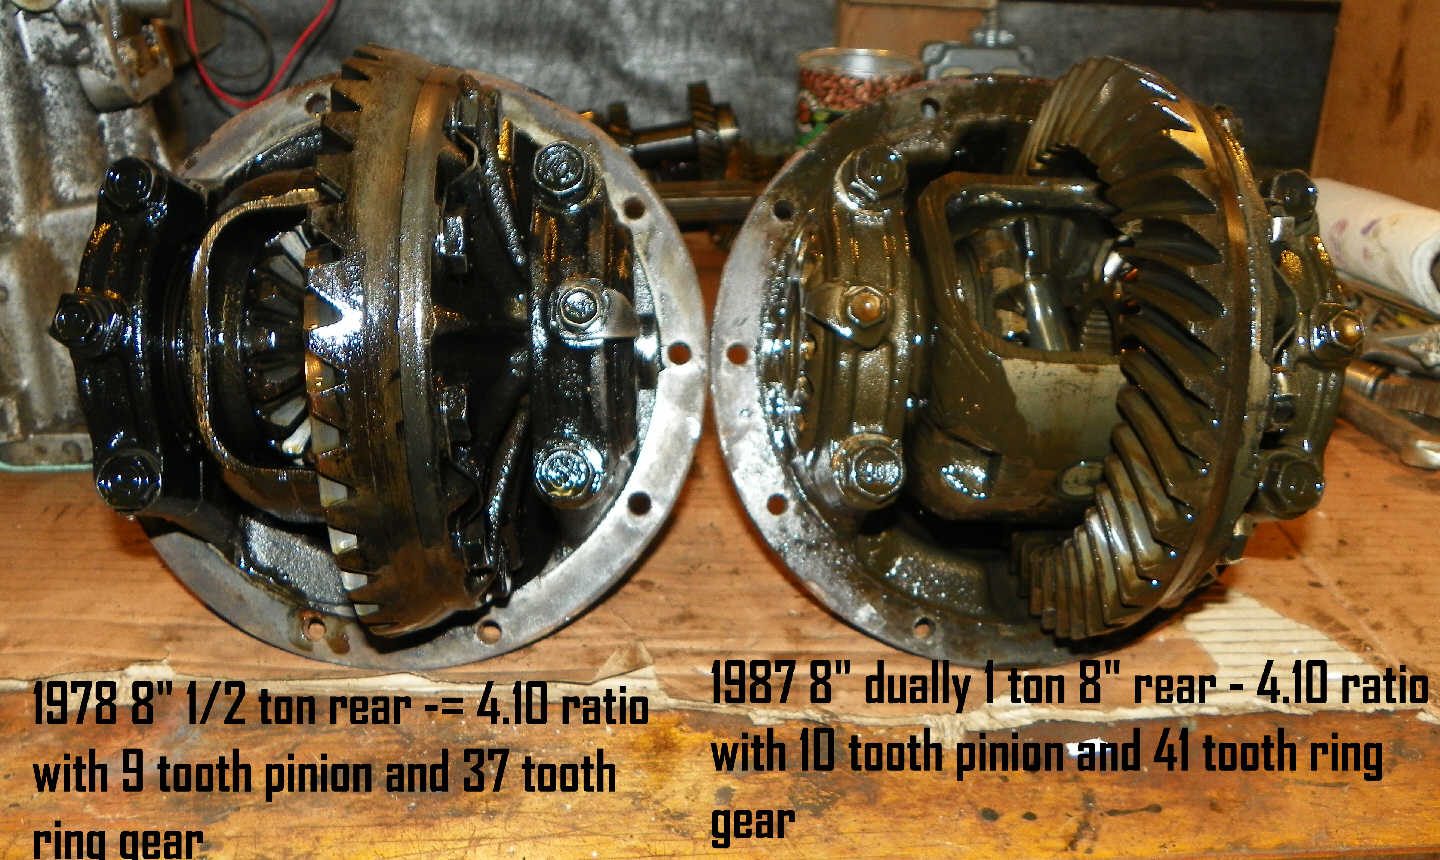
 After mounting the shocks, I reinstalled the original front sway bar, then fabricated a vertical mount from the lower shock mount to connect the sway bar. I recycled the old 7” long torsion bar bolts form the 2WD suspension, then reused the rubber bushings from the original sway bar connectors. While not a quick disconnect system, all I need to disconnect the sway bar are two 17mm wrenches, and the top nut comes off in under a minute. Quick enough and free. I moved on to fabricating a modified steering shaft connecting the steering wheel to the steering box. Because of the forward location of the new box, the stock shaft was a few inches too short. Again, some of the old 2WD parts came in handy. I used two threaded tie rod end sleeves from the old steering, cut the shaft, and bolted the two sleeves to either end of the shaft, giving me the added length I needed. The sleeves are thick and stout, and secured with bolted clamps. I figured if they're strong enough to hold together the tie rod ends, they're strong enough for a steering shaft. Next was reassembly of the entire front axle. Considering this procedure has been covered eleventy billion times on the internet, I'll skip ahead. Steering came after reassembly of the front axle. The Trail Gear IFS Eliminator kit came with all the components needed – tie rod ends, tie rods, drag link and pitman arm. The first step to getting the steering and alignment right is setting the proper toe-in. For solid axle Toyota trucks, I've had great luck with 1/8” toe-in. Easiest way to do this is to clamp a straight edge to the brake rotor surface on both sides. On both sides, measure 18” forward and 18” rearward of your wheel hub center, then mark each point. To set toe-in, run a tape measure from the driver side to the passenger side, first on the front marked edge, then on the rear marked edge. Take a measurement of each, then either tighten or loosen the tie rod so the front edge measurement is 1/8” narrower than the measurement of the rear. It will take a few tries. Once you get it exactly 1/8”, tighten the jam nuts, making sure to not let the tie rod turn. Once toe-in is set, then you can set the length of the drag link from the passenger side steering arm to the pitman arm. Find the steering box center, then the steering wheel center, and adjust the drag link accordingly, tightening the jam nuts last. Next I installed the steering stabilizer. Because of how much clearance under the engine I have, I was able to mount the stabilizer on top of the axle housing, connected to the tie rod. The flatter and more linear you can get the stabilizer, the better. Under suspension compression, the tie rod and drag link are very close to each other, but they clear by just about 1/2”, so there is no contact. I used the mount plates and urethane front bumps that came with the Trail Gear Kit, and welded the mount plates under the frame. I will better dial in the bumpstop contact point once I get the truck on wheels so I can see how the suspension is flexing and determine how much up travel I need. I cut the front spring u-bolts shorter, but kept them long enough so I could mount another plate above the u-bolt plate in case I need to shorten the length between bumpstop and axle. With the front end pretty much buttoned up, I moved onto converting the rear sprung under axle to sprung over. After supporting the rear axle, removing the shocks, sway bar links and u-bolts, I dropped the springs by pulling the front spring mount bolt and the rear shackle bolts. I bought new spring perches and placed them on top of the axle, then dropped the axle down so I could reinstall the springs, but first I had to flip the spring pack pin so it would fit properly into the spring perch (two giant vice grips work great to keep the springs compressed while removing the pin). The Trail Gear spring perches have three holes so you can run 1” forward, center or 1” back. I ended up running the axle 1” back so the axle was better centered in the wheel well to accommodate the bigger tires. And since the stock spring shackles are 5.5” eye-to-eye (2 inches longer than the stock Toyota 4WD spring shackles), I kept them. Once the springs were reinstalled, I set the pinion angle by rotating the axle housing. Setting pinion angle is a whole science unto itself, and how you set it depends on what kind of driveshaft you are using. I have a double cardan CV, so the procedure is to point the pinion straight at the output flange of the transmission. If you are using u-joints on both ends, you have to set the pinion differently so that both u-joints are perfectly in phase. I won't dive into this part, because it's well documented elsewhere. Once I set the pinion angle, I welded the perches to the axle housing. Because I wanted to run longer body Bilstein shocks in the back, I cut the old lower shock mounts off the stock u-bolts and welded them onto the now unused lower spring perch. The location is perfect for the shock and sits just below the level of the axle tube. Next was installing a u-bolt flip kit, then reinstalling the airbags. It took some measuring, cutting and drilling of new holes, but I got the airbags centered just right over the u-bolts. To make the stock sway bar work, I needed much longer links since the rear end is now almost a foot taller than stock. The old 2WD front end parts again came in handy. I used the two 1” thick horizontal brace bars that connected from the underside of both 2WD a-arm spindles to the front crossmember. One side of the bar has a threaded end with two jam nuts, a sleeve and two rubber pucks. I cut the non-threaded ends off, then welded them to the original rear sway bar link mounts. After opening up the holes on the upper link mounts, I slid the threaded end of the links through and they fit perfectly! Just the right length and the 1” thick diameter will ensure the rear end is tight with minimal sway. I fabbed a bracket to lift the Load Sensing Proportioning Valve (LSPV) to its full upright position (maximum braking power), then installed a stainless steel brake line extension due to the lift. After reinstalling the drivelines, it was time to fab the exhaust. This was a bit tricky, particularly because I have Doug Thorley headers on this 3.0 V6 and have to build a crossover pipe that runs underneath the transmission. But I had to make sure that there was enough driveshaft clearance so it didn't hit the exhaust pipe. After a lot of cutting, measuring, fitting and tack welding, I got the bends just right and maximized clearance for the driveshaft. The trans and t-case shifters went in without any drama, and I used my old Hurst shifter that I've had on four different Toyota trucks over the last 20 years. For wheels and tires, I scored. Found a set of five 80 Series Land Cruiser rims and near new E-Rated BFG All-Terrains in 265/75r16 size, which is about a 32” tire – all for $850. Then I installed the rear axle adapters for the stock 1 ton Toyota full floating rear end. These are probably the most asked about part of the job. The custom adapters are made by Motorsport Tech in Reno, NV. They've been making adapters for everything from drag race cars to rock crawler trucks over the last 30 years. These adapters allow me to run a standard Toyota/Chevy 6 on 5.5” bolt pattern single rear wheel. And with the offset of the Land Cruiser rims, the outer edge of the new single rear wheel is the same track width as the original dually wheels. They fit the wheel well perfectly, and the rim is very snug on the hub, maintaining a hub-centric design.
-
 I have a 83 Toyota Corolla wagon with a 3 speed Auto transmission that's having driveshaft vibration problems . I've replaced the extension housing bushing and seal but it didn't solve the problem. After installing the new bushing the driveshaft yoke still had too much back and forth play when I inserted into the housing ... Any help would be appreciated ? Ron ..
 -
 Hello again, after battling a rounded bolt on my transmission mount I was able to pull my extension housing, replace the bushing and seal, put a Speedi sleeve on the worst part of the yoke and put it all back together. Only time will tell if it leaks. Here’s the problem though. There is no oil tube in my extension housing. At first I thought it was missing but it appears there is no passage for it to fit into the extension housing. I lined up the bushing with the hole in the same place for this theoretical oil passage to flow to but the surface where the bushing fits has no holes for fluid to travel through. Im wondering if the earlier models didn’t have this tube? I’m assuming the grooves in the bushing are the only way fluid flows to yoke? That or a previous owner or mechanic really messed up. My truck is an 83 longbed
 -
Hey y'all I'm ordering all the parts to replace my rear output seal, extension housing bushing and slip yoke to hopefully end my terrible A43D transmission leak. The replacement yoke I found in an older thread on here is this one: https://www.northerndrivetrain.com/product/PTI-1303-41.html It measures 6.125" from the centerline of the joint to the end of the spline. My orignal measures about 5.750" from the center of the joint to the end of the spline. Thats a .375" difference, Any thoughts on if if the slight difference in length would cause problems or not? The measurement I'm speaking of is J in the picture below: U-Joint Series Toyota Spline Major Diameter 1.100 Spline Count 21.000 Spline Type Involute Universal Joint Retaining Width E 2.047 Universal Joint Bearing Diameter D 1.142 Centerline of Joint to End of Spline J 6.125 Ground Hub Diameter R 1.495 Counterbore Diameter 0.000 Counterbore Depth 0.000 Style Snap Ring Slip Yoke Plug part number (included) Compatible U-Joint Kits PTI-1351-20 Notes Toyota ps. my truck is actually not an rv but a 83 longbed with a pretty massive camper shell. I've found this forum a lot more helpful than the other Toyota ones for automatic info. Thanks for the help!
-
You can remove the extension housing without removing the trans if the seal is leaking most likely the bushing is bad.
-
 I assume you mean this A43D thread? http://toyotamotorhome.org/forums/index.php?/topic/268-the-a43d-automatic-transmission/ Have you checked the play on the shaft that exits the extension housing?
 -
 The 2 upper bell housing bolts will test your vocabulary. The preferred method is to remove transmission cross member and lower the rear of the transmission. I think its a 17 mm bolt. a LONG 1/2" extension and a breaker bar. Installing an allen hex or a torx will make the next change easier (in 20 years😁)
 -
 Hey everyone. I am driving a 1985 Dolphin that developed a very serious transmission leak that left me stranded. I think (and hope) that I have found the source and am replacing the extension housing bushing and the slip yoke which was scored as a result of the bushing failing. I am hoping that some people here have advice on removing the bushing from the transmission. I am also scouring junkyards to find a new slip yoke. Any advice would be greatly appreciated, I've got to get the ol' girl back on the road in less than a month. Thanks.
 -
 Question for the Toyota experts around here. Were there any changes in the A43D trans from years 88-95, specifically the extension housing bushing? I have a 93 2wd PU. ATP makes a replacement part (RB-13), but that part only goes up to 88. I called ATP and they were aware of no changes to the A43D but could not say definitively if the RB-13 would work in a 93. Speaking w/my local Toyota parts dealer they do not even show that extension bushing on their parts schematic for my year, but they do show it for the 88 and below. So there's that. Using the OEM Toyota part # 90999-73035 as a cross reference, I've reached out to several online vendors who indicated that is the correct part number for my application. Thanks in advance for any help.
 -
Hey guys I'm still looking for answers to why I'm having driveshaft vibration. I had a one piece shaft made , and installed a new extension housing bushing . The yoke going into the housing has some up and down play . Is that normal with the 3 speed automatic transmission ? And why did toyota use the two piece shaft in the wagons ? Any help would be appreciated..
-

1983 Mirage Renovation
zero replied to Motordome's topic in Improvement and Do-It-Yourself Projects you have done to Share!
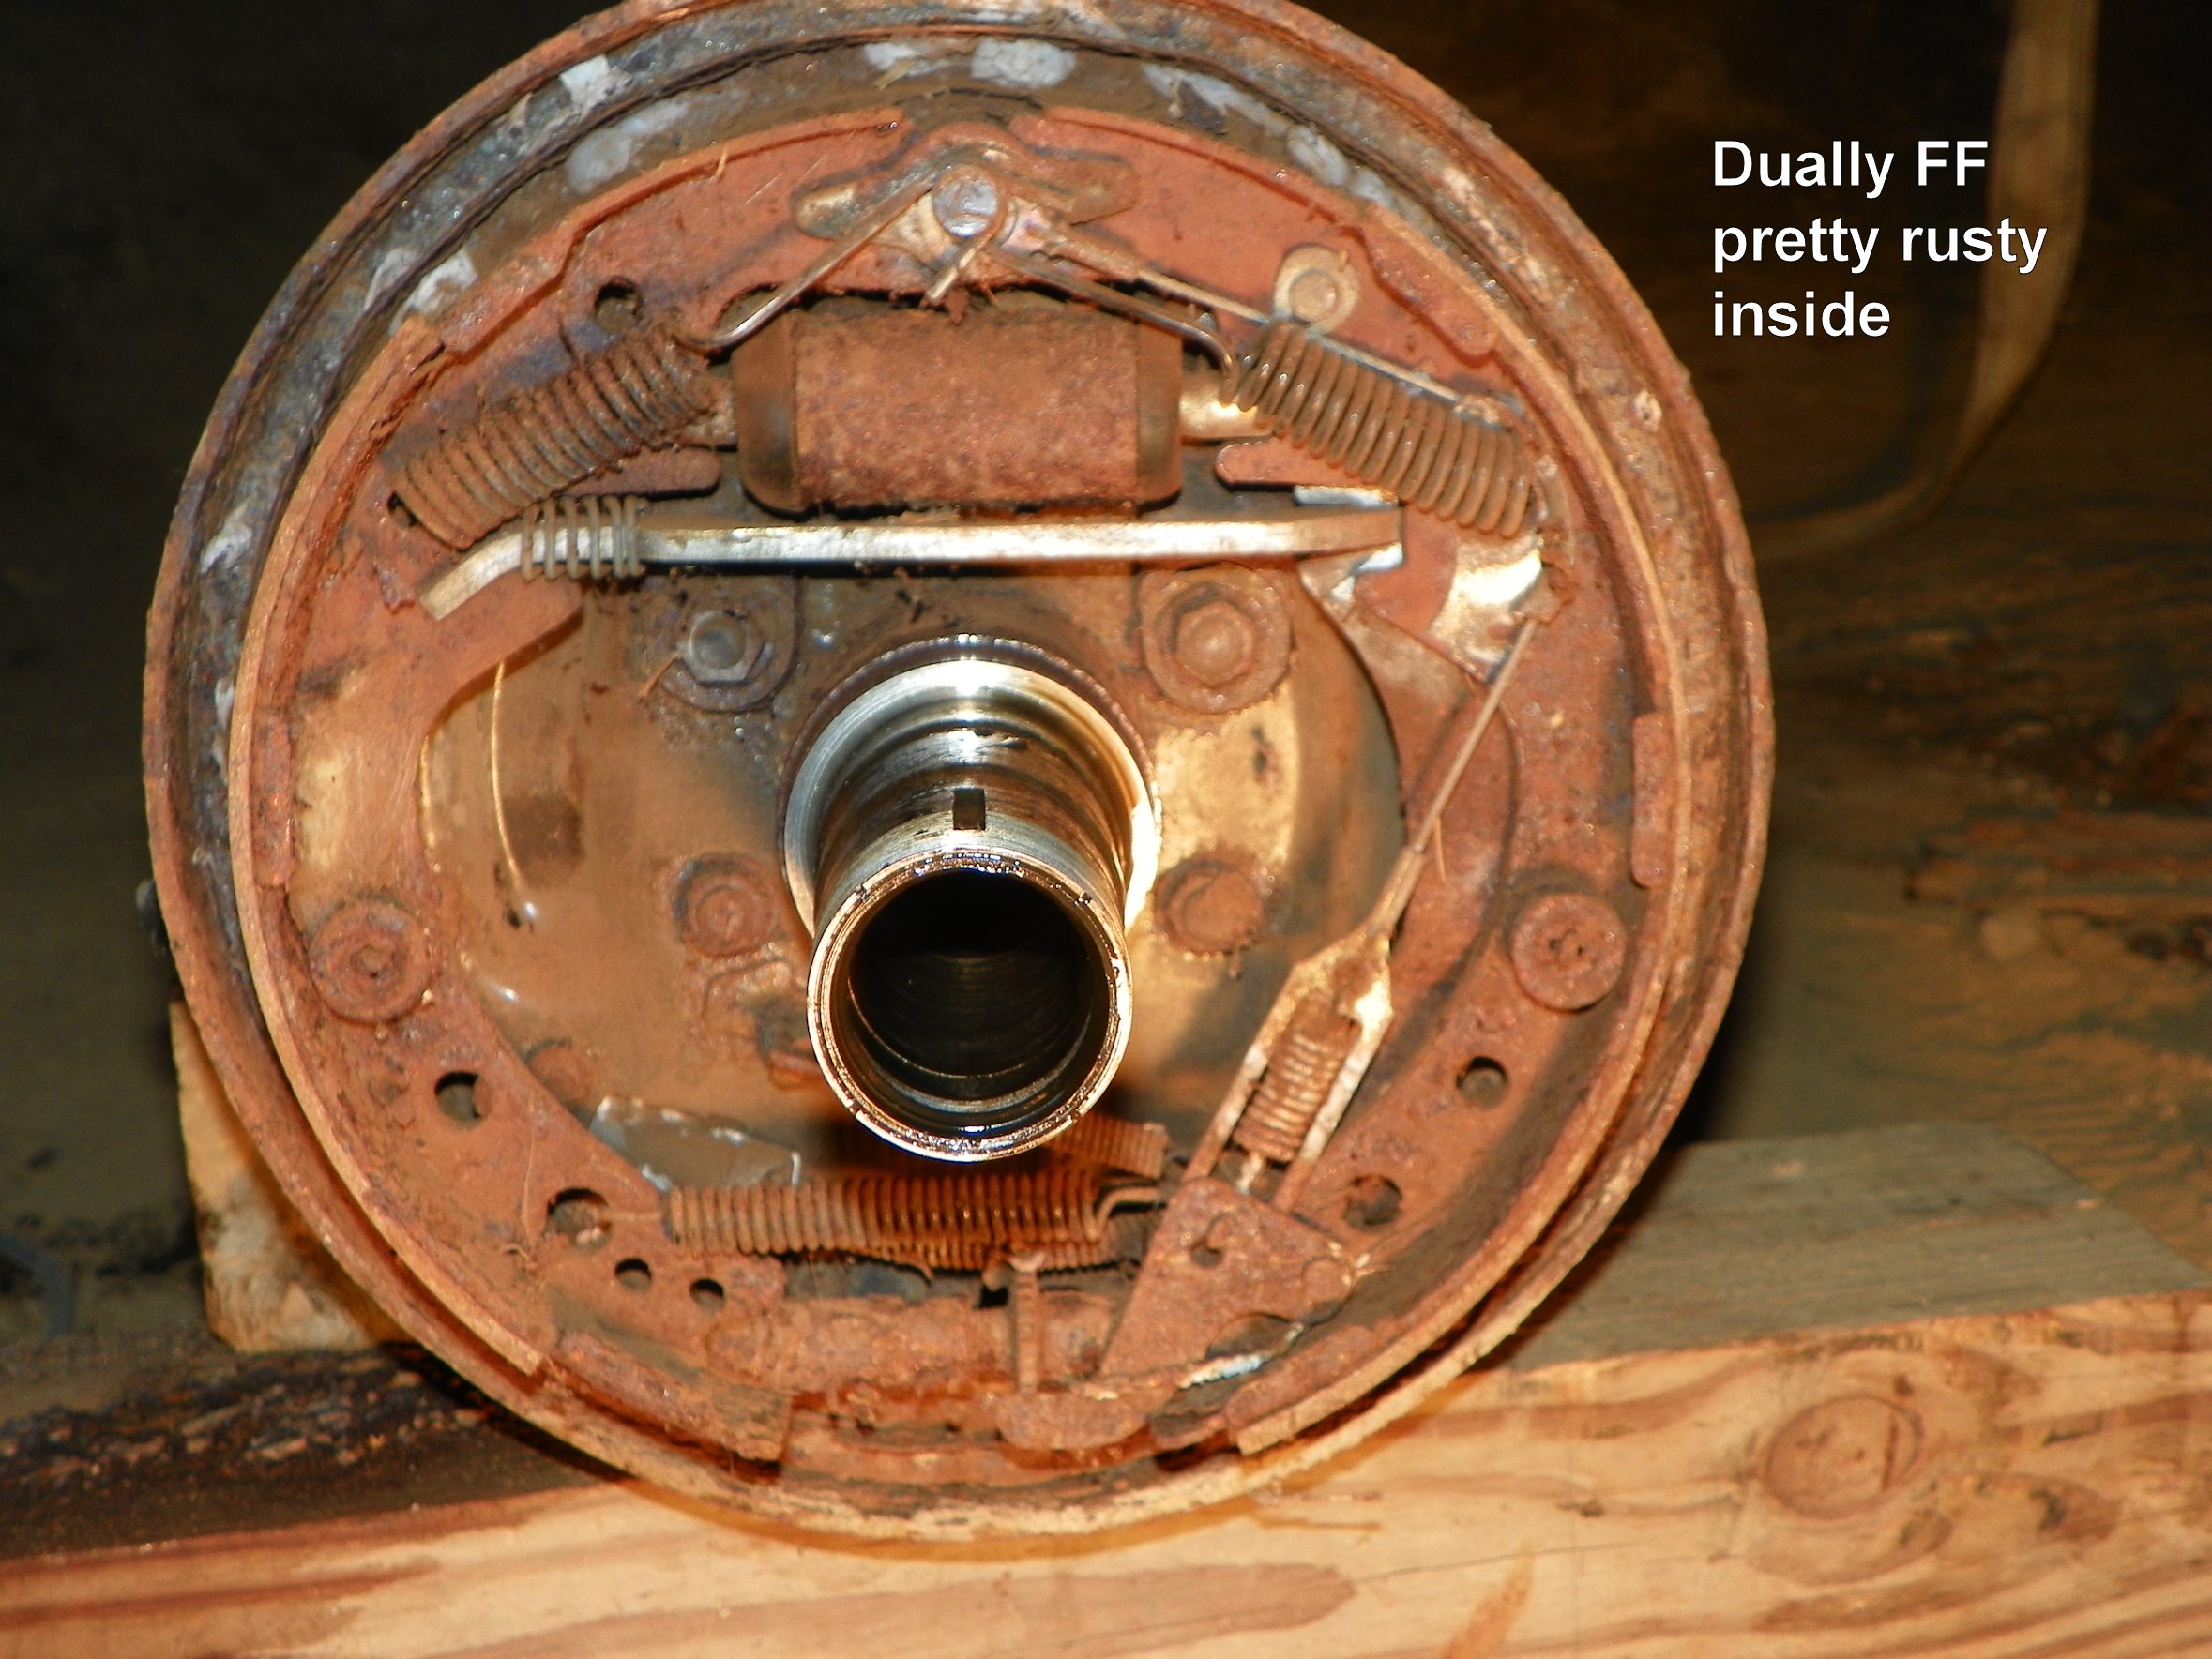
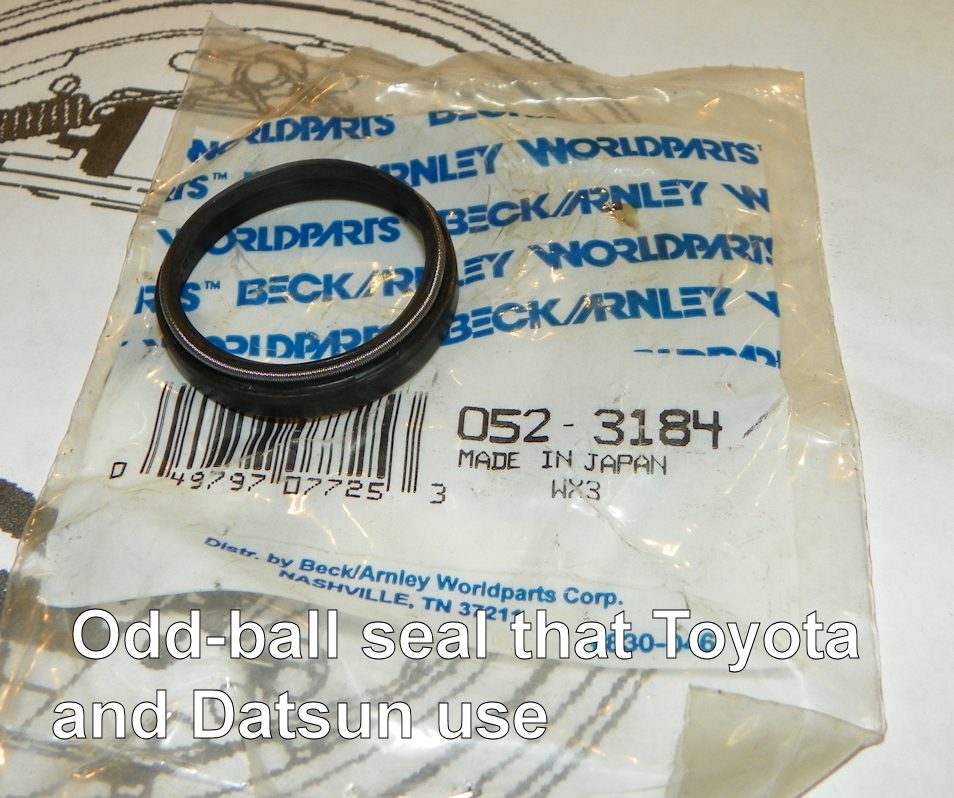
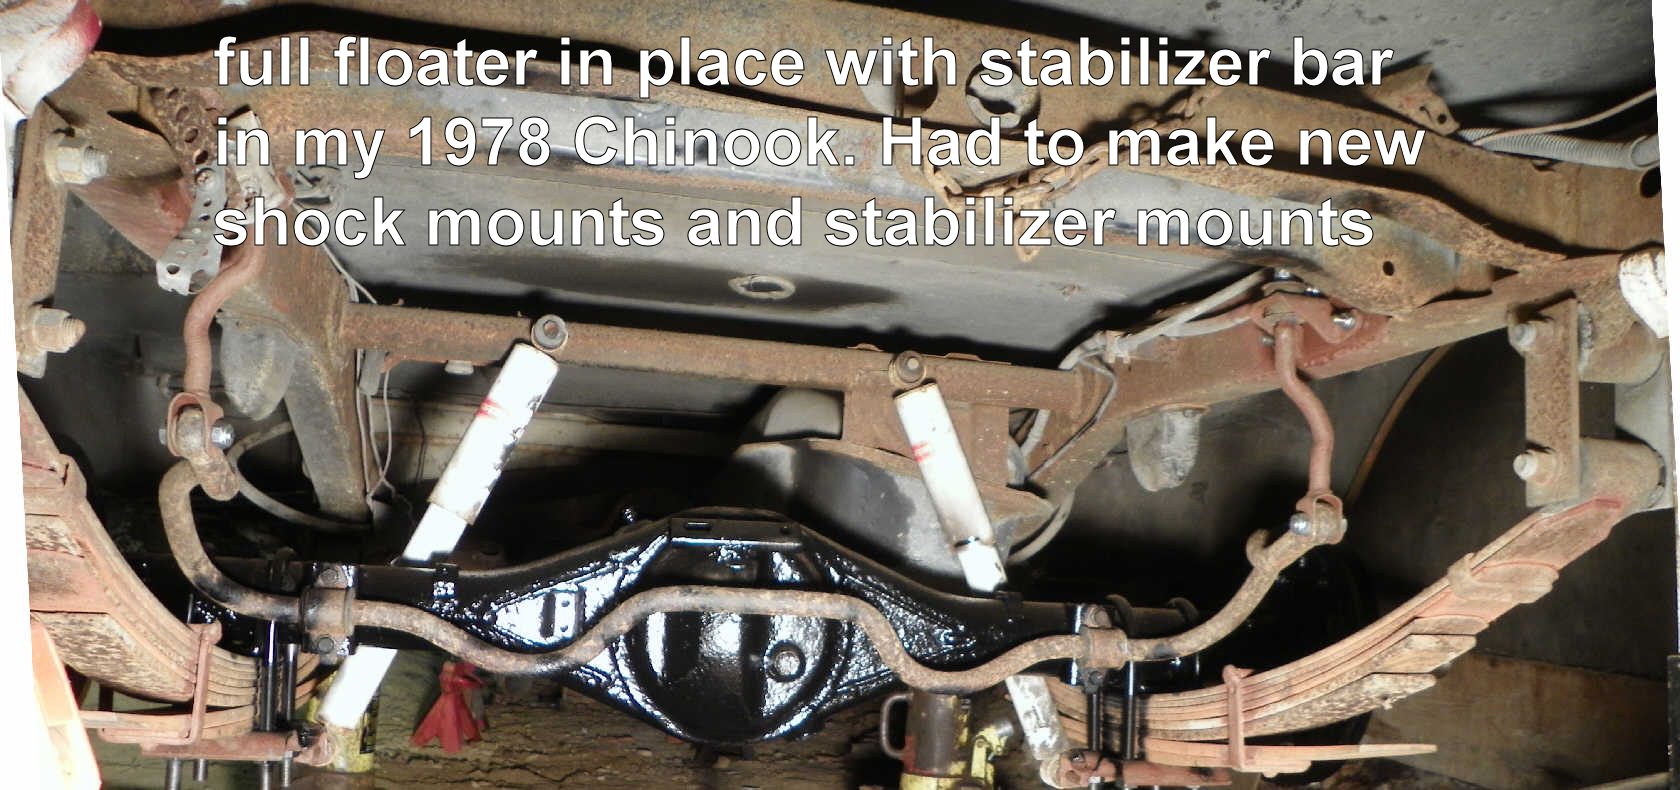
I did the same with mine before I put in into my 1978 Chinook. I suspect mine was a lot rustier. After finding two Toyota full-floaters in junkyards with rust-holes right through the main housing - I figured I'd better get the rust off and use a good anti-rust treatment. These Toyota and Dyna rear-axle housings look as though they are made of welded-together pieces of scrap-metal. Once slight glitch was the first two small-parts kits I got for the brakes. Each was missing one little extension spring for the brake self-adjuster and I had to get it separate. I also had mixed feelings about keeping the end-tube sealed with that little seal (I got via Beck/Arnley). I have only seen end-tubes sealed on Toyota/Dyna and Datsun full-floaters. Never on a USA axle that I've worked on. Not sure if I like it. I was considering leaving it out (like some others have done) so the bearings got gear-lube. But the fill/check hole in the housing does not seem correct for doing that. So - I said "the heck with it", and put the new seals in and repacked the bearings. I had to cut off the spring perches on mine and move them bit. 1978 frame is more narrow then the 1987 frame the FF came off from.
-
 HI I WAS TOLD THAT I NEED TO REPLACE THE REAR BUSHING ON MY 1988 DOLPHIN MH AUTO TRANS, ITS LEAKING FLUID AND HAS PLAY IN IT, WHAT TROUBLE ARE IN DOING THIS , REAL NEED INSTRUCTIONS ON HOW THE REMOVE THE HOUSING, AND WHERE TO GET THE BUSHING. WILL I OPEN UP A CAN OF WORMS, OR IS THIS A SIMPLE REMOVAL, ALL NEW TO ME ANY HELP PLEASE. THANKS RAS
 -
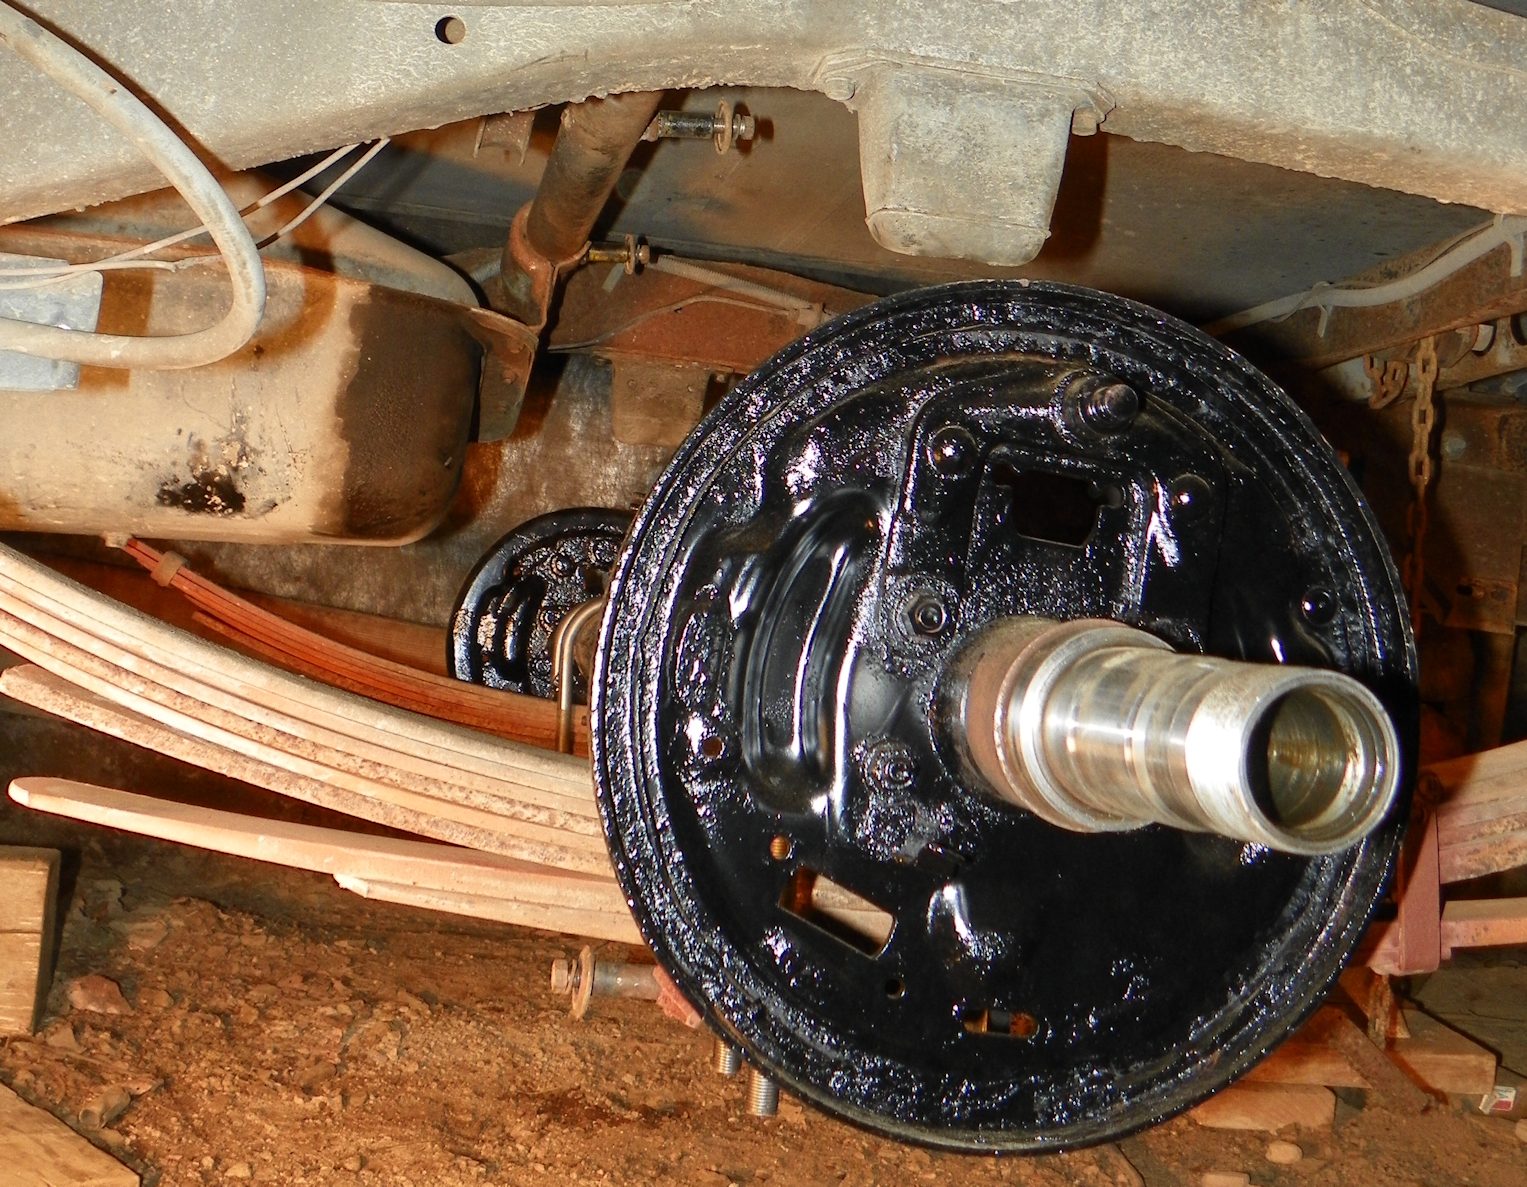
 Plain english, total noob. I have an 87 with an A43D transmission. I know that because it says so on the Toyota tag. Today I changed the oil and was looking for a potential exhaust leak the guy at the inspection place thought I might have (I found that too). I put it up on the ramps and this is what I found. I've previously read through the transmission sticky and after seeing this, read through it a couple more times today as well. The pan, well that is probably strait forward. The tail seal, here I'm a bit lost. Reading through it talks about the output shaft seals being an issue, the replacement bushing and such. Transmission is shifting fine. What do I need to ask the shop to do to fix this? I'm already looking at asking for a fluid change with filter and gasket. That I hope takes care of the pan. What about the tail. Extension housing bushing and what else? The topic says the 3 oil seal rings but I'm not sure from reading I understand what is involved in that repair. Planning on taking it to a shop. I've no press and frankly would rather someone else deal with this. What am I asking to get done to this?
 -
Hey everyone, just wanted to follow up with y'all since you helped me out. I removed the extension housing with the tranny still in the vehicle and the bushing replacement was very simple with it out from under the rig. I just finished a trip from Southern Texas up to Detroit and had no issues with it at all. Thanks for the tips!
-
Finding a good yoke ought to be easy although a junkyard will likely sell you an entire driveshaft and not just the front yoke. If for some reason you can't find one, I've got an extra driveshaft from an 87 A43D box-truck I'd sell. The bushing can be pulled and new one driven in with special tools. If not, it is tough to do without first removing the entire rear extensiion housing. For replacment bushings, there are standard and oversize available. Oversize requires reaming the damaged case to make it fit. I've never tried to remove the rear extension housing with the trans in place for the Toyota, so I don't know how easy that is. I just did it on a Subaru and it was fairly easy. I had to pull mine to get to the rear-mounted 4WD clutches. If the housing comes off fairly easy, you can remove the bushing and install a new one without special tools. Doing this will also allow you to heat the aluminum housing before removing or installing a bushing. Doing it cold sometimes results in displacing aluminum when moving a press-fit bushing resulting in a sloppy fit when done. Again, I have NOT tried to do it "in place" on a Toyota truck, so don't know how it would go. Only 6 bolts and seems it might not be too difficult. Anytime you try to press something into aluminum, the soft metal will want to wallow out. That's why either the part being pressed in is supercooled and shrunk, or the aluminum is heated so it expands temporarily. Simply driving in a hard-backed bushing can be asking for trouble - but if you DO it that way, I suggest you epoxy it in.