spungo
-
Posts
20 -
Joined
-
Last visited
2 Followers

About spungo

Recent Profile Visitors


spungo's Achievements
")
Newbie (1/14)
-
Nope, not in vain. The rig has so few issues and I know it so well that there's not much of a reason for me to log on here often. The photos were lost when the site owner migrated to a new message board system, methinks. I still have the pics somewhere and can likely email them to you. Drop me a line at spungo@sbcglobal.net
-
I joined this forum because of your tranny thread. I couldn't see the pics, so had to join, and still can't see the pics!
This says you were last active on Sep 04 2010, so I can only assume that this is in vain?
-
Great tranny write up. I have my engine out and am thinking of doing the a43d (114k miles). I got the 1993 book on it and there are some things, I bet that are critical, that are hard to understand from the pictures. I hate to do it and have it fail because of some small thing. Are you okay with a phone call if I have a couple of questions? Or email? Mine is symbiotic@hotmail.com -- thanks. Kim
-
Im 6 ft 5 inchs tall , will I be able to fit in the 78 chinook ?
spungo replied to enolaniaga's topic in General Discussion
I'm 6'5", 36" inseam, and have 2 bad knees, one of which was mangled so horribly that I actually had the interesting experience of putting pieces of knee in my shirt pocket in case the nice people in the ER could make use of 'em. While I'd certainly enjoy more room, I've been pretty comfy driving my Sunrader 800 miles in a single sitting several times. If my creaky drumsticks can hang with it, a normal person should do spiffy. While it's possible to modify anything with the right tools and motivation, repositioning the seat looks to be a pretty tall order. The world seems to be set up for little pipsqueaks, so sometimes ya just gotta make do. -
Flea bomb, eh? Unfortunately, too often our solution to problems is to douse everything in poison. Then, all surfaces in your camper will be coated with poison. Sounds delightful. I'm sure oncologists love those kinds of ideas, for those titanium putters don't exactly pay for themselves, now, do they? I could do without the borax, too. An alternative is diatomaceous earth, available at Lowes, etc. Completely non-toxic, and it also damages the exoskeleton. Very effective. Rub it onto your pet, and it wipes out the critters with none of the ill-effects of that HORRIBLE monthly stuff that's applied between the animal's shoulder blades. I've already saved 4 very sick dogs from ignorant owners who kept mindlessly poisoning their friends with the latest, greatest vet-approved atrocity. The most effective method for me has been a clip-on light with a tray of water under it. Turn off all other lights. The fleas jump at the light, then fall in the water and drown. Those round beer trays they serve oysters in work very well. Add a drop of dish soap to the water to break surface tension so the fleas sink immediately. This has never failed to eliminate the problem in a few days. If you have fleas, the bites should be visible. Check around the top of your socks. It's very effective to walk thru a suspect area to your clip on light, then check your ankles for fleas, pick 'em off, and chunk 'em in the tray of water. Fleas are attracted to walking animals, so if they're present, a slow, heavy gait will bring them to you. It's easy to get rid of fleas without poisoning everything in sight or cracking your wallet open. Good luck.
-
That's about it for now. Since my rebuild, I've driven the bejeesus outta the rig, much of it over brutal backcountry roads and up more Rocky Mountain passes than I can shake a stick at. Just got back from a trip to Colorado to spend two evenings with a guy named Maynard, and about to head back there for an evening with a guy named Geddy. About 10K miles so far on rebuild with nary a lick of trouble. But, if it breaks again, by golly I'll fix it.
-
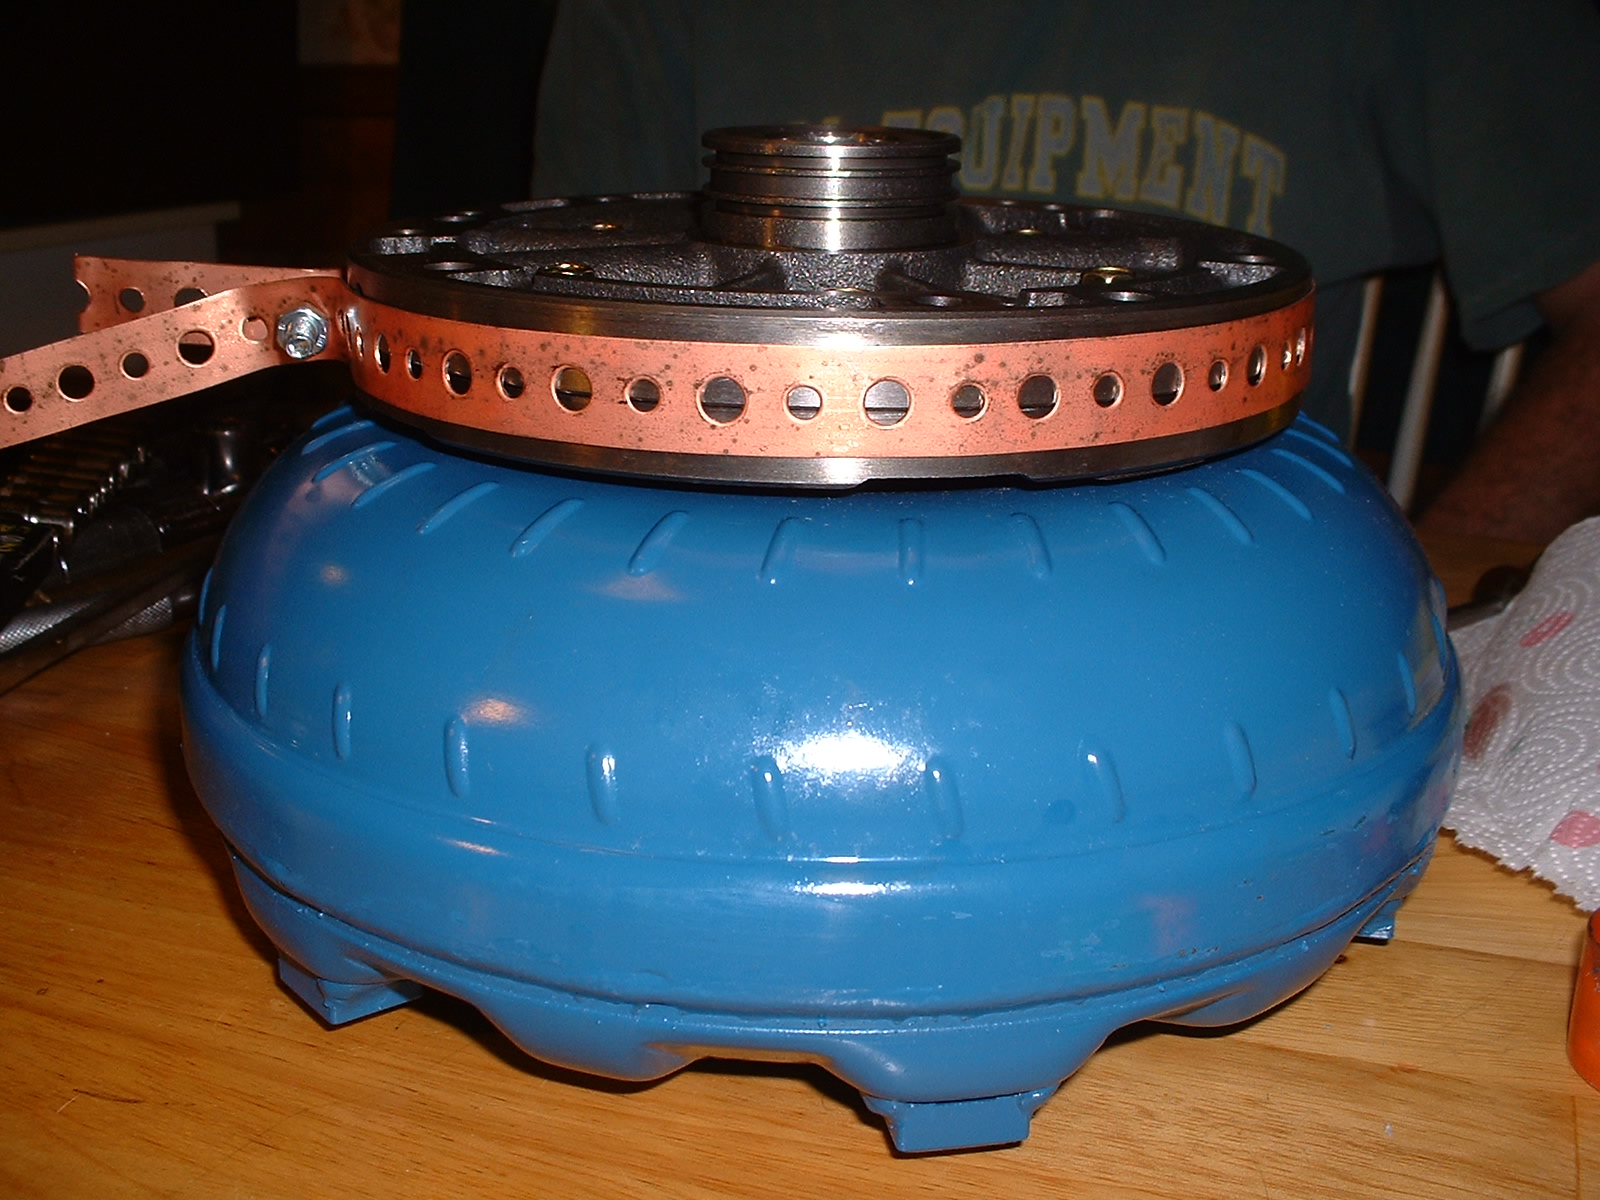
Might as well add an extra thing or two: Toyota sez I need a special tool to precisely align the two halves of the oil pump before buttoning 'em up. Yeah, whatever. A length of pipe strapping plus a machine screw and washer took care of bidness just fine-like. Good thing, too, because if the two parts are not aligned very closely, the oil pump won't want to make the rather tight slide back into the case. Make certain you do this part with great care. As directed by the manual, the purty new blue torque converter is used as a work stand for the oil pump.

-
Toyota sez a special tool is needed to pull the oil pump, which is the first step in internal disassembly. I got it out fine by putting a bearing puller on the shaft, then attaching a cheap 3 jaw puller to the bearing puller. Now come on....is that slicker than owl excrement, or WHAT? Yowza!
-
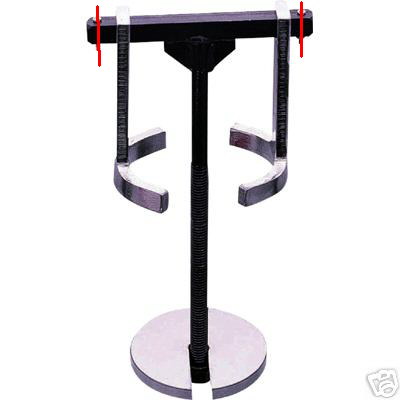
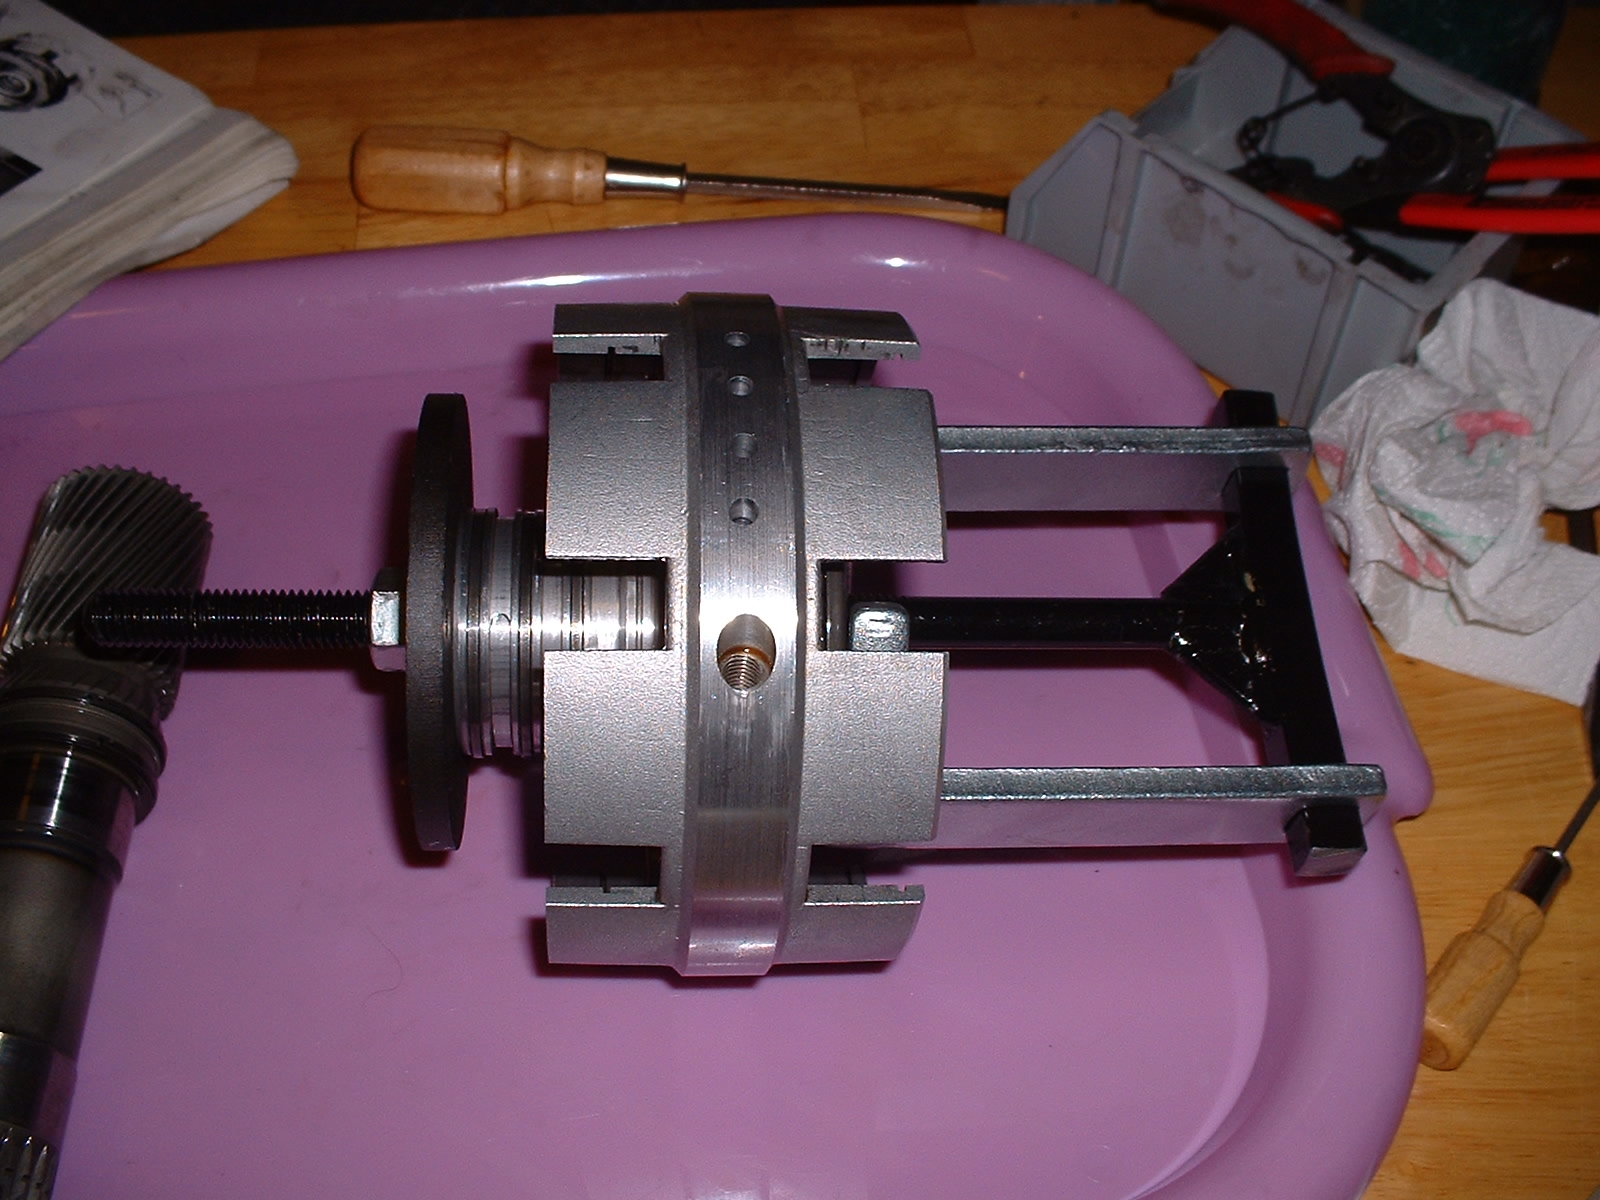
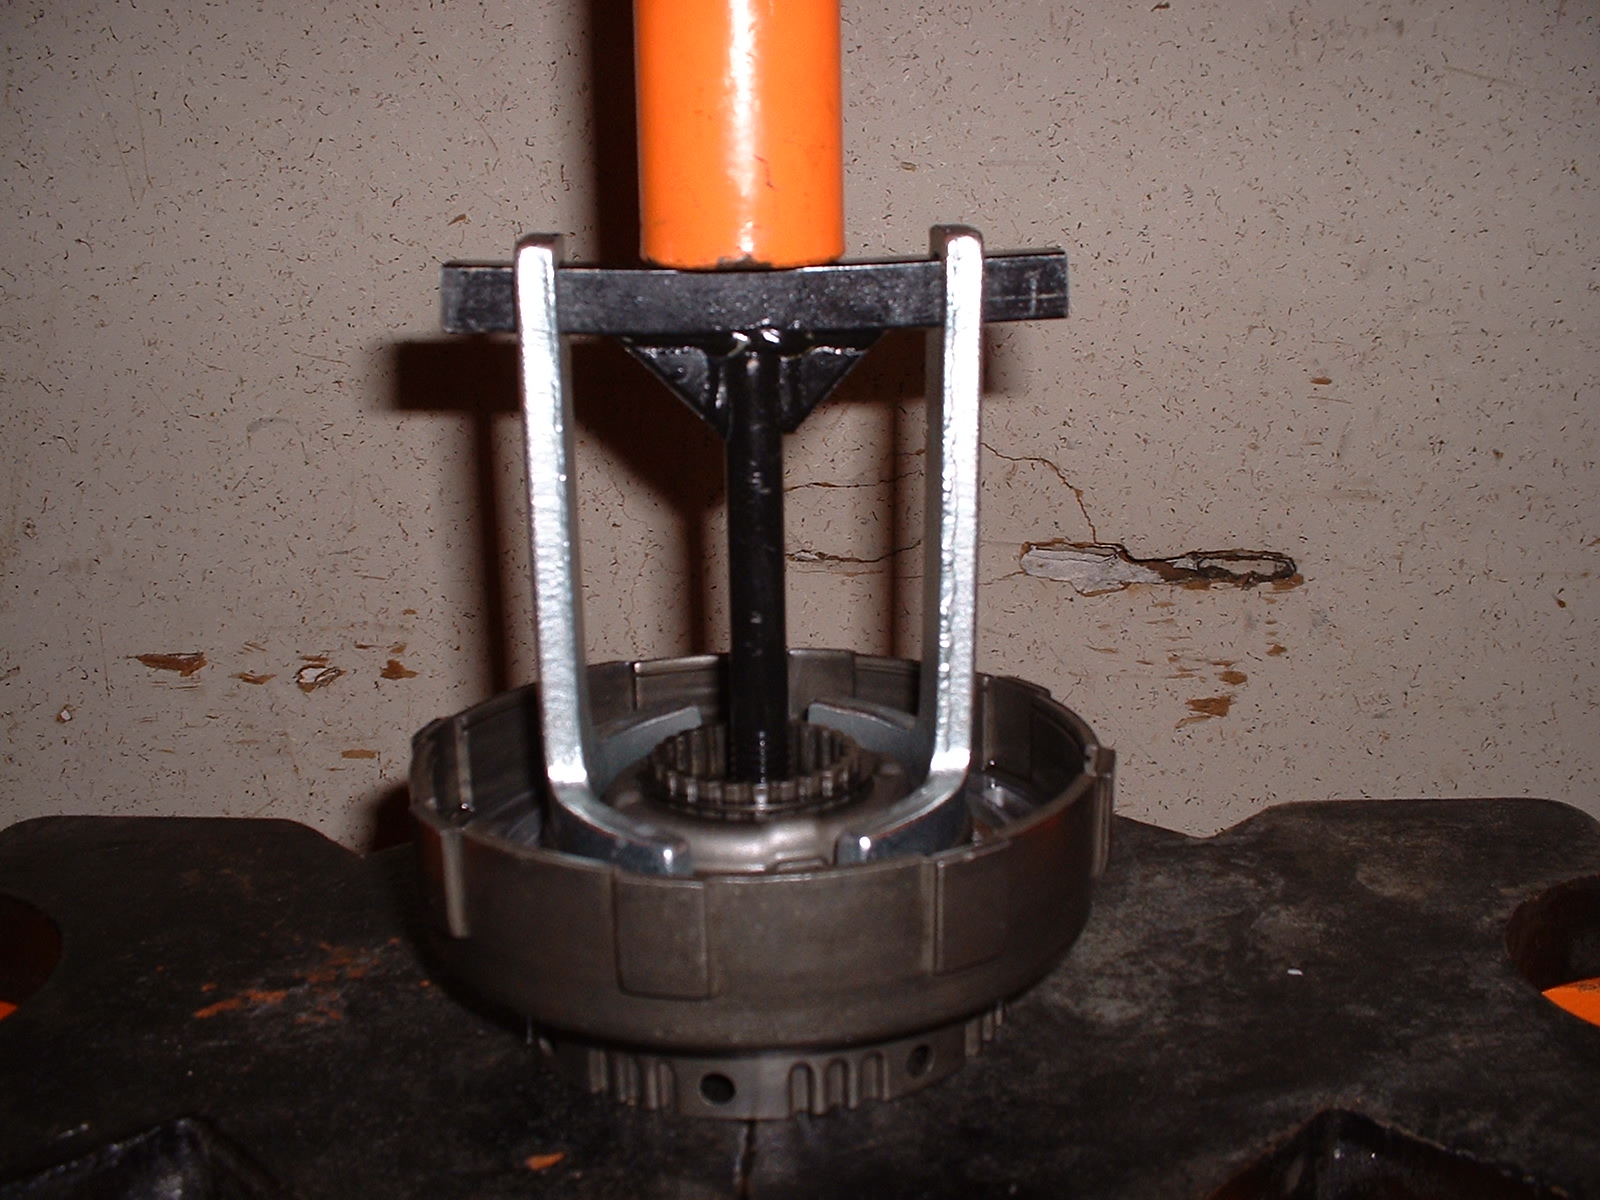
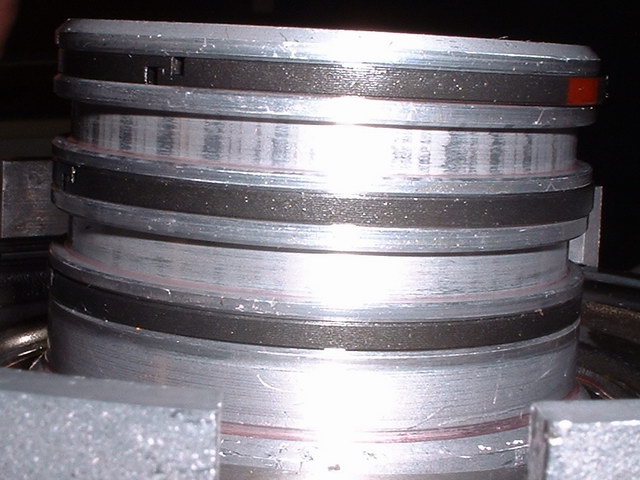
Transmission clutch spring compressor - about $40 plus s/h on eBay. Since this is a little tranny, you have to cut about 3/8" off each arm (red lines on photo) or else it won't fit inside the case to remove and install the No. 3 brake. Most of the clutch packs have a hole in the middle, so you can use the tool inside without a press - a 3/4" wrench tightens the nut for compression. The front clutch has no hole in the center for the threaded shaft to pass thru, so it needs to be done on a press, in which case you merely slide the clamps off the tool and reverse them to point away from the threaded shaft. It appears my staff photographer was off smokin' a bowl or something at the time, so no photo of that arrangement, but here's a shot of using the compressor on the shop press with the clamps in normal position.
-
Here's an example of the oil sealing rings, in this case new rings installed on the No. 1 brake on the center support. There are many of these rings in the A43D, but the only ones I've seen fail are on the output shaft.
-
New extension housing bushing installed. See the oil grooves? I thought they were some kind of a later design improvement. Wrong.....the old bushing was so worn that the grooves were no longer prominent. I thought it was supposed to be a smooth bore until I looked closely and saw evidence of the oil grooves. That's one seriously worn bushing and this is what I believed allowed the slop in the shaft causing the oil sealing rings to fail.
-
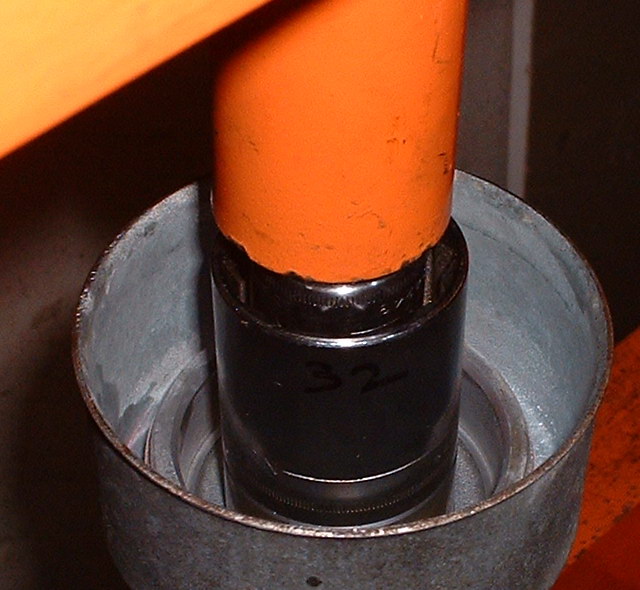
A 32mm Craftsman socket was the perfect size for pressing in a new extension housing bushing. And, I've since started using a reciprocating saw with fine metal blade to get those bushings out. Line up the blade with the oil channel and be careful and there shouldn't be any problem. Cool thing is that once you cut part way thru the bushing, it gets yanked out by the motion of the saw blade.
-
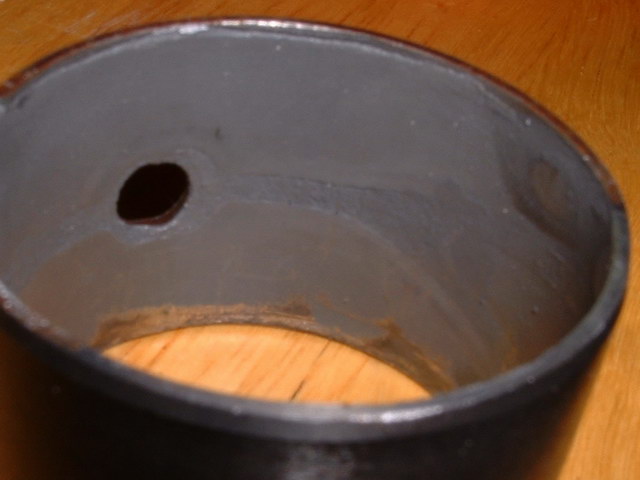
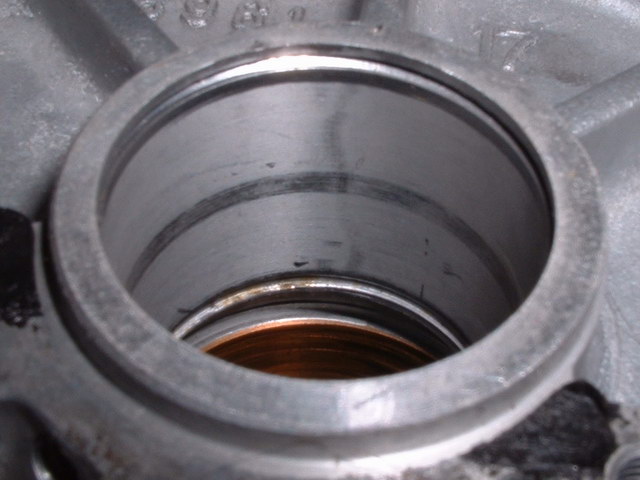
It didn't work out so nicely for the tranny case, though. Behold the grooves cut by the failed first and third rings spinning on the output shaft. Is that hideous or what? The center ring had not failed yet. This case can be saved by boring out the rear and installing a repair sleeve, but I didn't want to fool with that and instead found a donor AW71 (same as A43D except for bellhousing and buttcone) for $100. The worn case bushing,(not the same as the extension housing/buttcone bushing) is visible just under the bore. Unlike the ext housing bushing, it's copper-colored.
-
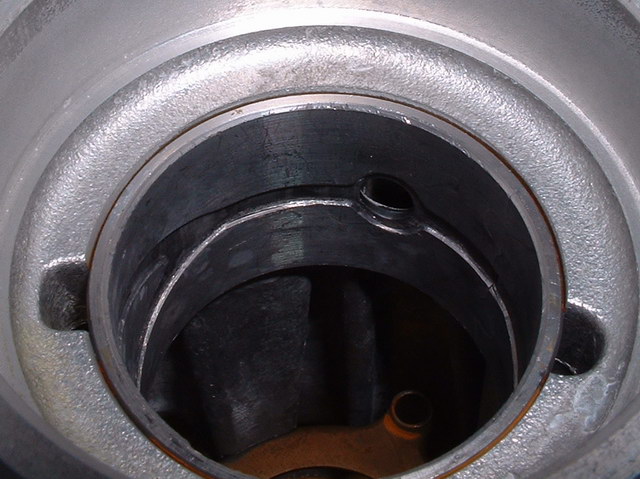
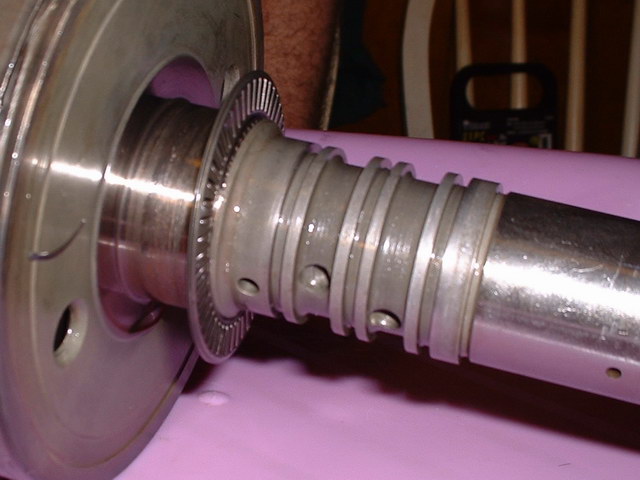
I've received some inquiries regarding the images missing from this thread. Found 'em on my old laptop, so let's try and get those back up there: Output shaft showing where the three failure-prone oil sealing rings are found. Fortunately, the shaft sustained no damage. These sealing rings are metal, somewhat resembling the rings on a notebook, and must be handled with care to avoid messing up the little clips that close them.