powdrhound
-
Posts
120 -
Joined
-
Last visited
1 Follower

About powdrhound

Recent Profile Visitors
2,203 profile views


powdrhound's Achievements
")
Newbie (1/14)
-
 The 3-row CSF 2314 has been installed for two months. It is working great. Steep uphills, the A/C is off for power, not heat reduction. Tioga Pass, no problem. As received, the fill cap will contact the hood. I had about 3/4" clearance on the bottom, so drilled mount holes 1/2" higher. Fit great.
 -
I have gone through 2 different 3 row aluminum radiators. Both leaked, one after 9 months, the other lasting less than 6 months. Both leaked at the tube/tank connection. I now have a 2 row copper radiator that is not keeping up with the engine above 55 mph. My attempt at the v-6 radiator C-50 size, was a failure. My non-4x4 has suspension brackets that do not allow the taller radiator to drop down the extra 3 inches. It stuck up 2 1/2 inches above the old radiator. Returned. My fascination with aluminum is over. Too delicate and not repairable. Worked great, though. CSF2314 is the next candidate.
-
So, considering our choices for the standard 185R14C are getting really slim, what tire size is everybody using? The choices for the Kumho on a 5.5" rim: 185-60 185-65 185-70
-
The chains that you want for 185R14 tires are SCC Z-547. Right now on Amazon they are $84.99 w- free shipping. Installing the chains is about a 15 minute stop, including walking the dog. I carry 4 10" long pieces of almost 2x4's (2x6's that split down the middle. I like the 4 pieces better, so have not replaced them.) 1. Lay out your heavy plastic garbage bag on the ground near the rear of the tires. 2. Behind the inside tire (assuming you are facing uphill), lay one 2x6 flat about 3" behind the inside tire. Centered on the tire, or far enough under that it will not touch the outer tire later. There has to be a good gap to install the chains. 3. Place the other piece at a 45 degree angle, between the tire and block #1. Snug block #1 up to hold block #2 tight. 4. Fire the engine and back up onto the blocks. The angled one tilts up flat, you stop while on top of the blocks. Moving maybe 7-8" or so. 5. Kill the engine, set your brake Firmly. 6. The outside tire is now hanging in space. 7. Determine which side of the chains is tire side and which is road side. They should be curving correctly, but check. Lay them out and insure that they are not twisted. 8. Slide the center of the inner cable under the hanging tire, and up between the tires. Pull it up as far as you can. 9. With your arms covered by the elbow length gloves that come with the chain kit, pull the ends of the inner cable around and over the tire and reach back between and above the tires to hook the C latch. Maintain tension on the chains to avoid the C latch unhooking. Having enough working clearance can be enhanced by having higher air bag pressures. For us without built-in air pumps, carry a bicycle pump. 10. Insert the top outer cable end into it's slot and pull it in a few balls. 11. Give the outer cables a tug to start evening out the cross chains. 12. Insert the bottom outer cable end into it's slot and pull it in a few balls. 13. Continue tugging on the cables, and moving the cross chains, and pulling thru the balls on the top and bottom ends until you can pull the cables to their absolute tightest position. (185R14's) 14. Secure the cable ends. The chains come with heavy plastic coiled tubes that wrap around the cables. Radio Shack carry's similar stuff. Get some. I use two pieces per cable end. Total of 8, and carry spares. 15. Although they say not to use cable tighteners on these chains, I find that our limited clearances forces me to use tighteners. I have big bungie cords with fat plastic ends that I wrap around the outer cables, as tight as I can. Then wrap wire safety fasteners around them, to hold them from flailing, should they fail. 16. Fire the engine and move the rig off of the blocks. 17. Repeat on the other side. 18. Test drive a few feet. 19. If the chains are making contact with anything (mine likes to hit the fiberglass edges) re-tighten the bungie cords. Or add air to the air bags. Or drive slow. Or go home. 20. If all is quiet, start driving, slowly. You may find that you have a speed limit where the cables start to hit. Slow down. Or check that the cables are TIGHT. With the Z chains, there is always a piece of cable under the tire. No bump-bump-bump-bump of regular cable chains. A smooth drive. 25 MPH is slow. 40 MPH is comfortable. These are the chains the CHP uses on their cruisers. Removing the chains can be easy, or not. Easy is: 1. Stop the rig with the Red cable end a few inches above the pavement. Preferably on the back side. 2. Unhook the tighteners and cable wraps. Leave the cable wraps partially wrapped on the cable for storage. 3. Loosen both outer ends a few balls, then fully remove the outer cable ends. 4. Pull the cables back behind the tire and create enough slack to unhook the inner C connector. 5. Drag the cables over the tire and lay flat-ish on the ground in front of the tire. 6. Repeat on the other side. 7. Drive forward off of the cables. 8. Shake off as much water as you can, then stuff the cables, bungies and wires into the heavy plastic garbage bag for the ride home. 9. Wash off the cables when you get home, lay out to dry, and pack them back up. The Not Easy: 3a. If I have been driving through a lot of snow or slush with overnight stays (Isn't that the whole point?), then I develop a ring of ice between the wheels, right about where the inner cable resides. This 2" thick Ice Ring evenly and thoroughly encases said cable. Until the ice ring is removed, the cable is going nowhere. I carry a long shaft screwdriver to poke through the holes in the wheels, chipping at the ice until it is chunked off. This can take 15-20 minutes per tire. Sitting on the plastic bag. Using an ice pick worked, but just felt wrong. Poking at the tires with a pick... Also carry side cutting dykes in case a cross member fails (Too many miles on dry R1 roads... California controls can be tight. For the Bay Area drivers that have No right to be on a snow covered road.). Cut it off and get a replacement cross member from SCC through your local dealer. (NAPA) I have used my chains dozens of times. Drive carefully and cautiously. Don't do anything too fast; accelerating, stopping or turning. We have more traction than power, but stopping is still pure physics. Anticipate the slick spots on the road. (North facing, tree shaded, melt water covered corner on an otherwise dry road. Duh.) Anticipate stopping. Think smooth. I have driven through 2' of snow in the Kirkwood RV lot. Not quickly, but we got out! Yes, you can. Let it Snow!
-
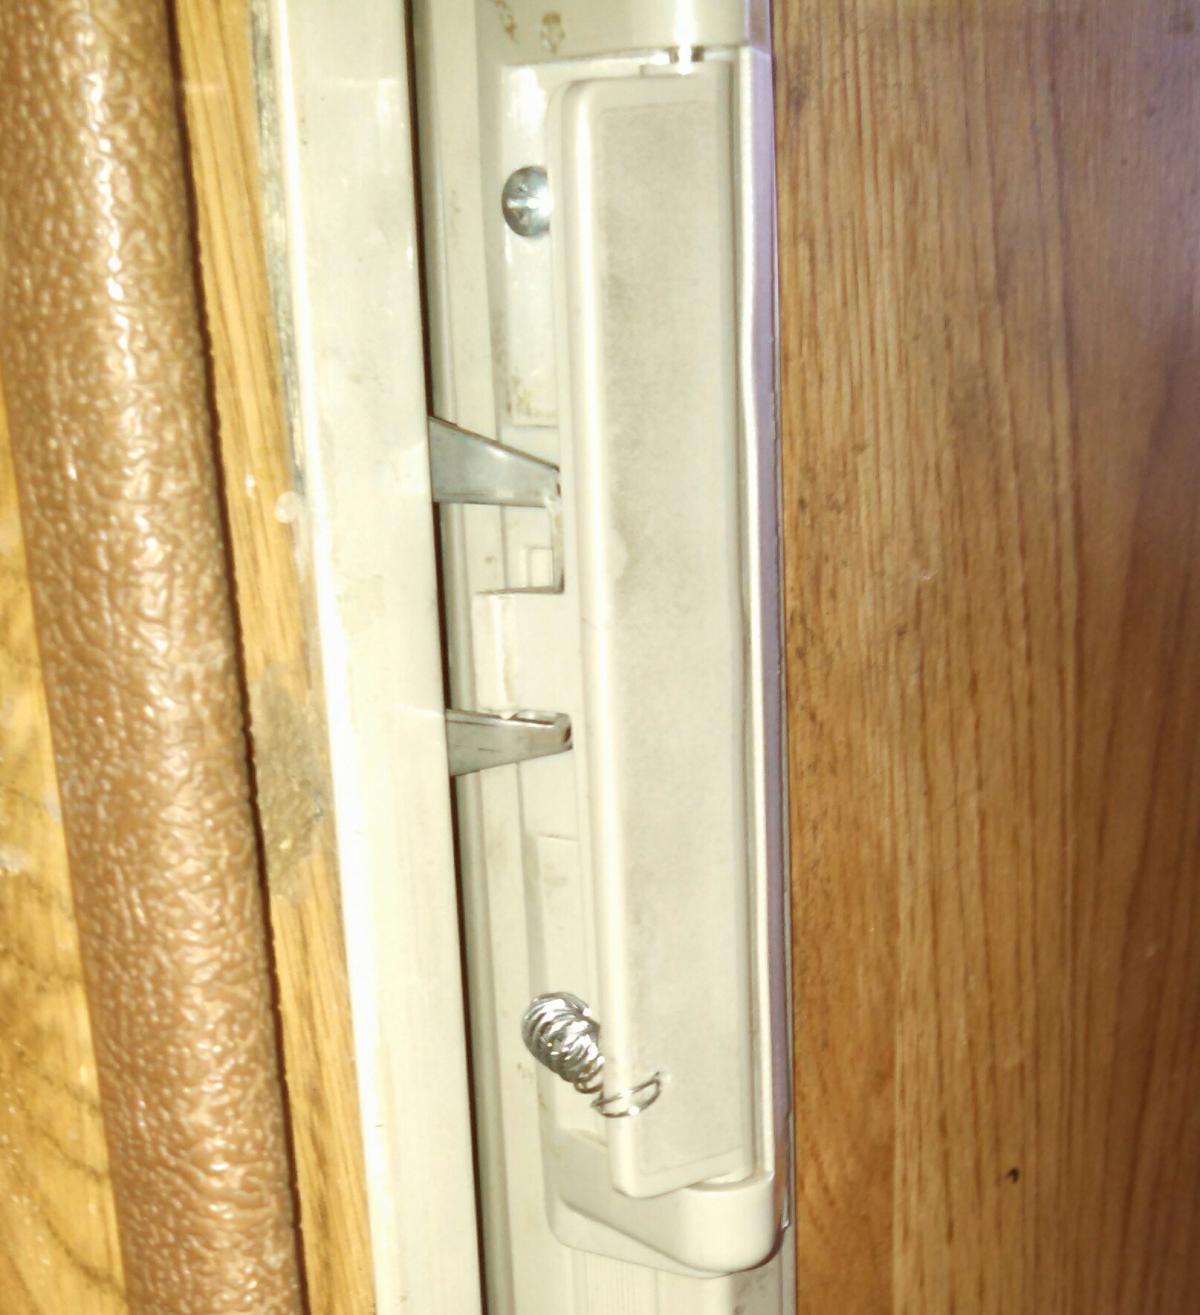
The first time the handle spring broke, my local shop sold me an old handle for five bucks. That spring lasted about a year. This time, the spring came from a pen. Drilled a tiny hole in the handle and threaded it in. The mount screw anchors the spring nicely.

-
Roof Sagging From Air Conditioner Weight?
powdrhound replied to Derek up North's topic in Coach ApplianceTech Issues
http://toyotamotorhome.org/forums/index.php?app=gallery&image=2860 I went fore and aft between the two metal roof ribs with 1/4"x1.5"x1.5" aluminum. Pulled up a half inch of roof sag with the 1/4x20 s/s bolts. Only had to shape the bottoms of the 1/8"x1.5"x.5" channel cross pieces to match the curve of the roof. p.s. Also got a new A/C from the project after cracking a tube pulling down the old unit. Not a one person job. And No, they are not repairable, legally, in CA. -
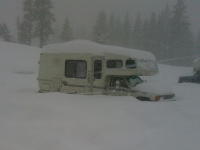
Patreeguy, I have gotten the SkiBumMobile to the point where I survive through sub-10 degree nights at 7,800' in the Sierra without the water system freezing. Wrap all the pipes you can reach. Add all the insulation you can. Find the cold spots around the water system and eliminate them. My most recent add was insulating the copper gas lines. They were importing huge amounts of cold under the sink/stove area. I don't know if my black tank has ever frozen, even on week long stays. It has always been thawed when I dump it back home. Get a Catalytic heater. Get a generator. The Wave 3 is On 24/7. (My pups have to stay inside while I am skiing) It is background heat only. These rigs were not made for winter. A Wave 6 would not be over-kill. Your regular heater is still essential. On a cold night it will still run quite a bit. My little battery will die overnight if I am not careful. First night is usually OK, with battery charged from the trip. Second and third nights are possible if the sun is shining on the 85w panel. Maybe. Any night under 15 degrees, I run the generator until it runs out of gas, The Honda is really quite quiet on the Econ mode. Otherwise the battery will die before the morning. If you replace your coach heater because of the squeeling motor, get the motor with the least amp draw. I much prefer a longer run time of active heat that heats the rig more evenly. Less time on purge & cool down fan usage, too. More tips on other threads here. Do a search.
-
My valve leaked around the valve stem. Replaced the o-ring inside the valve, problem solved.
-
Between my lady and my dogs, and living in the hot valley, I use my A/C quite a bit. Even on the days when it is only in the mid-90's (cool summer days) the temperature inside gets above 100 degrees. If I am going to take the dogs for a ride, I can pre-cool the inside to the mid-70's, and it will stay comfortable for Bella and Murphy for a long time. I just replaced the A/C this year after the old one lost it's charge.
-
Enjoy!
-
tlava: "after replacing the radiator (with a 3-core), the t-stat (with a dual-hole)" Could you give us details on your 3-core radiator and the thermostat? I would love a little more cooling for the 1st gear sections of the climb to 8,000' on the way to Kirkwood. Brand, part #'s. Thank you.
-
I have always contended that I know enough to be dangerous. On many subjects. This is some great troubleshooting info. I do drive "the Runt" at least once per day. (Not that my dogs are spoiled, but they do enjoy getting out, so I pretty much take them everywhere with me.) So this is happening in 1% of my startups. Never on original startups, but at some stop in the middle of the day. And not at a time when the engine is running hot. If I was supposed to see foamy gas from the vapor locked condition, than that is a strike against vapor lock, as it was 'dry' air coming out of the fitting. No wet spot on the paper towel until I had liquid fuel arrive. But I only looked at this after it had 'started', run roughly for a few seconds before dying, and after quite a few start attemps. The more I think, the more I get confused. I need to do some tests. Something is failing, somewhere, occasionally. I should have time to look at it today, with the grandkids on their way home now. 6 adults and 12 kids sleeping here on Christmas night. Really don't get to see them enough.
-
I hate intermittant problems. I'll take a clean failure every time. I am going to do the output test next. I also have a gas filter I was going to install, then the pump failed and they changed the filter for me. I'll do a before and after flow test. If the pump is doing this correct over-supply, wouldn't it push the vapor out of the system rather quickly? Maybe not in the cold start tube, but surely the fuel rail would be quickly refreshed, giving me clear fuel in the rail. Thanks for the help.
-
I can see no other way that pressurized air/vapor could enter the system. It definately was pressurized. At all other times, the little engine is running fine. No problems. Over 122K miles. Ran great once it finally started. I am considering installing a pressure gauge in the fuel system. Safer than cracking the fitting open, too. But I had a running pump and pressure. And a lot of vapor before the fuel started squirting. I can see no other conclusion.
-
I believe that I am having a Vapor Lock problem. Although everything I can find says that this should not be a problem with fuel injection, Yesterday was the third time. Parked for a half hour or so after a couple hours on the road. Engine started, very roughly, and limped for a moment before dying. After that, the engine may kick once, then just spins. Nada. The other times, I just waited for a while, and the engine would start and run quite normally. Yesterday, I cracked the fitting for the cold-start injector, and had nothing but air (vapor) bleed out of the fitting for quite a while. Still would not start right away. Cannot see a good way to bleed the fuel rail. Waited for a while, changed out of my ski clothes, called the lady, etc. As soon as I hung up the phone, I tried it again and it fired right up. Running great again. So it has to be a vapor lock. Fuel pump has been replaced a couple years ago. The engine runs fine. Starts on the 1st, 2nd or 3rd revolutions on a normal start. Solutions? I don't see any good way to wrap the fuel lines and manifold. The fuel filter sits right on the engine. Insulate that too? Thanks.