Ssunrader
-
Posts
25 -
Joined
-
Last visited
Content Type
Events
Profiles
Forums
Gallery
Everything posted by Ssunrader
-
Oh, well I suppose that’s a reasonable response after having seen the picture of my shackles before, and reading my amazement at how (poorly made) the original ones were. That picture was taken during the initial assembly where I was verifying angles that will effect the action of the spring/shackle arrangement, since the bushings were trashed prior to that and the positioning of the various parts within the assembly were different. The extended shackles provide a more progressive rate than the original setup with the different (Sunrader installed) geometry that they provide, that is the only real benefit that I could see from the change from oem Toyota geometry. Nice job trying to dodge what was said earlier, you’re not getting off that easy. Now what if the OP was a trained concert pianist and had great skill and talent, yet had no experience with metalworking? Picture a situational where, upon your advice, one went and got a 4” grinder, and went to town on that frame, then when the harbor freight goggles fogged up while working in an awkward position and oops, there’s a notch in the frame now. Oh, and it would be in a place that would be a fulcrum point very near where the air bags would be mounted… What I would recommend to you is to not assume things about people you couldn’t possibly know. I am not going to describe my background on the internet, to you, but trust me, I am doing just fine, also those washers are just fine too! The 14,000 pounds of pull up from the fasteners that are at 80% of their proof strength are keeping them in place pretty well.

-
“It would take extreme effort to damage the frame rails. Not so sure about that, have seen otherwise. Myself, I would just make a 45 degree angle cut in those tacked on pieces and not go near the surface of the frame. An angle cut but leave a 1/4” of the straight part where it is closest to the frame. _______/ \________ The Air Lift company says that there should be a minimum 1/2” of clearance around the rubber springs when inflated to 75 psi. Looks like that wasn’t as much of a problem from the pictures.
-
I would say the same thing, but unless you’re familiar with metalworking, it may be more of a hazard to risk grinding into the frame and creating a stress riser. these frames flex a lot, and I wouldn’t feel comfortable with a knick or gouge in mine I know. Maybe leave some of the welds and clean it up later, if you do decide to remove that tacked on steel tube, or just leave them. They shouldn’t have welded on a frame anyways! How much do the airbags in that 7113 or whatever kit really expand in the radial dimension? Do you even need the extra space? I have watched those types of airbags on semi trucks and they seem to maintain a constant diameter. Might be better off cutting down the spring brackets in the kit and making new mounting holes if they don’t expand outward.
-
You could probably get away with some rubber bump stops if your springs are good enough. Rubbershox has some that are 4” Dia, lengths like 4”, and 5-1/2”. Or get the original bags that Linda found, and make new brackets.
-
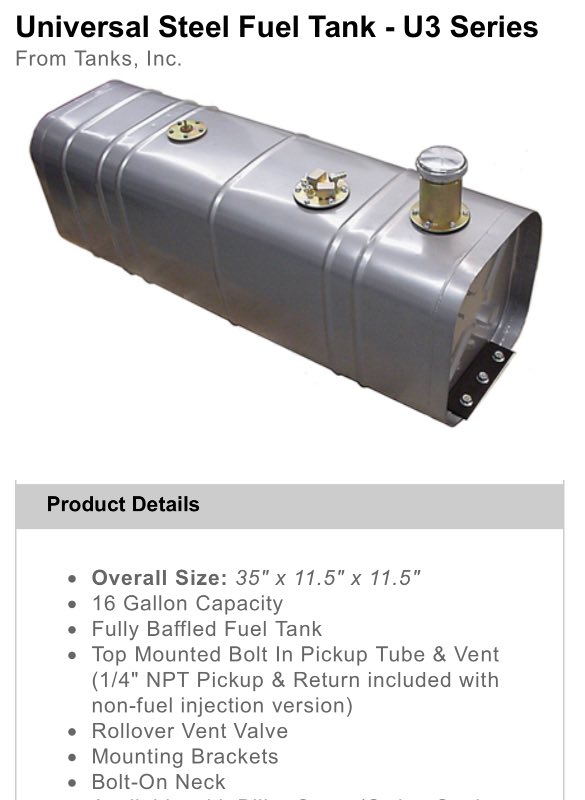
I found this metal tank that will fit on the outside of the frame, behind the driver’s door. Many have a compartment in that area that can be partially taken. The filler could either be possibly in the wheelwell or inside the compartment. https://www.tanksinc.com/index.cfm/page/ptype=product/product_id=128/category_id=133/mode=prod/prd128.htm The upper part of the volume could still be used for storage of a tool box, or another panel placed over the tank to close out the compartment. Not sure I would want that much fuel on the outside of the frame myself, the original tank is tucked away in a fairly safe spot.
-
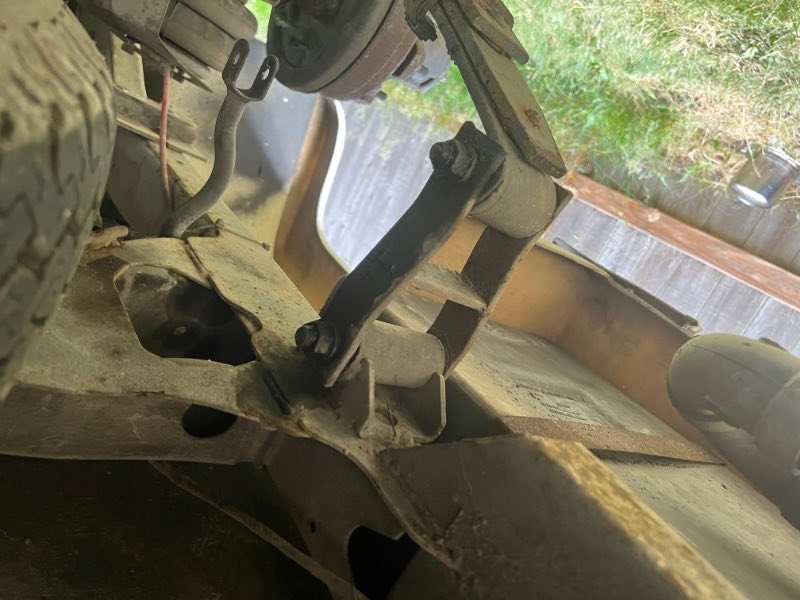
Those shackles are just some 3/8” x 1-1/2” steel flat bar I had here and drilled them to match the junky ones that came on it. I found the grade 8 bolts at an industrial hardware store. They are 5-1/2” eye to eye, same as the ones that came out, and used a polyurethane bushing kit. Also have an airbag setup on there too, highly recommended, can adjust to your situation.
-
The injectors I used were from a ‘90s 2.2 Camry. These really need help in the exhaust, not typical to have engines die prematurely because of it. I’ll bet that sounds much better now.
-
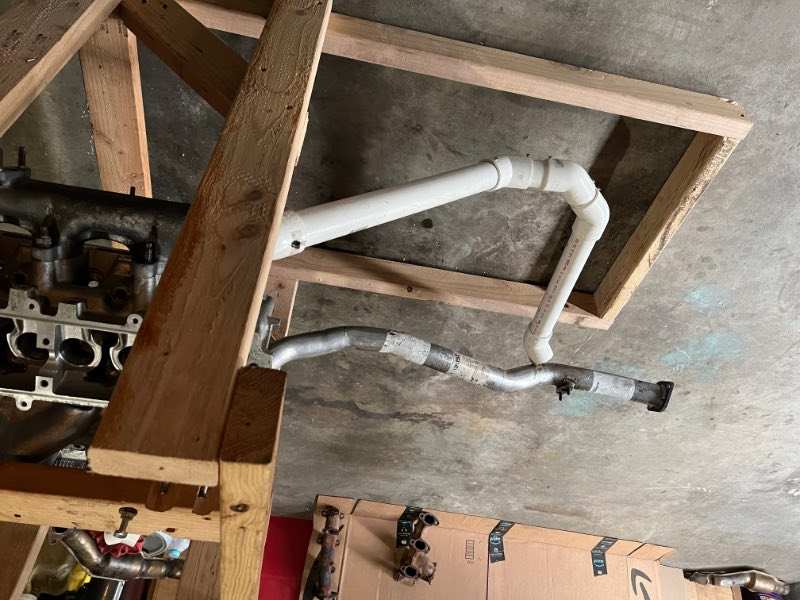
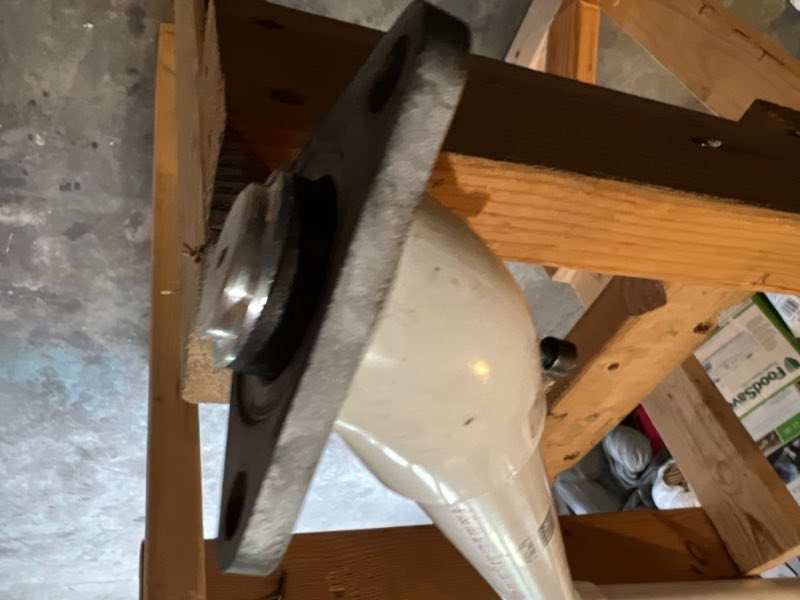
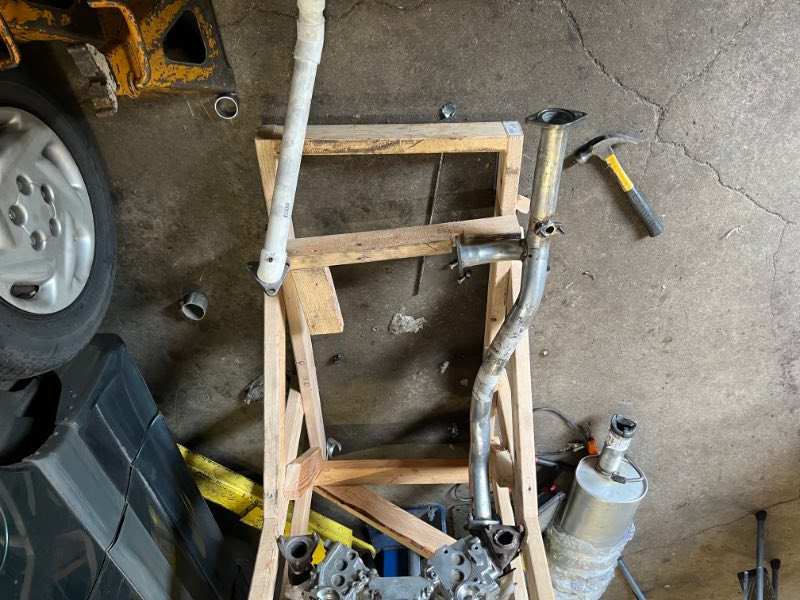
Some pictures of the process. the ones that are white pvc were part of the prototyping. This would have been much much easier had the rig been able to travel to the muffler shop. Sorry that most of the images load upside down…
-
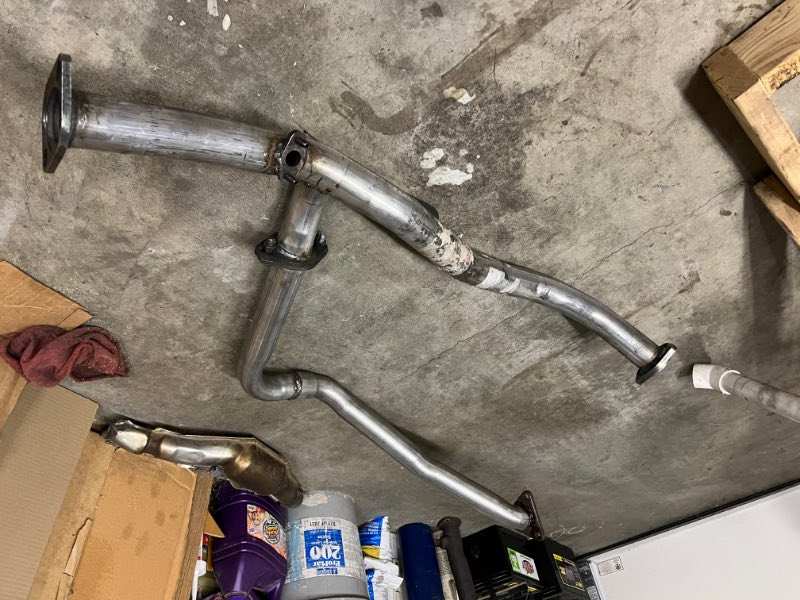
I have gone through the cylinder heads on our ‘91, and replaced the exhaust valves, springs with oem parts to be able and regain the ability to have a proper adjustment using the (limited) available shims. At the same time, I modified the intake ports, mostly on the roof, around the guide bosses. Also took the time to unshroud the exhaust valves in the chambers, and polish the chambers, relieving the sharp edges. After doing some research, I determined that the original injectors may be struggling after the headwork and exhaust modifications. I chose a 20% larger set of injectors instead of messing around with raising the fuel pressure. The new injectors also have multiple nozzles vs the original ones, for improved atomisation. The exhaust was changed to eliminate the congestion around the number 6 cylinder. This involved making a full sized mock up of the obstacles and making a few trips to a good exhaust shop nearby. The result is now dual 2-1/4” down pipes that merge just ahead of the original catalyst flange. No egr now either. The rest of the system is a Pace setter with an additional resonator, and more straight tubing to accommodate the longer wheelbase. The rig drives great after a few drive cycles in order for the system to acclimate itself. A gauge hooked up to the O2 sensor indicates proper mixtures, and if it had more power at open throttle, I would be concerned for the transmission’s life expectancy. Next is to make some distance runs at freeway speeds and check the gas mileage, maybe do some tuning if part throttle isn’t optimal on long hills.
-
Performance Friction 0438-30 FRONT Brake Pads - 1989-1992 Toyota Pickup RWD 1TON on epay for $20 now, are the only pads I would trust on this monstrosity…
-
Do yourself a favor and use an oem head gasket. Also get an oem thermostat for it also, took me a couple head gaskets in another vehicle to figure that one out.
-
They are all so old that getting parts is becoming a real concern. We bought our ‘91 V6 Auto Sunrader recently and have been spending LOTS of time going through it, and it was a decent specimen to start with. Plenty of areas needed attention; engine exhaust valves had no clearance despite a recent trip to the dealer to verify that, which brings a cylinder head r&r job, with new exhaust valves, springs, custom exhaust system to remedy over heating of heads/valves with the loads these heavy are under. Finding a set of replacement exhaust manifolds proved difficult considering the age of the parts, and the conditions they’d been subjected to. Many other parts will just be hard to find after 30 years, so get one that’s in great shape or suffer later. Ours has the original light bulbs everywhere, all the headlight retaining screws are well rusted in place. Just be ready/prepared to jump in and work on them…
-
I’m dealing with dead cab A/C, and am looking at maybe upgrading the system to allow for a rear condenser. That wouldn’t help while parked/camping however… Newer semi trucks use electric A/C, 12/24V, but are pretty expensive, and the batteries to enable all night use would be even more expensive. Neat though. The Sunrader roof just doesn’t seem like a good idea to put much weight on imo. The composite construction is only as good as the urethane foam can maintain a decent bond to the fiberglass, once that has failed, won’t be very strong at all.
-
Ok, so I spoke too soon about the “bolt on” part regarding the Jaguar alternator swap. As it turns out, the Jaguar part requires an offset extension to the lower bracket in order to be usable on the 3.0. The stud used to attach the main power cable is also larger, but that is a bit easier to adapt. i will post a picture of the adapter drawing used to attach it to the original slotted bracket when I get it sorted out, in the event that someone else is looking to go with the swap.
-
Don’t know if the op ever looked at the responses so far, but I just found that an oem Jaguar XJ6 (93-97) alternator is rated at 120A, and is a bolt on replacement for our feeble 60A alternators. Keep in mind the original ones were specified for a pickup, so engine ecu, headlights, fan, nothing else. Can be ordered from anywhere rebuilt for about $130.
-
So a little digging revealed that there is an OEM (Denso) Jaguar alternator that will bolt/plug right onto the Toyota 3.0. This one is advertised as a 120A unit, and came on the ‘93-‘97 Jag XJ 6. Luckily the local u-pull junkyard had one that I was able to remove earlier, and will rebuild it over the winter. The pulley appears to be the same or maybe slightly smaller, but not much if any.
-
I just recently did that during a valve job on a 90k engine. I had the rig torn apart and did the modification in the process of reassembly as the factory crossover is trapped behind the engine after everything is put back together. This required a mock-up, which had the intake manifold, both heads, and exhaust manifolds attached, along with a new, replacement original downtube. A pvc plastic assembly was made to fit the motor home, and was applied to the mock-up. After everything was made and repeated between both the motor home and mock-up, I took a trip to a local exhaust shop. I looked around to find a good one that was more of a one man show, some wanted two weeks lead time just to make an appointment to discuss my custom project. This guy has been doing this all his life. Apologies for the upside down pictures, I haven’t taken the time to edit them on my phone. The new exhaust bolted right in to the motor home, which allowed me to keep it at my house instead of towing it to an exhaust shop, or taking the engine apart at the exhaust shop.
-
Well I think I have some better parts now, so can start cutting and grinding things apart soon. Just need to do some trial fitting before tearing out the old ones. The studs (not bolts) are actually pressed into one side, were drawn in during assembly. I had initially thought they had been welded in since that side was round, no flats for a wrench. The driver’s side is installed such that the gray tank is in the way while removing, something that makes me think it was likely done before that tank was installed. The springs are indeed 2-3/8” wide, however one must account for the flanges of the bushings poking out as well, for the shackle inside dimensions. As heavy as this thing is, I’m not surprised that the lift shackles were installed, too bad they’re not the right parts for the vehicle, aren’t worth saving.
-
Well it looks like the shackles that were used were meant for something about 2-3/8” wide, not the 2-3/4” spring/bushing combo that’s in there, were forced into place and not very well. Think its time to write off the hack job shackles and get something proper. Really not a fan of the pressed in studs that have the knurled end on them either in this design, maybe without the welded brace. So the 4” angle grinder is looking like the weapon of choice!
-
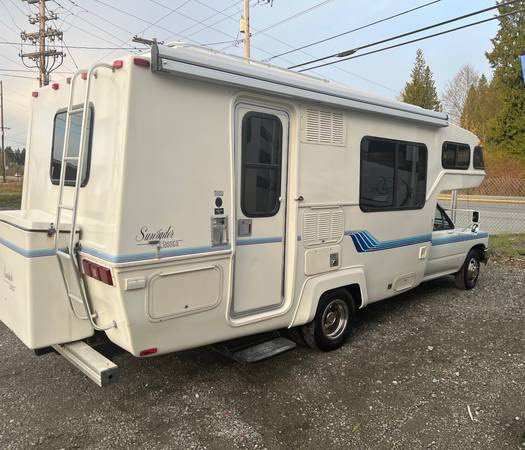
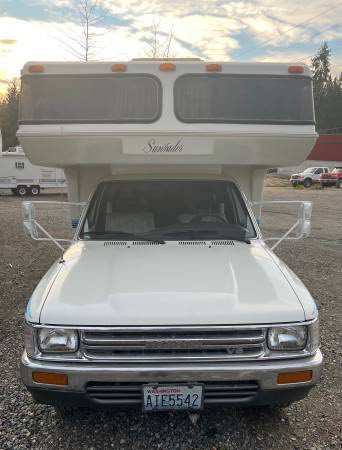
New member here, awesome site, had no idea how much is here until registering… We have wanted a Toyota based Motorhome for a longtime and when a one-owner ‘91 Sunrader, rear bath came available nearby, (north of Seattle) we pounced on it. Has only been an adventure in the driveway so far, starting at the front and working my way back through the truck parts before getting into the house equipment. Am doing all the work myself, trying to be as efficient as possible, but thorough. I am into it over a month now, and tackling the leaf spring bushings now.
-
Thanks for your reply. I have tried to pound on the bolts/studs, but didn’t seem to want to move, and only had round, weld-on heads. Everything else has been fairly easy on this rig. Maybe I need to retain the spring somehow so it can’t react to the forces, or, get an air hammer… Seemed like a way to save about a dollar worth of steel and not make the shackles a 1/16” thicker!
-
So I have decided to replace the elongated original rubber bushings in the rear of our ‘91. Upon disassembly, it became clear that it wasn’t happening without a sawzall. The shackles have a brace connection between them, and it is welded. That, along with the constraint of the studs having been welded in place, as is normal for shackles, creates an assembly that is unable to be taken apart without cutting something. Is this normal for Sunrader motorhomes?
-
Our ‘91 had the recall work done in 2010, Previous owner (rip) even returned in 2010, and asked to have the clearances checked. They did a compression test instead, but am pretty sure they fudged the numbers… It’s too bad the dealership couldn’t ever manage to check the valve clearances, is recommended every 30k on this engine. The exhaust were all at least .004 under tolerance (.008-.013), except for that one, which was 0, hence the extra low compression on that cylinder. Great recall, thanks for nothing, all had to come apart again after only 2,000 miles to have the exhaust valves/springs replaced. Exhaust valves rely on their contact with the head for cooling, heads and especially the valves showed enhanced wear.
-
I would steer clear of autopartsgiant, haven’t had the best experience from that outfit recently to say the least. Just do some research before buying, since they appear to be a Toyota dealer selling parts at a discounted price, but that’s not the case, are a third party with no affiliation. There are plenty of actual Toyota dealerships that will sell parts at fair prices.
-
If you want to be safe, buy an oem (Toyota dealer) thermostat. I have found the hard way that there definitely is a difference between the $4 Stant ones, and one that was made for the specific car/engine.