90Warrior
Toyota Advanced Member-
Posts
30 -
Joined
-
Last visited
Content Type
Events
Profiles
Forums
Gallery
Everything posted by 90Warrior
-
That's what I am thinking, repairing the seals on the window itself. That side where the leak is, is the sliding pane so I assume maybe that gasket is failing. I won't discount the gasket on the stationary pane either. Any recommended places to source parts for these old windows?
-
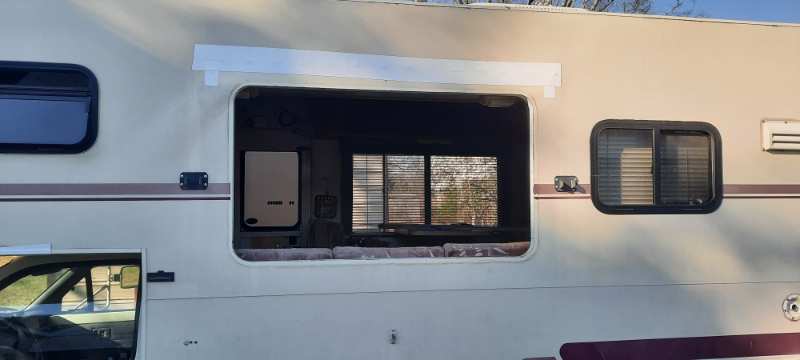
Bottom left corner from the inside. I don't think it's from where the old awning was mounted, or old damage where the de-lamination is in the top corner on the outside.
-
One of the big slider windows in my micro warrior has sprung a leak, the one behind the couch. It's leaking in the bottom corner. I've pulled that window, cleaned the fiberglass and window frame flange of sealant, applied fresh butyl tape and reinstalled it thinking maybe it was leaking in around the frame/fiberglass seal. Cleaned out the weepholes in the frame as well. During the rainstorm today, first one, it's leaking again; same spot same type of leak. I don't think it's leaking in from a roof seam as the wall vinyl above and around the window & cabinets is dry, but the bottom corner is not. Edit: It leaks from between the inside window frame clamp & luan/vinyl wall covering. What other ways can these slider windows leak? I'm thinking it may be leaking past the glass/frame seal into the frame itself and out one of the screws in the bottom holding it together, running to that bottom corner. If it is the pane/frame seal, how would I go about repairing it or locate parts rather?
-
Before this trip it hadn't sat for but a few weeks. I haven't taken it out on trips anywhere since owning it until recently. But usually once a month or so I'll move it around the yard or block to get fluids moving. Probably not far enough to warm things up and make the brakes lock. The parking brake on it seems fine, currently the truck rolls freely and I can use the hand brake to stop it no problem. I don't have any fluid leaking anywhere, none seemed to be lost during the lockup as well. I'm making vac at the booster, the pedal return spring is fine as well. I haven't lifted an axle on it or checked any corners yet as its been so wet with these pop up storms the past few days. I would figure it be very rare I have brake hoses collapsing on all 4 corners, or faults with the calipers and drums concurrently, but definitely not ruling it out; I have no paperwork when they were last serviced unlike everything else I have record of. One thing Im thinking of trying is lifting the front end, pumping the brakes and see if I can get the fronts to lock again, and loosening a fitting by the MC to see if pressure releases. Maybe rule out a bad MC or not. Would that be a plausible test?
-
I've ran into an issue with the winnie this past weekend taking it out on a trip. The trip was about 12mi or so down the road. The problem I have is that when using tbe brakes, they compressed and stopped the truck, however I was getting no release. I being smart as I am pressed onwards to get it to the end of the trip and not be stuck roadside. Driving caused the brakes the heat up and compress even more....by the time I made it to park I was just about dragging front rubber on pavement. So, I managed to get it parked and all 4 corners were screaming hot. After it all cooled down the brakes released. I now have a brake pedal that hits the floor with barely any stopping power, probably because I burned the pads out; and no more grease in the front wheel bearings. I am looking for suggestions on what it could be that caused this? Other than simple things like oil changes, brakes pads, etc I am not a mechanic. Googling around doesn't bring much up on why all 4 corners would lock. I've asked a local toyota mechanic suggestions and was guided to either the master cylinder or the LSPV since they're common items to all corners. Have any of yall ran across this with your rig? Mines a '90 v6.
-
I think you can repair that as Linda mentioned. Pulling that shower pan is really simple, take the screws out on the surround, unscrew the trim piece at the edge as well. Reach under and disconnect the drain at the trap and it lifts right out. More than likely the bottom of the pan will be covered with foam where it rests on the wood platform under. You could probably clear back some of that foam and patch the hole with some fiberglass mat and resin. Just keep in mind the screws holding the shower pan it zip right into the exterior wall and can go thru to the exterior if too long/tightened....ask me how I know.
-
I've not seen a camper van spec'd one of those either. Thats pretty rad. I say it is close enough to count. I remember seeing a handful of those growing up though, it was something else to see a 4wd one lifted on mud tires and a lightbar.
-
I am an electrician, as far as carpentry goes...making holes in things is bout it. First delving into the task it was a bit overwhelming, but after carefully peeling back the layers you can see how the frame is cantilever? sort of attached over the cab. The marker lights, one of them, was the main source of the leak. After making repairs to the cabover it prompted me to pull and replace/reseal all other exterior lighting and check other seams. Which with that I discovered the back wall was seperating from the floor and one side frame. Pulling off the corner and bottom outside trims let me re-pull the wall tight to the frame with screws and PL marine adhesive. I am of the opinion winnebago put these warriors together pretty straight forward, youve just got to peel the top layer off and look at things.
-
I think #6 sgx or thhn would work fine in this application. How long is the circuit from unit to power source? If its under 30ft total length #6 should be ok. Since it's DC, and 12v, ampacity will be a bit different than for AC ccts. Voltage drop plays a bit more factor here since we are at a much lower potential than 120vac. I would factor it as wire size as circular mils = (22.2 x amps x one way distance) / acceptable voltage drop Lets say its 15ft one leg run from batt to unit, and 5% Vd is ok. So CM = (22.2 x 60 x 15ft)/0.6 CM=33,300 33,300 circular mils is slightly larger than #6, smaller than #4. Double check nec 310.16 for bare minimum ampacity of cable at X deg C, #6 is just close enough.
-
It would be nice if ecoflow would provide straightforward electrical ratings for that unit. It shows input sources, various consumption ratings, charge input ratings, runtimes; nowhere yet do I see a rating for amp draw while running. Regardless of its performance or efficiency, having a number for amps at X Y Z input voltages, would provide us at least with some references where to start on the install and powering it in the coach.
-
So I probably jinxed myself on another post explaining how the warrior will crank and drive fine. Its a '90 3vze. I go to start it Saturday and let it run, and it turns over and over but won't crank or run. I start troubleshooting. I have spark, but no fuel going to the engine. After discovering I have no fuel flowing, I jump power directly to the fuel pump using B+ and Fp pins on the diagnostic connector under the hood, bypassing the ignition and afm circuit, and the circuit on relay. Fuel pump fire up, truck cranks and runs like a champ. First point to check is fuses...all good, then the circuit openining relay, located in the passenger kick panel tucked flush with the glovebox, I had to remove the glovebox to reach mine. I pull the relay and take measurements across it with no readings. I probe the molex plug and Im getting voltage where Im supposed to on the ignition and afm circuits, and the 12v switch side to the pump. I bypassed at the connector with a jumper, truck runs great. I patched in some generic 12v relays to take the place of the COR and everything works as it should. So, deducing it down my no crank no fuel issue is a bad circuit opening relay thatll need replacing. Figured Ide share this should anyone else with a 1990 v6 toy have similar issues.
-
I wonder what the final bid is going to be on that. Really clean looking rig. Im sure it being a rhd 4x4...diesel...hilux is going to send the bids sky high on top of it being a toyhome. I wonder sometimes why we didnt get as cool of trucks as other parts of the world, to stick a camper on.
-
Do you know where that circuit goes that keeps blowing the fuse? Im assuming its for the batt only lighting circuit? Can you move it to another terminal on the panel and see if it pops a different fuse? If it does I would start checking that circuit for faults, see what all is not working and troubleshoot. Also with that circuit unhooked from its terminal, unplug from shore power and see if the unit is supplying voltage out on it open load. Another suggestion is, depending on the converter model, might have a stuck relay that switches output from converter to batt when on/off shore power.
-
Best converter to use for upgrade in 94 warrior?.
90Warrior replied to Don bird's topic in Electrical
The magnatek units break down into two halves. The upper with the breaker block and DC fuse block, and the lower with the converter charger. I've seen units from mfg's that replace the lower half with a new converter/charger and leave the upper half the same. That may be the easiest case scenario to update. The breakers appear to be BR style? Unsure if theyre plug-on or bolt on, Im assuming not plug on as there is no buss bar in the breaker side. If they're in decent shape I would leave them unless swapping converters requires changing them. It could be an adventure to find replacements to fit. In my case, I pulled my whole power unit out, took it apart, rebuilt/refurbed the converter/charger; the breaker side was melted apart in the past, pulled that out and added pushbutton TM breakers instead. YMMV -
Looking at the bumper and frame on my warrior, I don't think it would be sturdy enough to support the full weight of the camper on stabilizers without modification. However, I do have a trailer jack mounted to mine that when let down to touch helps keep the back end from being as bouncy. It's not used to support the camper past that, and its been on there for a long time with no ill effect ive noticed.
-
I second this. The Everstart batteries at wal-mart Ive always had decent luck with across everything Ive put them in. I think they're still made by Johnson Controls but don't hold me to it. My warrior has a group 24 starting batt, unsure of what fits in the coach batt tray, it'll probably end up with an everstart group 24 deep cycle.
-
ALL MY LOCKS SUCK... Any better options???
90Warrior replied to thewanderlustking's topic in General Discussion
Tagging this to follow. Ide like to see folks suggestions too. I'm in the same situation. I have 2 sets of 4 keys for mine. 1 key for the truck doors and ignition, 1 key for the storage compartments, and the coach door takes two keys one for each lock. Would be nice to bring it all into 2 keys. -
Wifi/remote Battery solar charge and tank monitors?!
90Warrior replied to thewanderlustking's topic in Electrical
Its not turnkey, but there are a lot of open source programs utilizing Raspberry Pi or Arduino and the like, to monitor and control with. A local HAM has a remote setup for solar using open source and arduinos, really impressive. Most all of it could be reconfigured to use on an RV. -
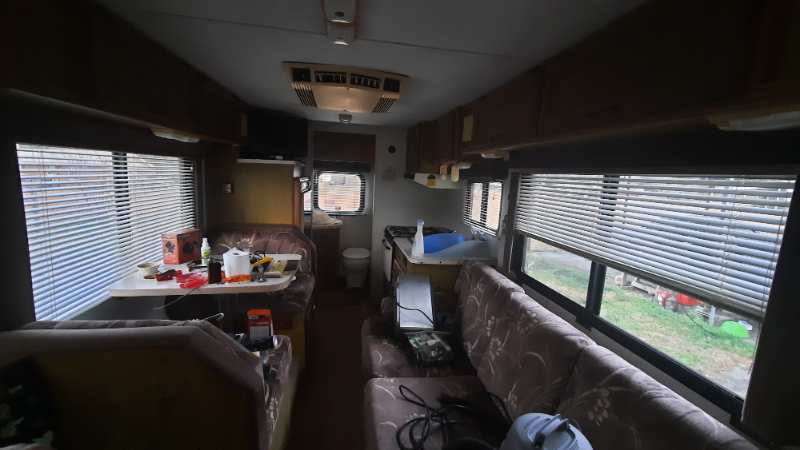
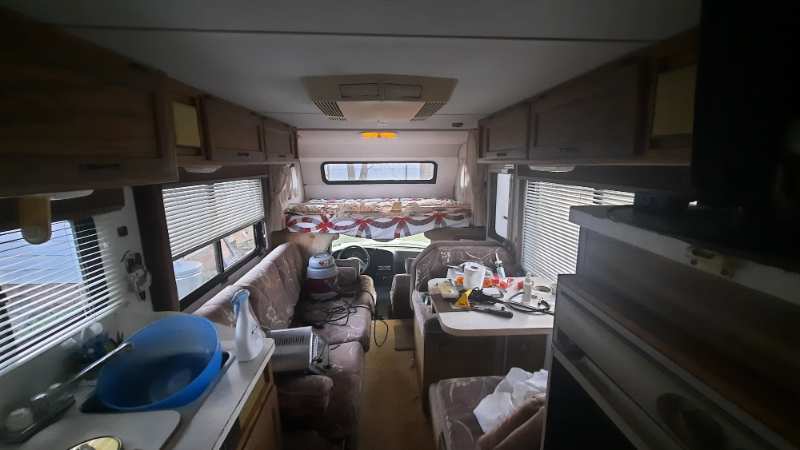
The picture doesnt do the details justice. It looks real good this far away, as you get closer though....😅 Its got dents and dings and rusty spots, but overall Ide say its a solid 80% good for 31yrs old. Tools are strewn about, but the inside is in incredible shape to have been used so much.
-
Ham radio operators in Toyota MH land
90Warrior replied to Maineah's topic in Communications and Electronics
de KN4GXM Extra Class operator. No mobile in the winnebago yet, I have an idea to do something with the old TV antenna location for a mobile antenna. I've got an extra Yaesu FT-7800 and Rpi3 aprs setup Ide like to install eventually. Usually you could find me late evenings 40m. But my trusty ol 940S went deaf across all bands sigh.... Local repeater down here has echolink if anyone uses it. Im always sandbaggin on that machine. N4RGJ 147.015 +123hz Mobile, AL -
Can see the ground through separation behind toilet
90Warrior replied to Waydago's topic in General Discussion
Thanks! First thought was run some screws thru it and pull it back together. But...I imagine that area sees a bit of flex/movement while the truck moves on road/parked and would wallow out anywhere a mechanical fastener is. So, Ive been thinking on an adhesive caulk or sealant type tape. Stick the areas together; that'll let them shift some. I've got a couple tubes of Loctite PL Marine Adhesive leftover from the cabover frame repair. When taping/caulking that spot together, would you think it'd be better to push the pieces together and then let it cure; or leave the gap and fill that space with sealant? -
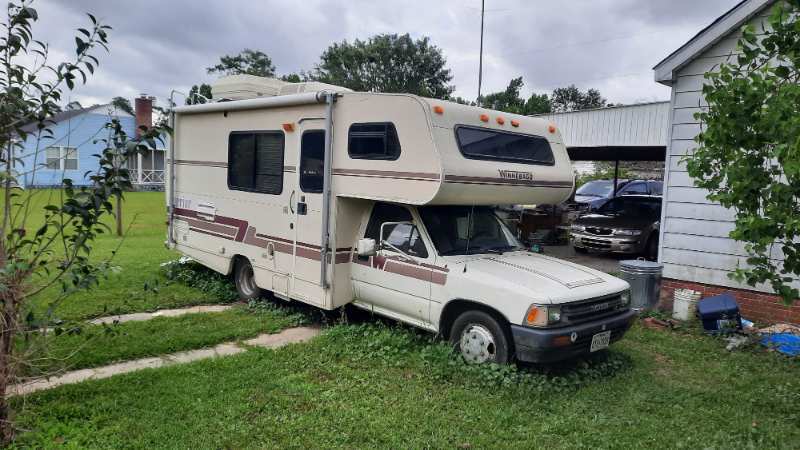
Here is mine. Winnebago Warrior 321RB. If you ask my kid, it's her truckhouse, not mine. Inherited it from my grandparents Nov 2020, Ive had it in the back yard for tinkering ever since. Its got right at 110k on the clock, engine and trans are perfect, stack of service records in the glovebox. I'm the 3rd owner of it. My grandparents bought it back in 1992 w/ low miles from someone upgrading to a class A. With 30yr and 110k under it, the Winnie definitely shows its age, however with determination and time, it'll end up 30yr factory fresh again. I plan to have it camp ready before this summer and take it out places around south alabama.
-
Can see the ground through separation behind toilet
90Warrior replied to Waydago's topic in General Discussion
Resurrecting an old thread. I've just discovered I have this exact issue happening on my warrior. Noticed it when I was vacuuming behind the toilet, had to double take when I thought I saw light, sure enough the rear wall has seperated from the floor at the bottom seam. Has anyone found a suitable fix for this? I'm searching for good ideas before I fire the parts cannon at it. -
From what I can tell on mine, the front window frame to cabover is sealed with butyl tape or some sort of tar like sealant (squished out past the frame). The window glass to the frame I cant tell how its attached. It and the other windows don't leak, for now thank goodness, even in the sideways rain Ive had here lately. The way the winnie is parked not much water runs down over the front window which helps.
-
Unsure of which relay setup you've got, but the troubleshooting should be generic across most. The relay kit should work like this; Battery + to B + on relay, Gnd on relay to gnd/battery -, socket from truck wiring to relay plug, socket from headlight to output socket on relay. Make sure all of your ground connections are tight with good continuity. Multimeter is your friend. With everything plugged in according to instructions, unplug one of the headlights from the relay, put your meter leads on the socket, turn on the headlight switch, check for 12vdc+ on the relay output. If you have voltage on the output check the headlights, if no voltage check the relay, and the truck wiring to the relay. Assuming the headlights operate on original wiring, but not on the relay setup, I imagine the relay isnt reveiving 12v signal and closing to pass power to the headlights.


