All Activity
- Yesterday
-
pretty sure they are wired in at the taillights
-
 cubbyboy57 joined the community
 -
Do your running lights on the cab work? The coach marker lights run off the cab running lights
-
Ok, cool. That is the same youtube video I found. I'm feeling good about it now. Thanks so much for taking the time with me here Linda! I think it's gonna be a permanent fix at a fraction of the cost! And I'll do it myself. I'll report back with photos once it's complete and leak free!! Cheers, BBC
-
None of the marker lights on the front, back, and side of my toyota dolphin work. i did test one with a multimeter (full disclosure; first time ive ever used it.) but got nothing. also tried replacing it obviously, got nothing. where does the power come from? can anyone tell me where all the wiring for that leads to and from? i’m just not sure where to start. i appreciate any help, let me know if theres anything i can make more clear.
-
NO don't do that. Plumbing dept at any hardware store. buy the smallest piece of pipe, probably a dollar. Grind it up with a rasp. it's easy. Grind into bowl from dollar tree. No acetone involved here. I have no idea how it would affect the results. I've done this on other people's campers too and never had any problems doing it my way. I guess you have to decide what method you use. Linda S How to repair and reinforce large ABS plastic items using ABS slurry. (youtube.com) Found a youtube video and it does look like it might be easier. Go for it
-
Thanks. So, I'm going to buy an ABS sheet, mix it with acetone to make a slurry....add the ABS glue to that? I can't understand what I'm going to grind? The youtube video says the ABS slurry will be made by dissolving the ABS plastic sheeting in acetone, then paste it on.....Sorry to be obtuse here - this is not something I'm familiar with.....
-
That fiberglass is way too thick. Cloth is just a mesh to hold thick slurry in place. Cheesecloth will work just as well. All the strength comes from the ABS slurry. Everything from local hardware or dollar store. ABS glue, rasp drill bit and small piece of ABS to grind. Dollar tree, aluminum disposable pans, gloves, stirring sticks and lots of brushes. Cheap messy job, my favorite Linda
-
Glad you were able to fix your rig! Thanks Linda! This is encouraging What kind of ABS product would you recommend? I see pellets and sheets options only. Something like this for the fibreglass: https://www.amazon.com/Bondo-20128-Fiberglass-Cloth-sq/dp/B002JRGOT8/ref=sr_1_9?crid=2GB9MJIKRSPZ9&dib=eyJ2IjoiMSJ9.qMrbkZlHGwx2uoaUtiNFiK4iLYAAdmlUy-Er1BStCpkDX6Sw5fR9GGlfxBzaJmE_bqPlaUzHNZgJ4X_ItfvxPD3EqoJM0MVApmHGblkyacxpP51FemjHs0B1VxHYoMeGBWOduyAq3i_IXp8ezo8jk-bjV-ppjcvRVPjm2ZBWxmV7YQ1yngrVSRztgVngQq_tZVl2oRR2lfv-Npp2OHNcvtrEt7cbikrzn3hOsBfdZeA.kpd5_BNThEkU0OqrvZBMlDuUtLg1N5m29vjNAfQUQt4&dib_tag=se&keywords=fibreglass&qid=1716135259&sprefix=fibreglass%2Caps%2C319&sr=8-9 Please let me know what you think - many thanks!!
-
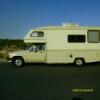
I have a 1979 Galavan on Toyota chassis. I know of one other in Texas. There are very few left on the road. Galavans we’re produced only for 2 years 1978/1979 by champion industries. Your coach body style is the first generation (1978) with the porthole windows. The 1979 had larger side windows, and no porthole. I’ve collected as much information as is out there. I’ve owned mine since 2011. I’ve done extensive renovations also. I’ll try to answer any questions you might have. Welcome to our forum.
-
I have been a member for the last year but never posted anything or introduced myself, so Hello, I have a had a 79 Datsun Galavan for about a year and just picked up a 79 Toyota Galavan, hopefully I can gain some knowledge and insight. I dont know how many of these were made or how many are left but I figured I better save this one.

-
 mcdom joined the community
 -
Perhaps an armored car. But then again, look how streamlined it is!
- Last week
-
Looks like it might be the VW Super Bugger grandfather.😁
-
Can't tell what you put on there but don't see a big crack. Is it at the outflow? My black tank was destroyed by a truck in front of me that dumped wood in the road. Outflow and whole back wall were gone. I went back and picked up the nasty peices and glued it all back together with ABS glue. You need to make a slurry of ground up ABS, used grinder bit on my drill, and mix it with the ABS glue. I also used an open mesh fiberglass for more support. ABS glue and the shavings make new ABS. Important thing is that you have everything ready. Fiberglass cut to fit, disposable aluminum pans for mixing , ground up ABS, brushes and the glue. I buy all the pans and brushes at the Dollar store. It dries fast so you have to be ready. Brush on slurry, apply fiberglass over that then brush on several more layers of slurry. Kind of looks like it's really your outflow that is the issue. That actually makes it easier. Buy a connector and slurry glue the whole thing back together. Camco Coupler 1 pk - Ace Hardware I fixed my tank over 10 years ago and I've never had another problem with it. Trust me mine was way worse than yours. Linda S
-
Looks like it might of started out as some type of milk delivery vehicle.
-
Hello Linda! I'm interested in a possible fix for the black tank...thinking it is ABS. Thanks Linda! Also, I have found a replacement, very similar size from Plastic-Mart - so thanks for that also!! Attached is where I have 'fixed' it previously. The guy at my local Camping World said the tank as is could not be fixed.....
-
That's pretty cool, to be sure. And the virtually cube shaped interior gives a lot of options for building out what you want! The down side is you won't have any privacy. My wife and I currently adventure in a bright yellow Vanagon and know from years of experience that people love to come look at a cool vehicle. It's part of the fun to meet people that way, of course, but it is a definite down side. We expect the same to happen with our Sunrader when it's ready for use. Doug
-
Don't worry it will buff out. https://bringatrailer.com/listing/1950-chevrolet-4400-camper/
-
 I was able to get the system working. I still have a few things to finish up.
-
Floor is still solid and no issues.
-
 Got the rubber "thickening strips" installed but wow. That 3M stuff cures WAY too fast to spread 20 feet of it. 10 feet of opening, and 10 feet of rubber strip. That sucked. I did find a useful way to have 10 feet of rubber strip under control with curing glue on it, but you'll need a helper. I wrapped it around an empty jug, taped both ends, then brushed on the glue. My sweet wife helper then unrolled it as I needed it to stick it onto the window opening. Worked great. This evening I went back out to see how well it's glued, and it already feels extremely solid. Phew.
-

Need help converting old light fixtures to new LED puck lights
Caser Racer replied to Caser Racer's topic in Electrical
Very true, thanks for the light testing tip! I have pretty much tried every combination and have indeed been turning on the lights after connecting. I'm beginning to go kind of insane but I have to keep at it -
I will echo what Linda said, I have a 93 Toyota diesel engine that came out of a Hilux and we swapped it into a 85 Toyota pickup, it’s been a nightmare with finding most anything for it.
-
Thanks, lads! OK, so the rotary cutter worked a treat. I have two lengths of perfectly straight 1/4" rubber that I'll glue along the perimeter of the fiberglas opening with 3M's best rubber adhesive. I'll even prep the surface with the recommended cleaner - 3M's Adhesive Remover. The rotary cutter literally cut the rubber effortlessly, following the edge of an aluminum straightedge, on my new cutting mat. I suspect it will similarly make short work of the leather when I get to that stage. And OF COURSE the forecast drops from tomorrow's 70s into the mid 50s right on cue. This is the umpteenth time the normally docile weather here has interrupted my work.
-
I want to replace my 4 gallon Atwood water heater with a tankless model. I would appreciate your comments and recommendations. Thank you.
-
I know that finding parts or a mechanic that will even work on them is a nightmare. Most parts will have to be shipped from Japan. Linda S