Odyssey 4x4
-
Posts
850 -
Joined
-
Last visited
Content Type
Events
Profiles
Forums
Gallery
Everything posted by Odyssey 4x4
-
I should have mentioned I also had check engine light codes 25 and 26, aka rich AND lean. Sounds like the code could have been a result of the injectors. We will see if it comes back on. If it does, I'm suspect of the O2 sensor, but the damn thing is so rusted on that I'm going to have to replace the entire section of exhaust. I'll crawl under it soon and ohm check the O2 sensor that's on it.
-
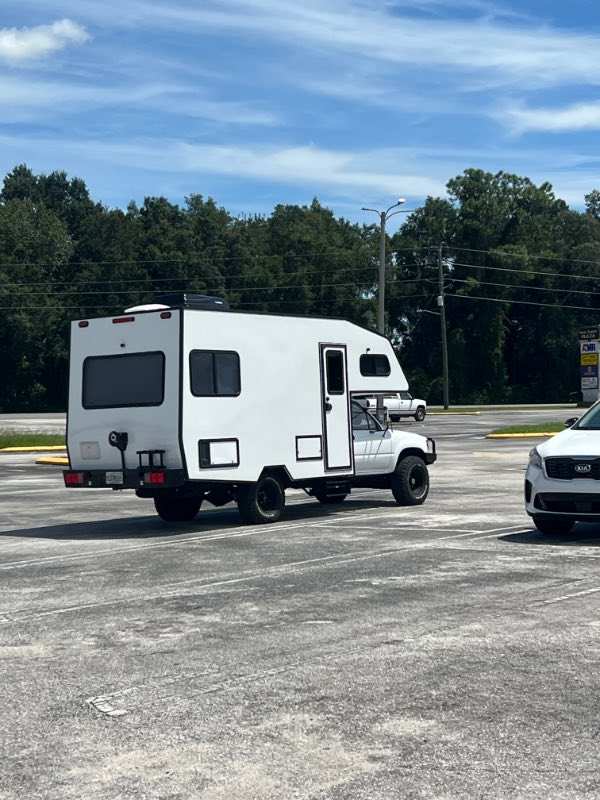
Haha, thanks! My first toy home was a 22re and had way more power than this did when down 2 cylinders! I'm lucky the shop was only 3 minutes from a family members place, I had the pedal to the floor and was doing 25 mph with a line of angry people behind me. I ended up using injectors from Advance auto, probably not advisable but it was my only option at the time and I didn't want to spend over $600 on new injectors for this. I've always had a backup plan of swapping a 3.4 into this if this 3.0 needed any expensive work. I slapped these injectors into it and will likely just run its for a year and build a 3.4 in the meantime and save the $ for the other parts needed for the swap.
-
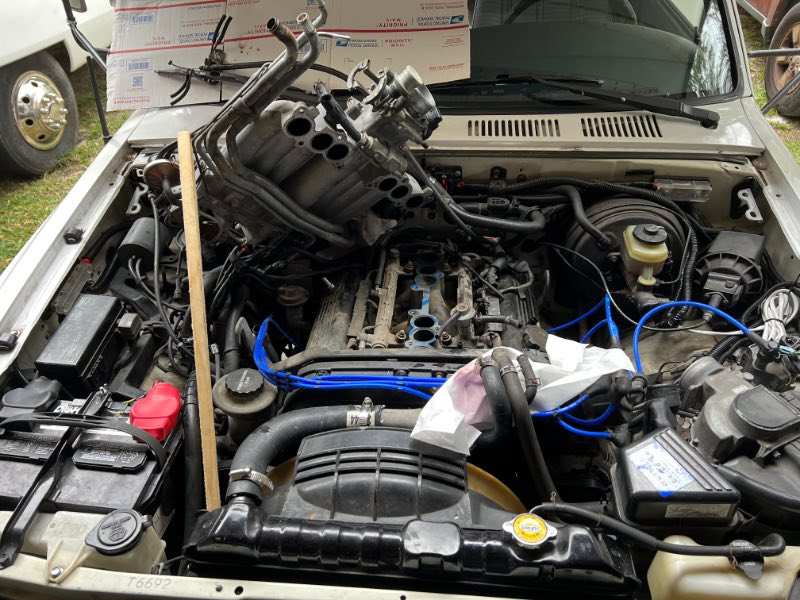
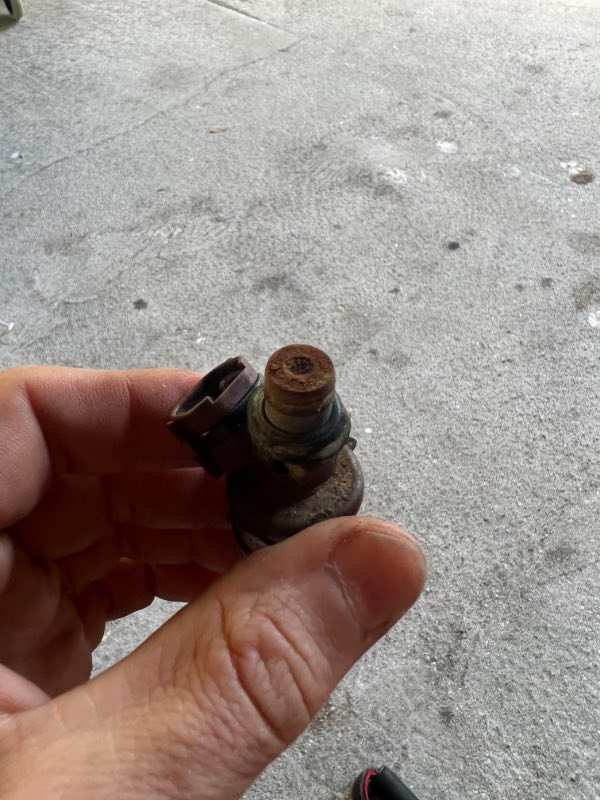
We recently took the Odyssey on its first long trip, around 1300 miles. We lost a cylinder a few hours from home and a few hours later, we lost another! The issue turned out to be some really dirty injectors. I found a shop to replace the two failed injectors (since I didn't have the tools with me to do an injector change in a friends drive way), and wouldn't you know it, on the way home we lost an injector in another cylinder. I would have had the shop replace off of them, but it was a struggle to find just those two in the small town we were in. I'm thinking the fuel injector cleaner I put in it a few tanks of fuel ago must have broken a bunch of crap loose and clogged up the injectors. When I got home I pulled the intake off and replaced all remaining injectors, it runs much better now. Also, we had a great trip!

-
I had a tempered side window break years ago. I stopped at a random glass shop near where I was traveling at the time. He said it would be no problem getting a new piece of tempered glass made but it would take a few weeks since they have to send it off for tempering.
-
painted stock wheels
Odyssey 4x4 replied to psxpak's topic in Improvement and Do-It-Yourself Projects you have done to Share!
nice job, looking forward to seeing them mounted! -
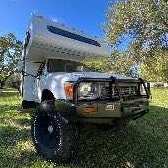
First trip in the 4x4 Odyssey was a success
Odyssey 4x4 replied to Odyssey 4x4's topic in Trip Reports
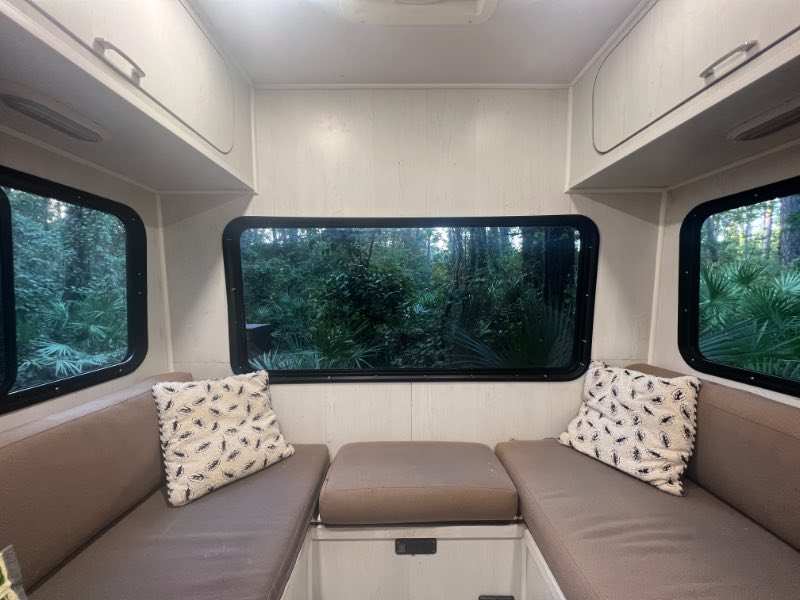
It sure is, it’s screened for bugs or opens fully for a great view of the sky or easy roof access/ fire escape. thanks! -
First trip in the 4x4 Odyssey was a success
Odyssey 4x4 replied to Odyssey 4x4's topic in Trip Reports
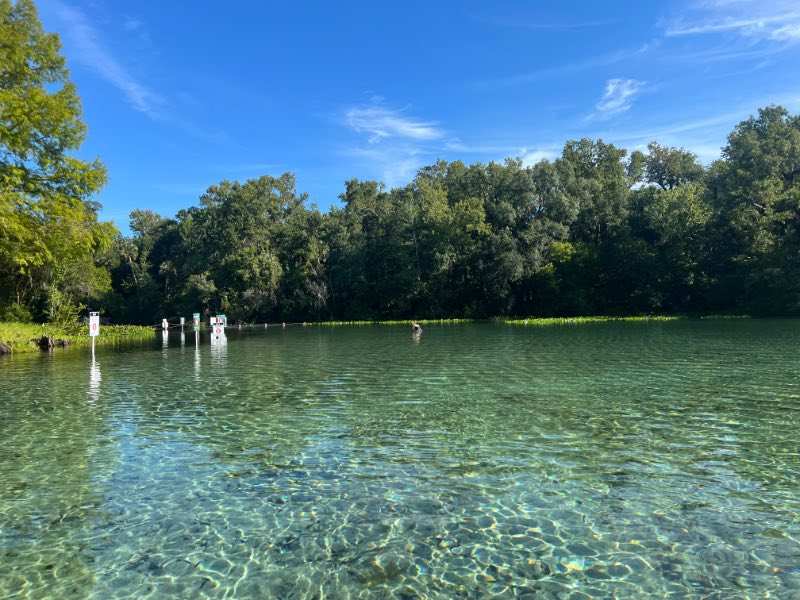
They sure are, i’ve been to quite a few now and each one has something special about it. They sure do feel like “healing” waters. This spring in Ocala is near a bombing range so it was pretty neat to hear some bombs and what sounded like an a10 warthog practicing while we were in the water! -
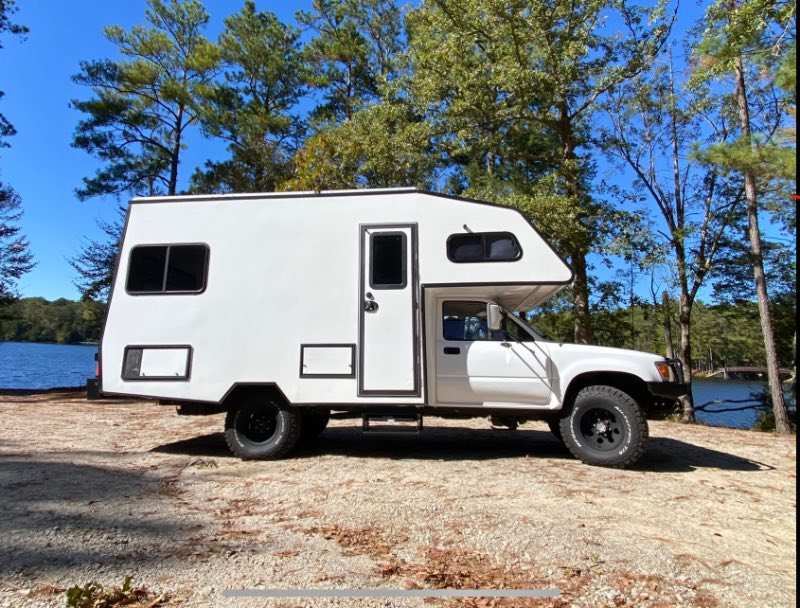
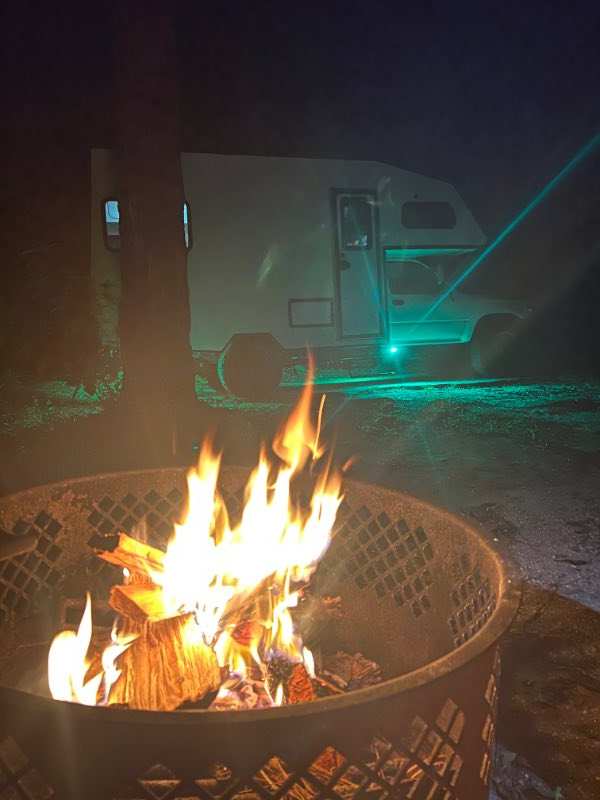
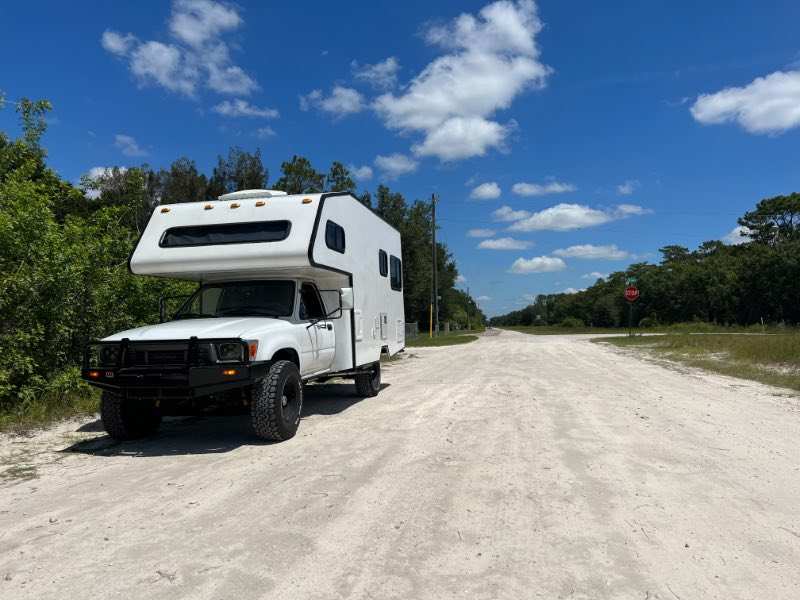
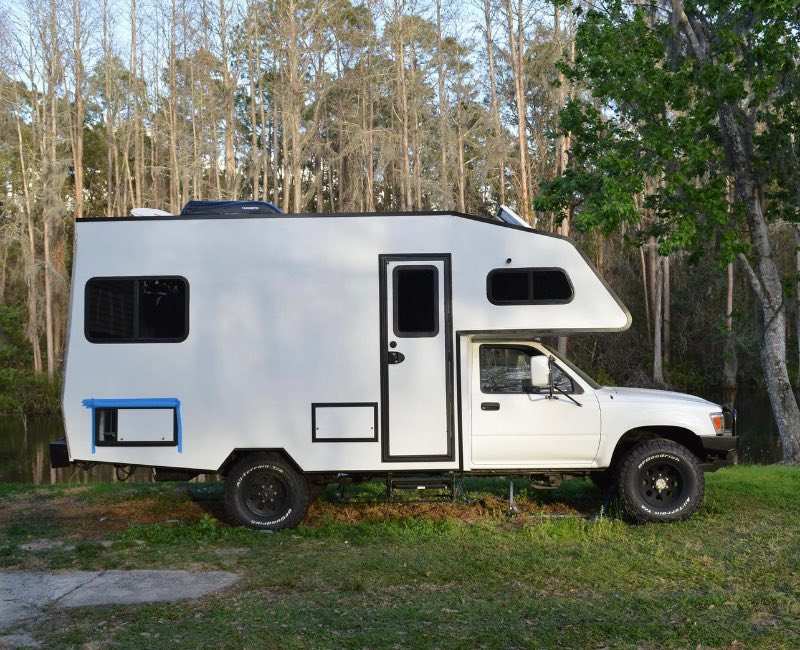
After years of work, the Odyssey has finally reached a point of being usable and drivable. The interior is 98% finished with a fully working electrical system including 200 ah of lithium (soon to be 400 ah), 30/60 amp DC-DC charger, 3000 watt inverter charger, dometic penguin ii 13,500 AC unit (able to run off of batteries for a few hours), etc etc. We welded up a custom exhaust on it. Replaced the timing belt, water pump, thermostat, pulleys, tensioners, all belts and hoses, new fluids and hit the road. It drives excellent and it a blast to travel in. We travelled about 2 hours from home to a local spring in Ocala national forest. I paid for a site which I usually refuse to do, but this being a maiden voyage and expecting anything possible to go wrong, I wanted an easy site to arrive to. We had a few small issues but overall had a great time. We learned plenty about the rig and layout and have a few tweaks to make, but we are excited for the next trip! I got a check engine light code 25/26, which reads as overly lean / overly rich. I'm hoping it was just a result of putting in a bottle of fuel injector cleaner, I've heard of other 3vze owners having similar issues when using throttle bottle cleaners. I ended up getting 9.5 mpg (remember its a 4x4), and we are in Florida summer and had the AC blasting and the dc charger occasionally charging at 30 amps.
-
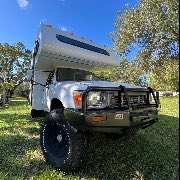
It’s been a long time coming, still plenty of small things to tie up but the first test drive was today and the truck feels great
-
Soft line between propane outlet and regulator?
Odyssey 4x4 replied to Odyssey 4x4's topic in Fuel Tanks
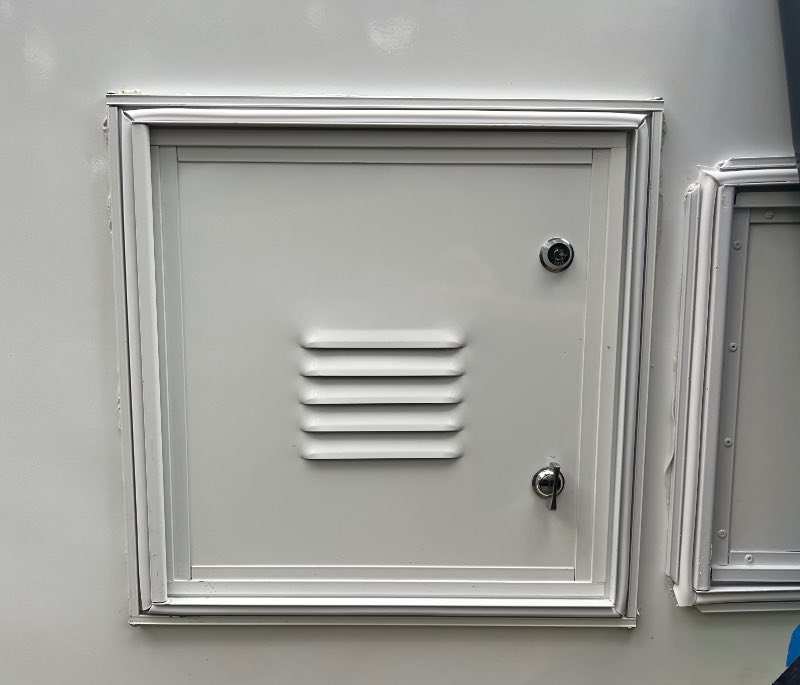
I thought this might be the case. I was between no lock for safety reasons, or having a lock to keep it tamper resistant from “curious” folks. I held onto the latch “just in case”. -
Soft line between propane outlet and regulator?
Odyssey 4x4 replied to Odyssey 4x4's topic in Fuel Tanks
Agreed! I’ve loved this website since day one of my Toyota camper days. Such a friendly helpful community. -
Soft line between propane outlet and regulator?
Odyssey 4x4 replied to Odyssey 4x4's topic in Fuel Tanks
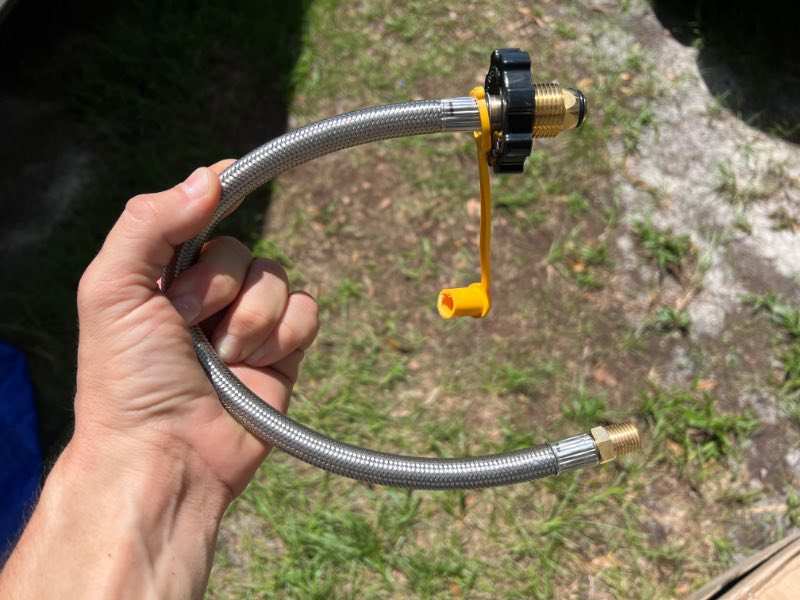
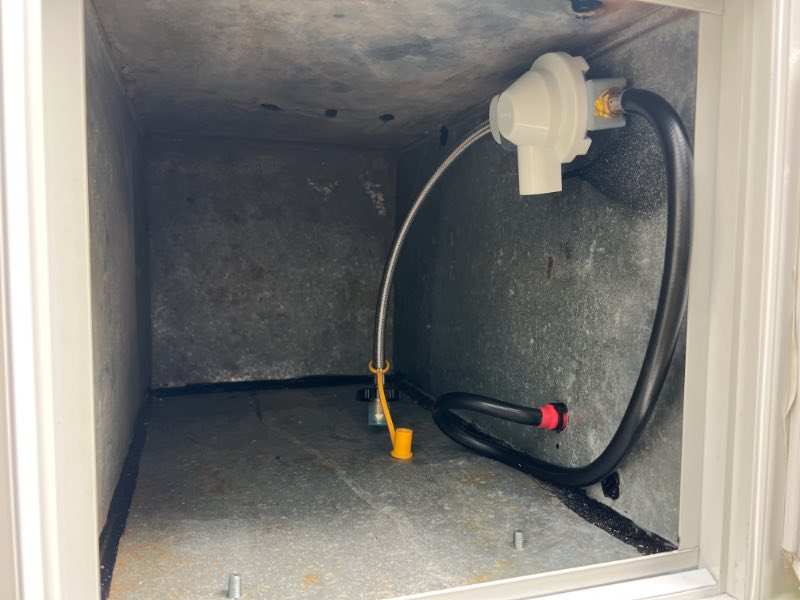
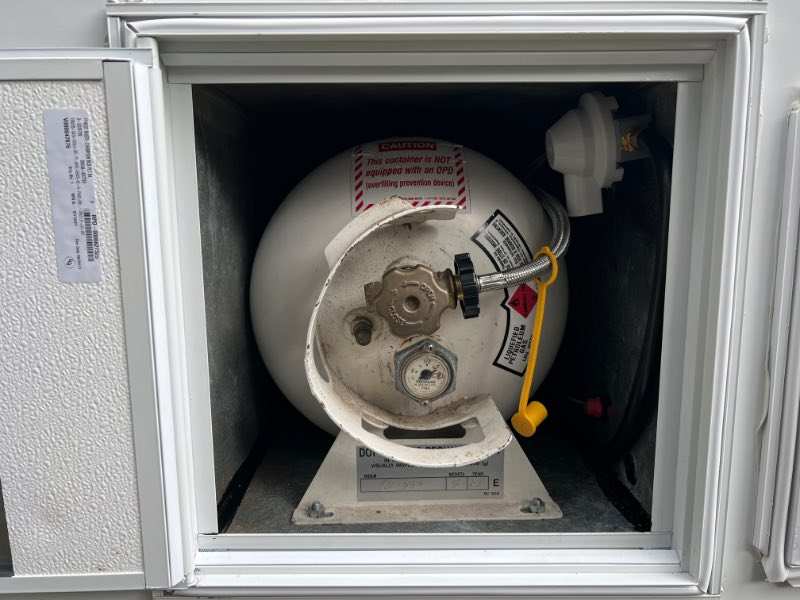
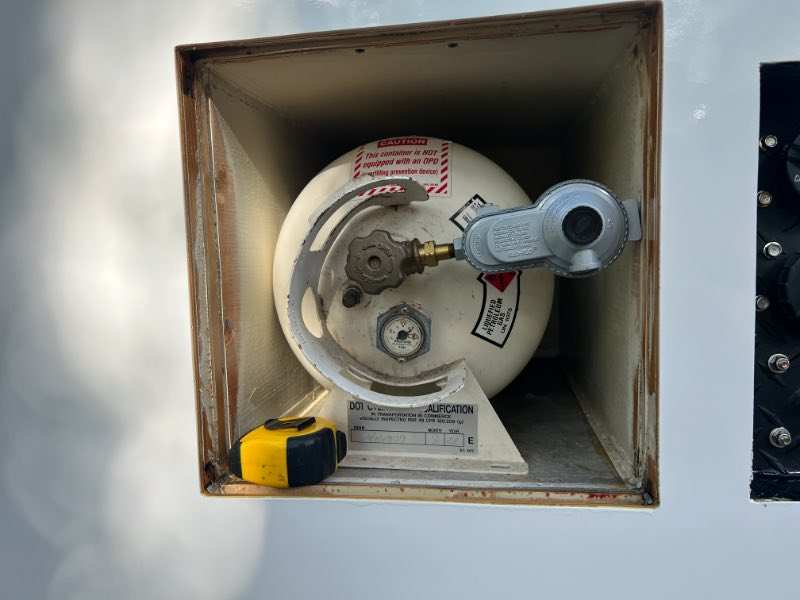
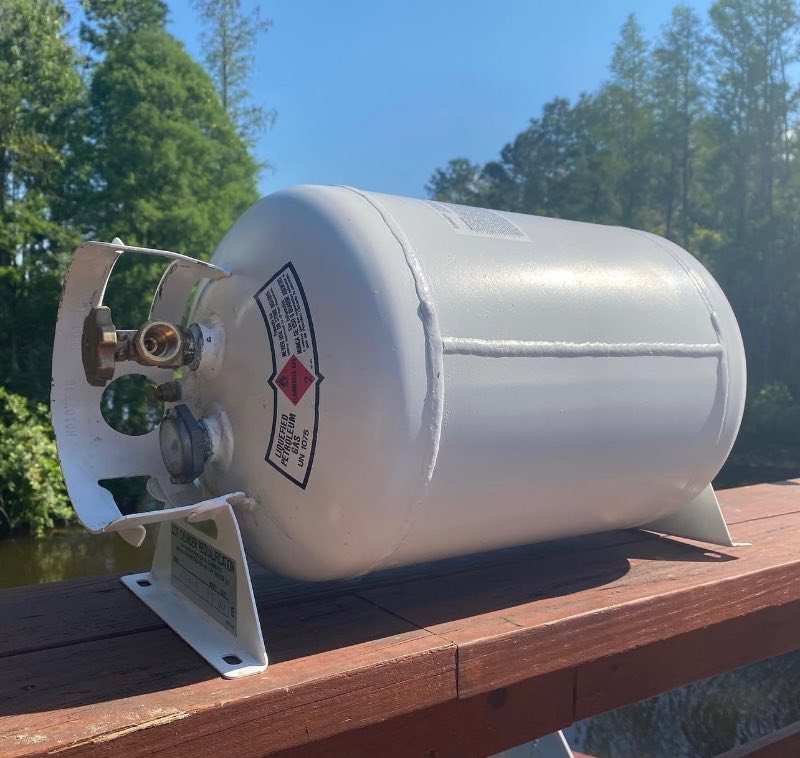
Here's an update on the finished product. I ended up doing a soft hose as mentioned... I used this hose from amazon to go from the tank to the regulator... I hooked everything up out of the vehicle and opened the tank valve, then checked for leaks at every joint. I then remotely mounted my dual stage regulator in the upper right corner out of the way so that the tank can still be removed to be filled, and also with the vent facing down. We drilled a pass through for the hose into the cabin, and double wrapped the propane line with a hose and shrink-wrap where it goes through the pass through to prevent rubbing. We slid the tank into place, secured it down with the studs I installed (you'll need a 1/2" wrench to remove the nuts when you go to fill the tank, I'll leave one in the compartment), and finally installed the new 14x14 door I ordered. I still need to clean the excess butyl off you see in the photo. We also caulked the entire interior side of the access door for any water that gets into the propane compartment. And the most exciting part, I fired up all the LP appliances in the RV for the very first time, and everything worked wonderfully! I'm glad to see my new water heater fire up and know I got all the wiring right on the first try for the remote panel. It was also fun to see the stove and oven fire up for the first time.
-
Soft line between propane outlet and regulator?
Odyssey 4x4 replied to Odyssey 4x4's topic in Fuel Tanks
Okay well that simplifies things! I'm glad I asked here before I did a permanent hard mount install! I'll update when install is complete, thanks folks. -
Soft line between propane outlet and regulator?
Odyssey 4x4 replied to Odyssey 4x4's topic in Fuel Tanks
I swear this tank was hard mounted into the box with bolts front and rear, but I cannot 100% remember. If you folks are confident that this is a remove to fill tank (PITA since it's a pretty big and heavy tank), then that changes my regulator mounting choice. I'd have to go soft mount with a remotely mounted regulator. If only I had photos of the original install! It was too long ago and I just can't remember. -
Soft line between propane outlet and regulator?
Odyssey 4x4 replied to Odyssey 4x4's topic in Fuel Tanks
Unfortunately the box doesn’t have room on the other side in that location. It’s looking like i’ll need to do a soft line and mount the regulator elsewhere in the box. I do see single stage regulators that will fit without issue. Is a 2-stage regulator absolutely crucial? -
Soft line between propane outlet and regulator?
Odyssey 4x4 replied to Odyssey 4x4's topic in Fuel Tanks
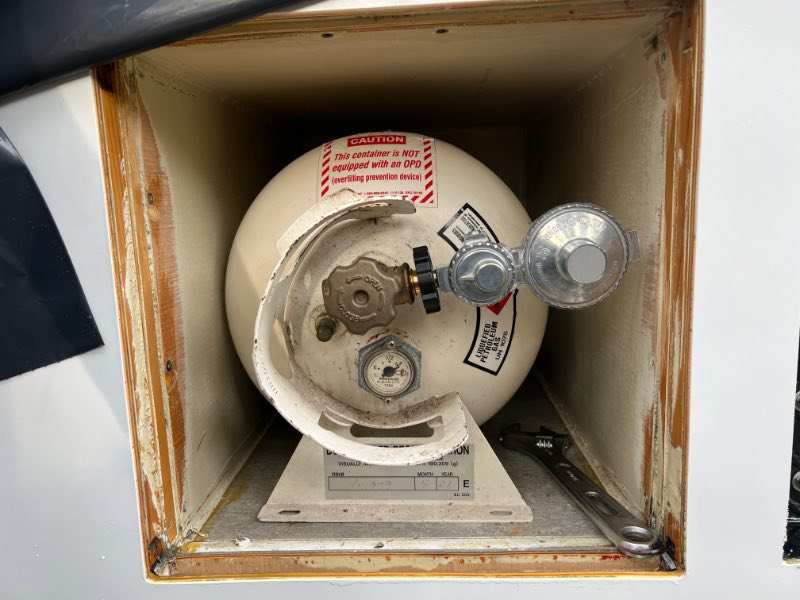
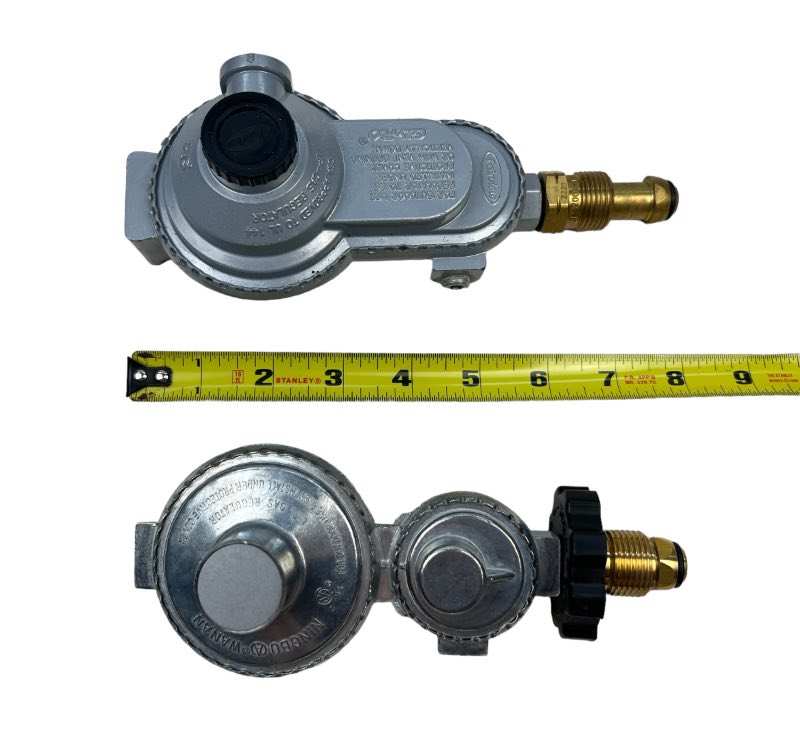
The tank is a permanent install tank so I'd need a permanent install solution. The regulator I have in the first post is JR Products 07-30375 and measures in at 8" inches. I just picked up the Charbroil regulator mentioned in this post and while it is shorter at 7.25", it's still too tight to work in the current configuration. If I were to either tighten or loosen the main valve a bit, I may be able to sneak the attachment line on in the current configuration. Otherwise, I need to do a a soft line mount and put the regulator elsewhere in the box. Here is the Charbroil regulator in place... and here are the two regulators...
-
For the life of me I cannot remember how the original propane tank and regulator layout was done on my Odyssey. I have my propane tank refurbished and a new regulator, but as you can see, there is no room to connect my propane line to the regulator in my propane compartment. Is it safe to add a soft line between the propane tank and the regulator so that I can mount the regulator in a different location where it will fit?
-
Horizontal ASME Propane Tank Refurbishing Questions
Odyssey 4x4 replied to AtlantaCamper's topic in Fuel Tanks
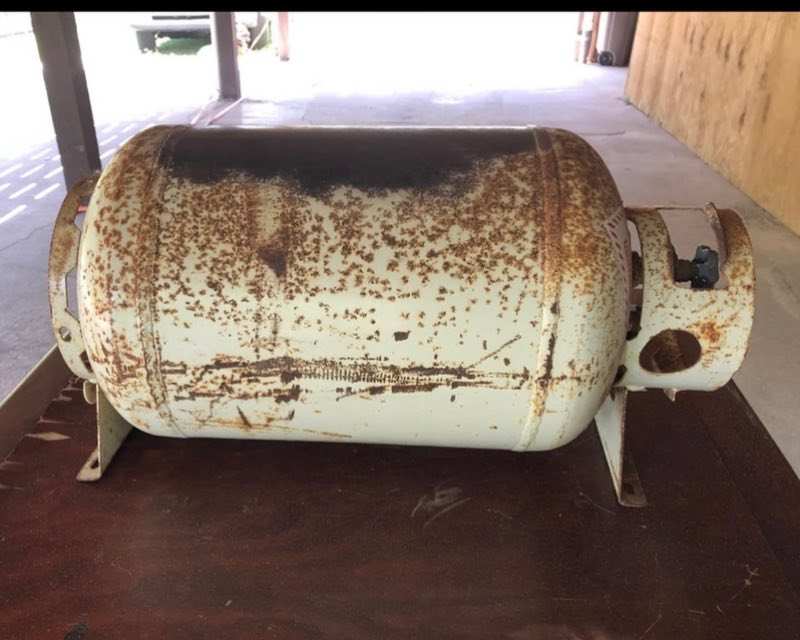
I completely refurbished my tank on the Odyssey. I pulled it off, drained it completely, removed all valves and gauges, sanded the entire thing down, and repainted it. I then took it to a local propane place and was lucky enough to have a kind old gentleman that took a look at the inside of it with a camera and was happy with the condition. He then installed all new valves for me and slapped a brand new certification sticker on it and filled it up!
-
likely the onan 2800
-
Sun Valley Products Window Latch
Odyssey 4x4 replied to BunnyJ's topic in Miscellaneous & Non-related
I just restored the Kinro branded windows in my RV. I found these latches that fit perfect. They look pretty similar to yours. I can post a few photos of mine from different angles if you need them. https://www.pellandent.com/Black-Plastic-Kinro-Window-Latch -
Did this gap exist prior to removing the window?
-
Looking for some insight into owning a Toyota RV
Odyssey 4x4 replied to Hill's topic in General Discussion
haha I don't know if I'll be doing anything in this rig that I'd consider off-roading. For me the 4x4 and ground clearance just means I'll be able to get a bit further out than most RV's. I imagine light sand, mud, snow, etc. You certainly won't see me going down Lions Back in Utah! The ground clearance of the 4x4 is really the big advantage for me. Plus the rig was just too cool to pass up and bring back to life! -
Looking for some insight into owning a Toyota RV
Odyssey 4x4 replied to Hill's topic in General Discussion
It’s been a journey!
-
Air conditioner issue. Compressor unable to start.
Odyssey 4x4 replied to deedubs's topic in Electrical
If you're comfortable working with the high voltage (don't attempt if you aren't), put a multimeter on the compressor power wire and see what kind of amps it's pulling when trying to start. -
Looking for some insight into owning a Toyota RV
Odyssey 4x4 replied to Hill's topic in General Discussion
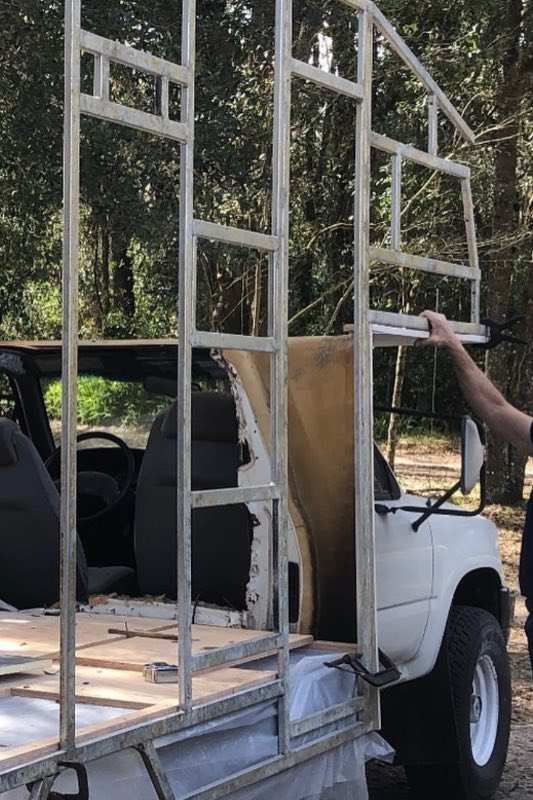
Aluminum framed walls are more ideal because if and when water does get into the walls, rot happens, aluminum doesn't rot like wood. If the walls were framed with 100% wood, 100% of the wall will rot and disintegrate. With aluminum, at least you still have the strength of the aluminum holding the walls together, as well as an easier start to rebuilding a water rotted wall. For reference, here's a (low quality) photo of my Odyssey's aluminum wall framing.