psxpak
-
Posts
25 -
Joined
-
Last visited
About psxpak

- Birthday 12/02/1987
psxpak's Achievements
")
Apprentice (3/14)
-

-
 Rare
Rare
-

-
 Rare
Rare
-
 Rare
Rare
Recent Badges
-
New after market Mirrors
psxpak replied to psxpak's topic in Improvement and Do-It-Yourself Projects you have done to Share!
I actually havn't gotten it out on the road yet since installing them. the feel pretty solid from grabbing them and giving em the push pull. I figure they shouldn't wiggle much with all the mount points. I'll let ya know though when I get it out on the road. -
Its really all prep work. it took weeks to get the caulking all off and sanded. Months really since I only worked on it weekends and after work. had it painted in a couple days. i re caulked after I painted so i could remove and re apply as needed without harming the paint. the lexel bright white was amazingly close in both color and gloss to the paint I used which was great. I've seen that alot of people roll paint on and they all seem pretty haply with the results. I just wanted a hot rod paint job so i went all in. I did skimp a little on the white paint though. I just used NAPA industrial acrylic enamel by the gallon. couldnt bring myself to spend thousands on the paint I usually buy for cars in the amount i needed for the dolphin. I've painted a few trucks with the NAPA paint and it always comes out lookin pretty darn good and buffs out pretty shiny for what it is.
-
Ya I don't really hate the windows at all but during the paint project I masked off the glass and primed and painted the siding and window frames then masked around the windows and sprayed the frames within the chemical bond re-coat time. unfortunately I mixed epoxy primer activator into my paint on the frames instead of hardener by mistake (I have a lot of materials in my shop) so the paint on the frames never got hard. to fix it I had to pull the windows out of the camper and remove the paint. I used lacquer thinner first which thinned it and spread it everywhere and made a huge mess. I wasn't happy with it so I pulled the rubber glass retaining seal and masked and sandblasted. Its really hard to mask in a way that a sandblaster won't blow off or through. as a result I hit the glass in a couple places. So now I have thinned paint (that I can remove with acetone) on the glass and a couple of fogged glass spots. It was really a huge bummer as i spent every weekend all spring and summer working on it as well as 2 weeks of vacation time. the mistake set me back literally months. When I put new black rubber retention trim in some spots did not fit in tight, no idea how the old ones did in those spots where the glass was set to far to one side or another, even trying to reinstall the old trim it was loose in those spots, i Wonder if they glued em in those spots when installing, that's what I did, used weatherstrip adhesive to make it hold. So after all of this headache I guess I kinda don't like them anymore haha. On top of all that they dont open or close well at all, never did. some have screws on the frame around the slider broke off from someone probably trying to open the stuck windows, I fixed one and it was a difficult process to drill out the old screw way up in there and get a new one to bite.
-
I'm thinking of replacing my side by side vertical orientation windows with a massive 60"x30" that will extend past both holes and the narrow side windows over the cab with 42" x 12" ones. has anyone done anything like this? it takes alot of the real estate up so I'm wondering if theres any crucial support between the windows that I shouldn't remove or if the windows are structurally sound enough to support what might come out.

-
I had a hard time finding a porch light replacement for my 85 dolphin and came up with a pretty decent solution. With the lenses on the original pull handle/light being so hard to find and the original lense being so delicate after time it almost seems inevitable to have to do something. I at first thought of fabricating a frame and flat lense like I had seen someone else did but found this flood light that was big enough to cover the hole. It actually puts alot of light out maybe too much haha though I havn't really played with it in an open dark environment. It's made by "Leisure LED" and available on amazon. the bottom top and right side caught the wood that the pull screwed into and I put a piece of 3/4" plywood behind the left side for some grab. I put a Toggle switch inside that was also from Leisure LED just because I liked the shape of it. I bought a white one at first and didn't like it and re-ordered in black. not sure what I'll do with the white one. I've done that with all kinds of stuff... I have 90' of white screw trim insert, white electric hatches, the white porch light... I actually rotated that close image in every direction and it was always sideways. guess you can't upload portrait orientation images
-
dude.. that thing is Awesome! I find with all of my restorations you're never REALLY done haha.
-
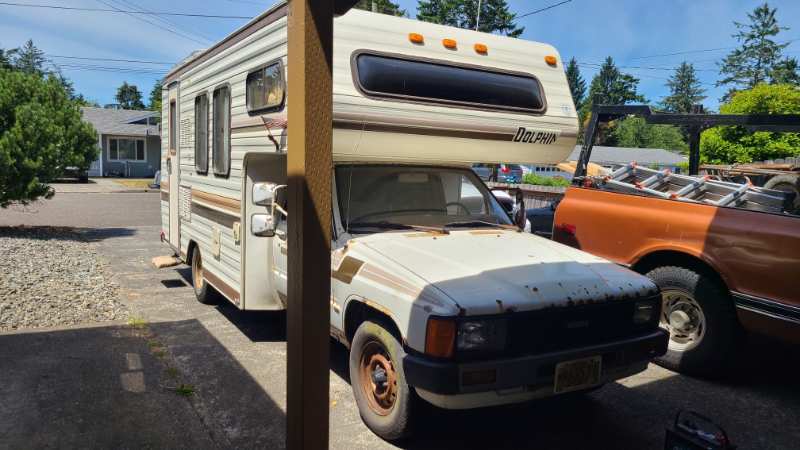
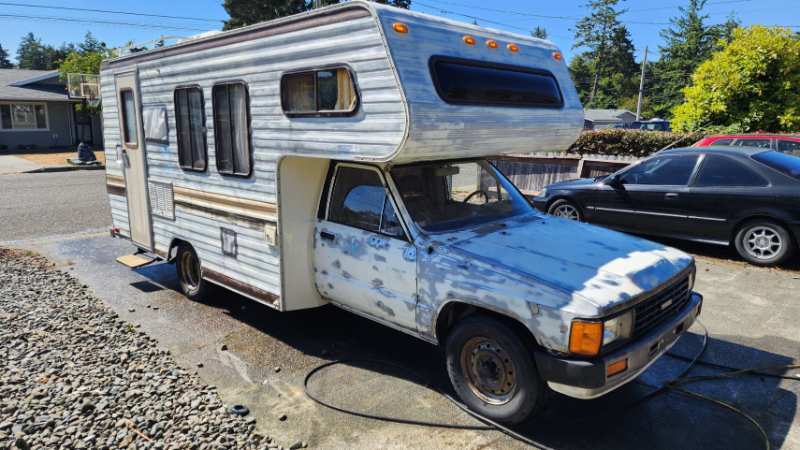
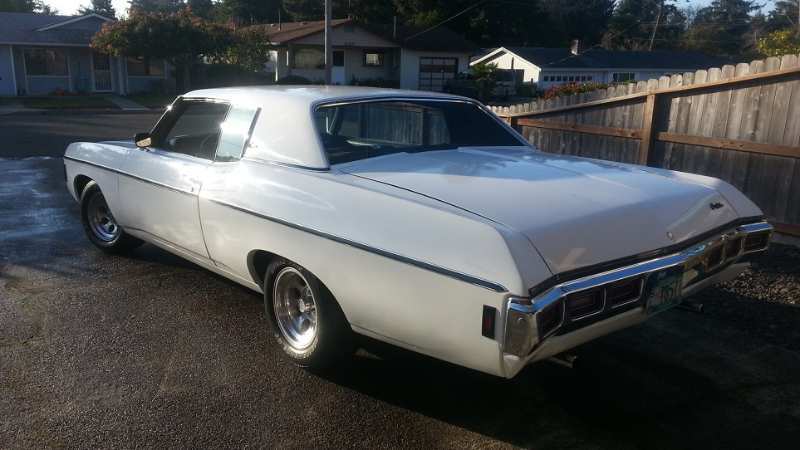
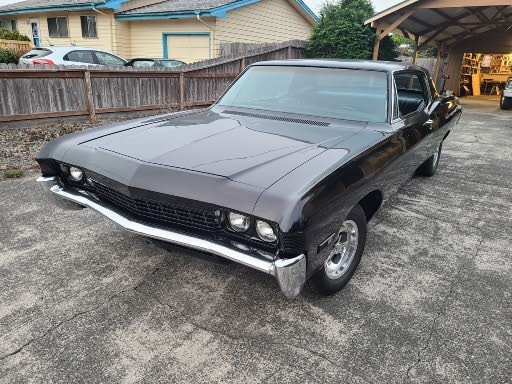
Wanted to add a Before and a couple In progress pics. And a couple cars that I painted in the past. still have the black one I've had it 18 years. Told myself I'd never paint another impala or full size car again Because how big the panels are and how hard it is to get them flat... So of course I went even Bigger and did the dolphin. Luckily next few up are smaller, A 71 El Camino, 73 challenger, and 72 Chevy pickup
-
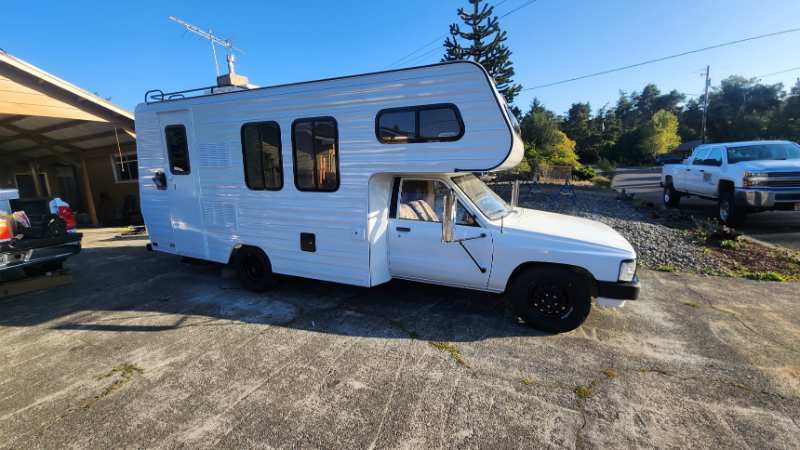
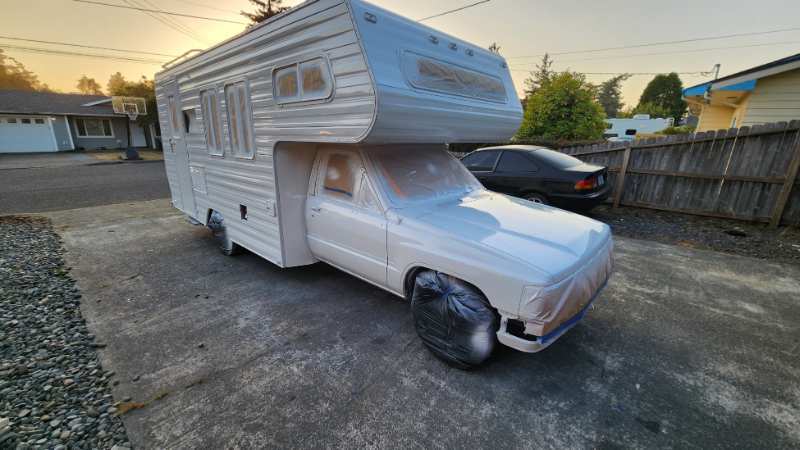
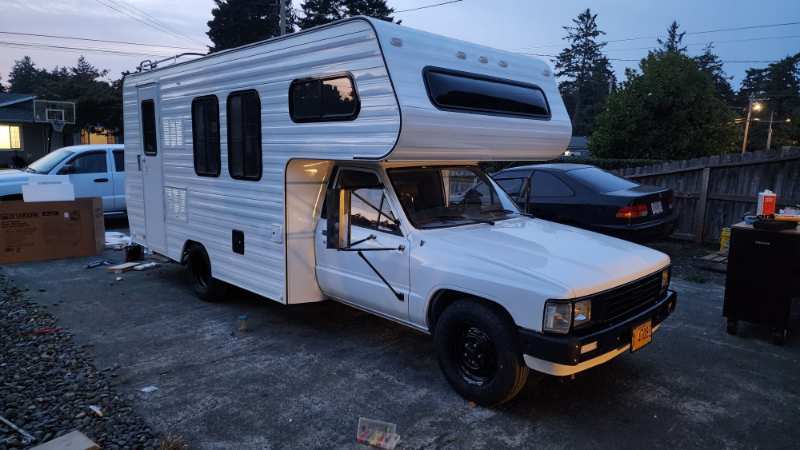
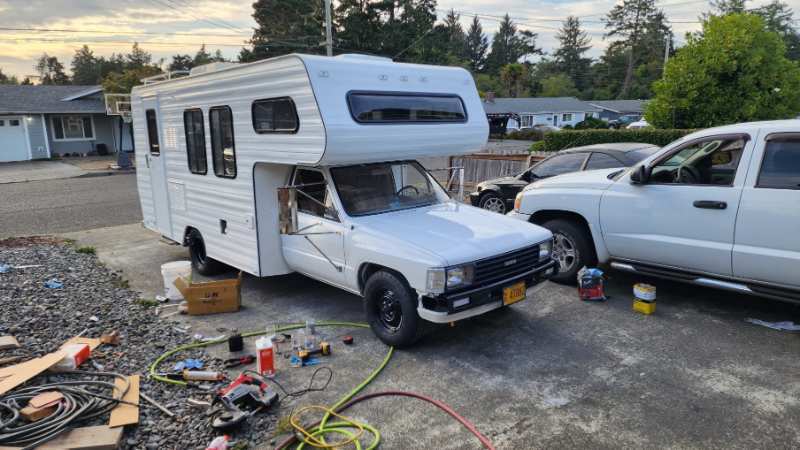
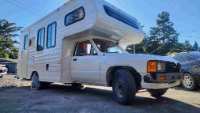
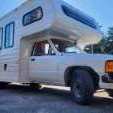
I'm like almost done with my project. White automotive paint, black accents. I put clear corner lenses and smoke clearance lights. New perfect matching Tail lights that already had black frames. Blacked out the Wheels, ladder and rack, grill, and bumpers. Semi truck mirrors with the mounting brackets painted black. (might paint the back of the mirror still) White lens front blinkers with progressive flashers that fill out like the new mustangs. All new roof vents. When I started the project I stripped all the caulking and sealant and prepped for paint then painted and caulked and sealed over so when I refresh my caulking It wont pull the paint off. I used lexcel bright white which matched my paint PERFECTLY. seriously looks like I painted over it. Black insert in the screw trim and black screw trim caps. MRF 195 14 tires. Raptor Bedliner painted step. for the porch light I have a white Liesure LED 8.5x9.5 light that covers the hole for the old lighted pull but I can't bring myself to put it on since I went to black hatches so I ordered the same one in black. I also have a new black freshwater hatch on the way that I expect to have to trim the camper to get to fit. I will also be re painting the hot water hatch black. I'm really stoke with the way it looks rite now. It's been a ton of work but I'm happy with the results and will be stoked to take it out next summer.
-
Maybe just take the dimensions and buy a generic access door that's close? might have to cut a little more out or shim slightly to accommodate. I did a quick amazon search for "RV metal access door" and a few things came up. I had to put 1/2" shims to get the easily available 8x8.5 electric access hatches to fit the holes for the old 9x9 electric and fuel hatches. I actually cut the back off the old fuel door and a notch out of the bottom and riveted it to the new hatch and it looks pretty good in there. Be flexible and think outside the box! Can often save time and money like that, I know I have. I used to try to go all stock on my car restorations and it always took a ton of time and money sourcing parts and eventually found using available aftermarket parts and adapting stuff saved time and money and gives a nice custom touch.
-
New after market Mirrors
psxpak replied to psxpak's topic in Improvement and Do-It-Yourself Projects you have done to Share!
got the frameas painted. didnt do the mirrors still kind of up in the air about it
-
just got LED replacement lights on amazon. black housing to match my rig. installing tomorrow Boy i tell you i am frothing at the mouth to see those and smoked clear lense clearance lights on there. long as you got em out why not throw some sweet LED ones in there
-
it is old lol, but dude, that box he had was pretty sweet. i woulda refteshed that thing. i need somehhing for sure, i just cut my bumper off today and sandblasted, skim coated with filler, primed and painted. extending out for maybe an aluminum box seing as i gotta weld back in the bumper. i took a week vacation since rains voming hete in the PNW, trying to get her wrapped up. although i find with all of the classic cars ive restored you're never TRULY done.
-
The 3.0 has a reputation that's for sure, and its not exactly a good one. the 3.4 is an excellent engine.
-
New after market Mirrors
psxpak replied to psxpak's topic in Improvement and Do-It-Yourself Projects you have done to Share!
Yea and it's all in really good condition. she's only got 45K miles and was 1 owner that was 71 when he bought it. -
I put my mirrors on today. I tried to make a time lapse video but my camera battery died.. Usually I have an external power source attached to it for 8-11 hour days doing concrete work but figured the internal battery could do an hour or 2 but i guess not. The mirrors are just cheap semi truck style universal mirrors from Amazon. I'm gonna take them back off and replace the mirror itself with better quality ones from Napa since they have pretty good ones there but the mounting hardware is all installed and adjusted. I'm also Going to paint the new mirror back and mounting hardware black to match the rest of the RV. I'll probably do it when i pull the rack and paint it and the ladder.