


JR67
-
Posts
25 -
Joined
-
Last visited
Content Type
Events
Profiles
Forums
Gallery
Everything posted by JR67
-
 Just found these outfits since full floating axles are hard to find up north http://www.9inchfloater.com/CompleteRrEnd/CmplteRrEnd_28_31.htm https://www.speedwaymotors.com/shop/axle-assemblies~14-5-469-30580
 -
Haha thanks Linda. I was hoping to find them cheaper on line but you got a point!
-
Hello all, Is there any reason NOT to try and put motorhome Bilsteins on the rear of my 18ft 1980 model? I see that the shocks that I have(Monroe Airmax) have a range of around 21" to 13" and are listed for 1979 to 1983 models, and the Bilsteins are listed for 1985 to 1994 models and have a 22" to 14" range(fully extended to fully compressed). The mounting bushes are 5/8" or around 16mm for all models so the mounting pattern and the one inch longer length at fully compressed state are the only difference. Or am I missing something? I know my 18ft Toy is not as heavy as the longer ones, but I also do not want to buy shocks that are only rated for pickup trucks since the Monroes are heavy duty and don't perform at all. Thoughts?
-
Check out Doomsdaydiesel. All conversion parts through one guy. http://doomsdaydiesel.net/index.html
-
I would call Westcoast Tire http://www.westcoasttires.com/map/ and maybe there are more addresses in Canada for the Sonny tires that I got there. They don't advertise them but I got them there, maybe they can ship them for a reasonable price?
-
I don't know where in Canada you want the tires but I got Sonny tires mounted at WestCoast Tire near Victoria BC. http://www.westcoasttires.com/ They are 14inch C rated 60psi, it was around 215 CAD for two, Perhaps give them a call and see if they have a Canadian contact number. I read quite a few good reviews about them, including a German guy that(of course in another size) had them on his Sprinter van for 75000 km year round no problems. Good enough for me. After calling every shop in town the only other option was Yokohama at around $495 for two........
-
Anyone Replace Rear Exit Window With Operable Window?
JR67 replied to donttreadonme's topic in General Discussion
I removed my original cracked glass window and replaced it with a piece of plexiglass. I made it removable with a few screws so I can slide surfboards throught the opening. I have driven a few miles without the window like that and it was ok for exhaust fumes, but results might vary.... I will eventually put some hinges on the top once I can decide on what kind of latches to use for the bottom. I have used black foam adhesive strips to seal the window but it is not easy to make the window completely waterproof at the top since rain water tends to follow the top of the window frame and then run inside the window.... So I will have to make a little aluminum strip of maybe 1 or 2" above the full length of the window as an 'awning'. -
Drilling Holes In Sunrader For Roof Rack Project.
JR67 replied to YoungSage's topic in General Discussion
Use Sikaflex sealant, as a marine mechanic, we used it to seal above and under water through-hulls for bilge and cooling water and to seal around bolt holes for outboard motors. Comes in black and white, and in short and long curing time and you can paint over it.. Best stuff on the market. It can be used as adhesive as well. Just stay away from silicone, it will only stick to itself in the long run! -
Ok it's 9pm on Thursday and I just booked; last second planning... We (my daughter and I) will be at site 207 as of Friday eve, hopefully before dark. Jurgen and Annie
-
Are there any particular camp sites that we should aim for at Living Forest?
-
I got these: Sonny SU-810 195R14C 8PR 106/104S D rated 2094lbs single/1984lbs dual @65 PSI for CAN$226 the pair including mounting/balancing/taxes at the local tire guy. The big tire stores could only get the the Yokohama Y370 for more than double that. Worth a try I thought and they are holding up very well so far.
-
Thanks so much guys, it looks like I am set then. Off to the Rockies soon! Cheers, JR
-
Would any of you Toyota guru's help me out with this one: On my 1980 de-smogged Weber carbed 20R I am trying to adjust the ignition timing(with a delay equipped strobe) and have found two conflicting sources of info: LC Engineering: disconnect the vacuum hose (I have only one) and set 5-8 degrees at idle and 34-36 degrees total advance at 2500-3000 rpm. They say their distributors add 5 degrees of vacuum and 18-20 degrees mechanical advance. First: 8 degrees idle plus 18-20 degrees mechanical advance makes 26-28 degrees total so even with adding 5 degrees of vacuum advance how do they come to a total figure of 34-36 total advance, ignoring the fact that at full throttle the vacuum advance shouldn't be in operation due to low intake vacuum??? Let's say we assume the above info is for their performance distributors and we ignore this info: The 'How to keep your Toyota Alive' manual tells me to not disconnect the vacuum hose on a 1980 C&C, so who is right here? I do know from experience that a total advance of 32-34 degrees for a two valve vintage engine is about right, just don't know how the vacuum unit is affecting things. The under hood sticker tells me nothing about disconnecting the vacuum hose to set idle advance(8 degrees), only to disconnect the vacuum hose to adjust fast idle, which I assume has to do with a coolant operated choke, which I don't have anymore. I did read up on this article which seems in depth enough: http://performancecarbscience.com/weber-3236-jeep-conversion/ Thing is that the maximum advance of my distributor when set at 8 degrees at idle is giving me more or less 28 degrees total, definitely not a figure above 30 degrees... So what do I do: disconnect the vacuum hose or not to set idle and forget about total advance? Or connect/disconnect the vacuum and set total advance which in my opinion is the most important number and forget about whatever the idle advance ends up being? I am running out of time to experiment with this, hence my post and hoping for a solution so that I can set the timing and hobble off into the sunset without burning holes in my pistons and not having it set too retarded with high fuel consumption. The good old 'advance until it pings and then back off 2 degrees' is a little too crude to my liking since I don't trust my hearing during possible silent knock operation plus I am going to do the Rockies soon and would like to stay on the safe side regarding combustion temperatures. Anyone? Thanks, in advance JR
-
http://www.ityre.com/en/tyres/catalog/sonny/size/122989/
-
Quick update: I found that my axle was not equipped with a 7.5" diff and 4.10 ratio as the F292 tag made me believe, but with an 8" diff and 4.10 ratio. So now I am running a 4.56 diff from a 1990 V6 4x4 pickup and all is good, I just needed to drill another bolt pattern in the diff's drive shaft flange. Somebody suggested to mate two halves of the new and old u joint with the different bolt patterns but the u joint cups are of a different diameter so that plan didn't work. Drilling was only half an hour work though. I don't see why Toyota would put on a misleading tag, but maybe the cab was originally intended for a half ton truck and ended up on my Cab&Chassis that (depending on what parts suppliers catalog you open) is a 3/4 ton, one ton or heavy duty pickup. It was Canadian build, maybe that explains this, or maybe not?
-
Thanks, I should perhaps pull my diff to see if it is definitely a 7.5" like the vehicle tag suggests(F292) and not an 8". Worst case scenario I can swap the complete rear axle. Decisions decisions.....
-
Hi everybody, Thanks for all the replies. Linda; yes plenty not-so-good roads here but I used to do logging roads in a Toyota Matrix so I might be ok with clearance:) I was hoping to keep my 15" wheels and LT tires, but can not find a 7.5" diff with proper gearing. Turtle: the diff's that you mention are from later Toyo's, that are 8" and unfortunately seem to have a different spline count than the 7.5" that I have, so the word is that they are not interchangeable..... If you can prove them wrong I would love to hear your input. Had I known last year that there was a guy in town that specializes in Toyota trucks then I would have replaced the complete rear axle with a later 8" one that have all the gearing options available. Instead I replaced the bearings, brakes and magnafluxed the drive shafts of my original 7.5" axle..... So I guess by now the smaller tires are the best/quickest solution. Last summer I towed my rigid bottom Zodiac with 55hp outboard over 18% steep hills... The only reason I made it up there was that I reached the top before the revs in 1st gear dropped to zero, and the only reason I made it down was the fact that some helpful guys with a truck that actually had working brakes (as opposed to my brakes that I completely smoked) took my boat trailer down the mountain for me. So much for route planners that don't tell you that you are about to take the steepest road in the province..... This year I'll leave the boat trailer home and will start with new front calipers, rotors and pads:) Anyway, we were talking about gear ratios and tires sizes. Since I now plan to go with the original diameter tires, were the stock 18' motor homes geared properly or could they still do with a lower gear ratio?
-
Thanks Linda, I'll look into those gears on Ebay. For now I will start with going back to 14" rims and 3" smaller diameter tires and see what the difference is, I have 15" 235/75 LT tires now that make it hard to get going in first and basically render my 4th gear useless.... Cheers, Jurgen
-
Hello everyone, Who knows what Toyota has a 7.5 inch diff with the 4.56 or 4.88 ratio ? So far I have not been successful in finding this info, perhaps there are none with the short ratio, only the longer ones like in the Toyota Corona? I have a 18' Canadian TravLMate with an F292 axle which is the 4.10 ratio. Any info is really appreciated!
-
I used Flex Coat by White Knight from Home Depot. Around $40 a gallon, cheapest that I found. I brushed it on, you can see the brush strokes, but then again who is tall enough to see your roof
-
To answer my own questions; the V6 calipers have the same bolt hole distance but have the pads further inboard by around 1/2", so a deeper dished rotor is needed. If I would discard the rotor shield it looks like there is enough room. What I didn't measure is what diameter rotor would be necessary to make the pads seat fully, I found that discs for a BMW 325I have the same spindle hole but different bolt circle diameter so I would have to drill new holes in between the original ones. If I would do that I suppose I could make pretty much any properly dished rotor with 5 holes and a smaller spindle diameter than 79mm fit on my lathe. All and all too much work for now; I'll start troubleshooting the brake system the way it is, replace what's needed and see what it does.
-
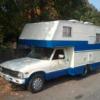
Hello everyone, I have a question about the front brakes of my 1980 motorhome, they need work... I found out it is a 3/4 ton C&C model(Canada) with the K-type calipers and vented discs. This is the caliper I have: http://www.cardone.com/Products/Product-Detail?productId=19-1387, I hope that the mounting holes of the bracket are similar to later, more powerful calipers. And this is the type rotor: http://www.autozone.com/autozone/parts/Duralast-Brake-Rotor-Front/1980-Toyota-Pickup-2WD/_/N-imb3hZ8knrq?itemIdentifier=42721_172993_2708_5171 I see that various manufacturers call it a 1 ton and others still call it 1/2 ton, confusing. Now my question: is there a bolt-on caliper that is an upgrade over the existing one(I see people mentioning a V6 caliper but only with swapping to 6 lug hubs, no mention of anybody keeping the 5 lug) or should I just go for the same caliper with maybe Hawk or ceramic pads, turned/new rotors and be done? I just measured the caliper mount and the bolt hole spacing is 89mm. And the spacing from caliper bracket to rotor is 36mm. Just in case somebody has a better caliper laying around that can me measured.... Can anybody tell me if the one ton brakes I seem to have, once in good shape, will work adequately or is this the perfect time to upgrade. I want to keep the 5 lug fronts since I am running the 5 lug rear. Don't feel like upgrading the rear axle, it is only a 16 foot rig, I pulled the rear axles, magnafluxed them, installed new quality bearings and replaced the shoes, removed the furnace, fridge and water tank so the whole rig is within maximum manufacturers weight limits. So about the front brakes, anyone? Thanks, JR
-
The Makita's have an LED in it
-
Just want to add: you wouldn't be happy with Milwaukee if you had one like mine: batteries die very quickly when not in constant use, trigger failed @ $56 before tax and it took 3 weeks to appear, so I ended up buying another drill to cover that period of time. Also the brushes wear out quickly and are not in stock, plus the chuck is on it's way out(the price of a new drill)...... So it's going straight in the scrap bin when my last battery fails or when the chuck goes. Mind you this is in Canada, the parts supply in the US and prices might be different. I would go with either high end Makita's like all carpenters have that I know or with any brand that is cheaper but has parts immediately available. Cheers!
-
Interested, depending on what weekend