Skydancer2992
-
Posts
380 -
Joined
-
Last visited
Content Type
Events
Profiles
Forums
Gallery
Everything posted by Skydancer2992
-
Tap the starter with a tire tool or hammer. Seems to reset the solenoid. Has helped with several of my starters as they started to go bad.
-
Jumper out your mass air flow sensor and see if the problem goes away. The MAF normally must detect air flow to allow the fuel pump relay to supply power to the fuel pump. The factory service manual will show how to jumper out. Or you can clean the MAF (near your air filter). I use carb cleaner although there are also special MAF cleaners at your preferred parts store.
-
#UHR23396094 CALIPER ASSY RH 1989-90 TOYOTA 1 TON W/O BRACKET Uhaul http://www.ebay.com/itm/UHR23396094-CALIPER-ASSY-RH-1989-90-TOYOTA-1-TON-W-O-BRACKET-/161305141355?hash=item258e89206b
-

-

-

-
 LaDonna Lake RV Park, Oregon, IL
 -
My Warrior needed one at 220K miles. However, it was over 230K miles before I traced the occasional "thunk" sound to the U-joint pivoting 20 degrees in the direction of rotation. The round cavity on one side had become a slot. While checking my fuel filter, I happened to reach over and shook the drive shaft. To my amazement, it had plenty of play when it should feel solid. Autozone had the U-joints for about $10 each. The Toyota ones were $40. My Toyota 4Runner has over 375K miles and it is still on the original U-joints.
-
Most plastics break down under UV light. Vinyl being an exception. Polystyrene is often colored black to protect the inner layers. Perhaps you can coat yours with paint, bondo or bedliner. My Harbor Freight amber LED lights turned to dust in four years. I installed U-haul surplus metal running lights with the dual halogen bulbs. May try a different LED in a few years.
-
Walmart will usually mount them for free but can't balance them due to a special adapter for the balancer.
-
The Uhaul site on Ebay usually has the air filters for about $7.
-
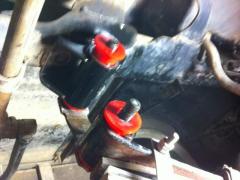
The Prothane kit for Toyota came with two large bushings and four small ones. My springs were all small ones. I replaced one side. Called Prothane and they sent me the two small ones needed to complete the other side. No charge. Great company.
-
Announcing The Fall Mid-West Rally In Illinois, October 2-4
Skydancer2992 replied to Tika's topic in Rallies & Toy Ins
Made my reservation with the RV park. -
Mine did not come with a center section cushion, just a couple of old cushions and a piece of wood. I put in a futon mattress, which I can fold over and slide the 20" plywood piece forward. Really haven't needed to do that. The bunk is just too handy as temporary storage. The camper was also missing part of the front driver corner of the loft, which had been covered with metal tape. I had to pull off the aluminum gunnel, beat it into shape before placing back. Made L shaped fiberglass repairs to the outside corner. Filled inside corner with great stuff. Added Bondo filler to even out the fiberglass.
-
My 91 Warrior looked a lot like yours. I vacuumed out all the peeling wood. Used Great Stuff foam to seal holes to the outside. Laid fiberglass cloth across the area, overlapping the remaining good wood by at least three inches. U-shaped around the cab opening. Poured cups of resin over the entire area. The resin sealed up all the remaining wood and fiberglass into a solid composite. Added a layer of plywood over the entire area to distribute the load. The plywood goes from the metal angles on each side. Two pieces so that the cab area is covered but I can move one over the other to open up below - a feature that I almost never use.
-
Help! Driving Across The Country. Need Advice!
Skydancer2992 replied to candace's topic in Electrical
As a temporary measure: Driving with a full tank will help with vapor lock by providing more head pressure at the inlet of the pump. If you are not going too fast, you can drive with the hood cracked open at the safety catch. I did the above steps in college when I owned an old 1976 AUdi Fox. -
On my 91 Winnie there is a valve on the discharge hose of the freshwater pump. When open, the pump will drain the tank, discharging out the bottom of the motorhome floor.
-
Sagging Roof On 1991 Winnebago
Skydancer2992 replied to guitarlover519's topic in General Discussion
When my AC bites the dust, I will reinforce the top side with a 2' X 4' piece of honeycomb aluminum. The duct hole will be cut approximately center. Gaskets above the old aluminum ceiling and between the AC and honeycomb. This material is used for aircraft flooring and is available on Ebay for about $50. -
"20R: 2189cc (88.5mm X 89mm),1975-’80, used in pick-ups, Celicas and Coronas. 21R: 1972cc (84mm X 89mm), used in overseas markets and not available in the U.S. 22R, 22RE, 22REC, 22RTEC: 2367cc (92mm X 89mm), used in 1981-’94 pick-ups, 4-Runners, Celicas through 1985, and Coronas through 1982." Toyota 22R Series http://www.enginebuildermag.com/1998/11/just-imports-toyota-r-series/
-
The last time I changed coolant, I had a hard time getting all the air out of the system. The needle kept going really high up after a mile. Finally, I removed the top hose from the radiator and poured fluid directly into the open end of the hose. Cool after that.
-
Just Imports: Toyota R-Series By Dan Minick Toyota has built numerous four cylinder engine families over the years, but one that has been in use for quite a long time is the R- series. The R-series has been the main motor used in almost all Toyota pick-up trucks, as well as the rear-wheel-drive (RWD) Celica and Coronas. The 20R was introduced in 1975 and used up until 1980. In 1981 the larger bore 22R was released. The R-series has a cast iron block, aluminum head, and is an overhead camshaft (OHC) design with the cam being driven by a timing chain. The oil pump is mounted on the front timing cover and slips over the end of the crankshaft where it is driven by a splined gear at the end of the crank. The 20/22Rs were used in only RWD applications, never in a front-wheel-drive (FWD) vehicle. So when the RWD Corona was replaced in the U.S. by the FWD Camry in 1983, and the Celica went to front wheel drive in 1986, the only vehicles that continued to use the 22R were the pick-ups and the 4-Runner sport utility vehicles. However, there are quite a few older Toyota pick-ups still being used today and they seem to hold resale value fairly well, which should provide some demand for rebuilding the 22R engines. One common mistake many people make when rebuilding this engine is to assume that 20R means 2.0L and 22R means 2.2L. Remember that in Toyota's numbering system the first number is the revision of that particular engine family, which does not pertain to displacement. The 20R is a 2.2L (2189cc), while the 22R is a 2.4L (2367cc) engine. There also is a 21R that was used in Japan and Europe with a displacement of 2.0L, but for our purposes we don't need to discuss it. 20R, 21R and 22R engine specs 20R: 2189cc (88.5mm X 89mm),1975-'80, used in pick-ups, Celicas and Coronas. 21R: 1972cc (84mm X 89mm), used in overseas markets and not available in the U.S. 22R, 22RE, 22REC, 22RTEC: 2367cc (92mm X 89mm), used in 1981-'94 pick- ups, 4-Runners, Celicas through 1985, and Coronas through 1982. 1981-'82 The 22R was introduced in 1981 on the Corona, Celica and pick-ups replacing the smaller bore 20R. The crankshaft and connecting rods were carry-over parts from the 20R. The cylinder head was a hemispherical chamber with canted valves. The rocker arm assembly was held on by the head bolts (see Photo 1). The overhead camshaft was driven by a double roller chain. For 1982 the motor stayed the same, with no changes. 1983-'84 In 1983 several changes were made. Main bearing alignment tangs were changed, requiring the use of different main bearings (see Photo 2). Timing components were changed from the double roller to a single roller chain and sprockets, different guides, tensioner, and a splined drive for the oil pump (see Photo 3). Some models had fuel injection, but the only difference was the addition of some extra bolt holes to the intake manifold side for the EFI intake. This head will retro-fit back to the 1981-'82 head, but you can't use the earlier head on an EFI '83-'84 model. 1985-'94 The 1985 model year was one of numerous changes for the 22R. Carbureted and EFI models both were continued, and all the changes made apply to both fueled versions. The block deck height was lowered from 11.312" (287mm) in the earlier blocks, i.e., 1981-'84, to 11.062" (281mm) on the 1985-'94 blocks. This is only ¼", and can be very difficult to tell even when the earlier and later model blocks are placed side-by-side. The best way to tell them apart is to physically measure the height (see Photo 4). Front cover depth was decreased while the oil pump thickness was increased. The front crank seal position is the same distance from the front of the block (3.00"). Formerly (1981-'84), the cover was 1.715" from the front of the block to the oil pump mounting surface, while the oil pump was 1.290" deep. In 1985 the cover was 1.435" from the front of the block to the oil pump mounting surface, and the oil pump was 1.570" deep (see Photo 5 and Photo 6). Timing remained as the single roller that was introduced in 1983, however, due to the shorter block, the timing chain and guides were shortened. The chain was shortened from 98 links to 96 links. The curved guide was changed slightly in its curvature, and the mounting bolts used now featured a longer shank bolt. The straight guide was shortened slightly and the bolt holes were moved closer together, i.e., inside-to-inside 3.020" vs. 3.225" for the '83-'84 guide. This guide looks practically identical to the earlier one, and even several parts suppliers have had trouble getting it right. The top hole is elongated and, consequently, many people think that makes it universal for both applications. However, they won't align with the bolt holes on the block (see Photo 7). The cylinder head had numerous changes to it for 1985. The combustion chamber was made smaller and was now kidney shaped. The exhaust ports were also changed from round to pear shaped (see Photo 8). Thrust washers were made thicker, and the third (center) main was narrowed by the same amount (see Photo 2). The crankshaft remained the same. All of the changes made in 1985 continued through the end of the 22R in 1994. 1985-'88 turbo motor In 1985 during the height of the turbocharged engine's popularity, Toyota introduced a turbo version of the 22R in its pick-ups and 4- Runners (22RTEC). The differences included a unique cylinder head with a combustion chamber larger than the kidney shaped chamber introduced in 1985, but smaller than the old 1981-'84 head (see Photo 9). There are only five different variations in long blocks. If timing isn't furnished, and one isn't concerned about the bearing difference being correct, the first two applications can be combined if carbureted. The turbo motor isn't that common, however. If one is needed, the head can be nearly impossible to find. The new pear shaped exhaust ports were used. The block was the new low deck block with an oil drain back hole and oil pressure feed on the left hand side for the turbocharger. The normally aspirated blocks have a casting for the drain back and can be drilled and bolt holes tapped if necessary. All other changes that were made in 1985 also apply to the turbo motor. The 1985-'94 non-turbo engine should be the most popular application for several years to come. It covers almost a full 10 years, something almost unheard of even for domestic applications.
-
Vacuum the enclosure around the fan and give it a little oil on the shaft. To get access, remove the brown front panel. I found a huge dust bunny in mine.
-
The sway bar has four bushings. My 91 Warrior has front and rear sway bars. The Prothane kit came with bushings for one sway bar. My sway bar bushings did not look bad after 200K miles. They just don't bear much weight compared to the springs.
-

-