powdrhound
-
Posts
120 -
Joined
-
Last visited
Content Type
Events
Profiles
Forums
Gallery
Everything posted by powdrhound
-
 My 1986 Toyota Repair Manual has a nice section on the "Rear Axle Shaft And Axle Hub (Double Tire)". [if I can get my scanner working, I will add it to the Manuals section.] It also does not specify any Rear Bearing schedule. On the other hand, the diagram definitely show an inboard Oil Seal. That would separate the bearings from any differential fluid. The re-assembly section also has good bearing repacking instructions. Since you have to pull the rear hub to service the rear brake shoes , the hub/bearing assembly will be sitting on the floor in front of you. This is the obvious time to repack the bearings and replace the inner oil seal and the axle paper gasket So, the service interval for the rear bearings will be whenever the rear brake shoes are replaced/serviced. Now to find those inspection plugs... John
 -
I still love the ice and snow traction I get with my Nokians.
-
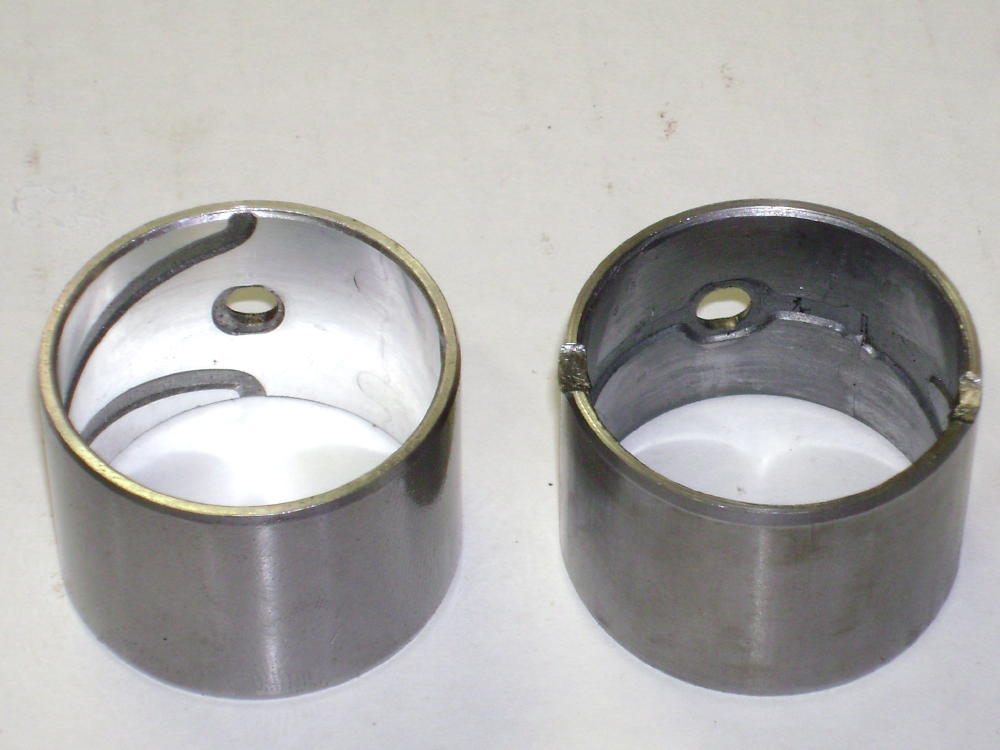
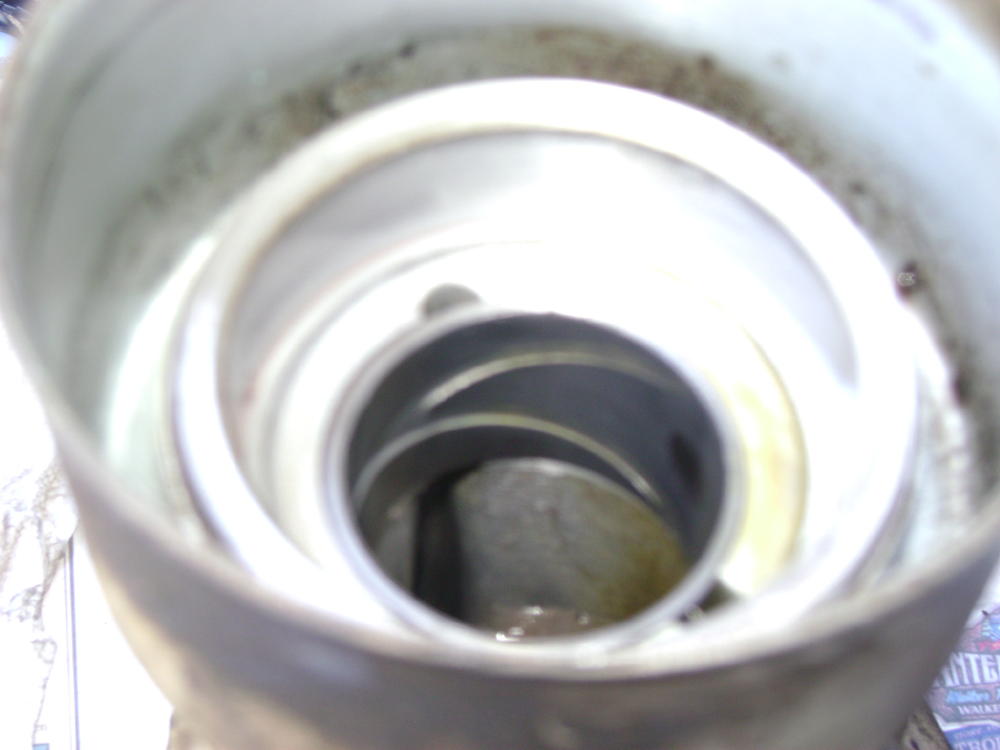
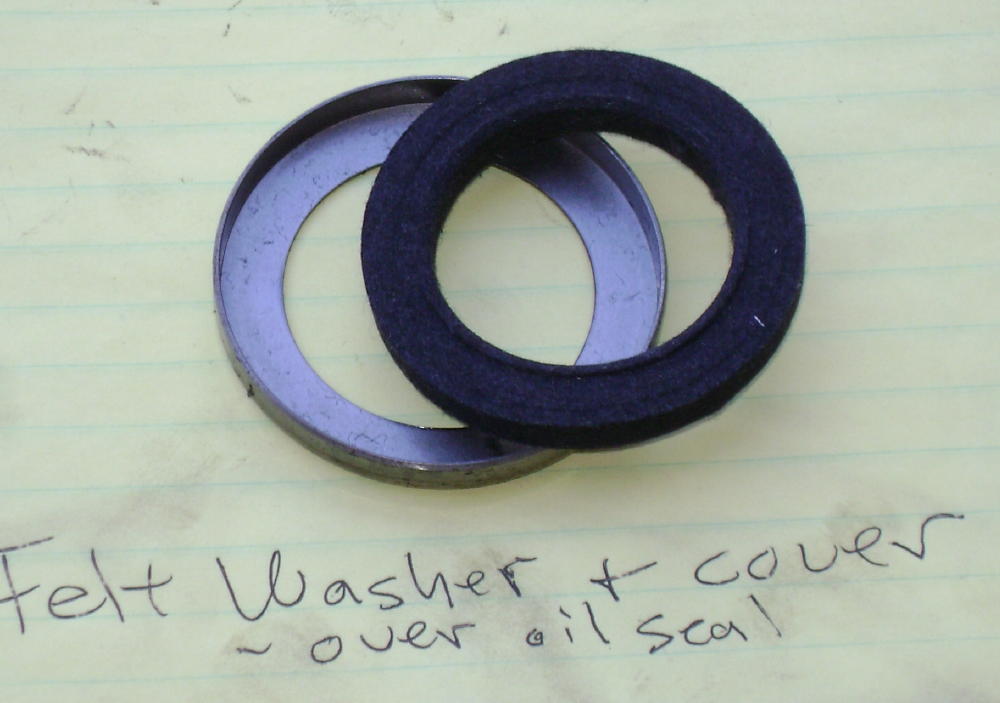
Simple, of course, turns out to be relative. The bushing actually rides on the outside of the U-Joint Hub's shaft. I was expecting something on the output shaft itself. Shaft measures 38.00 mm. Old bushing measures 38.30 mm. New bushing, before installation shrinkage, measures 38.15 mm. Alas, I do not have proper tool to reach down to measure the bushing once it was installed. Teardown: 1. Drain tranny oil. 2. Drop drive shaft. 3. Speedo housing bolt. Pull speedo gear, wrap in baggie. 4. Support tranny. (Getting the tranny jack last year has paid off several times now. Many uses.) 5. Remove rear tranny mounting bracket. 8 bolts. 6. 6 bolts on extension housing. 4 long, 2 shorter. 7. Breaking the seal was a bit stressful. Whacking around the output end with a soft hammer did the trick. 8. Pull out the oil tube and rubber bushing. The tube holder ring is staked in, so scrape off enough of one attachment to be able to wiggle it out. 9. Outside of the oil seal is a thin metal cap/disk covering a fiberous washer. It will come out with the oil seal. 10. Drive out the oil seal/washer/cover with a long (aluminum) drift. 11. A hacksaw blade would probably work for getting the bushing out. I used a punch and hammer, back and forth down the oil grooves. (Many small hits are better than fewer big hits.) 12. Clean, clean, cleaner. Re-assembly: WARNING: Toyota changed the design of the replacement bushing (also now $46.33). Before, the oil groove was bi-directional. Now it goes one way. Probably the other way. Got rushed, and did not think it through enough until later... This all may have been practice... OK, looking at the timing marks, BTDC is to the Left of the TDC mark, so looking aft, the driveshaft is going Clockwise. So looking at the front end of the extension housing, I need the oil groove going Clockwise, oil hole at the top and the groove going down the Drivers side. Counterclockwise looking from the back end, groove going to the Left... Yep, I have it backward. Maybe. So: 1. Set the extension housing in front of you. Line up the oil hole in the bushing with the appropriate top oil slot. Have the oil groove in the bushing going down Counterclockwise as you are looking at it. 2. Drive/Press the bushing into the housing. (Very Carefully. Do Not Ding Up the Bushing. Another good use for the hydraulic press. So glad I got that a couple years ago.) Re-check your oil hole alignment as soon as you get it started. You will Not be able to adjust it's position. Press it flush. 3. Drive/Press the Oil Seal into the housing. (This you can tap in with an punch and hammer if you are careful. 4. Install the fiberous washer and it's cover. 5. Re-stake the oil tube holder with a dull chisel. Just enough that it will not fall out. 6. Insert the oil tube and rubber bushing. Re-Installation: 0. Test fit the new bushing/housing on the Drive Shaft BEFORE you re-install the housing. (That may have helped me later.) 1. Permatex #2 for re-sealing the gasket. (gas/oil resistant, unlike RTV) Just a thin layer - mine came off pretty cleanly. 2. Tighten the 6 bolts in a crossing pattern. 3. Re-install the mounting bracket. I had to run a tap through one hole that was being stubborn. Pull the jack. 4. Re-install the speedo gear. I was able to undo the speed cable at the weird cruise control fitting, to be able to move the gear so it would mesh. Probably could have turned the output shaft too. Whatever. 5. Lube the splined shaft. Lube the outside sliding surface of the drive shaft with lots of tranny fluid. 6. Slide the drive shaft into the housing. The new bushing will make this a much tighter fit. Here is where your bushing installation skills will be graded. Any ding or mushroomed edge will make this major. See step 0. 7. Finish drive shaft installation. 8. Add tranny oil to Cold levels. Check after all is warmed up. Startup: Since I am not a machinist and do not have an adjustable hone, I had a tight fit between the drive shaft and the bushing. So, I drove around a bit at Very Slow Speed, to let the bushing get used to the drive shaft gently. Checking the temp's of the housing has shown that so far, I may have not scr.....d this up. The drive shaft no longer has the slop at the front U-joint.
-
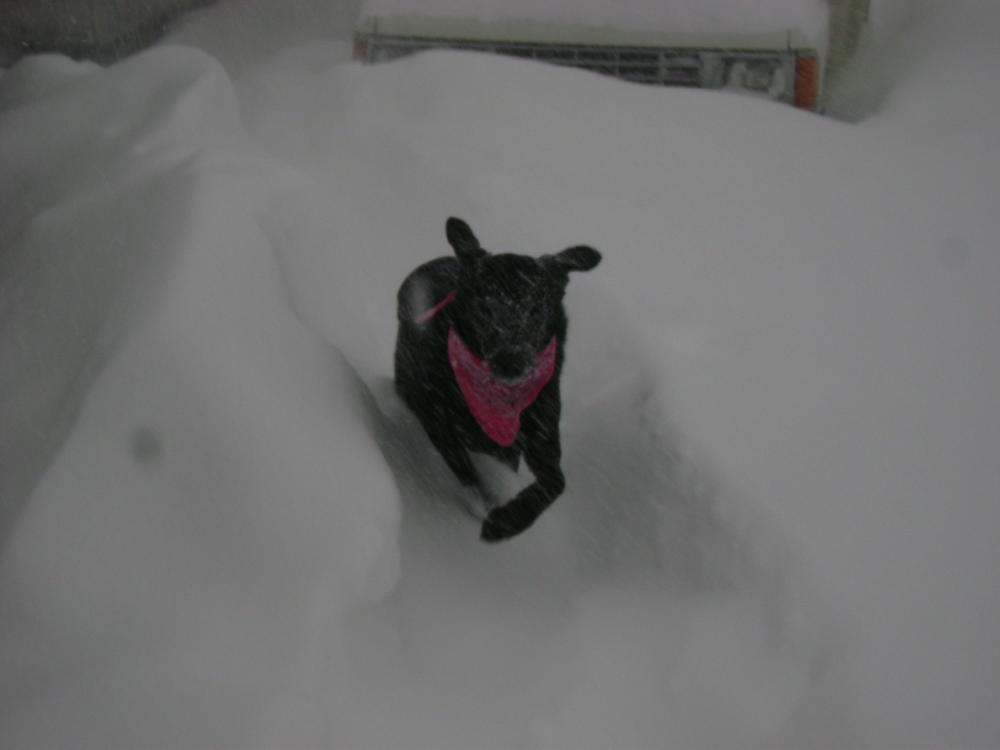
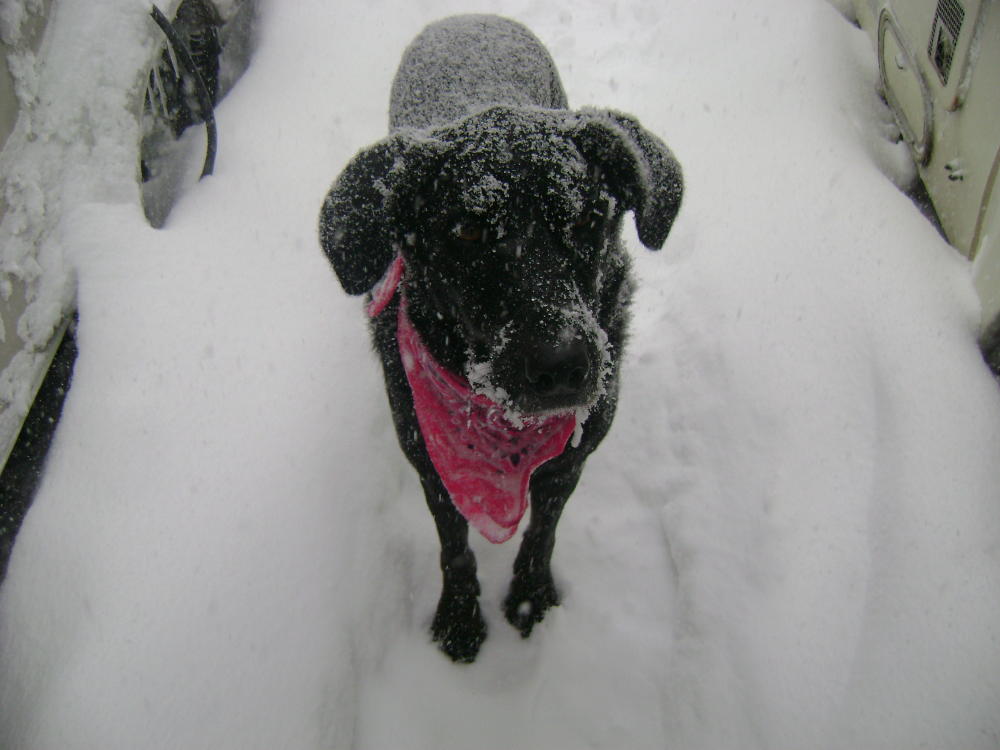
Bella Loves traveling with us. Loves staying in the RV lot, too.

-
will Toyota Odyssey fit in regular parking?
powdrhound replied to cheryle's topic in General Discussion
I often park the runt in regular width parking spaces. We easily fit between the lines. Easier if one side is unoccupied, but not difficult. You have to figure that most cars you are parking next to have Much newer paint jobs, so they will be careful. I have no problem exiting the vehicle through either door. I try to find ones that are double length, and pull forward to the front line. Hangs into the back space, and either no one parks behind, or short cars park there. Most single length spaces are pretty much out, unless there is extra clearance behind you, or like is said above, you can hang the rear end over the curb. I have only taken out a few plants and sprinklers, and havn't yet scraped the black tank (real close, once...). Have someone watching. But the downtown parking lots in San Francisco still charged the RV rate.... John -
The click you are hearing may be the self-resetting circuit breaker fail and reset. After I had replaced the battery isolator, I found that the breaker installed on the fender wall would pop if I had a large load on the alternator (coach battery low on startup, lights on, etc.) Both dash lights would illuminate, and would stay on, even after the breaker had reset and I had full power. Shutting off the engine would reset the lights. If I had low batteries I would have to disconnect the coach battery and/or turn off the lights, until the chassis battery stopped sucking amps. Then, pull over and re-connect the coach battery, so it could charge. My solution was to stop using that breaker. Or actually only using one side, as a terminal block for the two wires. I was not able to come up with a good reason to leave this breaker in the system. My standard alternator is putting out up to 65 amps on the test stand. Having a breaker here, prior to the isolator, limiting the output, makes no sense to me. The original breaker was a 30 amp breaker, and I tried a 50 amp breaker (largest I could find locally) before giving up. Sunrader put a 50 amp breaker prior to the coach battery, but that has not ever popped, to my knowledge. If I am being stupid, electrically, Please Somebody educate me! Thanks. John
-
Bodybagger - you said "The thing I would do before your trip is get under it and yank side to side on the yoke coming out of the transmission and check for a worn extension housing bushing! If it wiggles side to side even a little bit, DO NOT go on your trip until you get the simple fix" Did I find The Simple Fix in the sticky for The A43D Automatic Transmission? Spungo says: "I'd pull that asscone every few years as part of routine maintenance. Drop the driveshaft, pull the speedo, six bolts holds the tail on. The bushing only costs a few bucks, cuts out easily with a hacksaw blade (large oil channels under it make damaging the bore a nonissue), and presses in easily. Make sure you line up the oil hole just right. A shop shouldn't dream of charging more than $100 to do the whole thing, or $20 to press the bushing. If the bushing looks really bad, check the driveshaft and u-joints" I just replaced a bad front u-joint, and I Do have some slop in the output shaft. Obviously needs the bushing. Is this bushing located in the extension housing itself? We are not talking about the oil seal, are we? I have no oil leaking. The diagrams in the Toyota manual do not clearly show any bushings for the extension housing. Just looking for a bit more info before I tear into the housing. It may be obvious when I get there... Thanks. John
-
Huge congratulations to you.
-
Yeah, when shifting into gear/reverse or starting from a stop sign, a clear bell-like clang, followed by a straining, continuing sound like the drive shaft is trying to twist apart. Worse when climbing a hill. U-joints or differential... definitely drive line somewhere. Visual and physical inspection of the u-joints revealed nothing. They were all running cool, I could get NO movement from them by hand, and they all looked fine. The only warm place in the drive line was the differential. Probably >10 degrees of slop there. Depressing. That does not look like a driveway mechanic job. After research here and google, I raised my optimism for a bad u-joint and dove into the shaft. Lo, the front joint was a bit tight. Tearing into it, one of the arms was ~ 1/4 worn away! Sweet. A day of adventure to replace the three joints, but I now feel much better. But, how much slop for the differential before I bite that big one to replace the gears?
-
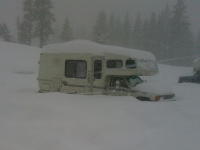
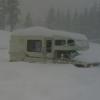
Winter #2 update: I will admit that California ski trips are different that Winter States ski camping. One of the beauties of this sad State is that you can take advantage of some of the very BEST that mother nature can offer, than easily come back home where it is warm and dry... 8,000' to 100' in a couple hours. And a two foot dump will happen regularly. Just last week! 11. Cutting back on air flow under the floor does make a big difference. The best nights are when I get back from Bubb's to find 8" - 10" of snow in the lot (love those blizzards) and you have snow almost up to the floor. A little shovel work to build a berm upwind of the rig also works well. A 1 1/2' berm is higher than the side opening, and will deflect most of the wind. Burying the rig is not required. The plastic panels probably would work, but probably a pain to manage. 12. Since I park in an often muddy dirt lot, try to park next to a good patch of snow/ice or shovel in a bunch of snow. The objective is to have the snow path clean off most of the mud from your boots or the dogs feet before you get to the door. And lots of newspaper. 13. I keep the Outdoor sender for the thermometer next to the water pump. Lets me know if/when I need to worry about the system freezing. Keep that cabinet door open! I may replace the door front with a wire grill. 14. I am not using the catalytic as much as intended. Tough to get enough airflow in the back of my rig to keep the CO alarm from sounding. I added another roof vent in the back, but when you have snow on the roof, it falls inside when you open the vent. Later after it thaws, you have water soaking into the ceiling. Need a vent cover, I guess. 15. The Honda 1000 does not have enough oomph to charge a Real Low battery. The charger is trying to suck more amps from the generator than it likes. It is amazing how much over spec that the generator gives, but it has its limits. So, if it is real low, I start the engine and let it put out it's 35 amps for a while. After a few minutes, I add the generator and kill the engine. 16. I made a connection with the Mountain Utilities boss, and now can get propane at the mountain. It is no longer a limiting factor on the length of the stay. So I stay warm. And I decided that the battery is just another regular expense, so if I kill it quicker than I should, so be it. I stay warm. 17. The mono-bar windshield wipers are way better than any of the blades that use springs. Both brands seem to work well. The wiper arm adapters are the weak point in the system. 18. Binding covers are a REQUIREMENT for carrying the skis on the back. They get filthy. Still think that a ski box on the roof would be a pain to load/unload by myself. 19. I need solar power. 20. Grover Hot Springs State Park makes a wonderful apres ski excursion. And they have showers! The little rig has worked wonderfully again this season. We were there over 40 nights this season. And another storm is forecast for next week! Let is Snow!
-
You have the same problem I had. The original plugs had been whacked off. installdr.com has the wire harness diagrams. pick-n-pull had the two donor plugs. Anything after 1987 that did not have the powered amplifier - a 20 pin plug, if I recall correctly. Take at least 6" of wire when you cut. No store will have the original Toyota plugs and harness wires. And for Greg: I now am soldering instead of crimping. I had a wire pop loose. Very annoying. Still much re-work to complete, now. Dash wires on my '86: 1st plug - 10 pin: A - R + front speaker - light green B - L + front speaker - pink C - +12v Ignition - gray D - +12v Battery - blue w\ yellow stripe E - R - front speaker - blue F - L - front speaker - purple G - ground - white w\ black stripe H - no dash wire - 12v out only for radio, to power antenna I - no dash wire J - illumination power - tap into a green dash lights +12v wire. I used the shift indicator light wire in the column. The 2nd 4 pin plug is rear speaker wiring. Use the diagram.
-
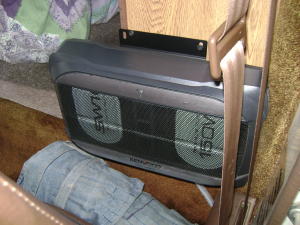
My original intent was for under the seat, but it was too thick. It may fit other seat options, but not under mine. Besides, that is where the snow shovel goes. It sounds great, has an adjustable crossover and volume control, and is self powered. Tap into the front speaker wires, a fat 12v source, a dedicated ground and switched power. John Edit: Finally got a couple photos. The blue rolls are my tool boxes.
-
I installed a Kenwood KSC-SW10 subwoofer. Placed it vertical behind the driver seat, on the couch frame. It works Great. Mounted the control box to the side of the radio with some velcro. Next time I have the couch bottom board off, I am planning on reinforcing the section where the subwoofer mounts, probably add another layer of plywood to stiffen it up, decrease some unwanted vibrations. I tried using the switched power feed from the radio, but this was for the antenna motor, so only worked when the Radio was on. Nothing for the CD or Tape. So I finally mounted a lighted switch right above the radio for the subwoofer.
-
My general rule in troubleshooting is to remember what I "fixed" last...
-
That does sounds like a head gasket. The engine may not be seized, but have a cylinder full of water on a compression stroke. It will not move forward. Pull the plugs and see if any have water. If it cranks over and spits out water from one or more, it is probably just a gasket. A compression test would confirm it.
-
Last year I installed a powered roof vent. They are designed for minimum 1 1/2 inch roofs. The Sunrader roof measured 1 1/8 inch. I was never satisfied with the trim flange hanging a half inch below the ceiling. Kept thinking about making some trim pieces to fill the space, not easy with the curved roof. Then this summer I had the realization that I should put a spacer Above the roof, and gain a bit of head clearance to boot. I contacted Shurflo and quite a few RV suppliers. No one knew of a spacer ring. Foam A/C gaskets? Nah. So it was on to finding suitable material to make my own. Wood would be easiest, but would need maintenance. PTFE would be impervious, but a bit pricey. Finally thought of vinyl fencing material. At Lowe's I fould vinyl stair ballisters. 1 1/4 inch square, 33 " long. Moisture sealed exterior, and some sort of a MDF base. A 5 pack for a bit over $3. Perfect. The mitered pieces need to be 17" tip to tip. Flipping the ballister after the first cut gave two pieces per ballister. After cleaning up the vent, I fit the pieces to the vent (love that blue masking tape) and transferred the hole positions, then drilled 3/16" holes. Also took this opportunity to clamp the ceiling back into position where the plywood and foam were sagging away from the fiberglass. Used 10/24 x 2" countersunk bolts thru the ceiling & thru the bottom of the square tube. Drilled 5/8" holes in the top layer so I could reach the lock nuts with the deep socket. A bit of silicone here and there, Voila! a spacer! Reinstalled the vent, using #10 x 2" screws (stainless steel required), silicone in every hole and around each screw head. Sweet. A year of contemplation, a couple days work. Measured from the bottom of the vent handle, I gained nearly an inch and a half of headroom under the fan. I'm so pleased, I had to share.
-
It is amazing how much less I use overdrive since I installed the transmission temp gauge. At freeway speed when I activate the OD I will see the transmission gain at least 30 degrees. Downshift, and I can watch it drop. When I first installed the gauge, my 'normal' driving habits were putting the oil at above 310 degrees (on the freeway with a headwind). Everything I can find says that the trans fluid is damaged above 200 degrees. That is when I replaced the little trans cooler with the largest one I could pack in. That alone dropped the temps 30 degrees under all conditions. I may even re-install the old one for double cooling. At 55 mph in 3rd, I am clocking about 3,000 RPM. Since the power curve drops off dramatically below 2,500 RPM, shifting to OD will drop it ~ 1,000 RPM, well below the power curve. The motor may be turning slower, but it is lugging and my foot is closer to the floor. Even at 65 mph, the motor is purring ~ 3,400. I now use OD only when going downhill with the wind at my back. (Tho I still want to disable the altitude switch.) John ps. The first snow of the season for the Sierra's this weekend. Looked beautiful on the mountain tops. Bring it ON!
-
With my 185R14, I read 55 when the roadside radar tells me 53. For an excellent look at 185R14's see: http://www.ratwell.com/technical/TirePhotos.html
-
I had no problem getting left-hand nuts and studs from Toyota for my 1986. But not chrome.
-
Sean, I made many trips to the snow this last year, and had Super results with Nokian tires. They are rated as a snow/ice tire. Drove them hundreds/thousands of miles on snow and ice covered roads, even to Mount Hood. Yes, they may have a bit more road noise on dry road, but I love the traction. I still drive pretty slow going downhill when it is slick. We have a lot of mass. Better yet to stay a couple more nights until CalTrans has the road cleared! Traction seemed better when I did NOT have the cable chains installed (Pumping up the air bags was required to create enough clearance.) When Required in California (A 4x4 would be nice...), I just drove the inner tire onto a piece of 2x6 and the outer tire was hanging in air. No Sweat installing and tightening the chains. No clearance problems between the tires. Full chain chains my be more of a problem, but I have not used that type for years. Since the M&S tire gets you past the slush usually found at the R1 chain control station, when you finally do have to install them for R2 you are in dryer snow. Always carry gloves, side cutters (should a cable break) and a heavy plastic bag (ground cloth & wet chain storage). Shouldn't take over 5 minutes per tire. Of course you have pre-fitted the chains, so you know exactly which links are correct. Let it Snow!!! John
-
The SkiBumMobile waits for the next ski trip in central California (Turlock). It Really enjoys storm weeks at Kirkwood, and has done several trips to western Washington to see the grandkids. John
-
One of the many nice things about traveling thru Oregon is that they leave the scales ON. Anyone can drive on and read the scale, even each tire if you want. My 21'er, with a GVWR of 5,500 (@ 28 psi) averages 2,000 on the front axle and 4,600 on the duals, in full travel mode. I see NO way to shed 1,100 lbs...I am running 45 psi on the Nokian's and 40 psi on the air bags. It handles well there.
-
My 26 gal tank does NOT use a Toyota fuel pickup/pump. The opening on the top of the tank is ~ 4 1/2" dia, the ones I saw on the Toyotas at Pick-n-pull were all Much smaller, ~ 2 1/2" dia. The name tag is worn enough that I cannot see the manufacturer's name...
-
Greg uploaded a Sunrader brochure that shows one years layout options. (Thank you again.) The SkiBumMobile is a RS model that is nearly identical to the one on the top of page 3! With all of the major heavy components located behind the rear wheels, I am imagining that the models with more centered weight would handle better on the road. But I like having the couch behind the drivers seat instead of a cabinet or the toilet right behind my head, and they would also break up the expansiveness of the interior space. Bella, my dog, would also miss being able to look out the front window as we drive. She loves the couch. > Toyota Motorhome Forums > Gallery > Toyota Motorhomes Files & Manuals > Sunrader Classics Brochure or http://toyotamotorhome.org/forums/uploads/...1_48_201768.pdf