Kimbo
-
Posts
41 -
Joined
-
Last visited
Content Type
Events
Profiles
Forums
Gallery
Everything posted by Kimbo
-
Super Storage Solution
Kimbo replied to Kimbo's topic in Improvement and Do-It-Yourself Projects you have done to Share!
Trailer is for sale. Located in Bend Oregon. PM me if interested. -
Super Storage Solution
Kimbo replied to Kimbo's topic in Improvement and Do-It-Yourself Projects you have done to Share!
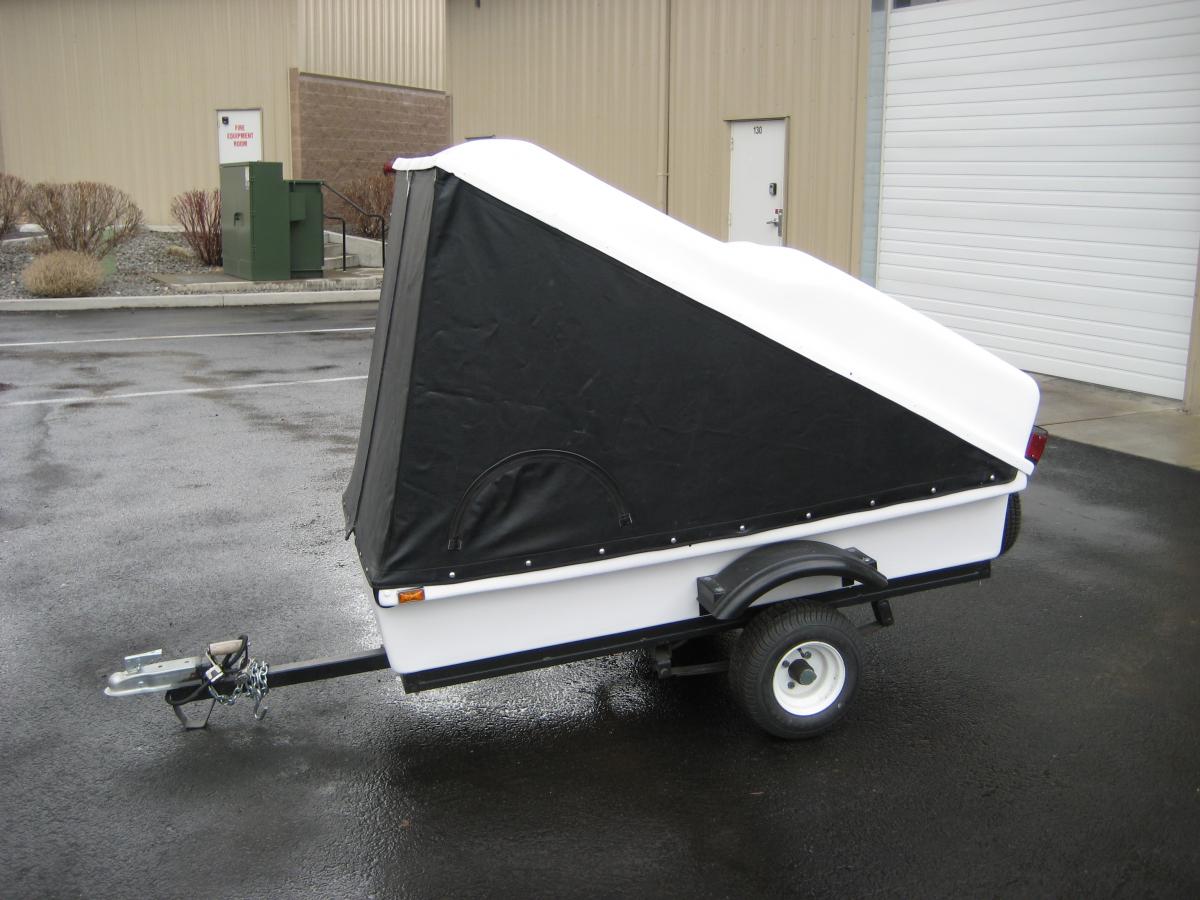
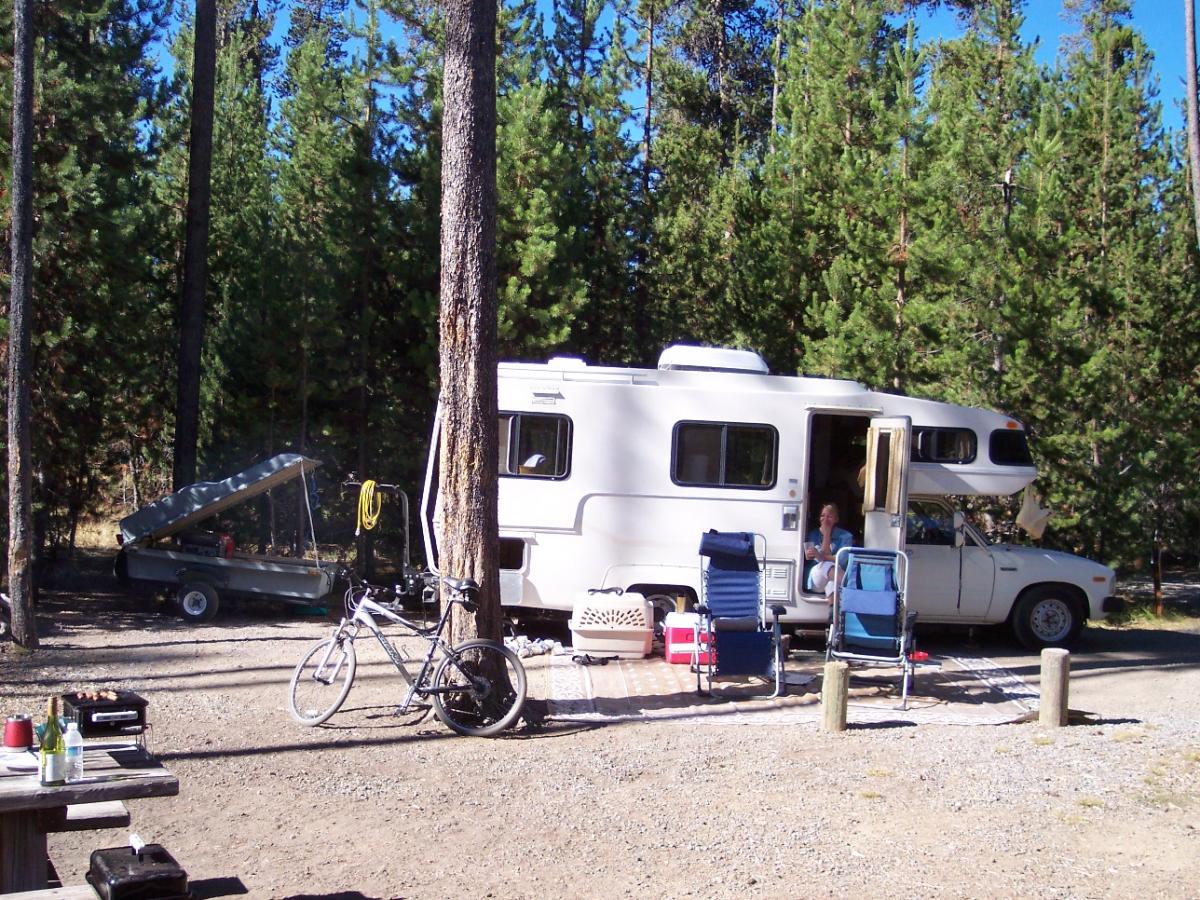
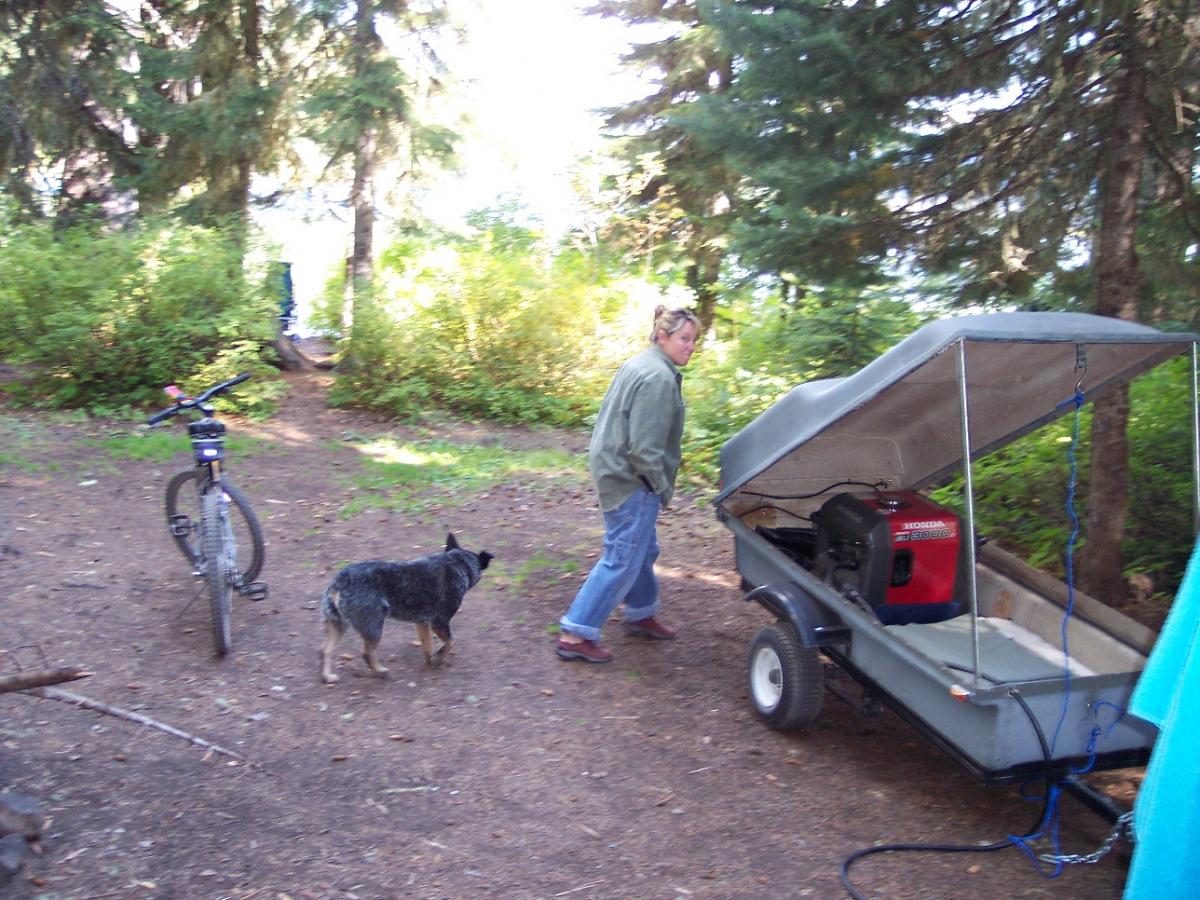
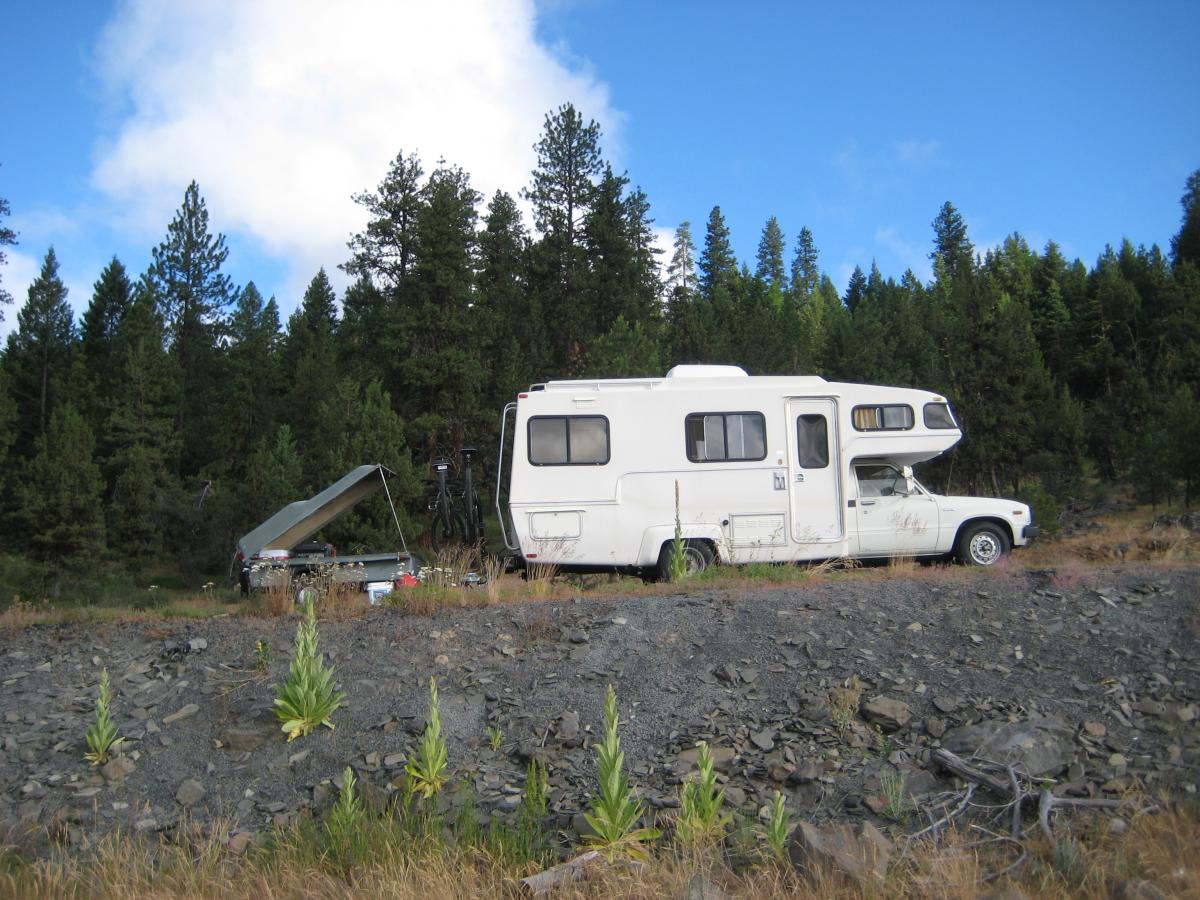
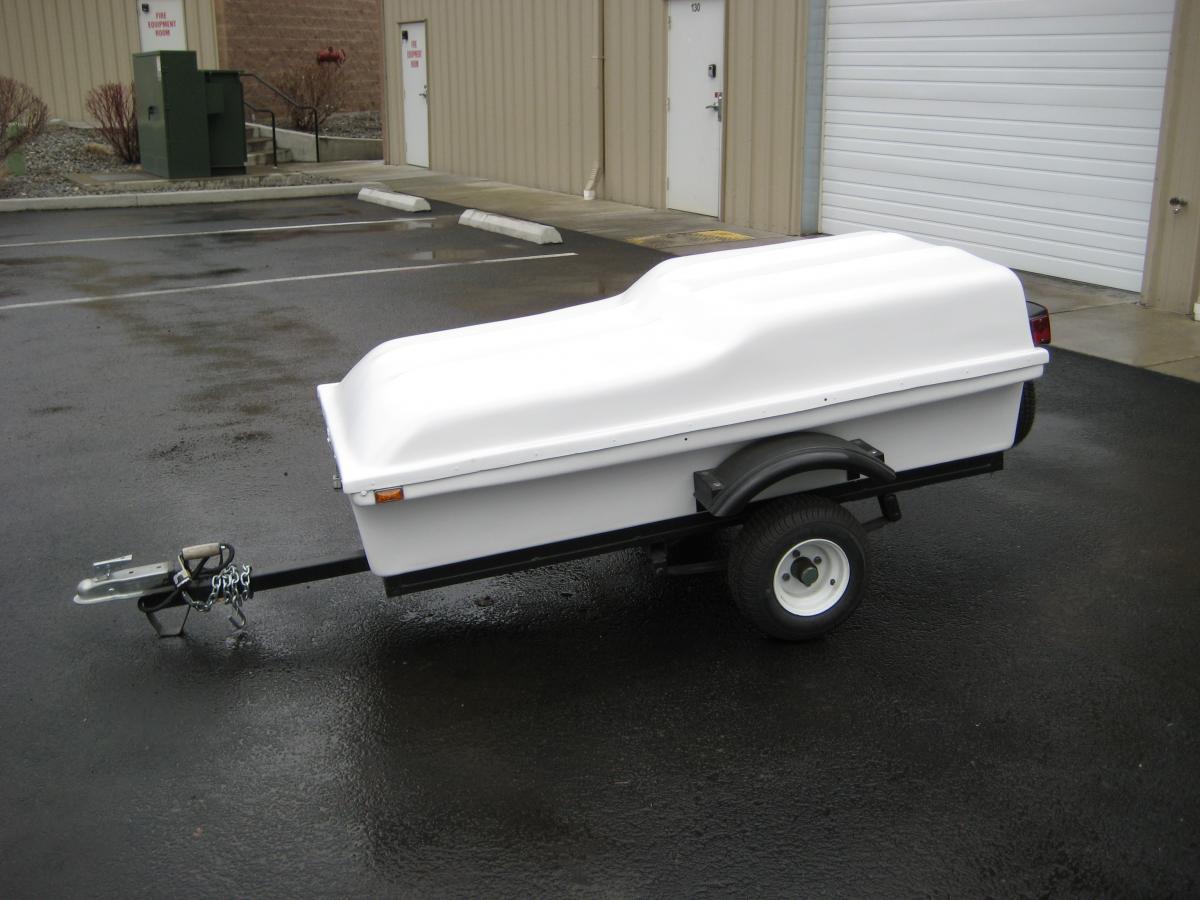
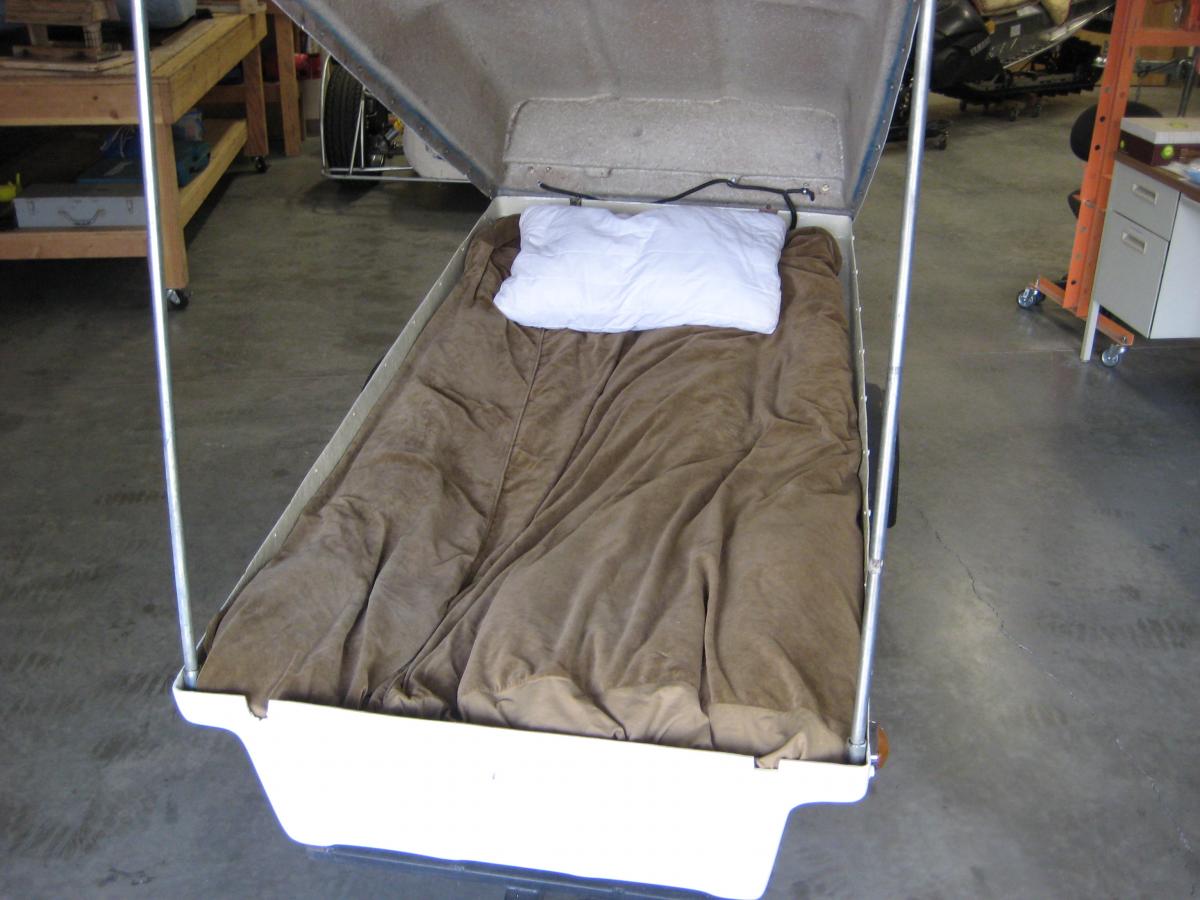
Whenever I got to a camp site I would simply unhook it and roll it back into place. Much easier than trying to back it up. It was originally a motorcycle trailer and still has the snap in material to turn it into a camper. Bolting a box onto the back of a Toyota motorhome is OK for some stuff, but don't put too much weight in them. There is no way a box could ever come close to holding what this trailer can. The Sunrader was great for several years but time to move on. -
Super Storage Solution
Kimbo replied to Kimbo's topic in Improvement and Do-It-Yourself Projects you have done to Share!
I do not know the origins of the trailer. When I acquired it, I stripped it down to the frame, strengthened the frame, widened the axle, and put new rims and rubber on it. Also replaced the fenders etc, etc. We no longer have our Sunrader, so this trailer may be for sale. -
Our 21' Sunrader is great but the problem has always been storage. Where do you put the generator, folding camp table, camp chairs,camp mat, extra water, fuel, firewood ? Struggled with this for several seasons and finally got sick of always loading things into the motorhome itself. I didn't want to build a rear storage box because it would never be large enough for starters, and secondly, the rear chassis is not strong enough to support it. My solution was a fiberglas clam shell motorcycle camp trailer. Tows beautifully, has tons of room, and can also double as an extra sleeping berth if need be. Everything I mentioned fits in there.......even a Honda EU3000i generator. In fact, it stays in there and all I do is disconnect the trailer and roll it 25 feet away from the camper, hook up the cord, and fire it up.

-
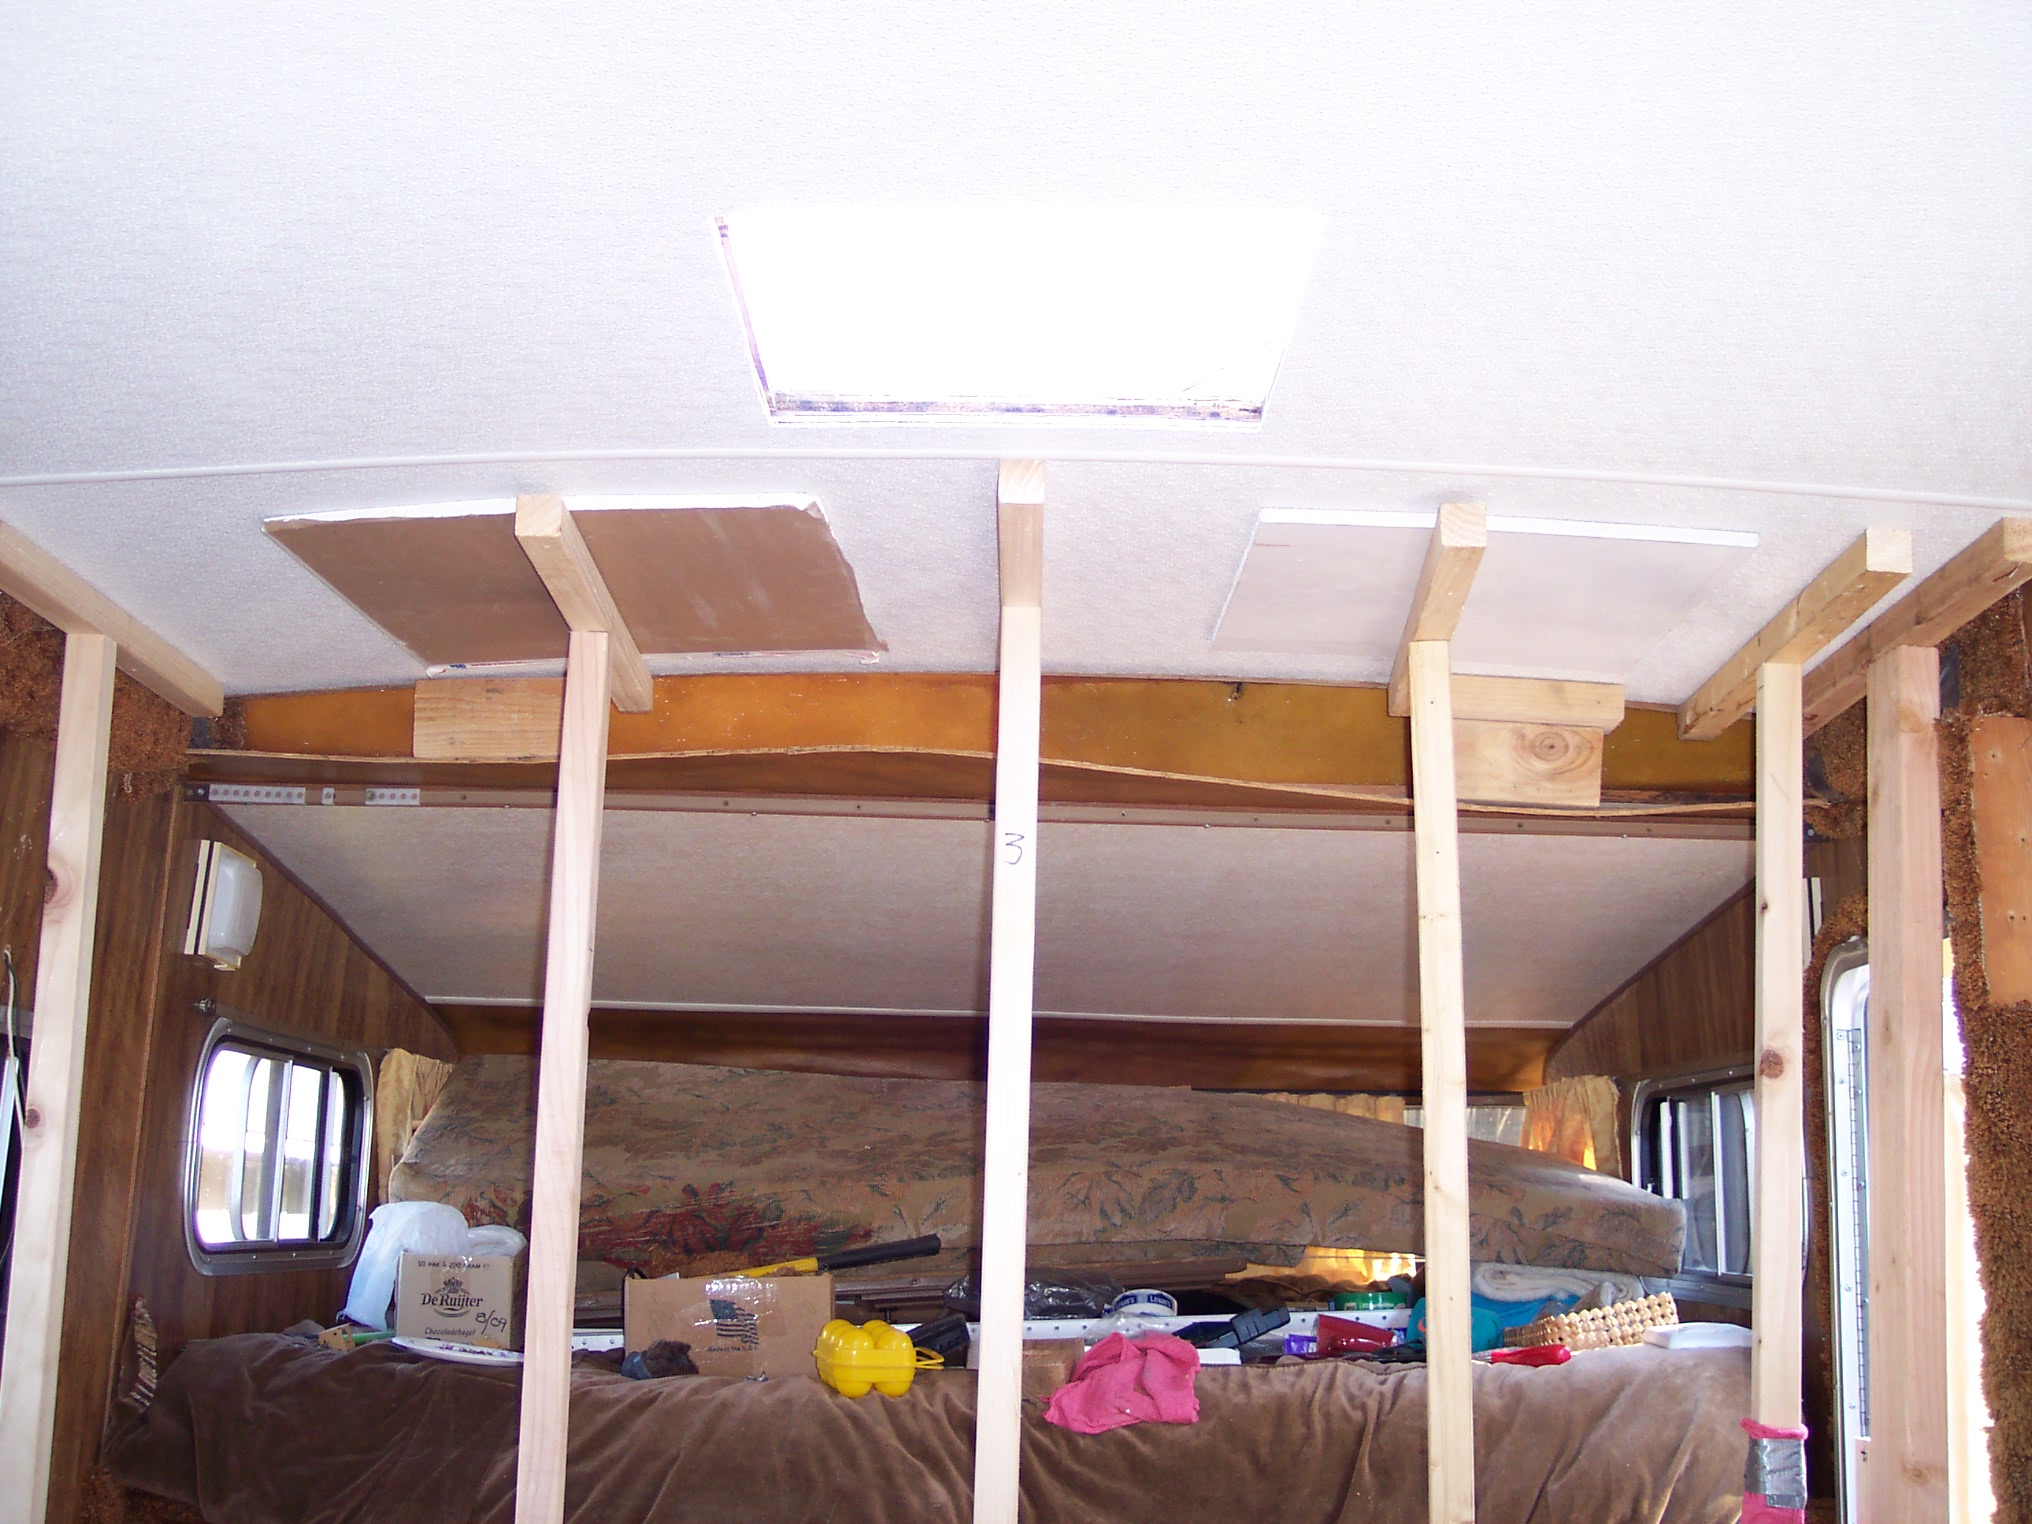
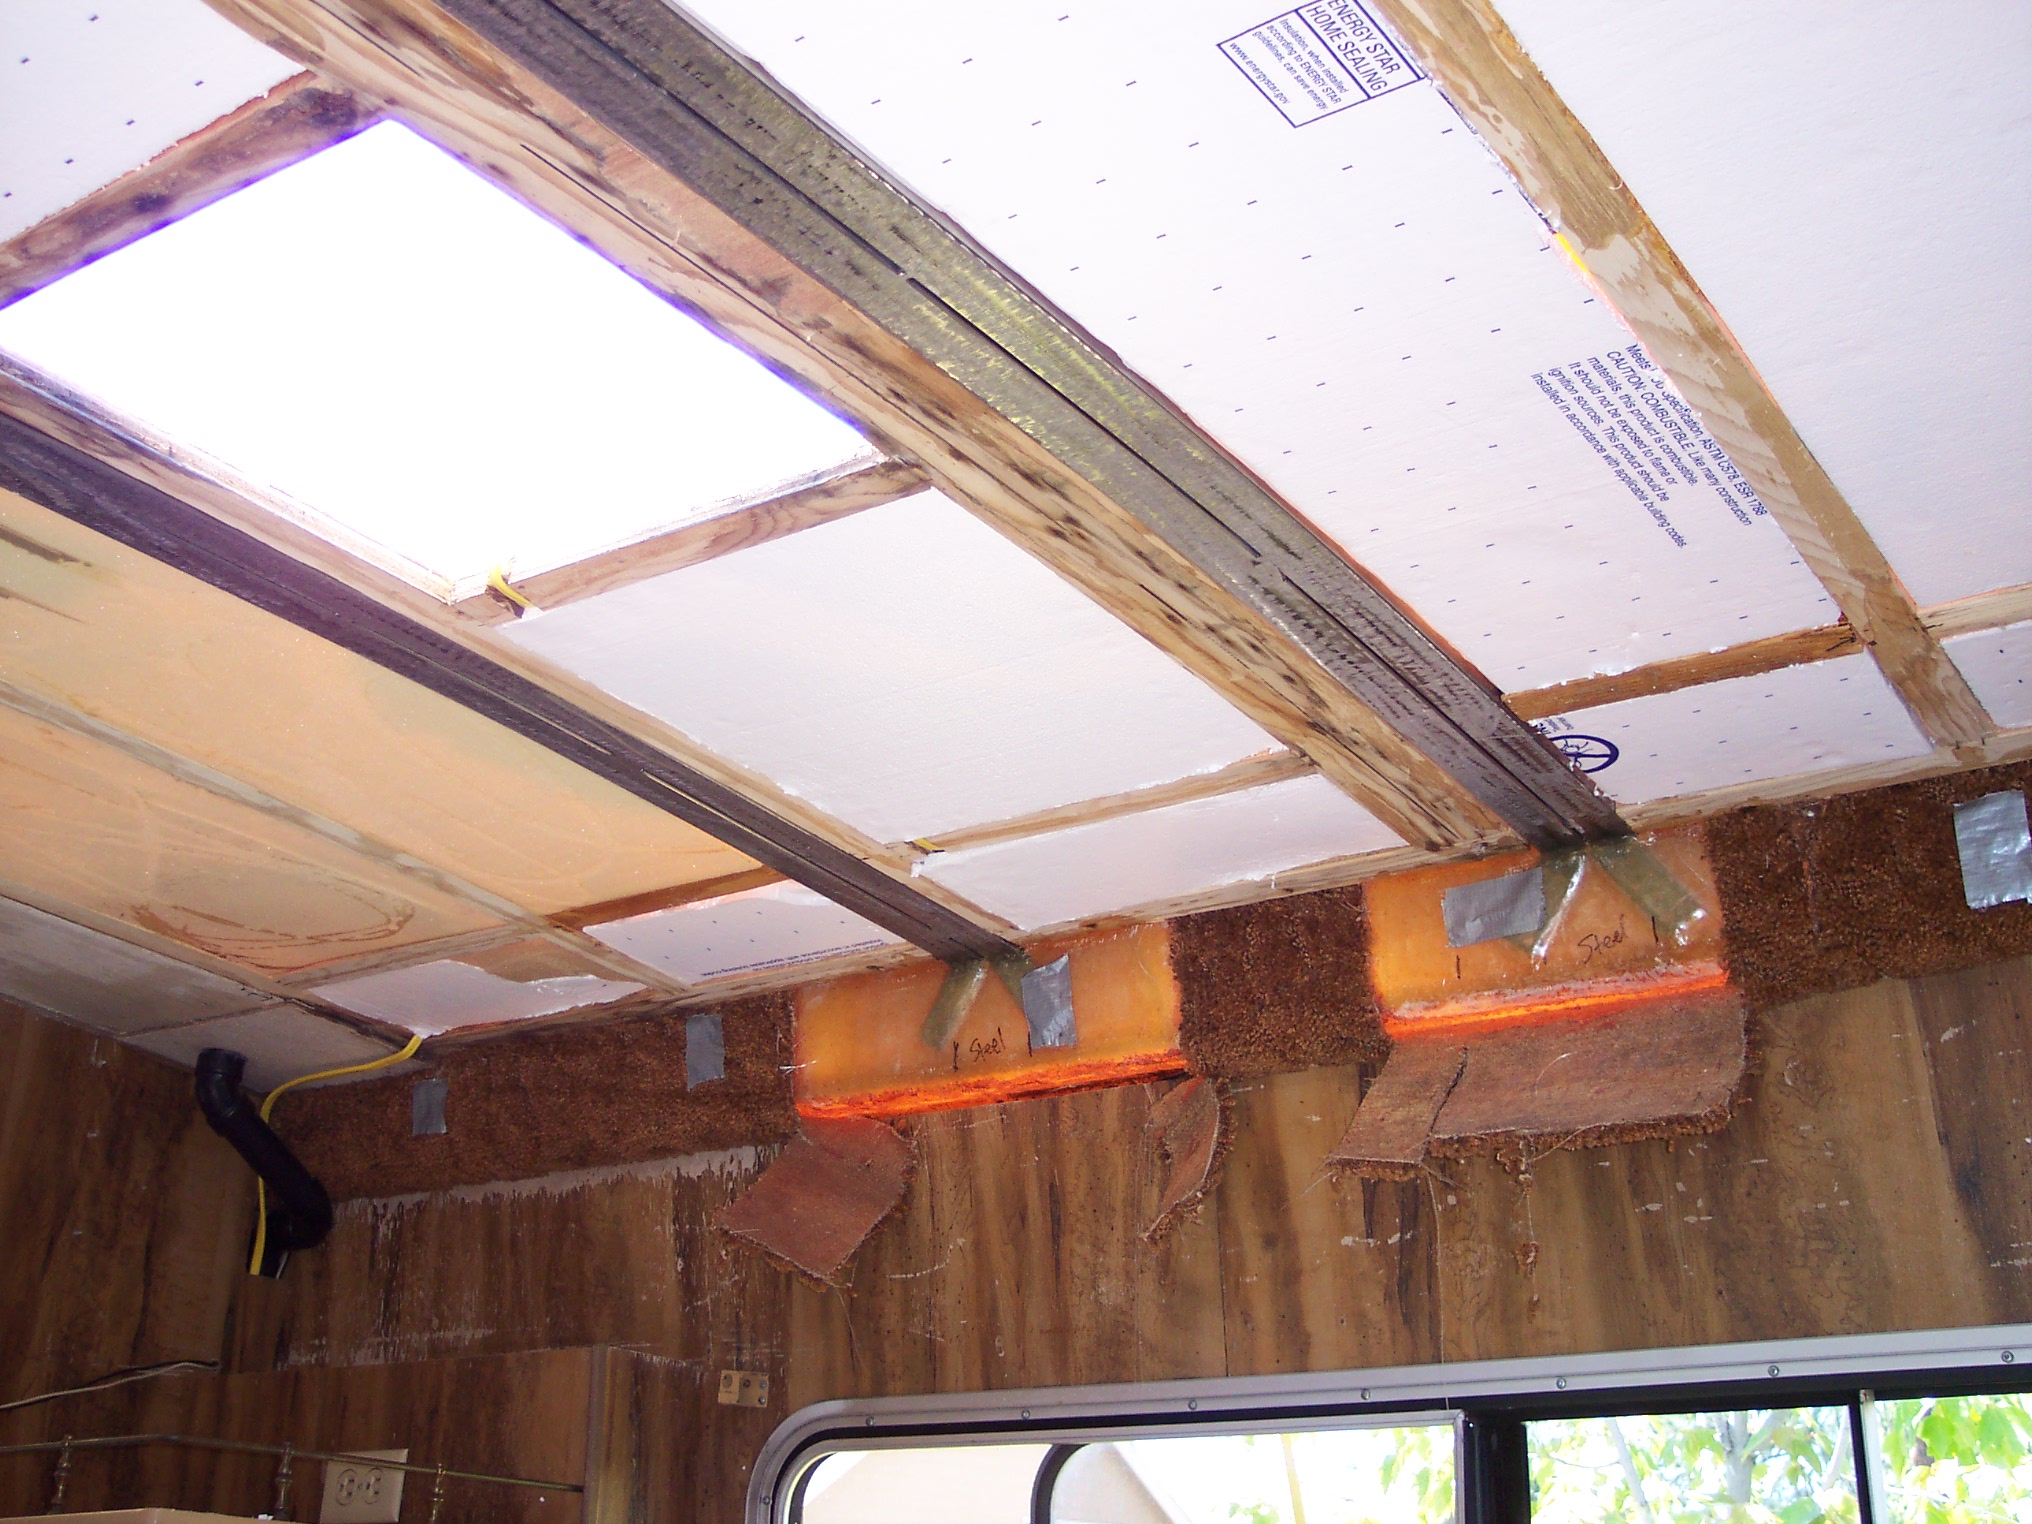
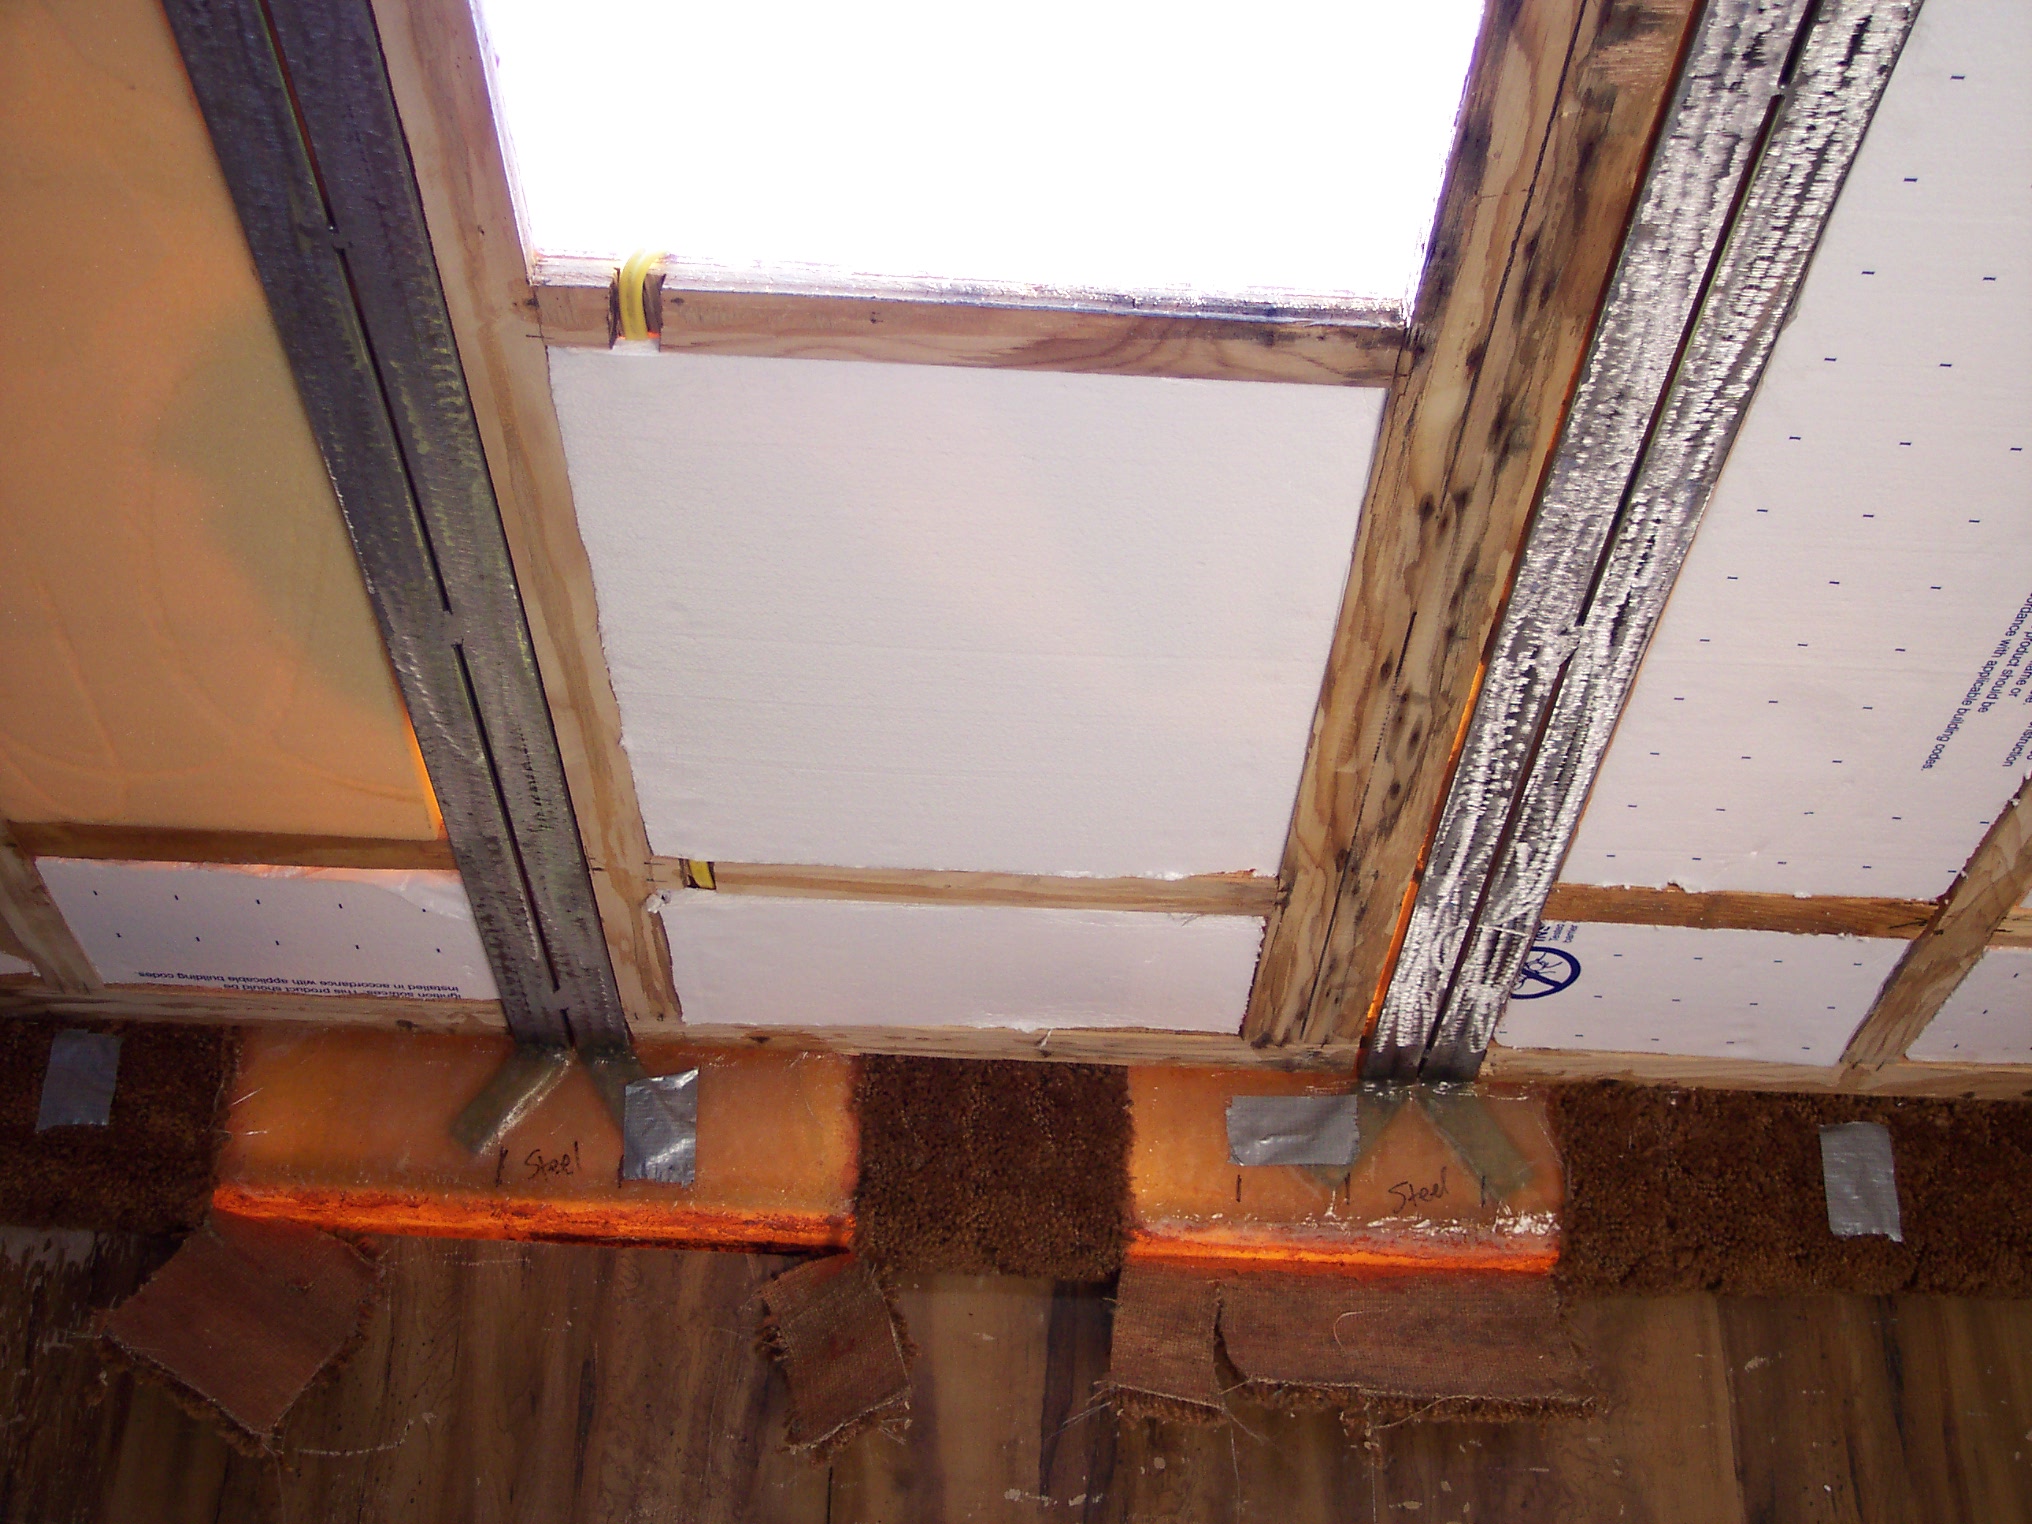
After the bracing the ceiling got recovered with 5.3mm sheeting and then a layer of FRP paneling.
-
Wanted to put A/C in my 83 21ft. Sunrader but the roof was way too weak. Later models bolted metal braces in place but I didn't like the stove bolt method. Ended up using 1.5x3/4 rectangular tube doubled up (to make a 3x3/4) .120 wall thickness. One was positioned in front of roof vent hole and the other aft. Fiberglassed them in place at each end.
-
Just finished putting the airbags on my rig. Piece of cake. No need to even take off the rear wheels. About 4 hours. Gotta love that 90 degree drill adapter. I am quite happy with the ride now along with my new leaf spring bushings!
-
Got the last 4 bushings changed after dropping the black water tank. Out of the 12 bushings all but one were worn all the way through. Rear suspension is quiet and tight now. Air bags work great as well.
-
Well, replaced the bushings on the passenger side. All 6 were completely worn through......that is to say, metal on metal. Same for the forward one on the drivers side. Can't get at the rear ones on that side until I drop the black water tank, but I can tell from looking at them that they are totally shot as well. Moral of this story.........Check 'em and change 'em. Best $21 spent.
-
You're right. Using the right angle drill tool made it so easy to drill the 4 vertical holes. Using a tap to make the threads is a good idea, although I didn't have a 3/8NF. The bolts worked quite well and snugged up nice. I had old brackets to cut off as well, which I did with a cutoff disc on a 4 1/2 grinder. I cut 3/4 of the way though them and then snapped them off as I didn't want to nick the frame rails. Did you get a chance to look at your leaf spring and shackle bushings? Just picked up my new set yesterday and noticed that they are now channelled laterally (8 grooves) in the inner bore to help with lube retention. The last set I bought weren't like that but that was back in the eighties!
-
Those will work. Just installed them on an 87, and they fit my 82 as well. They are available through a variety of places. Including Ebay, Amazon, SuspensionConnection, Jegs , and the list goes on.
-
Spent a few hours yesterday installing the same airbag kit on a friends Sunrader. Took about 4.5 hours total and everything came apart easily, including the U bolts. Using a 90 degree angle adapter for the drill (Harbor Freight) made drilling the holes for the upper bracket a breeze. The adapter allows you to get in there and drill each hole perfectly. Adapter is 19.99 and worth every penny. No need to remove swaybar or anything else. I'll be doing the same to mine in the near future along with bushing replacement for the rear springs. Mine are totally shot at 60,000 miles. I would venture to guess that most out there are in pretty poor shape. Installation of the airbags will also reduce the load on the new bushings.
-
The bottom of your rig looks like it has alot more corrosion than mine. I spent a few hours under mine yesterday in preparation for leaf spring bushing replacement and airbags and everything came apart easily. Bought the unit last year from coastal Washington but it must have spent most of its life indoors and off of the winter streets because it is very clean underneath with next to no corrosion. The truck frame is still the OEM black paint. Not bad for a 28 year old Toyota. I understand what you mean though. A job can go sideways fast as soon as things don't cooperate.
-
Where did you buy the materials to do this?
-
Hard wood floor
Kimbo replied to Tressa's topic in Improvement and Do-It-Yourself Projects you have done to Share!
I keep a small 12volt vacuum in the Sunrader. Bought it at Big5 sports for $10. Works great. It looks like a tiny shop vac and stores easily because it is so small. -
All bushings on my rig are 1.167". Just finished putting it back together. Off to order the bushings. Drivers side will be a pain. Have to drop the black water tank to take apart the rear shackle.
-
Called Energy Suspension and they have a bushing kit for 79-83 Toyota P/Us. P/N is 8.2101 and all 12 bushings have an OD of 1.167". Their kit for 84-88 have 8 bushings at 1.167" OD and 4 spring eye bushings at 1.5" OD. That P/N is 8.2103. I'm crawling underneath tomorrow to see if the forward spring eyes on my 1 ton setup are 1.167" or 1.5". I have already verified that the rear spring eyes are 1.167".
-
Looks like the bushings (rear leaf springs) on the 83 21ft Sunrader are finally shot. Has anyone done this? Looking at the polyurethane ones from Energy Suspension.
-
Thanks guys. System is a cobble job for sure. Somebody tack welded every slip joint as well. Hangers are makeshift too. I think I will go back to OEM style parts. The only piece that will have to be custom forward of the muffler should be the first straight pipe off the downpipe to make up for the frame stretch. What are the wires coming out of my cat?.......O2 sensor? Are these Toyotas California spec?
-
What kind of a post is that??!!!! Maybe you should take your ranting somewhere else.......like a Border Security Forum. Canada Customs has nothing to do with the good Canadian folk that drive Toyota motorhomes and contribute constructively to this forum.
-
Looking to replace exhaust on '83 21ft Sunrader. I see location of muffler is different than it was on pickup, namely behind the rear axle and sideways rather than in front of the axle and inline with the cat. Does anyone have part numbers or info on the pipe between cat and muffler (it goes over the rear axle) and the tailpipe (muffler to right hand exit behind right hand rear wheels) or are these custom pieces?
-
Same master cylinder?
-
What kind of mpg do these get and speed up a mountain
Kimbo replied to okiedokietoday's topic in Coach ApplianceTech Issues
Just bought an 83 21' Sunrader with a 22r 4 speed. Picked it up in Everett Washington and drove it home to Bend Oregon. Does 60-65mph comfortably on the interstate but did have it up to 75once in awhile. Could have gone a little faster I think. Checked the mileage in Sandy (just outside of Portland) and it worked out to 18.99 mpg (224 miles, 11.79 gallons). I was quite impressed. No problem maintaining 45mph in 3rd gear through the passes around Mt Hood. -
Bongo, Do you have to convert that to right hand drive?
-
I disagree with your statement. Lack of money and Toyotas do not necessarily go hand in hand. There are people with money that still choose to drive a Toyota. It might have something to do with not wanting to be like everyone else in RV Land.