pandu Posted June 15, 2011 Share Posted June 15, 2011 I live in Grand Rapids, Michigan. Just bought my 1984 Dolphin 22R 4 speed manual yesterday. Nice condition overall. No leaks. No rust. Getting 6 new Hancook tires on Friday. Having my mechanic go through it completely tomorrow to see what it needs or will need soon. And next week having a new fan/vent installed over an old fan-less vent (no air), complete re-caulking job on the exterior and a new awing installed (didn't have one). This is going to be a good Summer here in Michigan. Beautiful beaches at the State parks all up and down the coast as well as some National forest camping. Happy to be in The Toy Club! The siding is not as bad as most I've seen. It's faded some and dirty. I want to clean it up and wax it if that is the best. One friend said to use aluminum siding cleaner and go that way. The man down the road at the RV place said to use automotive materials. Lightly rub it out with rubbing compound and wax it. Does anybody have experience doing either one of these things or maybe even some other technique? Quote Link to comment Share on other sites More sharing options...
84TOYRV Posted June 18, 2011 Share Posted June 18, 2011 I have the same 84 Toy Dolphin w/stix, as yours. I use my automotive products to clean & wax. Looks great after you buff it out. I, too, have no AC. No need for it. I just had a new awning installed in '09 along with 6 new Hankook tires and a new Dometic fridge. Yeah, she's ready. I'm going to our family camp at Whitewater State Park, here in MN, next week. Beautiful & no mosquitoes! It's all about enjoying God's creations. Happy camping! Quote Link to comment Share on other sites More sharing options...
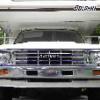
pandu Posted June 18, 2011 Author Share Posted June 18, 2011 (edited) Thanks. Sounds like we have almost twins. I've posted mine as my picture but for some reason it seems not to show up with my name. Did you feel that when using rubbing compound you had to go lightly on that painted siding? Or wasn't it an actual rubbing compound you used? My HouseCar passed its mechanical inspection with flying colors except he sent me to a spring man for suspension checking. It was sagging a bit and had about 3 added springs which weren't doing the job. So it's in for the weekend and is getting brand new custom built springs. Will cost about $650. Then I'm getting an alignment and with the new tires I'll be set for some cruisin' to nature's wonders! I'll post a pic with this reply. Edited June 18, 2011 by pandu Quote Link to comment Share on other sites More sharing options...
dogre Posted June 19, 2011 Share Posted June 19, 2011 Sorry to go off topic a bit. What state do you live in where your vehicle springs were found to be challenged and the inspector happens to know of someone who can help you? This is a gray area that I am curious about. Dave Chelan, WA Quote Link to comment Share on other sites More sharing options...
pandu Posted June 19, 2011 Author Share Posted June 19, 2011 Aah, Dave, I mis-spoke myself there. The inspection I meant was the 'used car' inspection I had done upon purchase with my local garage.I had him give it the once over. He felt the ride was quite bad and I, not knowing what the ride is supposed to be, didn't really know. So I took it to the spring shop and after a discussion of choices opted for whole new springs. After all, my HouseCar is near 30 years old. Quote Link to comment Share on other sites More sharing options...
84TOYRV Posted June 20, 2011 Share Posted June 20, 2011 My Toy looks identical to yours but with a tinted, bubble,front overcab window. Same graphics & colors exactly. I wouldn't use too much rubbing compound. Some is ok. Use sparingly. It looks a lot better than when I got it. Use a good polish and buff out, well. Quote Link to comment Share on other sites More sharing options...
pandu Posted July 16, 2011 Author Share Posted July 16, 2011 (edited) If anyone is still interested I have begun my "cleaning" project. Wow! What a difference. First, use a cleaner on the siding to get the dirt off. Then, I've used standard automotive rubbing compound. I had to rub fairly aggressively for just a few seconds on each section (did very small sections at a time being careful of the edges of the aluminum creases, those are the areas that will rub through the paint to the aluminum first). Buffed off the compound. Then applied some 'Rain Dance' wax although any would probably do. It made my siding look new again! Honest to God it transformed my Toy. Got one side pretty much done. It shines like new! Also found a 'paint marker' in brown on the internet (Grainger Online) which allows me to touch up the edges and corners of the brown trim around my windows which have been scratched down to aluminum in places. Makes a nice, neat edge. Was difficult to find a permanent brown marker and this one just did the trick. It's a commercial application product. Whole process is slow. Buffing wheels are only so effective with the uneven creases in the siding but they help with the final wax polishing. Labor of love because it takes time but hey, just take your time, eh? No hurry. Renewing an hour at a time. I also replaced all the steel hex screws around all the panels and door. Found some stainless steel ones at my local hardware so yeah, I'm screwy but I'm shiny too! Taking out screws is interesting because their rust level tells you where your buggy has leaked water down the inside in the past. Lovin' my restoration project. Was a good 'un to begin with but now it's getting to be awesome. See attached photo! Edited July 17, 2011 by pandu Quote Link to comment Share on other sites More sharing options...

Recommended Posts
Join the conversation
You can post now and register later. If you have an account, sign in now to post with your account.