DirtyPatches
-
Posts
69 -
Joined
-
Last visited
Content Type
Events
Profiles
Forums
Gallery
Everything posted by DirtyPatches
-
 I have the 3.0 v6 in my sea breeze, against all better judgement with what I have heard about these I still got it... When I bought it it apparently didn't have a thermostat in it and I drove it home, 2.5 hours at 55-65. Once I pulled off the highway it started overheating and got it home with coolant boiling out. I had a shop install a new thermostat, flushed the system, tested it under pressure, and supposedly drove it on the highway. Said it was fixed... Drove it for the first time yesterday since it was "fixed" back in may and it over heated after 10 minutes at 25-50 max mostly going 35mhp. Same deal it had the needle in the red, pulled over and coolant boiling out. Had the heat on and it was just cold air. I let it sit for about an hour and drove it home, the needle would jump up and down and the heat would also come and go. I drove it like a granny barely accelerating and going real easy and still was bubbling coolant when I got home. Is it just a bad thermostat? Or am I looking at new water pump? God forbid head gasket! It has perfect compression so hoping and praying that's not the case.
 -
That's awesome! Gotta know how you rigged that up. Been thinking of a way to get a canopy situation going without the huge investment.
-
So I got these LED RGB puck lights on ebay and my understanding with leds they're inherently 12v so you can cut off the plug and hard wire them in (seen it done on youtube). The issue I am having is they won't turn off or respond to the remote at all unless I use an intact plug from the other set I have... Had to wire them backwards into the 12 v to get them to work but can't use the remote. Also one of the 4 lights has 3 leds stuck on red.... Lots to scratch my head about. Anyone have experience or knowlege with this? First time I have had issues with 12v lighting so pretty frustrated. http://www.ebay.com/itm/401109770828?_trksid=p2057872.m2749.l2648&ssPageName=STRK%3AMEBIDX%3AIT

-
I have a Harbor Freight hitch rack (the cheaper steel one) $40 on sale, with a $70 plastic outdoor storage box from Lowes. I mounted the box to it with slotted angle iron to allow space for the spare. Went around the country, 10k miles and kept things dry and secure. Originally wanted to use a truck tool box but it blocked my licence plate. It would drag going in and out of parking lots or sudden steep grade but just sounded bad, never hurt anything. With this exact setup a 5 gallon gas can fits on both sides of the box, or a camp bbq, or one on each side like I did. Plan to use a hitch extension with a higher mount point to help with dragging once on the Sea Breeze but the Dolphin had horrible ground clearance.
-
Did you just paint in the shower or put up material? How is it holding up? Cant believe they put wall paper in the shower in both of the Toyota RV's I've had. Just started working on one with very similar floor plan, great inspiration. You did an amazing job!
-
Makes sense, thanks. I got it to work after messing with it a few more times perfectly level. Must have worked that air out of the line. Been running on propane through 9 states now!
-
New rear seal on tranny and exhaust manifold leak repaired, $350 and got me in and out in a day. Ready to ride around the country for the next few months! Road trip saved by a honest awesome shop. First shop said I needed to rebuild the tranny 2200-2800! Always shop around!
-
Replaced old 80's speakers with new Pyle aftermarket speakers in the dash. Also rigged 2 house speakers behind the seats (classic philly ingenuity) . The dolphin is bumpin now!
-
Thanks Snail! Yea not a whole lot of real estate to use up there without taking over rear cargo area. I was up there head scratching for quite a while before mounting (the pic was only a mock up before lap sealant and screws). The panels won't get much shade from the AC and vent covers plus still able to walk around the roof... somewhat strategically in spots. Got the second battery mounted today now for the struggle of wiring everything. We actually got rain in smokey western MT today so wasn't able to drill holes in the wall and run wires. The system is a bit over kill for the battery bank I currently have (two 35 amp hour batteries) but plan to add one or two more.
-
Two 100W Renogy Solar panels mounted. Next will be tying it all into the battery bank... If 1987 could see this Dolphin now!
-
Anyone have insight or suggestions with my Dometic fridge? It runs great on electric but could not seem to get it to run on propane no matter how level.. Couldn't see anything in the sight indicator either... Follow up to that is it possible to light the pilot without the ignition button (possibly the problem? and how would I fix?). Also is it possible to have the propane fridge running while driving in these? I was told my OPD valve was expired but doubt that would be the issue. Need a reliable fridge for long travel and don't trust it much.
-
See what I can do hunting down some pics for you tomorrow. Yea looks like somethings missing there seeing all those clipped wires. It should be a 30 amp plug looking like this. Mine (and probably yours) is a 30 amp system (pretty sure, can confirm tomorrow), good to get adapter plugs for 12v, 50 to 30 or vice versa
-
Thats awesome! I hunted close to a year to find mine, hard to find one in good shape, 21 ft, and that has the 22RE not 3.0 V6. Same model all around including floor plan? I could send you a pic if it would help happy to do it! So its in the compartment thats under the pannel in the closet next to bathroom correct? Need a pic of water tank connections? Should follow on tumblr, much better at updates and pics on that!
-
PL Premium, and for securing the wood especially on the wall. There isn't a whole lot of structure in the wall of the cab. It makes liquid nails look like a glue stick, just make sure you want what ever you're gluing to be permanent:) That's a good idea making room for thicker insulation. Im 5'11 so every inch of head room counts in the little dolphin home. I used 1/4" plywood underlayment, even hauled it with the RV! Just had to bend and convince it in some. There is thinner stuff at Lowes I believe but that's a good hour drive from my house in the RV and always nice supporting local business in a small town.
-
New insulation and paneling in the cabover. I cut out the piece perfetly but it wouldn't physically fit into the RV in a way to actually get into place.... D'OH!! So had to cut it and slap trip in. Just about done with the wall needing replacing, no pic of current progress. Cutting out that shape and getting the window right was interesting to say the least. Luckily got great advice from here and came out pretty good! Repainting rails and handles with Rusto Hammered Silver (no pic yet of handles but coming out great) Roof coated with Henrys Extreme Roof Coating Painting the interior and actually close to done! I will get more recent pics. Also working on custom finish work at this point. It is a crazy feeling, come a long way!
-
Thanks a lot! It had been a long process. I will upload some more recent update pics. We got a lot done without updating this!
-
Settled that windows hash with some marine window sealant. Now its finally 100% water tight! Lots of improvements, interior is almost fully primed, new walls installed, fantastic fan installed, cabover floor re done, new custom bumper fabricated and herculined too!
-
They rule! I was worried about possible damage at first but they are very gentle especially on the truck portion. If you spin it too long on the fiberglass it can yellow a little but have to look pretty close. I plan to paint it anyway so not a huge deal, even as is I'm very happy! It's kind of a pain working on the corrugated stuff and trying to get in little nooks and crannies but again very worth it. I will say this about the wheels: 1. Have a corded drill ready or not going too far with a cordless. I got a HFT one for $12 so I won't mind destroying it, almost intend to. 2. Works best at 3-4k rpm so let the drill catch its breath every once and a while. 3. Wear a mask! I got covered in yellow dust and very thankful I don't have lungs full of rubber dust! 4. Buy more than you need. I got 2 and thought that was too much... probably buying another. One did the stripes on the truck part and the front portion of the cab over. If your decals are rotted it takes a little longer and more wheel. 5. There are some small, residual baked on adhesive spots, that need to get touched up with the wheel and adhesive remover to be "perfect" looking... but again a few steps back it looks cherry! 6. Don't bother with plastic razor blades (as amazon will probably suggest), they are useless with baked on 80's decals!
-
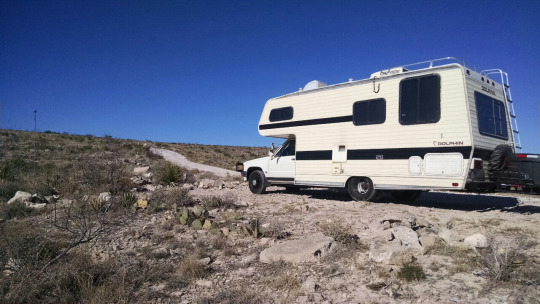
Been a while since an update so here's where we are... Bottom trim is done and whole coach got 2 coats of Bondo rubberized undercoating. Window leak in cab is fixed (hopefully) so new construction on the cabover soon, this weekend or one after next. Got a "Fann-tastic Fan" roof vent with temperature control on its way in the mail. It should be here by friday so will replace the rear vent with the upgrade fan, keep it cooler for us and the dog and help get kitchen heat/ smell/ steam out quicker. Once the new vent is in coating the roof with some henry elastomeric roof coating. Help prevent any possible future leaks and its suppose to reflect 85% of the heat from the sun so figure why not! Getting it professionally de-winterized since... 1. I just got it and if something goes wrong in the plumbing the damage will be far less than one guy working alone with no experience. Not worth the risk until I know everything's good. 2. Just don't have the time and for $85 to have it done professionally, without any concern, while I'm working... worth it! Lastly I've started removing the 1980's sun rotted decals and already looks 100 times better! The Dolphin slowly becomes "The White Whale". Before and afters.
-
I got a few screws to tighten up more and a little more butyl came out. Sprayed it down with the hose a while and now seems fine.... Got some marine grade silicone waiting on the wings when the screw it moment comes. In a perfect world I would get rid of the cabover windows and replace with new sheeting. Too many projects for now so fingers crossed window seals!
-
Above the window or the top of the window? Im wondering if it is the seal along the glass might be sun rotted... Tinkering with it today well see what happens. Thanks the the help!
-
So my only leak was from the passenger side window in the cabover. I resealed it with new butyl tape and thought all was good but after some heavy rain i notice the same spot is still wet. So obviously I'm not too happy and very frustrated with this window.... What do I do!? Is it the window track that is letting water in? The leak is under the window and toward the front about 3/4 of the way.
-
Took the tarp off and started getting the roof up to snuff. Lots of old caulk removed and replaced with new top notch stuff.
-
I haven't got to enjoy camping with it yet but figured it would be used little, unless I'm plugged in, but good to have. Glad to hear they're bright!
-
Trim work and wall repair is done! Had to replace a good amount of wood but most of it patched up nicely. Waiting on weather to start working on the roof. Replaced all bulbs with LED's, new porch light, things slowly coming together.