TacomaSue
-
Posts
119 -
Joined
-
Last visited
Content Type
Events
Profiles
Forums
Gallery
Everything posted by TacomaSue
-
I believe I paid about $65 each way for the ferry ride. You can go either from Pt Angeles on Black Ball ferry or from Tsawwassen on the BC Ferry (about half hour north of the border}. Last year we were at Living Forest Camp Ground and the ferry landing at Duke's Point was just a couple miles from the camp ground.... very convenient. Living Forest was a gorgeous campground, near town, but a nicely forested spot overlooking the water. At the end of the rally last year, as people started to mull over a get together for 2013, there was discussion of going to a different campground area. I don't think there was any consensus. Ron and Sue you have camped all over the Island, do you have some additional suggestions?
-
Ted: I would like to join your noon-time get-together. Please post the date/time and address. I Googled the Brown Bear Rest and could not find it. Sue
-
I'm in Western WA and I can sympathize with the difficulty you are having sealing your vent leak. I resealed my vent three times before I got the leaks. The vent was added by some previous owner and the hole is 15 x 15 for the 14" square vent so the vent flange only covers the hole a little bit on two sides. What worked best for me was 3M Marine Adhesive Sealant, Fast Cure 4200. It is a bit pricey, but made for wet marine environments. It is available from marine supply stores and ACE Hardware. When working with it, you'll need to wear rubber gloves as it is very sticky and difficult to get off skin. Here's the process I followed: Take vent off and scrape or otherwise clean the old stuff off really well. As a last cleaning, rub the area with alcohol. The area has to be really clean for #4200 to stick well. I put down a strip of blue painters tape about an 1/8 inch beyond the edge of the vent so I could get a sharp caulk line and not have caulk everywhere. Put a generous bead of #4200 around the edge of the hole and into all the screw holes. Squish the vent down into the caulk, screw the vent down and smooth the caulk around the edges of the vent. Despite the fact that the vent was sealed onto the roof, I still had water coming in. What I found was that the rubber seal around the top inside edge of the vent had rolled over and allowed water to come over the top of the inside part of the vent. You could not see the problem when the inside screen was on. I added household weather stripping all the way around the inside edge of the vent and that seems to have finally caught the last of the water leak. As a last protection for the heavy rains and wind we have been having, I put a tarp over the motorhome.
-
Great idea to go to Port Townsend. A really a fun place. Do others have some favorite places around Puget Sound or in Western Washington?
-
Hi Ted: A couple of years ago, when I had my smaller pop-top, I suggested a get together on the Yahoo Chinook site and had several responses. At that time, I was thinking about camping near Tacoma and coordinating with the opening of the new LeMay: America's Automobile Museum. The museum delayed its opening and one thing led to another and nothing happened. I still think it would be a hoot for a parade of Toyota motorhomes to line up in their parking lot. It could be a good chance for a brief gathering either in winter or early spring--if people are willing to take their vehicles out of storage. Perhaps, a one day meet for late breakfast or lunch and tour the museum (thinking about avoiding the cold and wet of winter camping). The museum is amazing---quite fantastic. I would be willing to talk about this and plan something if there is interest. Getting together around the museum is just a thought. I'd be willing to talk about other possible gatherings, too. There are some low cost campgrounds all along Puget Sound and up toward Mt Rainer. Sue
-
I, too, opened to a corrupted message. When I clicked on the "get more info", the notice said that there was no evidence of malware in the last 90 days. The more info note said that the administrators should ask for a malware check, i.e. run their program. I clicked on the continue button (in the notice box) and the Forum opened ok for me.
-
Welcome to the forum. Another person asked almost the same question on October 31. Several people provided good thoughts and ideas. While it was a different model of motorhome, most of the comments cold be applied to any model of Toy Home. Water leaks can be particularly damaging, so make sure that it was repaired properly.
-
Thanks for the encouragement to remove the cowl and clean the drains. I used a jet spray nozzle to open the drains and remove the sticks leaves and gunk that I could not shovel out. I still have a leak under the dash. It looks like water is pooling somewhere. There is a delay between spraying water into the drain and when it starts to leak under the dash and it drips long after the spraying stops. I pulled the cab carpet back and could see water oozing down the wall from the wet sound-proofing foam and dripping off what I think is the heater motor under the dash. I marked the drip spots with chalk so I could identify the spots later. I think it is leaking around what appears to be an air scoop on the passenger side under the skirt below the cowl, but it is not accessible from the outside. How do you access this area? Do you have any other thoughts or suggestions about what to do next---- besides rolling the carpet back and carrying lots of towels when it rains?
-
I know the topic of leaks under the dash has been discussed more than once, but I have not been able to pull it up on a search. During heavy rain last spring, I had a severe leak under the dash and water poured into the cab on both the driver and passenger side. It turned out that the front windshield had been improperly installed and was so lose it was in danger of falling out and the passenger side post was rusted out. You could not see any rust on the passenger side, until the windshield was lifted off the rig. A body shop repaired the post before the windshield was replaced and the auto glass shop swore up and down when I left that there was no way that they windshield would leak. This last week, was the first real rain since I had that work done, and I still have a leak on the passenger side. I could take this back to the auto glass shop, but I think I need to rule out some other sources of leaks. I've seen discussion about drains from the grills in front of the windshield---how do you check those drains and where do they drain? The rig was obviously in a fender bender at some point and the passenger side fender has been replaced (by a PO, likely--not on car fax report), how likely is it that the drains could have been damaged--maybe even covered over? Sue
-
I agree, if your headliner is down, it's a great time to rewire. Despite how my previous post reads, all the ceiling wiring was done before the new headliner was put up. The wires to the light bar went up the corner where there was a gap between the paneling on the side and the back walls (covered by corner trim) and through a flexible tube to the hatch door. The hatch door is upholstered and we pulled the upholstery lose to run the wiring across the door. I have ordered trim for the hatch door, but currently there is no trim on the hatch door so it was easy to insert the wiring behind the fabric.
-
Thanks. Sue
-
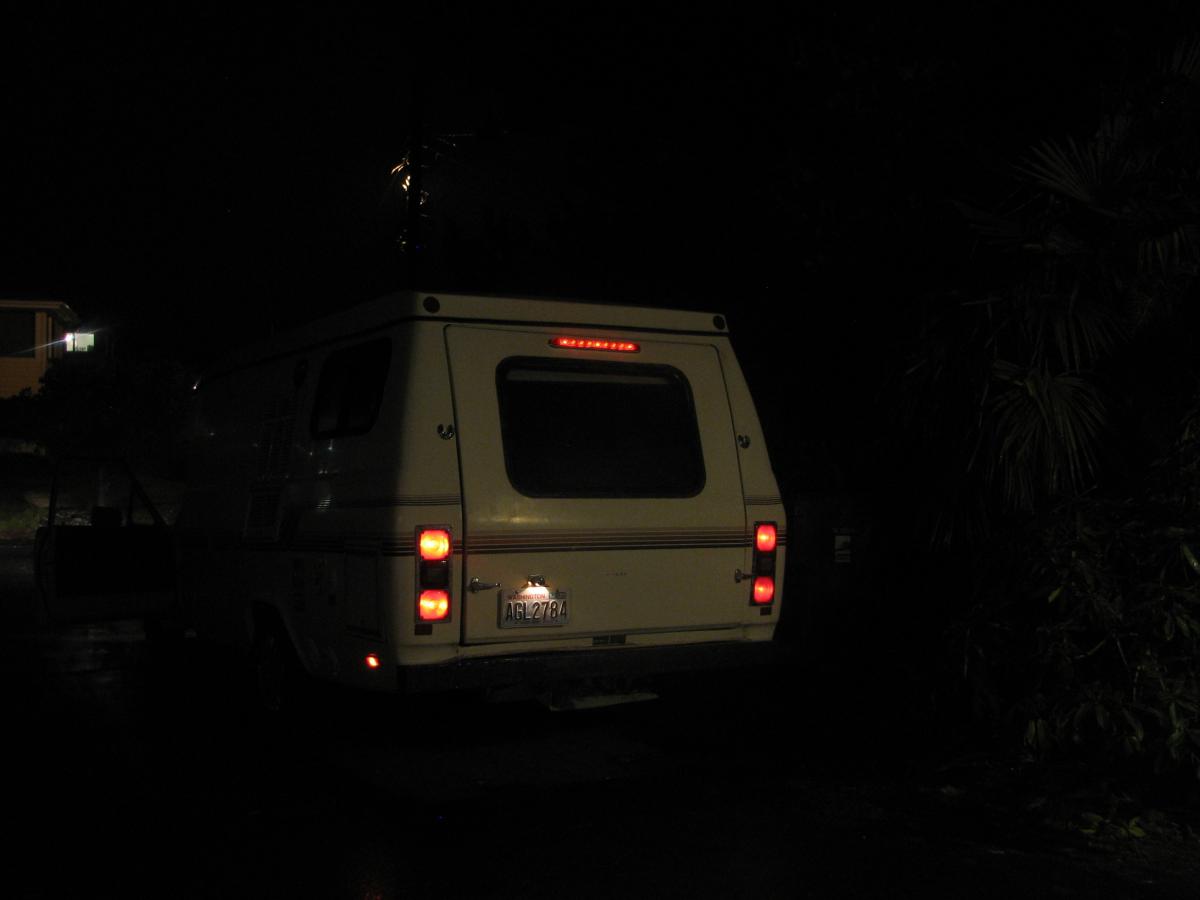
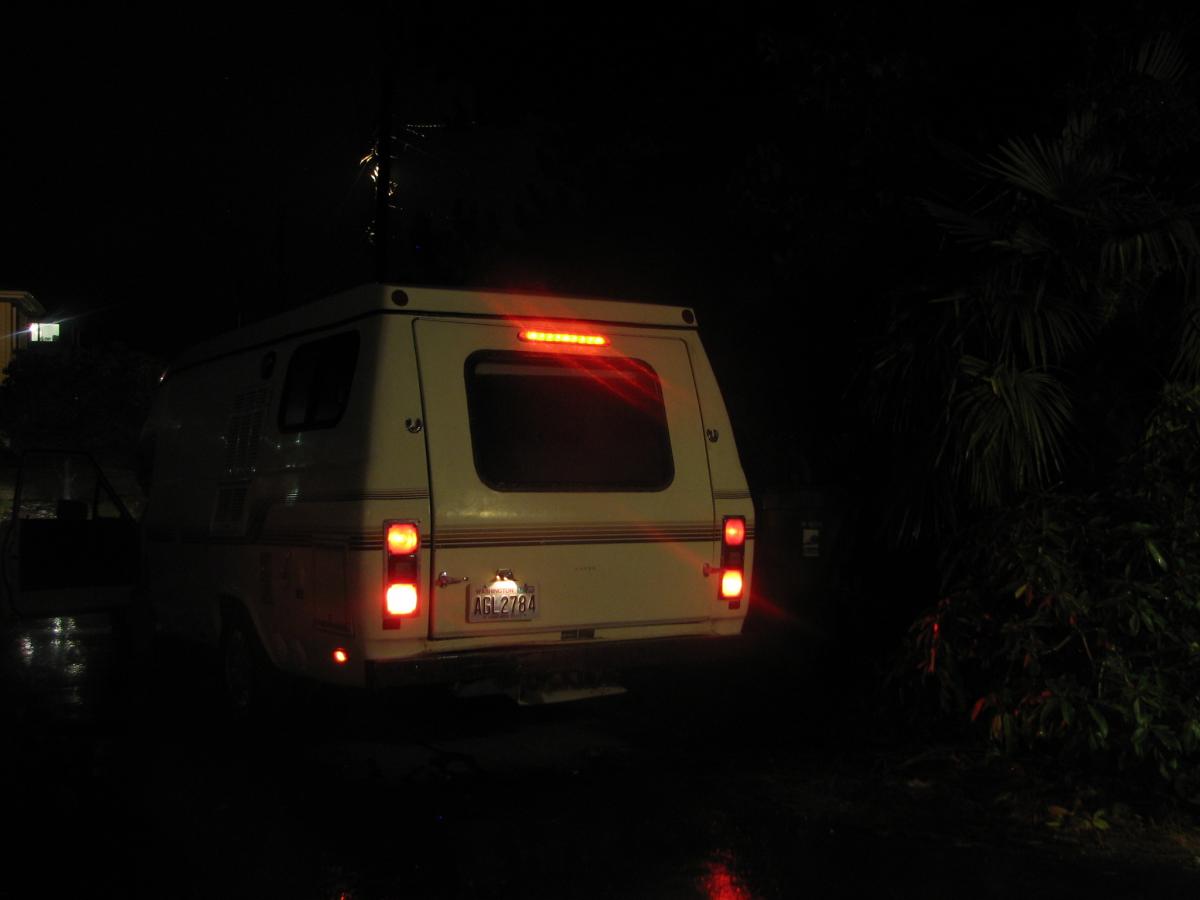
Derek: The light bar was originally sold as a light bar for a motorcycle trailer. It had 3 wires---tail lights, brake lights and ground wire. Here are a couple pictures at night. Bit of glare with the brake lights but it shows how much difference it makes.

-
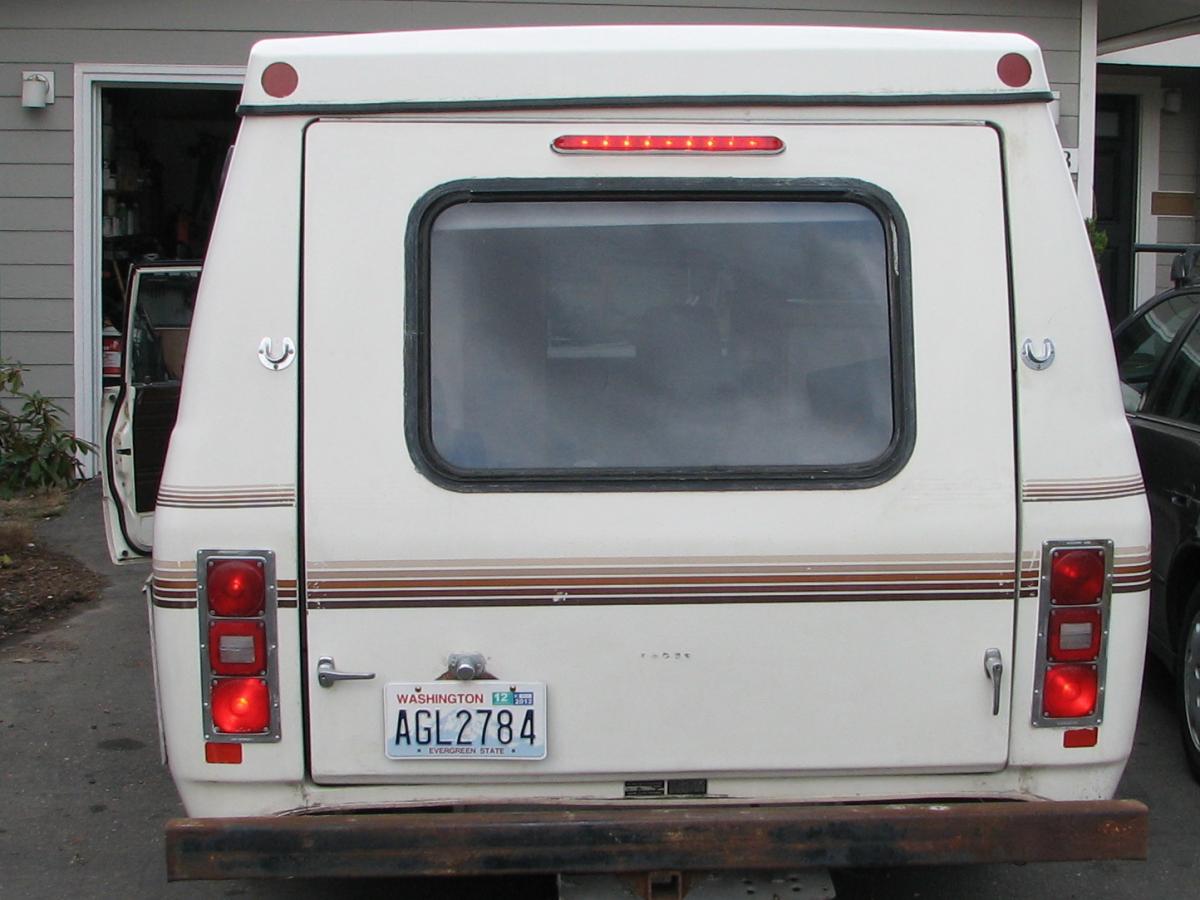
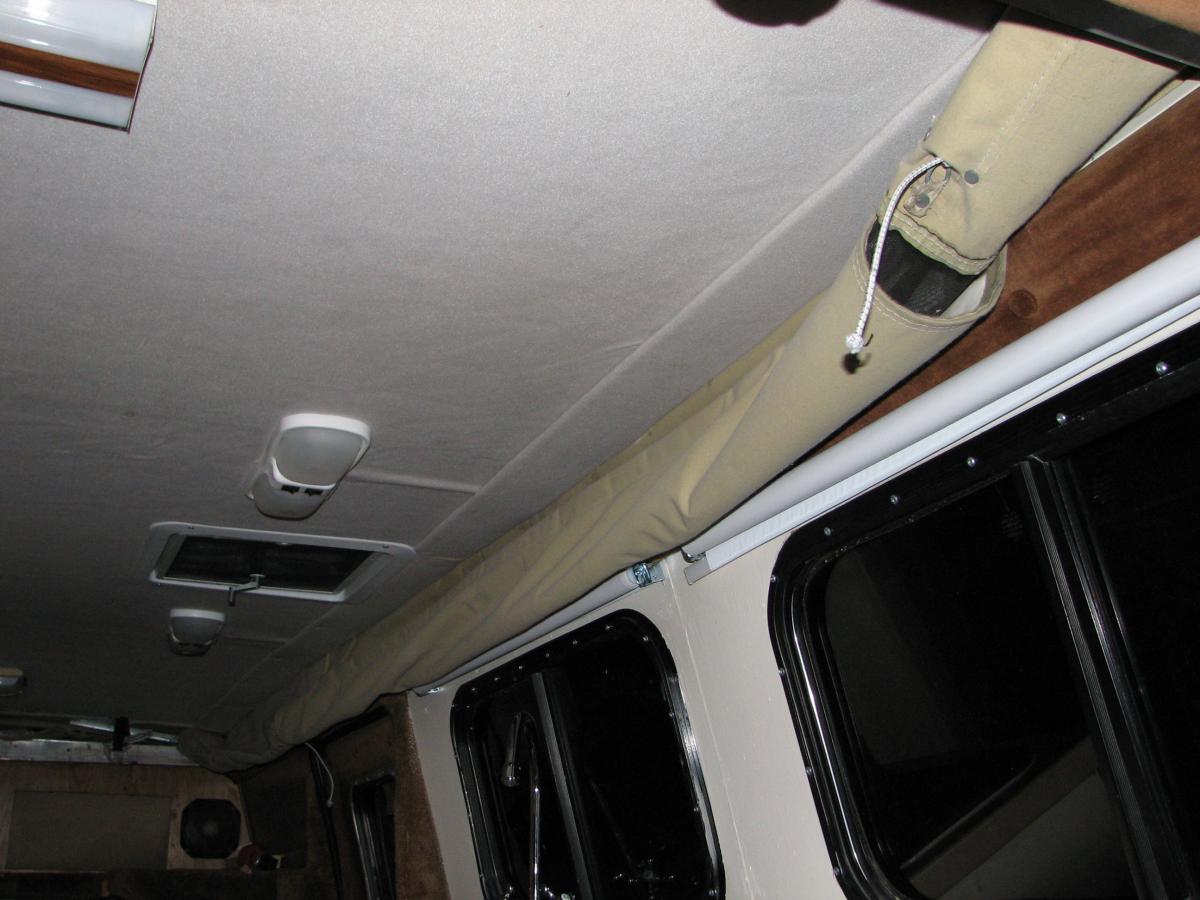
Lights. When I picked up the Adventure, I had two working headlights, but that did not last long. By the time I got home, I had one high beam and one low beam. The effect was winking at other drivers---definitely not the best situation. So, the first thing was to replace the headlights. Next was to deal with my concern about how visible the slow-moving Sunrader Adventure was at night with only lower tail and brake lights. It has no running lights and semi's would roar up and be almost on top of me before pulling out and around. This summer one of the brake lights quit working altogether because the connector to the wiring harness was badly corroded. To increase visibility of the rig at night, we added a LED light bar above the rear window in the hatch door. The light bar also lights up when braking for added visibility when braking. I like to think that this new light bar blends in so well that it almost looks original. We did not replace the tail, back-up or brake lights with LED's. Although the upper light bar is LED and the lower lights are not, the brightness is only slightly greater for the LED lights. The light bar was purchased from Brightlights.com In the interest of full disclosure, I must say that the "we" who did the exterior light work was my son. My part was offering encouragement in the form of refreshment. I replaced all the original interior light fixtures with LED fixtures. All are bright white, so it is like daylight when all the lights are on and I really enjoy this level of visibility. I know that others indicated they would rather have a softer light, but I like this for working inside at night. I decided that I can always turn the lights off and use a battery-powered lamps if I want less light. These fixtures were purchased off e-bay. Prior to installing the lights, I replaced the headliner with a foam-backed knit fabric. The original headliner was foam-backed heavy woven cloth that was installed before the canvas sides of the pop-top. so much of the old headliner was sandwiched between the fiberglass top and the canvas. I put the new headliner up just to the edge of the canvas and trimmed the edge. The thumbnail shows the LED light fixtures plus the headliner (taken with the top down). In the picture you can also see that I replaced the curtains with pull down roll shades. These have worked well for me. I would like to try to make these into cloth shades as I think that would hold up better.
-
Thanks for the note about Hardwick's----the one on Roosevelt Way? I'll check them out when next time I'm in Seattle. I love to browse hardware stores.
-
Cool bike! I'd like to test ride that. Amazon has a copy-cat bike for less $ than the real Strida.
-
Thanks for the nice comments, everyone. Linda, thanks for posting the link to the '86 in OH. The exterior is identical to mine, except that one has rust. Another difference is the lift mechanism for the pop-top roof ---that one originally had a crank mechanism while mine is pushed up manually--- keeps me in shape if I decide to take up weight lifting. I posted pictures of the mechanism awhile ago on this forum asking for suggestions for changing the lift mechanism because the roof was so heavy. A funny aside about that: The vent above the stove leaked into the styrofoam between the interior and exterior fiberglass on the roof. After PT Rader sat in the sun and dried out last spring, the roof became much lighter. Use of the cab-over shelf as a bed is limited by the supports for the roof lift mechanism and the wall of the bathrrom. The cab-over shelf could possibly be used as a bed for a very small person. It is only about 66" wide and 20" deep. One thought to enlarge it would be to make a bed that is wedge-shaped so that one side is 20" and the other side 30". Re: the bed boards. The boards are pretty secure on the hangers. The 3/4 oak table top and matching board are sturdy and would be ok for someone heavier than I am or for kids jumping up and down. None-the-less, it is a good idea to add extra security by using a milk carton. It is nearly a perfect height and could have many other uses. The large rear hatch door is really convenient when working on the interior, as a rain shelter, a sun awning or for carrying a bicycle. The coach is not long enough for my sea kayak, but could hold a river kayak.
-
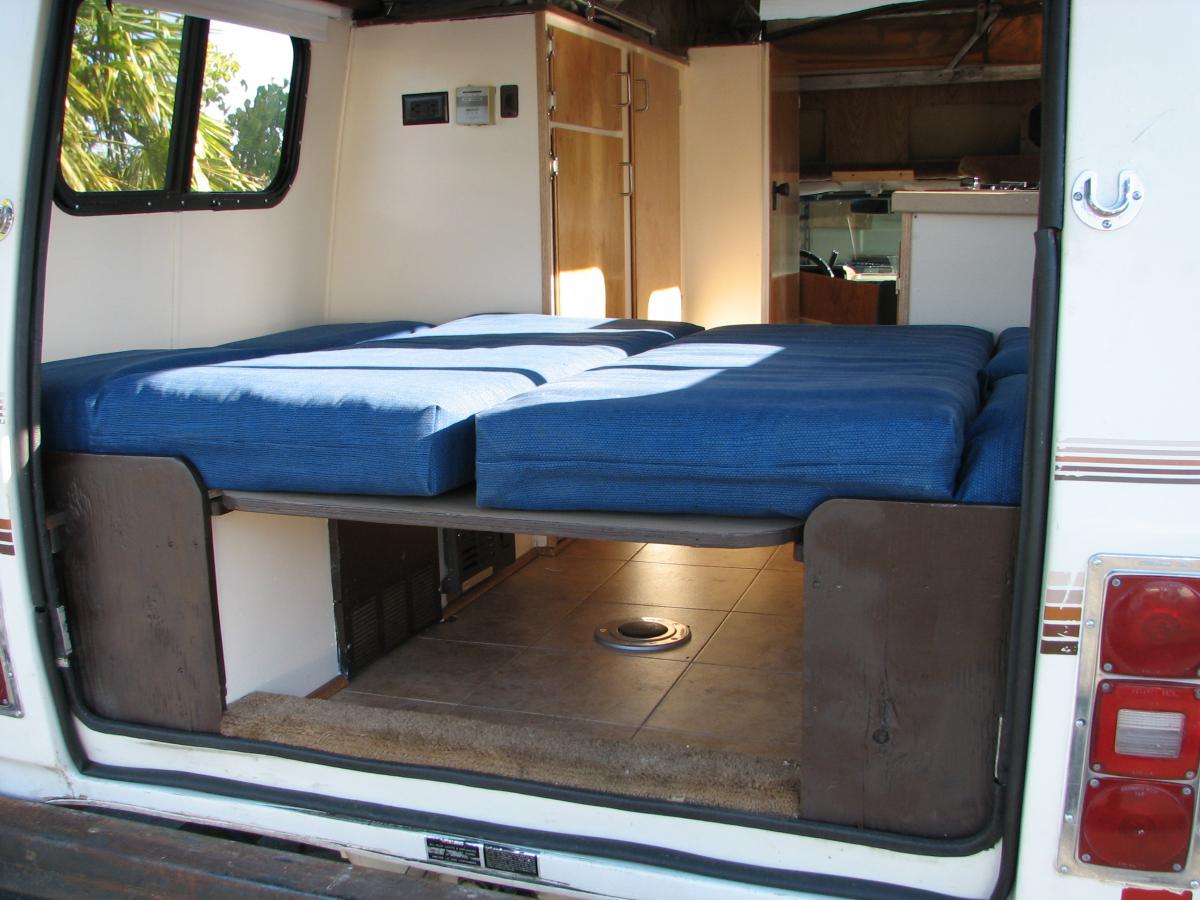
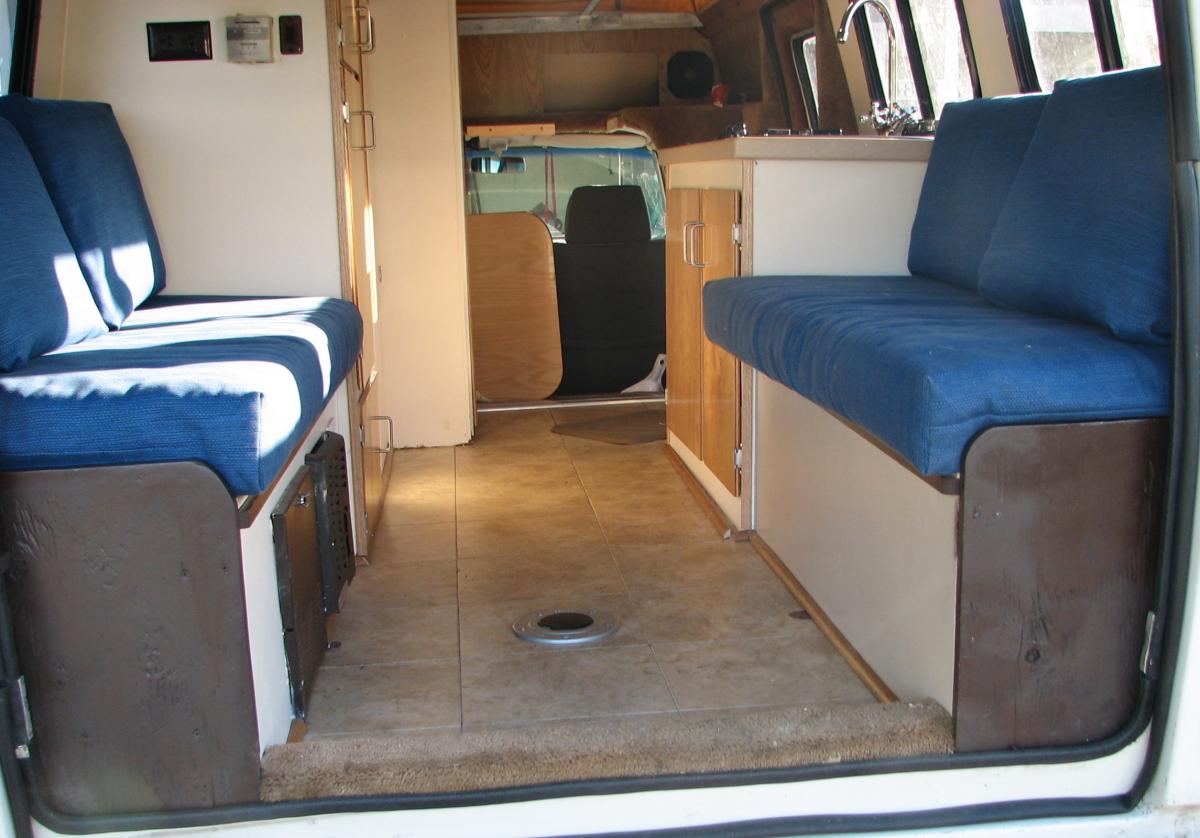
The layout: Behind the drivers seat is a a "bathroom" (toilet and shower, but no hot water), closet, refrigerator cabinet (did not work when I got this rig) and the bench seat. Behind the passenger seat is an entry door, "kitchen" and bench seat. It is only 19' long. To latch the cabinet doors, I used roller/spear head latches and put two of them on the cabinet door with the drawers. The drawers require some pull to open, but I am concerned that fully loaded they will slide more easily and everything will fly everywhere. I am looking for latches that can be put directly on the drawers inside the cabinet. The sleeping platform is in front of the rear hatch door. There are no interior handles on the hatch door so once it is locked from the outside, it acts like a rear wall and is secure. There is a side door for entry/exit. The bed area is small -- 48-inches by 72 inches---and that works for me. In many ways, it is a bit of a Chinese puzzle to set up the bed. Once I decided to change the original bed set up, what to do became a big question. The table top does not fully fill the space between the benches so it is the table top plus another board. I have also tested the platform with four one-foot wide boards and found that it is easier and faster to set up the 1-foot wide boards and they can be stored under the seat cushions during the day. I camp with my niece and her 3 kids so a table that is large enough for all of us is nice---since we have been going to the OR coast and have always had heavy rain. I have made a smaller table just for myself and use the 1-foot wide boards for the bed and that is easy, fast and comfortable for me to use.
-
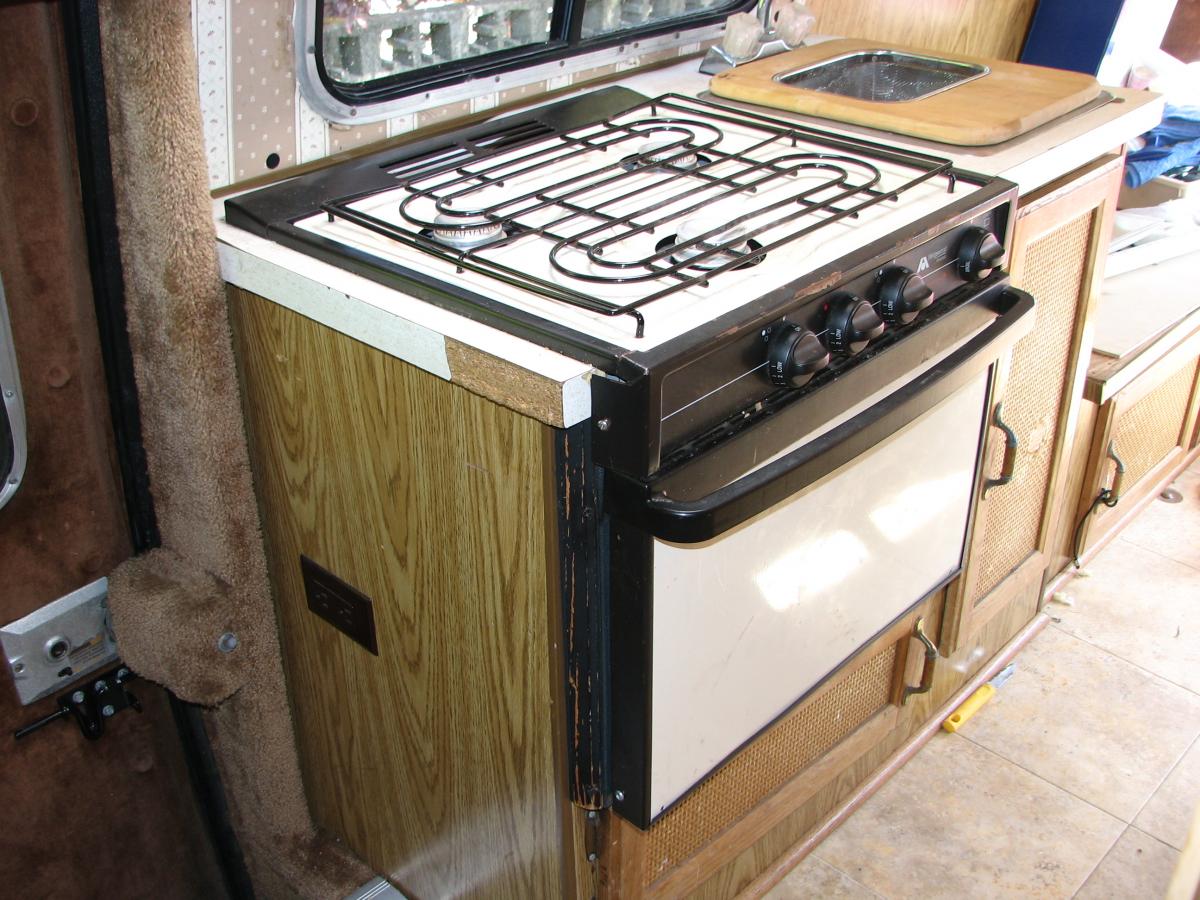
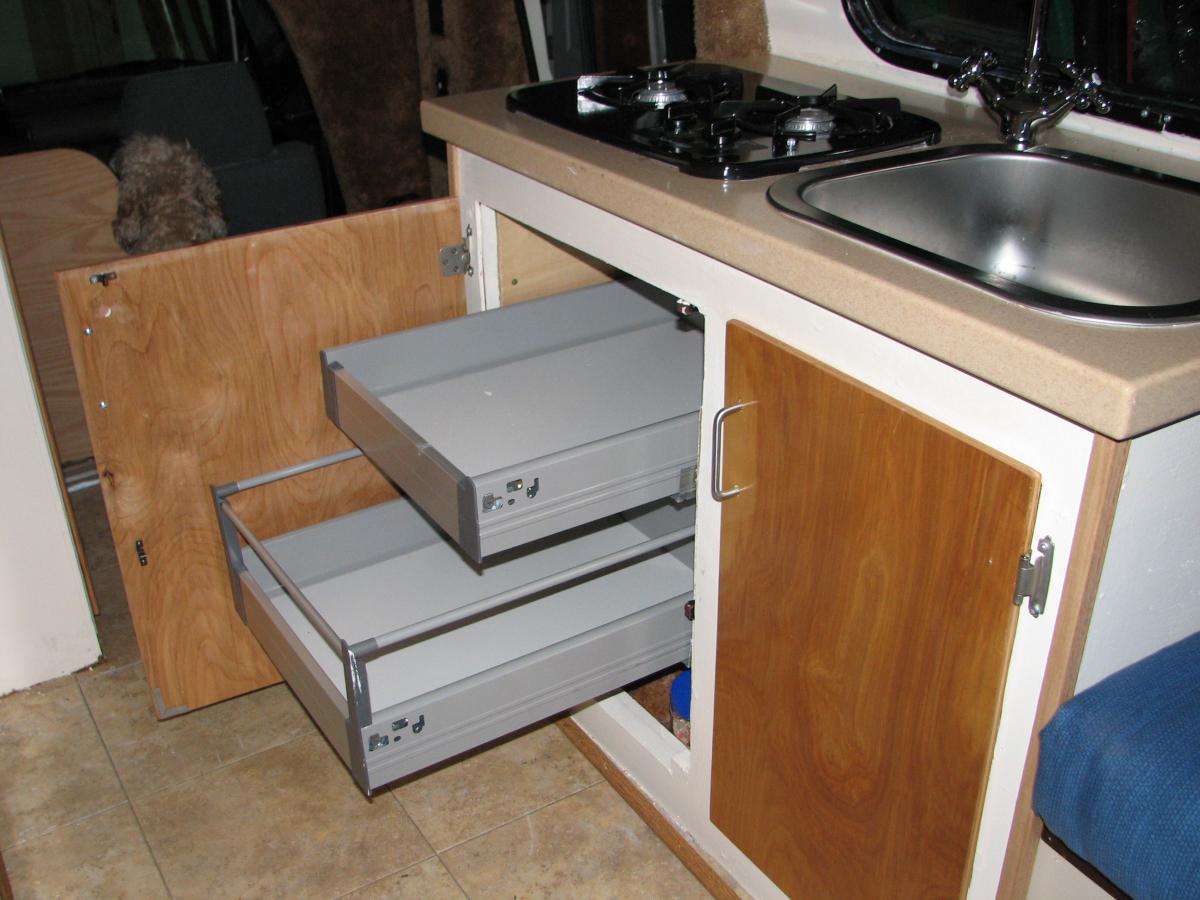
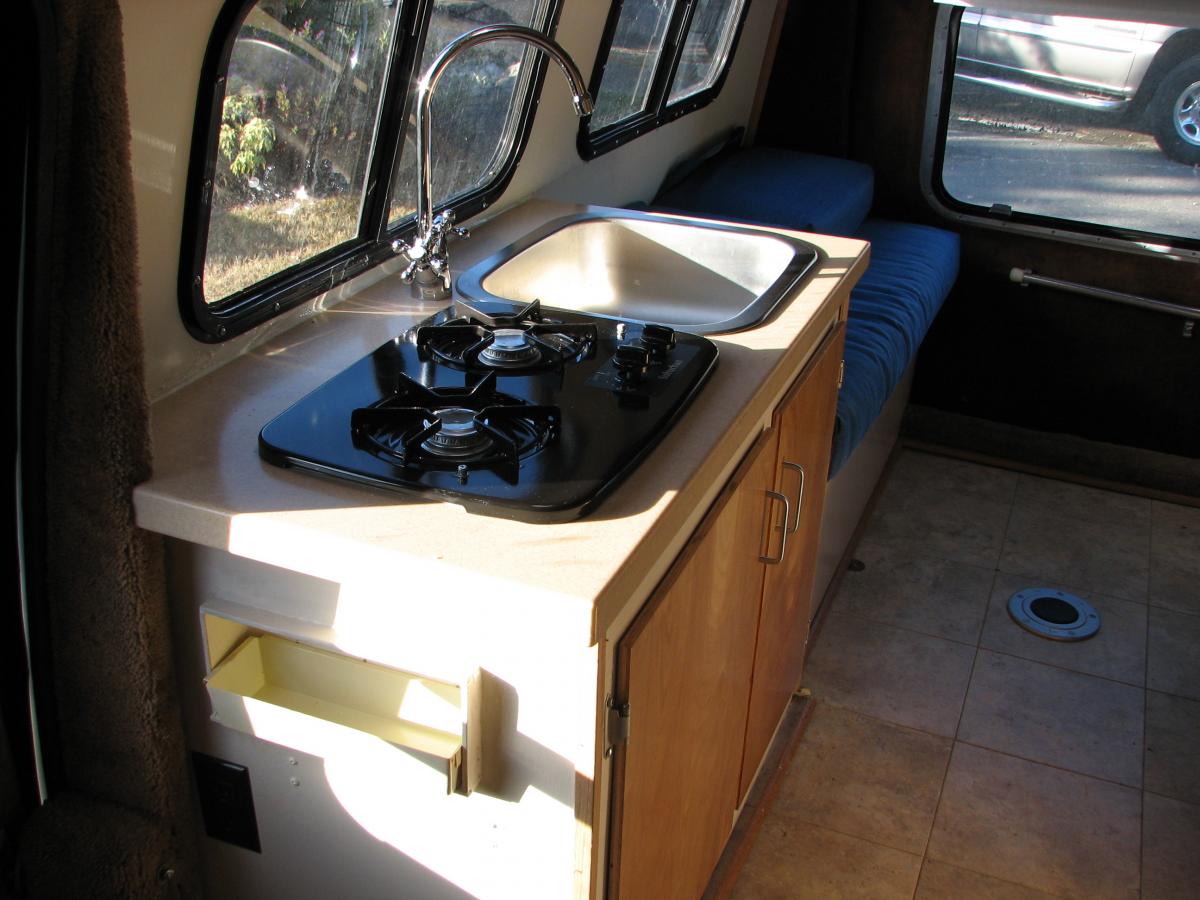
The kitchen area was more of a challenge. The countertop was old laminate that had gotten wet and swollen to double its original size along one edge and warped along another edge. The original cooktop and drawers had been replaced by a stove. While the stove worked, I took the stove out in favor of more storage. When I could not get the countertop I wanted, I began to look at Craig's List and found someone advertising corian cutting boards. He turned out to be a fabricator at a local Corian countertop company. From the company's scrap bin, he fabricated a nice kitchen counter, cut the holes for the sink and the stove. I reinforced the cabinet frame under the countertop to give it more support. I also installed a larger sink. The sink and faucet are both from Ikea. After one trip of storing things in boxes under the cooktop, I decided better storage would be nice. I installed full-extension drawers from Ikea under the cooktop. That turned out to be a more time-consuming and challenging than I like! The rails on the drawers needed to be exactly 16 1/8 inches apart and the cabinet needs to be square in a rig in which nothing is square. I used 3/8-inch birch plywood for the cabinet doors. If I were doing this again, I'd use 1/2 plywood, but I was going for light weight. I used double roller latches with the spear head for the latches on the doors to hold them tight and put two latches on the doors in front of the drawers. I have tried loading the drawers and driving around corners and over bumps to see if the drawers will "pop" the doors open. So far so good, but I am trying to find additional latches that can go inside the cabinet to secure each drawer.
-
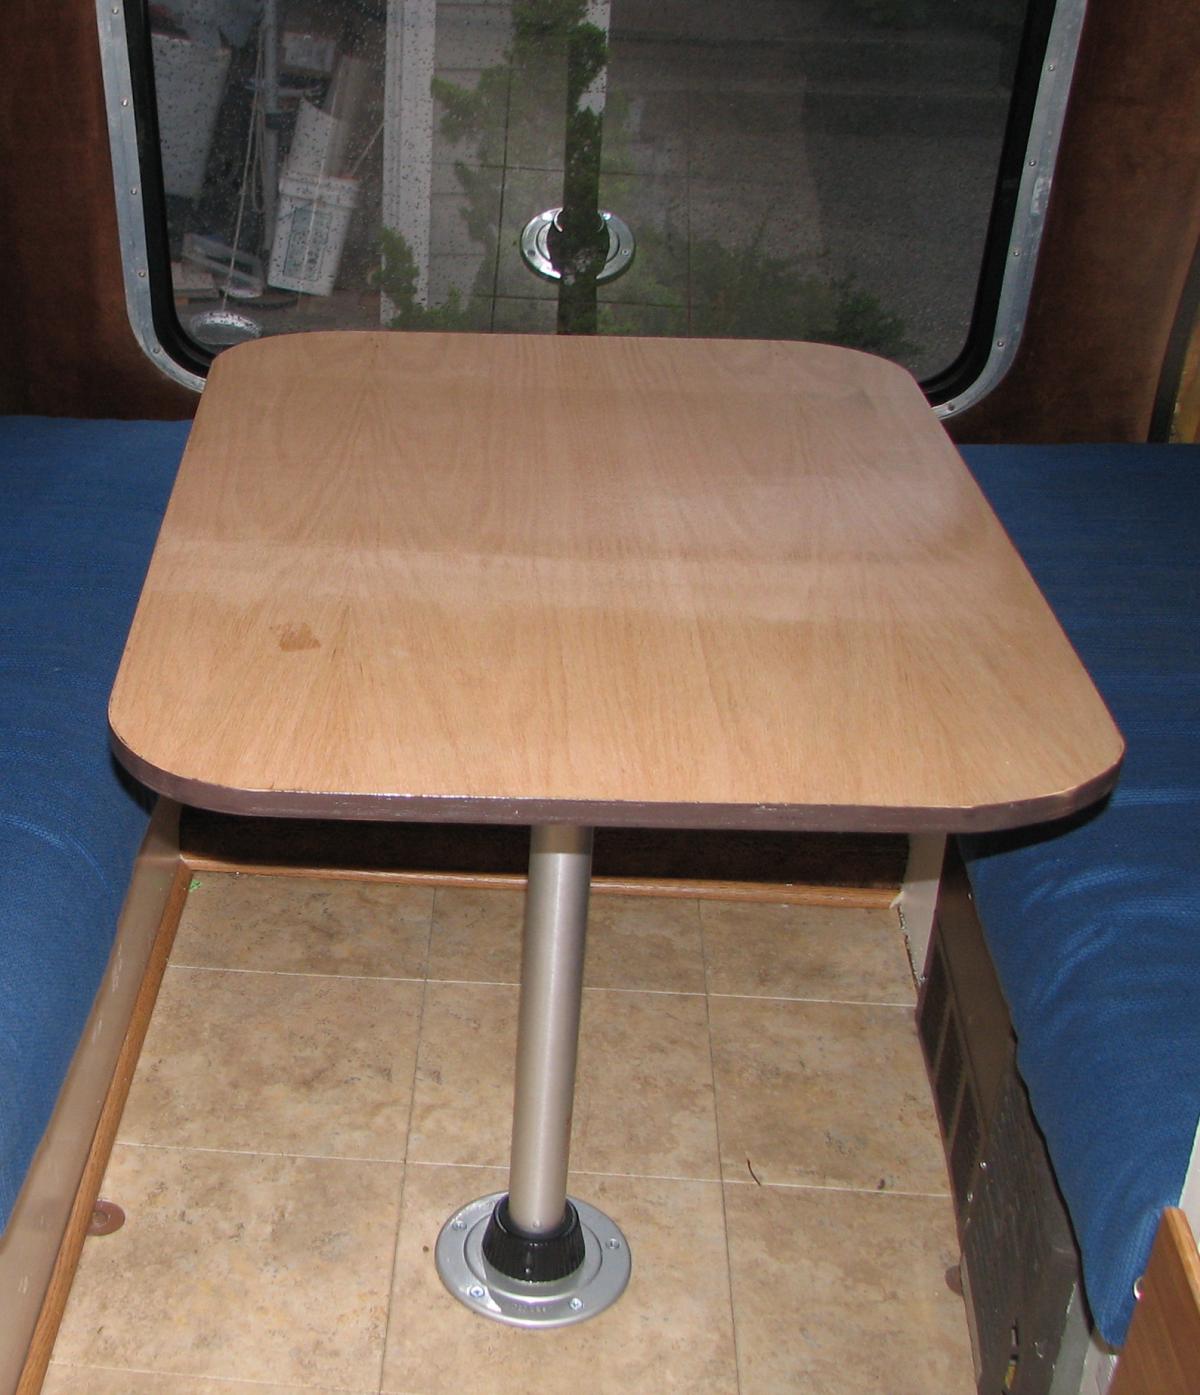
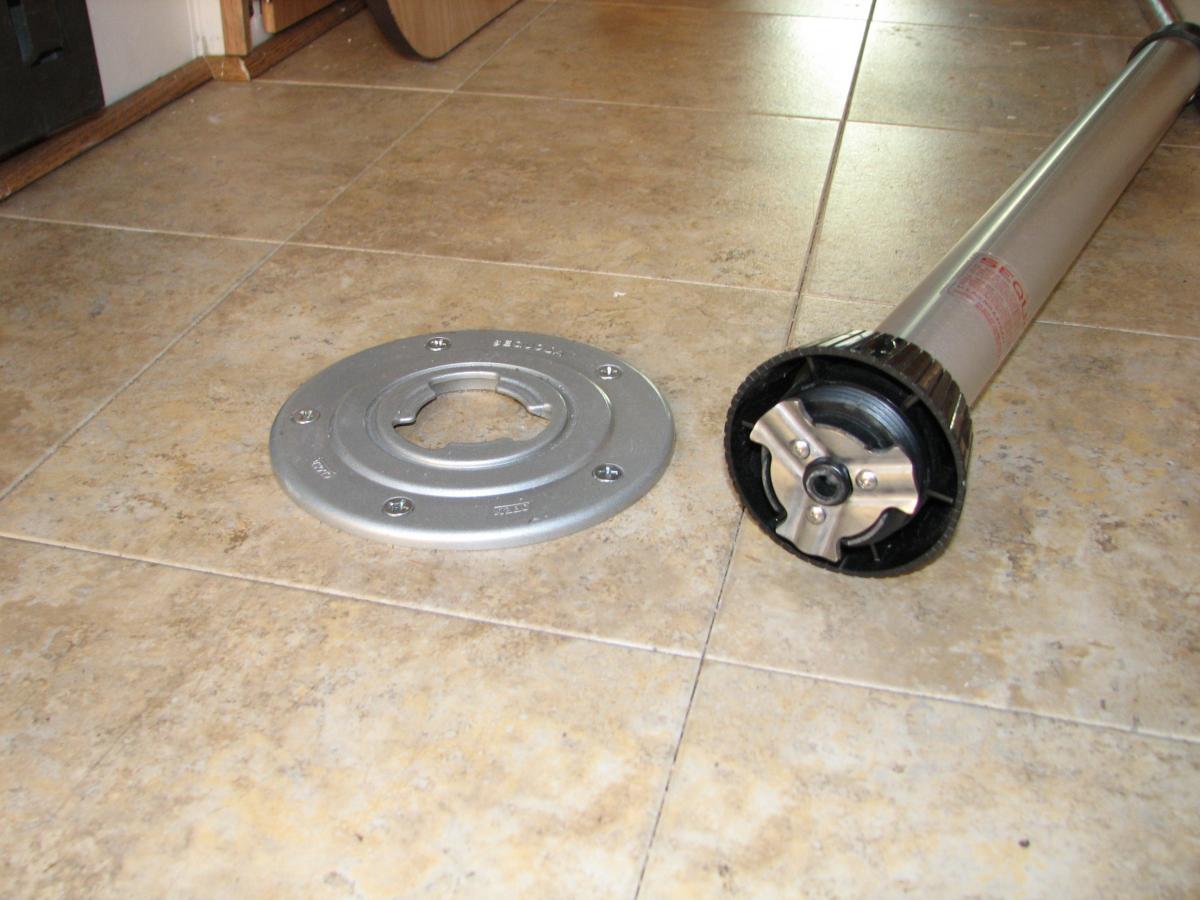
The Adventure originally had a table with folding legs, but by the time I purchased it, the table was long gone. I found a marine table base system that I liked. The base is flat on the floor and the leg has fins that lock into the piece on the floor. The advantages of this system were that it did not require drilling a hole all the way through the floor and the leg is light weight. I purchased the table leg system through Camping World on-line, but I have seen it other places. If ordering from Camping World, note that each piece of the table leg system has to be ordered separately. The table top is cut from oak plywood and fits between the bench seats for a bed. The table has multiple coats of polyurethane and the dark edge on the table is paint, not a plastic edge.
-
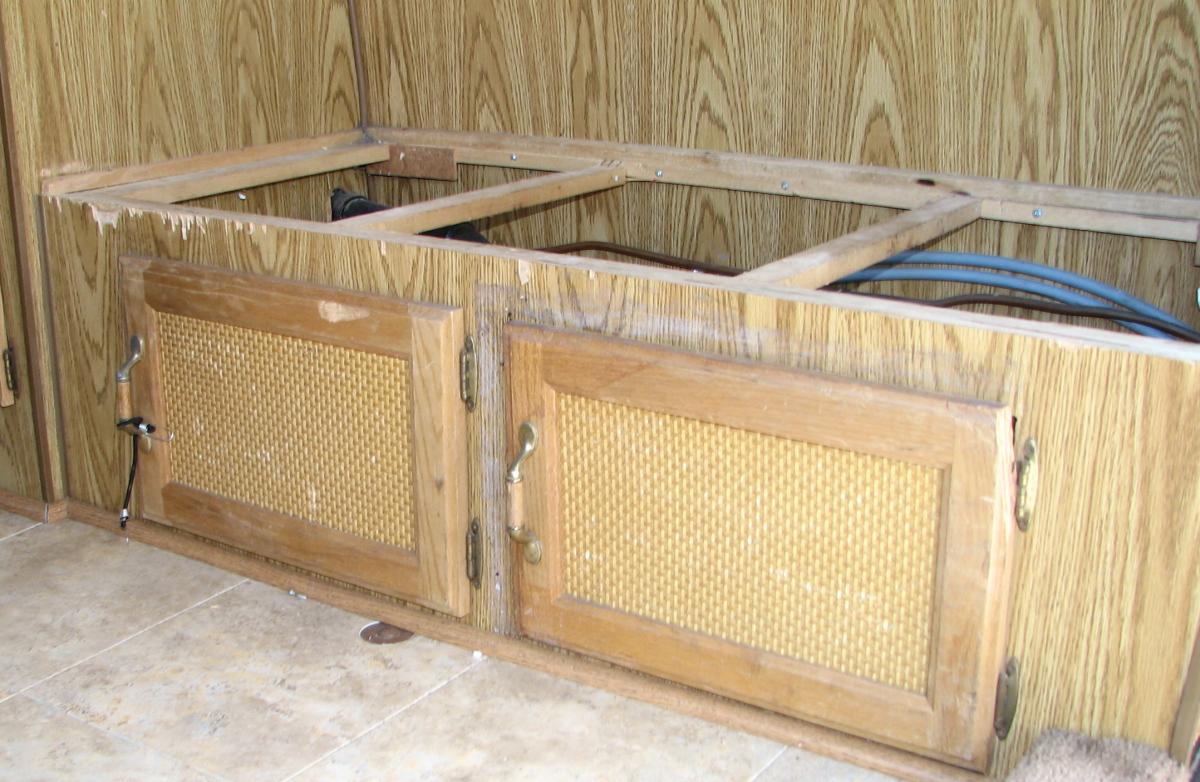
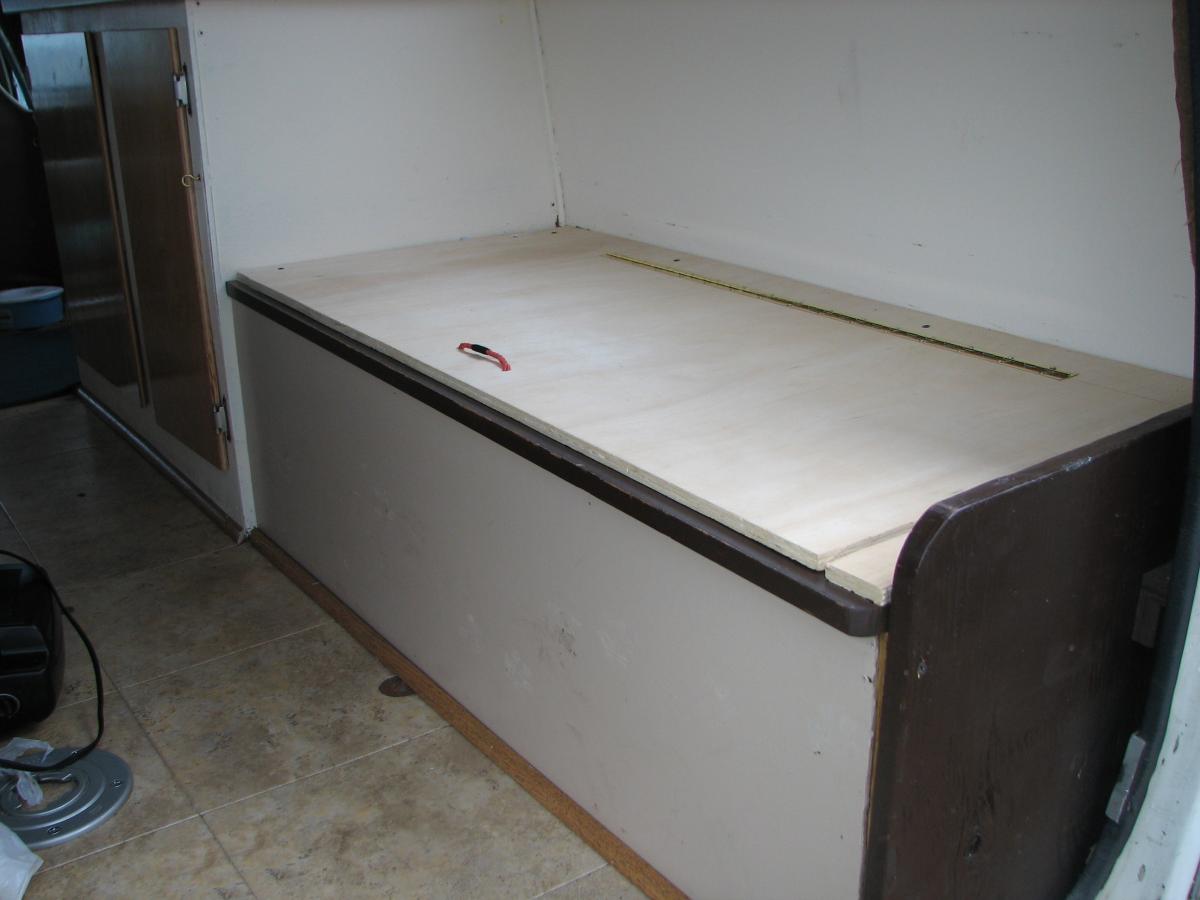
Over the last few months, I have been refurbishing my Sunrader Adventure, a pop top with a hatch door in the rear. The rear area serves as a dinning and sleeping area and the first task was to rebuild the rear area. The original bed pulled out from each side of the bench seat and latched together. It was difficult to handle and showed years of wear. On the passenger side, the bench had two cabinet doors for storage. The low cabinets were awkward for storing items and even more difficult to retrieve some things. PO's lost socks, coins, pocket knives, and business cards in that storage area. I was hoping to find gold, but no such luck. On the driver's side, the bench held the coach battery and another compartment that was accessible from the outside. I converted the passenger side to a bin storage. It is easy to see what is stored there and it provides more storage space. The lid can be held up by Velcro when taking items out of the bin, but I will be adding a cabinet strut soon. The bench on both the passenger side and the driver side have a lip for bed boards. As I watched people get into the coach via the hatch door, I noticed that they tried to grab the back edge of the bench seat for support. To make a hand hold, I used 3/4-inch plywood for the back end of the bench. This was cut so that it was taller than the bench and it was braced against the curved back wall of the Sunrader and bolted it to the cabinet frame. This has proven to be a very sturdy hand hold for people entering through the rear hatch door. The cushions for the bench seats/bed were made from 4-inch dense foam and covered with a fabric that resists stains and water. They are quite comfortable and fit tightly into the space so that they do not move around at night. After much thought, I painted out the "wood look." One of the previous owners had used duck tape and adhesive tape to stick things to the wall and seal the cabinet doors shut. When the duck tape was pulled off, the adhesive glue was left on the wall. I could not find a solvent that would not also strip the "wood look". In some spots taking the duck tape or adhesive tape off also took the finish off the walls.
-
I have only seen the owners manual for the 1977 Chinook. In that year, that there were only interior tie downs, a total of five, two in the front, one on each side and one above the back door. If you have interior tie-downs, you probably do not need any exterior latches. However if you want to other latches, you might look at the type of latches that I have on my Sunrader Adventure, another type of pop top. It has no interior latches or tie downs and the exterior latches are rubber ball latches (also called hood latches) . There are only two ball latches, one on each side of the front. The top on mine is very heavy. Here's a link to those latches https://www.pegasusautoracing.com/productdetails.asp?RecID=771. They are flexible and easy to use. There is a Yahoo Chinook Group for owners of all vintages of Chinooks. If you pose this question to the Chinook group, you will likely get a more complete answer. The link to that group is http://autos.groups.yahoo.com/group/toyotachinook/ Your son did a really nice looking rebuild. Would you care to share interior pictures. Sue
-
Over the last few months, I have learned more about Sunrader door locks than I ever wanted to know. I did not get a response from Trimark although I did not try as hard as I might have. Instead, I jerry-rigged a fix from my bucket of spare parts. I share my fix in hopes it might help someone else. My Sunrader door lock had multiple problems. The simple problems: it could not be locked and the interior door handle was missing. The more serious problem was that the 3” x 1/4" shaft that held the inside door handle would fall out when the door was closed with any force and during travel. (See picture of inside of lock with the shaft sticking out.) That shaft turned the rotors that opened the door and it connected the inside and outside door handles. When the shaft fell out, the door could not be opened either from inside or outside, which meant climbing through the cab to enter the coach. I used a pliers to open the door when I was on the inside. I took the lock to a locksmith to realign the springs and things so that it could be locked but his only suggestion for other problems was to close the door carefully. My best solution to secure the 3” shaft in the lock: I cut two thin metal strips 1/4” wide x about 1.75" long and bent them into L’s (one leg of the L was 1/4”, the other 1.5”). The smaller ends of the L could be slipped in next to the shaft and hooked inside of the lock. The long ends of the L were clamped to the bar with an electrical clamp connector. This centered the shaft and held it at the correct depth in the lock, but allowed it to turn. Most ready-made door handles fit square shafts and did not fit this shaft. I made a handle from 1/4” plywood and secured it with the clamp connector nut. While not pretty, I can now open, close and lock the door from inside and outside.
-
'93 Dolphin Remodel
TacomaSue replied to lagreen's topic in Improvement and Do-It-Yourself Projects you have done to Share!
Your remodel looks lovely. I'd like to know more about the bench to bed conversion. When you convert the bench seat to a bed, what type of support do you have under the pulled out portion of the bed? Is the bed, made of plywood under the cushion? Thanks for the info. Sue -
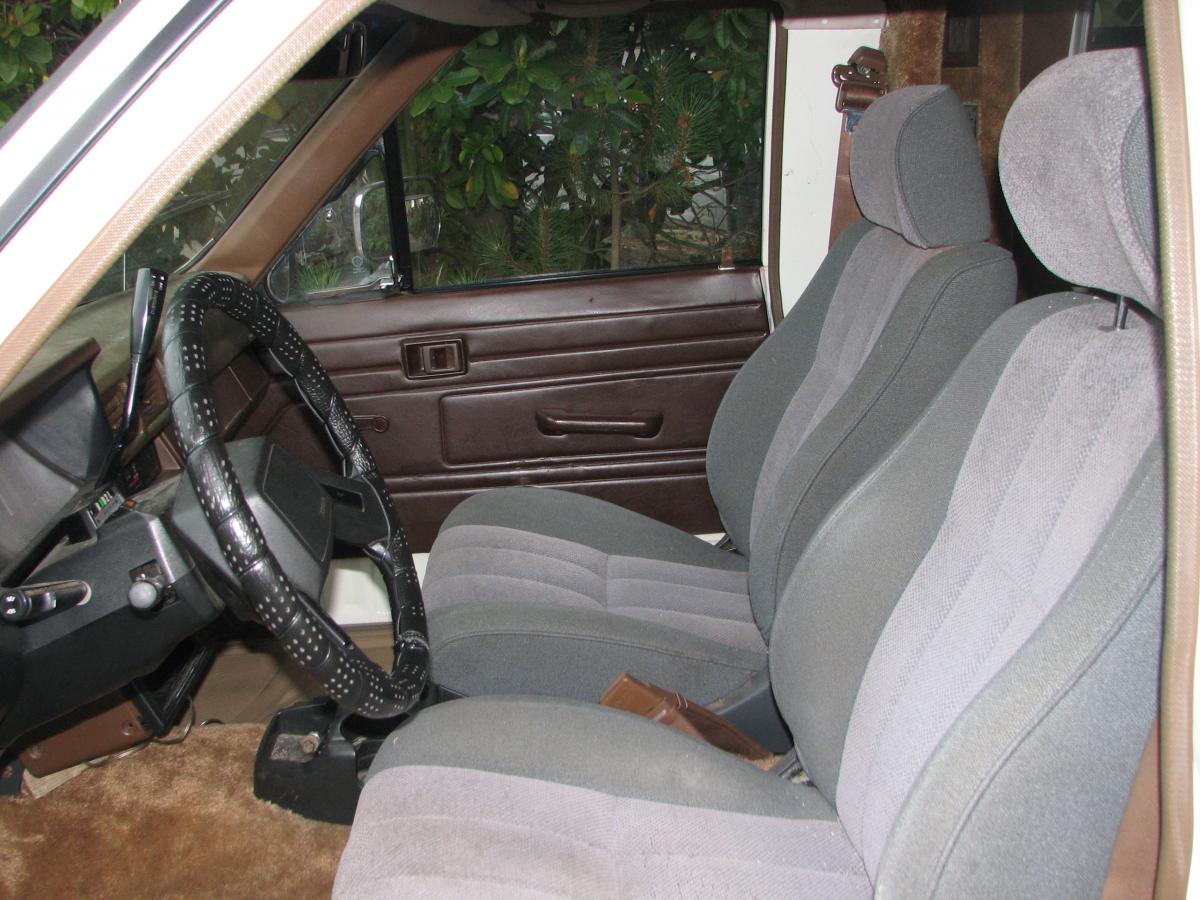
I only drilled two holes in the floor of the cab on the side nearest the door (for both driver and passenger side seats). I did not drill new holes in the runners. The new 1990 runners fit the 1986 bolt holes in the cab floor perfectly on one side but not both sides. I could line up the runners and the holes on the floor either toward the center of the cab or toward the outside, but not both at the same time. I found that it was easiest to bolt the 1990 runners into the old 1986 holes in the center of the cab and then mark where to drill new holes into the floor on the side nearest to the door. The new holes were about an inch closer to the center of the cab than the old 86 holes. The metal reinforcing under the floor of the cab was wide enough to accommodate the new bolt holes. I did not tap the new holes. I used a new slightly longer bolt, nut and lock washer.
-
I upgraded the seats on my 1986 Sunrader using seats from a 1990 SR5 (exactly like Bunney's first post in this thread). The bolts in the runners from the SR5 fit perfectly from front to back, but were 1inch off measuring from side to side. When I lined up the bolts up in the center first, new holes could easily be drilled into the original extra reinforcing for the seat runners under the floor. I found the seats on Craigs List and while the bolster on the driver's side is slightly worn, the new seats show much less wear than the original seats which had a split in the seat and squashed foam. Also, note the door panels were originally two-tone brown and beige and had numerous discolored spots that I could not remove. When I took the door panel off to seal the plastic inside the door to stop cold air from blowing through the door handles, I spray painted the panels using a spray paint for plastics. I painted the handles to match while they were off the door. Unfortunately, I spray painted the panels before I found the seats or I might have chosen some color other than Espresso.