MaineErik
-
Posts
89 -
Joined
-
Last visited
Content Type
Events
Profiles
Forums
Gallery
Everything posted by MaineErik
-
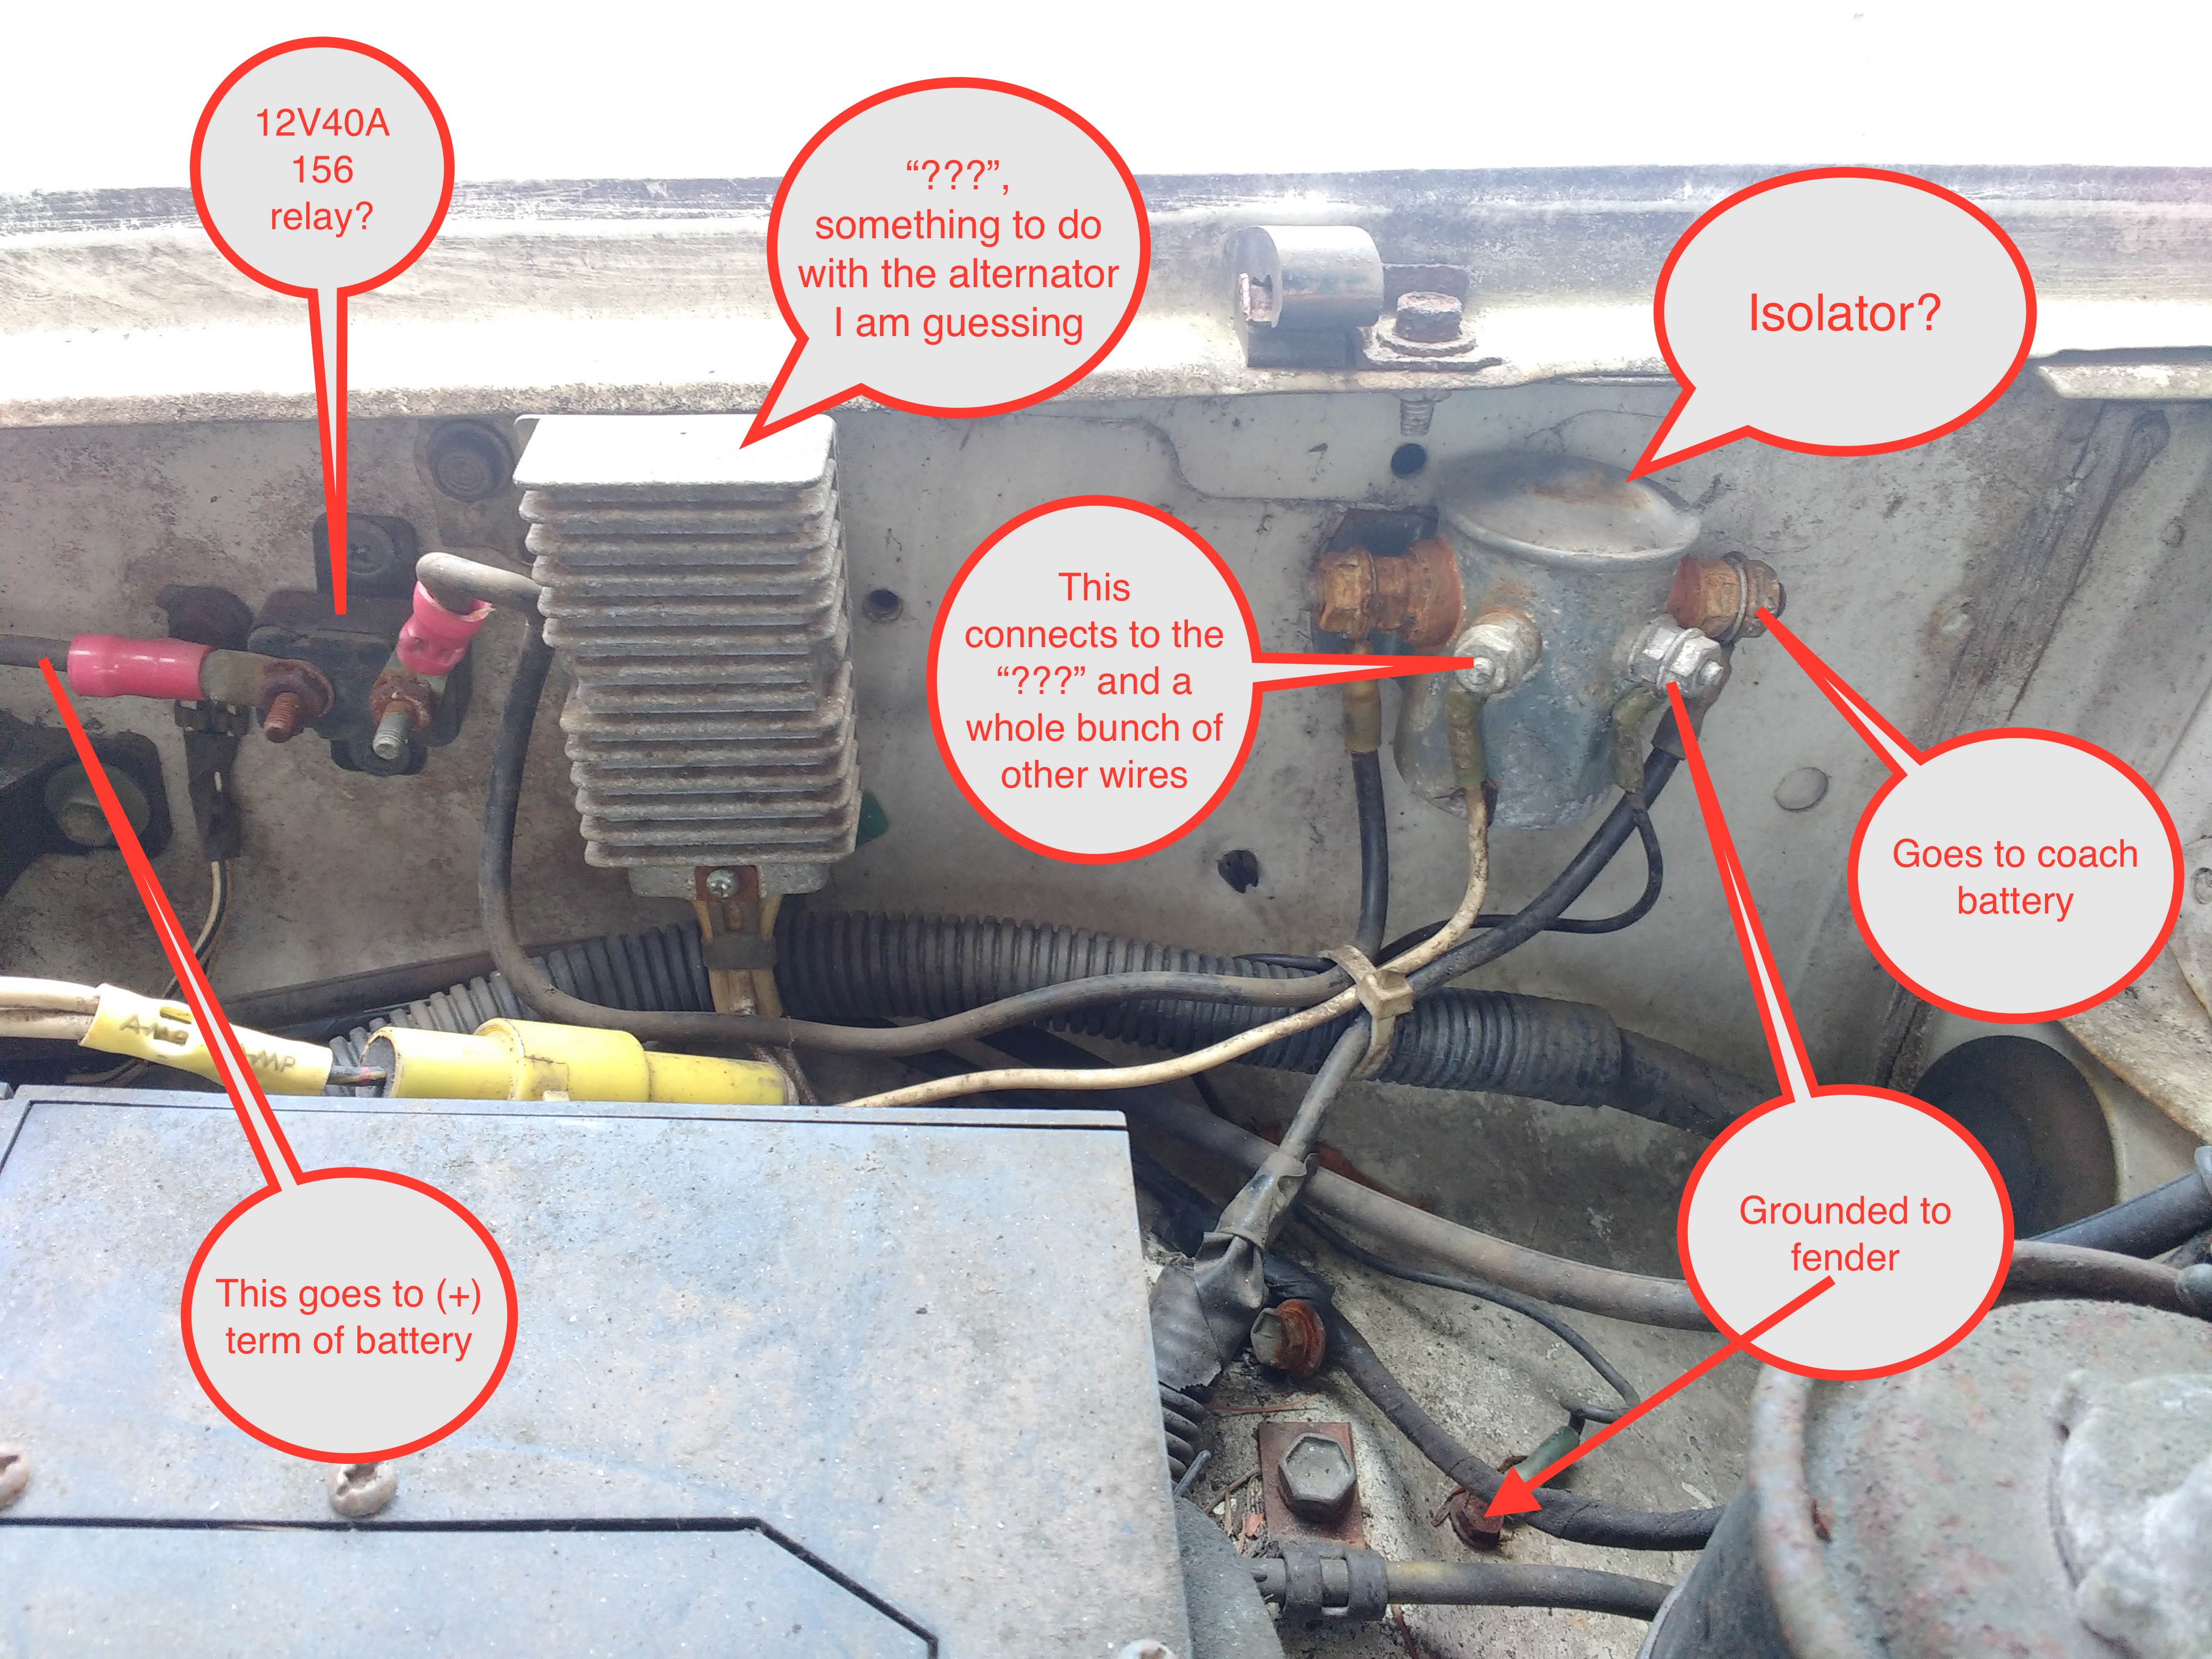
Hi Folks - Since buying the MH the coach battery has never charged from the alternator. I suspect the isolator and/or relay(?) or other electrical hardware is to blame. (Coach charges fine when plugged into 120AC). So today I decided that before replacing stuff (not even sure what to replace it with) I would try to clean up the corrosion on all the terminals to see if that got it working. Here is a photo of what it all looked like before I got started: Well the first thing that happened was that the relay (2 post thing on left) broke while removing the nuts. This is what it looks like up close: I have searched online but cannot confirm exactly what this is (though I suspect it's a relay) and absolutely have not been able to find one like it (or any 12v40a relay with just two posts). Am I even on the right track with cleaning the oxidation on all this stuff. Or should I just replace it all with new and stop wasting time? If the latter, what do you recommend. Please give me direction - thank you!!!

-
@Mrlope, Do you have the angle irons sitting on top of the edge trim of the roof? From the photo it looks like one side is sitting on the trim but on the other side it is unclear. I would think that placing it on top would work best, plus adding additional risers per @WME's suggestion. But then I wonder about putting too much point load/stress on the small area where the angle iron touches the plates. What about aluminum angle iron like this - do you folks think it would resist bending enough to do the job of lifting the roof? I know steel will eventually react poorly with the aluminum roof on the Toy (galvanic corrosion) - the paint will only prevent contact for so long (maybe some form of full length tape to separate the two metals should be used as well). Plus with AL one would never have to worry about rust stains either. Maybe a larger Al member if the one from Lowes is too flimsy? I'd like to purpose the angle iron to double as a roof rack too. They would make a nice set of cross bars to strap the kids to when they start bickering.
-
This is terrific, thanks for sharing. We have the dinette, no couch, in our 19fter. We are also now expecting another little person, which will put us at 5 in the Toy camper I'm going to build a bunk for over the dinette bed, another pipe like cot to hang over the front seats, and hopefully we all have space to sleep, or cry. I've also thought about turning the bathroom into a nursery, it's pretty useless to us other than storage as we don't need the extra sink and use public or natural pottys and showers while traveling. Luckily all the kids are smallish humans still. I wouldn't be so confident if it was 3 teens...
-
Perhaps, but only if the princess lied in the middle of the bed - probably better than the setup most of the berths have. Thanks for the better photos Zulandio. I still like the idea of some flush setup...
-
So once setup there was little chance of anyone traveling from the front to the rear of the camper without ducking/etc.? I'd prefer to have something that still allowed a pathway from the birth to the door and on to the kitchen and bath. I found this idea, but I'd like to have one above the dinette also. I've event thought that maybe I will remove the fridge and knock down that wall to make a bed that would pass over the shower stall --- but that would take more courage than I have to initiate!
-
I apparently am a princess! Ha, thanks Don. The cab pass through is SUPER useful for our family, in fact I probably use the camper door to get in and out more often then the driver's door. And on the road we always play a round of musical chairs between the passenger seat and those in the back (don't worry, the driver stays put!). So removing the passthrough via a non-cut mattress is not an option. But maybe all I need to do is replace the super soft foam with something firmer.
-
Thanks for trying but I'm totally not seeing the small sliding section in those photos - so does your sliding section still have an increased height relative to the surrounding U (not counting foam)?
-
The question was asked "what tires should I run?" - not Yoko's is for sure part of that answer as is what does work.
-
I don't have many miles on them yet, but I got a good deal on the tires I recently purchased from the local Stratham Tire shop: $370 for 6 new Goforms including balancing & mounting. 185R14C. Others here have recommended these tires and they are quite affordable.
-
Hi Dennis @bufbooth,I'm very interested in seeing your finished product as I've been looking for ways to make more separate sleeping areas in our camper (dinette and overcab beds only right now). The link you posted no longer works, can you share your photos with a new link or post them here? Thanks! Erik
-
Did you reuse the small section that fits into the 'U'? The stock one sits on top of the 'U', it's 5/8" plywood with a thinner pad on top. And I have discovered it to be VERY uncomfortable!!! The pads are so low density that the outside sleeper essentially has their hips higher than head or feet. I've been thinking of using some metal brackets and building a new insert that would sit flush or closer to flush with the surrounding U section, then finding some new pad material more similar in thickness to the surrounding pad. I can't imagine that anyone finds the OEM setup - it makes for a horrible night sleep, unless you are the lucky duck who gets to sleep near the front window.
-
Went for it this past weekend - used the shore water connection and also filled the tank... not a single leak! I decided I probably was never going to use the hot water heater, so I just turned off the valves on the heater so that cold water passes by. I've ignored the disconnected cold water line to the kitchen sink and just used the hot valve. Bath sink works well. Didn't try toilet or shower, don't expect to use either, well maybe #1s but not #2s, though with kids they may go for 1 and end up doing 1+2! Grey holding tank works well. We drank bottled water, a lot of the pink antifreeze came out when we first started using the system, can't imagine that being OK for the human body... I'll do some more research, maybe with a new filter it would be safe enough. Only 1 problem: water pump does not turn off automatically, I have to manually shut it on/off using switch. I tried tapping the valve head as the Shurflo manual stated, no luck. Guess I will try to disassemble it, clean it, and hope that does the trick... anyone try this before? I also need to re-lash the grey water tank as the original metal strapping is rusted and broken. Seems like it's also mounted to the undercarriage in some other secure method cause it's solid even with broken straps. I'm thinking of using plumbing support strapping (the one with all the pre-stamped holes) or nylon webbing. We did all this while visiting Lamoine St Park (Maine) this weekend. AND there was another Toy camper there, but sadly the owners drove off before we could say hi (must have seen us coming!). We also spotted a 3rd Toy driving toward the coast on our way back home. That's a record sightings for us! It poured rain and was super windy Sunday morning and not a single leak could I detect --- that feels good
-
Well I followed the git'er done method. Yours is truly more a work of craftsmanship! Do you have construction adhesive in there too?
-
#1 --- Yes! There is a random piece of hose with a female attachment, good to know what it was intended for #2 --- Any idea on freeing up these valves, I certainly don't want to use the 50gal drum of PB Blaster on my drinking water system! @Back East Don, the cold water line to the sink is in that photo, it's just been disconnected from the T fitting on the water heater (that being one of the mysteries!). All the plumbing seems intact under the sink, although there seems to be a very convoluted method of piping in a water filter. Could you take a photo of your water heater area and send it to me so I can see what it's supposed to look like? And are your H and C valves on the kitchen sink backward too? (cold on L, hot on R) So once I get this stuff put back together how would I go about making sure there is not a leak under the shower pan... I hope it's not just waiting for a wet rug or floor to appear!!
-
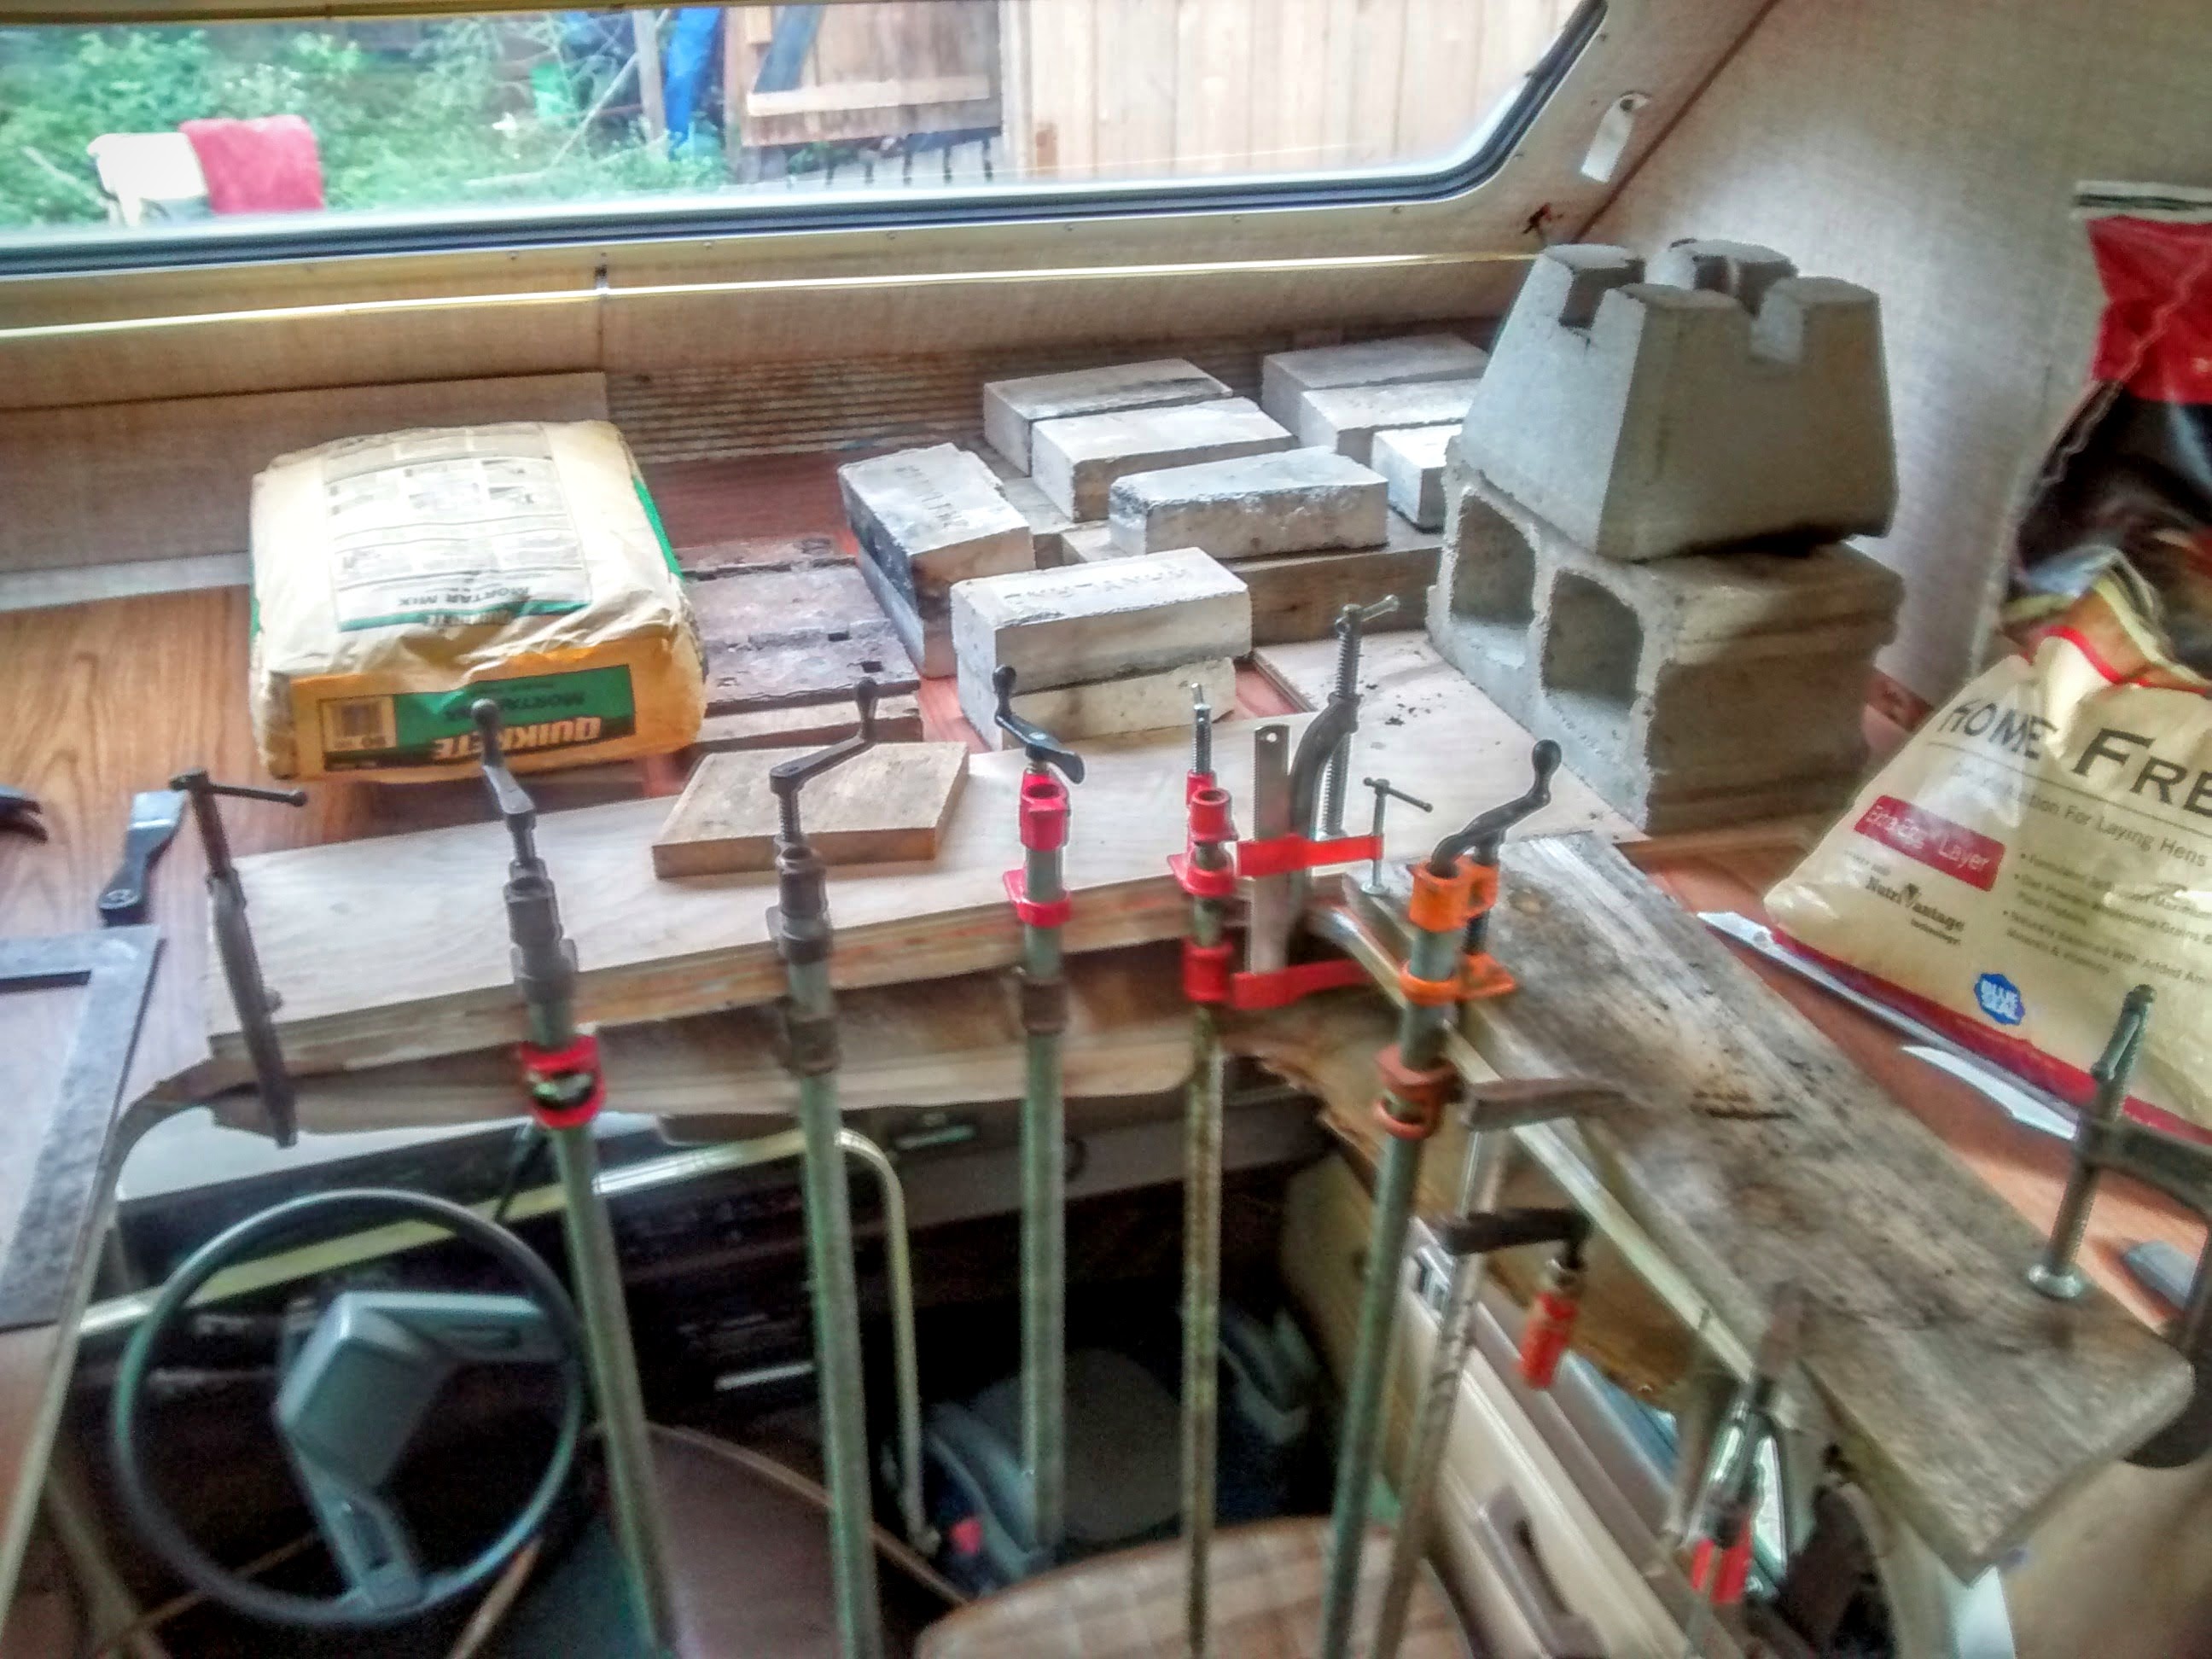
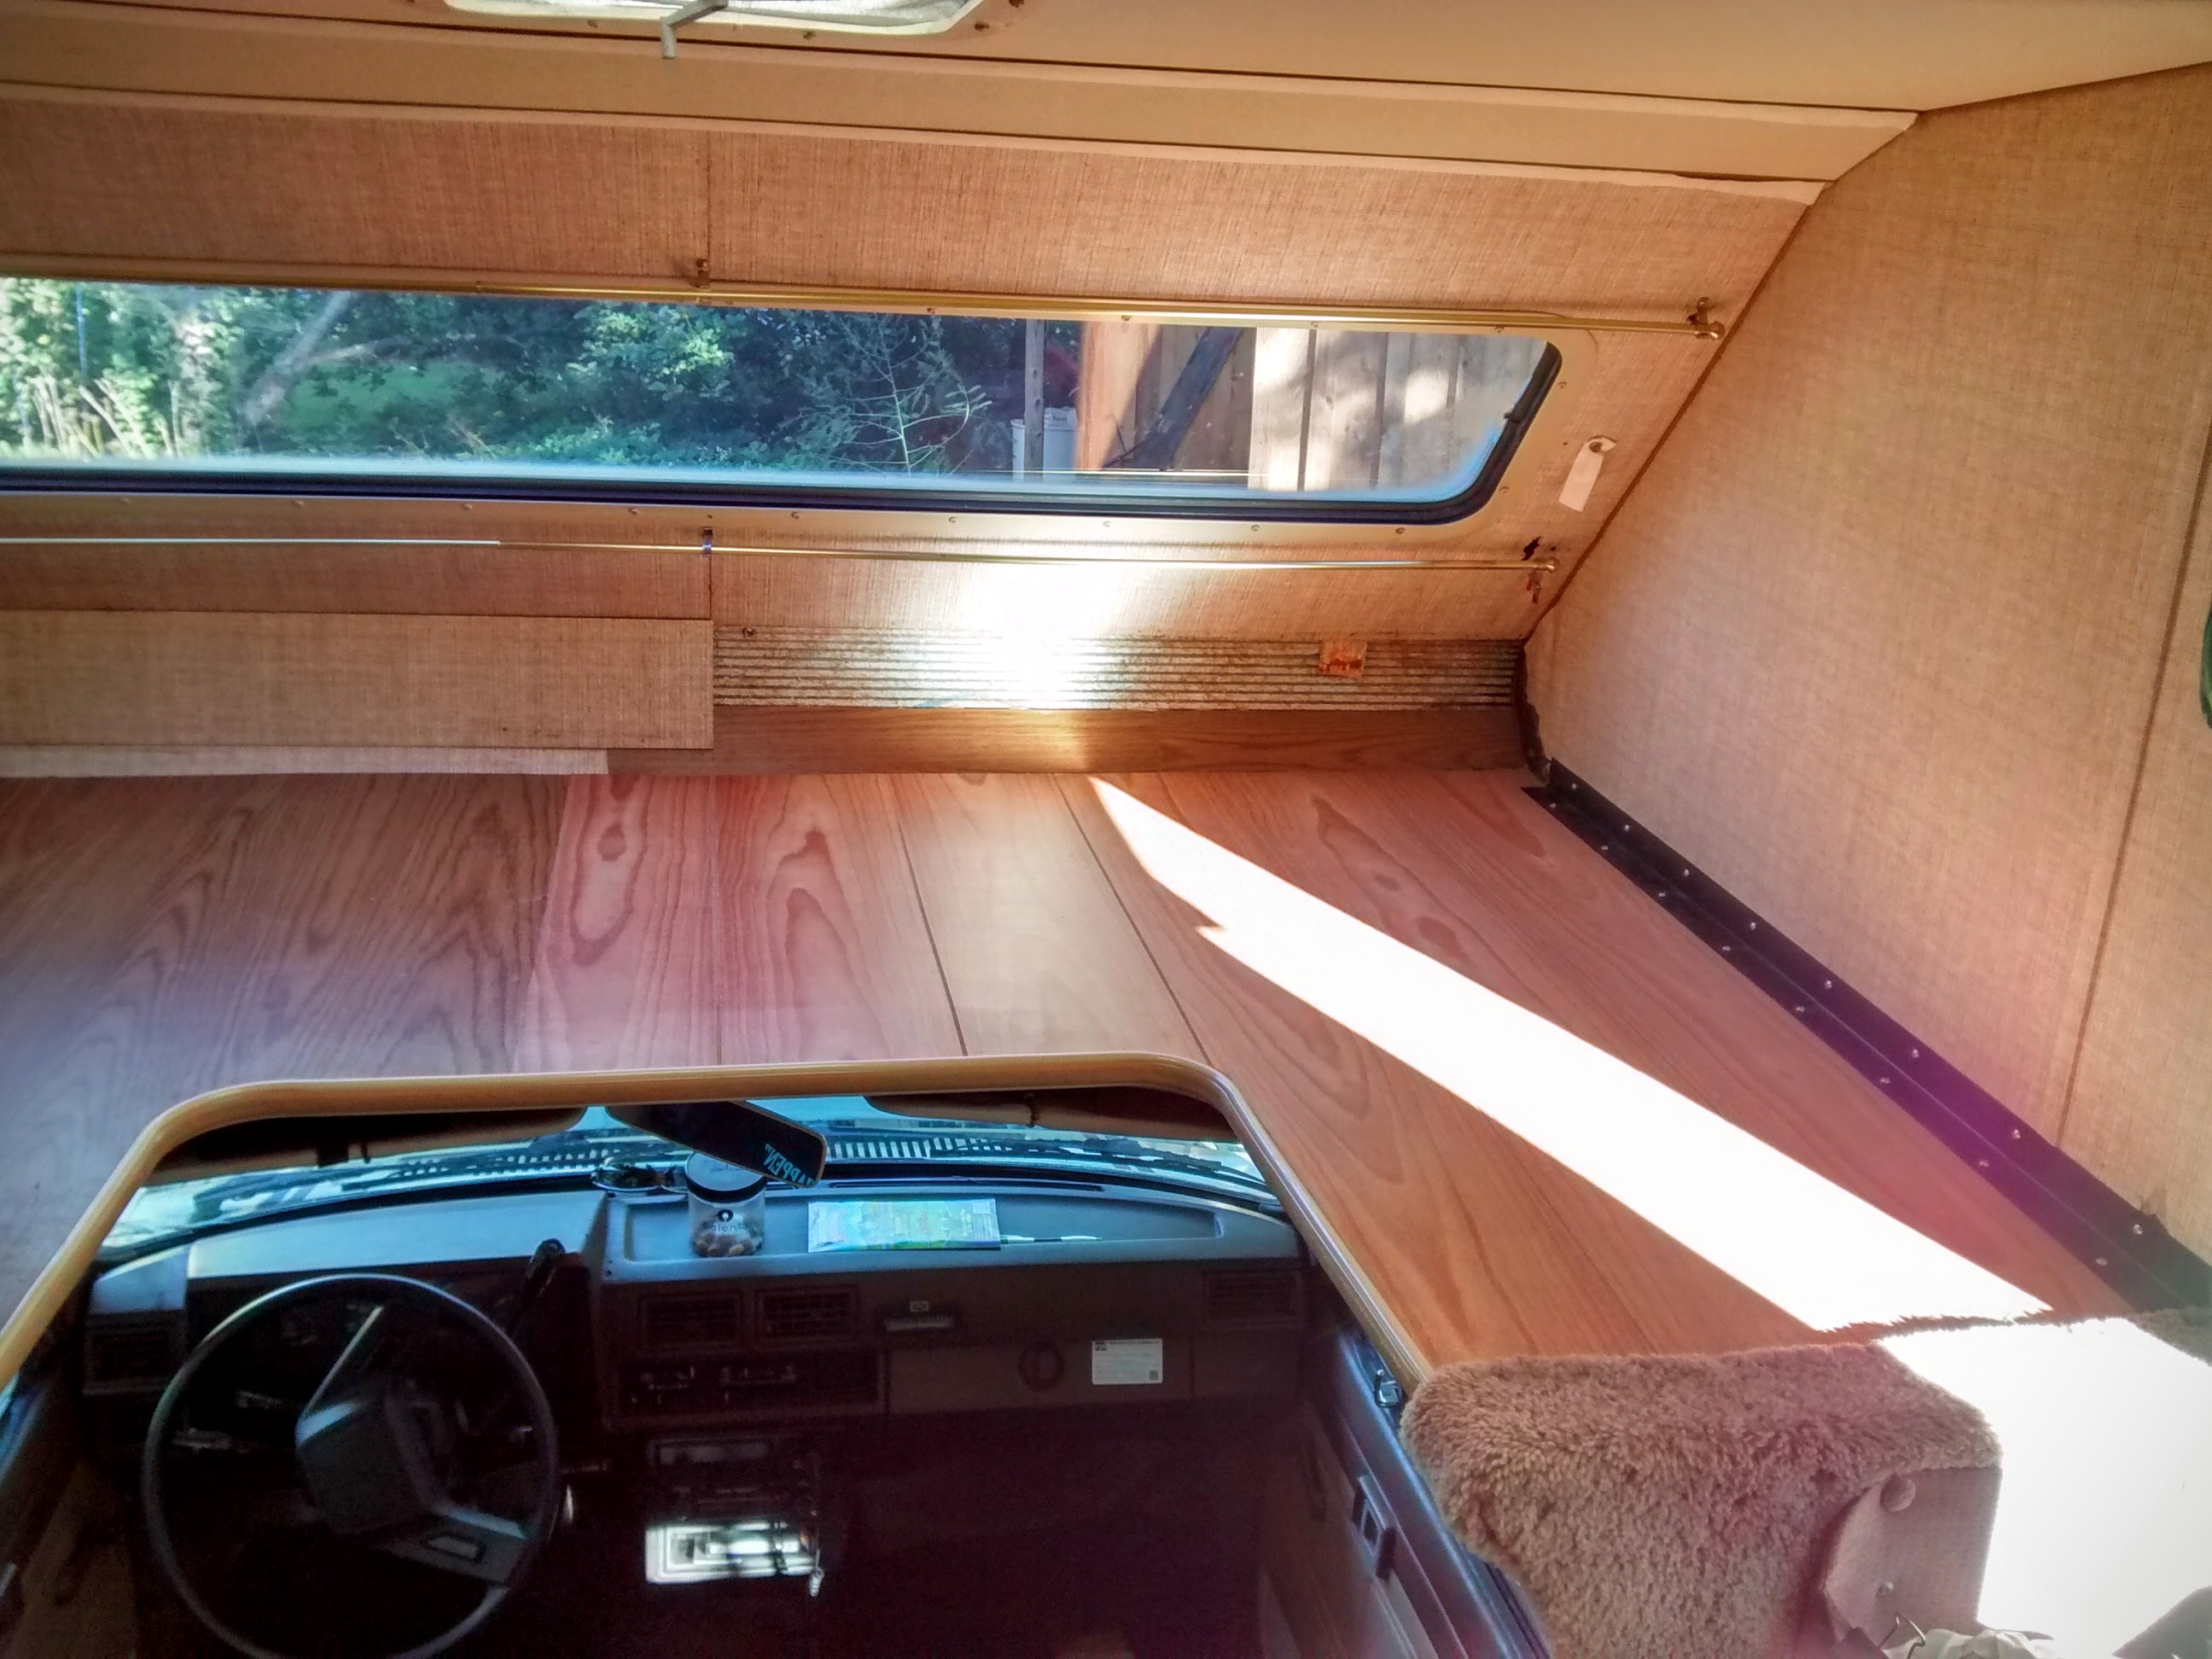
I rebuilt our berth last week, took 2 days to tear it apart and put it back together. Not bad at all! I meant to take photos of all the steps but of course I forgot to take the first photo and then kept forgetting to take subsequent ones. I tore the right 2/3 down to the Al skin (the left 1/3 wasn't perfect but it was good enough, still solid). I supported the bottom with some 2x lumber, plywood, and a set of ladders as scaffolding. I used 5 tubes of construction adhesive to rebuilt the composite structure. Layer one was 1/4" plywood, then 3/4" plywood & foamboard (I recycled the original foam), topped but a layer of 1/8" wallboard. Let it cure for the recommended 24hr period. And voila, good as new! Drove it 450miles to NH and back this weekend and it worked like a charm 1/4" plywood down already: 3/4" plywood and foam: 1/8" wallboard and clamps annndddd some weight to get it all adhered correctly!: Final product is ready for Martha Stewart: A few more final touches still need to be finished but the structural stuff is all good to go now, yahoo!
-
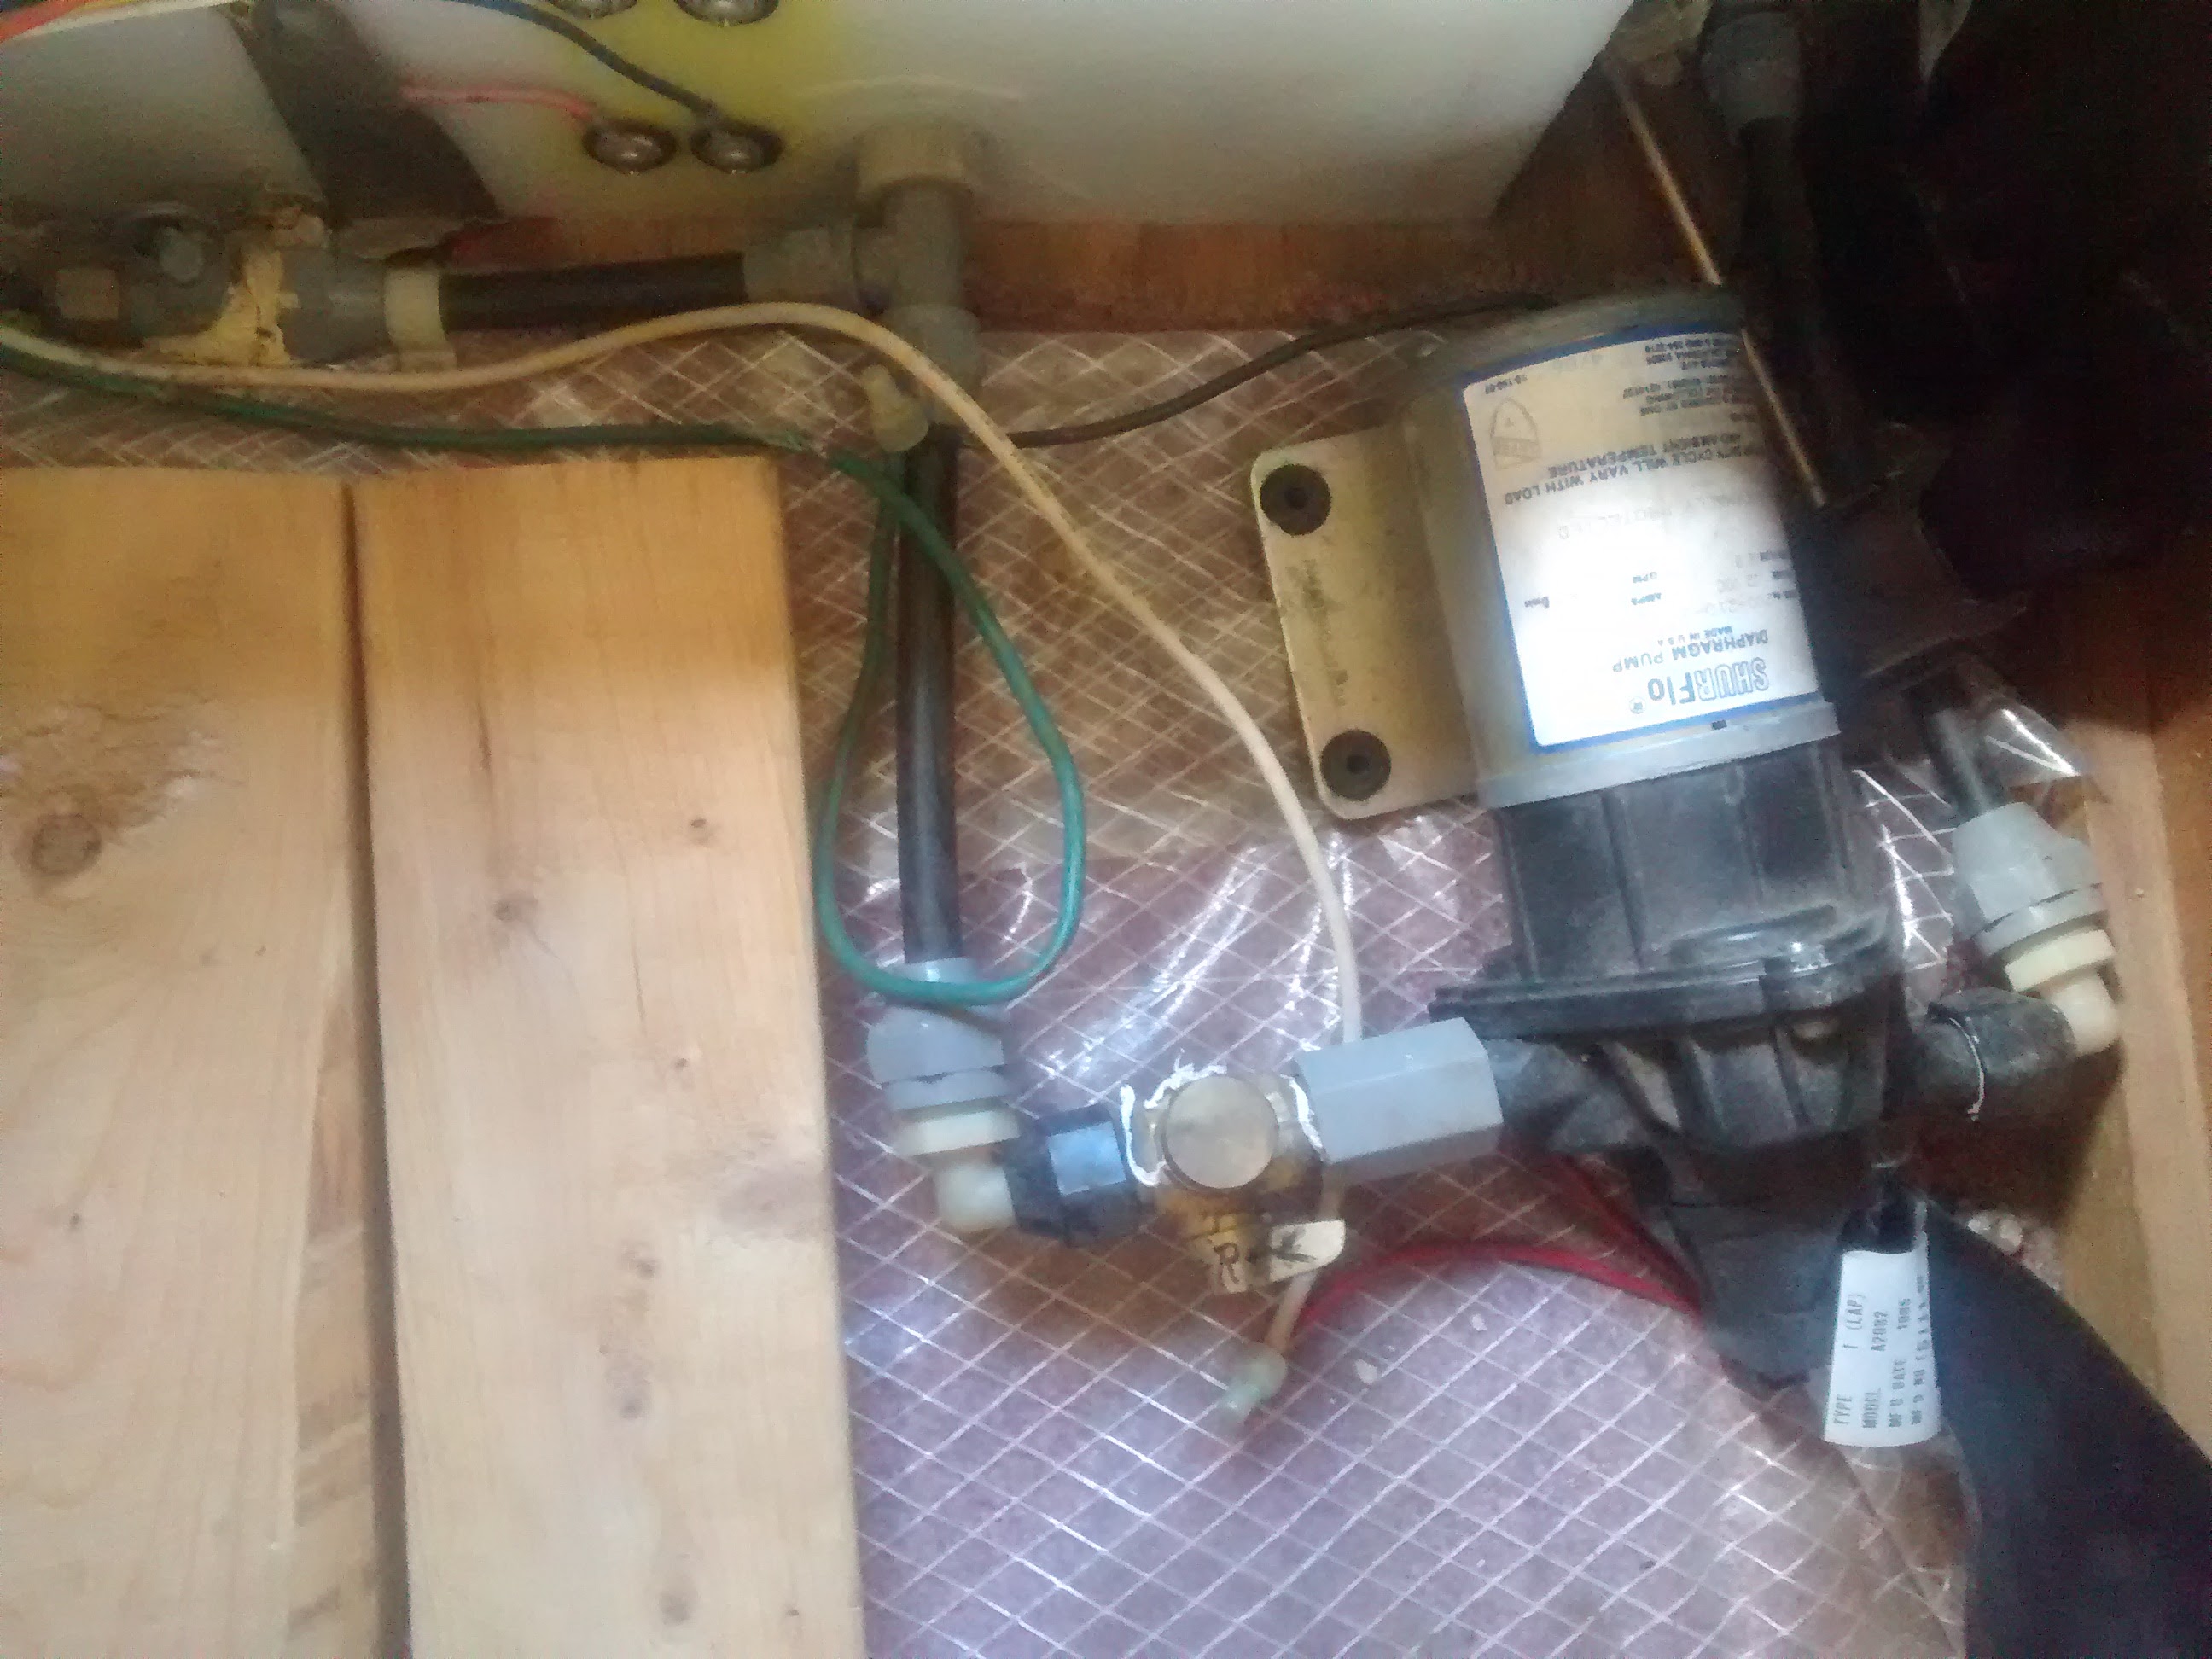
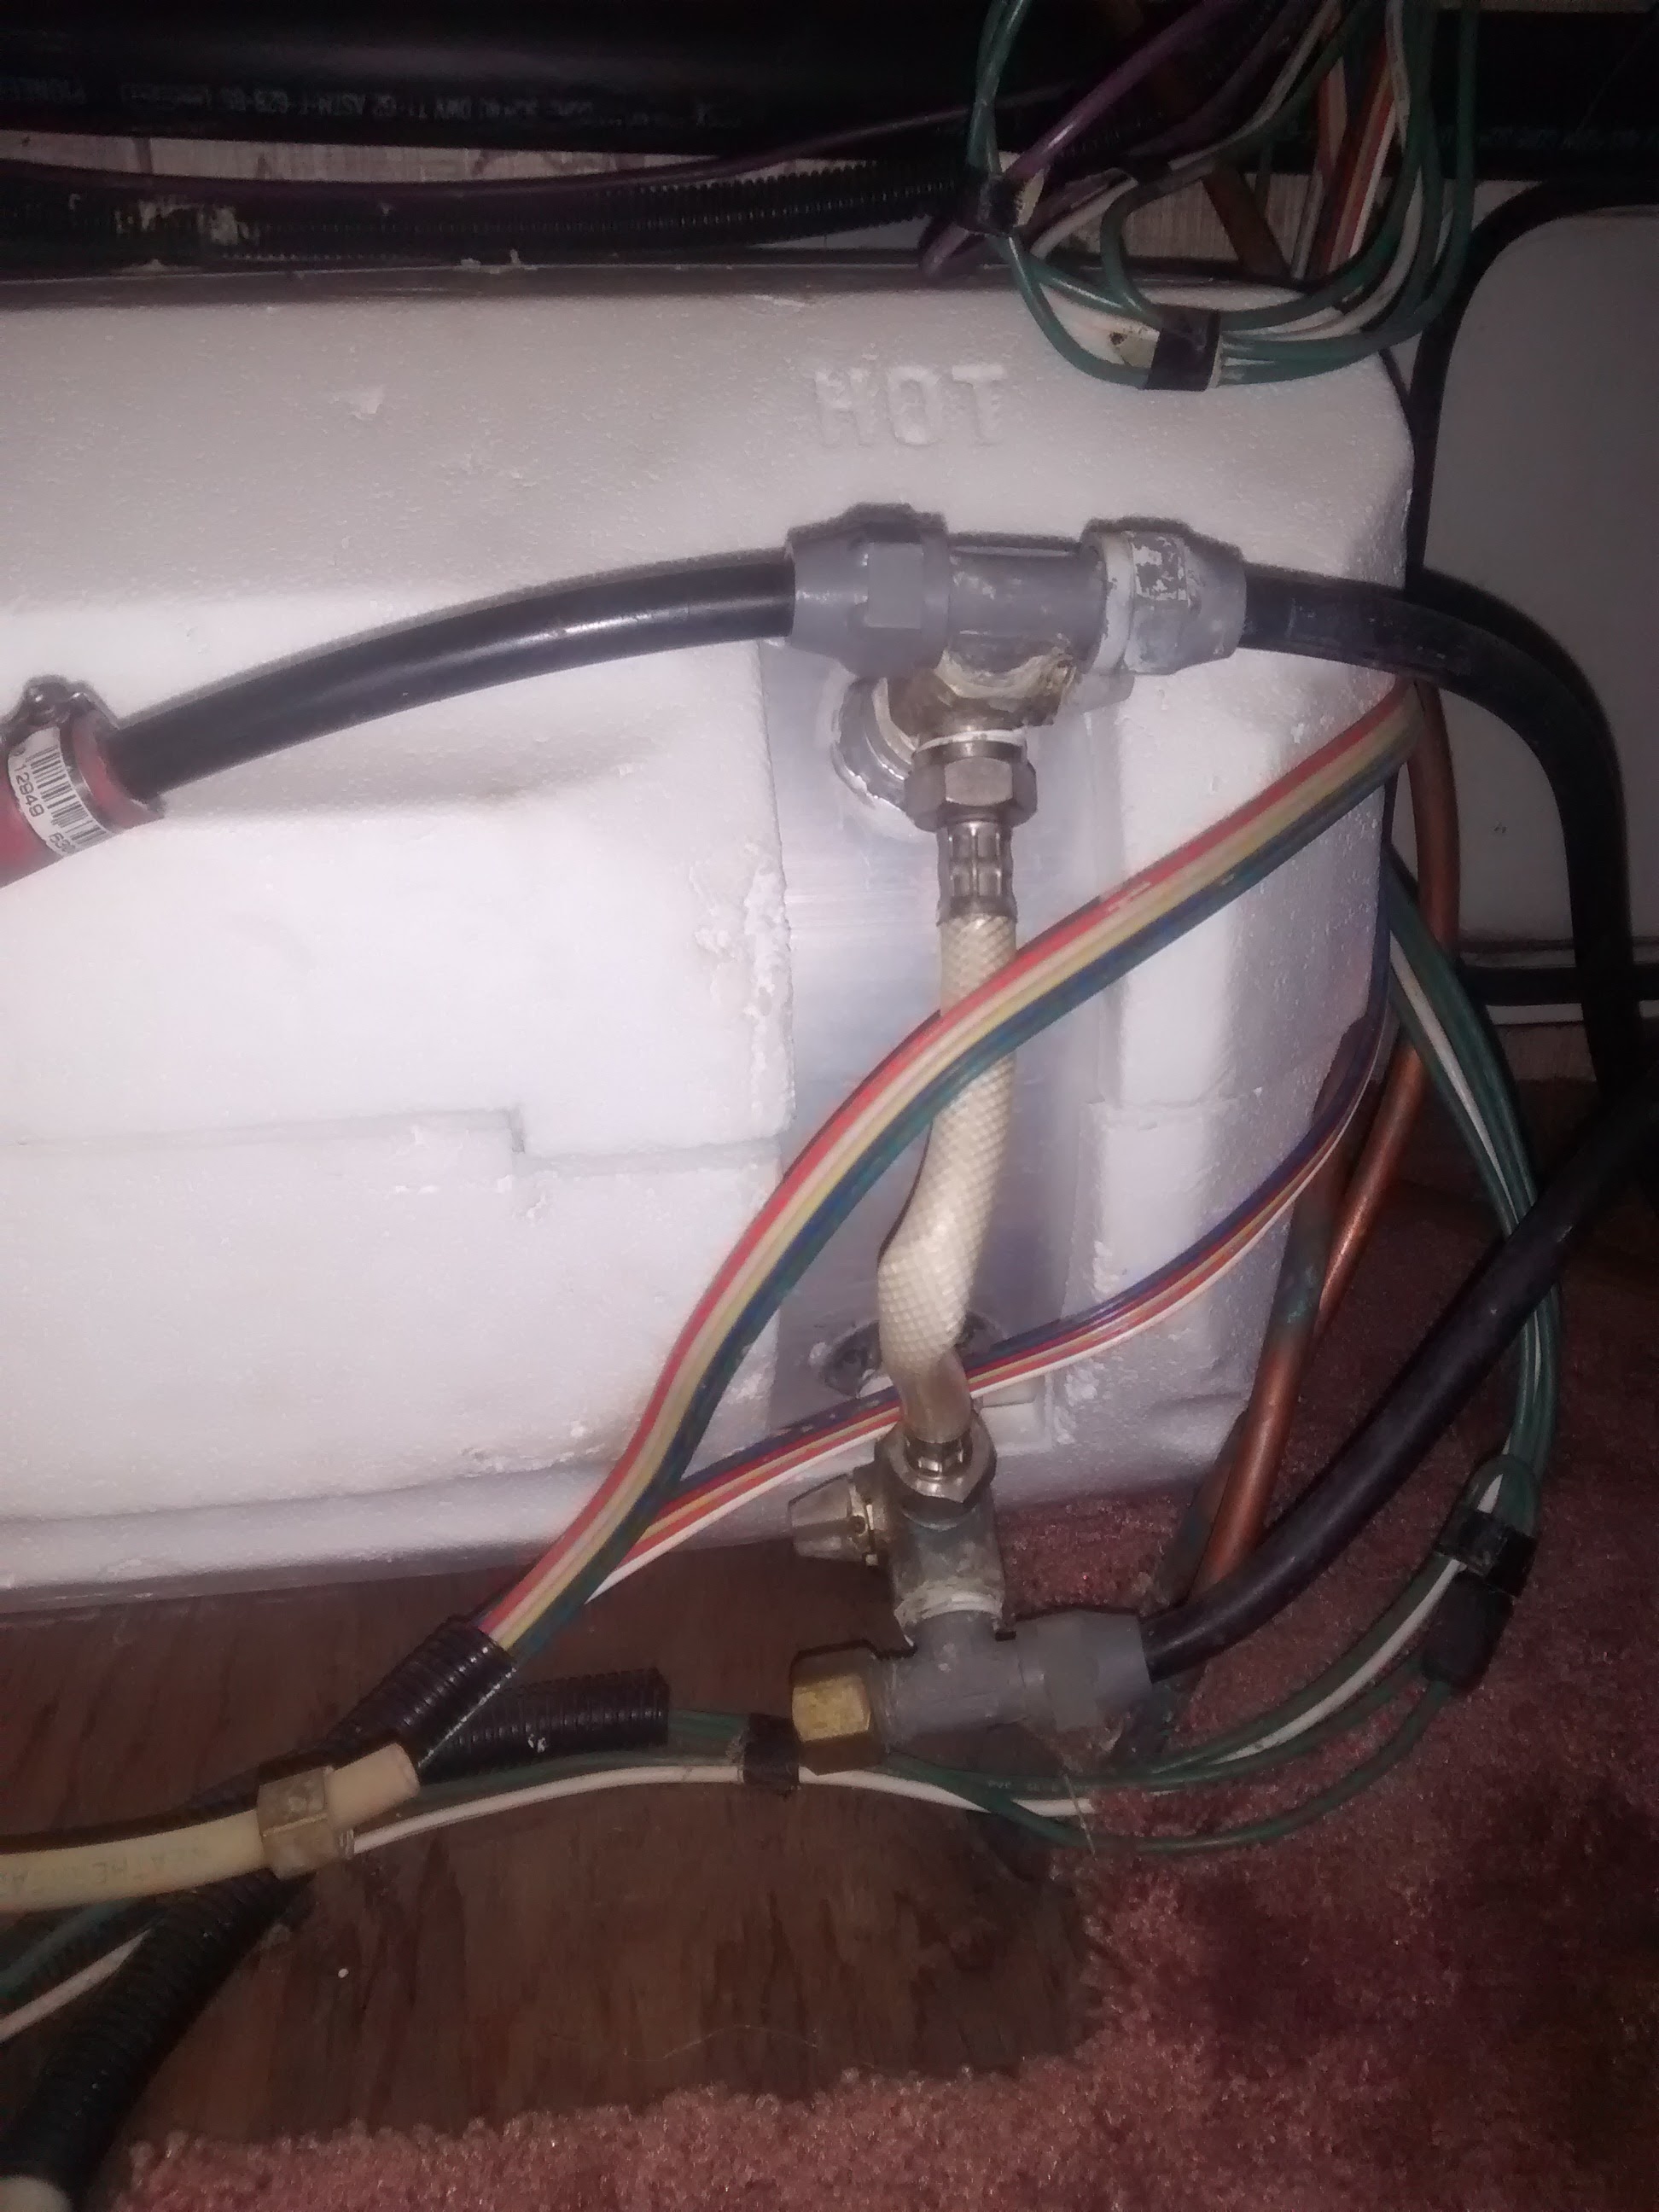
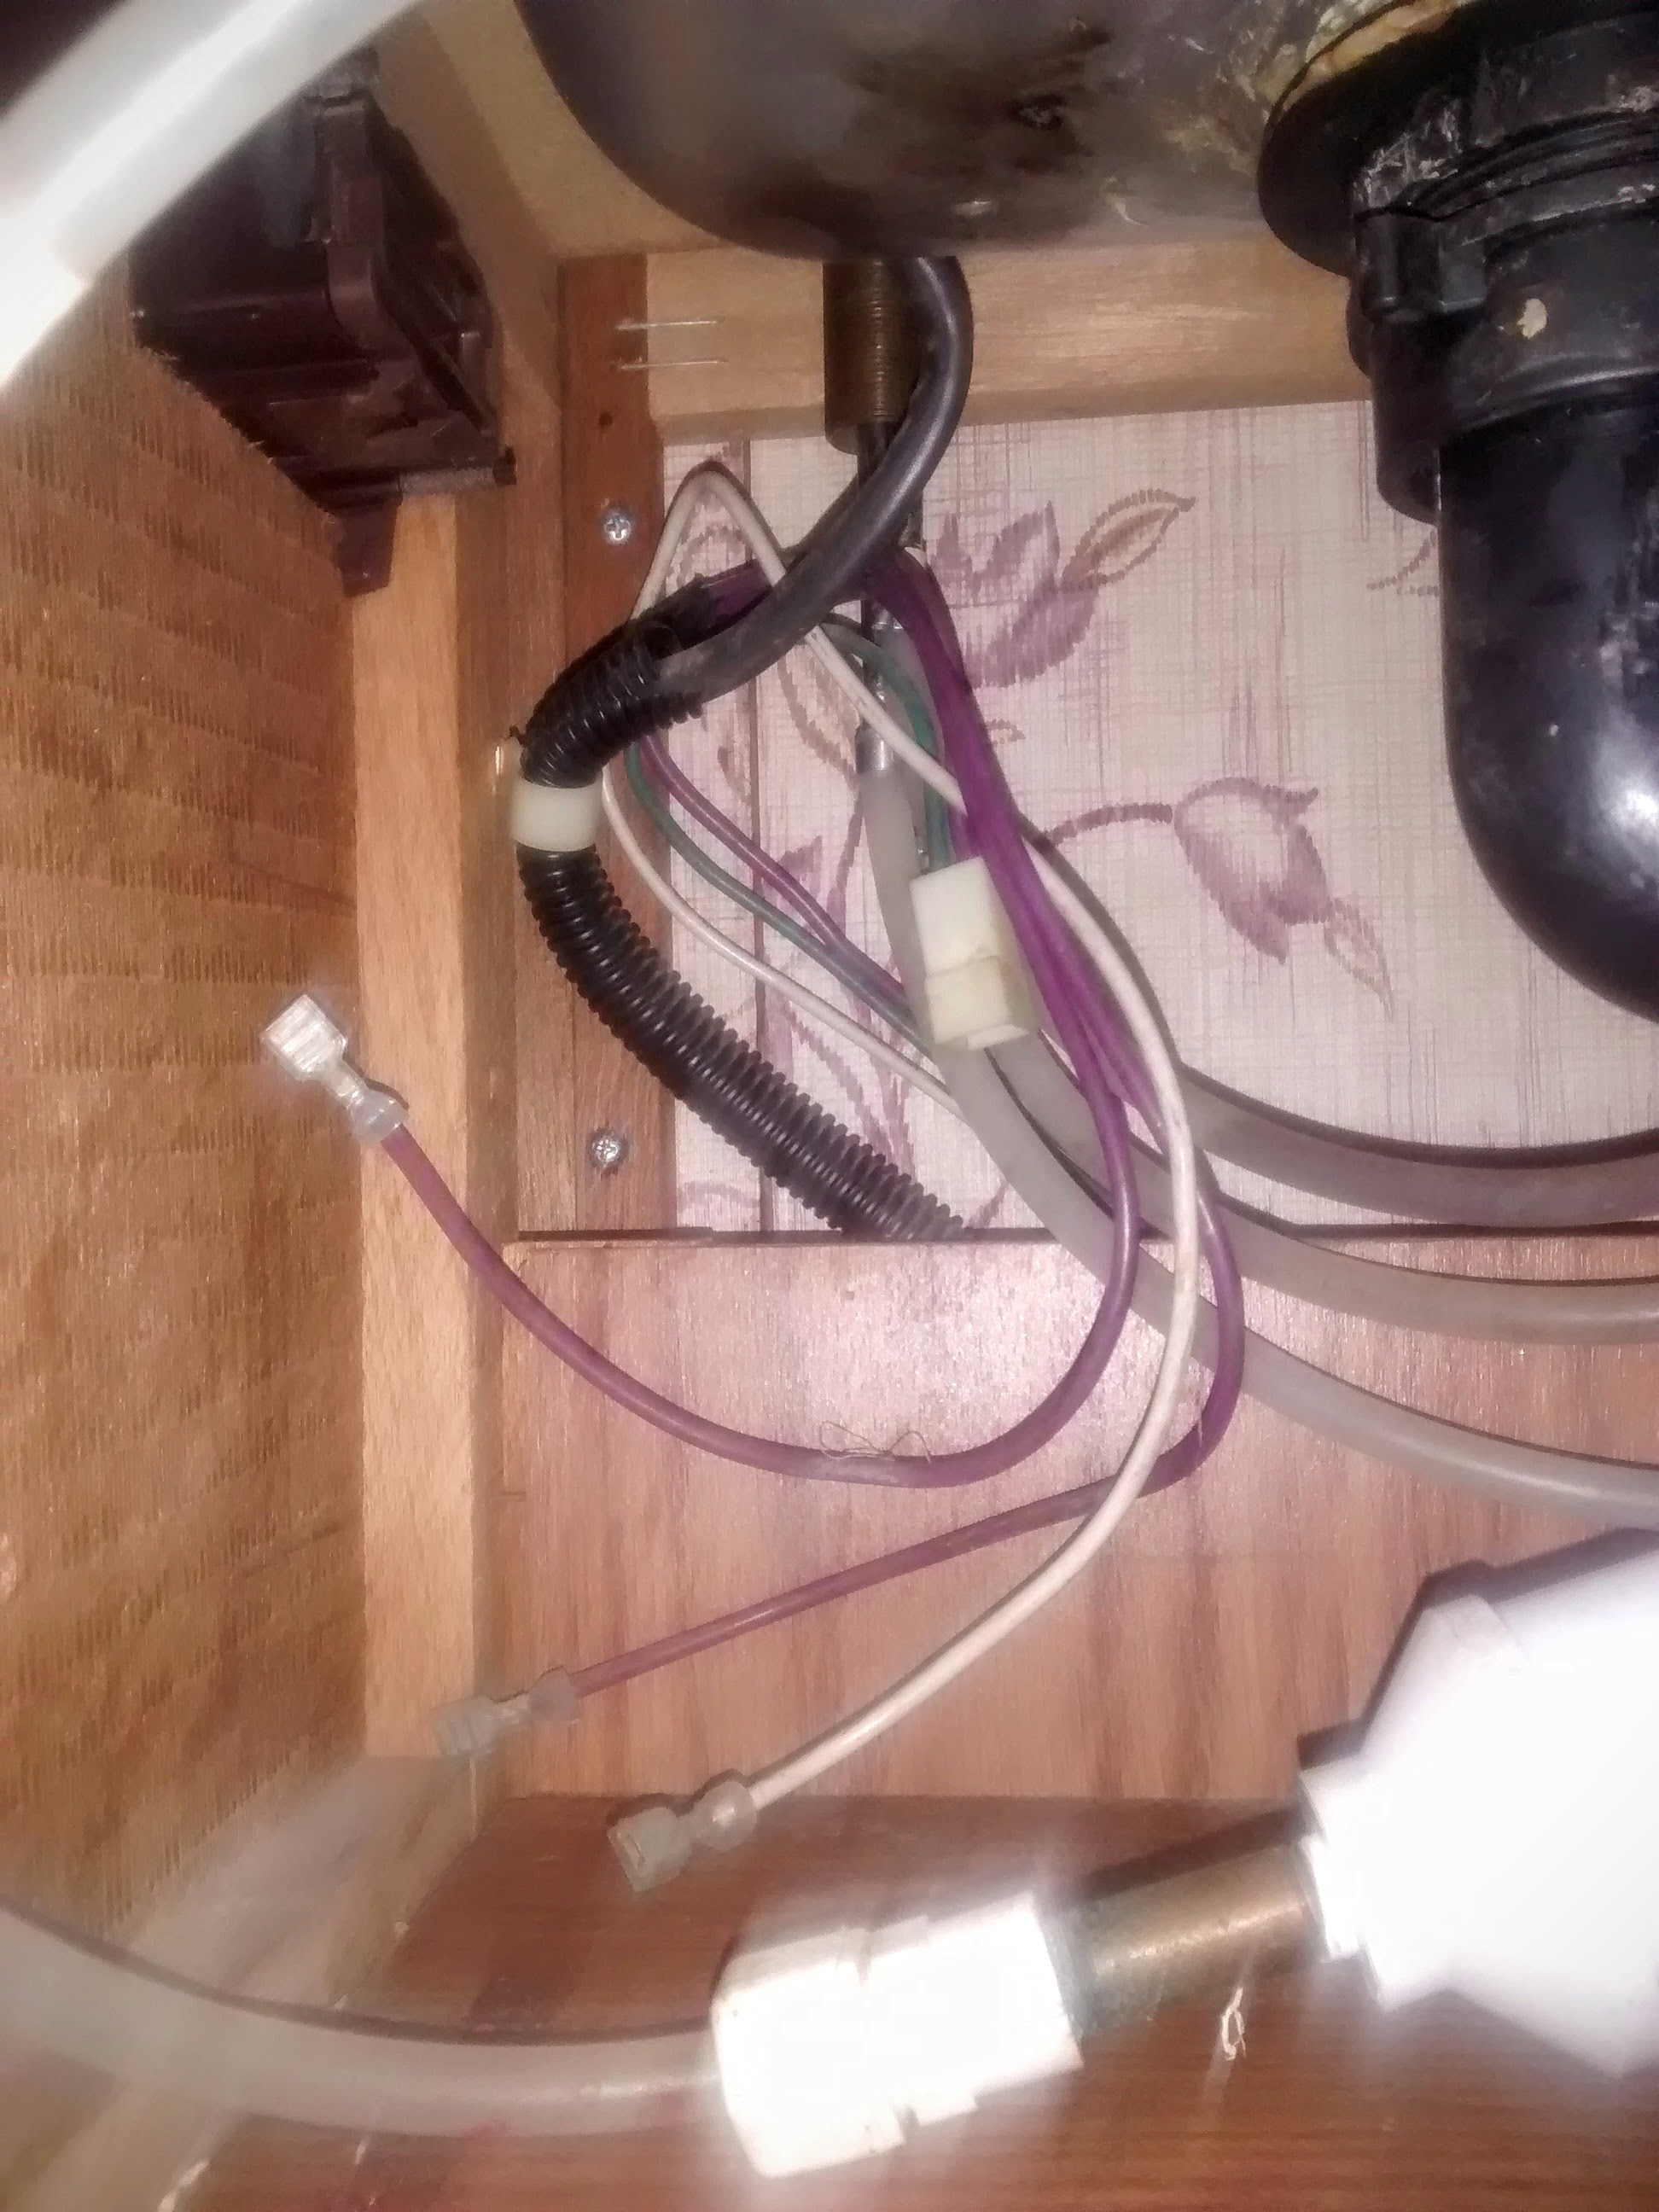
Maybe the infinite wisdom of this forum can solve my mystery! And/or maybe @Back East Don can match up my rig to his (I'm assuming it's the same) and help me. First Pic: what is this valve to the left of the pump? There is some marker scribble on the freshwater tank that seems to correspond with the valve and it reads "Reg" and "Anti". I'm assuming it's just an on/off valve but the "anti" is throwing me off. Second Pic: It looks like the previous owner disconnected the cold water feed that would continue to the kitchen sink (white-ish hose) and put a brass plug on the outlet of the T - Why in the world would anyone do that? Seems silly to have hot kitchen water but no cold. Also, there are two valves near the upper and lower T's that I cannot for the life of me turn. I assume they are just shutoff valves. Any tips on freeing them up? Final Pic: This might be an electrical topic but it's under the kitchen sink so here we go - what are these connectors for (1 harness and 3 crimp connectors)? The harness and the 3 crimps all connect to the purple, green, and white wires, which run under the sink, over the hot H2O tank, and then (unless I'm tracking them wrong) seem to go up in the direction of the range hood, which doubles as the digital systems check. There's an empty slot on the systems dash for a water heater, perhaps there was an optional electric water heater that all these wires went to?? I haven't put any water into the tank or tried a direct water connection. Could be a 101 leaks when I do... but I hope not! Thanks.
-
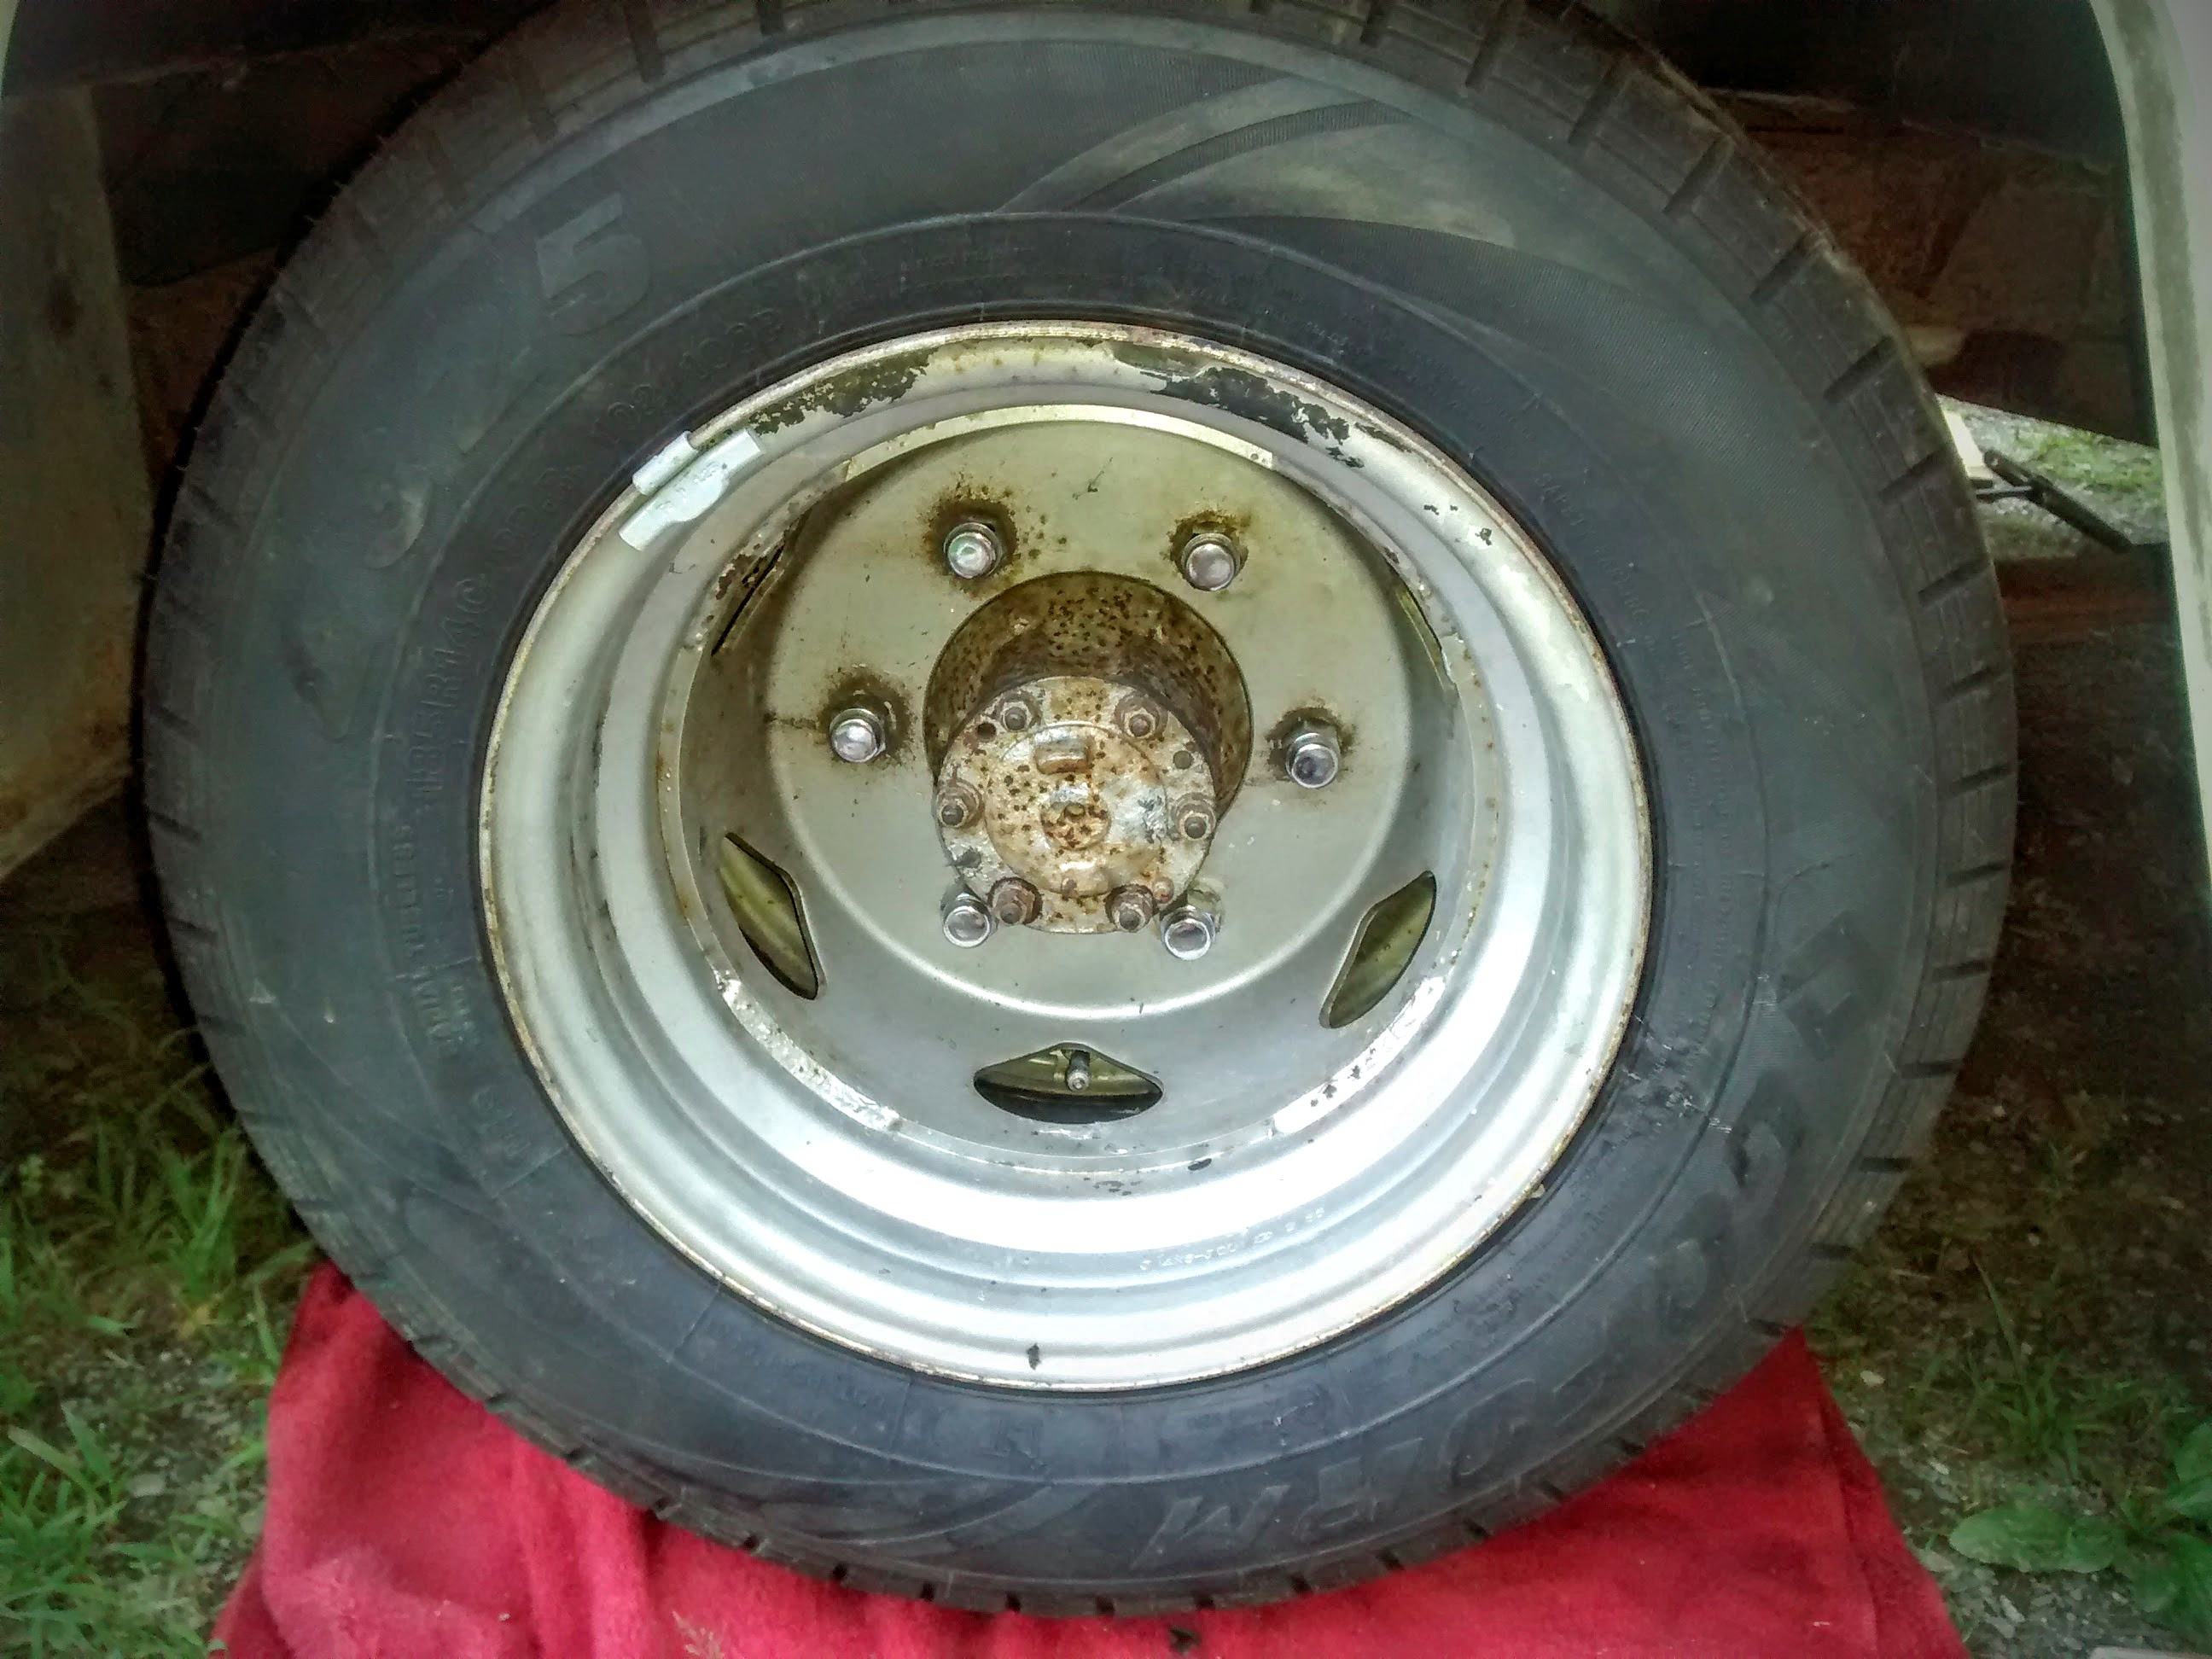
Case closed! Got everything put back together, drove it to that garage this morning, and now have a bright new blue Maine inspection sticker on the window - yahoo! For the record - Dorman 610-339 studs worked. I had to special order them, plus the lug nuts, and found the M15-1.5 inner stud nuts at NH Bragg (could have used them for lug nuts too I guess). I didn't replace any seals, but they all looked good. Getting the bearing preload correct is the only area where I'm not 100% sure - they were either loose, or I had to push a little bit on the lock ring, I chose the latter. I used a spring scale but there was a bit of drum/shoe rub so I'm not sure how accurate the measurement was. Those new tires look mighty purdy too! Chapter 2: Today I started to rip apart the over-cab bunk....
-
I drove to PA from ME recently to pick up our 86 Itasca - on the return trip (~700 miles) we consistently got 17-18mpg while averaging 60mph. The truck has a 17gal tank, so we were filling up around 200 miles but we were never near empty and by then a short break was always appreciated anyway The only surprise (negative) I was given with these old Toy Campers is the level of noise in the cabin - wind noise. My kids sit in the back and it's pretty much a yelling match when we want to converse about something. My eyes were always for a Sunrader, but as others have said they are hard to come by - so I was happy to settle for anything else. It's a bit like buying an old pair of used shoes, it really doesn't matter who made the shoes originally, what matters is what condition they are in when you get them. Any camper you're going to look at is good enough that it's lasted 30years already - just be prepared to buy some new laces, replace the footbed, and do a resole maybe!
-
Still waiting on parts to replace the broken wheel studs... all I need now are the M14-1.5 nuts to lock the studs onto the hubs, which I should be able to find a the hardware store, and of course to put the whole assembly all back together. Then return for the tires - and this time there will be no excuse for tech if he breaks another stud, augh! The new Goforms on the front look really nice though
-
Ha! I was in Jr High when that song was popular, or was it HS... either way, it was a surprisingly long time ago! The vinyl floor in our cab is barely attached to the metal body, I'd think going under with new wires would be easier than going overhead. That's my plan when it comes to installing some rear speakers.
-
I've been taking things apart since I was a wee little boy - the real test is putting it all back together! Correctly!!
-
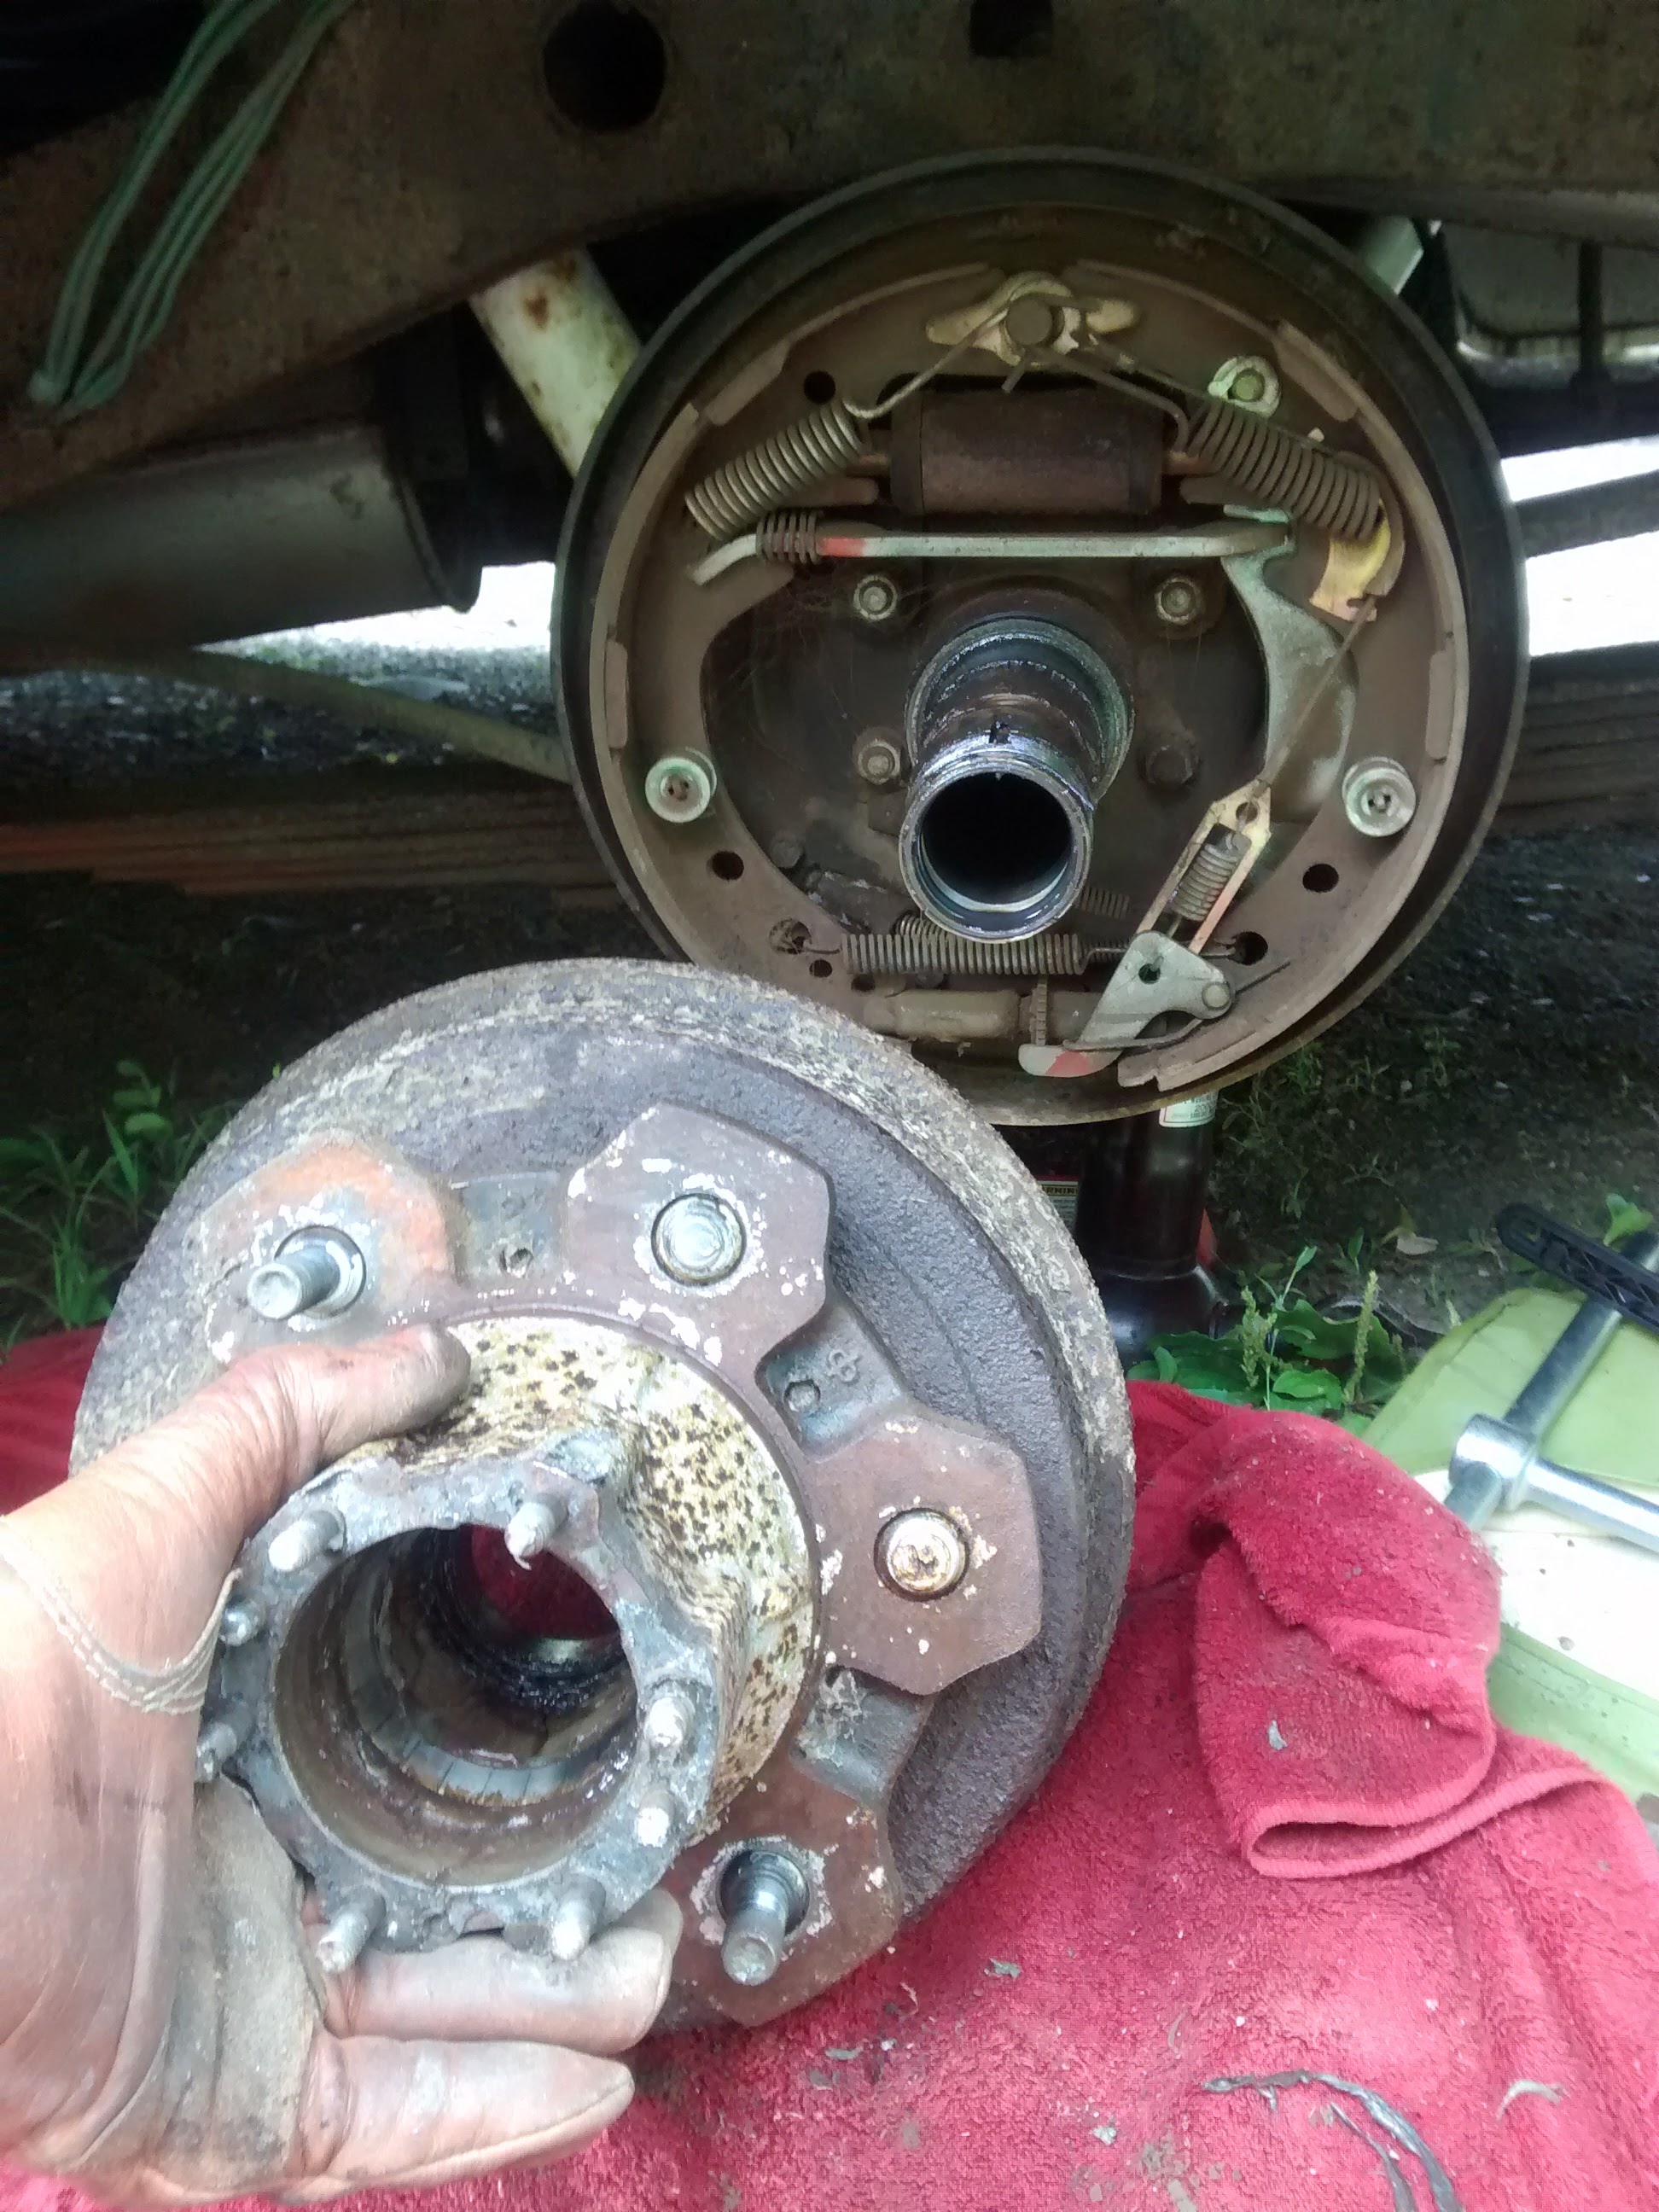
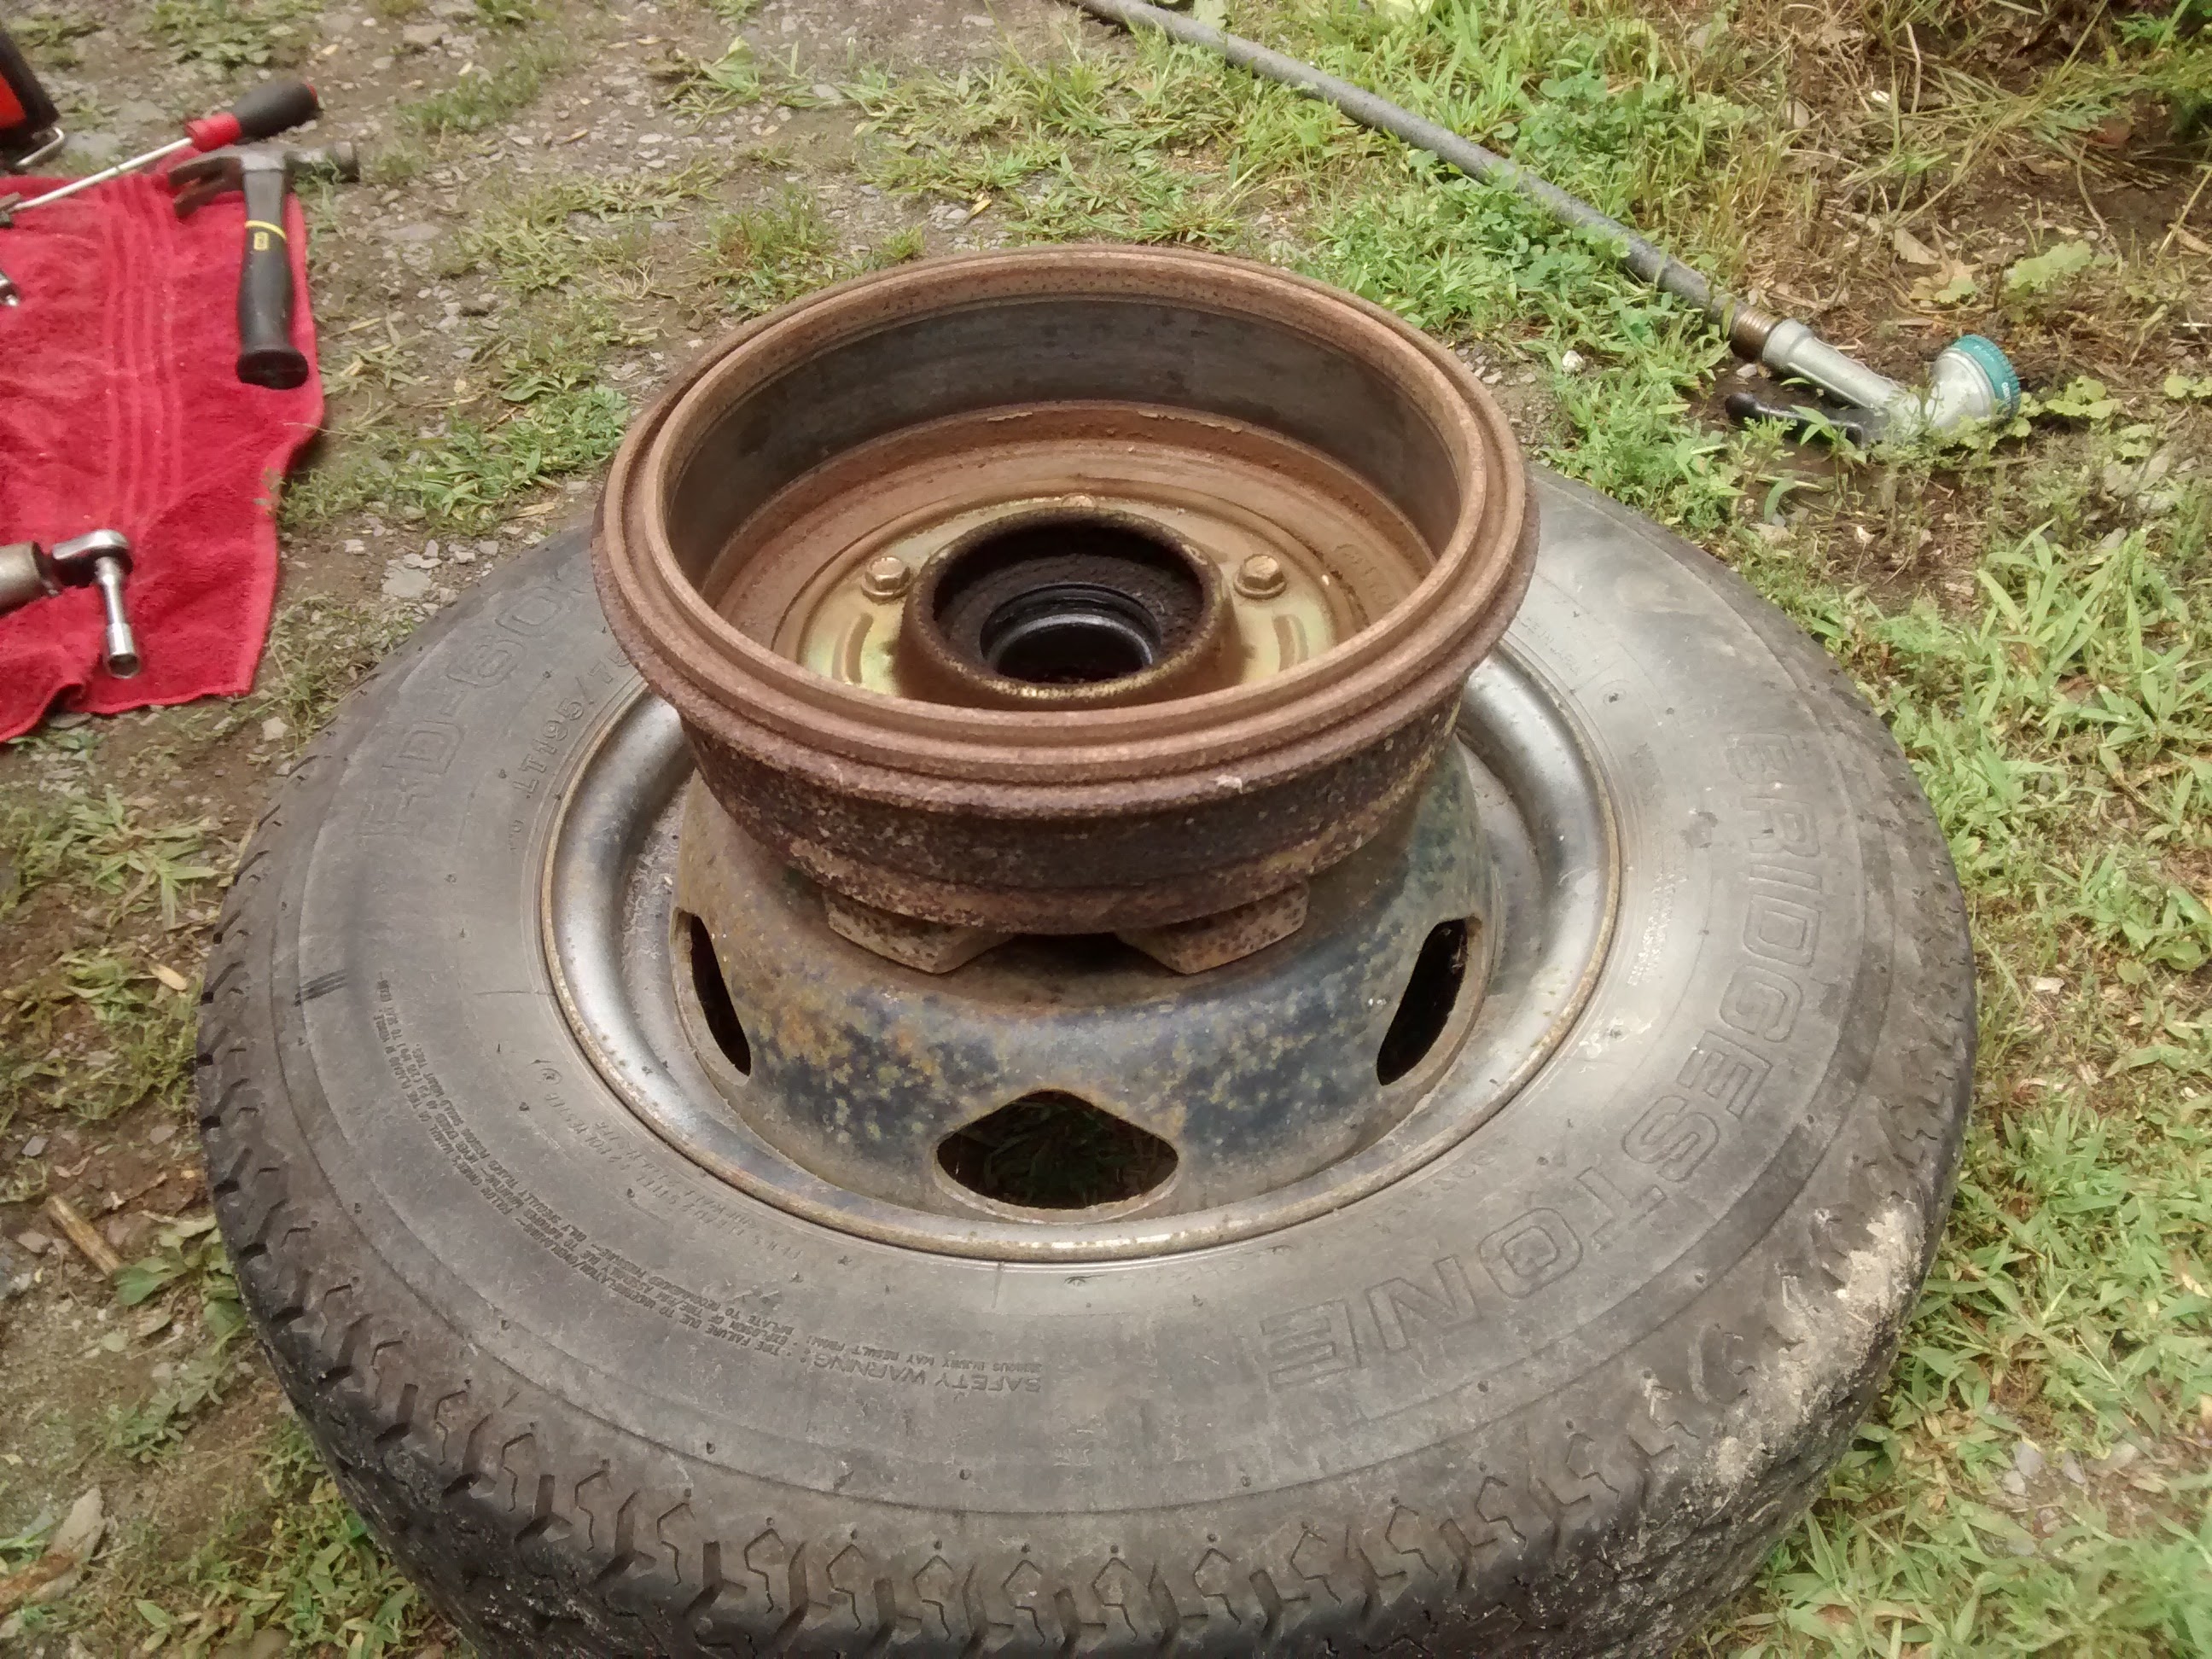
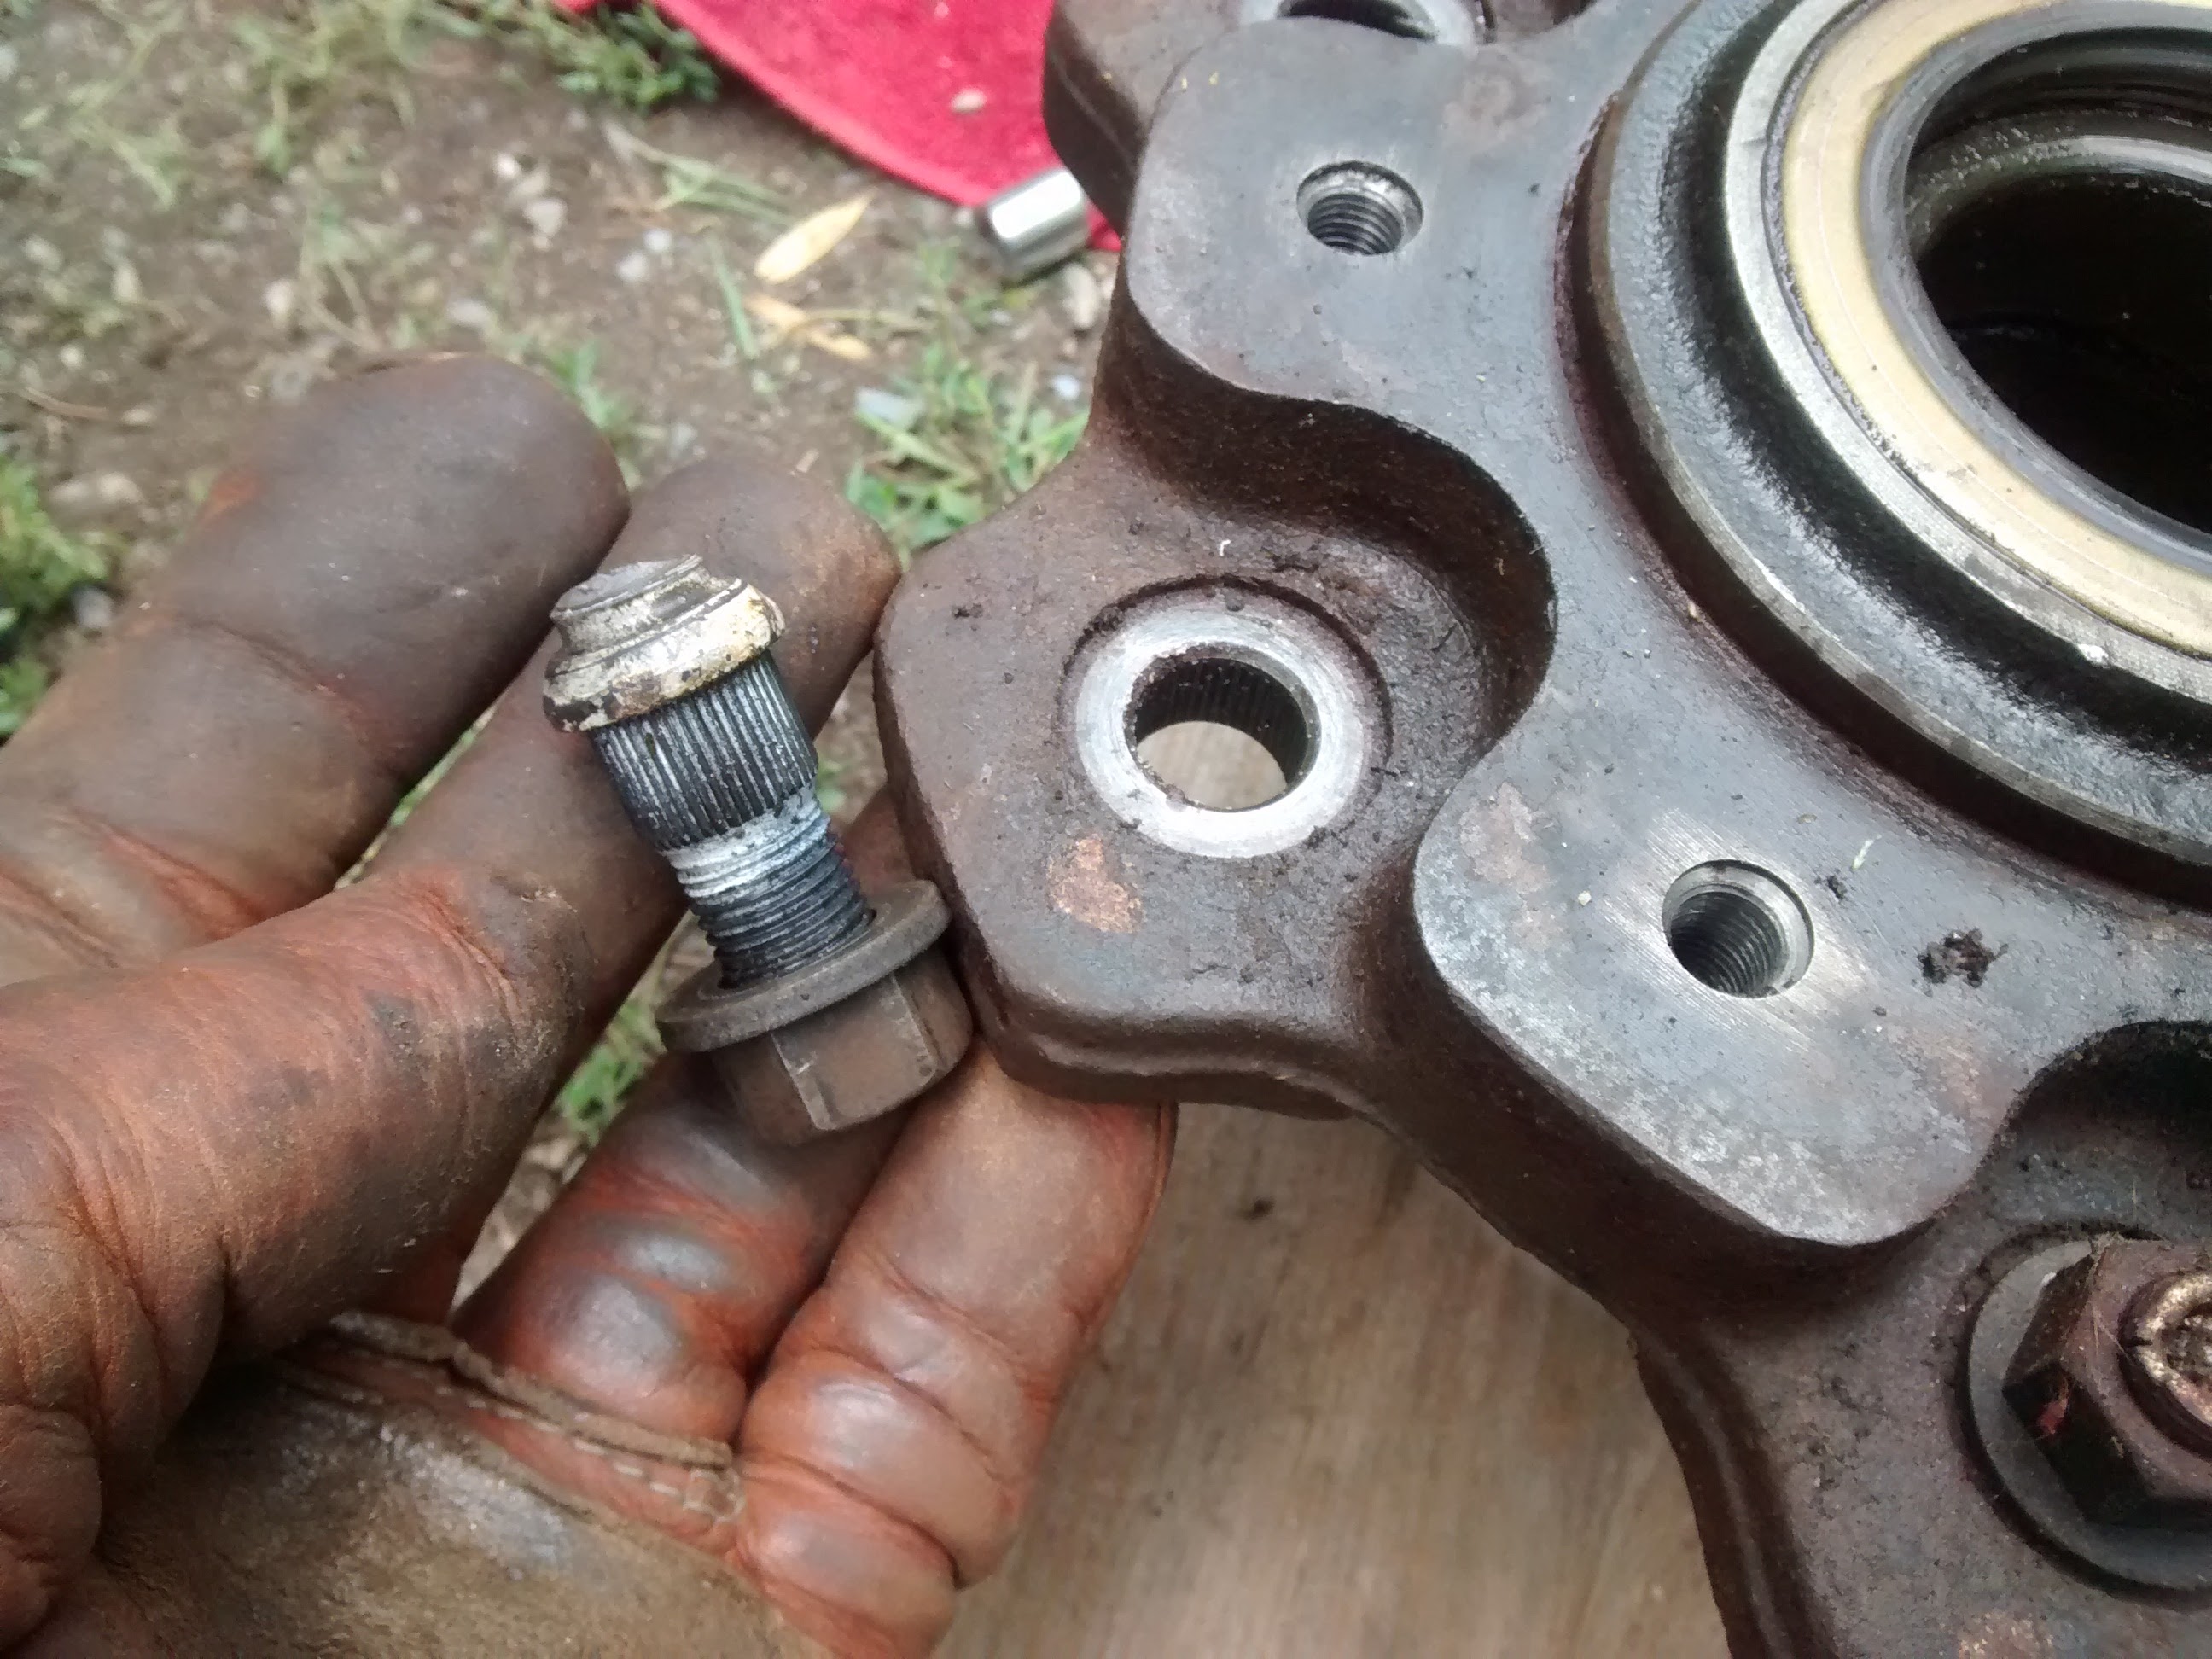
I went for it this morning and got it all apart with surprising ease. I followed the instructions from this doc, which I think @waiter published somewhere: Dully_Rear_End_Overhaul.pdf Removed wheels Removed nuts and cone washers (tapped with 14mm socket as recommended on this forum, loosened them right up) from axle shaft, removed axle shaft Removed phillips screws from bearing lock nut, then unscrewed lock nut by gently tapping with flathead and then spinning by hand. Removed hub/drum assembly, outer bearing is loose so catch it! Removed bolts holding deflector to inside of drum (placed the assembly into wheel to gain leverage), then use service bolt to separate drum from hub Released nuts on back of broken studs (didn't realize until later that the bolts had been staked, would have made life easier to unstake them first) Placed hub on block of wood and tapped out broken studs with hammer, they had been coated in anti seize and it didn't take much force to get them out So now I need to replace the studs with either OEM parts (part # for left ones is: 90942-01009, they're $6 at http://www.toyotaparts.metro-toyota.com/) OR go with normal RH studs like the ones @jjrbus posted: Dorman 610-339 double end stud, M14-1.5. Might also need new nuts, maybe from here if no where else has them. ***Question*** - can I press the new ones in myself by using the nut to pull the new studs into the hub or do they need to be machine pressed? I'll probably replace the axle seals - I guess?? - (from Autozone: Timken 226285(large seal); Timken 710076(small seal)), does that sound right, not sure which is which,@jdemaris could you help advise? Then put it all together and make sure the bearings are correctly loaded, there are some instructions here but they seem oriented towards the front (with cotter) and not the rear - anyone have any advice on preloading the rear bearings? The instructions in the above pdf are also confusing to me. I'll also need to replace the axle shaft gasket. Brake shoes, bearings, races, everything, even seals looked really good in general. More info on all the above in the following posts: Back Brakes and Bearings & Bearing repack - rear axle? I'm writing this all to help me understand what I'm doing just as much as to document for others.
-
Actually on 2nd examination of the schematic it looks like the hub and axle DO have to be removed in order to replace the studs: I've done plenty of drum brake jobs on old Hondas we've owned, so is this in the realm of my mechanical abilities and will I need any special tools?
-
So I went looking per Don's note and found this: jdemaris shared some pics and a schematic that shows the studs and the nut, it looks like once I remove the drum it should all be pretty straightforward. Any other advice before I remove the wheels and the drum? What about getting the studs out, will I be cursing my decision to DIY rather than pay the garage??! Thanks all for sharing your expertise on this repair so far.
-
OK, I got the 3rd of 4 lugs free this morning. I applied a full 50 gal drum of freshly brewed ATF/Acetone magical mixture to the 4th and last lug - it will come free!! So once it is free can you give me an idea of what's involved in removing the old studs and replacing with new ones? I'm assuming the drums have to be removed first, is that similar to what a typical Jap car would be like? Then I'll have to hammer out the old studs or are they screwed in somehow? Do I have to remove the hub? Gosh I hope not, but I don't want to wreck the bearings either. There are a lot of how-to vids for domestics online, maybe it's a similar procedure... or maybe I should just let the garage do it for 1.5hrs labor...