Ctgriffi
-
Posts
633 -
Joined
-
Last visited
Content Type
Events
Profiles
Forums
Gallery
Everything posted by Ctgriffi
-
Well, I ended up finding an eBay seller that was willing to sell me a smaller piece (47"L) at a discount, which I really appreciate! It's bright white in color, so I'll have to paint it to match the other beige-ish trim on my rig... which is fine, not a big deal. Here's the seller's page, if anybody else is interested: http://www.ebay.com/usr/furniturelady10
-
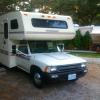
I don't have a photo handy, but any picture of a 90s Warrior would do; the area in question is the corner of the small vertical wall that juts out right behind passenger door (Winnebago calls this a "wing wall"). Probably only about 40" tall.
-
The second one looks about right... for $50 w/shipping, which I was trying to avoid. I think the first option doesn't have enough coverage. Aporeciate the links, Linda!
-
So I'm wondering if anybody has a good source for aluminum corner molding? My 91 Warrior has a botched repair job on the front passenger corner (wingwall) and I need just one 4' piece of molding to redo the area. I've given up trying to find anything in colonial-white/beige... but even the plain white ones are ~$50+ for a single piece, once you figure in shipping, which seems exorbitant. Are there any better deals out there, or do I just need to grow up and pay the piper? Thanks!
-
It is fairly obvious, yes, after you remove the AC cover. The capacitor I purchased was intended for that application and came with instructions. (Like two wires that need connected between cap and compressor power feed. )
-
In Mid-Trip: Norcold 2-Way Problem
Ctgriffi replied to Ctgriffi's topic in Coach ApplianceTech Issues
The photos do help, Darrel, thank you. I think that my tank design might be slightly different because I believe the toilet is centered up above the tank, rather than offset, but I will have to look again and confirm. In the meantime, I will probably use the "stick" approach for a bit and see where that gets me. I don't have a dump station nearby (now that we're back home), which makes this all pretty difficult. -
In Mid-Trip: Norcold 2-Way Problem
Ctgriffi replied to Ctgriffi's topic in Coach ApplianceTech Issues
Yeah, I saw this item, or similar, at one of the RV shops and it does look like a handy gadget—blast water into tank while still being hooked up to dump station (so you don't get covered with the stuff, if it should break free). In one of my braver, more desperate moments, I actually just shoved an old hose up the tank drain pipe and ran water up in there... which didn't do much good, unfortunately. -
In Mid-Trip: Norcold 2-Way Problem
Ctgriffi replied to Ctgriffi's topic in Coach ApplianceTech Issues
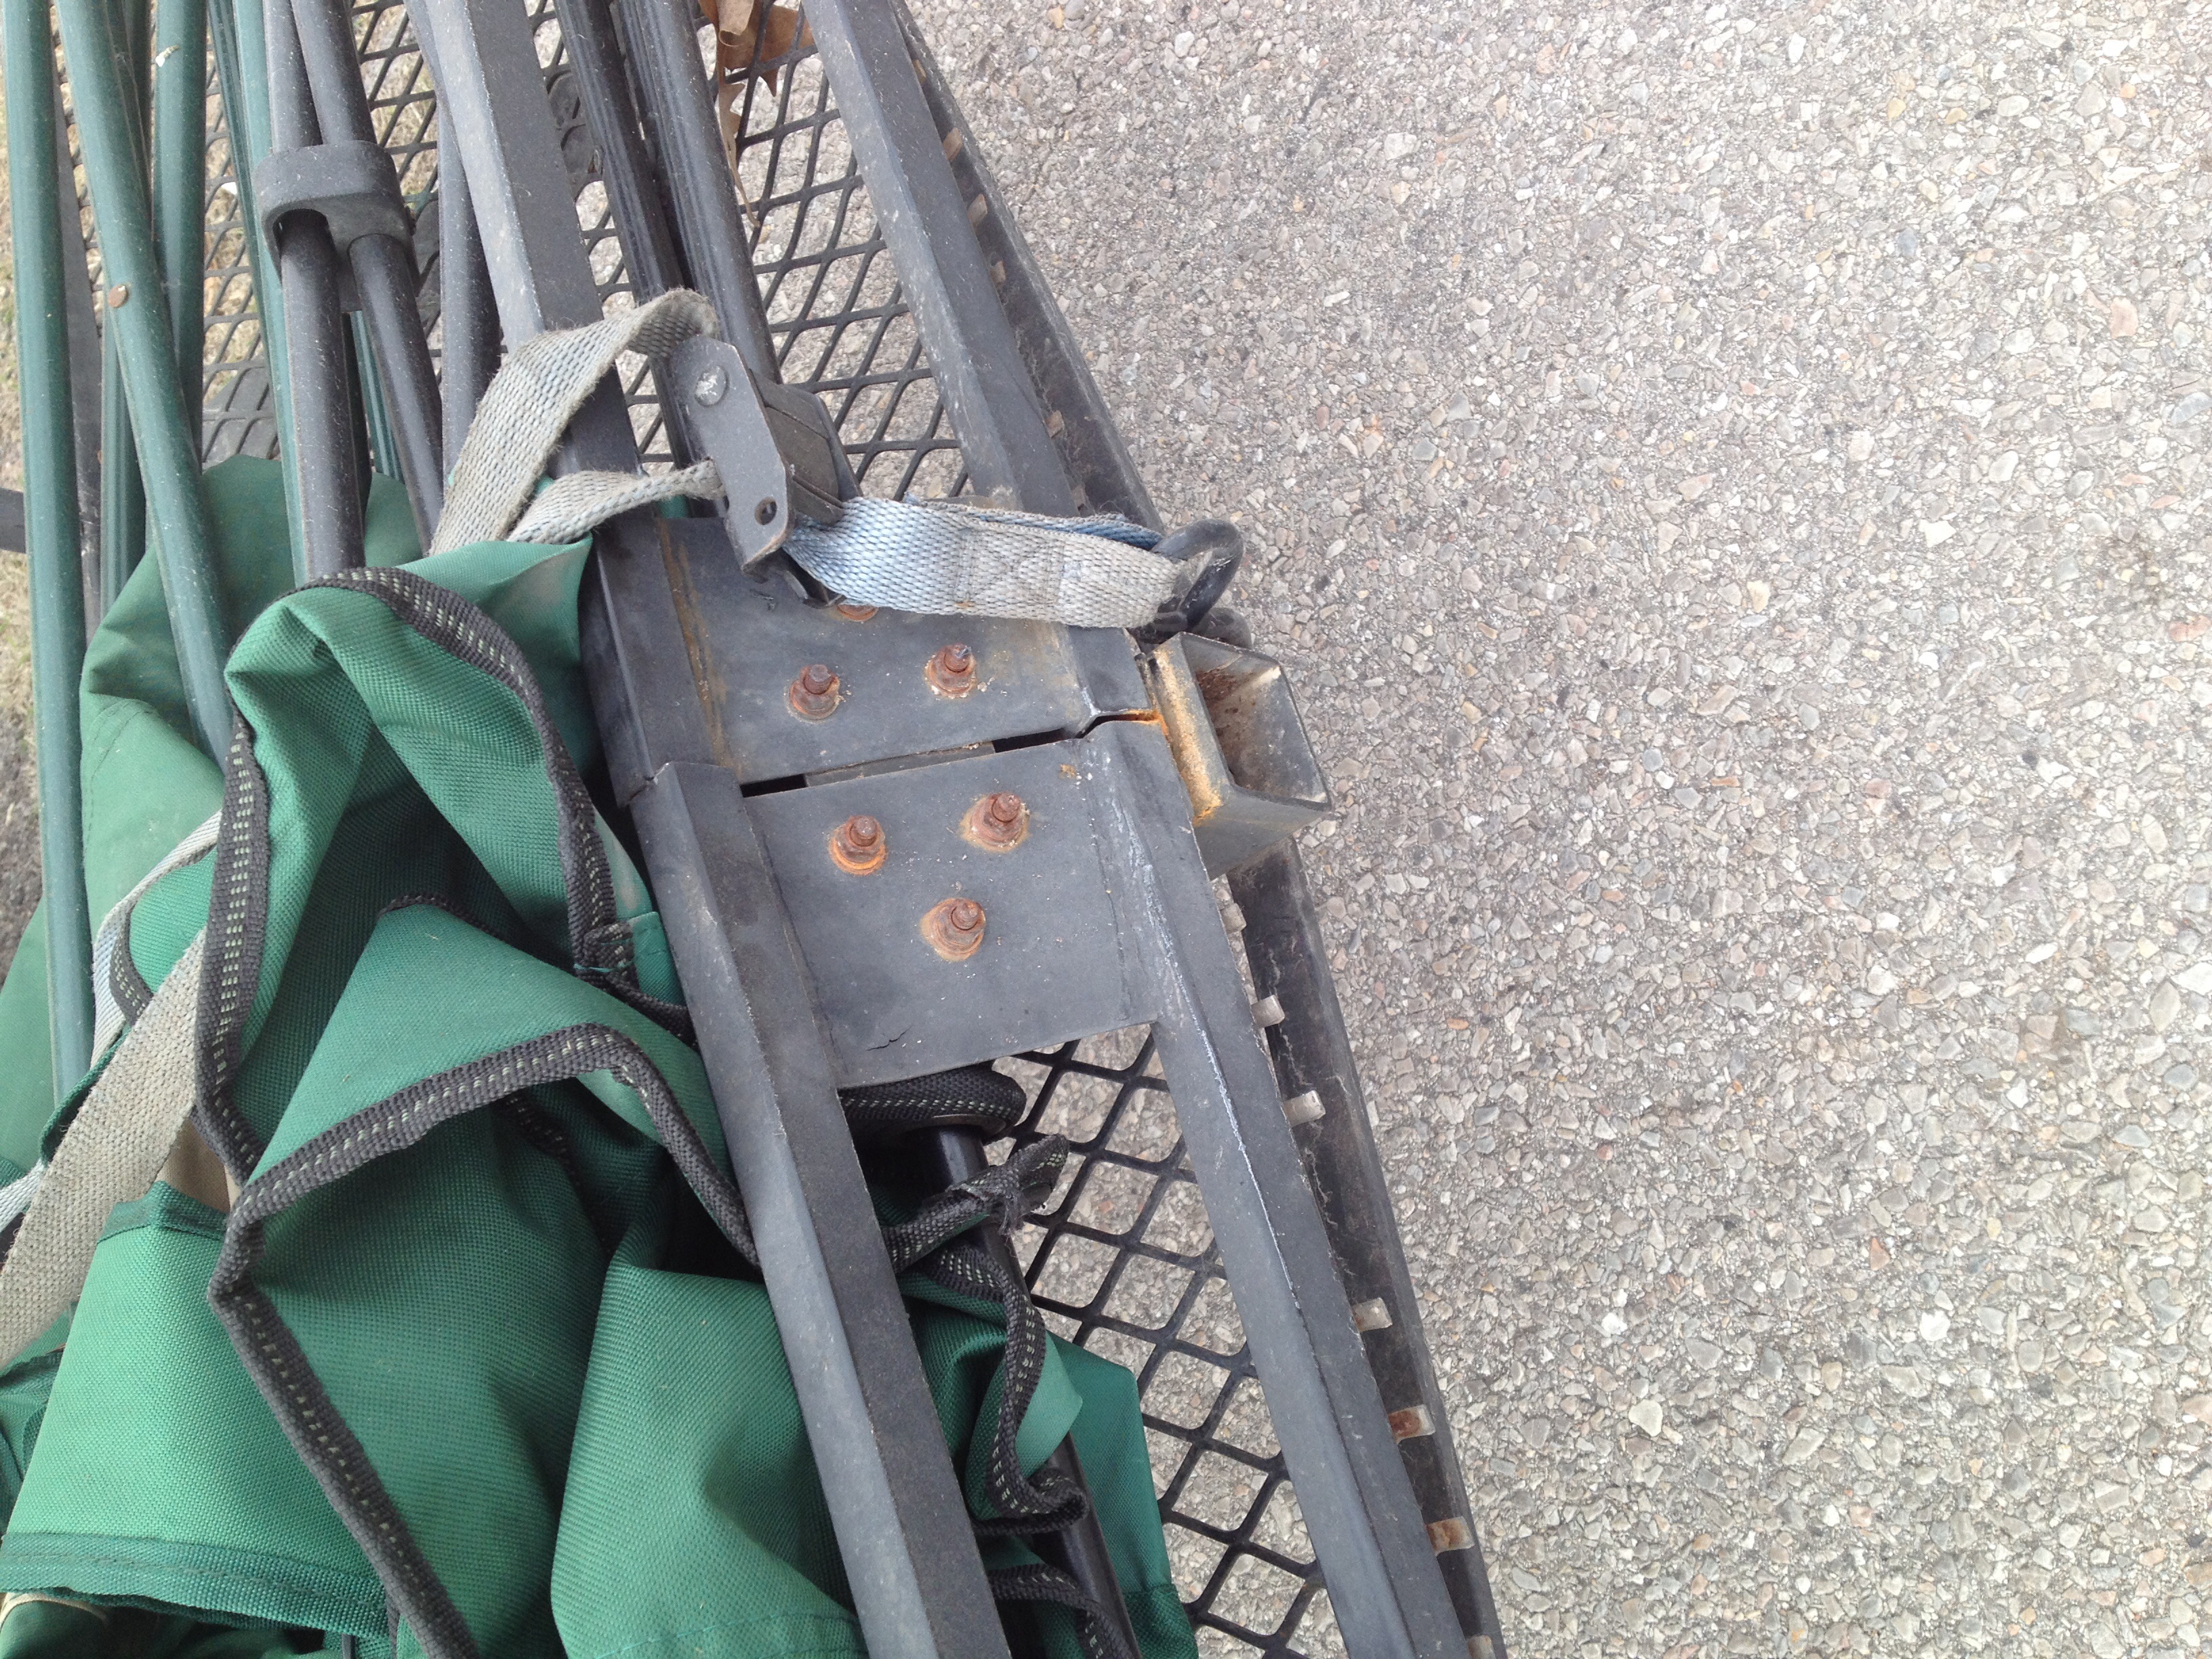
The black water tank doesn't seem to drain fully and toilet will no longer empty when flushed; stuff just backs up into it. I'm thinking that the TP in use was not suitable for RV use because this hasn't been a problem in the past. One shop sold us a large bottle of stuff that should dissolve all material over a 24 hr period... we'll see at next campground tonight, when I attempt to dump the tank again. Fridge ran all night on 120V and is very cold again, so it's becoming quite the mystery. I forgot to mention that we were rear-ended two days ago in OK City. Low speed impact and our rear cargo rack took the brunt of it. We barely use that thing but it came in handy this time!
-
In Mid-Trip: Norcold 2-Way Problem
Ctgriffi replied to Ctgriffi's topic in Coach ApplianceTech Issues
Propane mode no longer seems to be working either. We loaded up both bottom drawers of fridge with ice this morning, and still nothing feels cold in there. At campground tonight with full hookup so am going to try and run fridge on 120V again... Also, at 11pm last night my wife informed me that toilet would no longer flush (black tank is plugged and won't empty); was too late and dark to troubleshoot well, so we ate the campground fee and spent night in cheap hotel. This morning I tried to snake the toilet and also attempted Drano, to no avail. Three different RV repair shops in the area (Amarillo) refused to service due to customer overload (Spring Break for many). Heading east/home tomorrow, obviously none too soon. -
In Mid-Trip: Norcold 2-Way Problem
Ctgriffi replied to Ctgriffi's topic in Coach ApplianceTech Issues
Appreciate the dry-and-wet ice suggestions. Propane-mode seems to be working for the time being; guess I'll have to troubleshoot the electric side at some point... -
Heading west on Rt 66 through Oklahoma and are having trouble with the fridge (Norcold: original, I'd guess), which doesn't seem to be cooling. I ran it for a full night on 120v before we left but am not sure it was working; outdoor temp has been near freezing or below all day. This evening, the fridge just wasn't feeling very cold so I switched over to propane; seemed to ignite easily and kept a steady light on the front. Keeping my fingers crossed that it will cool down over night, or we'll have to ditch a bunch of food...dang it. The Norcold has worked well in the past, but we've never had to use it in very cold weather (weeks of warmth/sun here, right up until just before our vacation week, geez!). Appreciate any suggestions, folks! (Btw, no sign or smell of ammonia in or around fridge.) Thank you
-
Just to follow-up at the end of the job: My initial road-test was not good—missing and really struggling under acceleration, which definitely caused me some stress I can tell you! I got back under the hood, looked over everything in terms of vac hoses, connections, etc and discovered I had a bad spark plug boot and very poor connection on the #5 cylinder. (What are the chances? The only plug I didn't take a good look at the whole time, because it's buried back up under there, and of course that's where the problem was...) Anyway, it was a pretty quick fix, and everything feels strong and smooth now with good power on the highway (thank God). Tomorrow we head out on a much-anticipated, week-long Route 66 adventure: Springfield, MO to Amarillo, TX and back. Yahoo!
-
That loss of ".001 per 10,000 miles" sounds pretty darn accurate to me too, after just finishing mine: all my EX measurements were .003-.005 on my 83K 3VZE. Glad I didn't wait any longer.
-
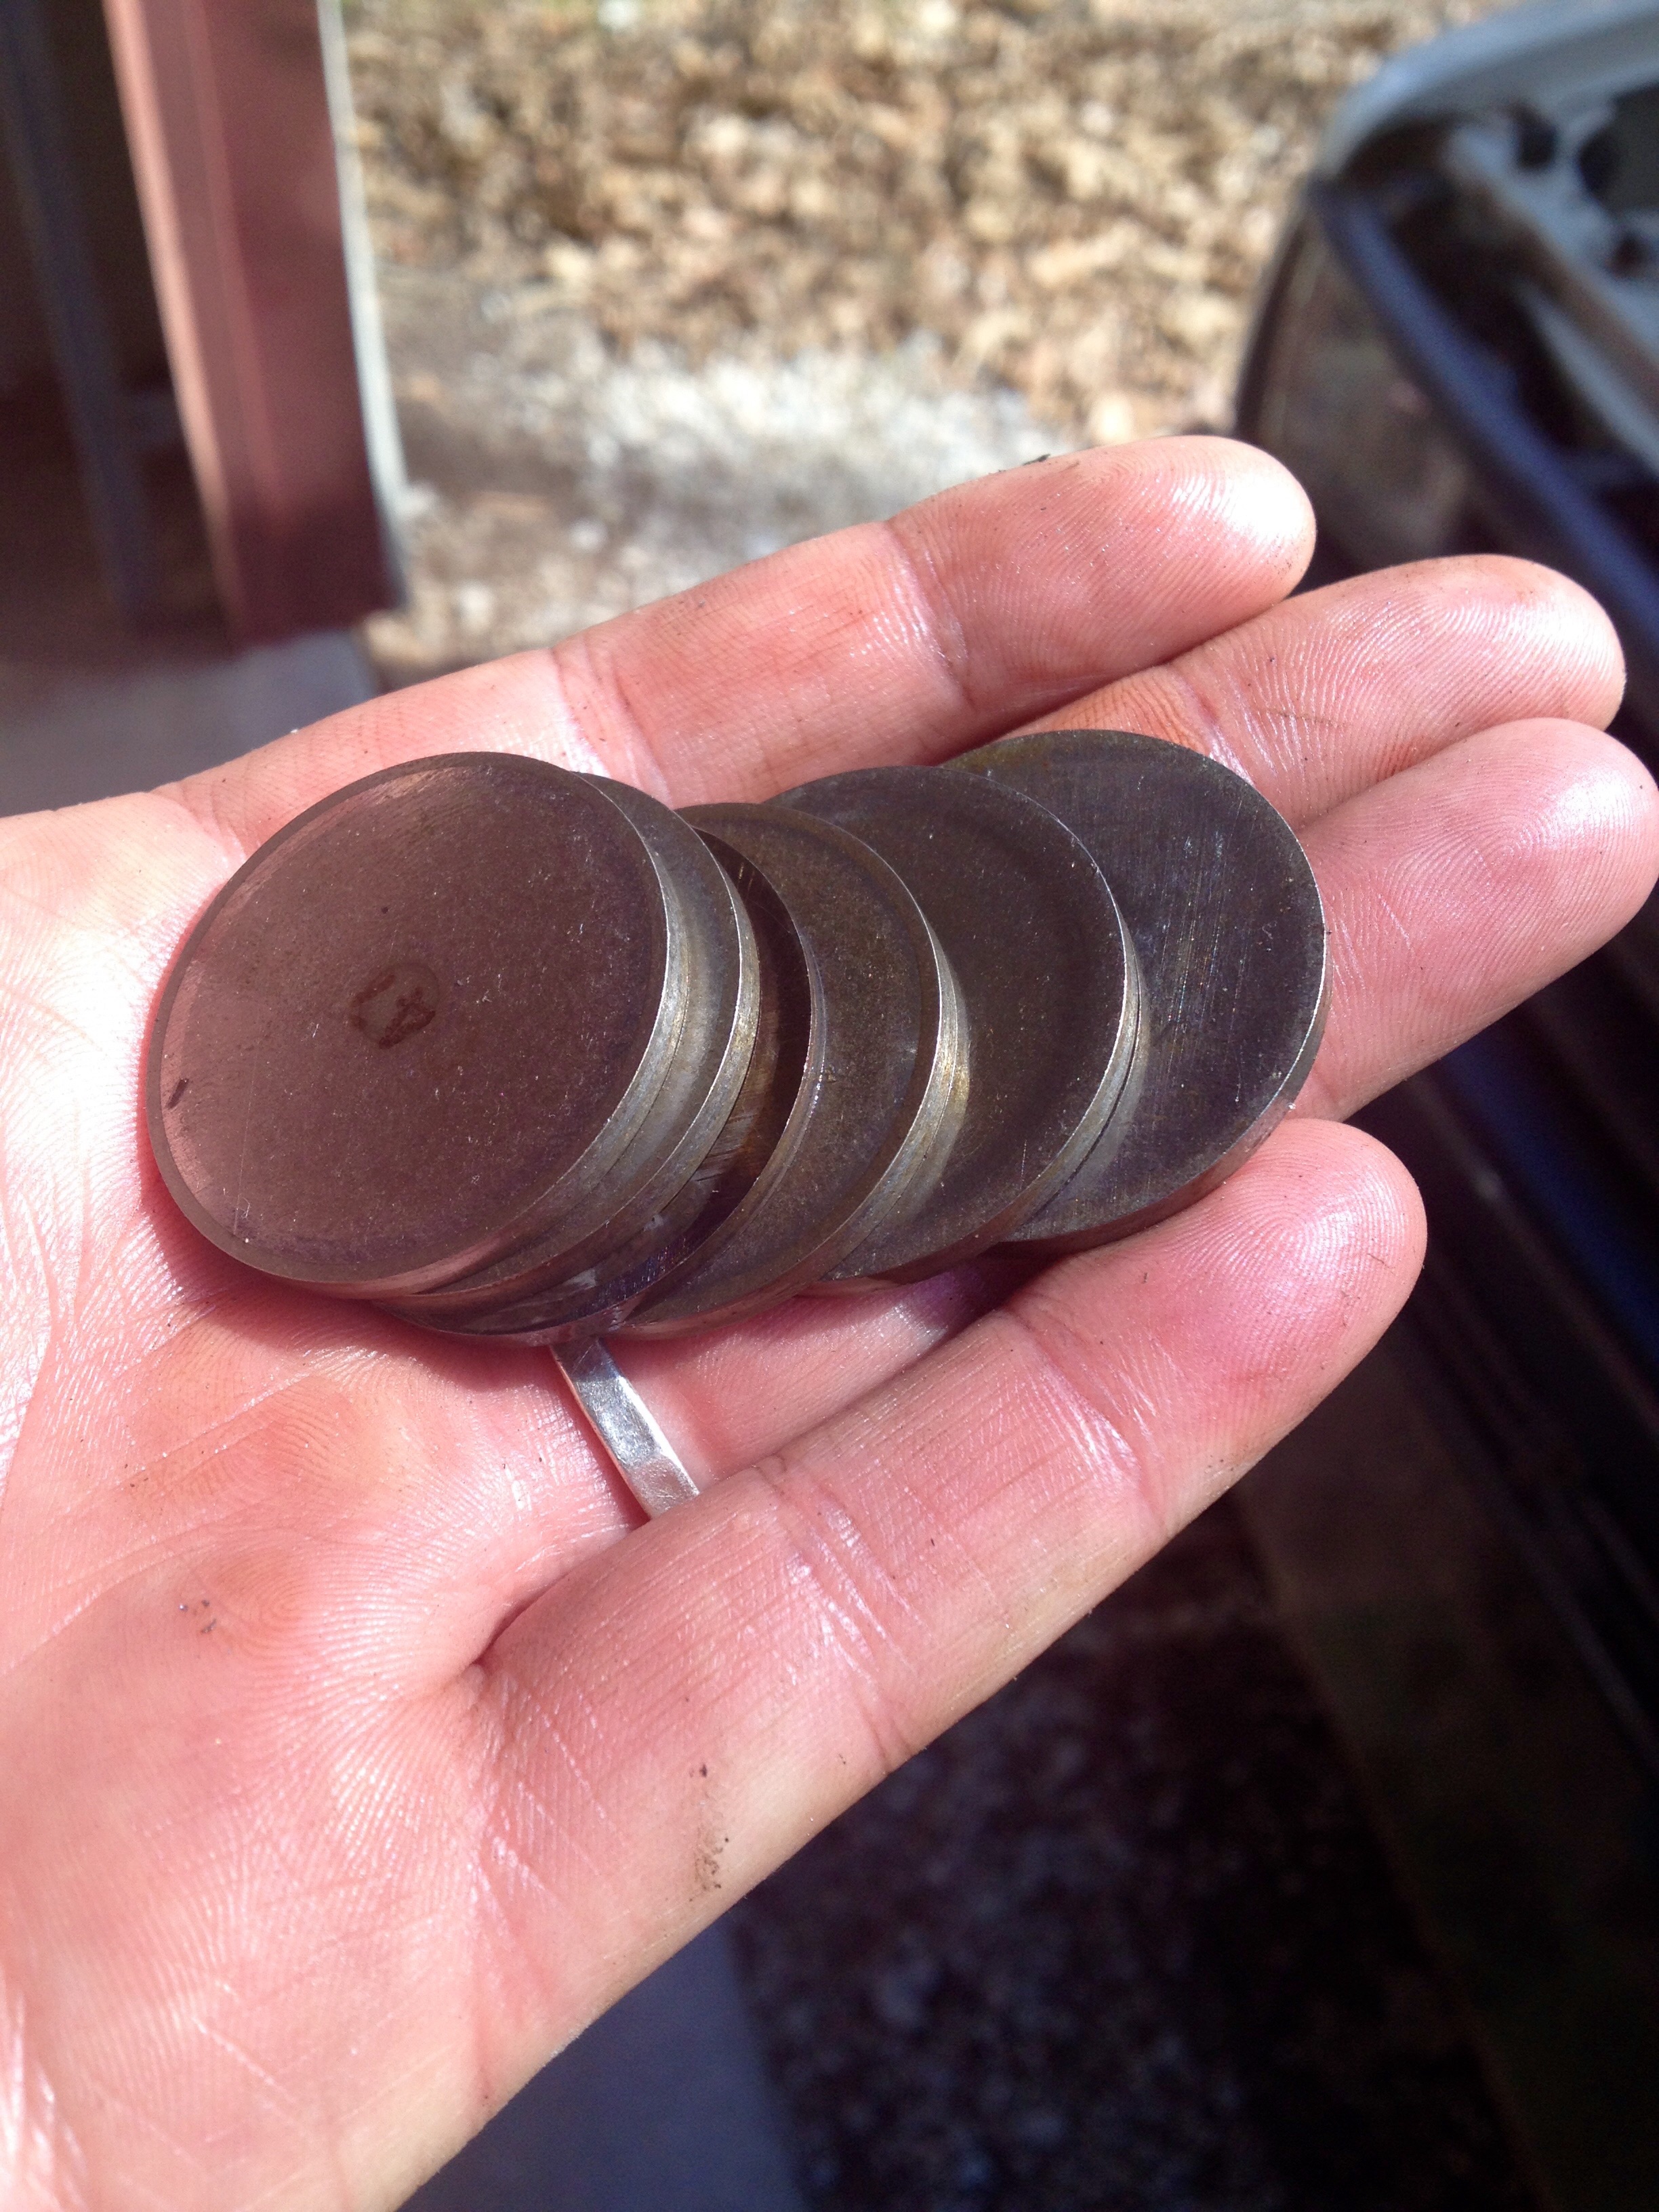
Since you asked first... you're welcome to my little stack of old 34mm shims. PM me an address, and they're yours.
-
Still need to road-test, but I finally got it all back together and running today. Started up fine after a few seconds and seems to idle well, rev up strong. I'm excited to see how she does at highway speed, etc!!! Feels like #victory
-
Thinking about it, yes, but I have two concerns: 1) My video recording hasn't been very thorough lately, on the tail end of the job; mainly 'cause we're heading out of town soon, and time is short. 2) I worry a bit that a video might encourage people to try something that they can't successfully finish (meaning: this job is going to be very difficult for a lot of folks). But, there are not a lot of decent videos out there on the subject... so, I'm still on the fence.
-
One piece of advice for mechanic, of which they're probably already aware: "Looser is better—so shoot for clearances on the far end of the spec" Yeah, please post your before-and-after clearances here if possible (or in another thread). Also, I'm sure many people will be interested in hearing the total $$$ damage, when it's all said and done. Thanks!
-
I use a digital caliper set that I bought at Lowe's a few years ago, and it's worked pretty well for me. (Looks a lot like the HF model, and I wouldn't be surprised at all if they were made in the same factory...)
-
If these six little boogers could talk... well, they've all been swapped with new, and my clearances all look good. Time to put it all back together and see how she runs.
-
I definitely didn't see this option when scouring the web. I like the pricing, although I'm a little surprised that they don't seem to mention the shim heights (i.e. 2.65mm, 2.20mm, etc) in their descriptions—absolutely crucial information, unless you plan on buying 50 of 'em and getting lucky.
-
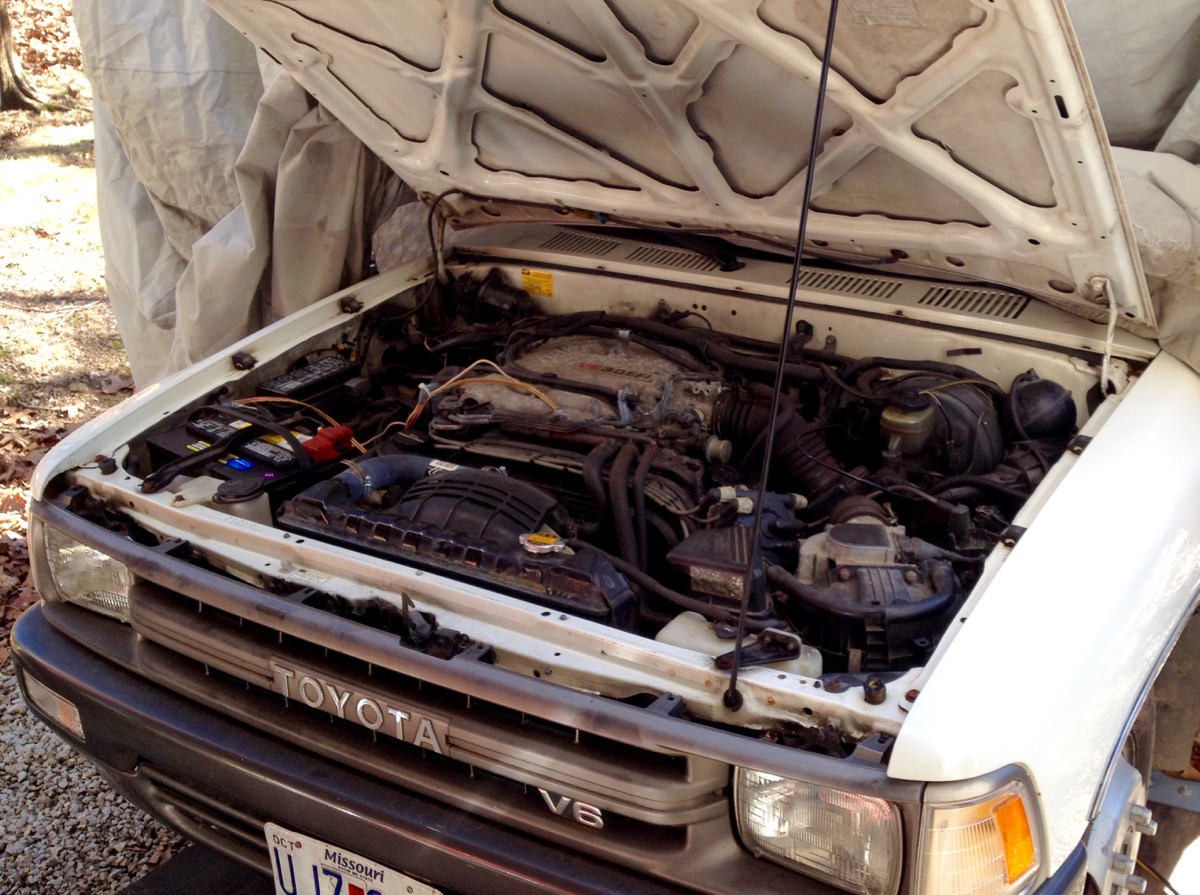
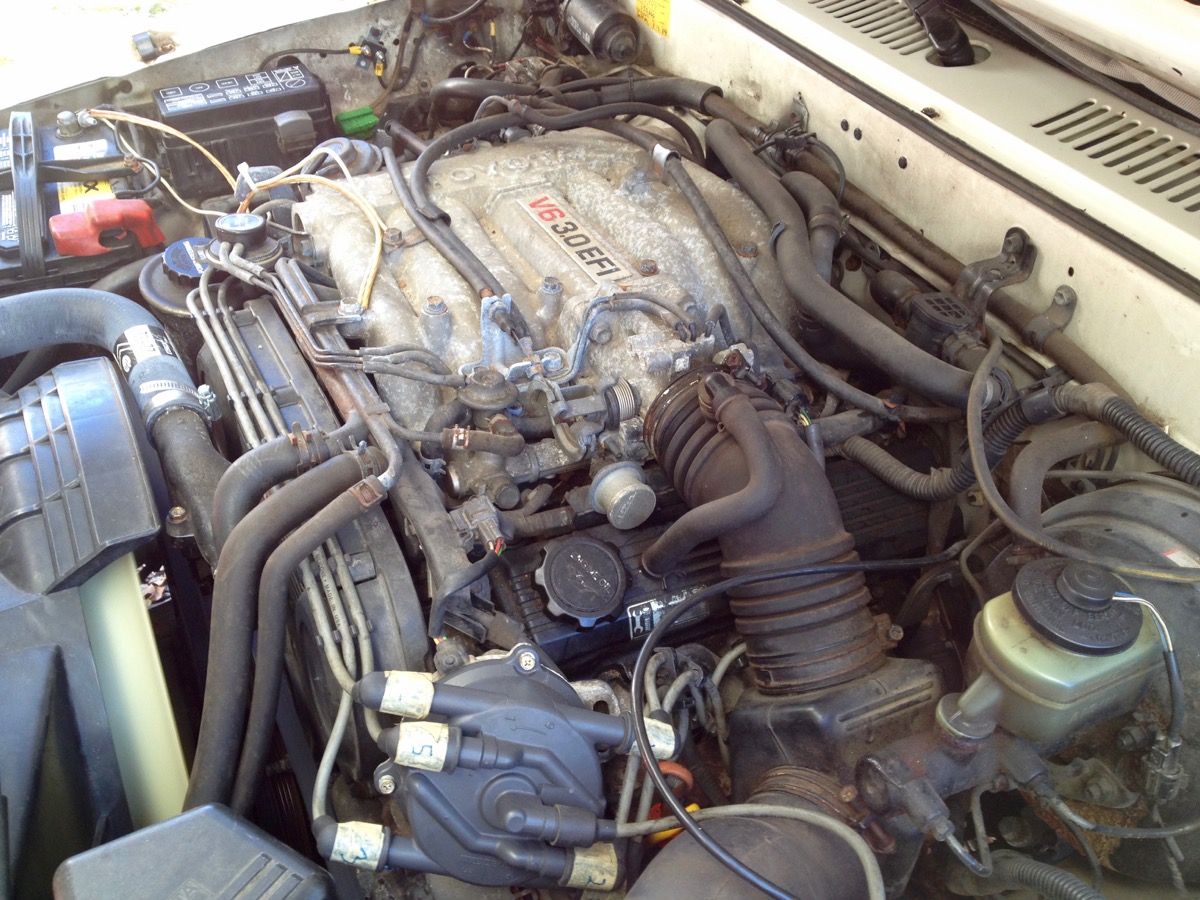
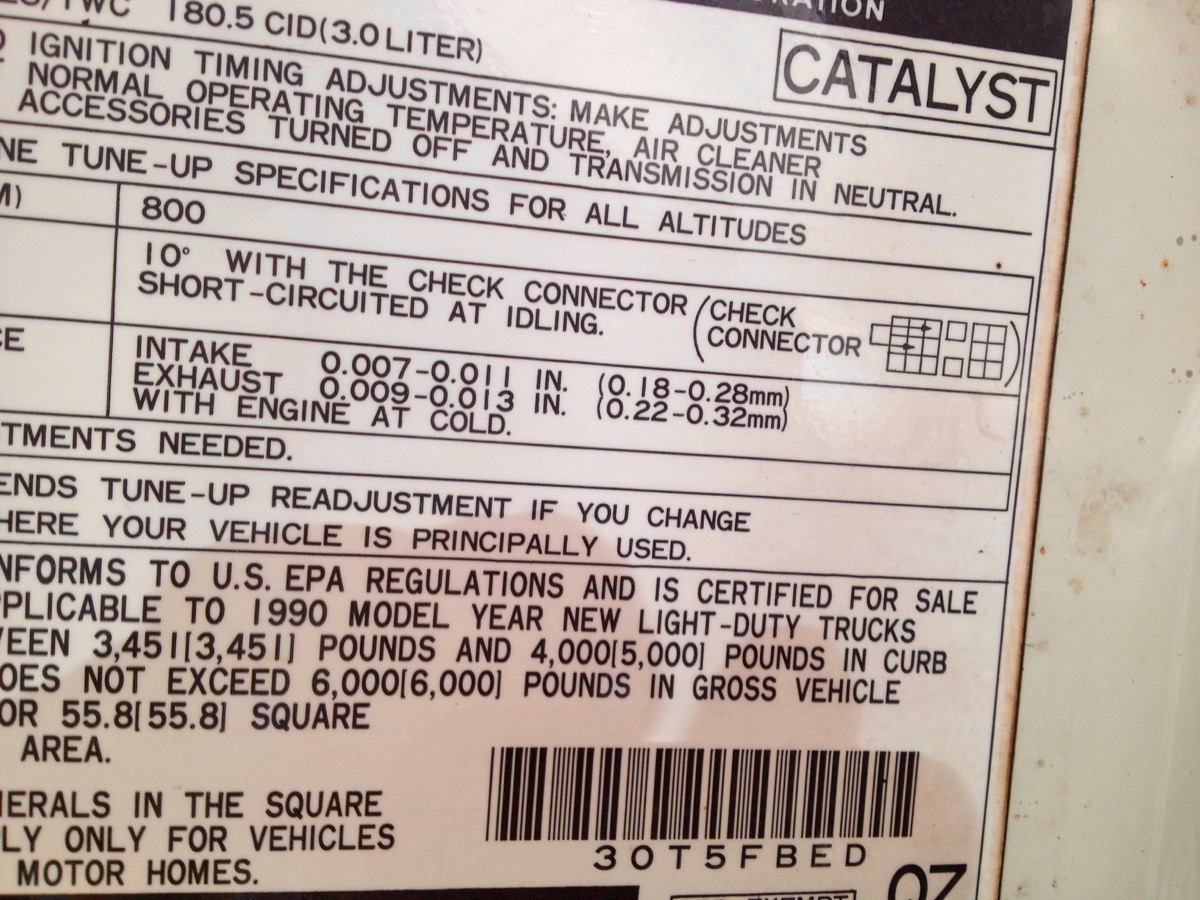
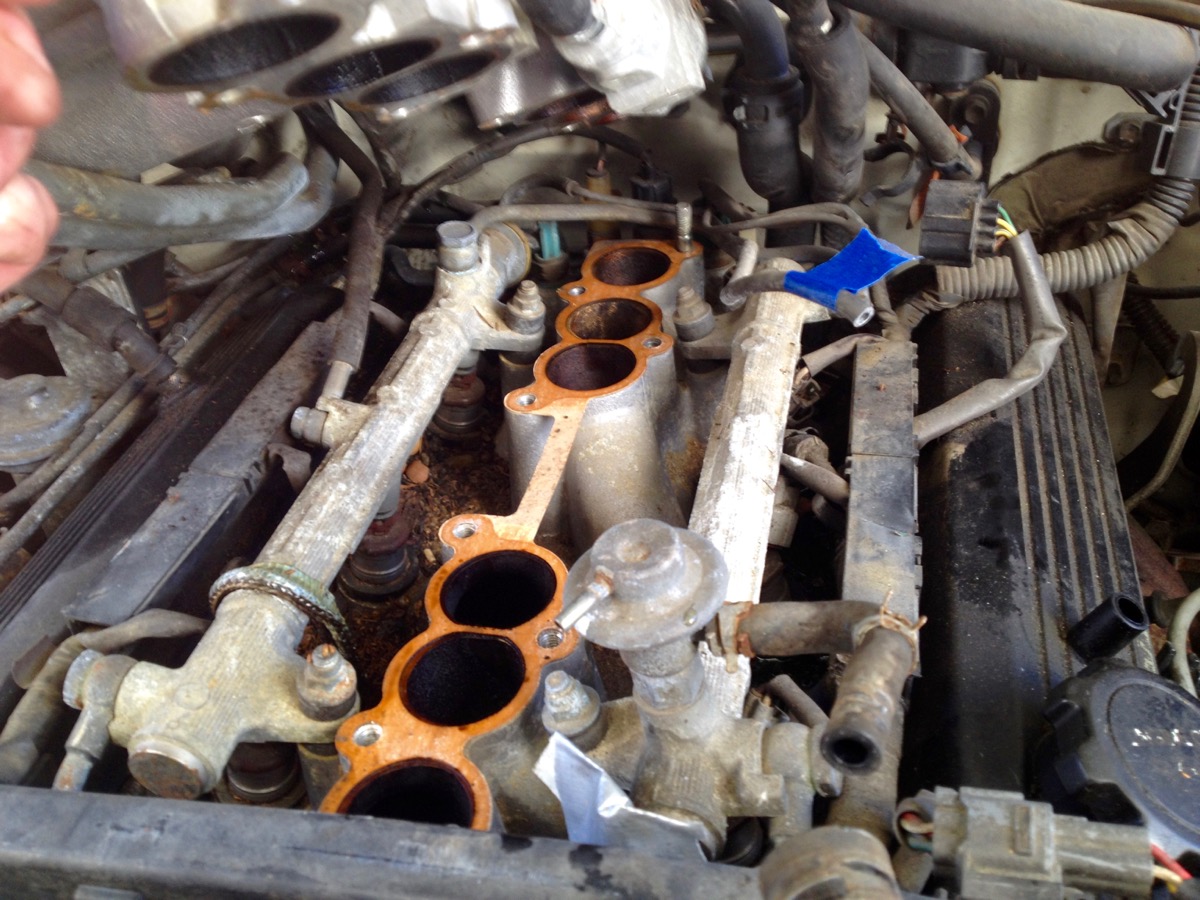
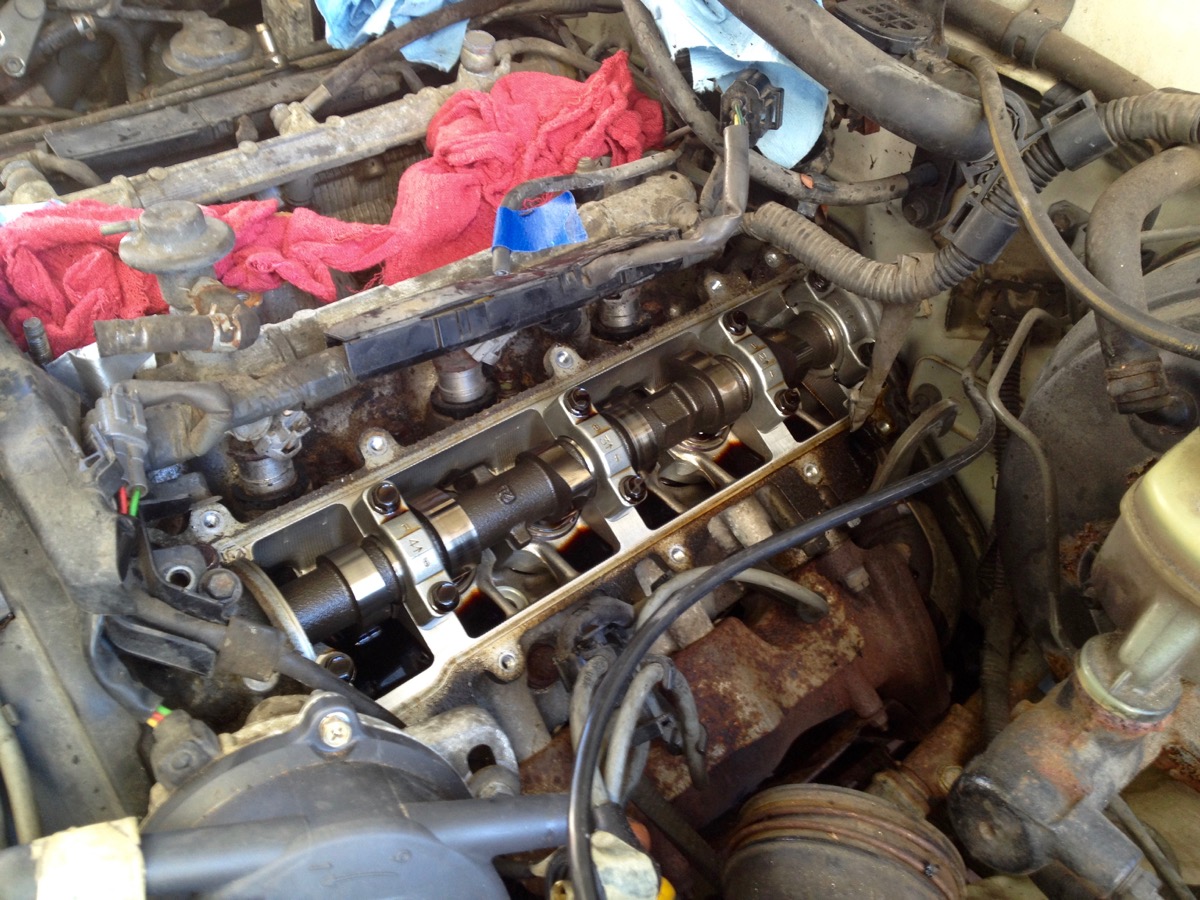
I'm in the middle of this job right now, and, unfortunately, it's every bit as tough as I've heard. Still, I know that a lot of folks have been talking/thinking about doing it, so I'm posting up a few photos that might prove helpful. (I actually have quite a bit of video recorded too, but am not sure now if I'll end up posting that on YT or not...) Notes: Give yourself a lot of time to do this job. I could see this taking a couple days of labor for the average joe, plus you need to measure and order shims, wait for delivery, etc. Try to label everything well and put parts/bolts/nuts in baggies with notes, to keep track of everything. Plenum has a lot of stuff attached to it and around it. Shims are 34mm in diameter and vary in height, of course, to set the clearance. One source of shims: https://www.yotashop.com/valve-shim-toyota-4runner-pickup-truck-t100-v6-3-0l-3vz-e-1988-1995-valve-shim-3vzvalveshim My 91 Warrior has about 83,000 miles on it and I'm finding that all of the 6 intake clearances are good (borderline, but good), and all of the 6 exhaust clearances are way tight. Pretty much the norm, from what others have said. I think the recommended special tools are a must on this job, but even those can't help on some of the difficult shims, next to the firewall. In those situations, when the brake booster (or something else) is making things very difficult, use a 3/16" allen wrench to lever the bucket down—because there won't be enough room to use this wraparound-the-cam wrench tool. After pulling a shim for measurement, put it back in the bucket before you turn the engine again. I've seen bad stuff happen before when a cam lobe catches the edge of an empty bucket. starting the project driver's side view clearance specs from hood label intake plenum removed (plug those holes immediately and clean/vac surrounding area well!) driver's side valve cover removed: cylinders 2 / 4 / 6
-
Thanks, Linda! That's very helpful, partly because it mentions the length of the belt: 890mm, which is very close to 35" (shorter than most of the aftermarket recommendations).
-
Uhh, I'm pretty familiar with Google (since I build websites for a living), but anywho... The original belt did come from O'Reilly's and they, like most other part resellers, seem to work from a common DB that falls into the category of "close enough for guv'ment work." That's why I come here, post things, read up and pick the brains of people who know stuff. Sounds like the general consensus is: go with the Toyota part on this one, which sounds like a good idea to me. Alternatively, I may just grab a 1/2" V-belt that's ~1" shorter than what I've got. Thanks, everyone!
-
Anybody have a firm, experienced opinion on what size belt (and PN) is correct for 3.0 AC? I've been fighting a loose, squealing belt for too long; tightened it as far as possible and have finally decided that it was probably oversized from the get-go! Appreciate the help.
-
I, for one, would like to get the link to that post Dan mentioned... And, btw, I used shims from this company for a Toy 5SFE valve adjustment, a few years ago. Prices were great and shipping was quick. https://www.industrialpartshouse.com/search.aspx?tSearch=Shim#pageSize=ALL