mtdave2
-
Posts
222 -
Joined
-
Last visited
Content Type
Events
Profiles
Forums
Gallery
Everything posted by mtdave2
-
 i have been running the new lexus motor in my dolphin to test different things. The oil pressure was around 65 psi, then a while later it was 50, then 40 then 20.. no change in the sound of the motor and the oil light never came on, even when it got to 5! I was sure the motor had oil pressure, it sounded fine so I just assumed it was a gauge issue. I had pinched the tube or something. Finally got to looking into it, did some tests, and figured I had a bad gauge, so i ordered a new one, an electric one this time. got it all installed and fired it up. 20psi. wth! baffled, i started to do internet searches and found that some people claimed the same issue and it was solved with a new oil filter. I though BS, but what the heck. Installed the new, different brand, filter. and i was floored to see the pressure at 65. who would have thunk it. I will cut that fram filter apart just to see what i can see. Odd no?
 -
True Jjrbus, just getting worn out. this is one hell of a project. I could do another in 1/3 the time and cost, with out many head aches. the first go is always a learning curve. I have enjoyed the heck out of doing it, I just am out of time. Need to get this thing buttoned up! Drive line should be done tomorrow and if it is, Saturday will be a test drive. and perhaps I can get the exhaust put on? if not then, then next week. lots of little things to do, mostly wiring. only thing left that will requires fab work will be getting the hood to close all the way, im about 1/4 inch too tall on the radiator cap. so that should be an easy fix. im hoping i can start driving it to work next week! that will be cool.
-
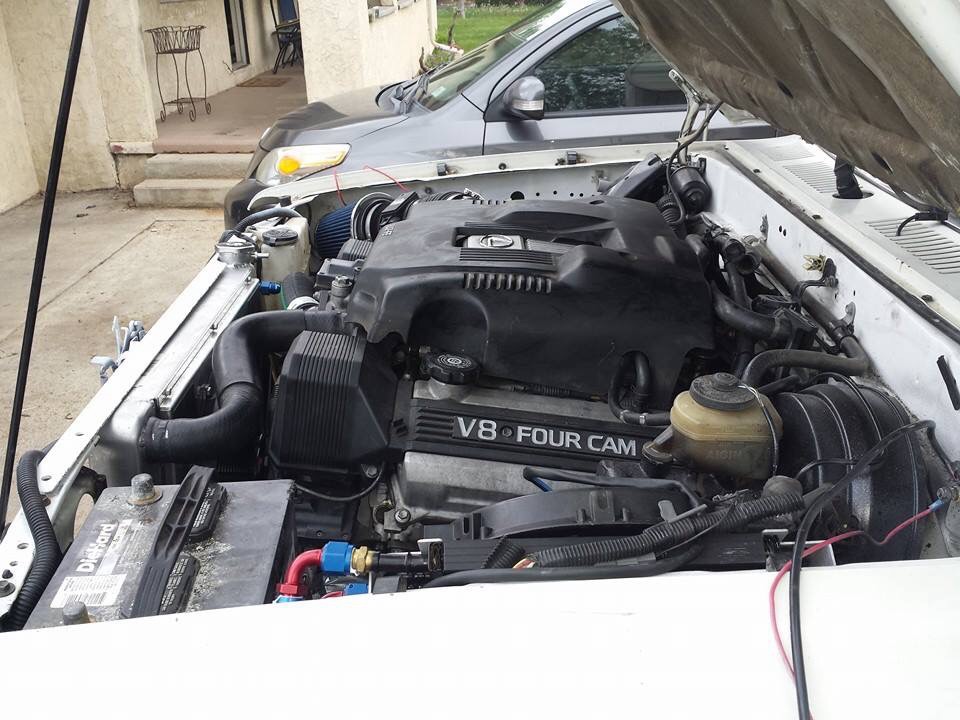
talk about a great rig for a lexus v8!!
-
well I have the sender out of the lexus, I'm hoping the bolt holes match the toyota. I did connect the wires and everything is still working. The lexus is a side mount, the toyota is a top mounted sensor, but i think with a little bending i can make it work. now i have to drop the tank, and see if it will fit. might as well change the pump i guess while im in there. Thanks for the input, sounds like this is the best option.
-
I am putting an 1uzfe in my 92 toyota truck. I am also using the lexus dash. My question is with the fuel sender. two different set ups and im trying to figure out if there is any way to make this work! lexus sender is the first photo, it has 3 wires toyota the 2nd with two wire. Any advice?

-
oh btw $150 part. ouch! but I was going tomorrow to a fab shop to have them make one, so i probably saved money this way. i need a metal lathe. I could do this. humm
-
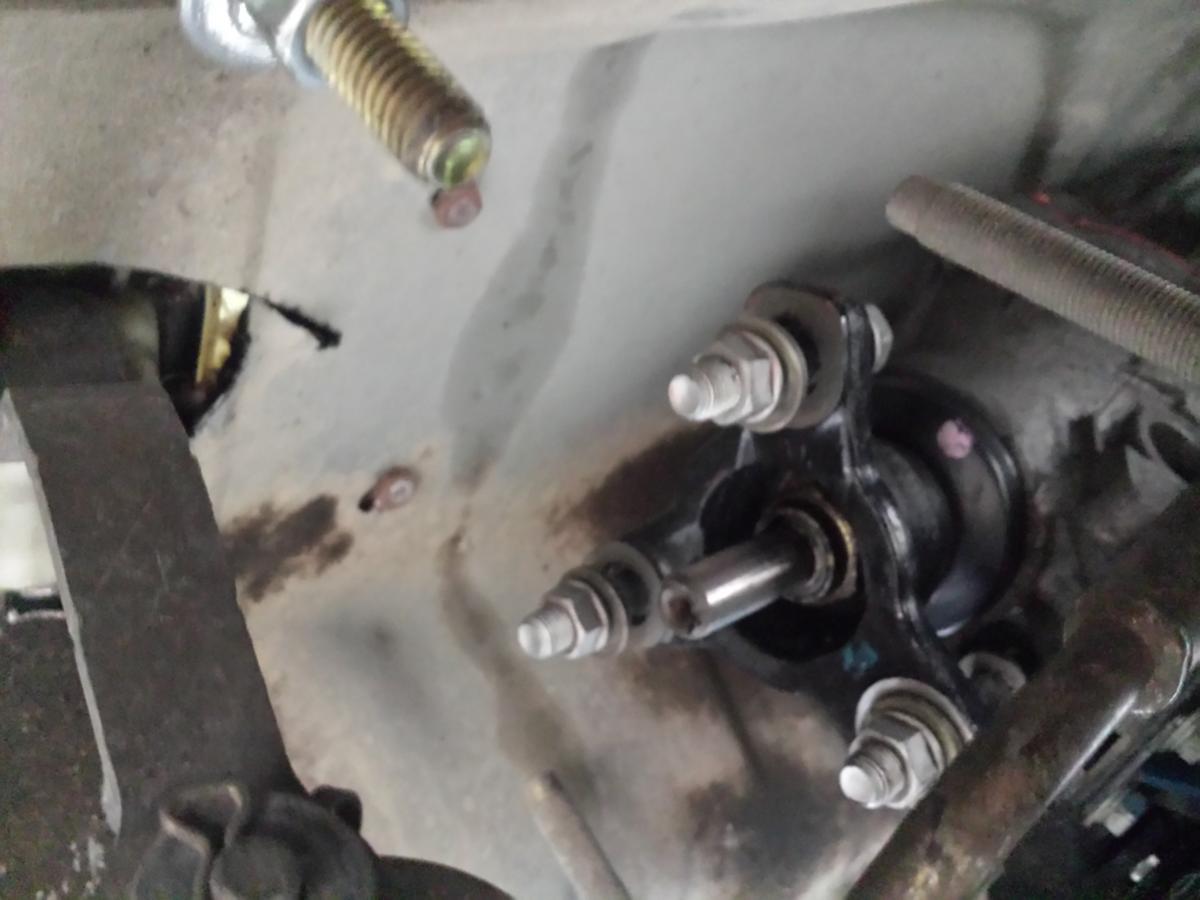
wow, this was an issue i was NOT expecting! I had every expectation to take my drive line with measurements to the drive line shop then pick it up in a day or two. HHAHA! you say. Here is the issue you face. First photo is the tail shaft of the Lexus trany. it is the odd doughnut pos fitting. NO drive line shop I called could get the fitting to weld to the shaft, then if they could, they had no way to mount it to their balance machine. took a few days of searching but there are a few options, the first is the rebuild the trany with new shaft. no. second is apparently you can convert the shaft, read that as cut off the extra pilot bit, and use a different tail housing. um...don't want to do that one. the trany is mounted in the RV\ I searched for an adapter, I could see what it would look like, but could not find a tail shaft adapter. I finally ran into a differential adapter. I was looking on the wrong end of the drive line! so, you mount this 1 inch metal disk to the tail shaft, then have the drive line shop make up a drive line with the standard rear fitting on the front. Then to the carrier. I am having them convert my rear shaft to the style they currently use on toyota, a rear shaft that has a slip join built into it. soooo im hoping this one works. man, i am tired of all these issues! i wana drive this bad boy.
-
mine is the same.
-
trying to get the drive line headache sorted out on my lexus motor swap into my 92 dolphin, I brought the whole dolphin drive line in. He was very surprised on our set up. there is no slip yoke connection on the rear shaft, only one on the front. This is odd he said because it is the axle that moves and needs the slip joint. The trany is stationary as is the carrier bearing. so the front does not move, and doesn't need the slip yoke. what say you all?
-
for the heck of it, this is how it sounds with it on. kind of a hack job, didn't spent tons of time, just needed something to quiet the thing down so the neighbors wouldn't be pissed, https://www.youtube.com/watch?v=zkotvEmzvac
-
Frankenstein exhaust to get it everything working and then to drive it the the muffler shop. kinda cool steam punk looking thing huh
-
https://www.youtube.com/watch?v=ow2fnE5IzIo
-
so, the radiator is not installed, and the trany lines are open but I wanted to start this thing. freaking runs and sounds like a dragster! tomorrow ill get the radiator in and finish up some wiring. still lots of work to do but man what a feeling to fire it up! sorry for the poor quality of the the first one, I have no idea why that camera did such a crappy job! the second one is better, and yes i was expecting the trany fluid. My buddy was not lol. the first fire up the second love how smooth it runs, and does not move an inch!
-
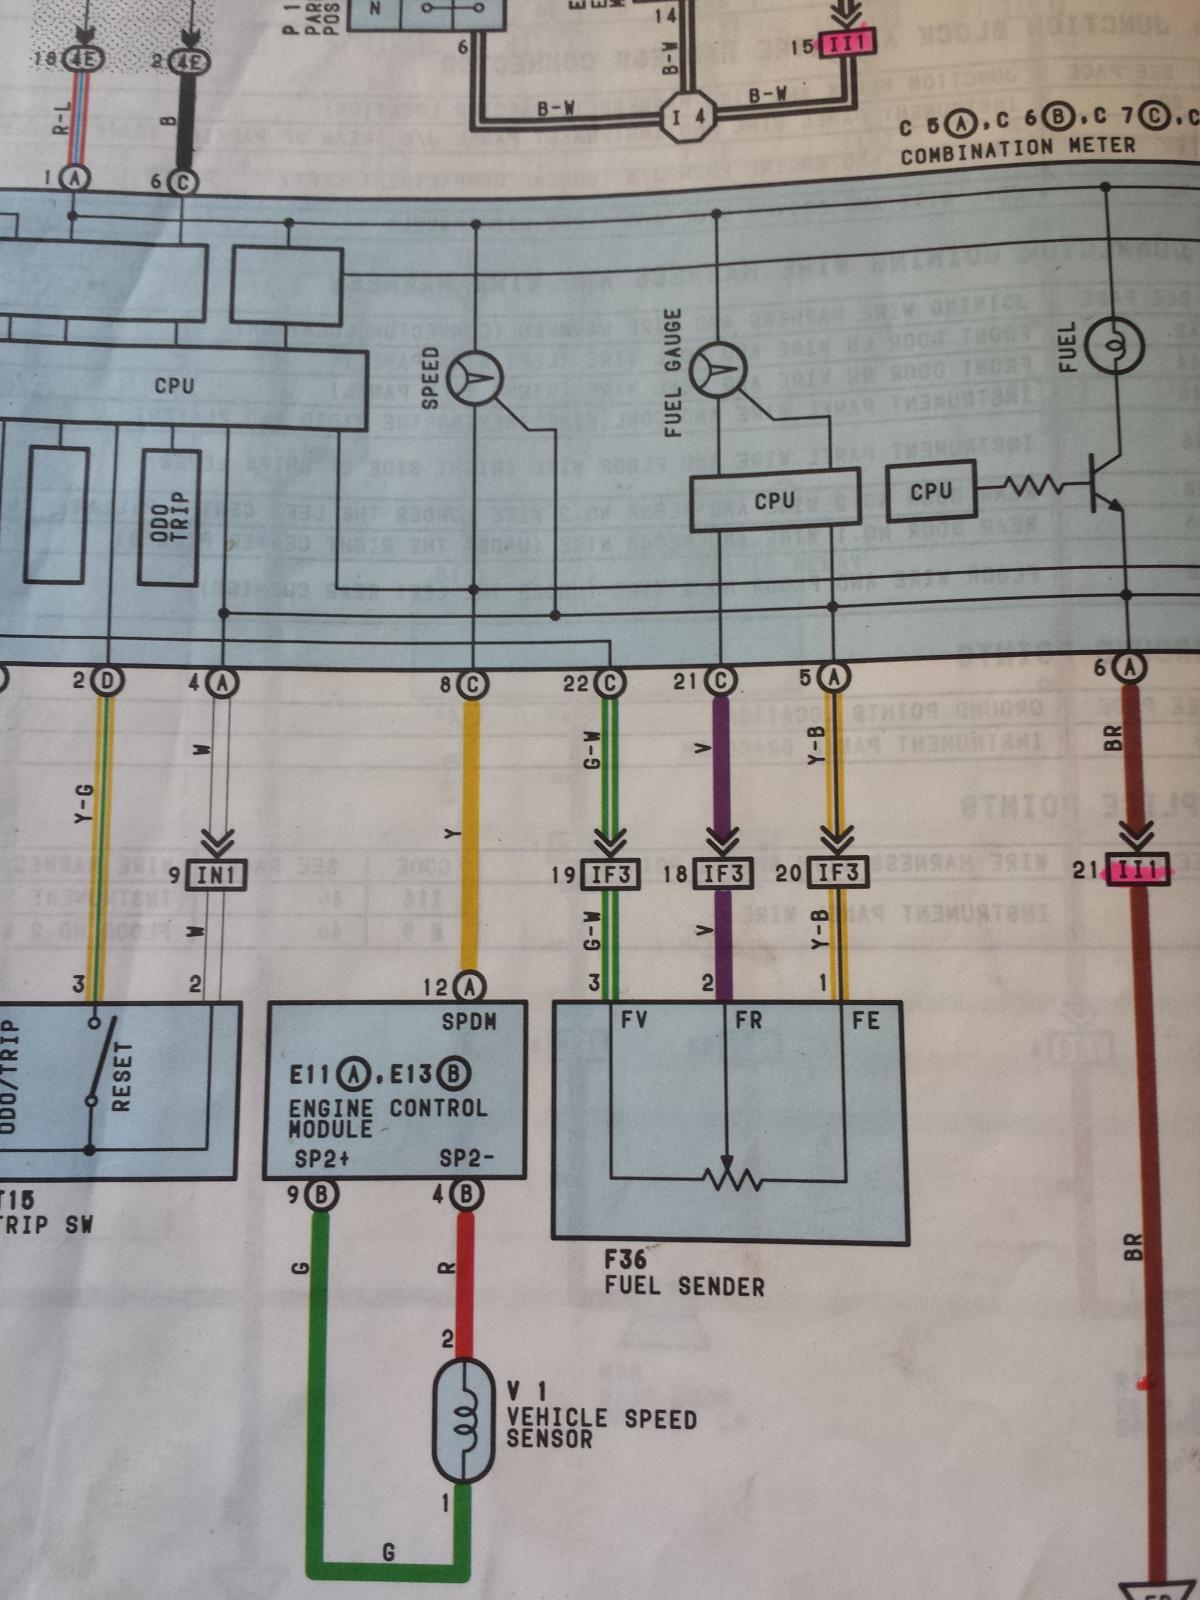
got the harness built finally. hate to know how many hours it took, but most of the time is spent figuring out what goes where, or not used or.. not a fun job. Did get most of it installed, There are a handfull of wires here and there to hook up. I am thinking it is very possible to at least get it to run for a few seconds tomorrow? we will see. I did spend 4 hours verifying the excel doc i made on what i connected where, and the pinouts of each of the plugs. I guess i understand now why people do not post the information, There has to be at least 60 hours of work to make the document. But, I will post it when I am done. it may help someone out, I would have loved to had something like this when I started. I will wait until im done to be sure I dont have to adjust something, but once i l know it works, I will post the information. What made my swap far more difficult was using the factory lexus dash, it added another level of complication. though, there are a few wires the toyota just does not have! so, you would not have things like a 3rd gear light on the dash, and all sorts of warning lights ect. Glad I did it, but Im not sure id want to again. Though it would be far easier now that I have wrapped my head around it, think that took the most time.
-
you know, its not the actual wiring work that takes time, its figuring out what to wire! ha! my head hurts and eyes are crossed from looking at wiring diagrams. Made some good progress, almost have the dash wired in, one of the three connectors done, new relays mounted to new bracket. sooo. getting close to fire up.
-
oh i will be filming, either a moment of triumph or shyt blowing up lol. not sure what will happen.
-
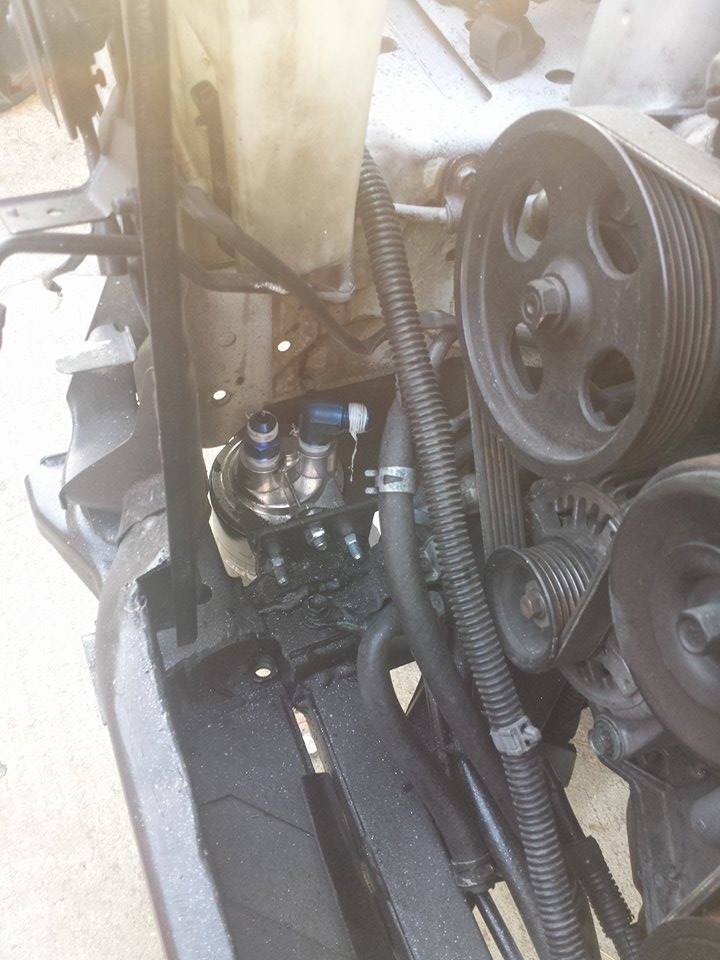
ya, I had a few ppl tell ,me that. oh well! i guess the an fitting dont need it. I stopped using it for the last few fitting. I just dont want a leak! If there is, it all comes out again to get it. before i put the grill and stuff on, I will fire it up to be sure.
-
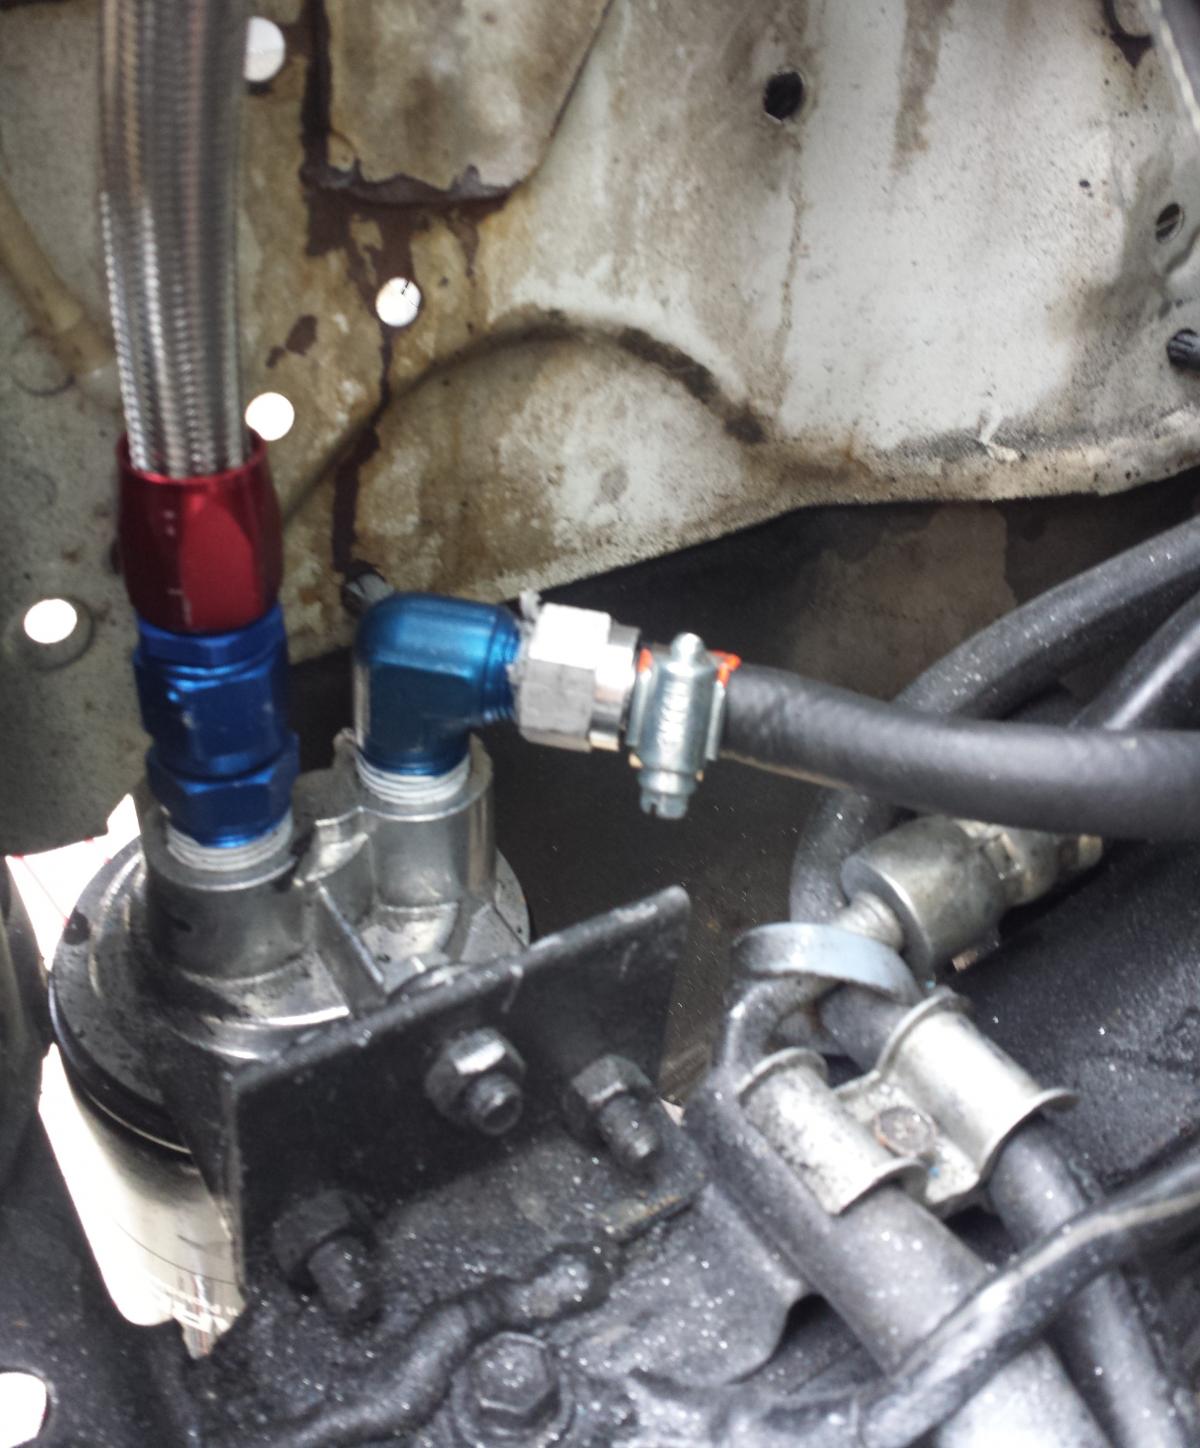
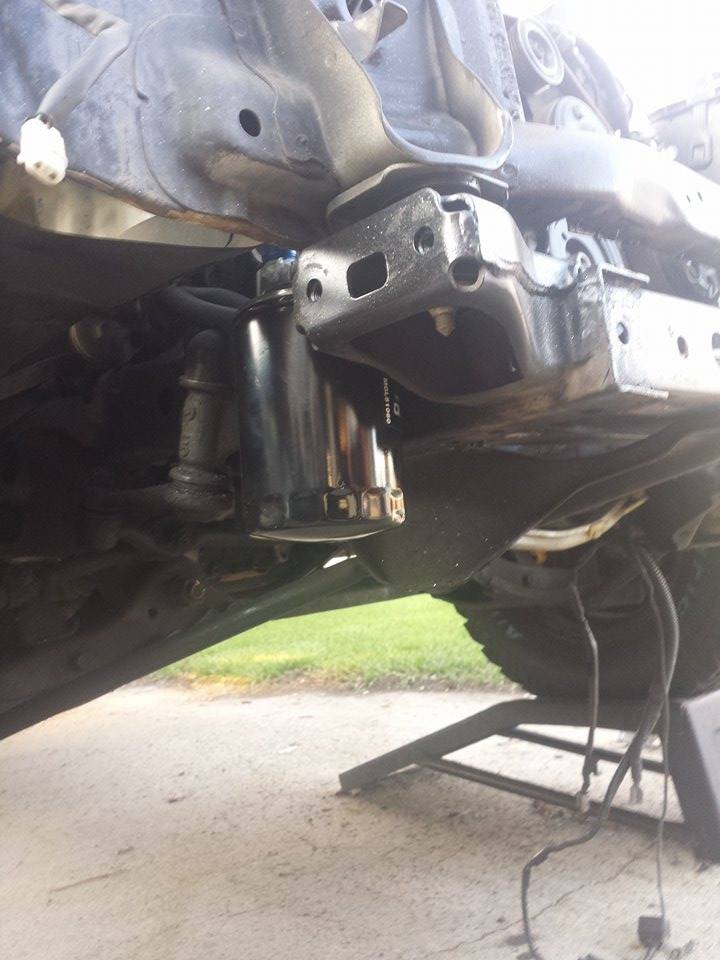
Been working on installing the cooler lines. One fitting left to get and then I can do the final assembly of the front end stuff! The braided hoses and AN fitting are really awesome. I hope there are no leaks, but I did take my time. Both oil and trany fluid have inline filters, and get ran through the cooler. I should be able to do 80 up hill in the desert and stay cool! lol
-
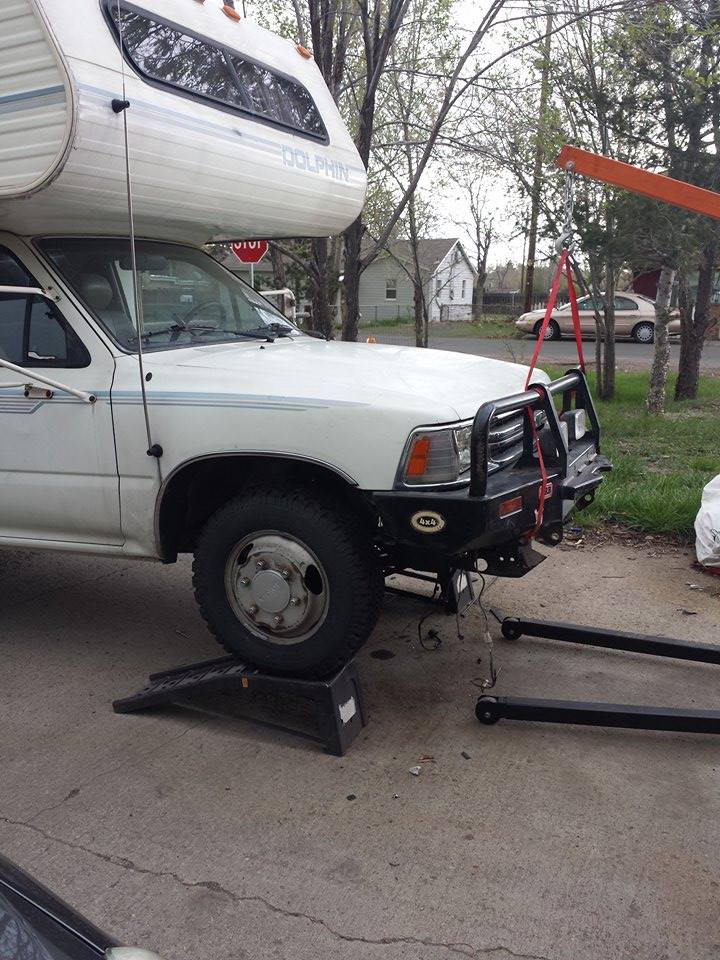
It's not as drastic as that photo makes it look. The rv is on ramps so that makes it look odd. There is a slant but I don't think it's a major deal.
-
Dry fitting. Can see what it will look like. Bad behind I think
-
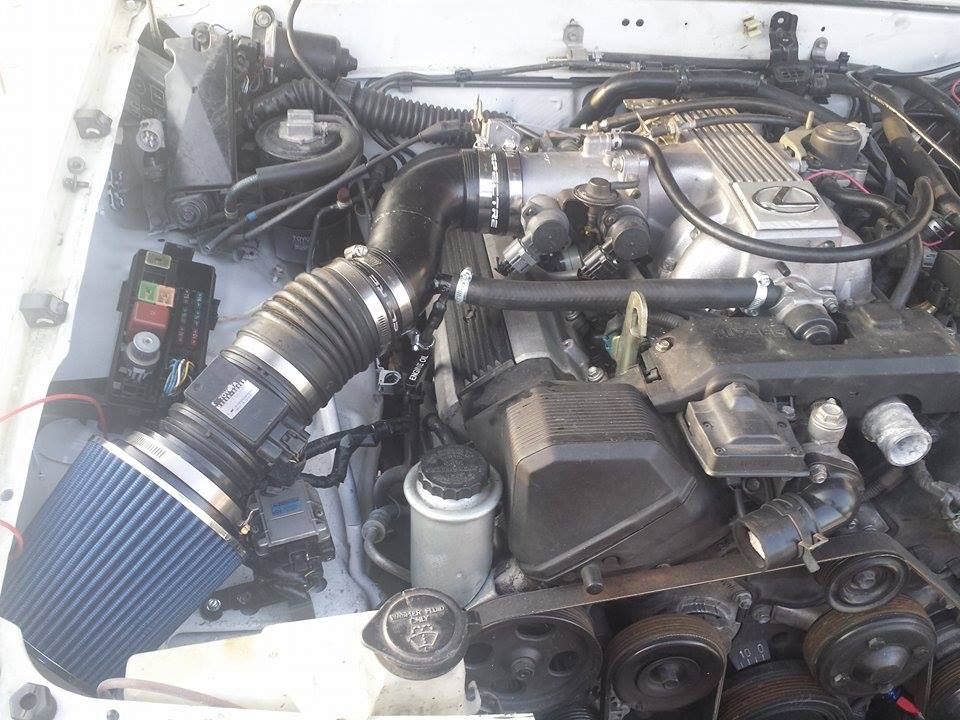
next is the intake. the stock intake has a box on the bottom that there is just not room for and the angle was off just a bit, could work but i decided to build one. use a 3 inch exhaust U fitting and cut it in half, then got the angle right and welded together. drill and weld in a pile for the vacuum with a bit of brake line for the smaller tube. Little paint, and a bracket and this sucker looks great and is solid.
-
ok, this is kinda cool i think. Turning out really awesome. Oil filter, and transmission fluid filter. i can squat by the wheel and reach up and unscrew the filters. most accessible filters I have ever seen. going to be a pleasure to change the oil. oil filter has the orange fram filter on it an one AN hose. the other cool thing is both filters are the same, and happen to be the same one on my old chevy truck so a case of filters will work for everything. cool huh?
-
guess those photos look just like the other ones. the difference is everything is mounted. radiator and all the bits. and the bumper is up 3 inches higher were it should be.
-
well if there is room on that side, my fuse boxes are gong over there.. some more photos.. dry fit everything. the hood closed. now just need to weld up the mounts for the bumper. nice to see what it will look like once done...... can not wait!
-
for the grins of it. the radiator is almost in. look how bad behind this big radiator looks.