


fred heath
-
Posts
2,048 -
Joined
-
Last visited
Content Type
Events
Profiles
Forums
Gallery
Posts posted by fred heath
-
-
7 minutes ago, KonCon said:
Just heated it up and no issue. One question I have of there is a key size between a 16 and 17 metic? The 17 one just has too much play so it "jumps" when putting a lot of force on it
You could try a 5/8” SAE wrench. It sounds like the fitting has been rounded over. Vice grips might be needed.
-
1 minute ago, KonCon said:
Just heated it up and no issue. One question I have of there is a key size between a 16 and 17 metic? The 17 one just has too much play so it "jumps" when putting a lot of force on it
Are you using a flare wrench? A regular open end wrench will round the fitting over. 6 pt is what you want.
Worst case, try a small set of vice grips and see if you can loosen it that way.
-
Trans fluid has a high flash point. Technically, it could get hot enough to burn. I’ve never had it happen to me.
wipe the area down really well. You’re directing the heat onto a specific area.
keep an extinguisher handy just in case. If you’re uncomfortable using heat, let the WD 40 soak for a few days.
-
Leave the flame on as long as you can. You want the metal to almost glow. Then immediately use your wrench.
Best method is to loosen….tighten…..loosen…tighten, back and forth until you feel the fitting start to move. Then you should be able to just unscrew it. Good luck.
-
12 hours ago, KonCon said:
Yeah so these are currently not coming off. I'll keep spraying them with wd40 and hope that they will come lose at some point. Worst case I will have to take loosen the pipe at the power steering pump and get it out this way.
If you have a small bernzomatic torch you can try heating up the fitting. The expansion many times will help with the removal of frozen threads. You must be careful not to melt any of your rubber hoses.
I’ve seen people use a bernzomatic grill lighter to get into tight spaces. I’m not talking about the ones that look like a candle. I’m talking about the ones that look like a mini torch.
You can buy them at places like Walmart. Here’s an example from Amazon.
Butane Lighter Torch Long Lighter Jet Flame Windproof Lighter with Visual Fuel Window for Fireplace Kitchen Grill BBQ Camping, Black (No Butane Included) https://a.co/d/iLDZFBo
-
7 minutes ago, KonCon said:
Alright making some progress. First screw is out, pitman arm is loose and all other nuts/bolts are at least loose. The line nuts are really tight so need to use more wd40 and get those flare crows foot sockets later that @fred heathrecommended. Overall good progress so far.
I suspect once I have those line nuts out, the toughest part will be separating the box from the steering shaft. In the video, the guy is using a crow bar but doesn't show how he does it.
Any recommendations for that?
As always, thank you all. You guys are incredible!!!!
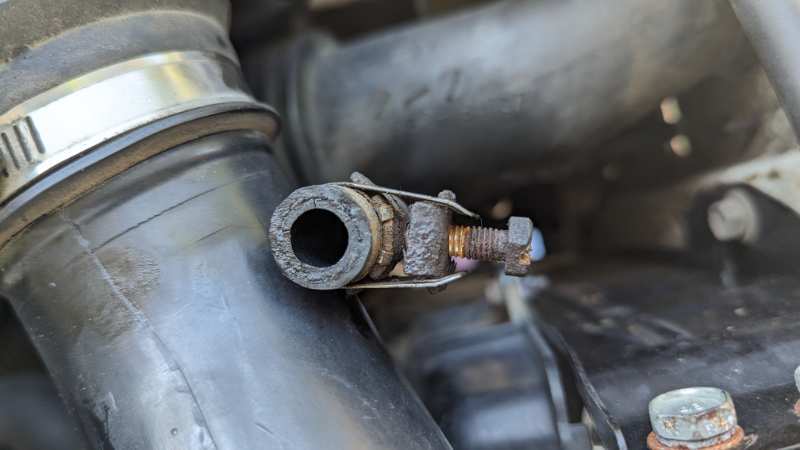
Oh one more thing. Do you recommend keeping this thing holding the hose on the fitting or is it ok to use a more modern, Standard clamp with a screw like I see on all the other hoses? Reason I ask is that it looked like there was also some leaking happening on this hose.

They also make flare wrenches. A wrench might give you more leverage than the crows foot. If you got the available space to manipulate a wrench, that’s the way to go.
-
The 22RE is supposed to be a non interference engine. 20R and 22R are supposed to be interference type.
There seems to be a great deal of debate over this issue. Browse through yotatech and see if they have clarified this issue.
It would be a shame to sell it cheap and have someone replace the timing belt only to have it running correctly.
If you have the V-6 engine, that’s supposed to be non interference.
-
I can’t comment on your setup as I’ve never worked on a Toyota power steering setup. My vehicle is older and has manual steering.
Based on your pictures, the “screws” I think you’ve referring to are actually “flare fittings “ and should be removed using a flare wrench or flare crows foot socket. This will prevent the fittings from getting rounded over by trying to use a standard open end wrench. Shoot them up good with rust buster and let them sit for a day.
The steering box itself is usually attached by nuts and bolts to the frame rail. Again, your setup might be slightly different.
On my setup I couldn’t get a puller over the pitman arm until I loosened up the bolts holding the box in place.
Take your time. If you have a Haynes manual or Chiltons manual, that will be a big help.
https://www.harborfreight.com/38-in-metric-crowfoot-flare-nut-wrench-set-7-piece-68999.html
-
47 minutes ago, KonCon said:
Oh I also probably should make sure the tires are pointing straight forward.
Your pitman arm will have index marks on it. The steering shaft will also have an index mark across it. When you reinstall the pitman arm onto the steering box all the index marks MUST align. Failure to do this will result in an uneven lock to lock on the steering. Limiting your turning radius in one direction.
-
53 minutes ago, IdahoDoug said:
Are you sure? I just randomly googled 5 1984 Dolphins and every one had dual rear tires. Thinking of a different model, maybe?
They might have “foolie” duals. 6 lug duals are what you want.
In 1984 they all came with foolies. Any 1984 with 6 lug ff is a retrofit.
-
4 hours ago, hortonma said:
Thank you for the thought out response. This really clears it up for me. So, for weighing it, should I just drive half of the vehicle on the scale with the rear wheels resting on the scale?
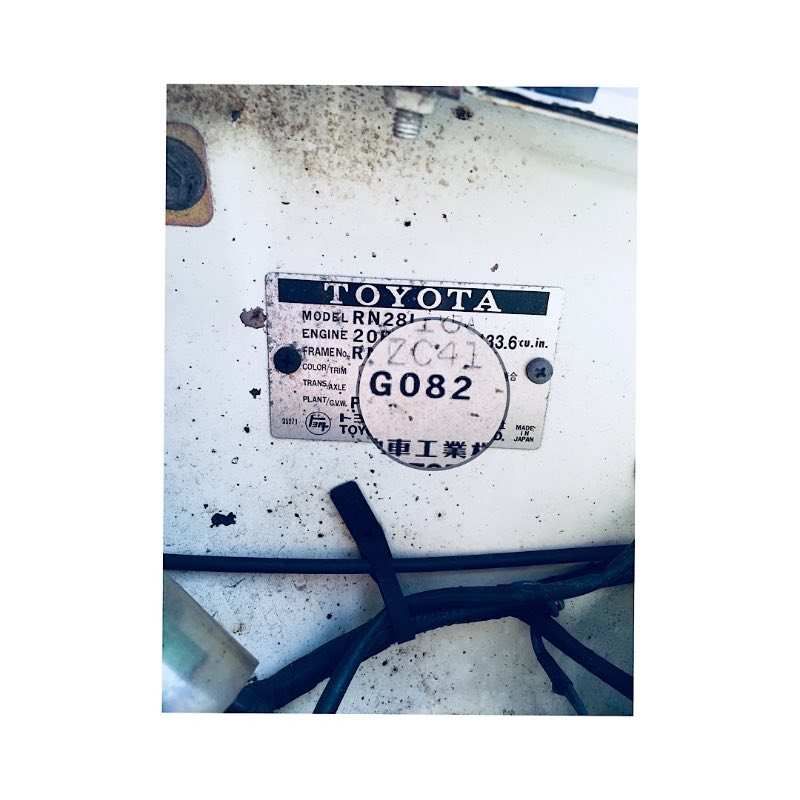
As for bearings and axle shafts, would I just get ones made for a 1983 toyota 2wd pickup?Yes to weight. No to axle shafts. The GO82 (3/4 ton) axle shafts up until recently we’re not available anywhere. These are the only shafts that will work for you.
Linda s found a source. Get the specifics from her. Bearings should be standard size.
I’m guessing you have the GO82 rear axle. Most of the motorhomes use this one. You might want to check your build plate under the hood just to be sure before ordering. I’ve attached my plate so you know what to look for.
-
11 hours ago, hortonma said:
Yeah, it has had me worried since I read about it. I saw conflicting information for the 18-foot sunrader. Some had said that these shorter sunraders were not affected by the recall, and others had said all of the foolies were an issue. Regardless, it has me worried, especially with how rough the ride is. I have to imagine that every time I bottom out, it causes an immense amount of stress on that axle. At the very least, every bump made me remember the constant potential for axle failure.
Do you know of any resources on good ways to approach an axle swap? When I had looked previously, there weren't many direct options. Some people had luck with their local shops, others had gone to scrap yards and found an axle that worked.
I really don't know anything about axle shafts and bearings but I will look into it. Are you suggesting that they can reduce stress or strengthen the axle?
Thanks for getting back.
First thing to do is have your rig weighed. The crucial weight is that over the rear axle. If your rear axle weight is 4K or less, you can switch to single wheels. This will eliminate the stress placed on the factory semi float axle shafts.
With a semi float axle the entire weight over that axle is carried by the axle shafts themselves. On a full float the axle assembly carries the full weight. The axle shafts only need to turn the wheels.
The factory Toyota 5 lug semi float axle (GO82) is plenty strong when used with single wheels as intended with the weight centered over the bearing assembly.
To carry additional weight most motorhome manufacturers added a second wheel to the axle. This caused the center of gravity to move to the outside of the bearing hub. Over time the constant flexing of the axle shafts caused them to break. When this happens the wheel assembly will completely detach from the vehicle. Not good if you’re traveling at highway speed.
A good parallel to draw is if you’ve ever watched a weightlifting match. With regular weights close to center the bar stays relatively straight. When heavier weights are added to the outside the bar will actually droop down when lifted. This is the same principle as your foolie axle.
Switching to single rear wheels is a good first step. Replacing your existing axle shafts and bearings will essentially give you a factory fresh rear axle.
If your rear axle weight is over 4K then you’ll need a full float axle.
-
Before spending cash on suspension upgrades, you should consider what you’re going to do about your foolie axle.
At the very least, you should replace the axle shafts and rear bearings. Ideally, upgrade to the 6 lug ff axle.
Suspension upgrades won’t repair a broken axle.
-
195’s will work fine.
185r-14 is 25.7” in diameter.
195r-14 is 26.2” in diameter.
-
-
Wasn’t thinking about that. Forget my baby is really small.
-
1 hour ago, linda s said:
Looks beautiful. We would very much like to know what truck mirrors you found that fit. Lots of us have rusty loop arms that aren't going to last much longer.
Linda S
I’m running Jr. west coast mirrors. Perfect size for our cabs. Plenty of choices online.
Fit System H3541 Driver/Passenger Side Replacement Jr. West Coast Universal Mirror https://a.co/d/iC6CMgS
-
Marlin Crawler has a great data base to work from. I’m sure you will find the torque settings you need.
-
33 minutes ago, Bryanmay10 said:
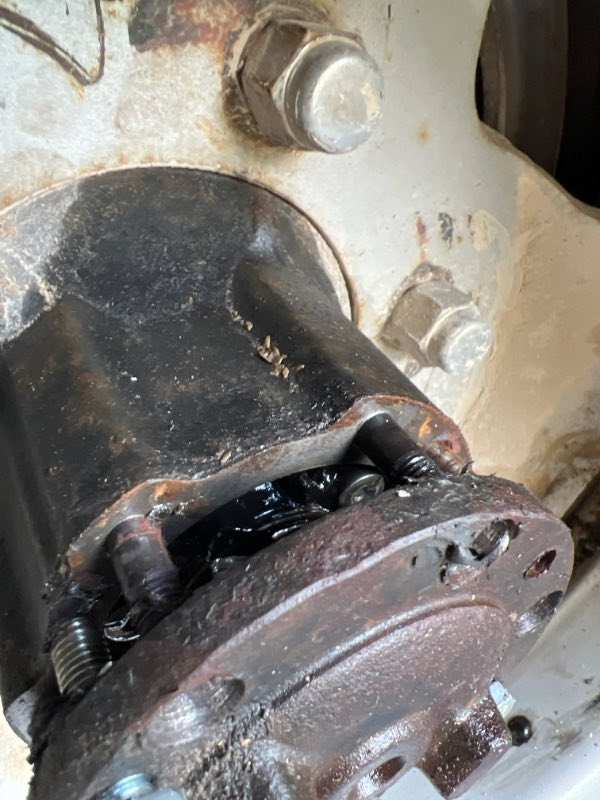
So the bolt size is 8mm with a 1.25 pitch. Ace did have them. The last time I was looking for something metric the person working there told me they had zero metric bolts and nuts. I didn’t get long enough bolts to get it full removed, but I got it out about an inch and it looked like there was gear oil that drained out. I’m pretty sure this means there is a bad seal of some sort in the axel then correct?
Never worked on a Toyota ff axle. You should be able to grab the plate and pull straight out. Axle shafts are heavy, you really need to pull hard.
Some lubricant will spill out because most ff axles use “splash” method to lubricate the bearings. GM axles have no seals on the shafts themselves. The paper gasket WME mentioned is what keeps the oil from leaking out.
-
Common thread pitch for most Toyota is 1.25.
Try a local hardware store or even places like autozone sell metric bolts and nuts.
-
Be sure it includes the black metal cover plate for the guts. It’s crucial to the cooling process for the unit.
I’m sure it was just removed to show insides.
-
W50 was standard on SR5’s of that year. Try dealership parts department and see if you can get a factory part number for that cable. Then google search that number for aftermarket products.
-
GO82 is a special 3/4 ton axle. The setup is not the same as the pickup.
Nothing is interchangeable between the two.
The GO82 is 4.10, the 6 lug is also 4.10 (I believe). Makes no sense to swap the pumpkin even if you could.
-
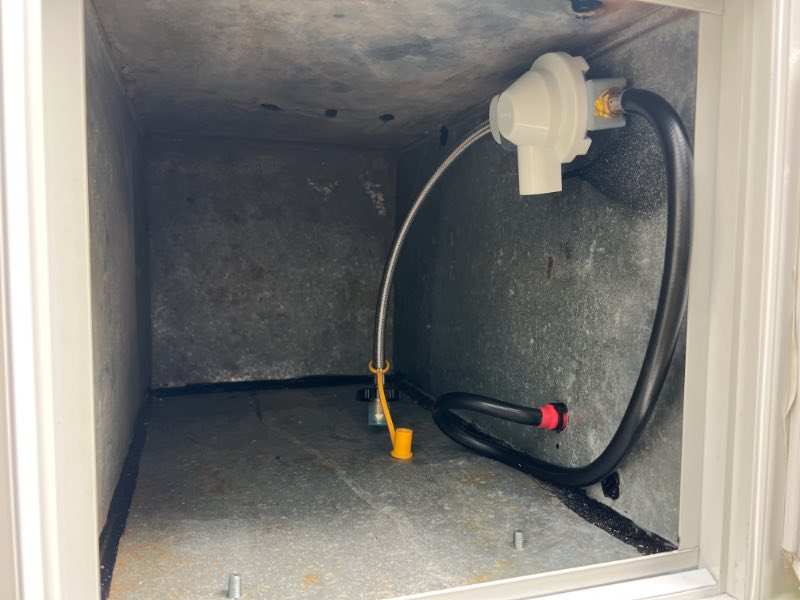
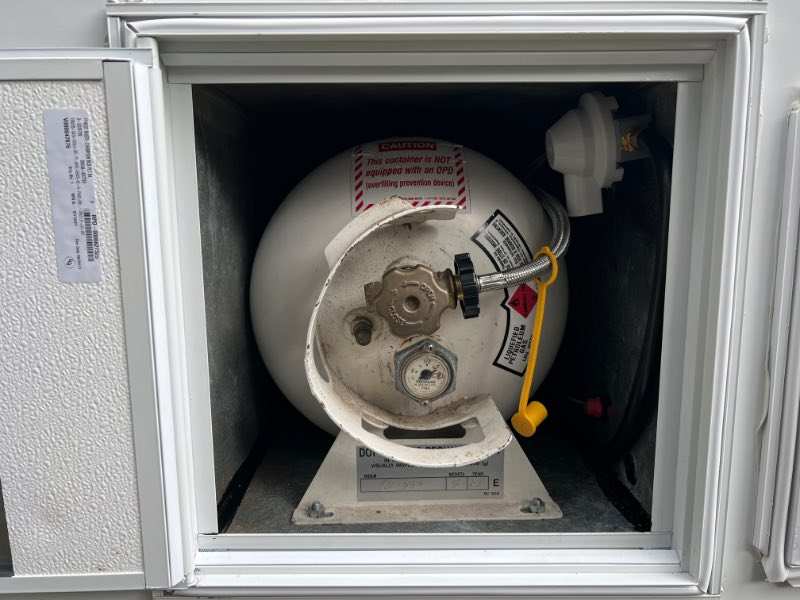
28 minutes ago, Odyssey 4x4 said:
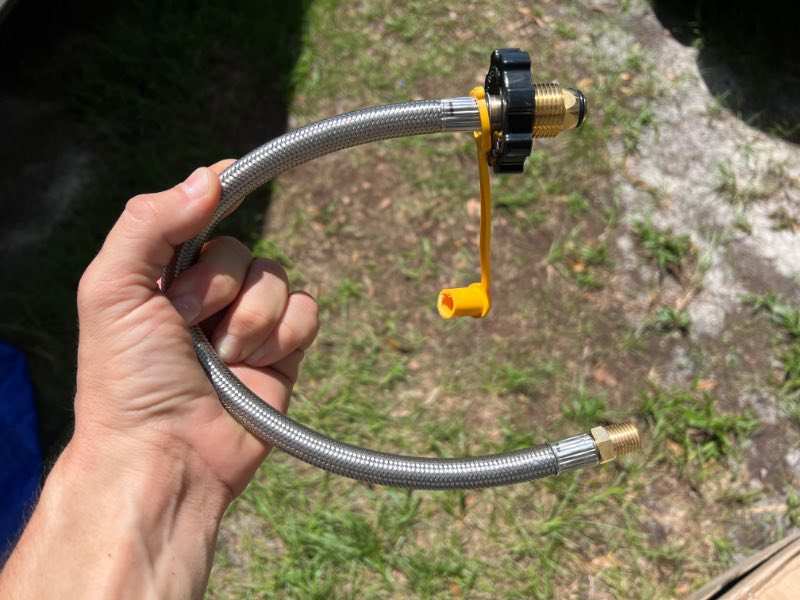
Here's an update on the finished product. I ended up doing a soft hose as mentioned...
I used this hose from amazon to go from the tank to the regulator...
I hooked everything up out of the vehicle and opened the tank valve, then checked for leaks at every joint. I then remotely mounted my dual stage regulator in the upper right corner out of the way so that the tank can still be removed to be filled, and also with the vent facing down. We drilled a pass through for the hose into the cabin, and double wrapped the propane line with a hose and shrink-wrap where it goes through the pass through to prevent rubbing.
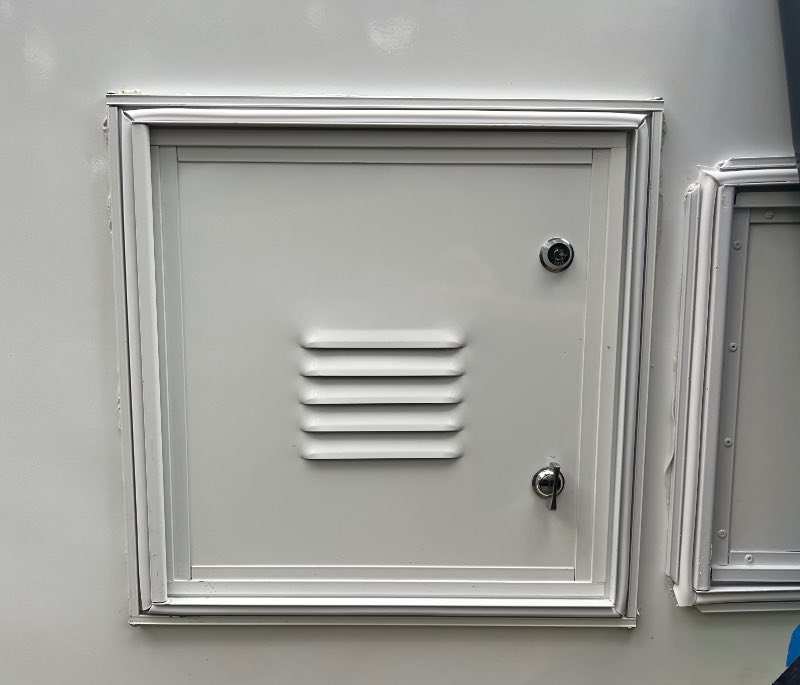
We slid the tank into place, secured it down with the studs I installed (you'll need a 1/2" wrench to remove the nuts when you go to fill the tank, I'll leave one in the compartment), and finally installed the new 14x14 door I ordered. I still need to clean the excess butyl off you see in the photo. We also caulked the entire interior side of the access door for any water that gets into the propane compartment.
And the most exciting part, I fired up all the LP appliances in the RV for the very first time, and everything worked wonderfully! I'm glad to see my new water heater fire up and know I got all the wiring right on the first try for the remote panel. It was also fun to see the stove and oven fire up for the first time.
NICE WORK……..


Leaking transmission fluid - power steering
in Engines - Transmissions - Drive Train - Suspension - Chassis - Steering - Exhaust - Tires - Etc.
Posted
Try flipping the wrench over. Sometimes you can get a better grab with the handle pointed down.