Bryan B
-
Posts
88 -
Joined
-
Last visited
Content Type
Events
Profiles
Forums
Gallery
Everything posted by Bryan B
-
1989 hood with 1999 scoop.

-
I use those rare earth magnets to line up sheet metal to weld, they do an incredible job of aligning 2 pieces of metal and holding them and are reusable. here is a pic of the hood after close to 400 "tack" welds later and begining to grind them flush to do body wotk so it will be nice and slick. The yellow truck in the background is my 1983 Toyota (same as my 83 sunrader) that has been narrowed by 12 inches to make it "more" nimble offroad.
-
cutting hood scoop hole in old hood, here are the marks and measurements.
-
I know not alot of you would care much for a hood scoop (like the factory 1 you see on newer 4Runners and Tacoma) on your toyhomes but I fig I would post up pics of a 92 hood that I installed 1 into. This is a pic of a new 1999 4Runner aftermarket hood with scoop I purchased to cut the scoop out of (60.00 for hood) here is the "old" hood (25.00 Local junkyard) with hole cut and centered to size, ready to set scoop into and weld
-
Anyone Interested In A 91 Winne Warrior for $500
Bryan B replied to Foos's topic in General Discussion
anyone in minnesota that can bid on this for me?! it really needs a Lexus V8... -
I was discussing wheel stuff in another thread and it reminded me of a new axle choice for Toyota trucks and 4Runners (motorhome straight axle Toys too ) The FJ80/FZJ80 front axle is very similar to the stock mini truck solid axle but much stronger and 4 inches wider per side (not a problem at all on a motorhome, actually creates more stabilty) and this axle carries more weight than any of our toy homes do or will in front. It uses a high pinion differential which beleive it or not you can bolt into your existing housing under a mini truck, it was designed this wy to reduce vibration in a luxury SUV but it also saves diff damage off road (yes I know we arent talking offroading here ok) but less vibration in 4wd is a plus, esp. at highway speed. it come with a flange on the hub which makes it full time 4wd, but you can bolt your same mini lockout hub onto it and have free wheeling like now. what enables these to be used now and not before is 2 companys make steering arms(Virginia 4X4, Hellfire fabworks), Hellfire fabworks makes steering ams and knuckles for extreme off road use, not something you would use on your motorhomes probably. These axles were designed for radius arm suspension with coil springs, the original steering wouldnt clear factory toyota leaf springs. up until now there were only "Bandaid" kits for putting these under a mini truck. I will post up some steering knuckle kit pics and an FJ80 axle after all the coil sping brackets were removed.
-
True, you can get custom adapters made, but after wheel cost and adapter I would still be ahead doing a weld in ring- more so I would be getting a little wider 1. with the wheel itslef being 1" and then I am not sure the offset is spot on plus the adapter width. too much for me, I have ran an adapter on the front of my trail truck (83 hilux, Toyota) basicly as a way to give me 1.5 inches more offset and I know they are mor than up to the job as far as strength but there is alot of weight- 2 tires, 2 thick wheels, the motorhome itself plus gear on top of the fact I will be running a 32" skinny AT in back which also will stress the axle, yopu can see why I would lean towards the wheel and not the adapter. I am using my sunrader to hunt out of this winter, I will not be embarking on any of this (4wd sawp) until the end of april but for now I am problem solving ANY of the issues that I am wanting to address now and not when it comes time to bolt in the transmission/transfer case and weld on the front spring hangers for the 4wd solid axle( I am using a Toyota Landcruiser FJ80 front axle, 1. for width 2. it carrys more weight than any of our motorhomes ever will in front (the 1FZFE 4.5L straight 6 engine for starters) The fun part is I have everything for the swap (axle too) trans/transfer case weld on swap kit/shocks. but the wheels are my only hang up. I will start a new thread when I do a set of wheels.
-
I dont think any adapters are made with a 6 to 6 pattern especially the odd 6's. I can have a steel ring water jet cut with Toyota bolt pattern in it and set it just inside the sprinter wheel, bevel both edges nicely for weld penetrarion and weld the center ring into the wheel (weld both sides of the ring) I have done a few sets of chevrolet rally centers for friends chevelles and camaros so they can have a factory wide wheel. some people do 5 mph welds and some people do 100+ mph welds (meaning only trust the 5mph welds up to 5mph and the 100mph welds up to....) my welds are the 100mph ones lol. I am picking up a sprinter wheel tuesday and starting on it. I have a waterjet cutter/local shop that cuts my flanges for exhuast that I will draw up my rings and have 4 cut for this project. Again, thanks Linda S for pointing out the sprinter wheel- I have oodles of automotive sources and knowledge but I was unaware of that wheel and its specs. you saved me from recentering a wheel using Toyota centers and chevrolet rings
-
no turbo, havent found 1 on the web with a turbo either
-
thanks Linda S. I will look into that for sure, I can weld the existing holes up and redrill new 6 lug pattern. EDIT- these are 6 lug, after hours of searching I still have no answer on wheel bolt pattern. this could be very promising, no fab work or welding whatsoever. I may run to a local salvage yard that has a set monday and pick one up for some R and D
-
It look as if I will be making a set of 16s then. I will contact custom wheel to see if they will sell me just the centers, if not car-part.com has some I will buy 4 of then remove the centers (all but the wheel itself) I can use a commercially available 16 inch wheel then make a jig to space them correctly and then weld the 2 pieces together. it will open up more tire choices and availability as well for me later when I swap in a solid axle converting it to 4wd.
-
my pics are fuzzy for now, so here is a link to the product- http://crestauto.com/new/hyvis.htm note that the tube colors (artwork/name) have changed, still a checkered flag logo just a different color so if you do order this and it appears different from the ad- no worrys. I have a Crest Industries close by in Fenton Mo, when you order you may want to use them, thats where I got my 8.00 a tube price. 800-377-2737
-
I second what that waiter fella said. I was having the same dilema with the outside porch light- (broken cover) I didnt even think about posting up here until I get to that point, seen this thread and just ordered one off the link above- thanks.
-
if this engine could be tweaked it would have a ton of available power, I dodnt see much for the 1L performance wise though
-
I have recently been approached by someone @ a gas station who has a 81 toyota with a diesel that he is wanting to sell (trucks frame rusted in 2) this is the Toyota 1L 2.2 liter engine. has anyone had any experiance with this engine? let me know what you think of it and its power/performance. with fuel prices doing what they are this is another consideration for a swap, Biodiesel is a very easy to make fuel.
-
Furnace suggestions for a 21 ft sunrader
Bryan B replied to Bryan B's topic in Coach ApplianceTech Issues
all very good suggestions, I am not limited to the original mounting and venting- at this point I have a blank canvas to work with- I will look into the different heaters/furnaces and see what the pros and cons are. This hunting season I will go with the Mr buddy heater for temp use and I will have my carbon monoxide detector and a window or 2 cracked open for good measure. -
where did you install air conditioner lines and AC condensor? how did you do the rear driveshaft? is there a grille still in place?
-
lets not forget the 2RZ and 3RZ too. great swaps for the 22R/22RE another quality 4 cylinder with 150(2RZ) and 170(3RZ) horsepower
-
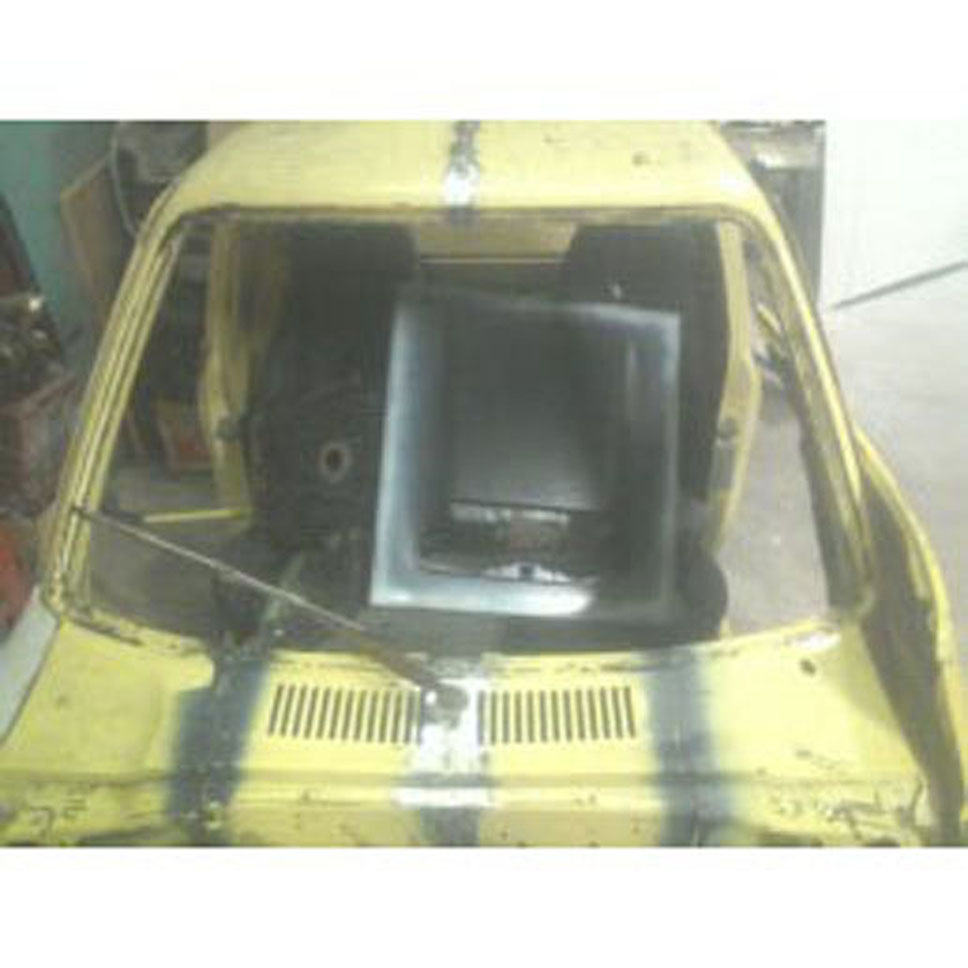
Stop in and say hi, email me first so I can make sure to be there. al the tools ya need and a shop too if your in need of popping open the hood for anything. you can see the newly narrowed 12" inches Toyota highlux trail truck we are working on.... yep, thats 1 wiper in the middle. lol, and miata bucket seats horrible pic from my phone BTW
-
email me @ maxxfabrication@yahoo.com and I will give you my # then we can discuss when our schedules would work and directions (very easy). Bryan B
-
I have a shop in St.charles- right up the street from Bass Pro Shops, I can look at it if you like.
-
thats the stuff John!! windshield sealant and yes you are spot on when you say "it aint leaking and it aint coming out" for sure, great stuff. I will post up a pic of the windows and the urethane I used (8.00 a caulk tube locally)
-
2011 October Midwest Toyota Rally - Northern Indiana
Bryan B replied to bufbooth's topic in Rallies & Toy Ins
I cant view it- it shows its only been viewed 1 time? can anyone else view it? -
Furnace suggestions for a 21 ft sunrader
Bryan B replied to Bryan B's topic in Coach ApplianceTech Issues
the hole is kind of still there- the outside holes are in the body but all the glasswork/ducting inside is gone. I was hoping to find a compact unit to free up some more space. -
High pressure washing test this AM an no leaks!!! This isnt the first time I have used the Urethane but damn this stuff does the trick- if you would have seen the multiple attempts made to seal these windows by the previous owner you would think it was impossible to do. there was clear silicone, and what looks like plumbers putty, and some hot glue. it was fun cleaning it all off!! I dont think that I will be doing this again for a long long time, like I said after applying this it stiffened up the entire structure- I had a friend who was helping me say the same thing.