gpchoochoo
-
Posts
46 -
Joined
-
Last visited
Content Type
Events
Profiles
Forums
Gallery
Everything posted by gpchoochoo
-
This is same as I posted on the other site too. Anyone know where I can get the 3 slides they use for the couch to bed option? I could use the whole thing but I am sure it would be easy enough to make the wood parts. Just have to copy whats on the other side now. But I haven't seen where to get the super strong slides that my Toy came with. I have the rear lounge with barrel chair on one side and the Boss and I figure that the dual slide couch thing would suit us the best. That way we would be able to make it one big bed with a memory foam topper that we would store over the cab. I think while in the cold winter nights sleeping up higher really helped on those 10 degree nights, in the heat of the summer being lower where its cooler would be better. Thanks in advance. Have a great day !!!! GP
-

Interior Makeover
gpchoochoo replied to waiter's topic in Improvement and Do-It-Yourself Projects you have done to Share!
Real nice looking job . I hope to get mine in half as good a shape as yours is. Keep up the good work and get out and enjoy it !!!!! Have a great day GP -
Good for you on getting the new Toy !!!! Ya might wanna make sure that the missing battery does not have wires that are live and gonna touch a ground. Have great day GP
-
DSCF4688.jpg
gpchoochoo commented on Gulfstream Greg's gallery image in Temp global album for root member albums
 Looks like a great place to hike. We loved it out there when we were at Kings Canyon and Yosemite. Have a great day GP
 -
You could try tapping on it with a piece of wood while pulling up or take a longer piece of 2x4 and duct tape it to the pole down near the bottom letting a foot stick past the pole to give you some leverage, or put the wood on the seat bottom. A pad sander with no sandpaper makes a good vibrator to shake it loose while pulling up also. That is assuming there is no set screw holding it in. Mine does not have anything holding it in. The WD-40 is good idea too. Have a great day GP
-
I have an 1990 Odyssey Mesa rear lounge and I am not sure about the roof but I have metal frame in the side walls. I am going to find out what the "stud" in the roof is soon as I am planing on making a hanging tv mount of sorts. Mine has a slight sag but I am not worried at this point. All seems well around the A/C. My A/C is in the back hole and vent in the middle. When I get into the roof I'll let ya know what I find be it metal or wood. I can tell by the shape and the way the frost melts off it there is something there. Have a great day GP
-
Our 1990 Odyssey rear dinette Mesa model does not have 2 slide out beds, only one , but the over the cab is 58 x 80. 58 in the middle and 56 maybe 56 1/2 at the ends. One thing is the front roof slopes down real quick. The wife says she's ok with it. We have stayed in it 27 nights so far and alls well. At 6'5 it might be a tad tough getting in as our bath on one side and the closet on the other make for a smaller opening to the Master Bedroom. I was thinking about finding another set of slides and making another couch so I can make the huge bed in the back. If anyone knows where I could find either the slides or a whole slide out couch near Maryland would be great. Have a great day !! GP
-
Thanks Greg I needed someone to hold my hand. GP
-
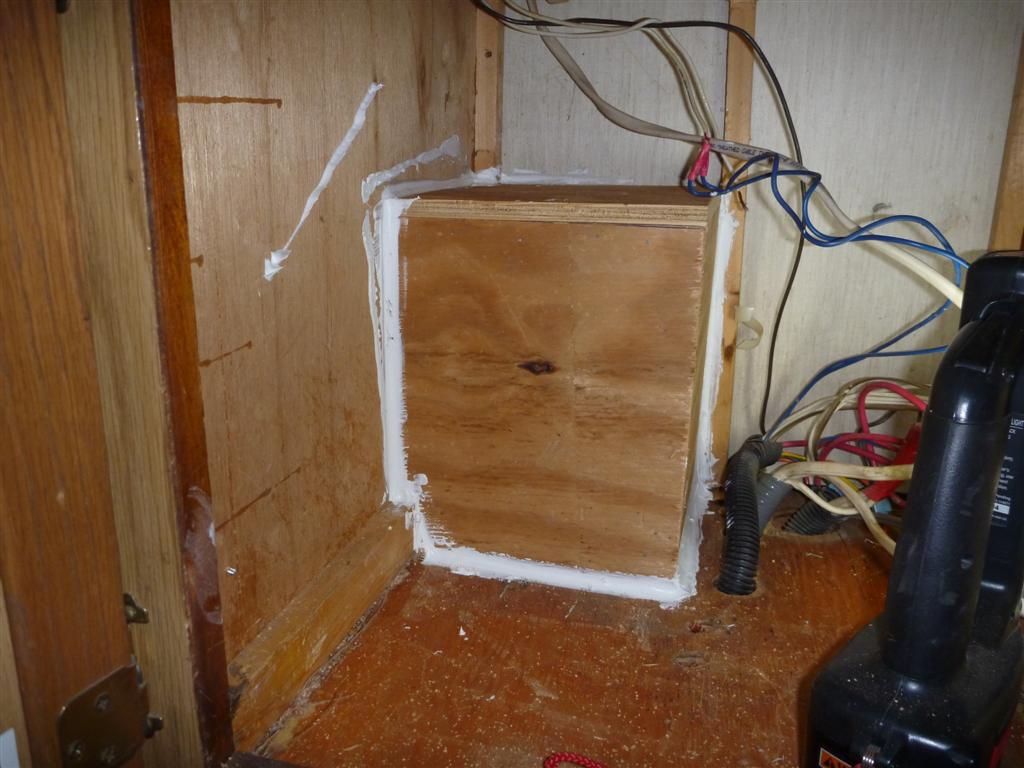
 The converter before the "fix"
 -
The install what else !!!
-
-
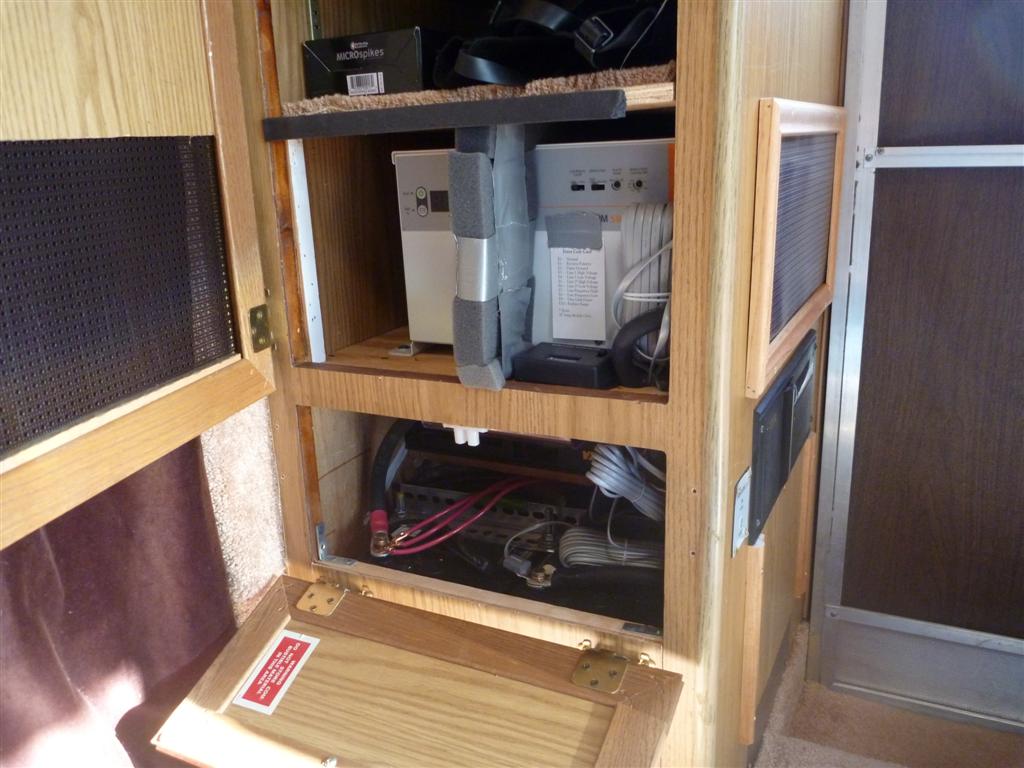
From the album: The Big Inverter Install
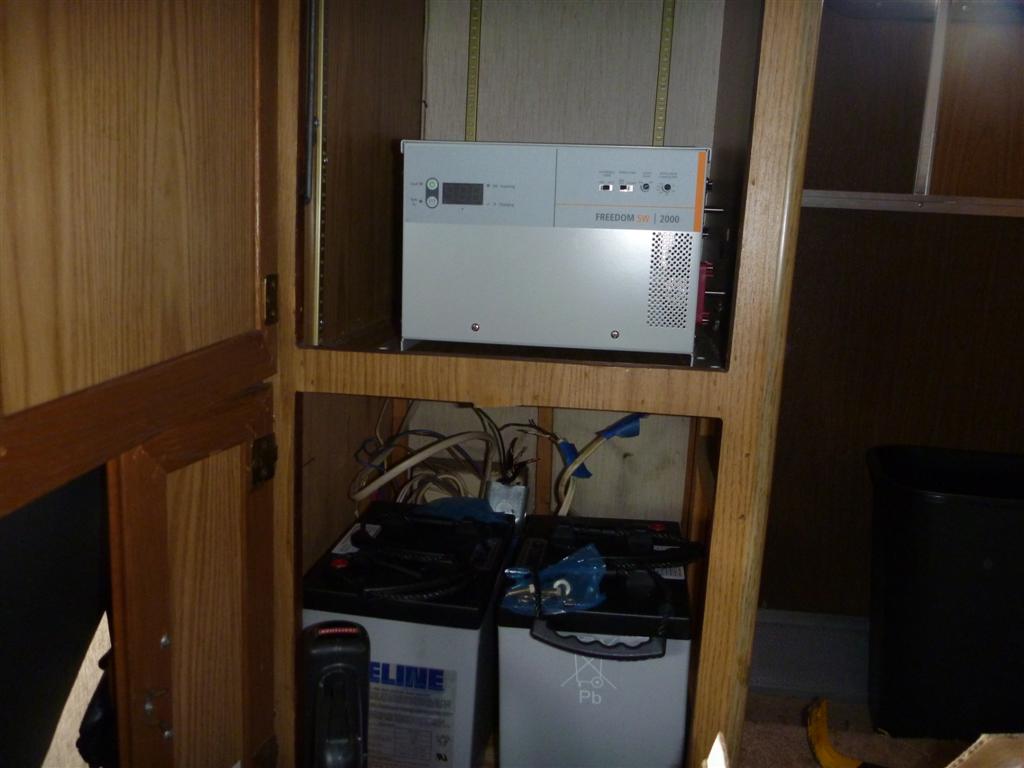
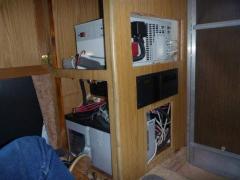
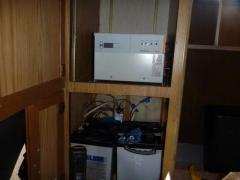
Here it is all done. The venting for the inverter works well. I only put one door back on the bottom and put it sideways. The piece it is hooked to is removable with 2 screws in case I need to get the batteries out. The little white panel is the on/off switch for the inverter. I left the bottom of the old converter hole open a little bit so if for some reason I need to vent the battery area all I need do is open the door. Air can flow in through the little grill on the bottom and out the door. The inverter has battery temp sensor so I am not worried about overheating the batteries. After talking to quite a few people in the know I have no concerns about the AGM batteries being vented inside. If not over charged they will not out gas is what I believe from talking to the pros. I also have a foam barrier separating the front half of the inverter from the back so the hot air can not be drawn back into the inverter causing a heat build up.© Toyotamotorhome.org
-
From the album: The Big Inverter Install
All systems good !!! No sparks or explosions !!!!!! And i still have all my fingers to boot !!!!© Toyotamotorhome.org
-
From the album: The Big Inverter Install
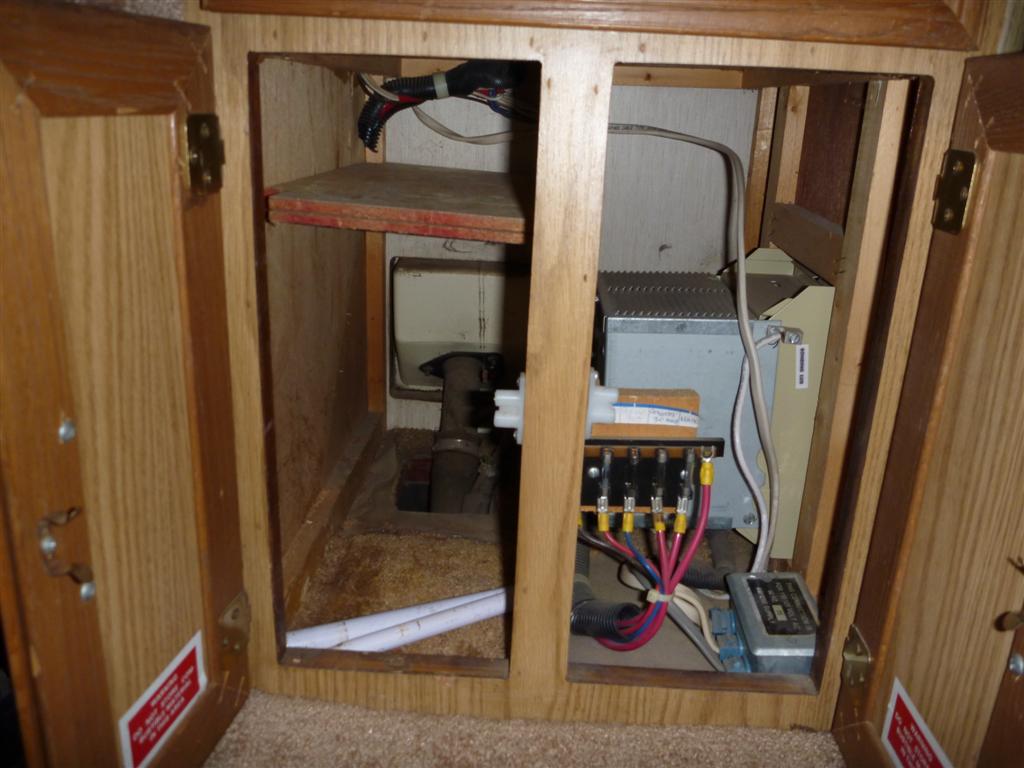
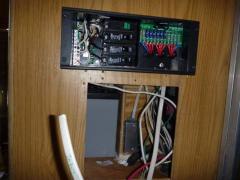
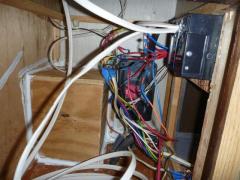
This was the best deal I could find for a distribution panel. At 50 dollars it was the way for me to go since the shape was good for my set up. It houses both the 120 volt breakers and the 12 volt fuses. It's twin is inside for the inverter side. I couldn't find a better alternative. The hole below is from the old converter. The only wire too short to move was for the A/C and thats the little box in the middle. Had to add a little more wire. Was VERY lucky in that aspect.© Toyotamotorhome.org
-
From the album: The Big Inverter Install
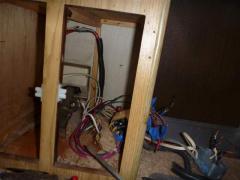
The second distribution panel over the battery is for the inverter side of the 120 volt. Behind that box is the junction box for the 120 volt plugs throughout the coach. As you can see the battery is only 1/2 inch from the fill tube cover. At first I thought I might have to put the batteries under the sink where the old one lived.© Toyotamotorhome.org
-
From the album: The Big Inverter Install
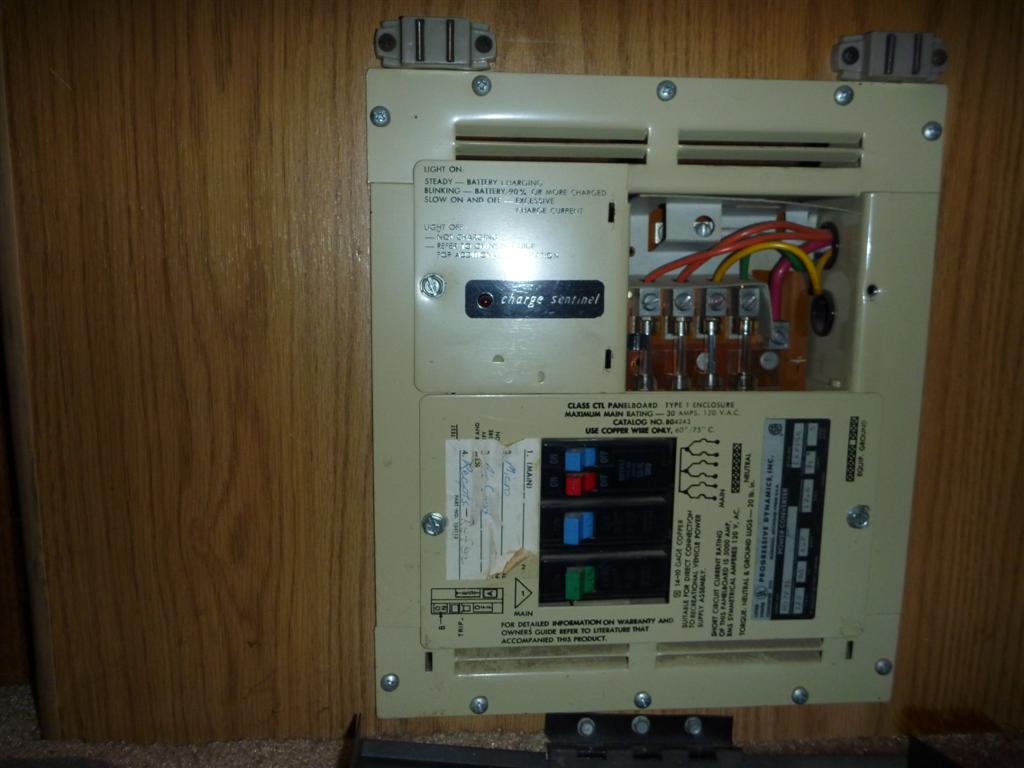
This is the back of the main panel with the shore power 120 volt breakers and the 8 -12 volt circuits. The Electrical Management System is on the back wall. I went ahead with it because it will protect everything inside including the inverter from bad juice. It's my genset that concerns me the most.© Toyotamotorhome.org
-

From the album: The Big Inverter Install
Most of the demo done here. Just have to cut out for the venting of the inverter.© Toyotamotorhome.org
-

From the album: The Big Inverter Install
I not only caulked the places you see but inside and along the edges too. Very important no fumes make it in here since the divider is gone. No more gas smell when filling up now !!!!© Toyotamotorhome.org
-
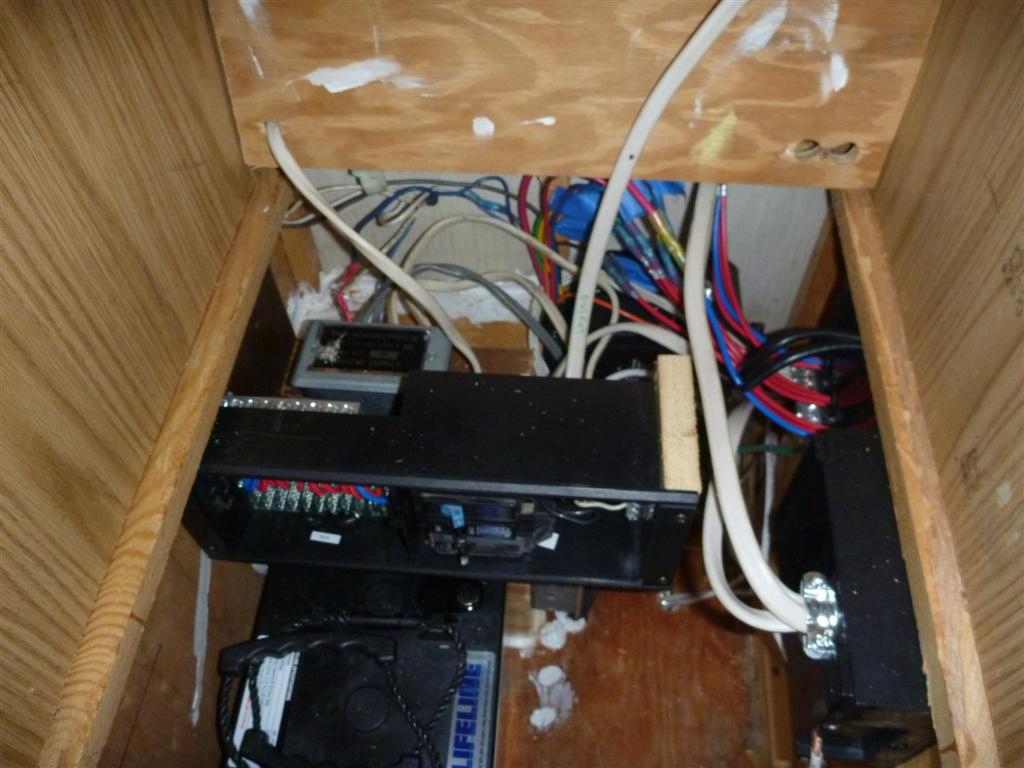
From the album: The Big Inverter Install
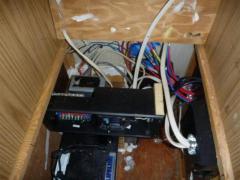
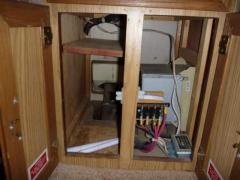
Checking the fit of the inverter and batteries. At this point I wasn't sure if the batteries would fit under there. The wires come out of the floor just behind them and the grounds I had to move.© Toyotamotorhome.org
-
From the album: The Big Inverter Install
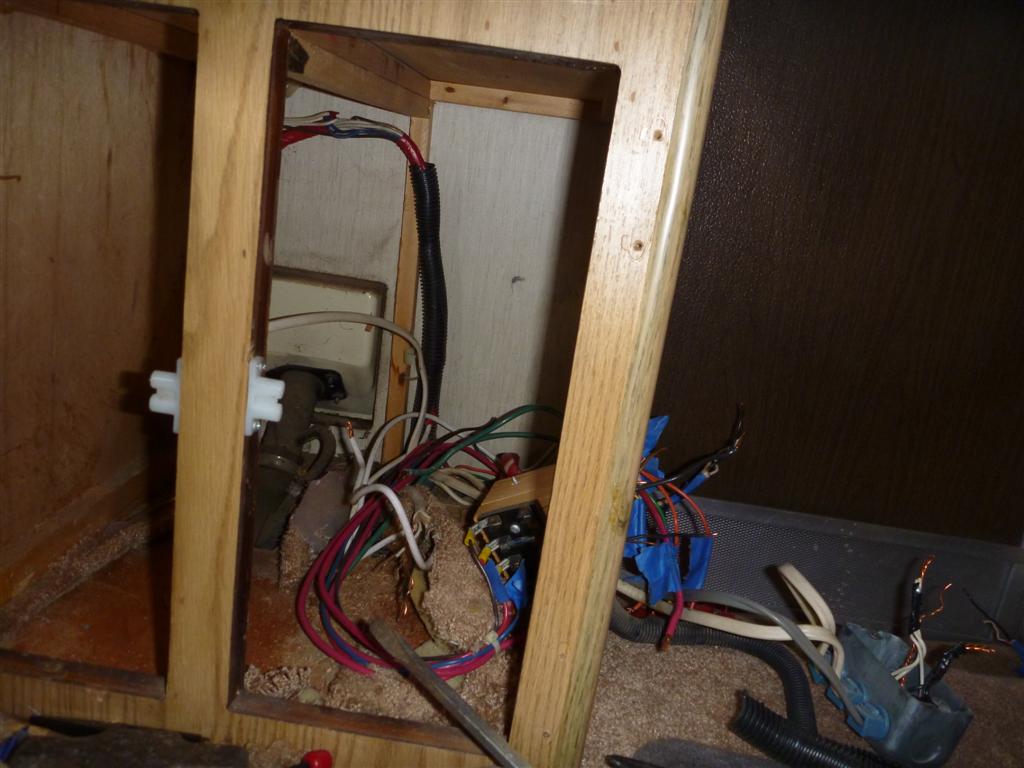
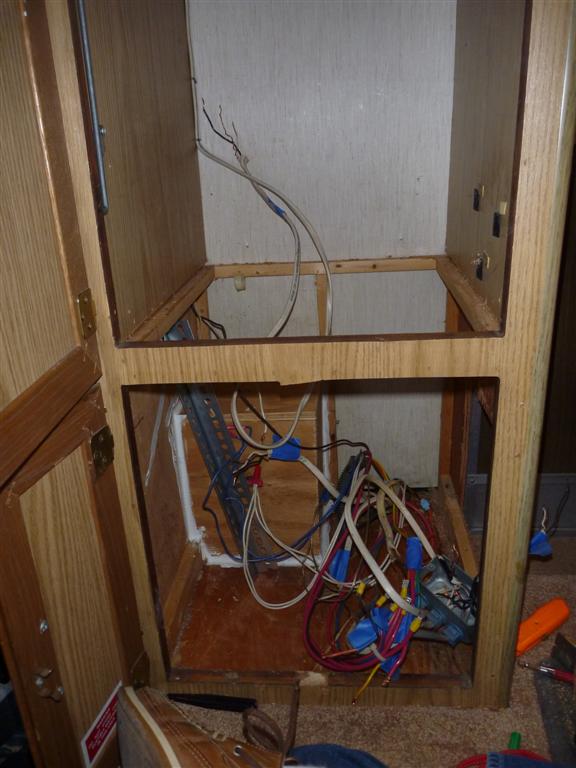
Most everything out here including the divider. Thats all the 120 and 12 volts for the coach.© Toyotamotorhome.org
-
From the album: The Big Inverter Install
The piece of wood on the left was just sitting at 45 degree angle over the fill tube, no wonder we often smelled gas inside after a fill up !!!!© Toyotamotorhome.org
-
From the album: The Big Inverter Install
© Toyotamotorhome.org
-
This is what I did to be able to do our 1,2 or 3 day hiking/biking trips without needing to plug in or start the genset which the boss doesn't like so much. It is working great and makes the little Toy just like home. Was great to get back from a frozen waterfall hike and be warm and brew up a pot of coffee looking out into the Shenandoah Valley with nothing but the gurgle of the coffee pot. Being cold we pretty much had the place to ourselves. I would be happy to answer any questions about how or why I did it this way. PS I have tried to add explanation of each picture in the album but I can't even get them to load in order. I' ll get the smart one in the house to look at it if she can and see how to do it.. Sorry it's hard being dumb but I do it well. After the much needed help of Greg I now have the pictures in order and with small explanations in the album.

-
Hey we cooked a turkey boob in the oven while going down the road for Thanksgiving and had no problem except it made me hungry !!! Have a great day GP
-
What I got from the RV shop person is that when unlevel the flow stops and this makes the anti-corrosive stuff start to crystalize which then blocks the plumbing up. Once crystalized it will never return to its proper state. I was told if you run it unlevel it's only a matter of time before it stops up. I then looked online some and it seems to be true. Good luck with getting it fixed whatever way ya go. Have great day GP
-
Hey John, I just last week put one in my Suburban. $106 I think it cost. Make sure the sail switch does not touch any of the blade . I didn't and mine makes 1 ping sound as the first blade hits it before it moves out of the way. Hmmm I assume <--- key word, yours has a sail switch. Just a mistake I made wanted to let ya know incase you have the same. Have a great day GP