

Shoprat
-
Posts
351 -
Joined
-
Last visited
Content Type
Events
Profiles
Forums
Gallery
Everything posted by Shoprat
-
 I R not paper training puppies. But let me tell ya this, it's a story about two visitingBeagles in a garage for about an hour . They left. I was out in the garage later, saw what I thought was a dirty rag on the floor. I bent down, did the swoopy thing with a hand to pick up the rag. Fingers went through the supposed rag leaving three trails in the glop. I was not happy.
 -
Ok Dogmush. By the way- WHY did you pick that name ? Ok- back to the subject at hand. The two shock numbers from Carquest is "SHK ( thats a vendor code) 50682 and SHK 50692." I hope you will come back on here and appease my wife , who WILL threaten to turn me into a eunich if I don't re-establish the status quo in the replacement of archives long-lost. I got piles of paper S**T all over the kitchen floor.
-
Well, with the exhaust system you have now, definately get rid of it. Why gas yourself when a few hundred bucks will keep you alive. I, myself, always go by the adage" If it can't get out, it can't get in" in relation to exhaust systems. As I recall, I think the standard exhaust diameter is 1 7/8 inches. I would go to a muffler shop and go to the larger diameter pipe. I went with 2 1/4 all the way back. Seems to workout fine, but I have a Turbo. Still, go as big as possible. Shockwise, let me check out my records, if I can find them. I went with Carquest Sportbruisers all the way around. Get back to you later on that one.
-
I don't think that another 4000 miles will adversely effect your trip. But, I have one other question. If the exhaust is getting a little fuzzy around the edges( rusty-leaking- you know), I would replace it. After 21 years , definately replace the shocks. I would reccommend a sport truck shock, but some don't like the ride harshness. I want my unit to corner like a Fomula 1 car, or come close to that ideal. But, most normal people think I'm nuts.
-
You Sir, have REAL hair on your chest ! By Thanksgiving! Someday Son, you and me gotta meet up ! I'll by the refreshments.I raise a glass of a dark brew to you , Sir, over the miles till then. Dayum. Charge ! I extend all four of my thumbs up !
-
It just keeps getting better! After I installed a new head gasket, the engine would hardly start, would hardly idle, and blew blue smoke in an outrageous manner. I left the engine run after I got it so it would idle and the blue smoke went away, only to re-appear when I revved it up. Took a wet and dry compression check on the cylinders and everything appeared kopasetic. So, I did a cylinder pressure test with my air compressor. I heard wind blowing in #4. No wind heard when I listened at tailpipe, no wind heard when I listened at throttle body, but wind blew strongly out of rocker cover vent telling me the rings were bad. I checked the rest of the cylinders, but couldn't get an accurate reading ( listening?)from them as to the way the cam worked the valves. When the piston went to BDC, one or the other of the valves would open slightly and the test was invalidated. So, I started tearing the engine back down again! I pulled #4 piston out and the top ring was fine, but the second ring and third ring were frozen/collapsed in the piston grooves to where they did not expand when released from the cylinder bore. There was NO sealing available from these components. So, I decided to check out the other cylinders while I had the engine torn down. The other cylinders were the same way. I decided to re-ring the entire engine. As the rings were stuck in the collapsed position on the pistons, I decided to soak the pistons in carb cleaner to eat the gunk so I wouldn't damage the pistons when I removed the junk rings. I removed #1 piston after it had soaked a while to be greeted with the second ring expanded to a normal confriguration. I was just going to peel the ring from the groove, when I noticed something funny ( Oh yah- right- funny- har-de-harhar). A goodly chunk of piston land was missing from between #1 and #2 ring groove ! Yup- a chunk was GONE ! I stared at this for a while, disbelieveing my sight orbs. The root of the missing land chunk was dark. It had been broken for a LONG time ! It was a wonder, what with 2/3s of the rings not doing their jobs, that this engine ran with any power at all. Coupled with this, a broken piston along with a turbo honkin' more boom mixture in the cylinders. It was a miracle this engine didn't blow its' cookies all over the pavement. I was able to fish the broken piece out of the bottom of my cleaner can. This proved to me that the only thing keeping this piece connected to the piston was gunk that the carb cleaner ate! Well, I gotta get new pistons. I will not re-assemble this mill without new pistons in all cylinders to give Ol' Shoprat peace of mind. Guess I'll go with cast pistons again, unless ya'll have any better ideas.
-
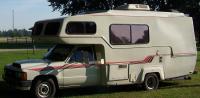
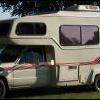
I got mine weighed at a grain elevator. Cost was 5 bucks. With a partial load of gas and propane- no water, it weighed 5860 pounds.
-
I'm running about 5 psi right now. Will probably stay at that level just as insurance to keep the engine together. Horse power is fun , isn't it ?
-
Thanks for the reply , Nolan. I called LC Engineering and talked to John in engineering. We decided that since I wasn't going to a higher boost pressures to keep longetivity, the bolts will do fine. I'm going with new bolts, a stock Toyota head gasket, and an exhaust stud kit with the serrated self locking bolts. I have to helicoil a couple holes to get full thread contact. Not to bad a deal- 150 bucks for all this.
-
Ok - here goes- got hood back after installing hood scoop, paint felt a little soft. Guy at the body shop couldn't figure why. Said to give it a few days and see what would happen. Leaves fell from trees in my back yard on the hood and left patterns in the paint. I took the hood back and he checked into the paint type used. Turned out the paint was different from the type he normally uses so he used the wrong thinner in the application. I got the paint from my work, the manager used a cheaper type paint to save me a few bucks, his decision, not mine. The body shop was used to using the top of the line paint, so he figured that was what I got. Bad communication all around. Wound up my work supplied the proper paint at no charge, I supplied the stripper to completely strip the hood, and the body shop did the job at no charge. Got it back and it looks really neat. I made a scoop grill out of the grill used for flourescent light fixtures and it doesn't look TOO amatureish from a distance. Got a lot of the parameters dialled in on the fuel/ignition management system close enough to run it down to Backwoods Racing to map it in more completely. Couldn't get it on the Dyno because of clearance issues, so Don the Mapper set up his laptop in parallell with my controller and we headed off down the road to do some serious mapping. BOY- does that make a difference ! This thing started running like we were throwing off heavy chunks of motorhome body to lighten the load ! He kept saying things like, " Stop and just tip in the throttle. I see it's running a little lean/ rich between -1.6 MAP and .6 MAP. Also you might want to replace the TPS because there seems to be a small dead zone in it just off idle. The TPS isn't that serious yet, but they never get better." Then his laptop battery went dead. So, back to the shop, he re-set up his laptop to run off my ciger lighter outlet, and off we went again, To the expressway to dial in the high speed load /ignition timing. I see the goodly hill ahead at the beginning of the expressway. Don the Mapper says, " Full bore accelleration so I can max the timing." Nothing lost on this Ol' Leadfoot ! I push down to where the backside of the pedal starts seriously kissing the carpet. The motorhome kicks down into passing gear, the engine responds like " YEA BABY", and it starts to accelerate up the hill ! No, I don't mean just holding its speed like it used to do to finally drop off gradually, I mean gain speed up the hill ! I whoop- Don laughs- then we hear ignition knock. Don backs off timing- still knocking- backs off more timing- still knocking. I look at Don, he looks at me. We both say bad words. I barely make it back to the shop where we do a compression test on the engine cylinders . 180 psi in number one. 162 psi in number two. 30 psi ( I groaned) in number three. 30 psi( I started to hope ) in number four. Sounds like a head gasket said my co-worker who happened to be there that night. His prescence there was a God send. The Toy was unable to be driven the 40 miles home . He was able to give us a ride home where we would have had to call somebody to come get us. I was able the next morning to have the body shop where I had the hood done tow the unit back on his rollback. He charged us an amount that exactly matched the amount that my road service would re-emburse us. No- he didn't ask for the amount so he could match it, that was his decision on the amount. I pulled the head off yesterday, and the gasket was blown between the #3 and #4 cylinders. Heads not hurt, and neither is the block. So, I will have the head checked for cracks and warpage, have the valves looked over, and start to look for a set of racing gaskets to reassemble the engine. Before this old gasket went. it was running like a striped ape, and I want that back. I will call LC Engineering to find out their recommendations as to gaskets and so forth. I hope this is the last major problem I will have to face with this unit. But , all in all, I consider myself a fortunate man. To have a co-worker show up at the right time, to be charged the exact amount that a road service will cover, to just have a head gasket problem with a 20 year old engine that I'm doing my dangnest to soup up where the eagles fly. All this could be a lot worse. Yup- I'm a fortunate man.
-
For myself, I put my tranny in overdrive when I will be driving on flat roads and in gentle hills. Any kind of serious mountains or hills, I take it out of overdrive. I believe the constant shifting doesn't do the drive train any good. The cost of gas has risen and I like to stretch a buck to the limit, but constant shifting can break a tranny, so what have you gained ? I guess I just use caution to dictate when I use overdrive.
-
Howdy Army. Glad ta see ya ! There is a great site for all of your questions. Just scroll down the home page on this site and go to Yahoo Toyota groups. On their site, look at the upper left and you will see a resource block. Click on any topic there and be prepared to spend some time reading. Lotsa good stuff. This site is easier to peruse , so I decided to hang out here. Anyhow, enough of the sharing b/s Shoprat
-
There are several folks here who have used the Toyota truck turbo. Check back into the archives on their experiences, but my understanding of the Toyota turbos are that they are not to long lived. Seem to burn out wastegates. Also you have to change the pistons to ones that lowers the compression ratio, otherwise you get spark knoch. Very hard on an engine. Mine was a low boost unit so the stock pistons would work ok. You might want to check out a few posts lower for a fellow that was installing turbo charged Lexus engines in the Toy motor homes.
-
Howdy Old Man from another Old Man. I just installed a turbo on my 86 Sunrader with the engine configuration you described. I got mine from LC Engineering. They were pricey, but they make the whole kit so you don't have to resource the whole job by yourself. They specialize in go fast Toyota parts. I started installing my turbo in April and am still doing minor things to finish. Besides the turbo, I installed a new computerized fuel management system to eliminate the chance of the turbo leaning the air fuel mix with resulting engine damage. So far I have about 5 grand in the upgrade, hope this helps.
-
1987 Toyota Mini Cruiser - Running light problem
Shoprat replied to MC1987's topic in General Discussion
Try under the dash by the drivers side. Should be a small coverd box there. By the way, welcome -
I'll try posting a link : http://f1.grp.yahoofs.com/v1/EI3hRM9KpxRqx...NG%20GUIDELINES Give that a go
-
Okay. I'll give it a go. I think you'll probably be better off letting this one slide. Just my opinion. You can check on the value by going to the Toyota Motorhome Yahoo message board and looking up the article on values. They take into affect all the factors-a/c, mileage, year, engine, body builder etc. Get a quote figgered out from this, drop about half the value for all the repairs it'll need and go from there.
-
Thanks Pickle Bill. I found out about this float thingy when I Thanks Pickle Bill. I found out about this float thingy and filled the reservior and the light was still on. I disconnected the float and the e-brake switch and it still does the same thing. I'm thinking it must be something weird in the ccr in the dash unit, but wanted to check with ya'll to see if there wasn't a quick fix out there.
-
I have a brake indicator light on the dash that stays on untill I rev up the engine, then it goes out. Any of you out there run into this?
-
Welcome to the board . Kick a couple snakes out of the way, sit down and open a cold one.
-
Three grand for everything? Man. Did I miss the boat on this one. The engine is probably used though, right ? What's the warranty period. Inquiring minds want to know.
-
AHA ! Found the brake fluid leakin' little bugger !
Shoprat replied to Shoprat's topic in General Discussion
I tried it out today doing about 35 miles per hour on a gravel road and did a panic stop just to see what would happen. Straight line stop and didn't feel as though any wheel locked up. Tried it on pavement and with the slotted rotors and the new fully functional rear wheels the stopping distance is in my estimate, 30 percent better. -
AHA ! Found the brake fluid leakin' little bugger !
Shoprat replied to Shoprat's topic in General Discussion
My valve had three lines attached. One from the master cylinder, one to the rear axle hose, and one going forward to the front brakes . The prop valve bled pressure off by putting it back into the front brake circuit. Because my valve was leaking and it really isn't needed anyway, I decided to eliminate the thing. I could connect the line from the master cylinder to the rear rubber hose with no problem, but the front brakes would leak badly if I left the bleed line open. There is a tee in the front brake circuit by the right front brake caliper hose frame support. One line comes from the master cylinder, one from the bleed line , and one going a few inches to the right front caliper hose. I disconnected the line from the master cylinder at the tee, removed the caliper line entirely, and then directly connected the master cylinder line to the caliper hose. This took the whole bleed line out of the circuit. So, guess my choice of words here was wrong. I didn't bypass the prop valve, I eliminated the whole set-up. Now I have just a plain, old fashioned brake system. -
Glad to see you here. , and welcome.
-
AHA ! Found the brake fluid leakin' little bugger !
Shoprat replied to Shoprat's topic in General Discussion
Well- I'm gonna find out ! I removed the link rod and the proportioning valve, then bypassed the brake line that bled off the "excess" rear fluid to the front brakes. I'll let you all know how it turns out.