IdahoDoug
-
Posts
316 -
Joined
-
Last visited
Content Type
Events
Profiles
Forums
Gallery
Everything posted by IdahoDoug
-
Ended up using a rotary disc sander with 80 grit. Did a nice job prepping the ceiling for epoxy and ribs, as well as the side wall tops where the side plates will go. Mostly done: And done:

-
So does mine. What does yours attach to on the axle housing? A flat plate with two screw holes, or a pair of U bolts?
-
Took about 90 minutes of carefully trimming a piece of 6 foot wide cardboard to the curve of the roof held up with 3 rams to get a nice shape I'd like to duplicate the whole length of the roof. I then transferred the curve to 3/4" plywood and tomorrow will make the two roof rams. Aluminum is supposed to be here Thursday. Once I've got the curved beams, it will be a painful few hours sanding the roof to remove glue residue and some bits of resined on wood. I need not just the lines across prepped where I'll epoxy the beams, but 100% of the roof prepped as I'm also glueing up new foam after the beams go up. Planning to use Owens Corning Foamulator, and this will also add strength to the roof between beams. I will need to use a respirator and one of those disposable hazmat-like suits. Yeesh - not looking forward to the sanding. Anyone have tips on what tool to use to sand the roof?
-
Just ordered $400 worth of aluminum 1X1, and thick 10 foot by 4" plates for the sides of the roof. Gotta buy some plywood and build two rams I can push up against the roof with curved tops to get the shape I want. Getting exciting!
-
And to answer your question, good chance yours will come in under that weight as the weights on your plate are the maximum allowable. What you'll discover as a weight is commonly referred to as your "curb weight" or the weight your car actually is sitting at the curb today!
-
So I bought a Dolphin FF rear axle a couple weeks ago, put it in my work area and moved on with the Sunrader project. Because I'm bringing some metal to a machine shop, I thought I'd also bring the axle and have the spring perches moved while I've got the trailer out. Just to see what the shop will need to do, I crawled under mine and measured the spring widths, then compared them to the axle I bought. Eh? Same measurement. Even has a correct bracket for the proportioning valve, though I'll need to get larger U bolts for mounting my sway bar (the Dolphin did not have one). Axle guru's - am I right to assume the spring perches are good? I'm pretty sure, but I've never seen a video of a Toyota Fooly axle replacement that did not require the spring perches to be cut off and rewelded. OK to pinch myself that the Toyota gods are smiling down on me with this one, or am I missing something? There are no markings on the new axle except for an "N1" stamped on the rear face of the axle housing well above the drain plug.
-
Hi Tika, Just wondering how the event went, and if anyone took pictures of what sounds like a fun way to meet others and learn the various ways people have kept these unique beasts on the road? Thanks in advance.
-
Self welding wheel bearing!
IdahoDoug replied to Toycollector47's topic in Whoops, Mishaps and Murphy's Law
Once you've got it baselined with fluids, lubes, replaced hardened rubber things like belts/hoses/valves, rear main, valve guides, I'd expect miles of smiles and the cheap, reliable motoring this generation of Toyota is known for! Of course, it's 33 years old, so there may be tertiary things to repair due to aged wiring, but it will always get you home. -
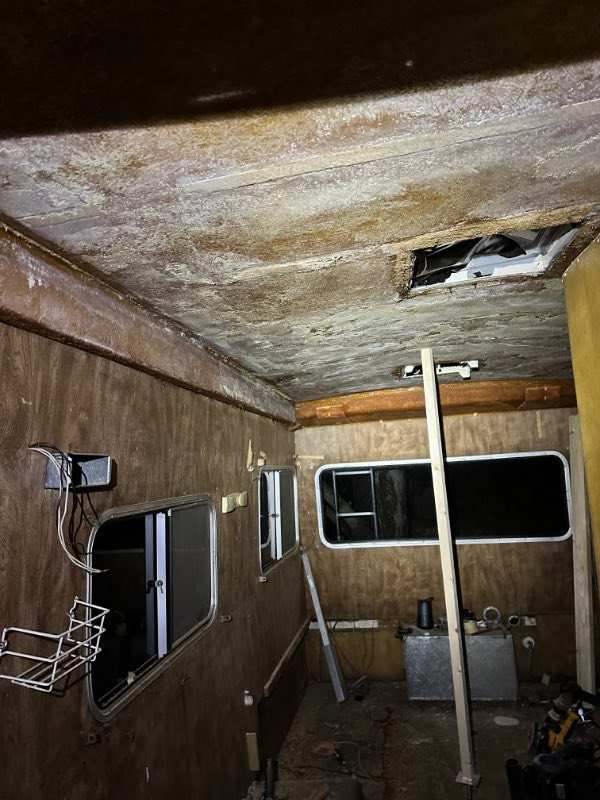
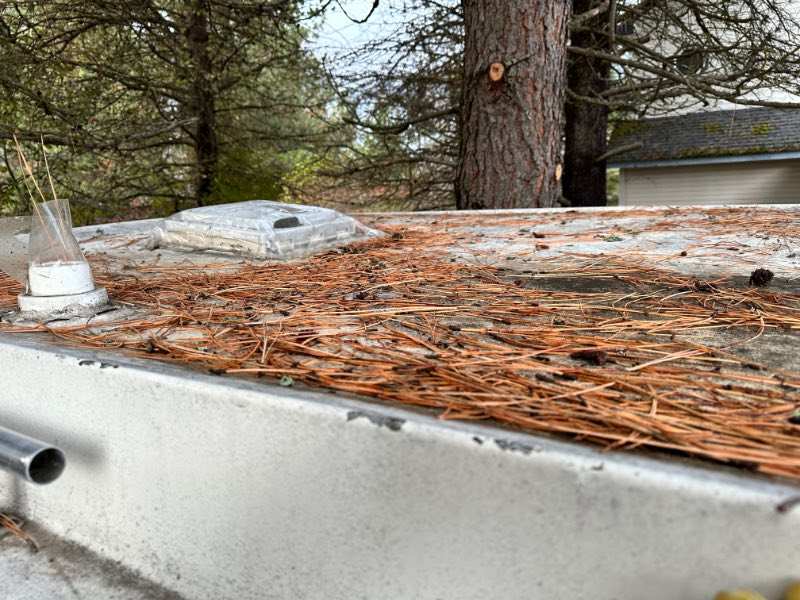
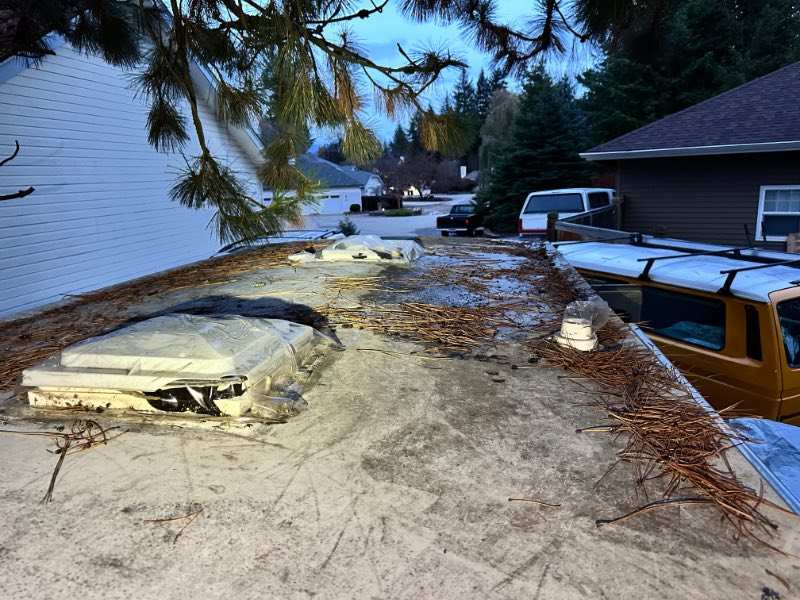
Bob, Thanks. Yes, I was studying that very thing today - how the sides bow a bit with the roof re-arching. This caused me to take an extra step with the roof re-arch. When you have only a small bow (I think it's about 2" in the center of about a 6 foot length), maintaining the bow with weight on it relies upon the strength of the wall where the bows meet the wall. If the weight on the bow can push the wall out even a fraction of an inch - the bow can collapse. So I'm going to install a thick aluminum plate full length for the bows to push against without moving that section of the wall. So, thanks. Working on finding that plate material and have a sample already in my garage "spares" box from some other wacky project. And yes - removing the paneling so I can start with bare fiberglas by adding insulation, then new paneling material (no ideas yet....). So, did not mess with anything further today but the roof as I've got to get it arched, stable, and winter worthy asap. Last week I bought 4 joist jacks which you place a length of wood atop and then can screw to force the ceiling up with. Just to see what's possible, I placed 3 of them down the centerline and put only moderate pressure on the roof, actually lifting the post at about 70% of my max strength and bringing the jack up under it to hold it. Not using mechanical advantage yet. I ended up with 6'2" down the centerline, which I'm really pleased with. So, I'm moving on to buying rectangular aluminum hollow stock for the roof beams, which will press against that thick aluminum plate. I'll need to find a way to gently arch them - shopping for a wheel bender this evening. I don't want a shop to arch them as I may need to change the arch a bit depending on how things go as I start at the rear and go forward and the last thing I want is to find the single arch shape is all I have. I plan to bed the beams all the way across the roof with a thick bed of 2 part epoxy, essentially making them into a single bonded structure. I'm looking for 3/4" by 2" stock. Of course, I'll sand and prep the roof surface (that's going to suck overhead and I have to do the entire roof as I'm also glueing Owens Corning Foamular to the ceiling between the beams and need a good bond there for strength addition) before epoxying. The foam will add strength between the beams for walking on as well. Still unsure about beam spacing, but I'm going to err on the close side - perhaps only a foot apart the entire roof length. I also ordered a two burner propane Magic Chef cooktop. Details later, but my plan is to shrink the length of the kitchen counter, but eliminate the cooktop. So the cooktop will only appear when needed (what - .5% of the time when you're actually cooking?). I'll reveal how I'm going to do that later but it's cool. So it's exciting to have the fridge and cooktop handled. Next as we're eliminating the stove/oven unit, we'll be replacing it with a convection/microwave. Wow - expensive but I saved a bunch on the fridge so am still on budget. So, the roof is my current focus. Here's how it looked before I touched it: Here it is now with just quickly putting up the 3 poles. The roof has a nice arch and the fore and aft ridgeline is nearly straight. Yes folks, that's my work area for the winter up here 90 miles from the Canadian border. And that's our current "weekend escape capsule" - our restored 1988 VW Vanagon: And here's an interior shot with the 3 jack/beams just pushed up by hand (no cranking yet). Getting the wood out of the corner up where the roof and walls meet was a pain. The left side wood piece yielded to simple prying and popped out in several lengths to bare fiberglas. The right one must have been installed by the better worker as he was liberal with the resin and I needed to use my hatchet being pounded with a hammer to essentially chop it away from the fiberglas to make room for the thick aluminum beam. That beam will also do double duty as a strong base to mount an awning to later. I'll try to leave access to it so i can drill through it and use real fasteners (stainless nuts, bolts, washers) to attach the awning. Possibly also a roof rack will attach there.
-
So it fits! Might be the largest fridge in any Sunrader once I build it in. It's a Norcold 3 way 412.3UL and 4.5 cubic feet. The cab seats are still out from pulling the old fridge and it really didn't take much juggling through the cab. It's 36" tall and frankly someone could likely get one in that's another 6" tall by my guesstimate. By removing the passenger door also, it would not surprise me someone could get a 6 cubic foot double door unit in that way. The capacity difference from 3 to 4.5 is amazing. A full size half gallon fits in the door, as do 2-liter pop bottles. A gallon of milk fits in the fridge, with a clever hinged section of shelf, and the freezer section is big enough for a LOT of ice cream, cubes, or Haagen Dazs dark chocolate fudgsicles. This could be dangerous to my waistline next summer. It's back stowed in the garage after the trial fit, and now I'm headed out to start tearing out the wall paneling, propane tanks and eyeballing the floor and ceiling. A buddy reminded me I better change from the floor as priority to the ceiling as we'll have snow before long and the roof is now a floppy wet noodle. He's right, so that's next.
-
Same drive train here and also considering a 5 speed swap, so we'll kill two birds with one stone on the replies. Thanks!
-
Yup - Butte. Just made the round trip in 8hrs, 1 minute including all stops and loading the fridge in the parking lot of the Best Western where I met the nice couple selling it. He'd bought a 3 way Norcold and discovered how fast it drains the battery on 12V. Never even hooked up gas. I'm happy about the extra cubic feet. BTW, not sure about the truth in advertising back then, but when I compare the "4 cu ft" fridge I removed with a 3 cu ft Dometic I bought, there is only a 1" interior difference in a single dimension. This 4.5 cu ft Norcold I just walked in the door with is huge by comparison. I'm happy and my wife will be happy as it's large enough to really work with for us as we eat a lot of fresh produce, which is bulky compared to many people's packaged diets. Bonus points for me.
-
I would roll it across a scale and see what the rear axle weight is with a full load of everything just as you'll take it on a camping trip. When those axles fail, it's a life threatening situation, so you should know what the actual weight is. Yes, yours looks lighter. For reference, my completely empty Sunrader weighs over 3800lbs on the rear axles. Check back after a weigh - local dump may have a scale, or google weigh stations.
-
Thanks - yes, I saw that. Was kinda surprised they had some kind of vague massive mechanical and handling issues, and then disappointed they ended up selling the Sunrader as well. They were SO close to having a remarkable road trip machine! I really liked what they did with the vehicle and it sure was nice that her Dad seemed quite an accomplished cabinet maker - THE skill needed on that project. So as is typical of my projects, there are things I do along the way in driving it forward that others think odd. Such is the case with my search to find a fridge. I want one that's larger than the one in mine, which is supposed to be a 4 cubic foot according to the 1984 literature, though perhaps my 1982 was smaller. For a time, both Norcold and Dometic made a 4.5 cubic foot model which is exactly the size I want and both quit making this size. New, they both stop at 3 cubic feet for 3 way models and the next up is 5-6 feet double doors, which is way too large for the Sunrader. But I can't find them used, except a guy on eBay who's selling them for $950 plus $300 shipping for a grand total of over $1300 without a factory warranty. Many weeks of searching fruitlessly on FaceBook and Craigslist. Then, a super cheap 3 cubic foot nice Dometic popped up right here in my town. I snagged it this morning and it works great - makes ice cubes on both AC and propane (it's 2 way). Hours later, someone I'd been trying to get to cut price a bit on a larger Norcold agreed to deal and I bought that one as well. The catch? I am making a banzai run to Butte, Montana tomorrow to pick it up. So by tomorrow evening after weeks of fruitless search I will have not one, but TWO fridges. Ah well. The Dometic is in great shape and I should be able to sell it and get my money back. The unknown is whether I can fit the larger fridge in via the passenger side of the cab with the seat out, which I needed to get the old fridge out. Will be close, but soon we'll all know just how big of a fridge will fit into a Sunrader. Stay tuned.
-
Self welding wheel bearing!
IdahoDoug replied to Toycollector47's topic in Whoops, Mishaps and Murphy's Law
Not sure this is relevant now, but the LandCruiser front full floater bearing nuts will work with a NAPA 2 3/32 socket. Fits very tight and that's what I've been using for a collective 562,000 miles we've put on our two 80 Series girls over the decades. For the rear full floater, I have the tool noted above though mine might be a factory tool as it's chrome plated. I like the cut socket and the wood solution!! My 1-ton full floater is out behind the SunRader so they can get to know one another before the spring mating season. Super happy - paid $500 for a 45k axle with the dually wheels! I'd been resigned to pay $1200 for months. I know of one here in N. Idaho for $650 sans wheels if anyone needs a 1 ton axle. Happy to connect you, and he's a nice guy to boot. -
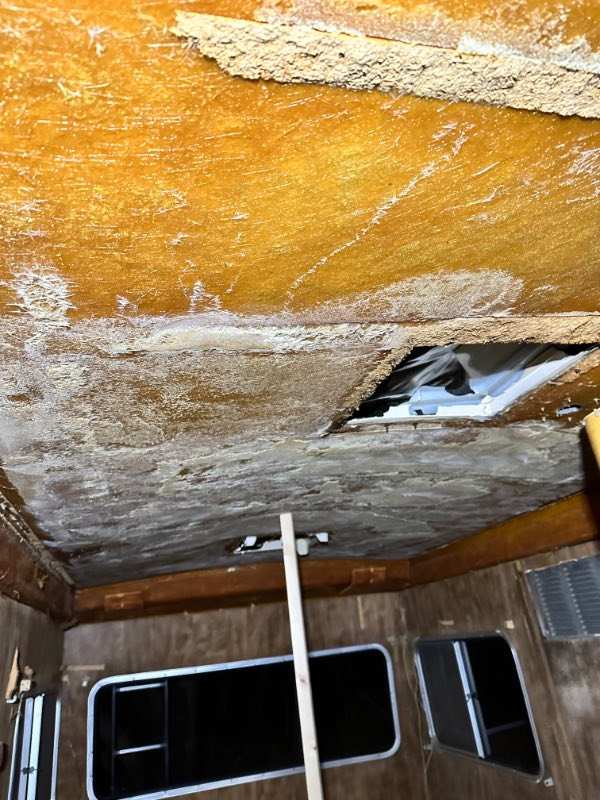
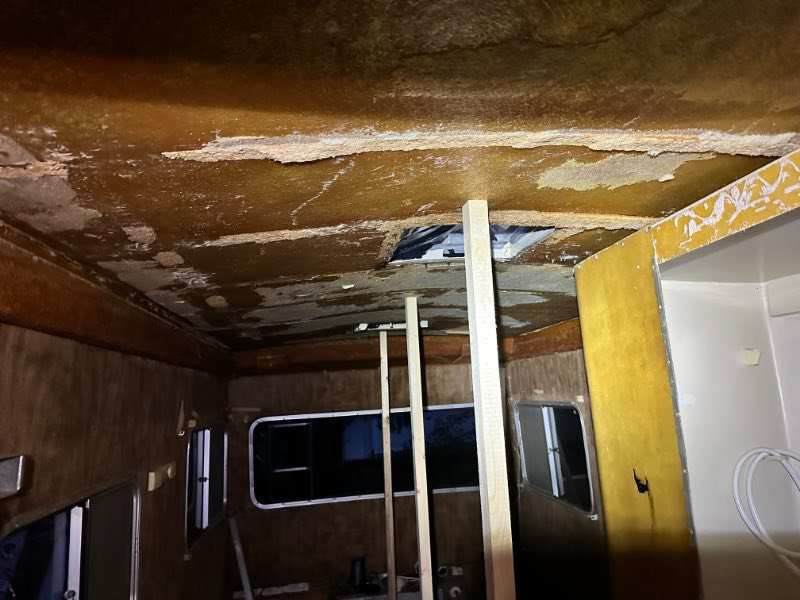
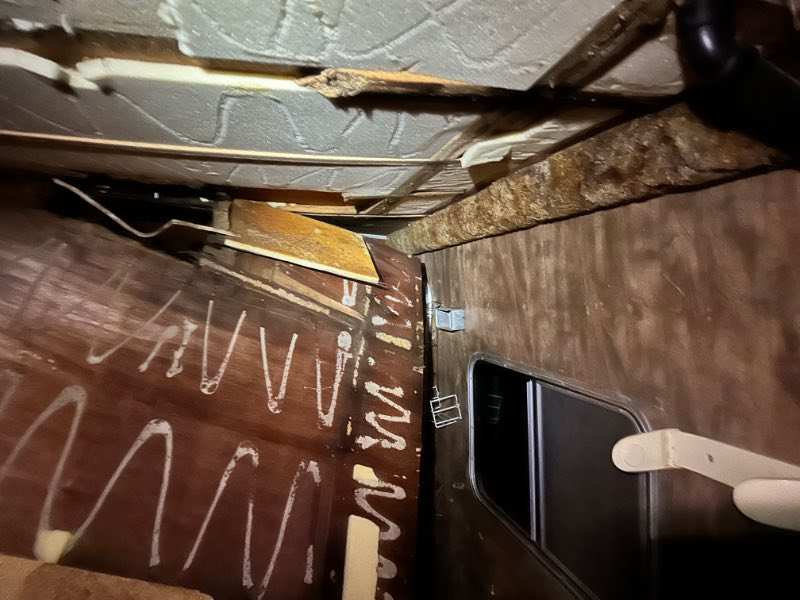
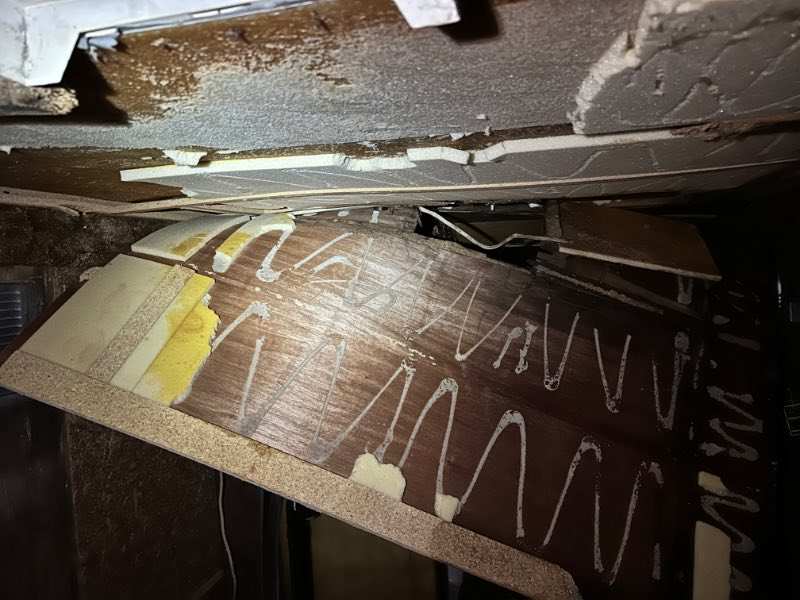
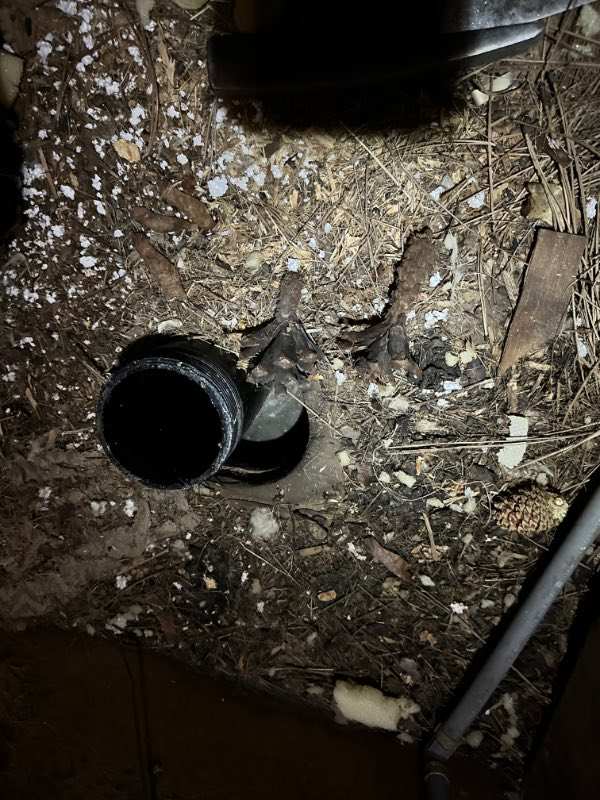
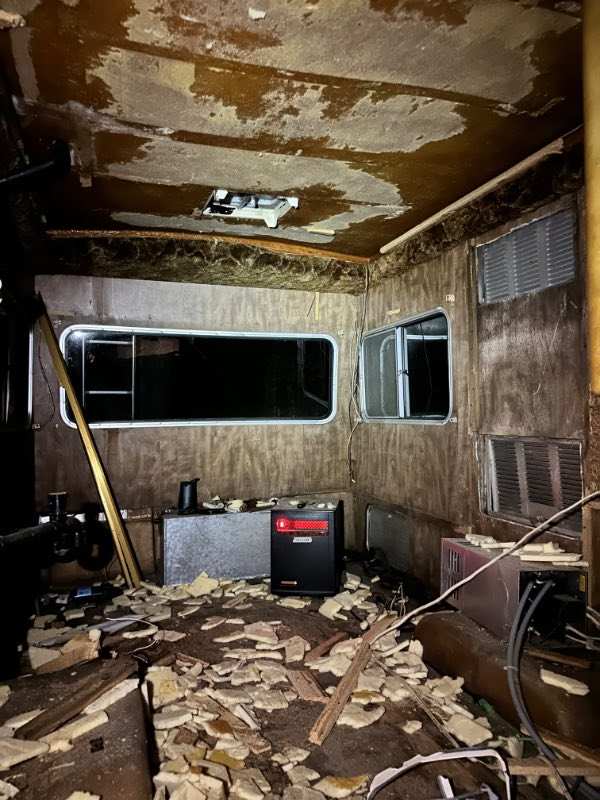
OK, had some drama (see separate thread "Does anyone know how the Sunrader bathroom unit attaches to the floor?" getting the bathroom disconnected. Turns out the thick black hard plastic toilet base held in with 8 screws simply unscrews. Mine was covered with silicone, which I cut expecting to simply pull it and the tube straight up out of the black water tank. But no. Back on track, the bathroom unit is held to the floor via the aforementioned 2 day delay, plus the window frame if yours has one. Once that's loose, it's just friction with the sagging ceiling that prevents you simply dragging it away. I recently learned it will fit in the over cab bunk, which is great news for getting it out of the way. Right now I have a bunch of cabinet doors and things there, so I'll confirm that at some point. With the bathroom moved from its corner, I tore down all the ceiling: Discovered a HUGE opening under the toilet the manufacturer erroneously cut and didn't bother to seal, allowing some good size creature (packrat?) to comfortably live under there for however long. Whatever it was, it was not a mouse as there was no poop or pee there at all. Almost a considerate houseguest and he had a nice nest there, but no food or evidence of eating! Mice will pee and poop constantly wherever they sleep, walk or eat. Anyhow, I'll be sealing this up with the new floor: Here's where things stand as of tonight: Probably a few more hours of tearing out remaining bits of wiring and scraping the ceiling, but I'm going to clean out the front bed, wrestle the bath unit up there with an extra set of hands, and then tackle the floor. Some foreshadowing that the ceiling is very floppy and I hope will prove responsive to my re-arching and reinforcing plan. Almost scary how floppy now without the layer of foam and the left side cabinets and bathroom holding it up somewhat. In this wide open state, it's really amazing how much room these rigs have. I'm going to do a rough calculation with some measurements to see what the cubic feet is and see if it compares to a Sprinter or Ford Transit. I suspect it will.
-
Victory! Was able to loosen the upper ring. I put paint dots on the pipe entering the tank and the pieces and just started hammering and going under to see what I was rotating. Turns out I was able to rotate the hard thick plastic toilet retaining ring and the lockring under it stayed put fortunately. When I reassemble, I'll glue that lock ring in place as it would be just my luck it would start slipping when trying to bang the hard thick plastic toilet retaining ring and I wouldn't get it properly tight. Phew! Should be back at it after dinner and move the bathroom by tonight.
-
OK. Still at a loss. Here's what I'm up against. Up top against the floor is indeed a locking ring of some sort on the bottom of the bathroom floor. As the pipe coming down fills almost the entire hole as it passes through the floor proper about 3 inches down from that, I can't possibly get up there to loosen the ring. So, I'm removing the blackwater tank. That's not happening either as the pipe appears somehow secured to the tank as well. Atop the tank where the pipe comes into it is a thin ring with 4 circular metal items that look like a giant rivet. Here's a photo: In the photo it DOES appear vaguely to be a nut but I assure it is not. The straight line marks are from me tightly forcing a socket onto it when I thought it was a hex nut. Turned out to be round, so take my word for it. I do not see any indication I can spin the ring to let holes in the ring line up and release. At a loss. I released the black water tank's straps and am prying/pulling down so hard expecting the tank to simply pull down off the pipe but it will not. I'm using lots of leverage with a 2X4 to spread the load and I'm pulling so hard I'm worried I will pop a hole in the top of the tank. It's not simply sitting in that ring - something physical is holding it that I've never encountered. Has anyone encountered this before? I'm at an impasse where I simply cannot get the pipe to release from either the tank or the floor of the bathroom unit. Help!
-
Oh, that's great to know I may fit it up in the bunk. And as you clearly know, dedication and insanity are only separated by a few degrees. Many of my projects over the decades have been head shakers for my buddies and family but they always seem to turn out extremely well. I hope for the same result here! Will get on it later this evening. PS this just reminded me to go shoot Liquid Wrench on those 40 year old undisturbed bolts. Happily, this girl lived in a dry climate and at 32k, every fastener so far has come off without drama. Aaaaaaaannnnnd with that - I've completely jinxed the entire project!
-
Update. Went out to take pics. So this morning with the light of day I could see there actually IS a ring up under the floor holding the drain. Last night I looked with a flashlight from above through the gaps in the heavy toilet ring and could see only pipe. However, now I can see a long ways deeper down several inches is a ring - that huge gap accounts or not only the bath floor, but also the plywood spacer under it, and the thickness of the floor. So, now I have to drop the BW tank to release it. I'd assumed* the holding issue was the tank, so in my mind I couldn't even drop the tank to solve the issue. Not the end of the world as I've heard it's wise to inspect the straps for rust anyhow. With only 32k on my Sunrader, they look good but I'll take the time to sand and repaint them for the future. So, looks like it's resolved - thanks for staying with me in all the turns and twists. * Never assume........
-
Copy
-
Thanks, Linda. Yeah, that's what I expected to be down at the tank as it would be a typical friction fit at the tank like household stuff, but instead it's got 4 rivet-like round headed metal buttons and a thin ring at the tank. No rubber sealing lips visible at all - the pipe simply comes to the tank with no visible seal. So, something's different with mine. It's not a simple friction fit like I expected. That seal Linda posts is what I'll use when I get this dang pipe pulled out.
-
Bob, For clarity, my toilet flange is loose up at the bathroom floor and you are discussing it as if you think that's where my BW pipe is stuck. My problem appears to be is where the black pipe connects at the BW tank - that's where there is a collar of some sort with 4 "rivet looking" items on it and the pipe is stuck there at the tank and won't release. I'm fairly certain what's preventing me pulling the BW pipe up from the tank is that collar and in your photo (thanks), it looks like you instead have an elaborate multi-layer seal of some sort at the tank. It looks like it was simply a friction fit seal with no fasteners? The seal also looks like it has a lip that is much large in diameter than the hold in the BW tank. How the heck did you get that out of the BW tank? By contrast, my BW pipe has no visible seal as it enters the tank. It's just plain pipe that enters the tank with a bit of sealant smeared there. Am I perchance getting it wrong and that seal laying on your BW tank was actually up at the bathroom floor? Perhaps you could outline where it was and how your pipe sealed at the BW tank? Thanks in advance.
-
There are 4 thick rivet-looking fasteners on it. Are you saying use the fasteners to spin the seal?
-
Hey Bob - do you still have your black water tank around? I'm stumped on how to pull the toilet pipe up into the coach out of the tank, and wondering if you removed your tank you might be able to help me with mine. There's a metal ring at the tank juncture that's riveted on and I'm hoping that's just a rubber seal, vs me needing to cut those off, etc. Thanks in advance!