Supurcar
-
Posts
160 -
Joined
-
Last visited
Content Type
Events
Profiles
Forums
Gallery
Everything posted by Supurcar
-
 Here is the latest on the furnace, we went for a test run overnight to a local RV park. I plugged into the land line and turned on the gas. The water heater fired right up and the stove was working fine. I noticed after some time a funny sound coming from the converter box or panel. I had the fridge on elec mode at the time. The sound from the panel was kind of a chirp like a relay trying to trip and then not engaging. It did this in a cycle for hours until I realized what was going on. I tripped the breakers trying to isolate what was causing this. finally I wanted to try my fridge on gas for the first anyway, it fired up like a champ and seemed to be working fine, and lo and behold the chirping sound went away from the converter box. I think I have an electrical issue with the fridge now. This is even funnier, after I got the fridge to work on gas, I thought maybe this is related to the furnace not working so I fired up the furnace as it was almost cold enough to need it anyway. Again behold the furnace fired right up for the first time in months, and I ran it for about 30 minutes, I was in heaven for a while. After I turned off the furnace I can not get it to light again, DOH! This can not be a major repair, I just have not had time to tear it down as I have been working on the carpets. Any tips?
 -
When I bought my 1987 Sunrader the rear was sagging. I noticed it had air bags but they where not holding any weight. I crawled under the thing and noticed they ran the air lines over the exhaust, which needless to say melted the lines when they became low on air, or over loaded. I patched and rerouted the lines and so far so good. That could be a place to start checking on your's if you haven't already. I also replaced all my shocks with the "Rancho 5000" shocks, they appear to have a thicker piston and are designed for heavy rigs. On a recent trip I noticed it handles the bumps and potholes much better, no more bouncy, bouncy.
-
Great job of bracing, should look great after the wood panels are added. I am resisting the urge to tear into mine and reface. Actually I am even considering removing the wrap around windows and fill the space with fibreglass. I have not decided. It will be interesting to see your's when it is finished, you will have to keep adding pictures.
-
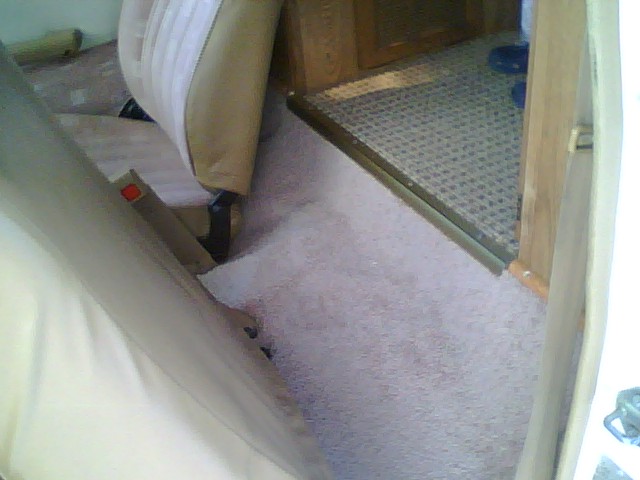
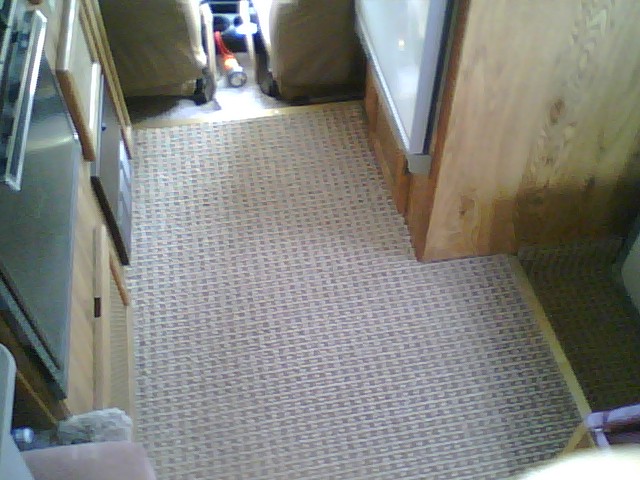
Well here it is, kinda hard to get good picture with the seats in the way. It is not very snug, but as it settles and loosens I will go back in and stretch in and make it fit better. Where the factory just folded the carpet back on itself on edges, I used the aluminum strip and some wood 1/4 round modling that you can barely see in this photo. I still need to finish the door panels, I will glue some cspret over the vinyl and be done with it. We also finished tinting the windows in the cab over and above the stove to reduce the summer heat. Okay now time to go somewhere in it.

-
I will look for one, here is what I did tonight, I will try to lay the new carpet tomorrow. A lot of curves in the cab, this is a little trickier than the flat floor in the rear.
-
Submit your ideas and artwork here!
Supurcar replied to Gulfstream Greg's topic in News - Forum Help & Discussion
I just saw this posting, give me some time I will come up with a couple concepts. Someone asked about a cartoon Toy RV, in the movie "Cars" there is an elvis looking RV that I think is a mini-winni Toyota type RV, there was a couple others in the few scenes as well. Rather than make a new reply I will just tack this picture on to my previous post. I just whipped this manip up real quick and came up with a quick slogan, I will try to make a real good one next week.
-
Howdy, I have a 1987 and I found with mine that in high altitude the thing would not shift into overdrive, I think it is designed to operate this way. I am not sure if that is what is happening with you, but if you recently went over 3500 foot elevation an it stopped shifting into overdrive I would guess that is what is going on. Seems like awfully low mileage to be having tranny issues. Good luck!
-
Thanks for the tips Mr. Pucky, Looks like you did a great job on yours. I am studying the windows, and will continue to plan. Once I have the tools, parts, and most of all something to stand on to be able to reach the windows without denting the hood, I will dive into that project. With the tips I have received from you guys it should go a lot smoother for sure.
-
I am concerned by linking two tanks with a "T" connection, are you thinking they would balance out as one of them filled? I wonder what would happen if the "T" became clogged or blocked, I imagine that would not be fun to try and clear, maybe you are thinking of a large "T" connection to make up the overflow as one filled?
-
Too bad, looks like it did some damage. I found the top vent covers at my local RV retailer pretty cheap. Some other general type stores in town carry RV supplies and have lens covers/fixtures. You might try the RV retailer on the A/C, I am sure they have a source for parts. If you have insurance, you might be able to get your insurance to replace the entire AC unit if parts are not available for the old one. I replaced a couple of my marker lights with LED, a lot of work and no room for the wires though. Good luck!
-
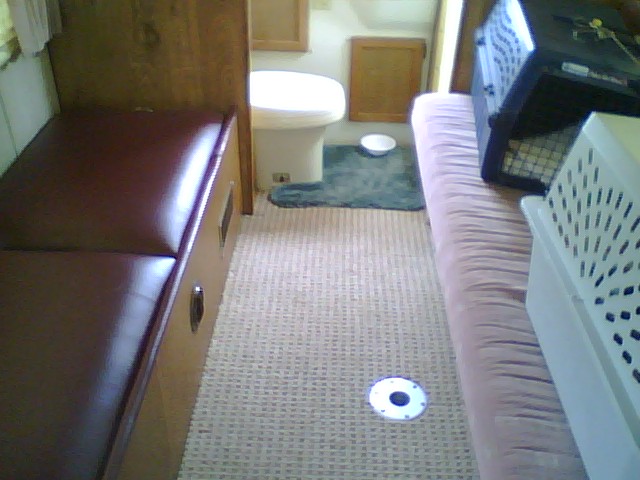
So far so good on the carpet work. What I did was study it very long, almost start ripping up the carpet, then study some more. Finally got brave enough to do it, being careful to remember how to put it back together. Actually was not as hard as it seemed, but it is not knowing is what is scary (my first time trying this). One tip I would give is to be careful with using the old carpet as a templet, because you could reuse someone else's mistake or bad design. I was sure to leave about a 1/2 inch or more extra on the template for error or redesign. Once I got it on the floor and rolled it up the wall paneling I cut it how I wanted it, using a (metal) straight edge ruler. In some spots I simply loosened the screws on the seat (box) brackets in the rear and put the carpet under the wall so I would not have to do any scary measurements, helped quiet some sqeeks as well (and I noticed the factory did the same thing from the wheel wells out). We also added some new curtains in back, I may add some photos later when I get a new camera. I will tackle the cab this week, same thing.... no plan just reverse engineer it, adding any improvements I think of. I did remove the shag carpet from the cab door panels, what a shoddy job they did on that, cover a wood plank and wood screw it into the panel. I will buy some vinyl and recover the whole door panel too. Stay tuned, LOL. P.S> I forgot to mention the cost, I was quoted $1200 to redo the interior, so far I have spent less than $100 by far. $35 carpeting, $5.95 glue, $1.62 12mm staples (hope I used the right length), Aluminum step edge $16.95, elbo grease-free.
-
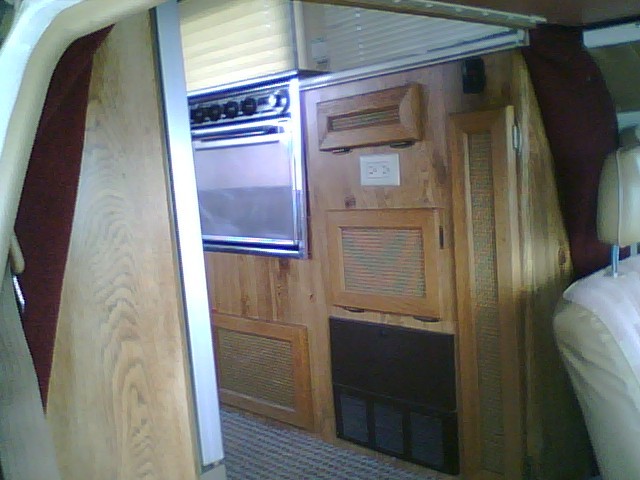
Here is what I have done to the cab, I got tired of the shag carpet behind the driver's seat. I tried to change it so more of the wood would be visible, instead of dirty carpet. I used the burgundy indoor/outdoor carpet for this. Next I will try finish the floor of the cab and I will be finish laying carpet for a while.
-
Looks like a clean rig, but it looks like the last year of the 5 bolt axle. The hubcaps may be there to hide that fact. I would make sure it is the 6 bolt axle, if not it is not worth the $4k to me. If it has the 1 ton axle it looks like a fair deal. The 4 cyl. will make it up hills, just need to drive smart and get a good run at the hills or the thing will bog, and staying in the far right lane is good advice. They do get blown around by high winds also. Have fun with it!
-
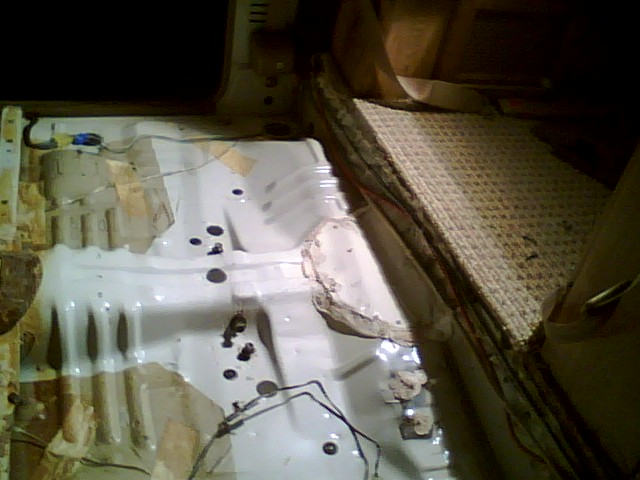
Here is a few pics from my cell of the new rug. I had a load of fun doing this, my first time laying carpet. I went underneath and tightened all the bolts holding down the particle board flooring. I then used glue and staples to hold down the new indoor/ outdoor carpeting. I finished it off by installing some aluminum edge molding on the steps, nice touch. I painted the metal hold for the table bottom.
-
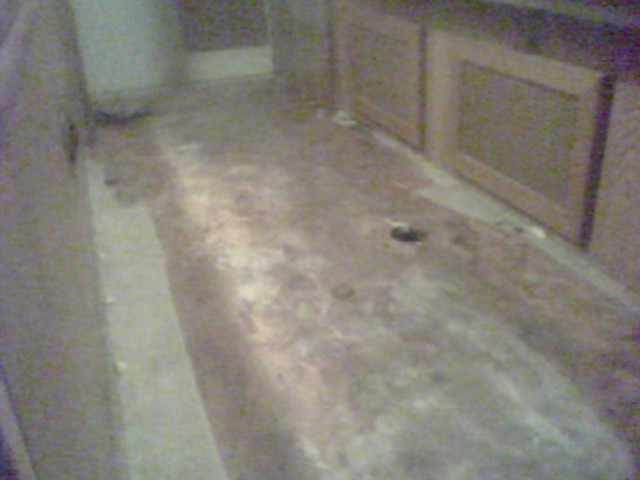
I see your cab over is lined with wood, mine is all fiber glassed in, and is raised a bit. I think the previous owner tried some home improvement on this thing. well I installed the new carpet, indoor/outdoor so if it leaks a little no big deal. Plus we have the pad over it and it will not be visible most of the time anyway. I started to rip up the carpet in the main area also. It was not moldy, but was worn out. I noticed the wood underneath seemed to be warped. It is not rotten or anything, but there is a definite warp to it. It almost looks like someone cut out a piece and put in a new center aisle or something. If you look under the couch you can see a gap toward the rear under the paneling, toward the front there is no gap.
-
"Do the job right, and you'll only cuss once" ToyoGuy Agreed no one likes a half a$$ job for sure. I wanted to ask another question as I prep for this work. I could see in one of your pictures where the wrap around window is out you had the wood siding like I do. I cannot figure out how to remove the wood paneling on the sides without damaging it. It almost feel like it is glued in, my only other guess is to remove the window frame on the sides, if that holds it in. If I can get the side panels out I can really see what is going on with the wrap arounds.
-
So the wire on the inside of the seal is a speaker wire project gone bad after all, it is a thick wire with a metal core and it was hanging out in the open. Actually may have been an antenea as there is a patched hole in the top of the cab over sleeper. Oh well I guess I have some work to do either way, the seal is expanded badly- the profile of the window is far outside the line of the fiberglass body. It is like a horrific overbite LOL. I appreciate the help I am sure many people will benefit from your replies. Last question, did you replace the window seals or clean them, and re-use it?
-
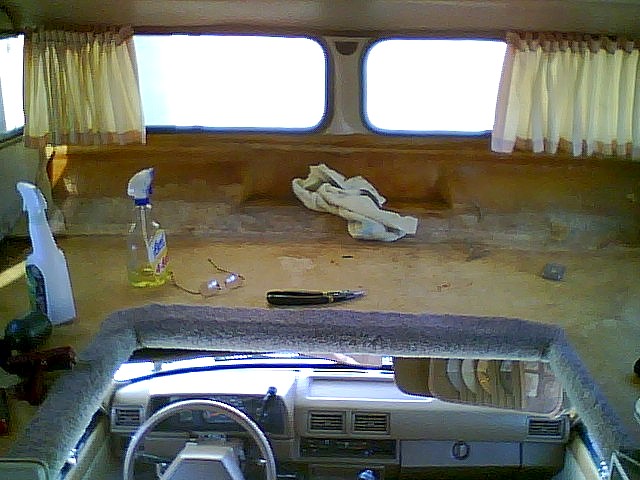
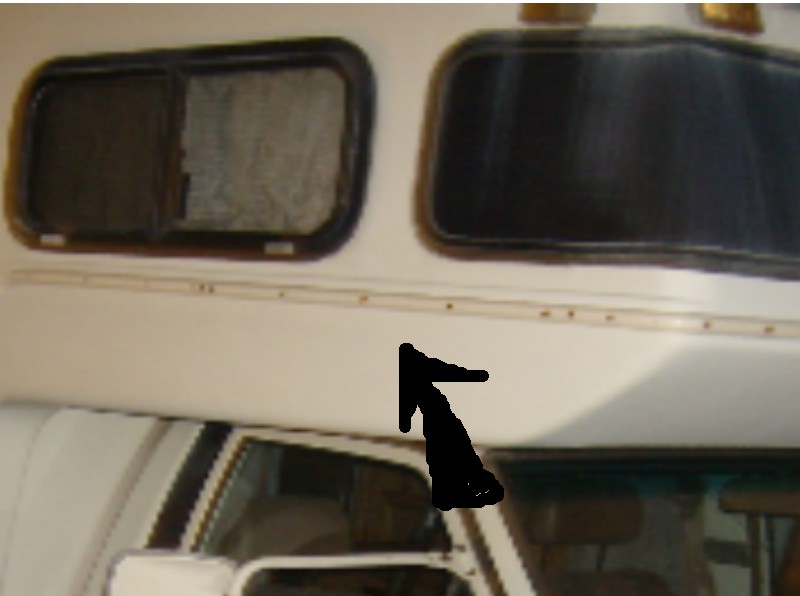
Well I got brave and yanked out the carpet and it was soaked and it has not rained here in weeks. I dried out the area and proceeded to inspect. I notice a wire hangin out of the seal around the window, your last message explained it must be the locking bead. I had already yanked it out before I realized what it was, I thought maybe it was an abandon speaker project or something because it has metal wire in it, must be to hold it fast. I had my wife go and spray the hose on the seal and..........no leaks. I thought for a moment and realized on the highway that thing is bouncing around and vibrating and wind etc. so I then had her spray and I pushed on the window to immitiate road conditions and.............. MAJOR LEAK. SO now I need to reseal the thing somehow. I was thinking of buying a tube of silicon and pulling the seal back and laying a large amount of it in the track. Help Mr. Wizard! I am also attaching cell pictures of the inside and also the new screw strip I installed last week.
-
Good point, I did replace a couple of the lights (faded, cracked, corroded) and yes there is hardly any seal there, maybe I will gob some silicon around them too. I put in a couple LED lights on the sides, there is no place for the wires to go so it is very hard to install them. I am just going to go for it and cut the old carpet out and see what happens.
-
I found an old photo taken when I first purchased this Sunrader, you can see in the picture the old "screw strip" or even called pinch molding because you pinch the strip to get it in the groove, the old strip has cracked and fallen out in this photo, you can see the screw heads. I have since done a lot of work to replace the strip and polish the fiberglass. The carpet on the other side of this wall is where the moisture is, actually on the other side of the truck. I have since globbed some silicon around the plastic windows, I think I need a new seal but no one in town wants to tackle that job. I am affraid once I get it apart it will not go back together.
-
I have been spreadin myself thin working on this Sunrader. I had a bad exhaust leak, was told I need a new manifold and I just turned a few nuts and it was fine nice and quiet. I also replaced the strip that covers the molding where the upper and lower sections of the clamshell meet. I think they called it the screw strip, but I went with black 5/8 strip and spent about $18 and it looks great. I have also sanded the top of the thing with 2500 grit sand paper and polished it to a mirror shine, what a difference, even in the aerodynamics as well as the looks. Now I have had a musty smell for some time and I went to investigate. I assumed it was the old carpeting in the thing. I was right, but it is worse than I thought. The upper cell above the cab is capreted, and it appears moisture is getting in somehow, I used some silicon around the plastic windows in fall. This morning I pulled the carpet back and it is black around the edge and was moist, I could not see where the water was coming from almost like condensation or dew under the thing. I am hoping resealing the outside screw strip will help, the old exterior strip was coming off in chunks and was dry and cracked. Also a ton of dirt was getting under the strip so everytime it rained a load of dirt would streak down the side and stain the fiberglass if you can picture this. So now I am trying to remove the carpet and see what is going on, but I can see it rolls under the ceiling of the cab somehow and looks like a project to reinstall. I would hate to remove the thing and be stuck and not be able to re lay the carpet correctly. So I guess I am asking if anyone has done this and can give me some guidance or tips on this kind of project. My camera broke so I have to get a new one before I can post new pictures. Thanks-
-
http://www.shockwarehouse.com I found this website and it does list the Toyota mini motorhomes and shocks available. There are not many site that are able to do this. I did how ever go off the board for a shock not listed here, a "Rancho 5000" which came highly recomended for heavy vehicles. I just put them on and I have not done a road test yet. I will get an opportunity this afternoon to see how good they are. My second choice would have been the Bilsteins, but these are a lot more $$ than the Monroes. The Rancho 5000 is spendy as well.
-
Oh, and here it is after the recent mods..........
-
Wow big difference, when I bought mine the back end was sagging like that (first picture). I found out they had run the air lines for the bags over the exhaust and melted the lines. Once I fixed the lines the rear came back up as would be expected. But the fact the shocks would not hold the thing scared me a bit, what if an air line went out on a trip. So that is why I want to upgrade my shocks too. On the rust proofing I just went to a local dealer, you know the old undercoating thing. I did get information on the products they use, some of them use good stuff and some are snake oil. What I used was similar to what they put on new cars from the factory, kind of a waxy sealant they spray on with a compressor. I do not have a facility to put my Sunrader on a lift, so that is why it made sense for them to do it. I talked them down to about $150.00, I got a deal and they still made some money. I do not think rust is good for anything on the rig, and I think the floor is made of wood so it is good to seal it from water damage. I will see if I can find a picture of Supurcar and add it to my avitar.
-
Nice job, I am thinking of doing the same thing. I wonder if these shocks you bought will fit on my '87 Sunrader as well. I have the bags on the rear of mine, but the shocks look original. Mine is real bouncy, I want to try to smooth it out a little bit if possible. Our dogs shake like a leaf when we get on a rough road. I noticed some rust in your picture, the first thing I did to mine is have it undercoated with that wax type undercoating at a local dealer.