


Sandune24
-
Posts
86 -
Joined
-
Last visited
Content Type
Events
Profiles
Forums
Gallery
Posts posted by Sandune24
-
-
4 minutes ago, Sandune24 said:
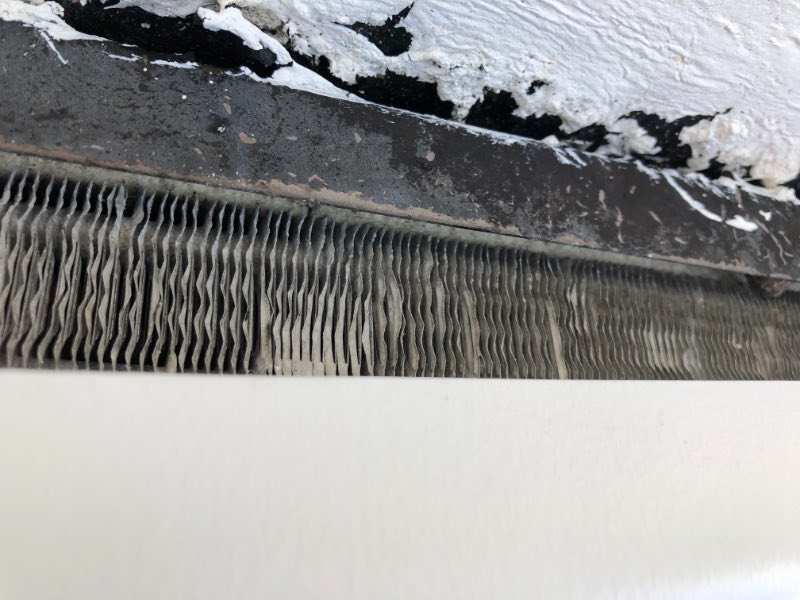
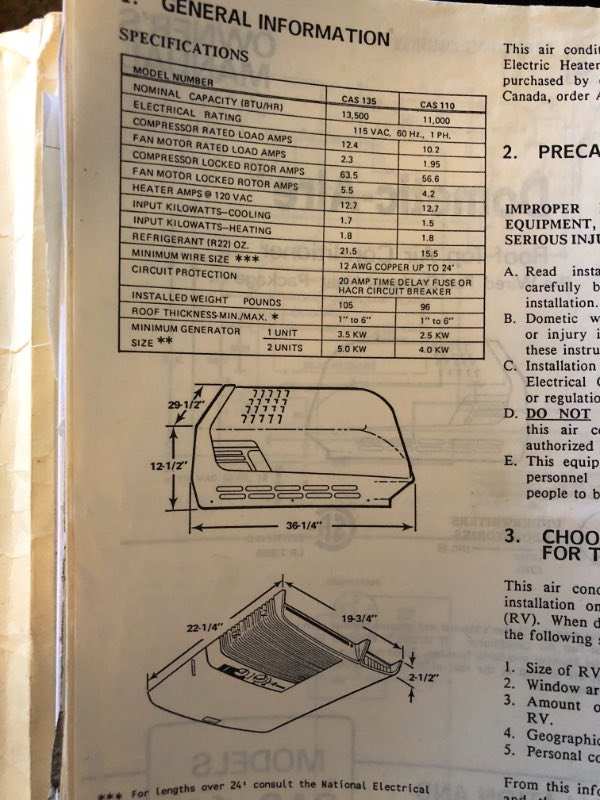
So , here’s what almost always happens, I followed the measurements from the original Dometic A/C manual I have and bingo . I’m about 2.3 “ to short to meet the foundation plate…


-
2 hours ago, Sandune24 said:
Thank you I thought the same thing when I saw the price 😂. I’m going with this method stainless self tappers. Thank you for the feedback. I’ll post after I get the done. First I have to change the gasket.
So , here’s what almost always happens, I followed the measurements from the original Dometic A/C manual I have and bingo . I’m about 2.3 “ to short to meet the foundation plate…
-
3 hours ago, jjrbus said:
Holy bat poop Batman, TWENTY SIX DOLLARS! Go to the most expensive hardware store in your area and and buy the appropriate number of pan head 3/4 inch number 10 stainless steel screws and washers and install with them. Save about $22. Plus you can pick your own head style, philipps, torax, robertson. Can drill the holes to install or buy self tapping screws.
Or you could buy zinc plated #10 X 3/4 truss head screws, these also come in self tapping. Cheaper but will rust over time. The larger head or washer is to keep the screw from working through the plastic over time.
Thank you I thought the same thing when I saw the price 😂. I’m going with this method stainless self tappers. Thank you for the feedback. I’ll post after I get the done. First I have to change the gasket.
-
2 hours ago, fred heath said:
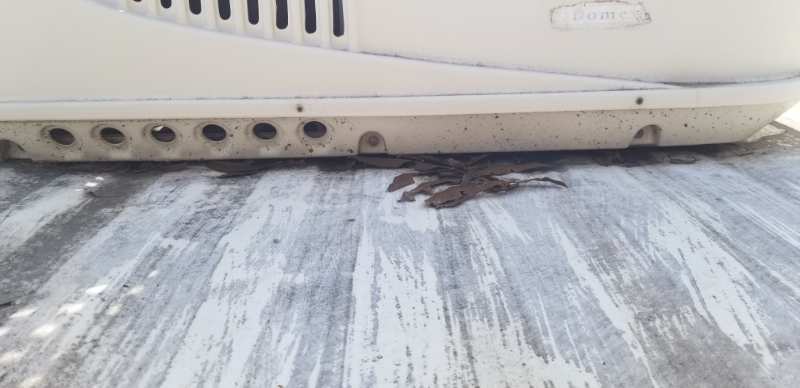
Most Coleman units have 4 studs topside that secure the shroud to the unit.
I would think dometic should be similar.
1 hour ago, extech said:bottom half screws to unit, top half screws to bottom half
It has openings for the screws , my question is what type of screws/nuts or fasteners? Thank you 🙏🏻
-
Hi everyone, I just purchased a new shroud for my Dometic ac . My question it to what do I need to attach the shroud with ? It didn’t come with any clips or screws … thank you 🎃
-
Hi Cannate,
I’m in Queens and was recommended to Sonny’s Transmission in Oceanside, Long Island ⭐️⭐️⭐️⭐️
-
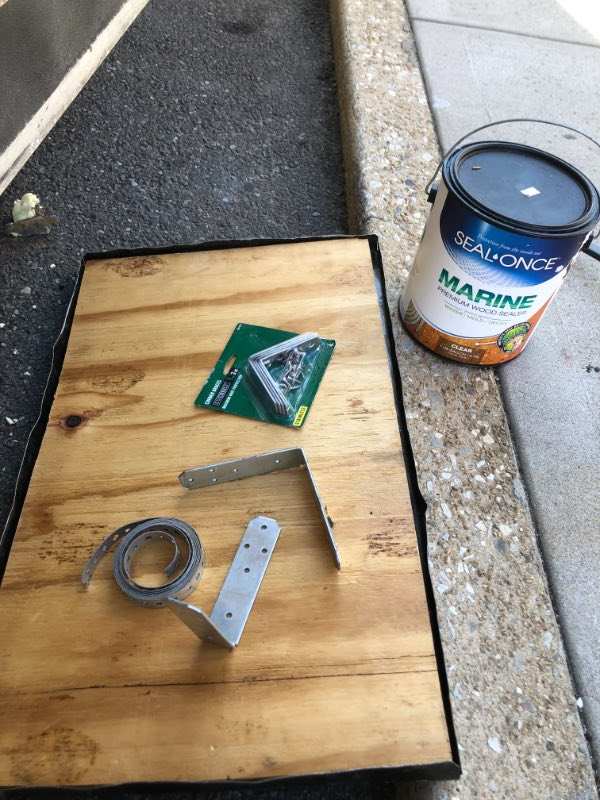
I order a 24” Lippert single step. I haven’t installed it as yet as I am rebuilding the lower step in my Escaper. The step is solid and has slip grating. Stay tuned.
-
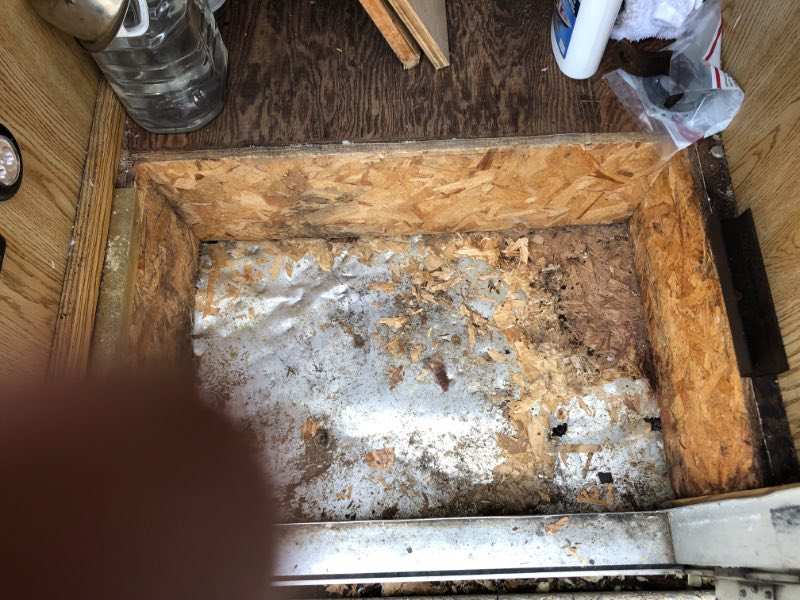
I am removing wood rot on my entry step and looking for repair ideas
I dont see what the folded up step, it looks like that to me from picture. Thank you for responding. More info please ...
-
I am removing wood rot on my entry step and looking for repair ideas
-
Hi If you still have the rear LEDs I’m interested. I have an 1987 Escaper. Thanking you in advance 🙏
-
You guys are the best !! I looked at read your step by step support in rebuild. I’m next on rebuilding my 87 Escaper. Thank you all 🙏
-
Hi WME,
Thank you for the link . All I know is that it goes best by the circuit board . I was going to mount it by the house battery....
-
Situation that I have right now is trying to open the latch on my spare tire? Also watching the feed on the mount situation too. How do I open latch to remove cover ? Thanks
-
Hi Linda , Hope you are well 😊. So, in regard to your comment stating there is the possibility of adding cross beams and going behind the cabinets to add lateral support would do the trick? As I know I will be replacing the a/c gasket too.
-
Love your mind 🙏👣💪
-
Ports I am still looking at this eyesore from inside my cab!! I decided to go with stainless steel deck screws. I let you know how that works out.
-
Hi all, Hope everyone is healthy and staying safe during this pandemic. I am, thank God.
I have a rear kitchen Escaper and I want to install the progressive dynamic in a proper location. Also I would be grateful for Information regarding changing old fuse panels and breakers during upgrade. -
Hi WME, just saw your cargo strap solution...I have delamination around the top sides and rear. What size cargo straps did you use, I have proflex to seal with . I’ve been grappling with sealing exterior via vises, not to many options. I would prefer tackling wood rot from the interior. The cargo straps sound doable with a little more of your insight. Thanking you in advance.
-
On 7/8/2020 at 6:49 PM, Maineah said:
Usually what I do is fill the tank maybe half way or less with a shot of bleach run the pump to fill the lines and go for a ride over hill and dale. Drain and refill clear the lines with clear water.
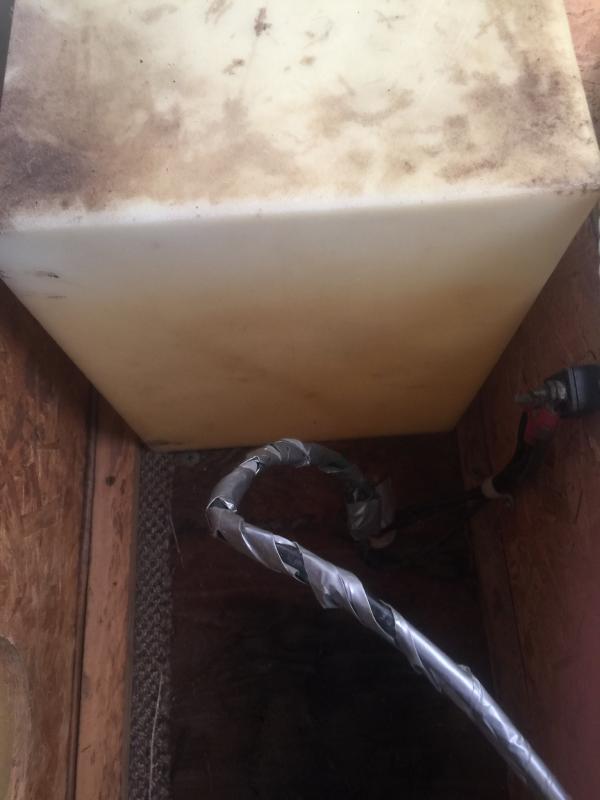
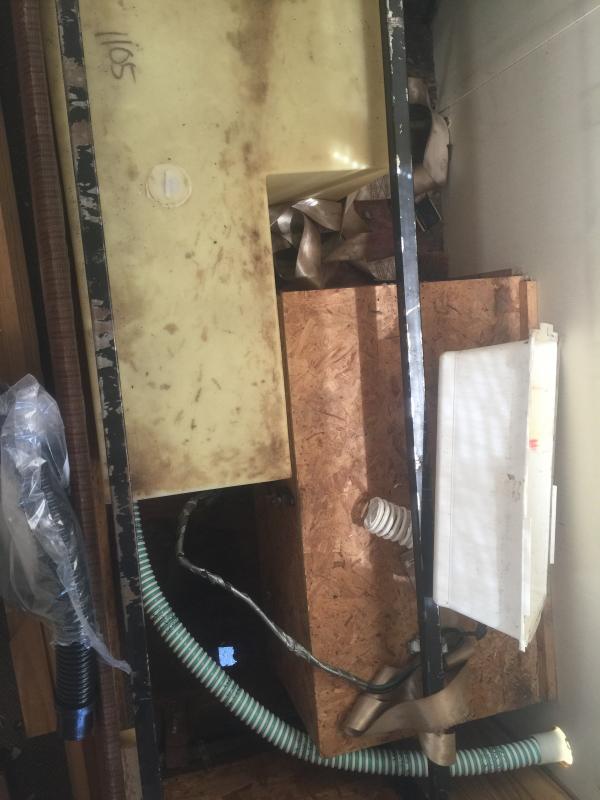
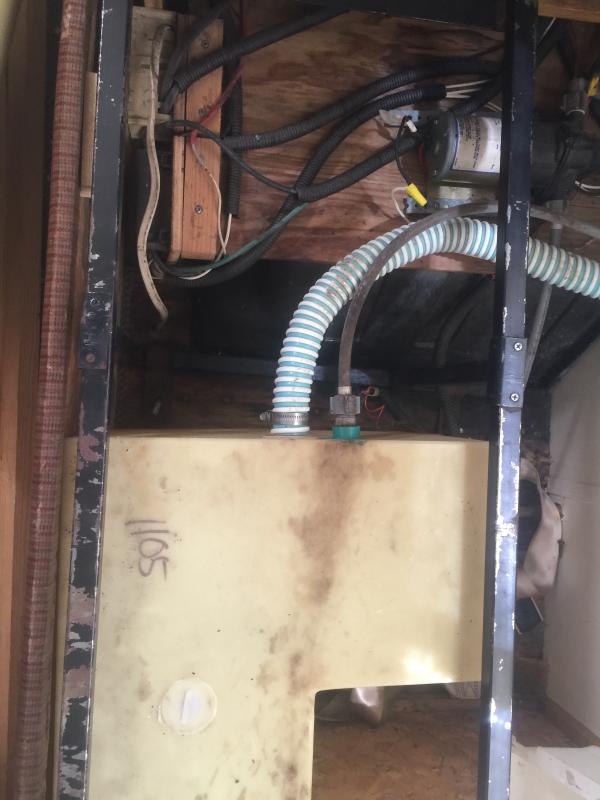
Maineah I see that you have a ‘87 Toyota and I’m aware they are not all the same . I am trying to figure out how my fresh water tank gets filled. I found the hose attached inside was broken and attached to nothing .
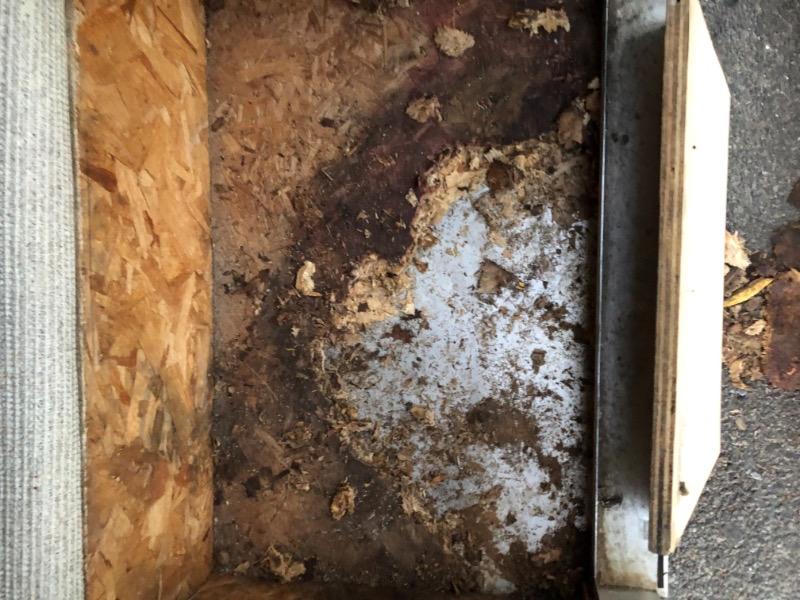
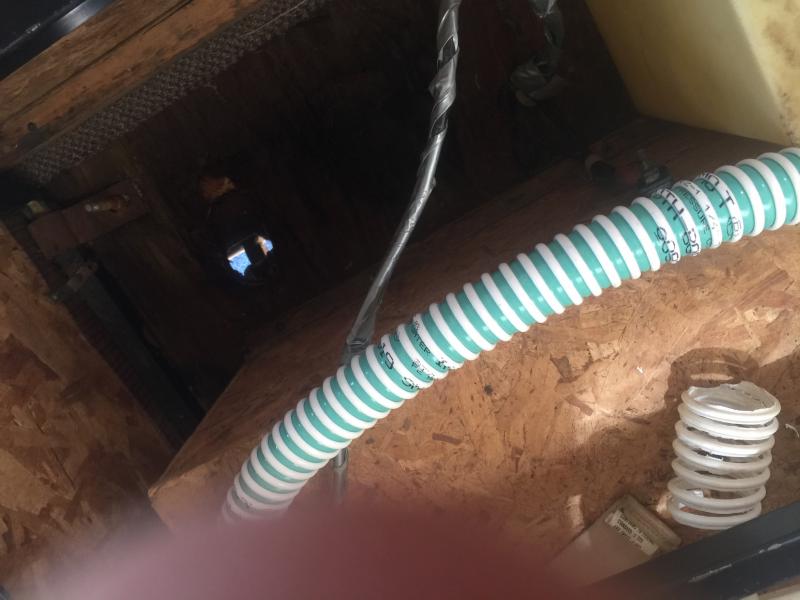
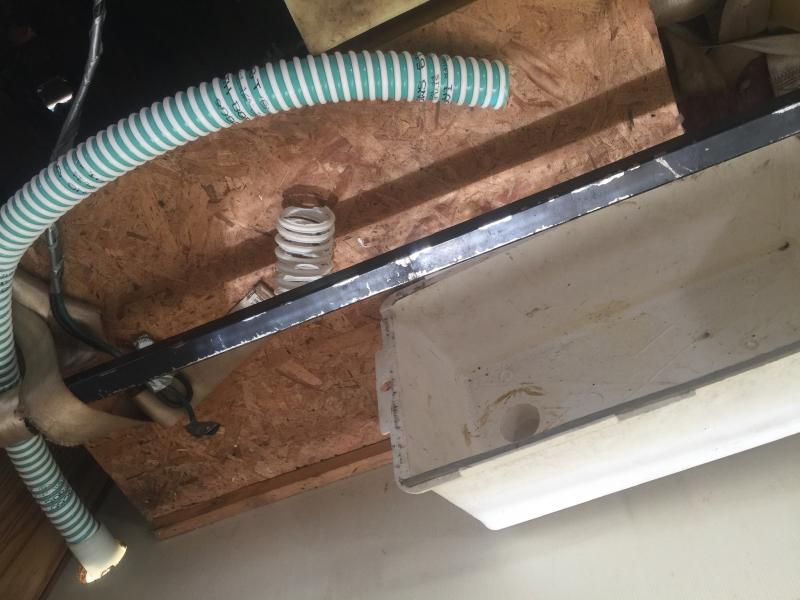
Below are the photos of what I found under the split couch. There is no opening to attached the city water hose. I’ve looked and tried to lift it , the only spot I see is the manufacturers sealed opening. All the connections are correct , going to the Shurflo water pump but the rest is not connected to fill fresh water tank ....any suggestions?
-
I had to replace the intake hose for my fresh water tank and inside I see no place to connect?? Any help would be appreciated 🙏 it a 1987 Escaper 😊 and I have idea what the white bucket connects too.
-
Inside photos, I glued a piece of wood across where the screws from outside wasn’t grabbing. I need to get a nut set for my drill so, I can attach and close the over cab once and for all !
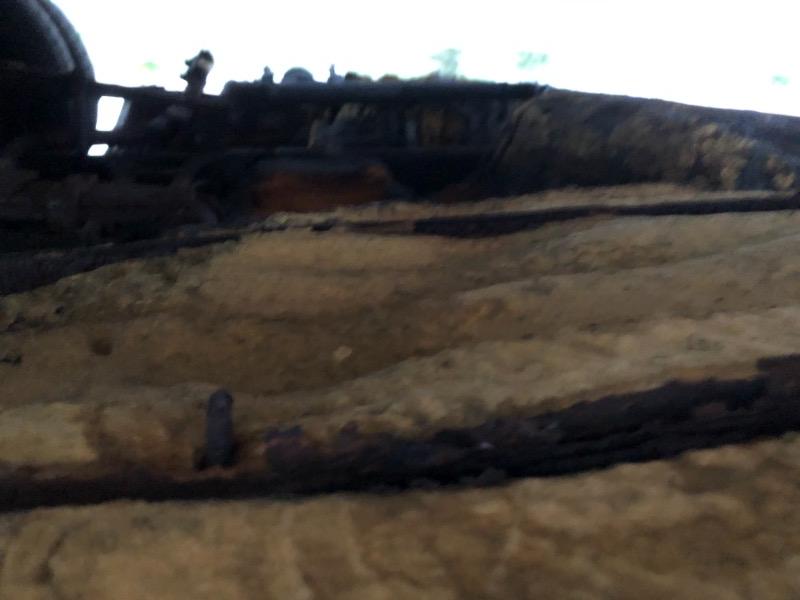
Inside I can visibly see rot on the aluminum floor of over cab. Photo 2 what should I fill them with before I lay the insulation?
-
Thank you Linda I needed confirmation. Derek butyl tape and Dicor on screws.
-
When I cleaned up the cab over there was layers of 1/8 wood over the insulation . That must have been where the screws were grabbing. I have wood that fits under the aluminum frame , should I add that or just replace the insulation and 3/4 marine plywood and see if the screws will catch that wood?
open to suggestions/experience and thank you 🙏 Hunkaman, Derek, and Odessey
-
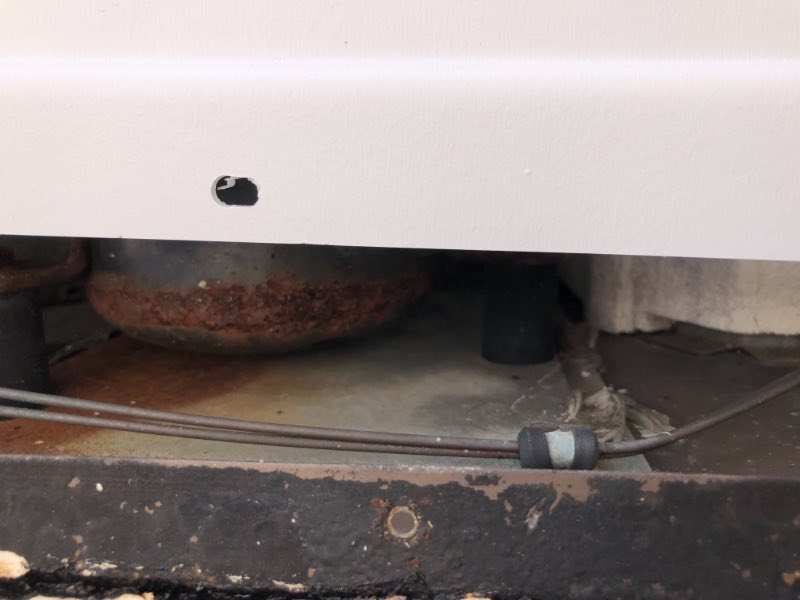
This is the section from front of cab. I removed this piece and bought new Stainless steel screws. Also I replaced butyl tape too.
Then the issue is, that it won’t join ?
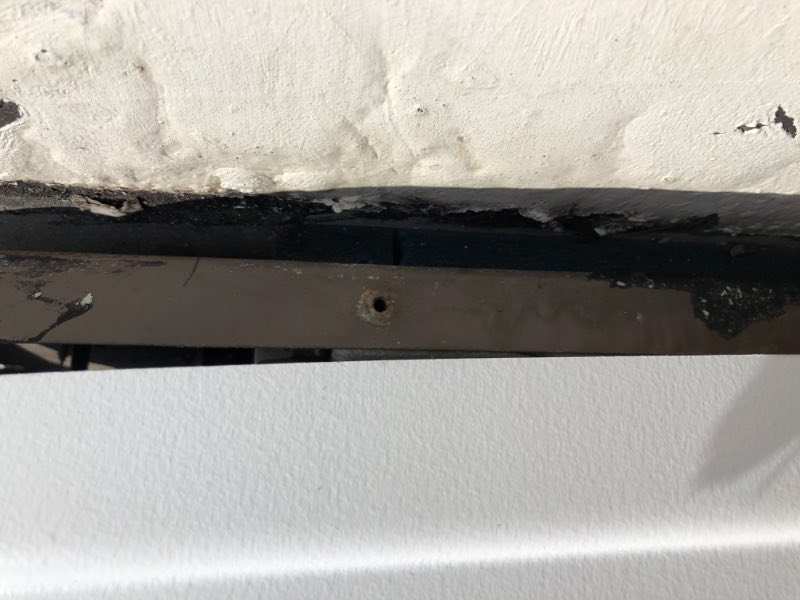
The 3rd photo is from inside, showing the gap.
When the screws go in all they are catching is the floor of the cab over. I don’t think that’s how it goes. Should I place wood on the inside along that seam?
Thanks

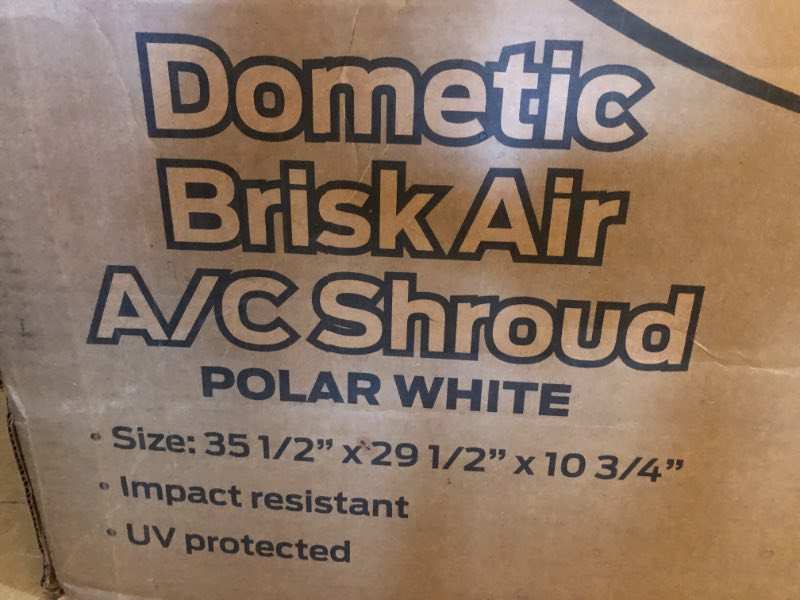


A/C Shroud
in General Discussion
Posted
Bought this to replace model that didn’t fit
I just order This to replace the one that was too short…