Search the Community
Showing results for tags 'carport'.
Found 1 result
-
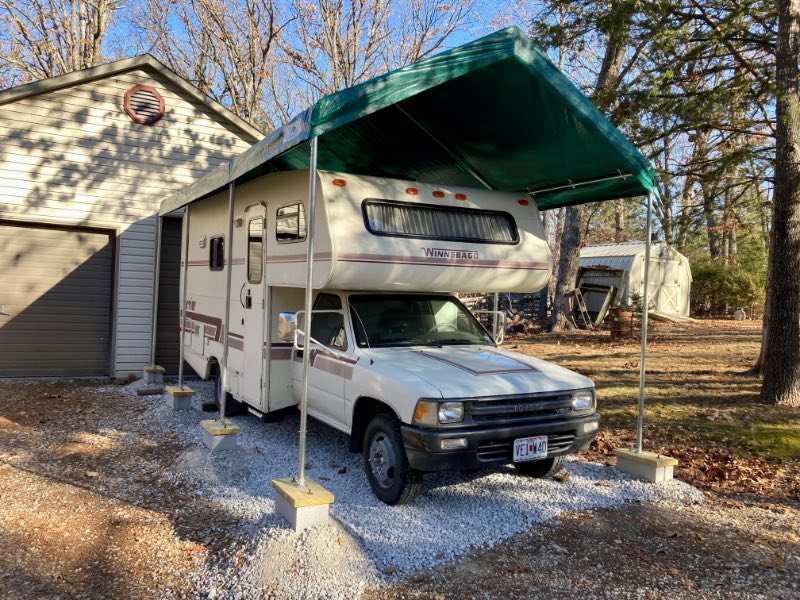
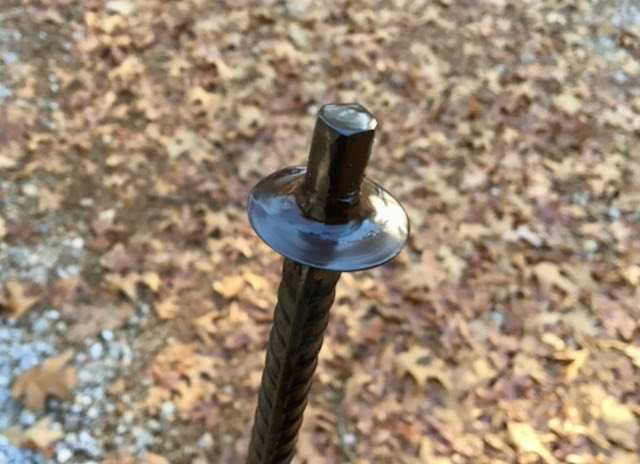
 If you're like me and never had a good, covered place to park your rig, well... it can just eat at you over time and make RV ownership that much more of a mixed bag. There are a variety of solutions out there (most of them, not cheap!), but here's what I did for my 20-footer: This is the 10x20 Advance Outdoor Carport Kit that goes for about $270+tax currently on Amazon. The kit is decent quality and adjustable in height, although I wouldn't go with the tallest setting, because the pole extensions just get too wobbly at that point. To make it all more secure and semi-permanent, I used 5/16-in lag screws to bolt the kit down onto sections of pressure-treated 2x10, each of which were staked twice through open-core concrete blocks with 30-in lengths of rebar. I started the whole thing by laying out string lines and using a variety of levels to get all the blocks straight, plumb, and on the same plane—gravel base mixture + a steel tamper is required to get a firm foundation for each block. The 30-in stakes were cut out of 10-ft pieces of 1/2-in rebar with an angle grinder and then given a "cap" by welding a thick washer near the top of each (see below), which helps pull the whole thing down tightly to the ground; perhaps similar stakes could be purchased ready-made, but I couldn't find anything locally, certainly not for less than $2 a stake! Once the blocks were set and staked, it was really just an hour or two to assemble the frame and get it installed, with the help of my wife. At this point, it's pretty sturdy and feels secure, although I do have a bunch of self-tappers that I'm going to use to pin each joint on the frame eventually, just to add a little rigidity. Hardest part, as you might imagine, was driving the 16 LONG stakes into rocky ground with an 8lb sledge. Overall, I probably spent about $430 for the entire project, and I'm happy with the cost/benefit. Feel like a load has been lifted