


AtlantaCamper
-
Posts
269 -
Joined
-
Last visited
Content Type
Events
Profiles
Forums
Gallery
Posts posted by AtlantaCamper
-
-
11 minutes ago, mpanzar said:
feedback on the torsion bar upgrade?
I am very happy with the torsion bar upgrade. Before the new torsion bars I couldn't keep a consistent height on one side. Now it's all rock steady. I honestly can't tell any difference in ride quality or stiffness or anything. They work, they fit, they are good quality. And pretty straight forward to install. If you have torsion bar issues the sway-a-way's are good replacement options.
13 minutes ago, mpanzar said:Where did you find the rear sway bushings?
I ended up not changing the rear sway bar bushings. The ones I bought didn't match up exactly and so I just didn't install them. I determined that there was very little play in the rear sway bar so I left well enough alone for now. I'll have to deal with replacing them someday, but for now the old ones are performing at an acceptable level. Seems like replacing them will take a bit of effort to source some that will work/fit and there doesn't seem to be a great deal of consistency in the pictures I see of other folk's setups so one person's solution may not fit another person's situation.
One other thing I should note is that I bought regular old rubber (Moog brand) leaf spring bushings. Two have already given out. Two others squeak. They didn't fit right from the start and maybe I messed them up on the install but I've recently purchased the Energy polyurethane bushings and I'll be replacing all of them soon. I should have gone right for the Energy's from the get go.
-
I looked into the idea of using a small portable tankless water heater in the camper as well, but I decided it would be impractical and cumbersome in a small RV. If I have to do a DIY or modification of a different product in order to use it in the camper then that should throw up a red flag.
What I ended up doing is getting a different temperature switch for my existing gas hot water heater so that it doesn't heat up so hot. When I got the camper the hot water would be scalding hot and would take a long time to heat and use a lot of propane to do it. Now I have it set to be 'shower hot' directly from the hot water tank and this is working out as a reasonable compromise for me.
There are options out there to make a solar water heater. It is a DIY thing as well but maybe something to consider.
-
12 hours ago, Huggi said:
Which Toyota car from that era can I buy a used transmission from?
EDIT: Opps, I posted the info for the wrong transmission type (the A43D instead of the A340e), disregard the application data table I posted. I guess this table tells you which vehicle does NOT have a transmission for you 🙂

-
12 hours ago, Nana Banana said:
portable tankless hot water heaters
In a home they can be great, in a camper I don't think they are a good fit. The primary reason is that they require very consistent and very high water flow in order to function. The pulsating pumps in our RVs and the limited volume of the fresh water tank makes it impractical to use one without being at a campground with a water hook-up.
-
44 minutes ago, linda s said:
some people whose Sunraders had window cutouts larger than they should have been
that is definitely the case with mine. I've got a few small (<1/8") gaps between seal and fiberglass plus about 1/4" of walking/warping of the fiberglass surface at the cutout (not flat/straight). Plus the corner bend on the plexi window is at least 3/8" off from the face of the fiberglass. In addition there is an area of fiberglass that seems to have been done poorly right in the original casing process. It is what it is, but all of this results in leaks. I've used this sealing approach ever since I got the rig and it always leaks within a year or two. But this is the first time I've really done the whole sealing process carefully from start to finish. I think this will last me quite a while.
Most of my fiberglass looks great but there are three small sections (front window, and two on rear driver's corner) where the actual fiberglass was made poorly. Ripples and bumps and the gelcoat is thinner. It doesn't hold the wax like the other areas. It's not a repair, I can see from the inside of the fiberglass that it looks different. I'm thinking that I have a "student model" because of these fiberglass issues plus you may recall that I've noted that the welding in the rear looks like it is "C" grade work from a high school shop class. I'm not complaining , just observing. I'll take my "student model" over no Sunrader any day.
-
2 hours ago, linda s said:
there shouldn't be any sealant on the rubber window gasket. If it leaks replace that gasket
Your point is well taken. In my case the plexi window and fiberglass cutout have, um, issues and there is some warping that I doubt will ever be corrected without some serious fiberglass re-working and/or new windows. So I do the sealant route. Likely others could find themselves in a similar situation and this approach could apply to them. Folks should take Linda's advise and get a new seal before going the sealant route if they can.
-
I'm going to post a follow up here about silicone removal and choice of sealant and application techniques. It may be useful to someone in the future doing a search in our forums.
After looking at the image Iflyfish posted and commenting on alternative sealants instead of silicone, I ended up going out and taking a close look at my own sealing on the front wrap around plexi windows in my Sunrader. OMG, a LEAK! I have been doing a hack job of sealing and re-sealing the front plexi window gaskets for several years (initially with silicone...) and it has finally caught up with me. There were two issues, the marker lights above the window were giving out and need replacement and there were a few small leaks in the front windows. The leak was small and caused no damage, but I decided to try and take care of it properly this time.
Here is a summary of the approach/method:
- remove all sealant around marker lights and front plexi window gaskets
- remove old marker lights
- use Zep wax stripper/tool to remove all polish/sealant/silicone
- remove all remaining sealant from rubber window gasket
- Use Bar Keepers Friend to clean gel coat
- attach new marker lights using butyl tape only
- seal window gasket wtih ProFlex RV clear sealant
- re-apply zep wax after sealant has dried
Supplies/materials/tools (i'm excluding all marker light install stuff like soldering here, just focusing on sealing):
- Zep floor wax stripper (contains a mixture of strong organic solvents)
- Tool for removing old sealant (painters tool)
- ProFlex RV non-silicone solvent based polymer sealant
- Butyl tape
- towels (paper/cloth), nitrile disposable gloves
- liquid soap solution (for smoothing sealant bead)
- caulking gun
- Small pieces of 120 grit sandpaper
- Several new course green scouring pads
- BKF (bar keeper's friend)
I'll give a few hints and observations about the process for those looking to seal up their own front plexi wrap around windows. First, the tool I found to be most efficient to remove old sealant and not leave scratches in the fiberglass gel coat was a regular painter's tool like this:
BUT, I modified it by sharpening it on a belt sander so all edges were very sharp. This would gouge and damage the gelcoat so I then carefully sanded the sharp edge down to round it off just a bit so that it was not razor like sharp (razor blades are a no-no on gelcoat -- too sharp, cause damage) but it could still easily remove any sealant that was present. I was able to use a lot of pressure this way but not cause any damage to the gelcoat. It make it easy to get even the most stubborn silicone or adhesives off but didn't damage the fiberglass surface.
One thing I decided to do was to take all of the previous layers of gunk off and get down to the clean bare gelcoat/rubber substrate surfaces. Applying sealant on top of old sealant or on to of the zep wax has not worked well in the past. What I found was that in the process of removing the zep wax with the stripper, the stripper also acted as a very good solvent for removing the various sealants/silicone that was there before. A win-win. Scraping the swollen sealants with the modified painter's tool after applying the zep stripper was a good process. BEWARE that the zep stripper solvents can easily etch the plexi window so you need to be very careful to quickly clean up any stripper that gets on the plastic windows.
Once the wax was gone, cleaning the last remaining stuff on the surface was easily accomplished with good ol Bar Keeper's Friend and some nice new green scouring pads. At this point the only old sealant left was on the rubber window gaskets. I could tell from previous attempts to seal this rubber that failures had happened at points where there was 'sealant over sealant'. I found that using small squares of sandpaper carefully used along the rubber would get me down to the bare rubber and remove anything else.
I attached the marker lights with just the butyl tape and screws. I left water drains open in case water gets inside the light (it will) but there isn't any path past the butyl tape for water to get into the interior. i don't think any other sealant will be needed on the marker lights and it makes a nice clean install with just the layer of buyl tape. I'll see how that works in a year or so i guess.
Application of the ProFlex RV was easy once I figured out the special soapy finger tooling method. With a rubber/nitrile gloved hand you dip a finger in a soapy water solution and this makes it SO much easier to smooth/tool the ProFlex bead into a nice clean application. Doing only about a foot or two length at a time, I applied a very small/thin bead and smoothed it over with this method and the result is much better than anything I've done previously with sealant. A thin bead on window to rubber and rubber to fiberglass took about a third of a tube of proflex. It dried pretty clear and the bond is very strong. I think it's going to last a while.
I put ~5 coats of the Zep wax back on and it blends seamlessly with the old stuff. It's pretty easy to strip off a section, do a repair or whatever, and then put zep back on and blend it with the existing wax layer. It took a lot of steps, but since my previous efforts have all had failure points I think it was worth it to take the time and get everything down to the bare substrate this time and then use a 'proper' (non-silicone) sealant.
-
2 hours ago, Tahoe Toyota said:
they all leak
This I believe in. It's just a matter of how much. Pull up the corner of the carpet and see if you see signs of water leaking in. Peek behind the lower doors near the floor and look for the same. Look at the floor underneath. Look at the bottom sill of the windows. Somewhere you will find indications that water got in. However, this doesn't mean that it's a big problem. A little water dries up and if the owner sealed it up again then all is good. That's the state of my rig - I can find a few indications that leaks happened, but there is basically zero serious structural damage. Minor water 'damage' but still totally solid.
-
There is an access hole for the rear brake drum shoes. You have to crawl under the truck and get to it from the inside of the wheel area. You remove rubber plugs, one at the bottom of the plate to get to the adjuster and the other one is near 9 or 3 o'clock to see the pad/drum clearance. With a flashlight you should be able to see how thick your rear pads are (at least for one of the two pads) and how big the gap is between the pad and drum. You want it small, I go for 1mm or less. Use the star adjuster at the bottom to do this adjustment.
To address your other question about how to adjust the pads. There is an "auto-adjuster" in the brake setup. To me it appears to be connected to the emergency brake cable. When you pull the e-brake it can tighten the rear pads. Others will chime in and tell me if I'm off my rocker or not. It's better to get under there and do the adjustment yourself with the star if you are able to get it to turn with a screwdriver.
-
I have recently realized the evils of silicone based sealants. I have vowed, "No more silicone" on my rig. Unfortunately there is still a good bit of it on there and I've been systematically removing it and replacing with Geocel Pro Flex RV. It's a work in progress.
Dried silicone doesn't dissolve in anything well and so I find that abrasives are one way to remove the last bit of silicone after using a razor/knife. Most often I start with a simple dry cloth to try and rub it off. If I can get the bead to come loose intact it sometimes comes off as a whole piece/bead. If it still has a decent bond then I try to soften with solvent and then continue scraping with a sharp plastic blade (doesn't cause as much damage as a razor blade). Mineral spirits or turpentine have worked best for me. No solvent will dissolve the silicone but rather they will often swell and soften and this can weaken the bond to the substrate and make it easier to scrape off. It takes a little time to get the solvent into the silicone though. I use a rag wet with solvent with a nitrile gloved hand to do this.
Once the silicone is off I've been using the Geocel Pro Flex RV instead and it's holding up really well. This is not a silicone based product, but it's still clear. It is not a true polyurethane based sealant but rather it is some other type of polymer that cures as it dries. It's pretty sturdy stuff with excellent surface adhesion and doesn't come off like silicone. But now I've got the same problem as the silicone: how do I remove the Geocel Pro Flex RV when it comes time to do some maintenance? I am not sure how many years I'll get out of the Geocel but eventually it's going to need to be replaced. It doesn't come off easily at all and it's rubbery/flexible - all of this is good in terms of in-use performance, it just makes it hard to get it off when that becomes necessary. Uncured material can be cleaned up with "solvents such as MEK (lacquer thinner), Xylol, Toluol, or chlorinated solvents. Cured materials may be removed by cutting with sharp tools." One has to be careful with those solvents because they will mess up the plexi windows in front or other plastic parts like tail lights. Like silicone swell with light petroleum distillates, the Pro Flex RV can swell with a suitable solvent - but here we need an organic solvent and not a hydrocarbon like I use for silicone. Fiberglass and rubber are OK with MEK or acetone or even some chlorinated solvents, but plastics are easily damaged or hazed. Chlorinated solvents are not generally available at the hardware store so one might try MEK or acetone which you can find at the local hardware/big box store. MEK has a lower boiling point so it doesn't evaporate as quick. Acetone will be gone in an instant in hot weather. Ideally I avoid using the solvents and am able to get it off with scraping, I only go to the solvent method as a last resort.
FYI, I compiled a list of non-silicone sealant materials that are relevant to RV use:
Dicor Lap Sealant 501LSW is self-leveling and designed for fiberglass roofs.
Dicor Butyl Seal Tape, BT-1834-1, typically is used on roof vent flanges, furnace exhaust ports, etc.
Dicor Lap Sealant 551LSW is non-self-leveling with low sag properties. It is designed for vertical surfaces
Sikaflex-252 is an elastic bonding adhesive. It bonds and seals, has excellent gap-filling properties
Sikaflex-221 is a high-performance, no-sag polyurethane sealant that cures on exposure to atmospheric moisture
Sikaflex 219-LM is a low-modulus elastomeric polyurethane sealant, similar to Sikaflex-221 except that it has excellent flexibility
Geocel Pro Flex RV Flexible Sealant is a nonsilicone product specifically designed for RV applications such as windows and body trim.
3M 06580 Marine Adhesive/Sealant Fast Cure 4000 UV
3M Marine Adhesive Sealant Fast Cure 4200
-
8 hours ago, 1988dolphin said:
4:88 gears makes a big difference
This is an excellent point in this context. Yes, hill climbing would certainly improve with a 4.88, but there's a trade-off. I've got the A43D auto trans with no lockup in OD and with a 4.88 the 3rd gear top speed is limited to around 55 mph. This means I'd have to rely exclusively on OD for highway driving. My OD slips so much now that I just never use it and I'm not confident that I'd be happy with full time OD as 4th gear on the highway with a 4.88. I'm continuing to watch for a used 4.88 locally so I can try the swap and easily go back to the 4.11 if I don't like it, but so far I haven't found a decent used 4.88 3rd member for a fair price. I'm in no hurry, but in the mean time I'll have to deal with less climbing ability.
-
BTW, I looked up that hill that caused me to turn around - the one that caused me to look for this elevation/navigation tool: It has a max of 18% grade! (specifically 1/8 of a mile of 15% to 18% grade). It was short but mean looking. No wonder I took one look and said, 'no way." At least I'll see that kind of thing coming from a mile away now...
-
I'm posting an update about my effort to find a tool to help me plan for steep grades on a route.
Things I wanted:
- ability to import/export points/routes from My Maps in Google maps
- Offline GPS based navigation with downloaded maps
- Ability to view the elevation/grade changes on a selected route
- Ability to warn of an upcoming very steep grade coming up while navigating
There were two basic options that I investigated: 1) a dedicated Garmin GPS made specifically for RV use, and 2) a smartphone app called Locus Map Pro
Garmin makes a GPS unit that will show you the elevation profile of your route while you are driving. This seemed like a good solution as this unit, according to the specs, met all of the requirements above. I waited patiently for one to come up on ebay as the ~$300+ price tag was a bit high. For $130 I got one to experiment with. Short answer is that it's going back on Ebay next week. The unit is too simple, slow and is generally tedious to deal with. Routing is difficult to change and the "RV" profile is not useful for out small RV's. It kept trying to send me places as if I was a huge bus of an RV. The ability to import/export data was incredibly poor. Overall just a bad experience. But I'll get my money back out of it by selling it.
On the Smartphone App side, I found that "Locus Maps Pro" is a good option for what I want to do. For a total of about $15 for the app and some (very) detailed maps of the states around me I now have what I wanted! The downside of this app is that it's relatively complicated and has a bit of a learning curve. It took longer than I was hoping for to learn how to do all of the things I wanted. But once I figured it out I was pretty impressed with Locus Map because it's able to do much more than I needed and it does do it very well. One thing I quickly learned is that viewing the elevation isn't really the key thing, it's viewing the slope or grade on the road that is most important. This app lets you set a route and color it by change in grade (blue/green is flat, red/orange is steep), like this:
You can see the grade ahead while navigating based on the color of the route. But the most helpful feature in this app is the ability to easily view the elevation and grade of a selected route in a graph so that before you start driving you can tell what you are in for:
In this example I see one spike in the gradient graph saying that there is a section of road that has a 13% grade. The app let's you jump right to that spot on the route and see what's up:
That one steep bit is shown above with the red "+" marker. It's right on a tight corner. 13% isn't terrible (and this is just an example I found to illustrate this app), but if you hit that one going too slow you might have trouble. The point being that I'd like to be aware of these grades and either re-route to avoid them or be prepared when I hit them. In this app I can hit a button to make a marker and then while navigating the app will notify me 1 mile ahead of the steep bit so that I can get ready to power up the grade. Again, 13% isn't bad (not great either), but if it's 15+% I sure want to know!
During my last trip Google would sometimes route me using a short section of "local" road to get from one highway to another in order to save a few minutes. This is how I got caught and had to turn around last trip. In this app I can easily see that issue and avoid it. This is a route Google suggested moved over and shown in Locus Maps Pro:
The shaded topo view plus the colored route suggests this shortcut is perhaps to be avoided. It's not high, but it's steep for about half a mile with a max grade of 14%:
Armed with this kind of information I'll soon be able to know if this represents a "no-go" zone or if this is simply a "hit it at 4000 rpm in first and you are fine" situation. In the latter case i just want to be ready for it.
OK, so that's the report. I'll update this post if I find that in actual use over time I find better options or issues with this app that make me stop using it.
-
20 hours ago, ModocMade said:
looking to ditch the Dometic fridge for basic apartment fridge
Just curious, is your existing Dometic fridge broken or still working correctly? I was wondering why you want to do the fridge swap.
-
I took the 32 year old carpet out a little while back and I'm so glad I did. There are a billion and six staples that are really tedious, but you can get past that. I have two boys, 5 and 9 and they are rough on the camper. I'm waiting until they are older before I do any real effort at upgrading the interior or the floor. So for a temporary solution I got an inexpensive single sheet of vinyl from the local box store. It took no time to install by using cheap quarter round to hold it down at the edges and it's really made it easier to keep the camper clean. For a long term floor I'd put down some kind of sound deadening underlayment and a premium piece of vinyl flooring. My floor was a little wavy and the click together flooring planks don't like that so I'm sticking with a piece of vinyl that is much more forgiving on a floor with a bit of a wave to it. I would think twice about painting the floor because it needs to breathe. If you get any water in the wood the paint makes it even harder to dry out and you will get rot faster. Single sheet of vinyl is simple, cheap, easy to install, waterproof, masks floor imperfections and the premium stuff doesn't look bad at all.
-
3 minutes ago, Boots said:
I have all the tools and fittings for the pex system.
If you can find a good option for joining your old (presumably butyl) pipes to new pex pipes then buy a bunch of those and just repair as you go. Or if you have the gumption you can just replace all of the butyl with pex. I spent an hour at the local plumbing supply store and bought a nice set of all of the bits and pieces I could possibly need to do any repairs and I just keep all of that in the camper now. I had a leak start one trip and it took very little time to fix it on the road by using the pex to butyl adapters and just dealing with the problem area.
-
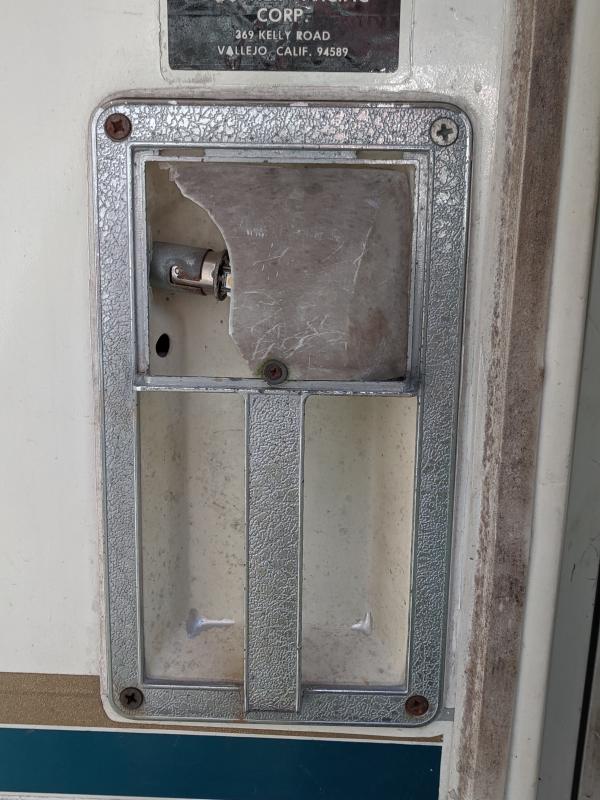
29 minutes ago, linda s said:
so strange that you have the old style handle
Yea, I thought the same thing after reading about the type most others have. I don't see any indication that it was replaced, but who knows.
I like your idea of using a milk jug or similar. I'll cut out a piece of plastic from something like that with a kind-of-similar pre-molded shape and screw it down.
-
13 minutes ago, markwilliam1 said:
the Old Reflect-O-Light door handle you cannot find a replacement lens unfortunately
For the porch assist handle grab light fixtures with the screw down lens covers that have no new replacement options, does anyone know of an affordable and available new fixture that I could use as a full replacement?
$80 plus shipping is a bit steep for this kind of thing: https://www.ebay.com/itm/113770886243
I'll do as markwilliam1 suggested and fabricate one if I can't find a new replacement option.
This is mine in it's current condition:
-
4 hours ago, Derek up North said:
I THINK it's normal for all the dash lights to illuminate at start-up as a 'bulb check'.
That has always been my impression too. If the bulb doesn't light then you know it's burned out. Only the operational/in-use dash lights light with the initial turn of the key up I believe.
-
10 hours ago, Maineah said:
A tip for a 4 cylinder toy home don't stop on a very steep hill. The torque converter can "stall" and when you try to start off again it will not move.
I've been wondering about this issue and I was hoping that someone could help explain a bit more about what happens in the (automatic) transmission when you try to get moving on a hill but just can't get going no matter what you try with the pedal.
What if you have no choice but to stop on a steep hill? I had a car abruptly stop on a steep hill right in front of me this last trip. I was lucky that I was able to complete my _only_ uphill pass of the trip because nobody was in the opposing lane, but what if I stopped on this steep hill? What is the best approach to getting moving on a steep grade? Are there any key tricks, tips or do's and don'ts? Press the pedal and pray? If you do manage to get physically moving but the rig is clearly laboring, is it ok to just 'tough it out' and keep the pedal down as long as it doesn't stall or is this potentially doing more harm than good?
One time when stopped on a steep two lane hill I decided to use up the whole road to sort of get the rig angled across the road so that I got going the first 5 to10 feet on a relatively 'flat' grade and then zig zagged to get up past 10 mph and then I was able to get rpms up and was able to go up the hill. Is this a reasonable strategy if you have the room or not? Once I get rpms up past 3500 in first the rig will go up some really steep grade confidently, but getting there from a stop or from <10 mph due to a hairpin turn can feel nearly impossible.
Does the transmission fluid temp have any significant impact on torque converter stall behavior?
-
1 hour ago, Maineah said:
dedicated RV GPS
Oh, that looks like a good option, I'm going to check it out!
-
47 minutes ago, jjrbus said:
doors and windows open
Yes all doors/windows open, with fan on max and letting pressures stabilize at 2000 rpm
-
I'm reviving this topic as I have some info to add having just returned from a trip from Atlanta to the Great Smoky Mountains National Park and back again over about a weeks time. Maybe this can help others who want to travel through these relatively low and accessible 'mountains' (nothin' but 'hills' to y'all over in the West) in a 4-banger yoterhome. It can be done relatively easily, but a little planning and expectation management can make the trip a little more pleasant.
I was traveling specifically in the lower section of the Smokey Mountains National Park, but most of the Appalachian Mountains are going to behave in a similar manner. I did some route planning using Google maps and the bicycle route feature that lets you see elevations, but I really wish I could have seen the upcoming elevation changes in regular car driving mode. I decided to not go one one scenic 'skyway' because it was a 2-laner with very steep climbs along a ridge. I missed the views by going around but i think it was the better choice given that the 22re and auto trans are not exactly sporty on the climbs.
I got very in tune with shifting the auto trans manually (3 gears, no overdrive) and this made climbing a lot easier for me. I used the previous suggestion of 4k RPM to climb and I could get up some pretty good hills in second this way. When I had to go down to first I could do about 28 mph at 4000 rpm and could get up (almost) all hills I came across. It was tricky sometimes because some corners are so sharp and so steep that it was hard to keep up rpm and speed to not stall out. I had to be pretty aggressive to keep rpm/torque in tight cornering climbs (which there were plenty of).
I monitored trans temps on a gauge and had no issue. Never got over 190 and brakes never got too hot. I went down the hills in the same gear I went up in. This was hard sometimes as you want to go faster down, but you need to be kind to your brakes. I never had hot pads or smelled any pad burning or felt any brake fade this way. Yes, you go a little slower going down than the people behind you want to deal with, but there a plenty of turn outs and I used them all the time to let folks by. Note: don't pull out to a stop on a steep hill, it's hard (sometimes impossible) to get going again from a dead stop if it's to steep. Wait until you have a flat or not steep section to pull off and let the other folks by. Traffic was very light in the areas we visited (by choice) and this helped a lot too. Driving along the rivers with no one else around, for example, was terribly pleasant.
At one point I found myself running the Tail of the Dragon at Deals Gap (318 curves in 11 miles - plus hills). This is a famous motorcycle and sports car run near the national park. We had to go this way to get to our campground but boy I wish there had been a different way around... Still, it was kind of festive. They even have photographers along the route - check out the thumb's up in pic 1 (of you zoom in) and the lean around the corner in pic 2:
It was actually a pretty tough run of 11 miles, but I gave it a good go. Fortunately there was a storm threatening and all the motorcycle riders were on a full-stop - that was my cue to get through the Gap while the getting was good. The rain held off for me and I only had to pull over 4 times to let other cars/cycles past. My riders in the back were pretty car sick at the end of the run!
I did get stuck on a hill one time and had to turn around and go a different way. Fortunately this was not a problem and cost very little time, but it was a bit disconcerting and there was a tinge of wounded pride as I slunk away from the big steep mean hill. Google had decided to save me a few minutes and sent me on a more 'local' road and since I was offline I couldn't see elevations. I was coming around a very steep corner in first that required me to slow down to 10 mph and then suddenly in front of me was a wicked steep hill - looked like a 12% grade and I didn't have enough steam to get up it from 10 mph even in first. I bailed out in a driveway and turned around. Maybe I could have stressed it out and made it up, but it didn't look good. I know that the grade of a hill could be kind of like the size of a fish, but this was _really_ steep. First time I ever had this happen.
I hope to find a way to be able to map routes and monitor upcoming elevation changes (climbs or descents) as well as plan routes to avoid any unreasonable uphill grades, all offline since there was zero signal in that national park 80% of the time. If anyone knows of a dedicated GPS map device or an app for a phone that accomplishes this let me know.
-
I finally got around to doing the AC charge with the can of R12 I received. Although the system was low on charge (both low and high were below spec pressures), the addition of refrigerant did not have a huge impact on the system performance overall. Vent temps dropped 4 degrees F, but were still higher than the expected vent temp range of ~40F to 45F by a good bit.
Initial readings at 45 %RH and 85F:
- low: 15 psi
- high: 195 psi
- vent temp: 57F
Post charge readings at 45% RH and 90F:
- low: 25 psi constant
- high: 240 psi (variable with peaks up to 275 psi)
- vent temp: 53F
- hose to the evaporator was 60F (R-12 discharge temp) and out of coils was ~130F, which seems normal
Overall the data and system behavior suggests that the inability of the low side to get above 25 psi indicates a blockage, problem or obstruction in the expansion valve. The intermittent high readings on the high side with constant low on the low side support this I think. The system appears to be limited by the bottleneck in the expansion valve and this limits the overall vent temps in the system as it is. I may take a little charge out of it now since the expansion valve problem could hurt the compressor at full charge due to the pressure spikes as it cycles on/off. Hopefully this data/thread can help someone in the future diagnose their ac issues. (I even bypassed the heater core to make sure no extra heat was being added to the air flow path. No difference.)
I can live with the existing AC performance for the time being but if I want any improvement or there is any problem I'm going to have to go the full conversion route to R134a from R12. This is a pretty big task and I'm not ready to do that just yet. Still, with this experience I'm now confident that I could do that task when the time comes. It's too bad that changing the expansion valve requires removing the refrigerant and then taking the whole evaporator assembly out from under the dash. Then you have to change the accumulator out and swap every o-ring and then vacuum it down and leak test, etc. Probably makes sense to swap the compressor at that point... That's a lot for 10 degrees more of cooling.... I think I'll stick with what I have for now.
I just got back from a week in the Great Smoky Mountains National Park. Turns out I only needed my AC for the two hours going out of and then returning to Atlanta! The rest of the time it was so cool and pleasant in the hill country that I didn't use it. The national park campgrounds there are really nice and we like the fact that almost all of them had no electric or other hook ups. No issue for us and it kept everything quiet there. Temperatures were so mild that we didn't need anything more than a bit of fan cooling during the day. We camped right next to rivers or streams every night, sometimes with no neighbors for a hundred yards. Now, getting up and down the hills to get to these sites is a different story, one that I'll post as an update to this topic:


Air Lift newbie question....
in Engines - Transmissions - Drive Train - Suspension - Chassis - Steering - Exhaust - Tires - Etc.
Posted
The "Air Bags" are inflatable bladders that help to support the weight of the truck on the axle. Get under the truck and take a look and see what you have. These are put in by the RV manufacturer, not Toyota and your setup may be different from other's, but the basic setup is that you have a rubber accordion looking air bag inserted between the axle and truck frame. There will be plates on top and bottom of the air bag as mounting points. There will be plastic tubes, usually 1/4" diameter that connect each air bag to a separate 'fill connector' on the side wall or in some other location. this is where you fill it with the pump. They are separate and operate in parallel with the shocks.
It's not that hard to trace down a leak. You should not have to stop and fill every 4 hours. Get a soap solution in a spray bottle, pump up the bags to like 50 psi or so and start spraying around. First place to check is the schrader bicycle type fill valve. These go bad over time and are very easy to replace. The valve part screws out and you put a new one in. I had to do that recently to one of mine that started leaking. If that's not it start spraying and looking for bubbles. Then you know what to fix. Hopefully it's just a tubing connection somewhere.