


wonderabout
-
Posts
31 -
Joined
-
Last visited
Content Type
Events
Profiles
Forums
Gallery
Posts posted by wonderabout
-
-
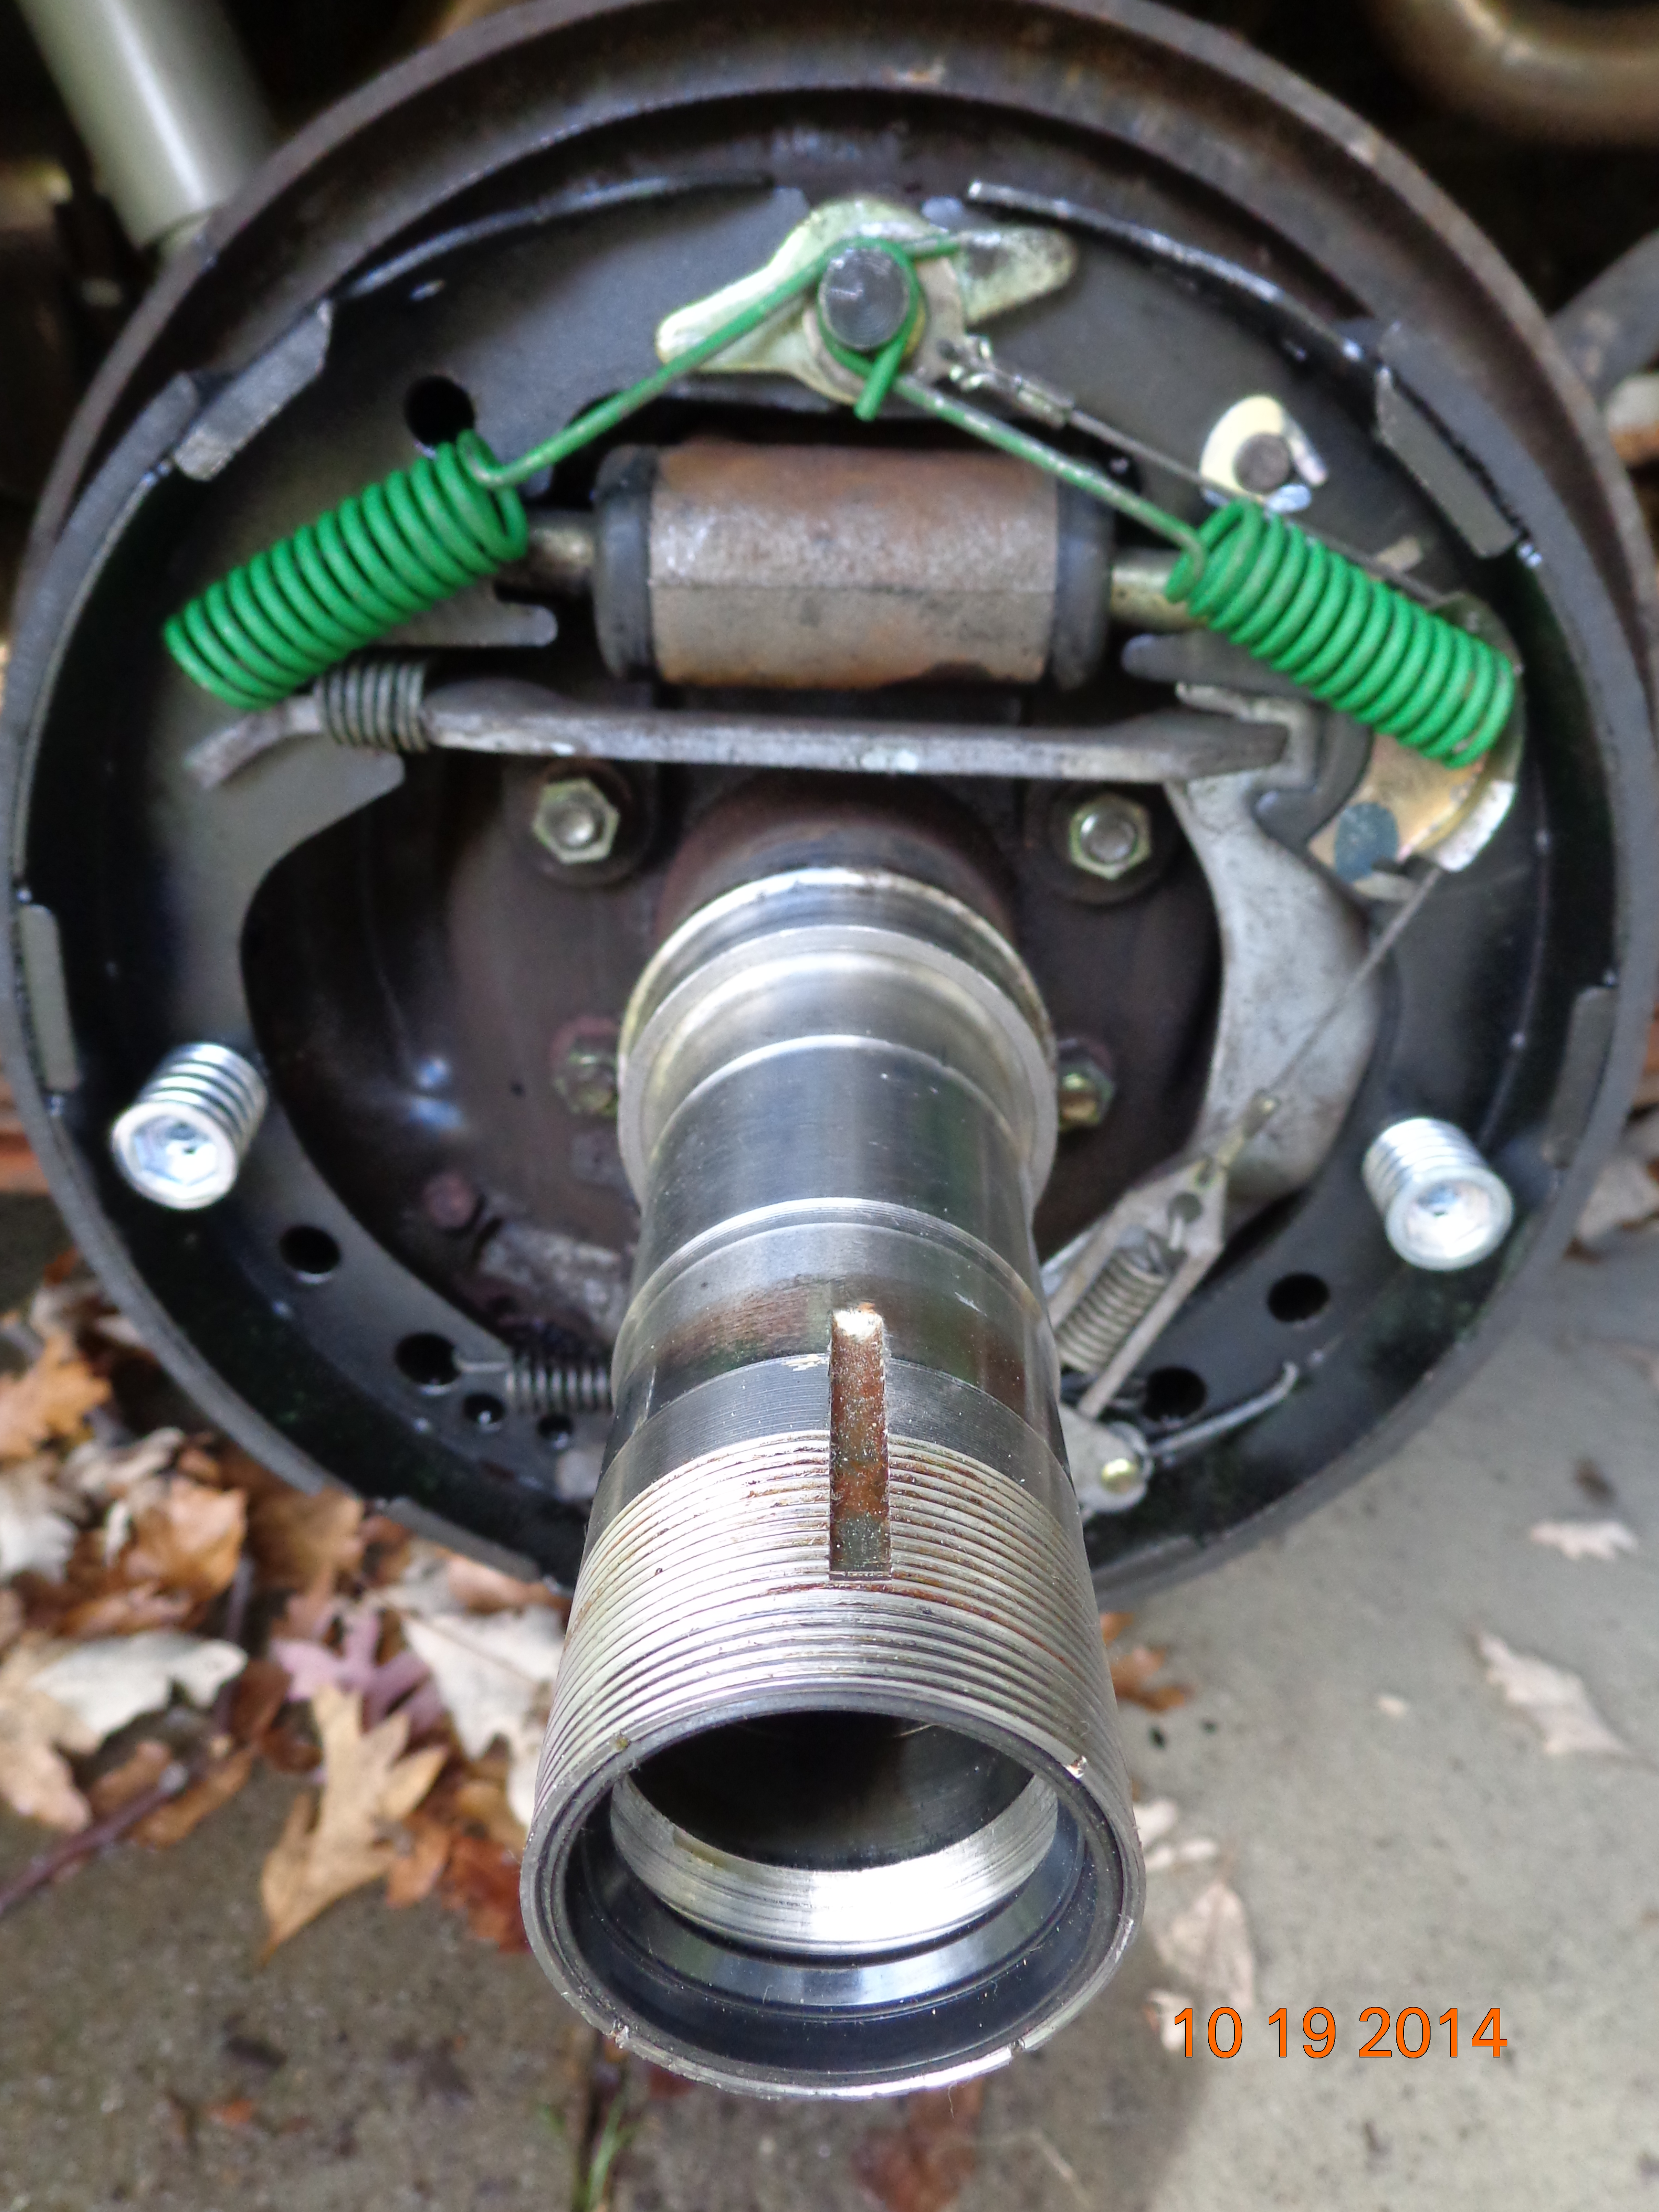
Yes all parts were replaced, cylinders, shoes, springs, bearings, race, wheel seal, axle seal. I thought I did a really good job for a first timer at full floating axle. The cylinders are not leaking. When I pulled the outer bearing out I new something wasnt right as it was coated in a thick oil instead of grease. Pulling the drum off the inner part where the bearings are, out flowed thick oily goo. Did the seals seat properly? I can only guess they were installed properly and did matched in size to the ones that came out. All I can guess is they didnt seal properly, but why?
All new parts have been ordered. How can I be sure the seals a sealing with out going through this again?
Very frustrated!
-
Looks like it been four years now that I replaced the rear brakes, bearings and seals and I've put a few thousand miles on since then. I've always been concerned that the front brakes always locked up on gravel and wet surfaces so I've been doing a lot of reading on this subject. Got to thinking maybe I didnt adjust the rear shoes properly so today I started to investigate. Thought it was going to be as simple as jacking it up, popping off the plug to the little sight window, sticking in a screw driver and adjust the little wheel, was I in for a surprize! Pulled the drum,
 Grease and oil everywhere!
Where did I go wrong!?!?
(Pictures wont attach)
Though I dont have the part numbers for the seals handy, I do believe I bought the right ones from Napa
-
Just a side note, it was common practice for early settlers to chatch a king black snake and put it in thier cabin to keep mice away
-
On 9/26/2017 at 4:33 PM, markwilliam1 said:
Welcome! I've only tried boondocking once in a very large recreational area in S Ohio. I was so dismayed of other campers @ least 300 yards away running their very loud generators 24/7 that I only stayed 2 days. Couldn't even hear the birds singing! It was a complete bust for me but it was free. Maybe on the coast people won't be using their loud generators so much. Hope you have better luck!
Hi Mark, I'm from Ohio also, are you refering to AEP land? I like the area, fishing hasnt been the best and I usually say during the week days, I know it can be busy weekend and holidays
-
Yes your 92 should have an aluminum frame work on the sides only. I beleive it is 1.5" square. Hope this photo helps. Look on the right side, you see two angles supporting the door frame
-
Sorry VROCRIDER, but I put that window to use on the side
-
does this help
-
Hey all, sorry for the delay in getting back to you all, things have been busy. This particular build is not your "normal" rv, I hope to post more about it when time allows. Again I like the versatility of the coleman, just wondering why one can be used indoors and one not. Thanks again.
-
Boy if that isn't the nicest little unit, the only thing that would make it even more perfect is if it was on a 4x4!
-
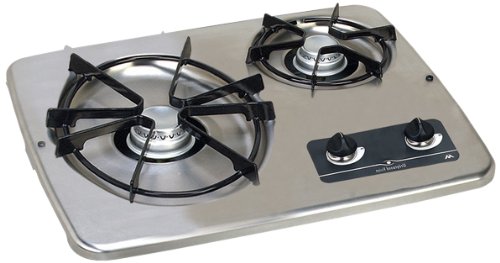
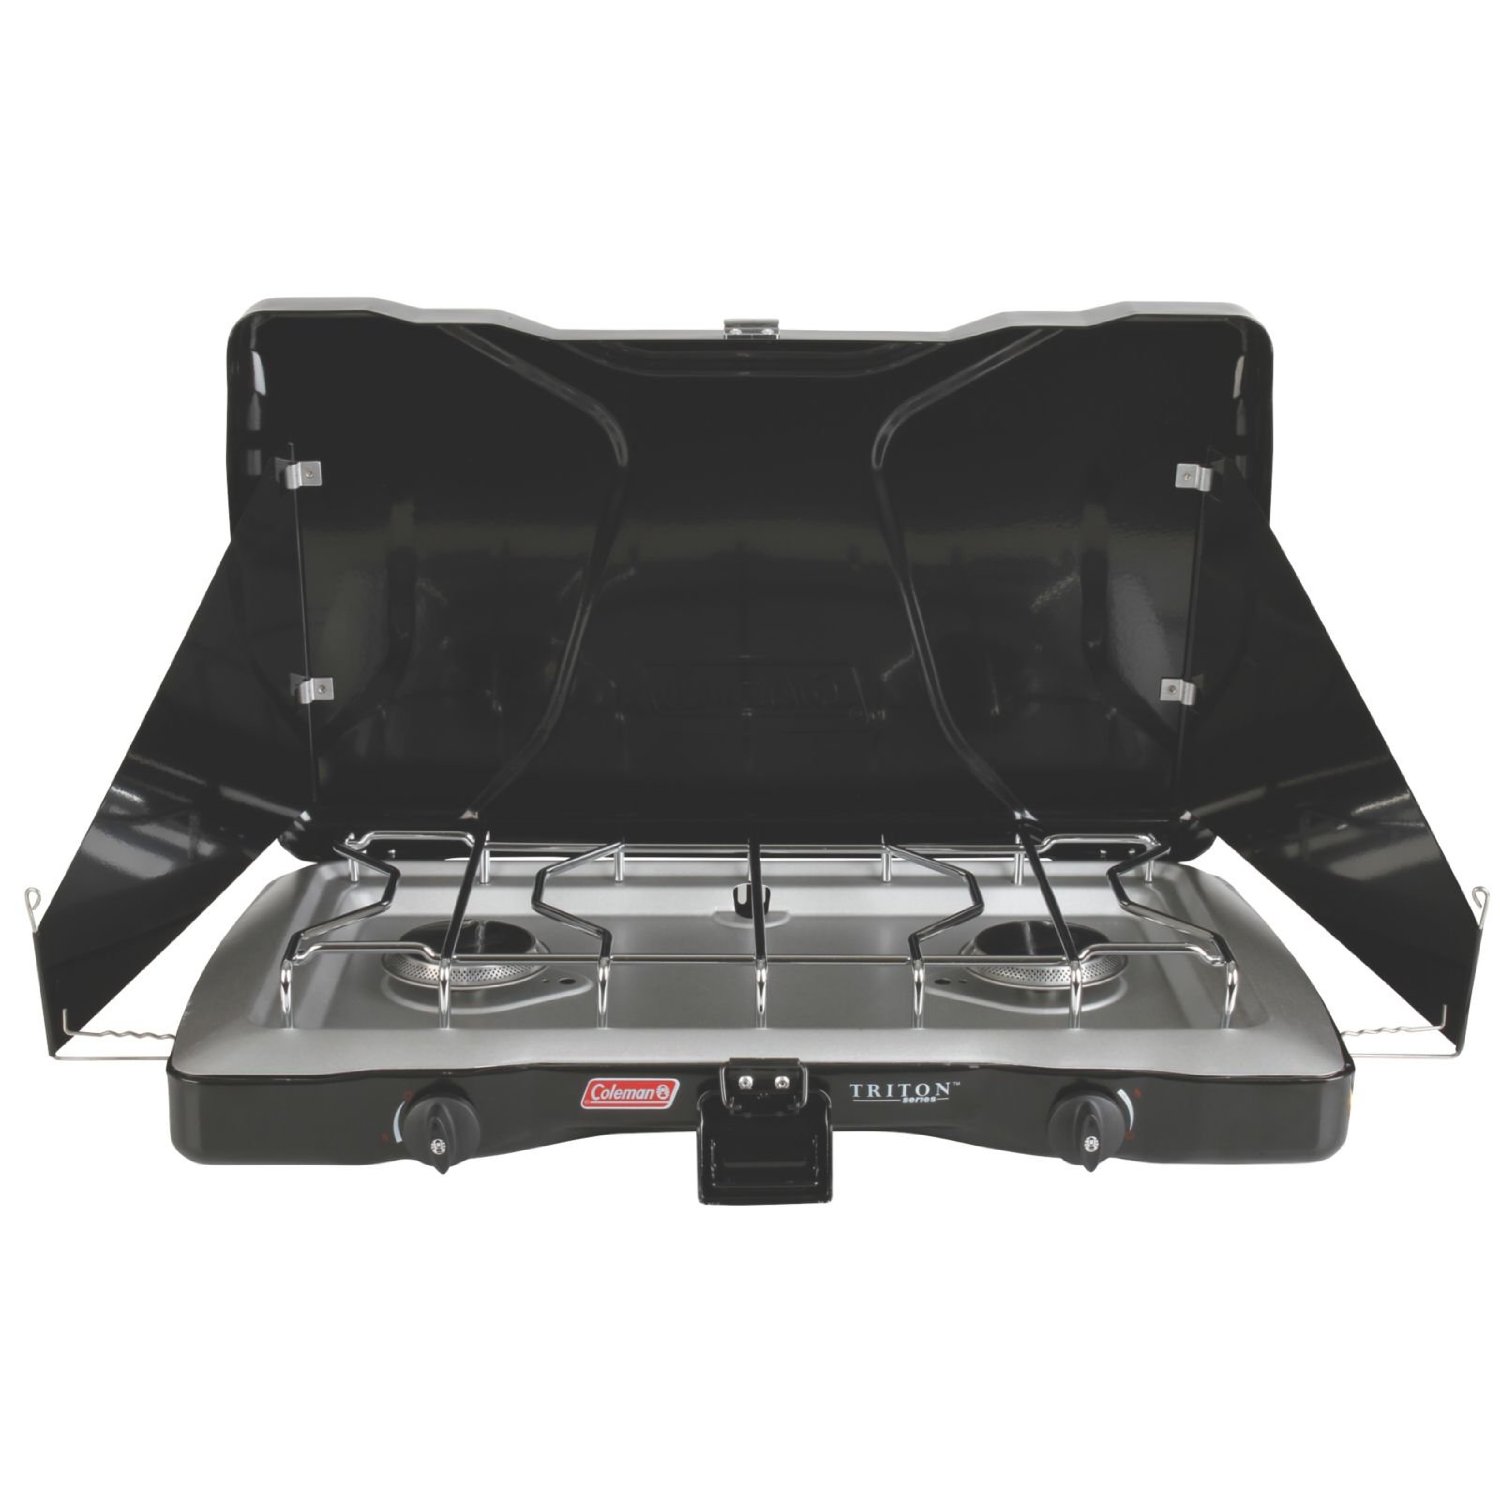
Getting ready to make a counter top for one of my builds and got to wondering whats the difference between these to stoves? The Atwood is rated at 7200 & 5200 btu's and the coleman at 2 @ 11,000 btu's. I like the versatility of the coleman because I have an extra flex line to cook out side, but the coleman is only rated for outdoor use. So whats the difference there both burning propane? Could someone educate me. Thank you
-
Just found out I have the dreaded cabover leak, again! Guess I didn't do a very good job the first go around. I have to wait for things to thaw before doing any repairs and got to wondering what others have done to find the point(s) of entry. I see that RV places can pressurize the interior and coat the outside with a soap solution to find leaks, but I'm a do it yourselfer. I did find where one guy did it himself using fans, but that looked rather involved. http://www.class-c-motorhome-info-made-simple.com/leak_test.html
So I was wondering if anyone has used or thought about using a water soluable UV dye and black light to find leaks. there are leak detection dye for sale like this https://www.amazon.com/Invisible-Blue-Reactive-Water-Dye/dp/B00KPF5A3M/ref=pd_lpo_60_tr_img_2?_encoding=UTF8&psc=1&refRID=VSJ61DAPWKR60SZNA0NW
thanks for any responses
-
I did research part pricing and know they charged full retail, all I can say is they really get you by the short hairs. There was no negotiating with them, either you want the work done or not. I too have never had good experience with dealerships. once at a local chevy dealer I caught them in an outright lie which resulted in them giving me a full refund for parts and labor, will I ever go back, never! Generally I try to do the work myself when I can.
-
These same mirrors where used on dodge vans in the 90's check local scrap yards, had to replace one of mine
-
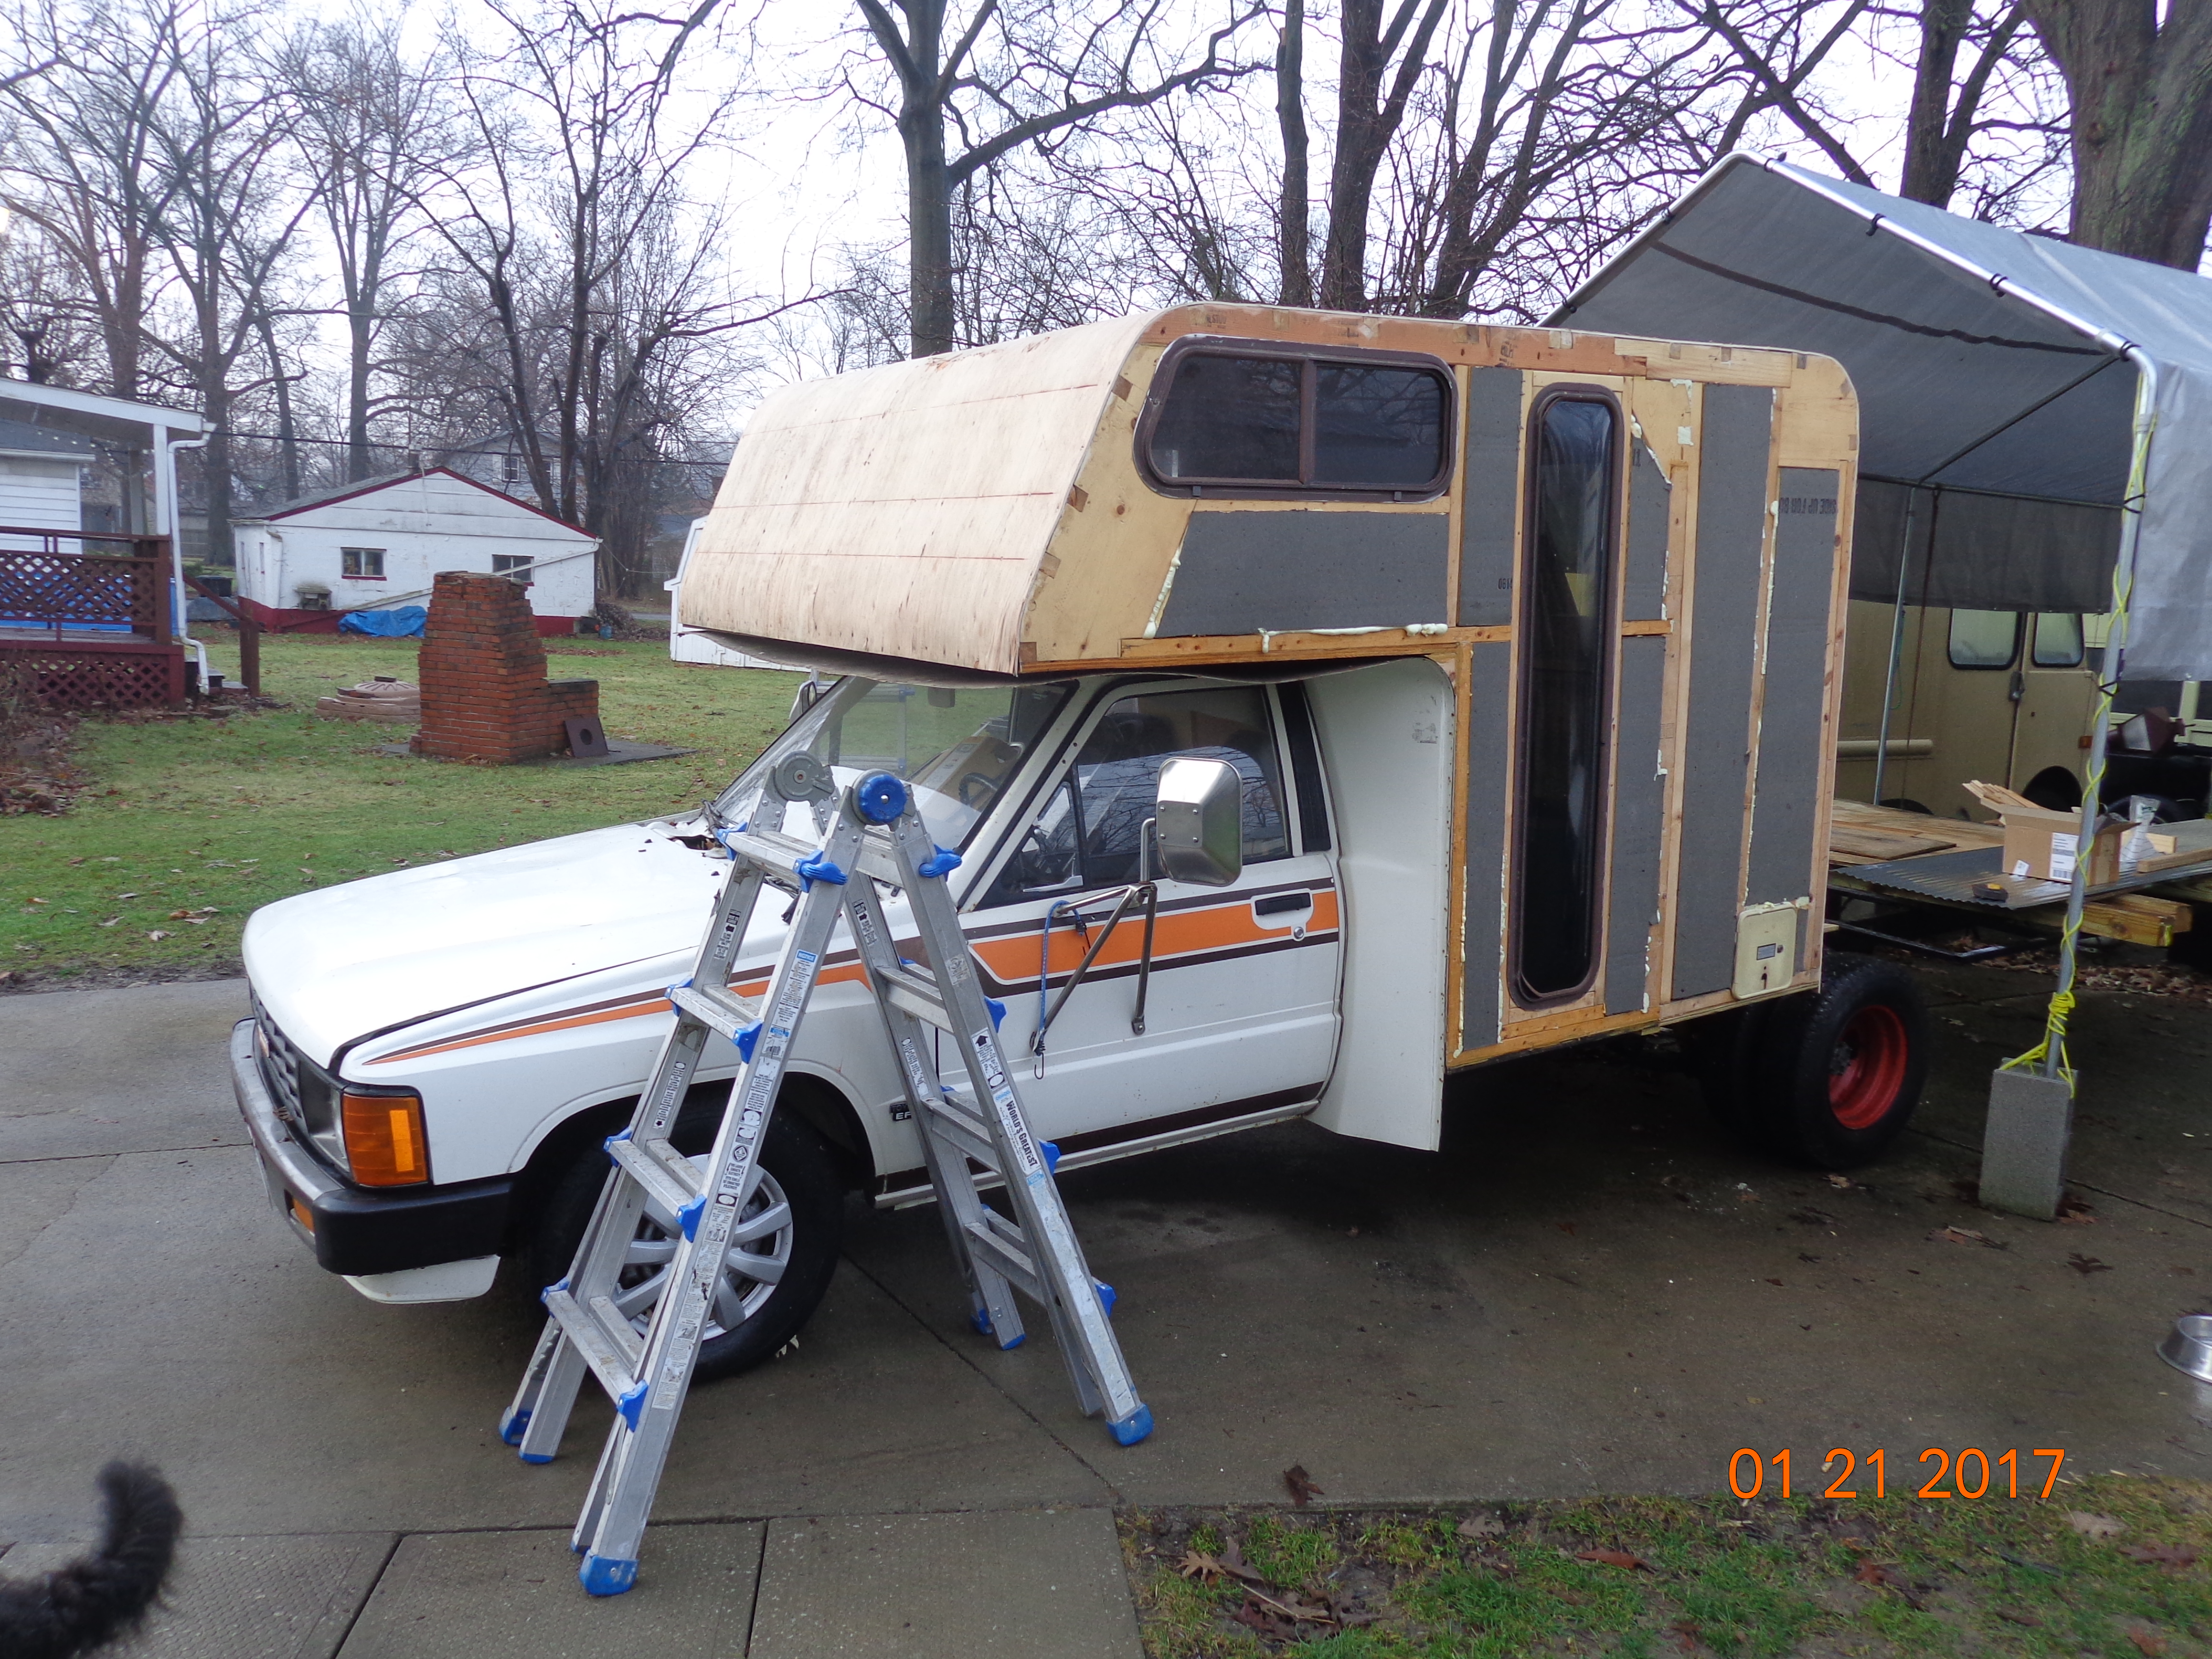
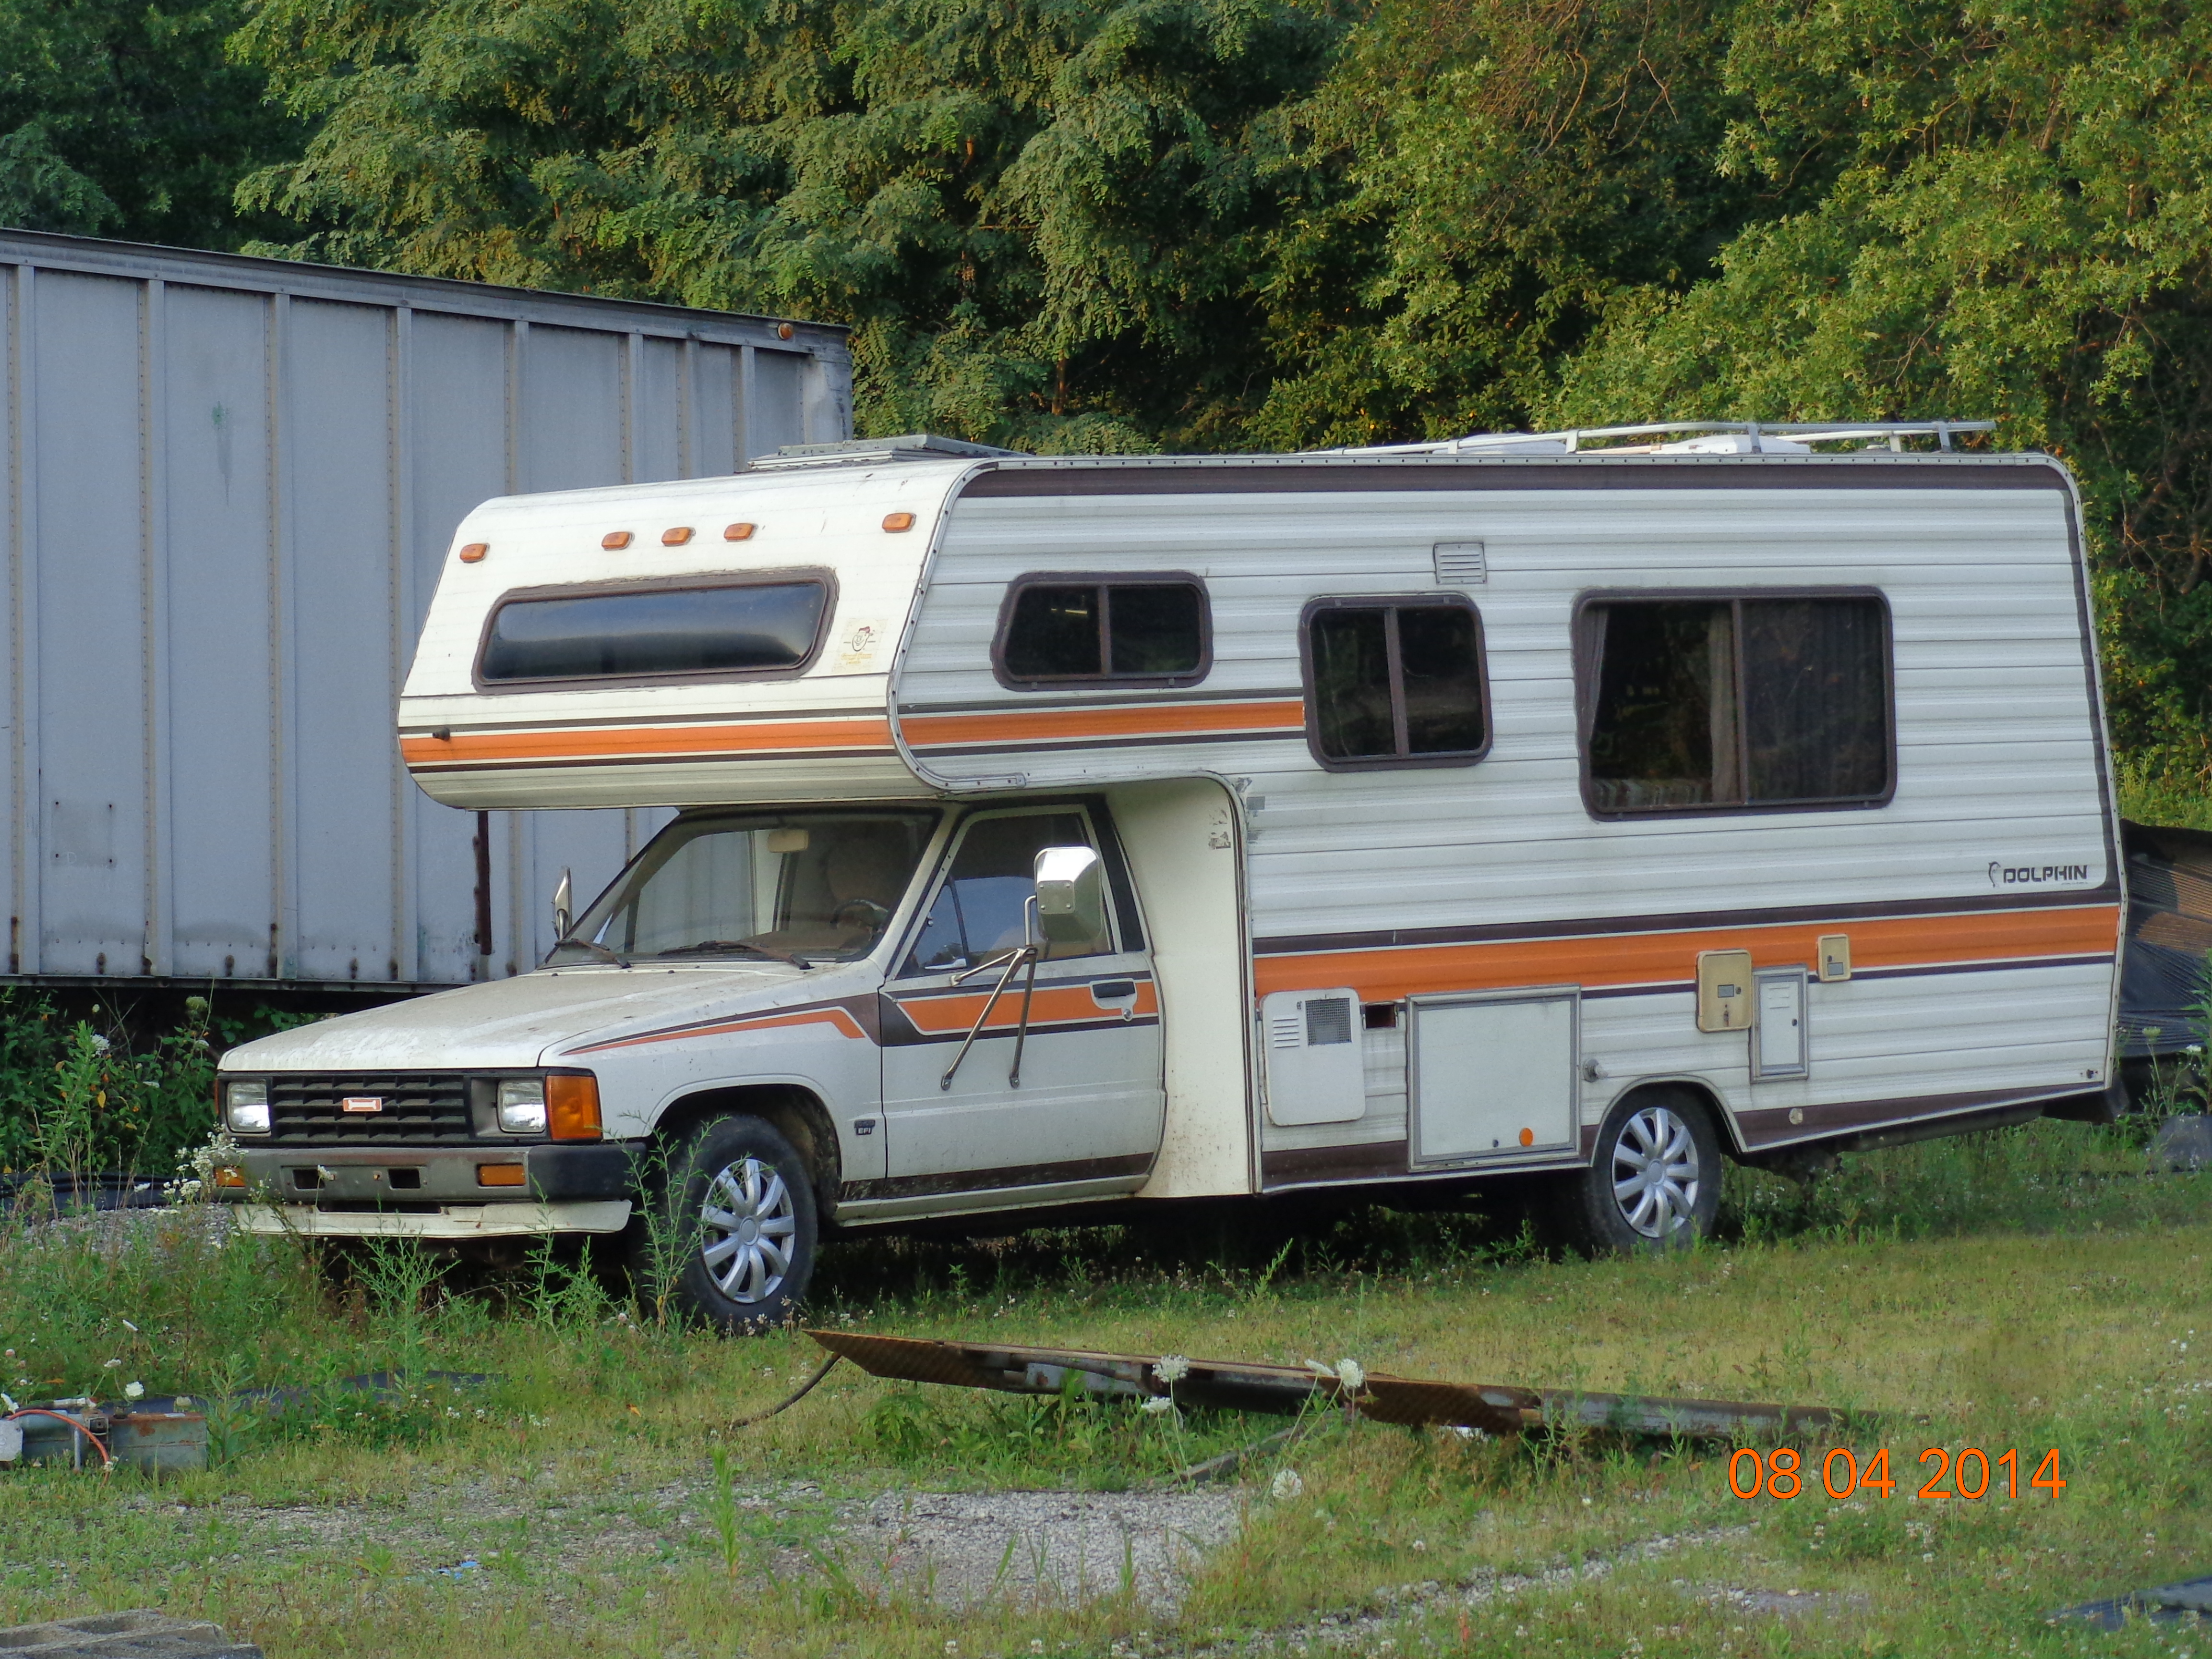
Converting to a flat bed may be as simple as going to your local title office and have the name changed, this is done often in the VW world when a beatle is made into a dune buggy. I was going to make a flat bed work truck out of this 85 dolphin, but it is VERY slowly becoming a flat bed toy hauler, but that's a story for another thread when I have more computer time.
-
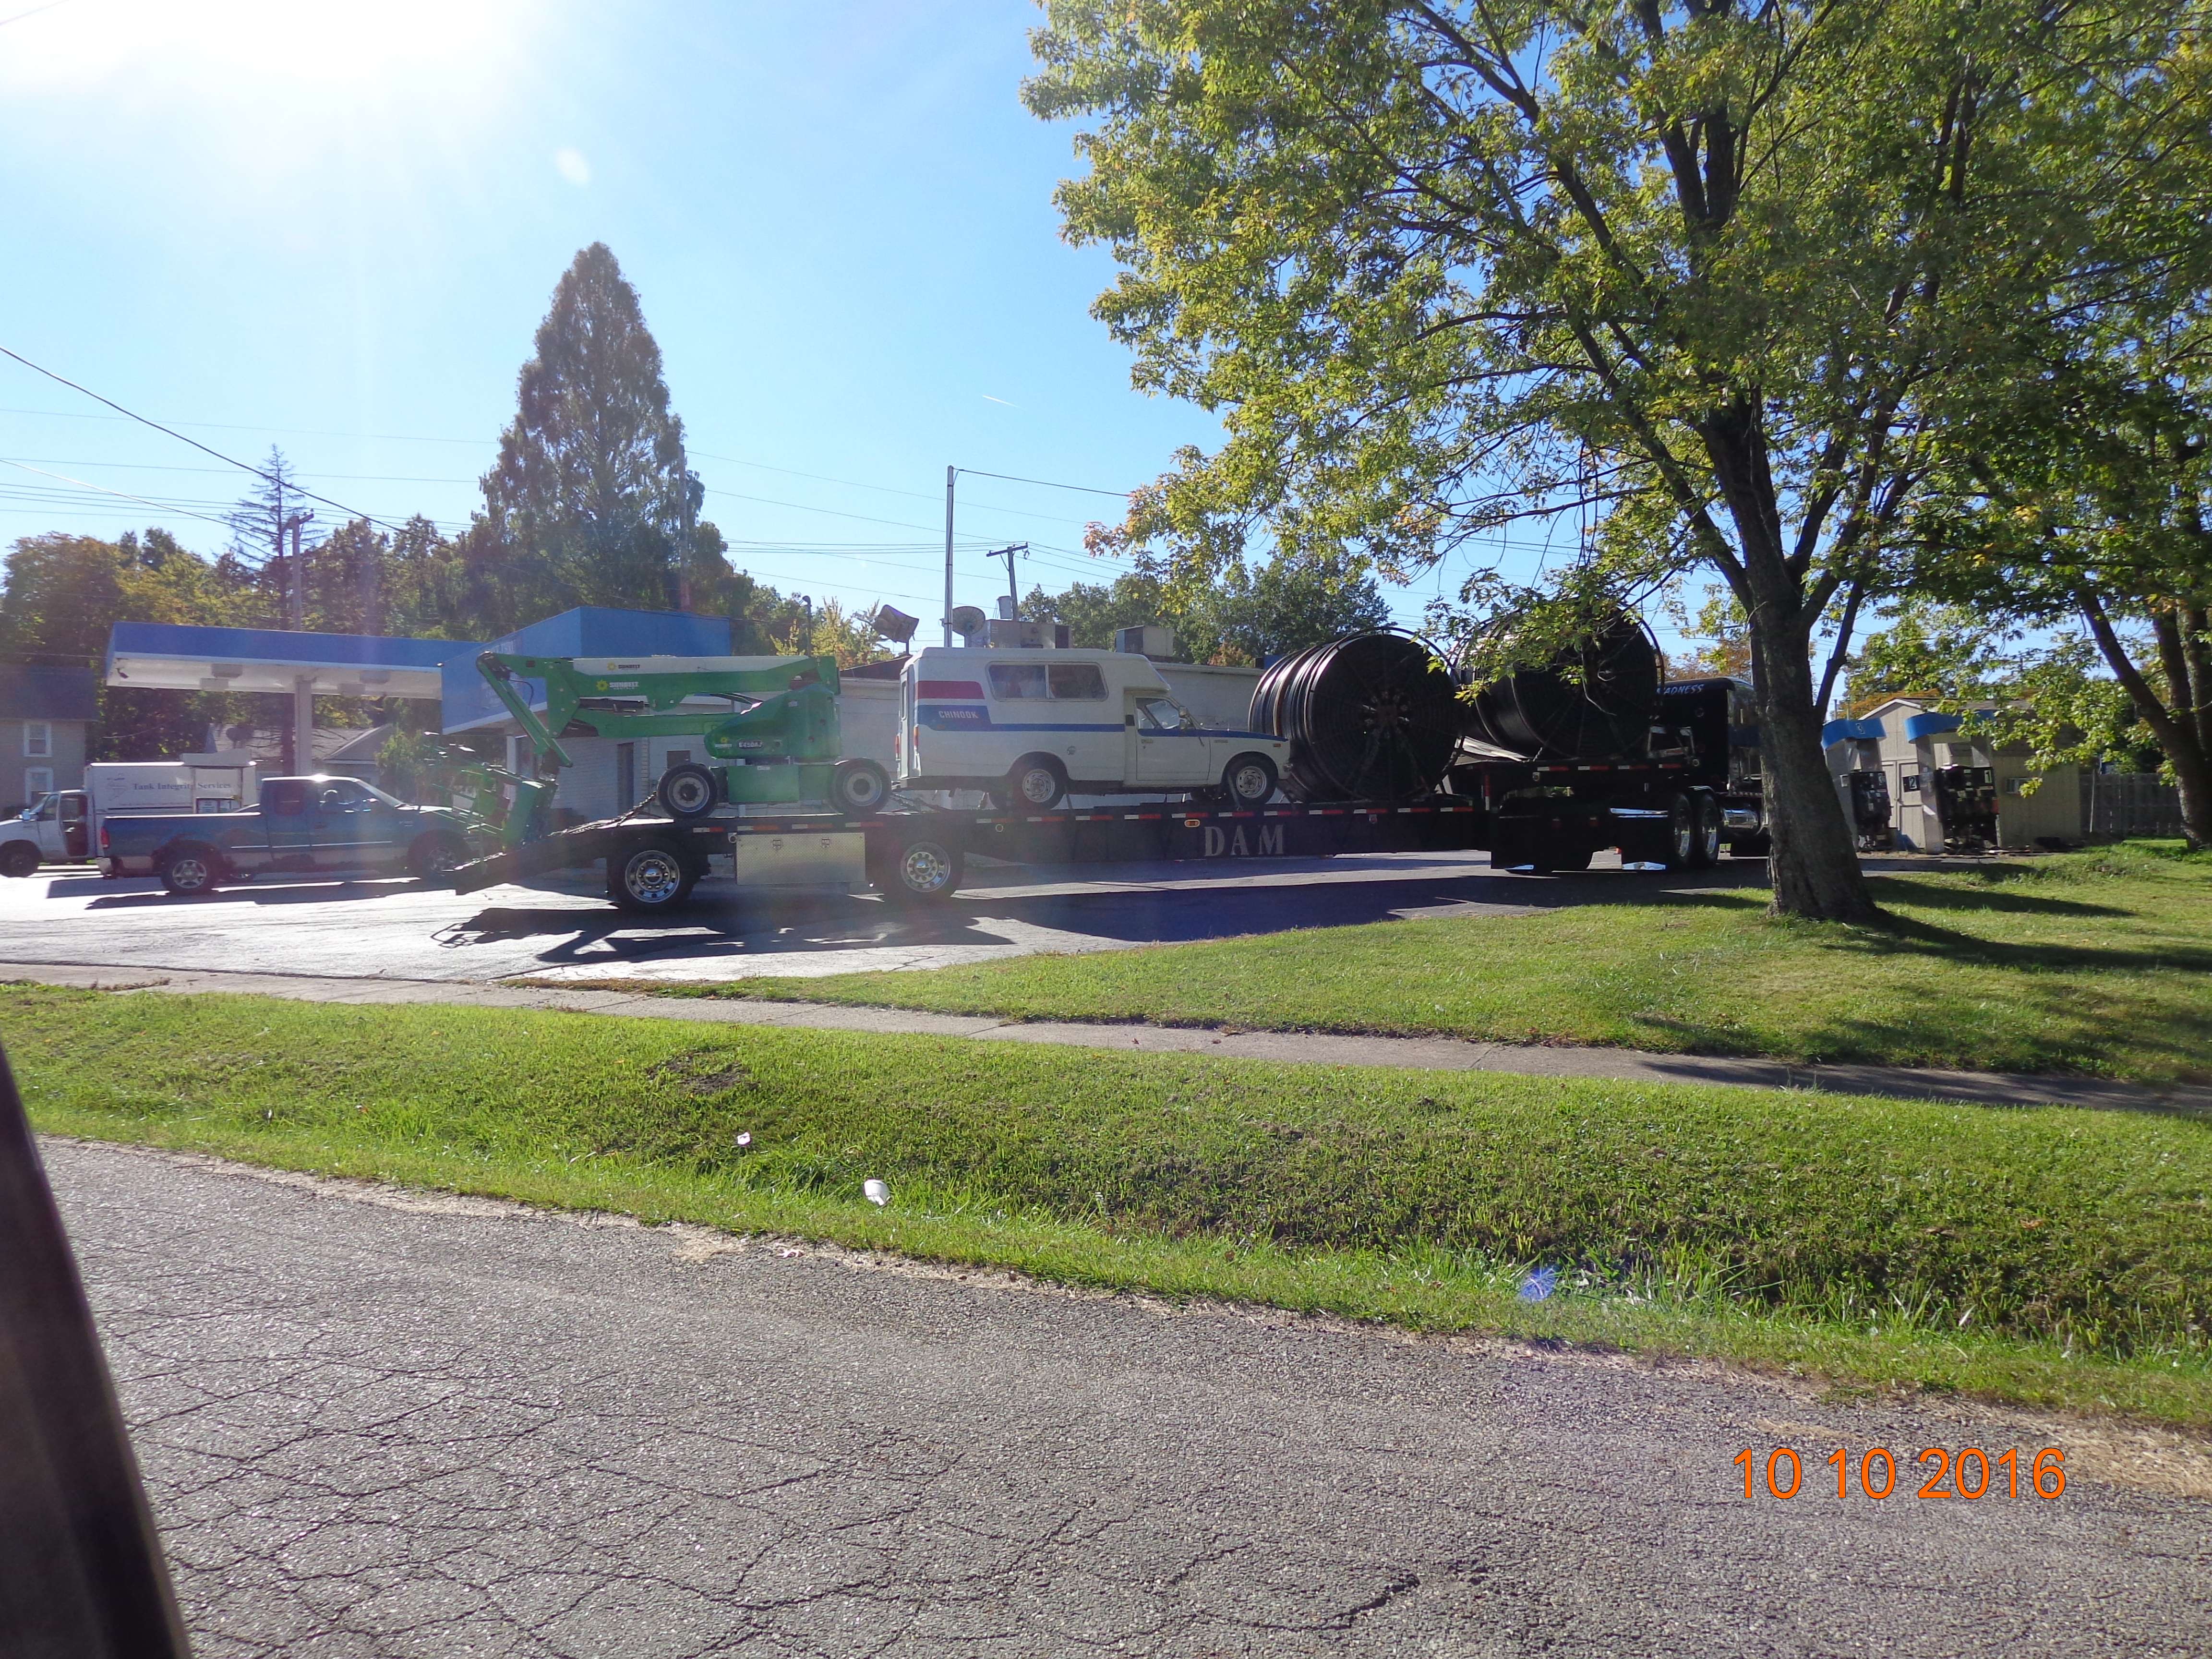
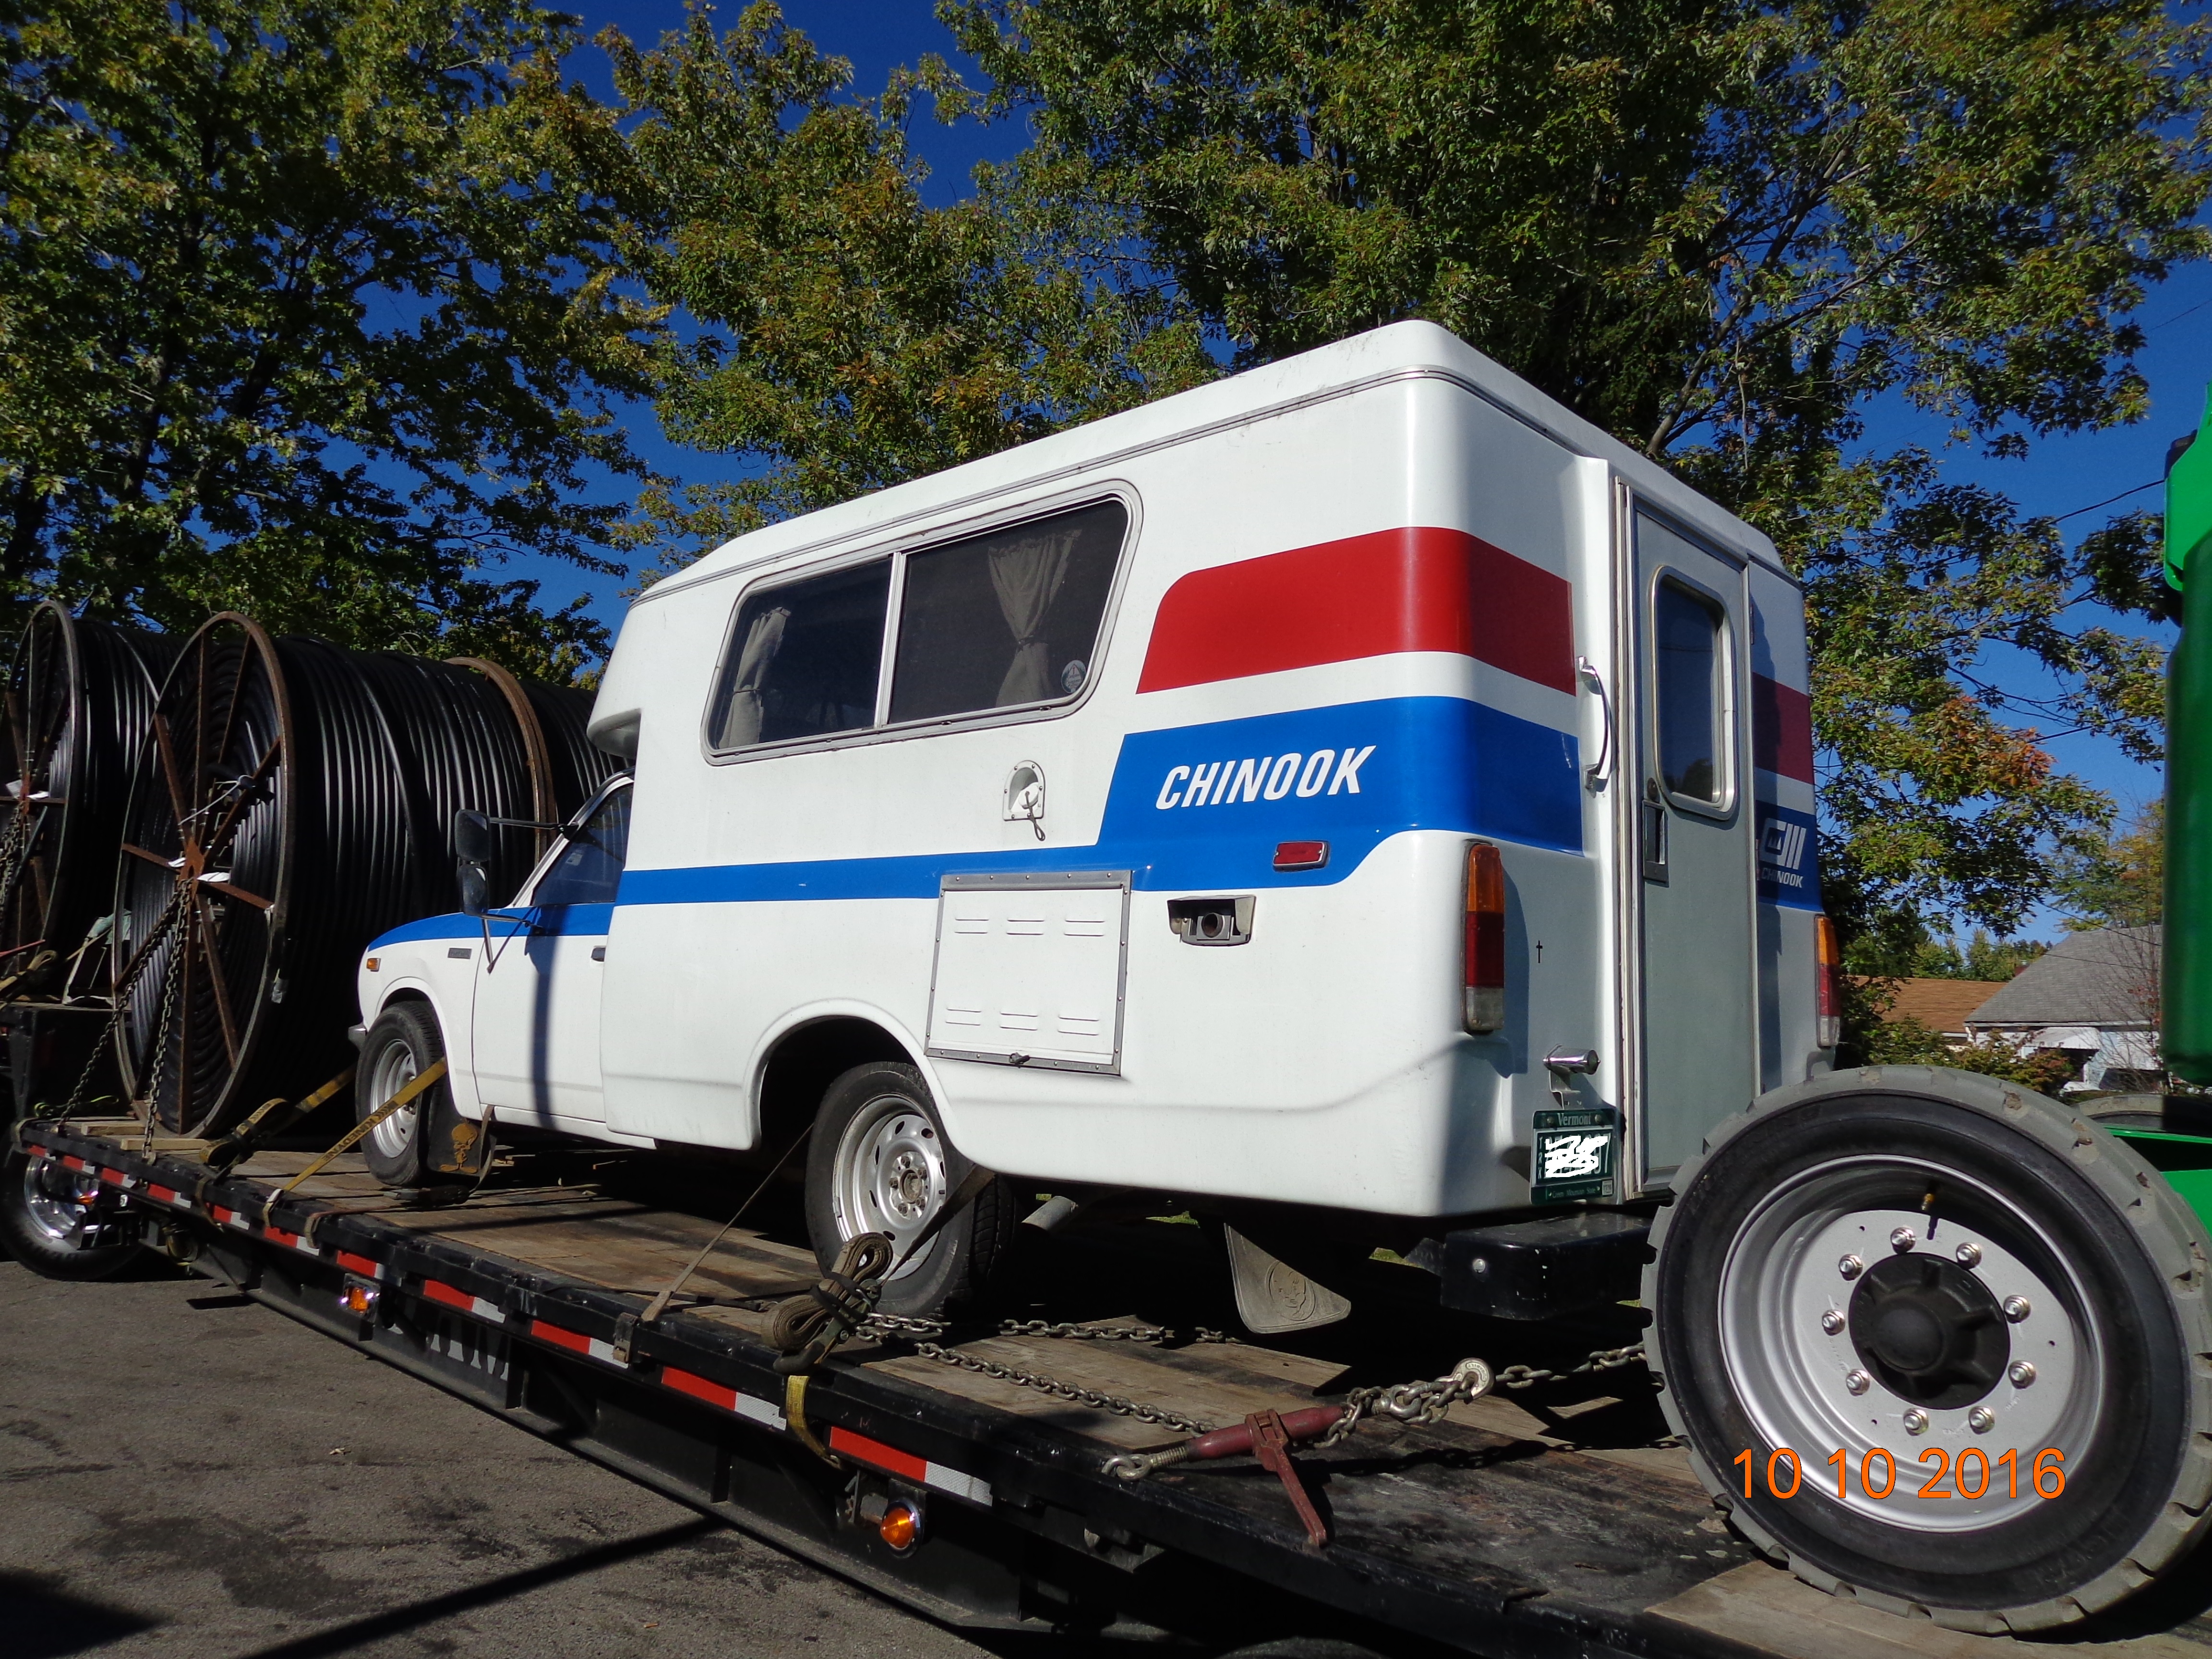
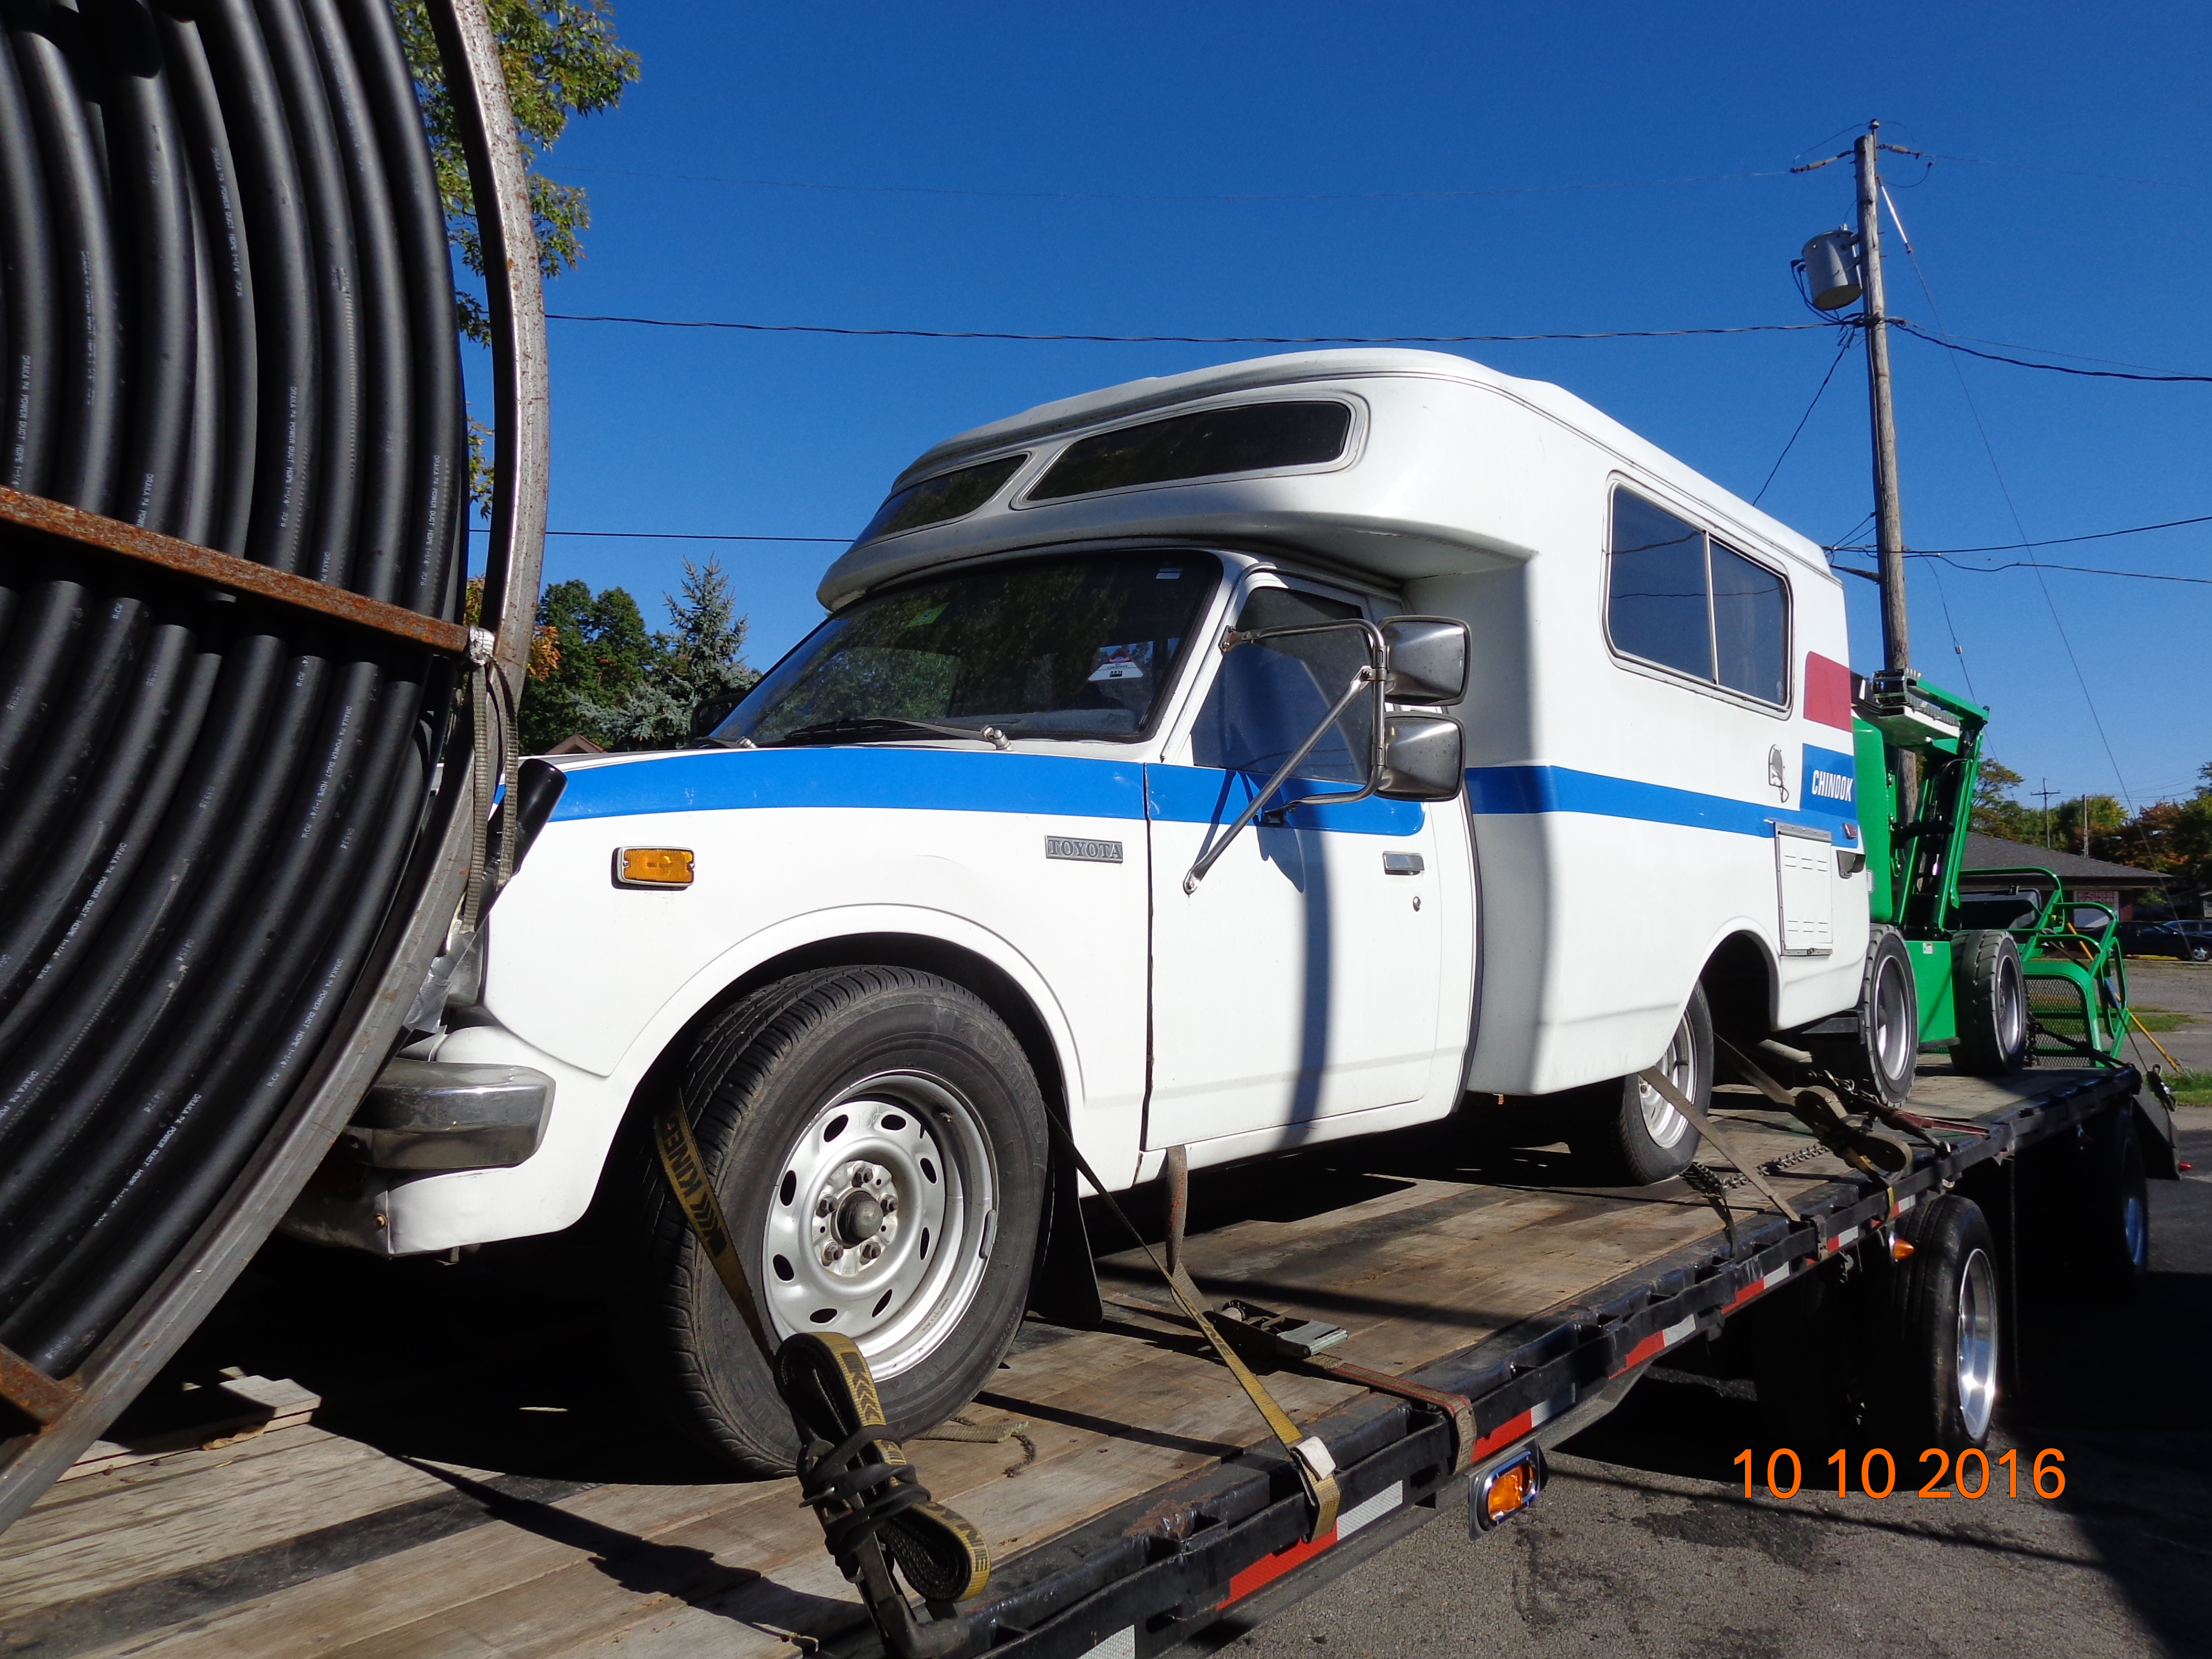
Came across some pictures of a dam nice Chinook I took awhile back, was in great shape, got to wondering if it belonged to anyone on here, had Vermont plates. What year would this have been?
-
Got to wondering has anybody retrofitted or considered installing power windows in the cab? I travel with a little buddy and it would be a lot easier if I had power windows for him to stick his head out. When in the pickem' up
when we come to a stop light or traveling down a slow country road he likes to stick his head out and smell for the moow cows and horses.
Do you think this is possible?
Here's a picture of "Odin the Wanderer"
-
4 hours ago, Maineah said:
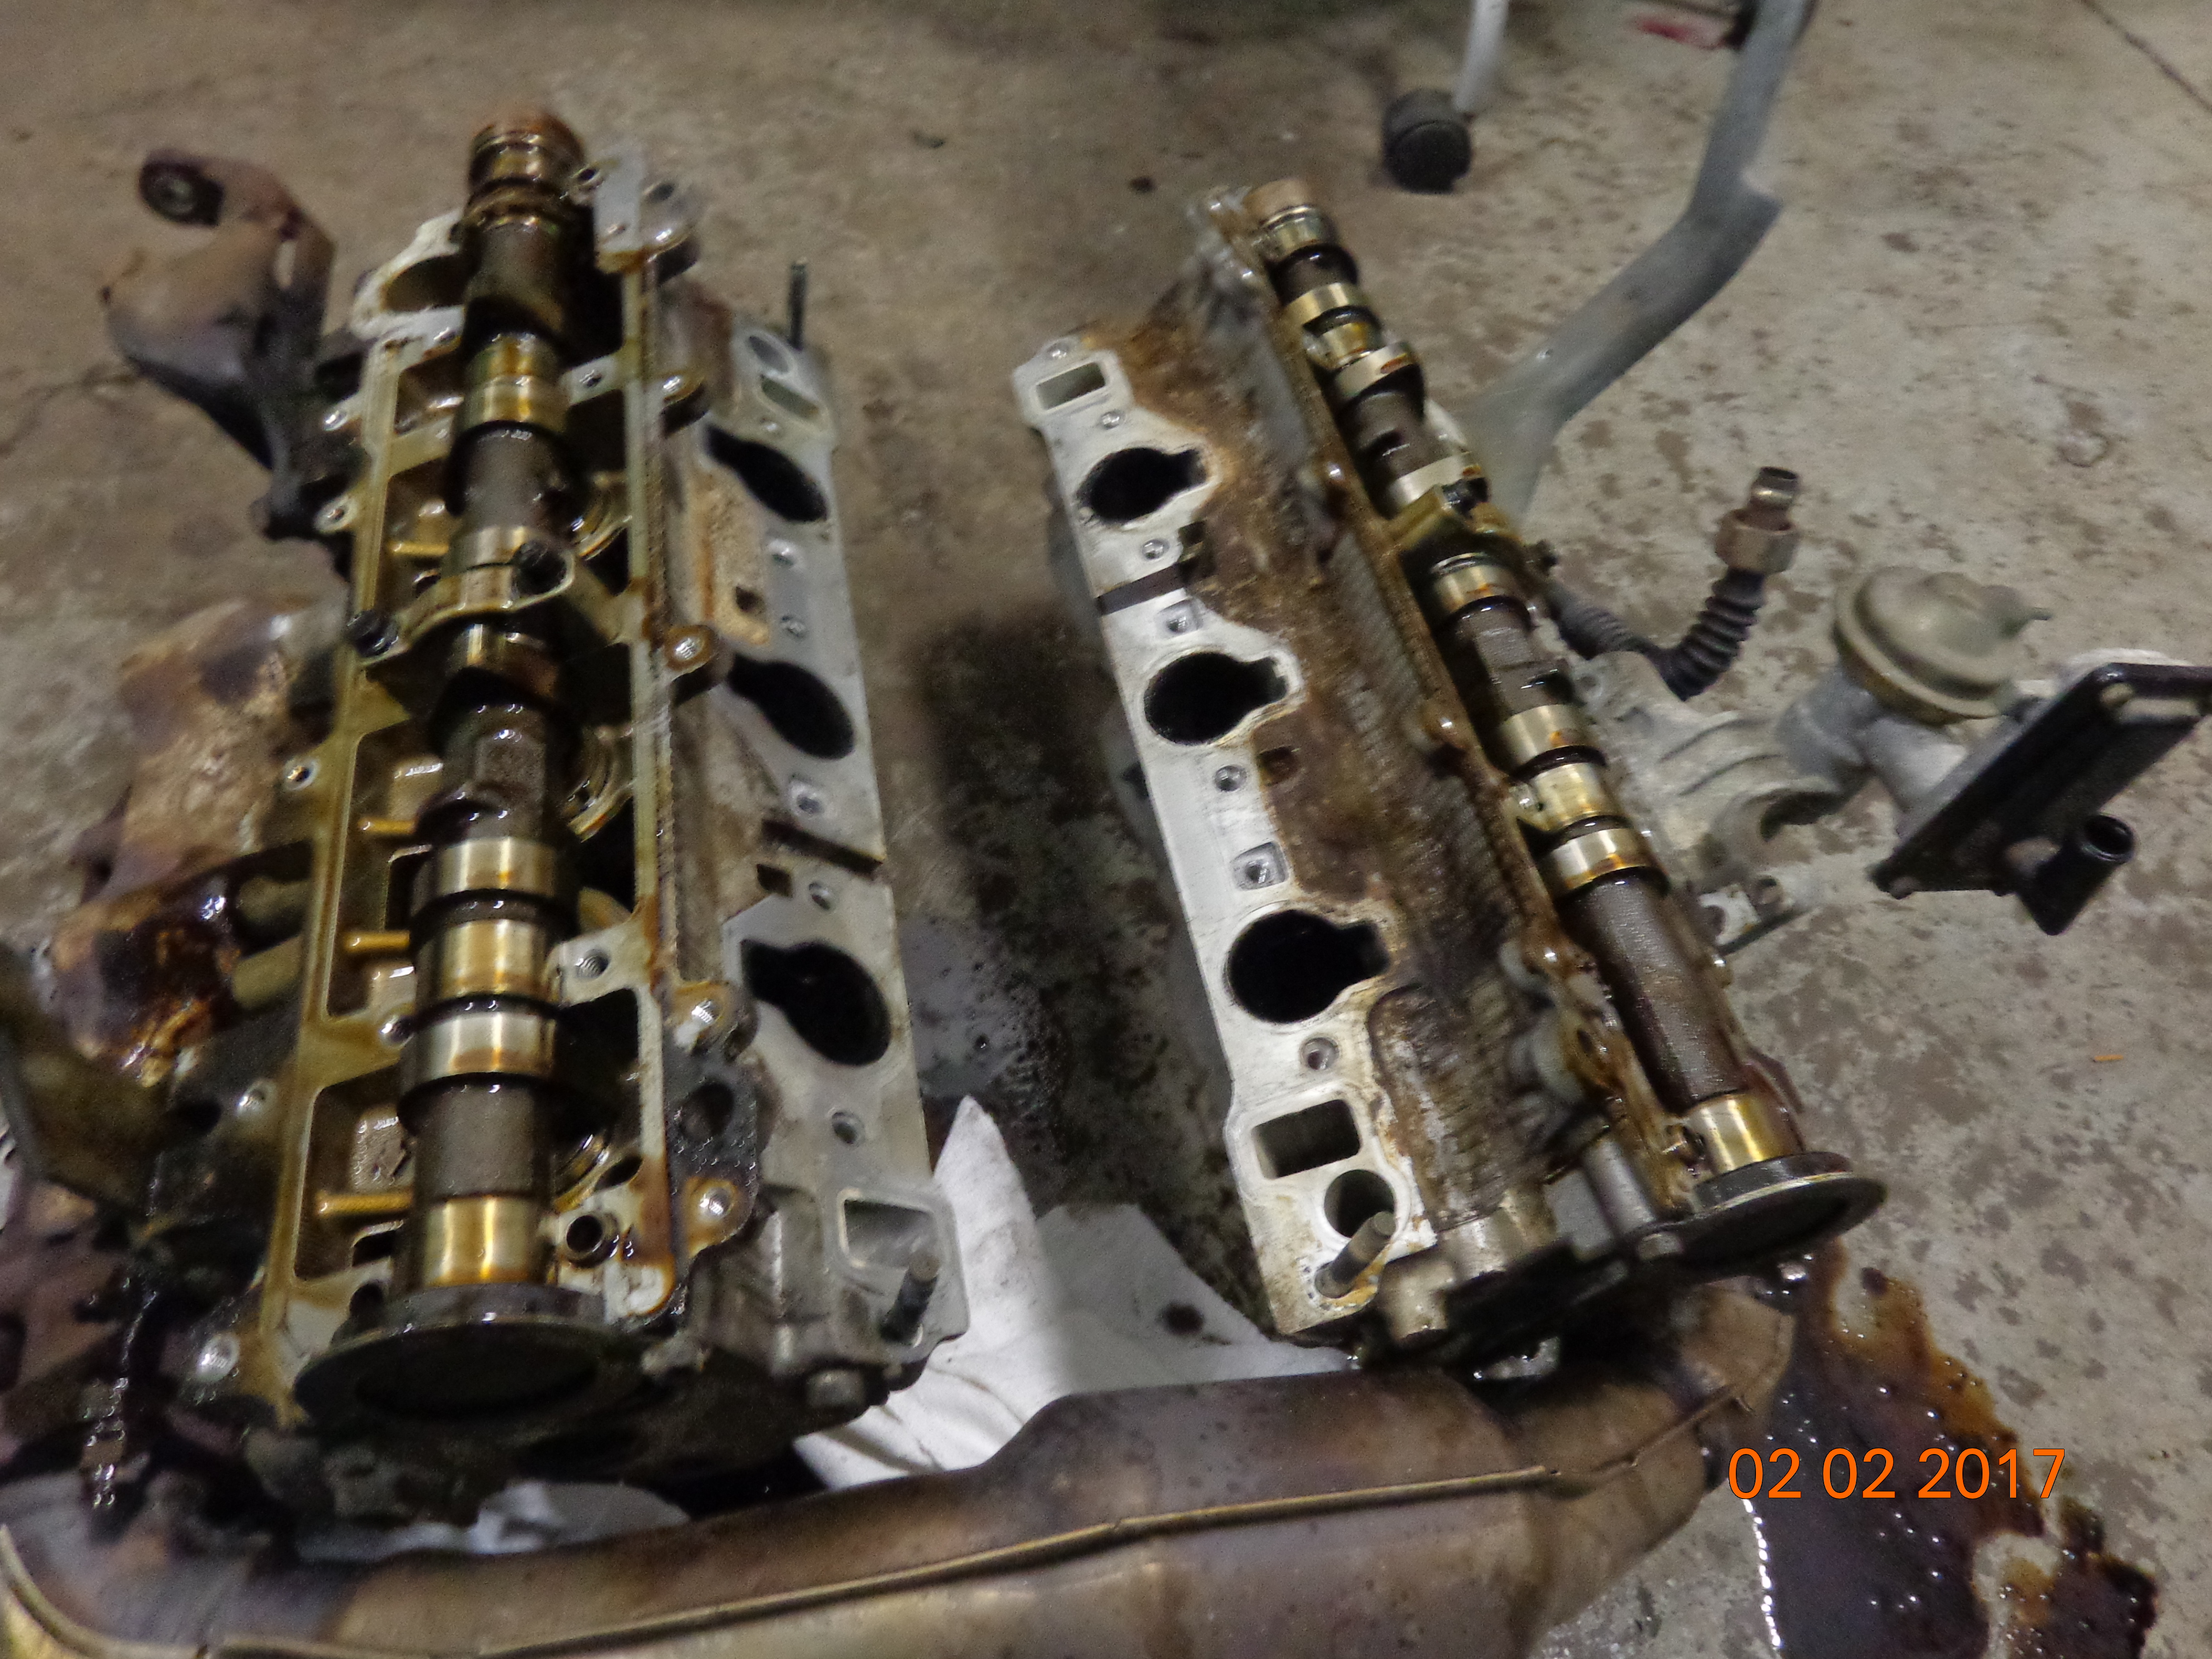
The metal bar is a normal method, paper works (it's around .002" ) but a feeler gauge is preferred what I don't under stand is why the cam caps are off except the center one that puts a good bit of stress on the shaft. they most likely did check the clearance and removed the cams to select the shim size with the heads off that could save some time because you do not have to use the tool to depress the valve springs just an easier method. The knock sensor is a labor intensive process to deal with later so that and the harness was not a bad ideal.
When these pictures were taken is when we were having the discussion about doing the valves, so don't really know why they were removed, other than the mechanic had a trainee helping him
-
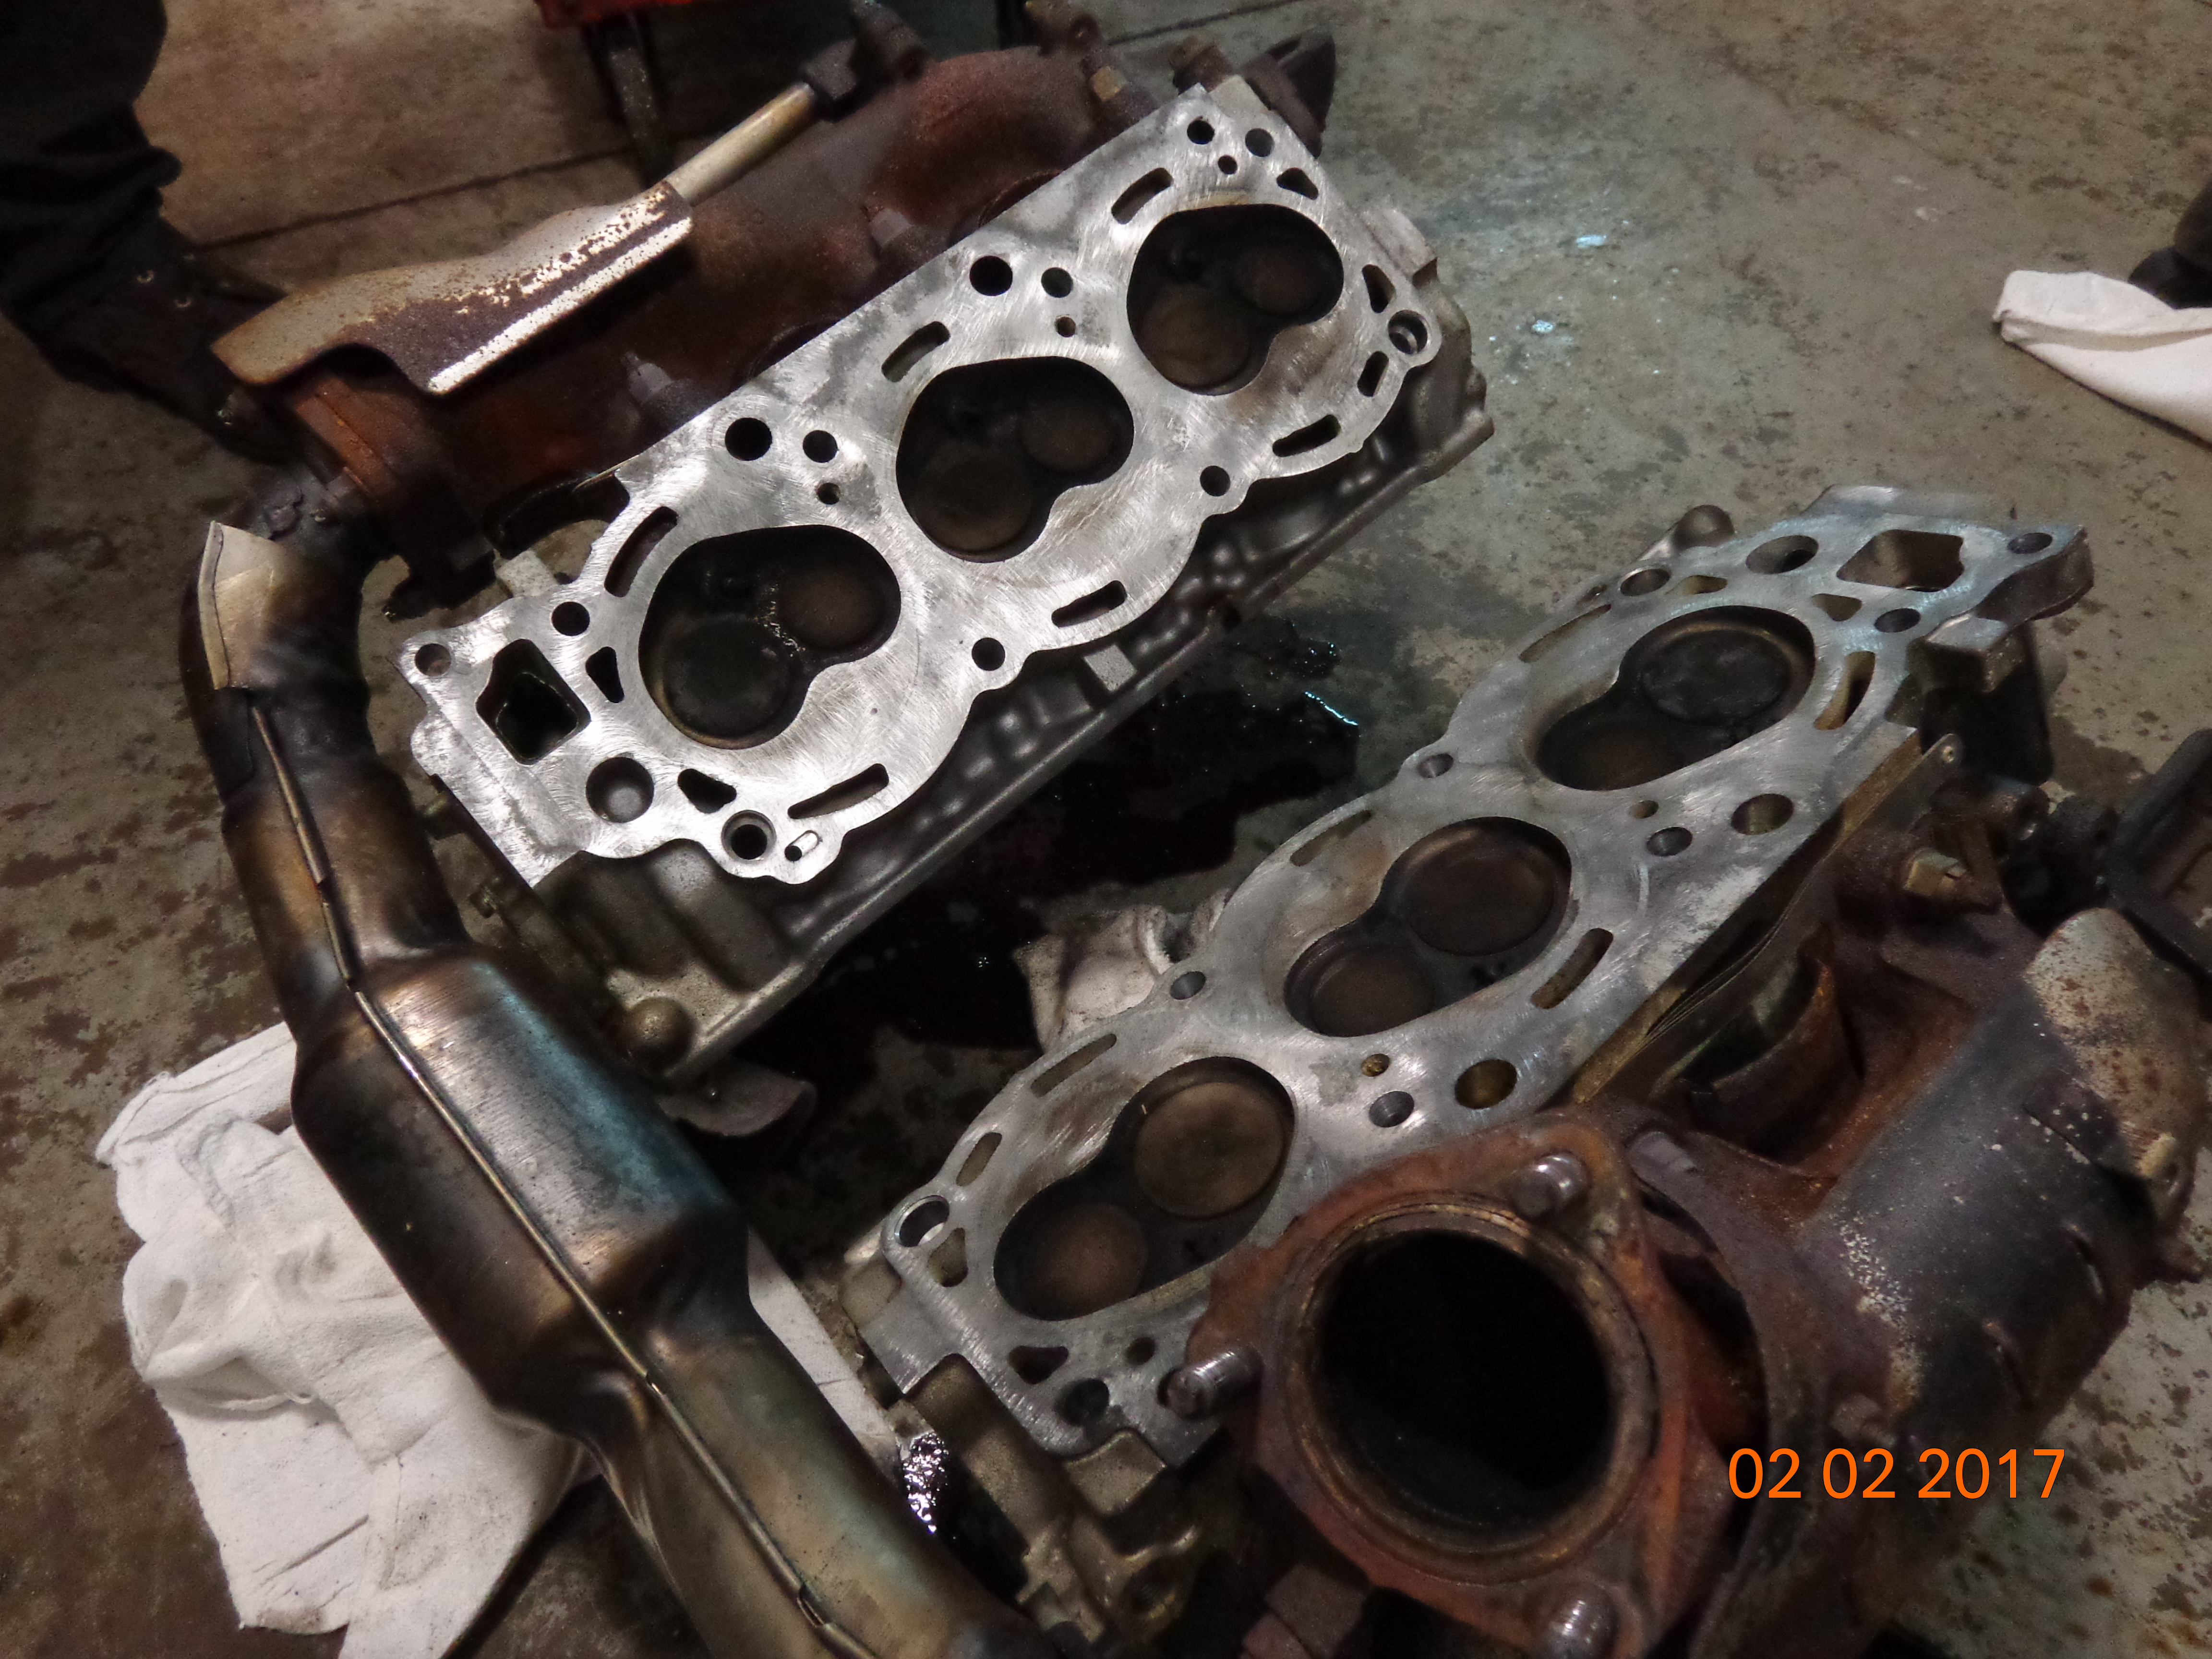
Hey all, well she's back home. What started out at $600+ ending up being just over $1300. First off it did not have a blown head gasket, the piece of gasket material I found came from the upper idler pulley assembly, seems when I was flushing the system I developed an air pocket, this was my thoughts at the time. I jacked up the front end , turned on the heater fan in an attempt to release the bubble, I never had this problem before so I wasn't completely sure how to fix it, then my neighbor mechanic told me about signs of a blown head gasket so that's were I got that idea.
Here's what was replaced:
head gasket no charge, was not on bill so I have no idea what it was replaced with
timing belt 1356865010 $32.86
water pump 161006947583 $112.80
fan/ alt belt 909160237883 $41.45
power steer belt 909160219683 $30.32
a/c belt 993321089078 $23.26
idler sub-assy 1350365010 $109.99
gasket 1625865020 $6.64
thermostat 9091603079 $30.08
water pump? gasket 163435010 $2.84
wire knock sensor 8221989103 $15.83
knock sensor 8961520010 $259.65 WOW!
idler sub-assy 1350565020 $187.13 WOW AGAIN!
labor $380.00
misc and tax $113.64
if you do a google search for the Toyota part numbers you'll bring up a picture of item
Notice there's nothing stating a valve adjustment, seems I had to press them on this issue, the mechanic with 20+ years experience said it wasn't necessary since it only had 60,00 miles. When I asked why it wasn't on the bill their answer was they didn't have shims in stock and instead of waiting for an order to come in the mechanic got some from another dealer that didn't charge them so they didn't charge me. Sure smells kind of fishy given the conversation we had about this issue. #5 intake was tight by .003 and #6 exhaust was loose by .003 When I asked for the old parts back all I received was the water pump, the upper idler pulley, drive belts and timing belt.
The service manager had no info on the SSC, in fact the day I took it in he was oblivious of our previous conversation and quote. I had to get him on the Toyota web site and hold his hand to show him where and how to bring up the SSC.
The whole process does not make me sit very well but it does run and sound good.
Hope to meet some you on the road
here's a few photos
notice the high tech tool for checking for warpage
-
Thank you Linda and Derek, Yes I did ask about the valves they said they would if it needed it, and I will ask what info they have on the future of the SSC
-
Hey all, well I got the ok to have the head gasket replaced under the special service campaign, it took 2 trips to the dealer, first trip I was told it was not eligible
the young lady kept reading me the rules for the Special Policy Adjustment, not knowing the difference I came back home and did some searches on the net. Going back loaded with info from the Toyota USA website I spoke to the service mgr, he got on his computer, after sitting there for quite some time I politely asked him what he was looking up, said he had 30 page document to read so I showed him what I had and 2 minutes later said it was all good ! Happy Days.
They just got back to me with the additional cost for a new water pump, timing belt, fan belts and coolant, Parts and labor $632, which I think is a bit high since the engine is already opened up but then again it is a dealer, but I'm happy as a Lark to get this back on the road.
I didn't mention that the gasket blew while I was flushing out the coolant system. It blew near an exhaust valve and created back pressure. Better to happen in my driveway then 1000 miles from home. Note the pictures, first I didn't know Toyota used a red coolant thought it was just really really dirty, then this piece of gasket material came floating by, then things really started to heat up!
So the question I like to ask is there anything else I should be having done while they have the engine open?
-
There are a lot of parts in the engine compartment I'd grab, mass air flow sensor, fuses, radiator, wiper motor, etc
-
I could use a few misc parts, what state is this in?
-
Sorry, that was 185r14c
-
3 years ago a ordered 195r14 Hankook tires from walmart, believe a paid $95 each


Rear Brakes and Seals Where did I go WRONG!?
in Engines - Transmissions - Drive Train - Suspension - Chassis - Steering - Exhaust - Tires - Etc.
Posted
Thank you all for your responses, all but the axle seal has arrived so I pulled it all back apart to examine things closely, here is what I found... It appears I damaged the seals during installation. You'll see on the axle seal a flat area about 12 and 1 o'clock, also notice the damage on the inner hub seal. Fluid did not come out the front of the axle as it was sealed well with rtv silicone.
You'll notice the slight corrosion, I cleaned that up with 1000 grit.
I havent checked the diff fluid yet, having a heck of a time getting the plug loose. for reference it takes a 24mm 6point socket. It is slightly damaged so somebody has had it off before, have it sprayed with penetrating fluid. Is 80-90 weight correct?
Once I get this back together I do the other side.
Something else I'd like to bring up (maybe this is for another thread) but before I even started this I thought it would be a good idea to see what it would be like If I was broke down on the road and had to jack up the rear. I carry a 3 ton bottle jack, breaker bar, 6" extention and 23mm socket. The question is where is a good jacking point? Any point forward of the leaf spring shackle will lift the entire side of the vehicle with the front wheel about 6" or more off the ground before the rears start to clear, to me thats a lot of weight to put on a 3 ton jack. It wont fit under the U bolt behind the wheel and any farther in on the axle means you have to be under the vehicle during jacking which is a really bad idea. So I'm wondering how others jack up a 21 footer on the road?