oooPIVYooo
-
Posts
21 -
Joined
-
Last visited
Content Type
Events
Profiles
Forums
Gallery
Everything posted by oooPIVYooo
-
 I had no idea about this. Just called Toyota and apparently mine was also replaced back in 2000. Thanks!
 -
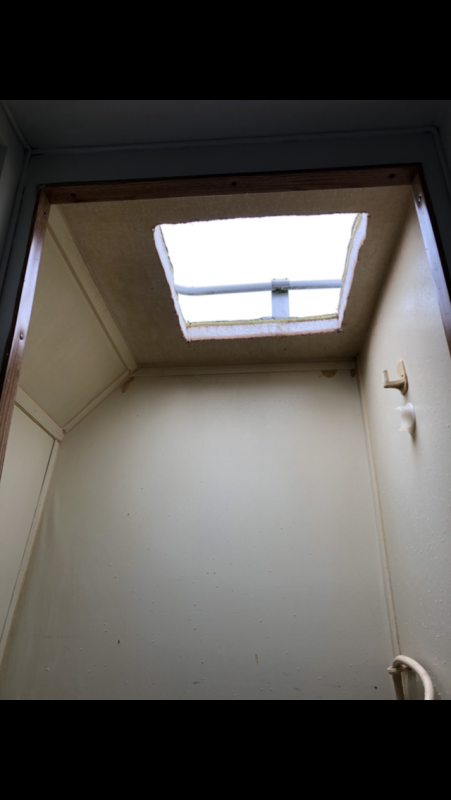
Shower skylight
oooPIVYooo replied to oooPIVYooo's topic in Improvement and Do-It-Yourself Projects you have done to Share!
Skylight: https://www.amazon.com/gp/product/B009S7I8EG/ref=ppx_yo_dt_b_asin_title_o05_s01?ie=UTF8&psc=1 The trim was too big and needed to be cut to size, which actually worked out nice. https://www.amazon.com/gp/product/B00DPJ3S3O/ref=ppx_yo_dt_b_asin_image_o05_s00?ie=UTF8&psc=1 The bathroom still has its own vent above the main toilet/ sink area. -
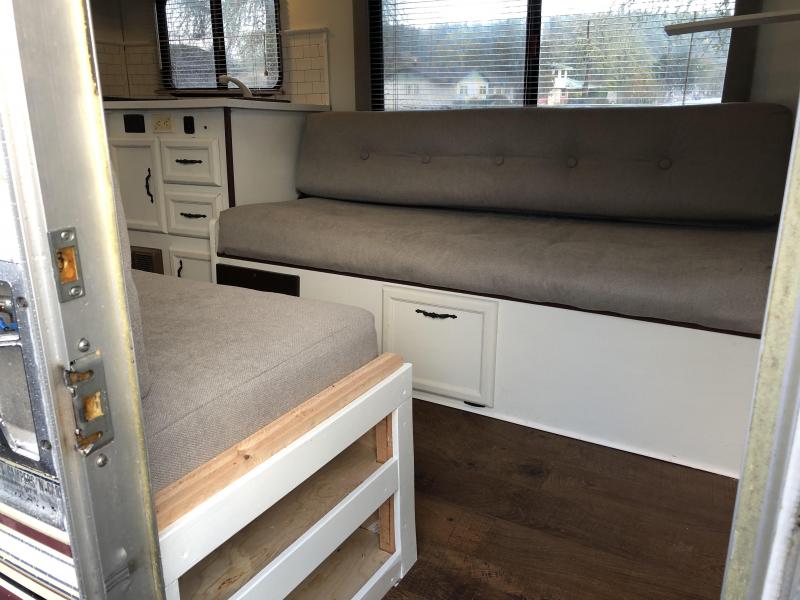
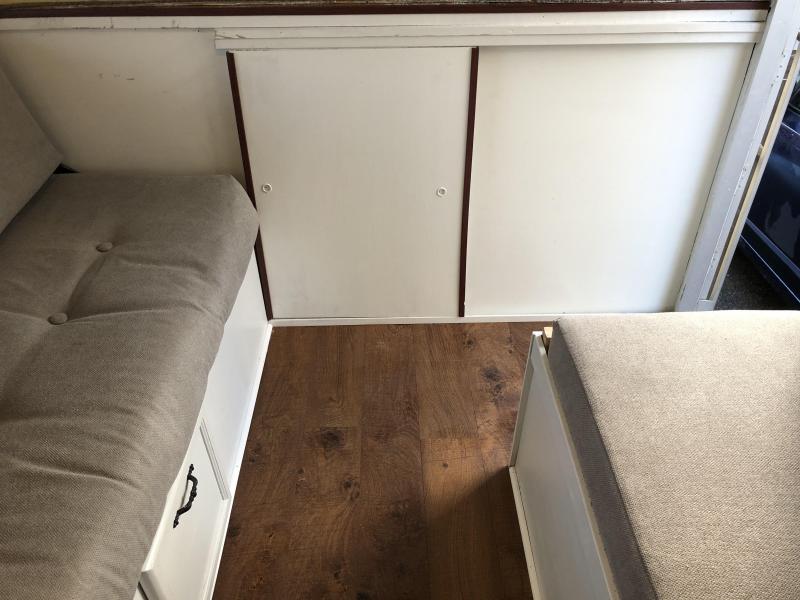
Finishing up the remodel in the next few weeks and thought I would share the progress. Got the idea to build the cab separator from a thread on here. Thanks!

-
I’m 6’0, so I can just barely stand up in my dolphin. Due to the shower pan, I have to hunch over in the shower. It always bugged me with my last dolphin. Decided that with this one I would put in a skylight so that I can get those few inches of headspace back. Works perfect, and added bonus of creating light in an otherwise dark area of the RV.
-
I recently purchased a 1990 Dolphin and the previous owner removed the dinette. I'd like to rebuild it and wanted to see if anyone had the stock measurements. I'm mostly just looking for the seat height, as it came with the cushions so I can use those to figure out the width and the seat back height. This dolphin has the dinette located on the passenger side behind the door and in front of the fridge. I will need to build a box around where the wheel well is as it looks like that will be right in between the seats. Thanks!
-
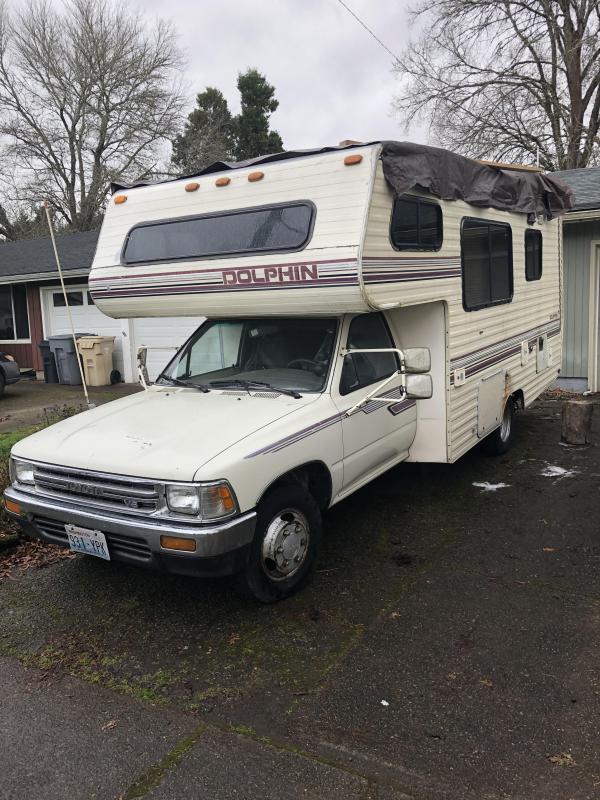
Sold my 86 Dolphin around 4 years ago due to a divorce, and finally got a 1990 today! It's a fixer-upper, so looking forward to scrolling though these posts again.
-
I got mine on Amazon (free shipping) https://www.amazon.com/gp/product/B00K6L79K2/ref=oh_aui_detailpage_o07_s00?ie=UTF8&psc=1
-
I've been thinking about making the couch into a bunk bed as well. The previous owner took the back of the couch off and tossed it, so I would need to fabricate something from scratch. I found the below pictures on a craigslist ad and thought something like this might work for a Toy. Rather than suspend it from the ceiling, maybe have legs that pop out of the bottom of the top bunk and secure to the floor or bottom of the lower couch.
-
Thanks. Are there a lot of Marines that chose these little RVs or what? Former 1st Tank Btln. 1999-2004.
-
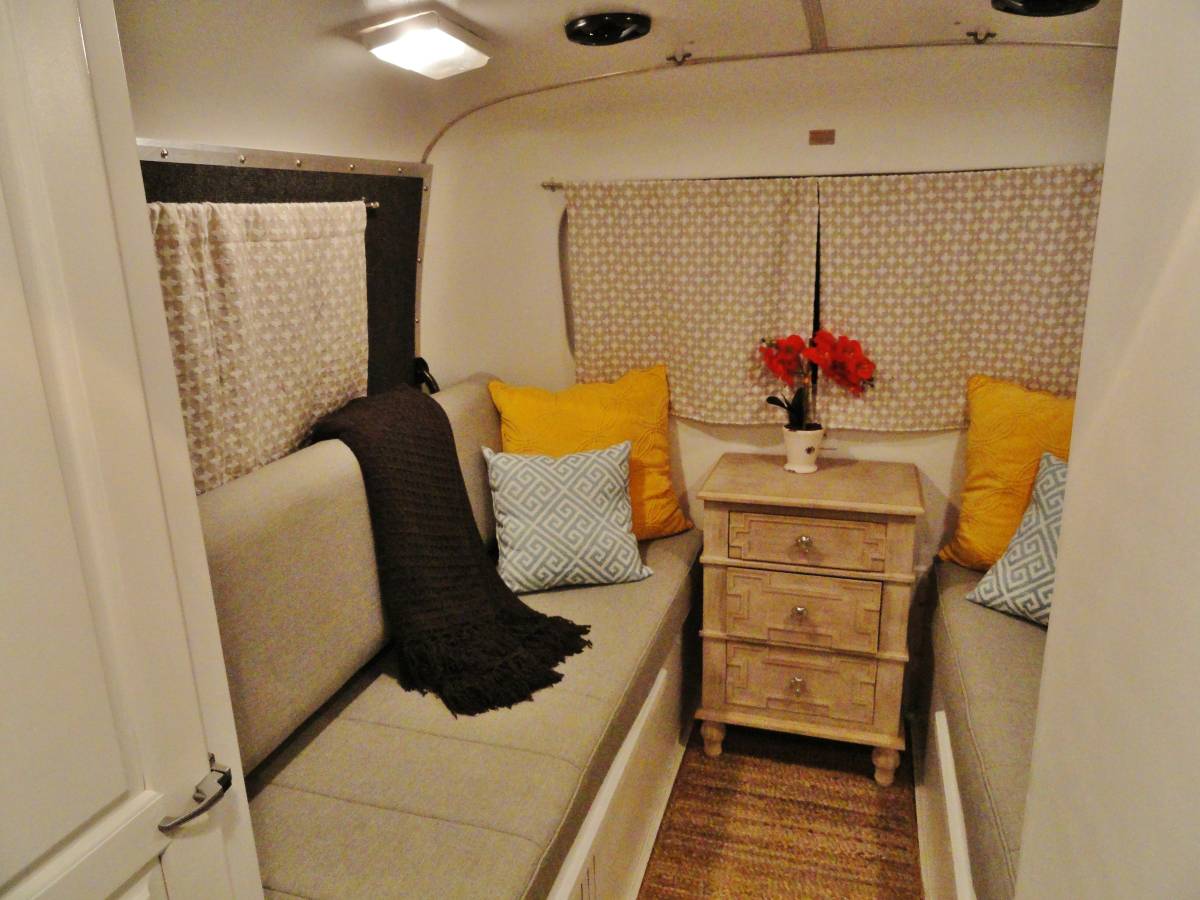
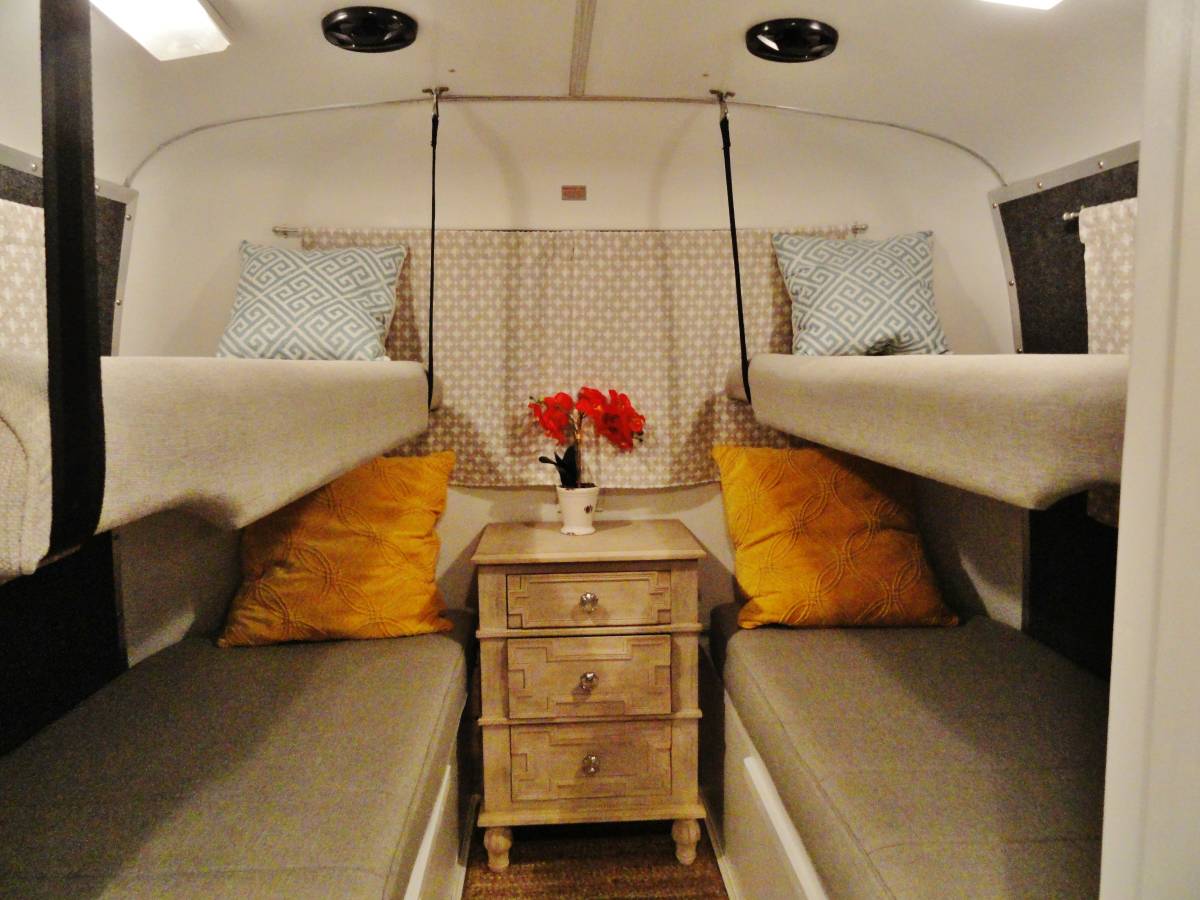
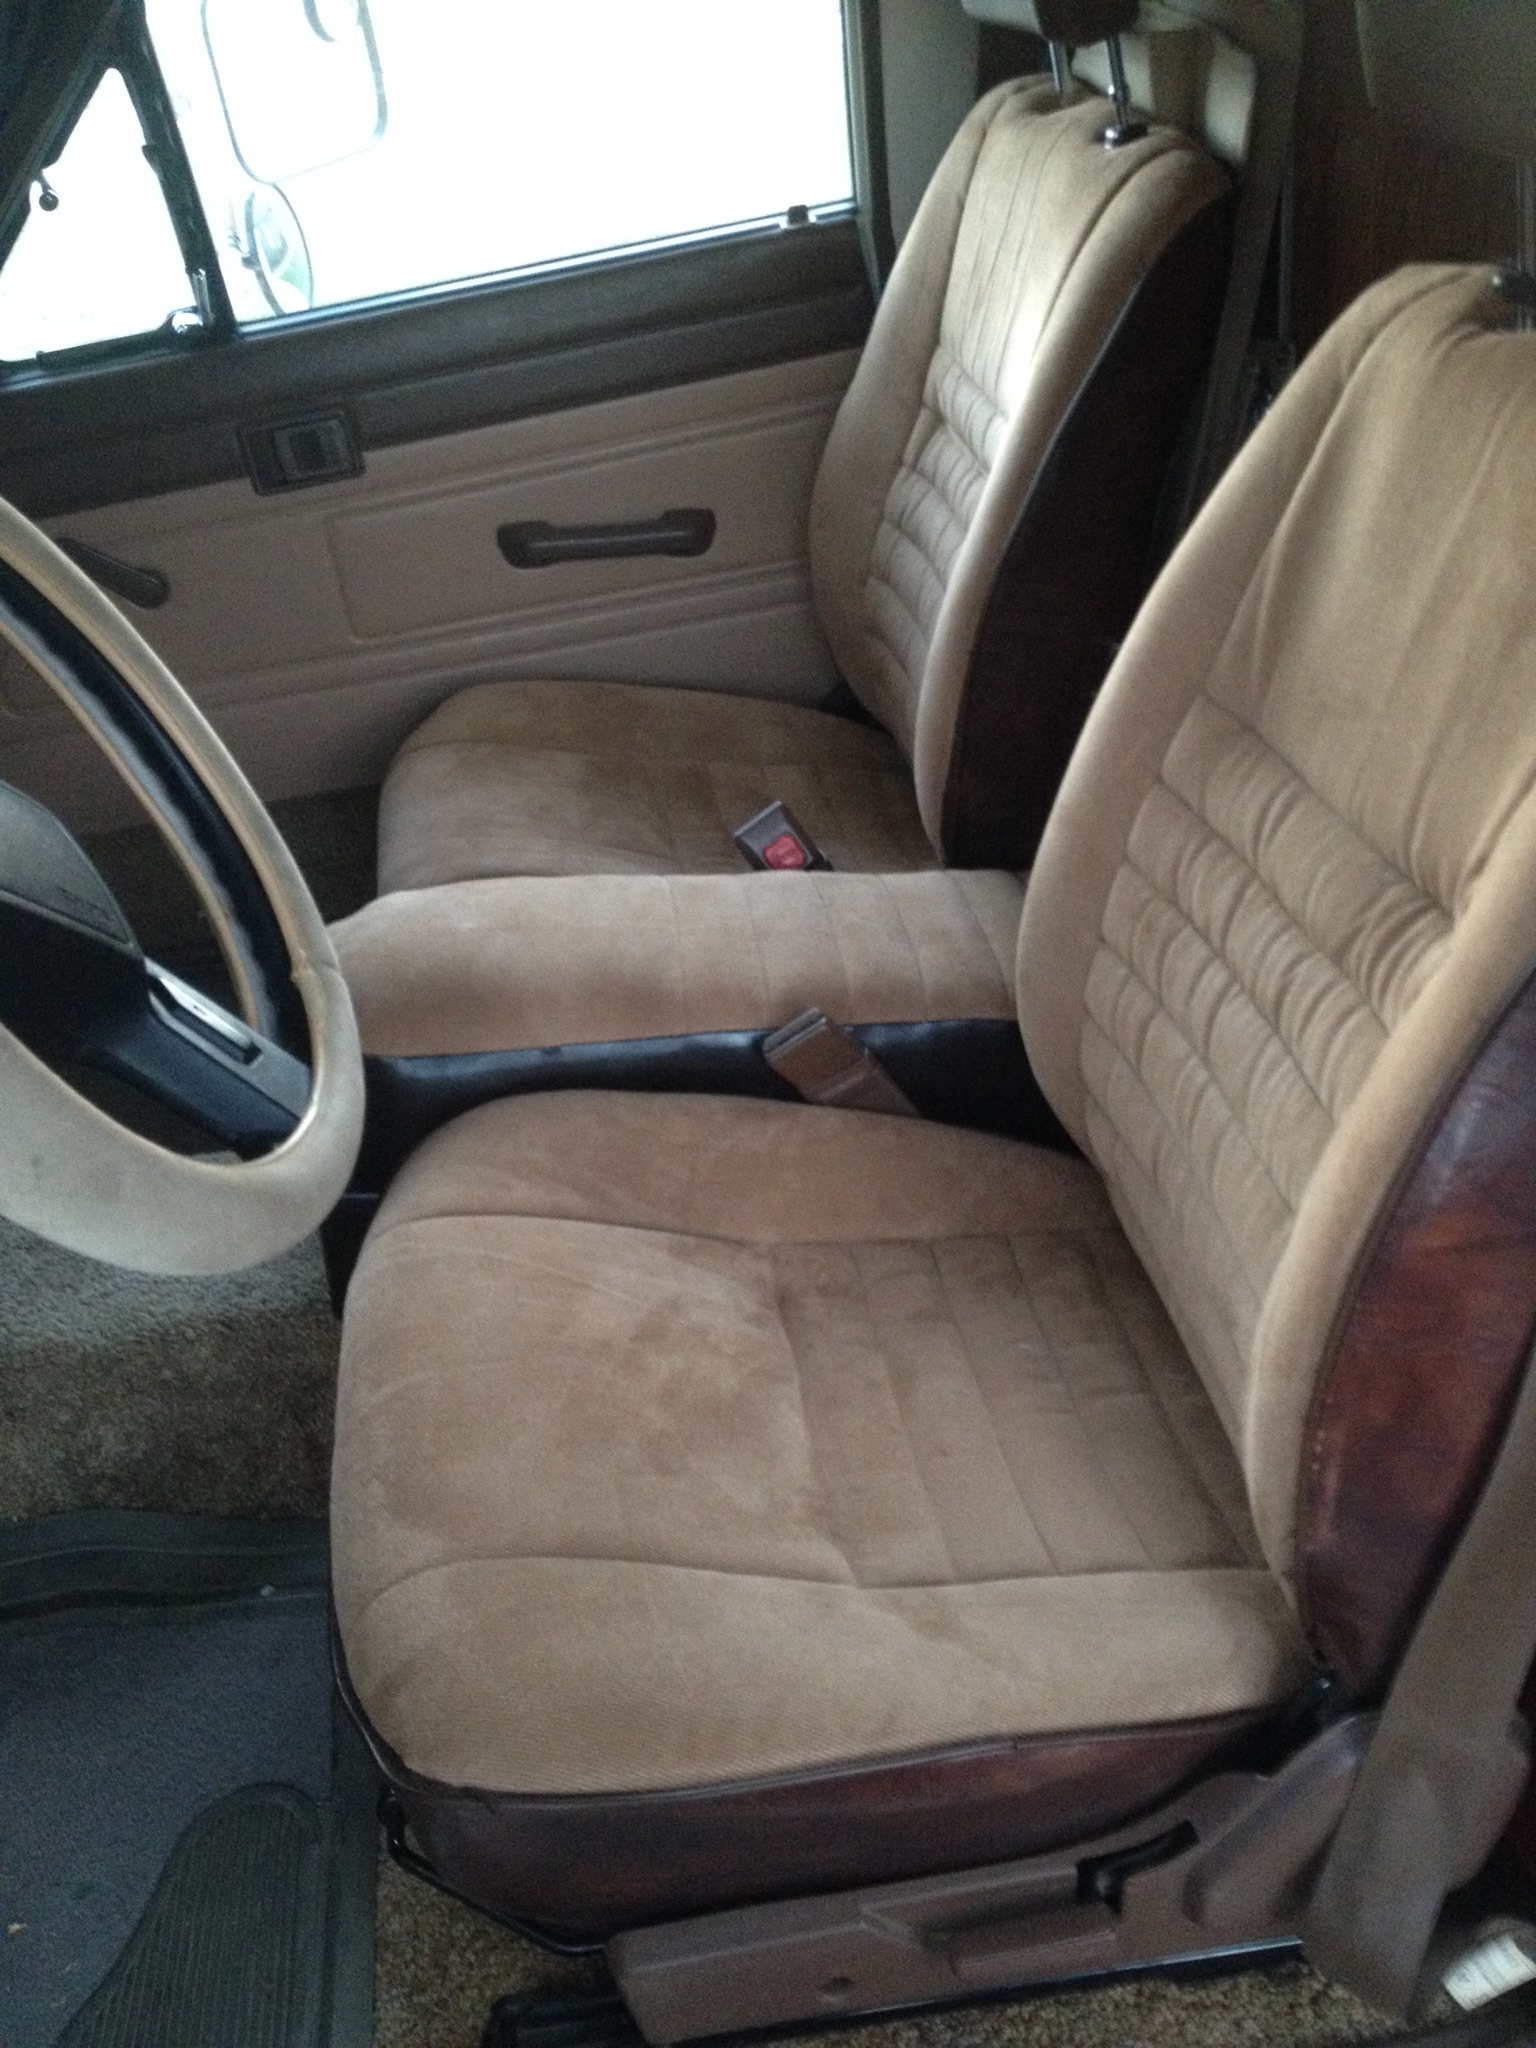
When the heat finally died down a bit we decided to do a little of revisions to the interior. For the walls, I started by cleaning all the walls with 50% acetone 50% water. After that I lightly sanded everything down. The walls were not too bad before, but, for me, there was just too much wood! We did one coat of primer, and then two coats of primer/paint. I chose eggshell because I find its a little more mellow. One thing that I was nervous about was the little piping in between the cabinets and the wall. I thought that it would make it more difficult to paint with them. However, I found that they made painting the edges soooo much easier than without them. I also added a cargo rack from Harbor Freight. It was only $40 with their coupon, and it has a nice 45 degree bend so it picks up off the ground a bit. I'm only using it for spare gas and an extra cooler, so I think I should be fine. I'm hoping this will keep me from scraping like I did before with the straight-necked cargo rack. Lastly... the seats... I have been looking for over a year for new seats with no luck. I wanted the SR5 seats, but there just hasn't been anything reasonably priced in this area. Finally, I decided enough was enough. When we camp, I drive. One trip had me sitting in the driver's seat for 16-hours total. There is just NO back support in those things. I looked at a bunch of photos of the SR5 seats and decided to take a crack at just upgrading mine with some discounted fabric from the fabric store. This project took way longer than expected. In the end, I ripped out the centers for both seats, and added extra padding all around. I added an inch of extra padding in the lumbar support and sides. The seats feel 100% better. I added a little center console/ arm rest with the extra fabric and padding too!
-
Looks like the rear axle has been upgraded now.
-
I imagine this is what a Toyota RV would look like if it was still made today. http://thehuntsmanrv.weebly.com/ http://thehuntsmanrv.weebly.com/interior.html
-
Not so much! I just plan on attaching it for a cargo rack.
-
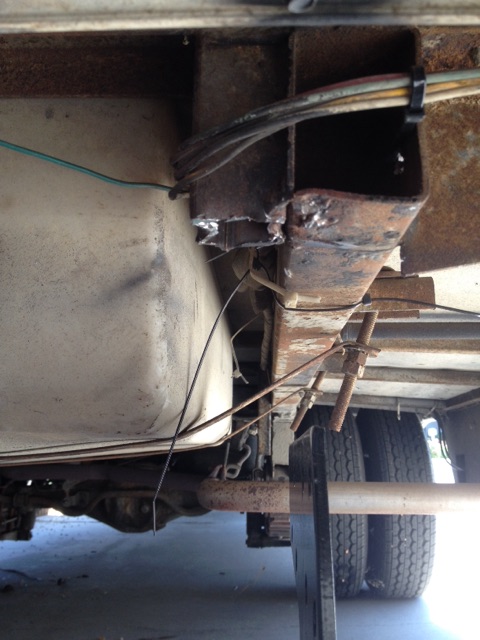
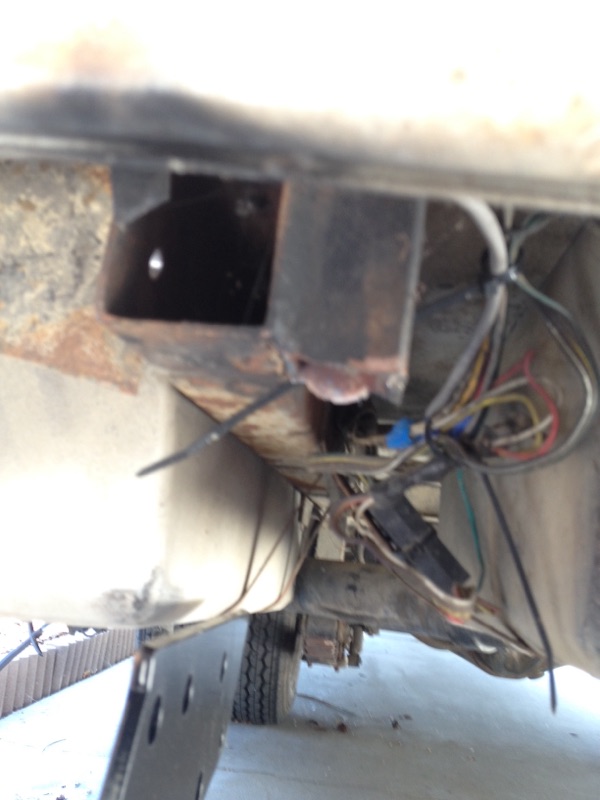
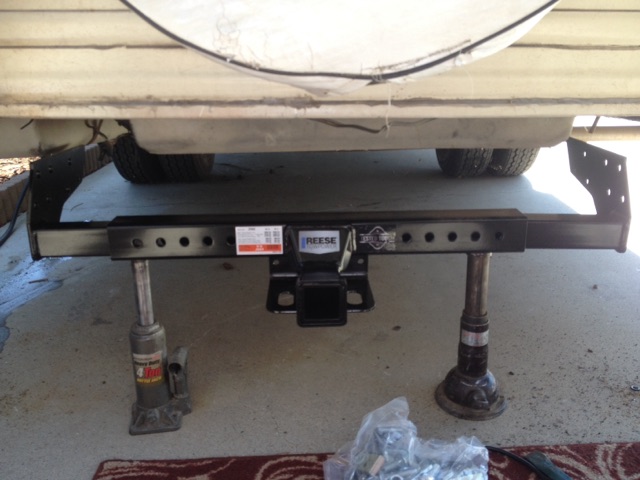
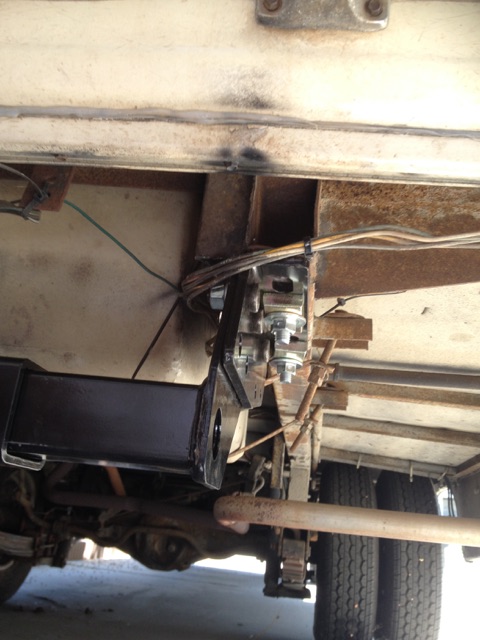
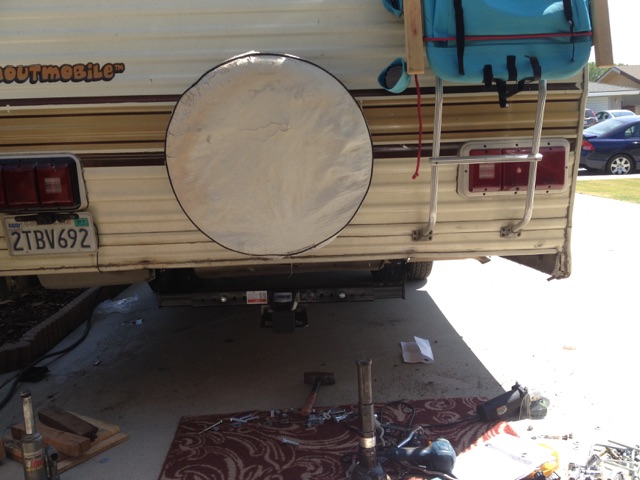
My welding skills are just not good enough to fabricate a receiver. I've been looking around for a decent receiver that might fit my 86 dolphin, when I saw a "universal" one that looked like it might fit (and costs less than $100). Turns out, this thing fits perfectly. Had to drill 4 holes for the bolts and had to grind off a couple little brackets that were sticking down, but that's it. Everything else was 100% bolt-on. Now I just need to get a bumper back on there to hold the sewer line. https://www.amazon.com/Reese-Towpower-37042-Multi-Fit-Receiver/dp/B000CQOIR8/ref=sr_1_1?ie=UTF8&qid=1470461240&sr=8-1&keywords=reese+multi+fit+hitch First photos is the passenger side before install Second photo is the driver side before install Third and fourth photos are how i lined up the hitch to install The last pictures are of the hitch installed
-
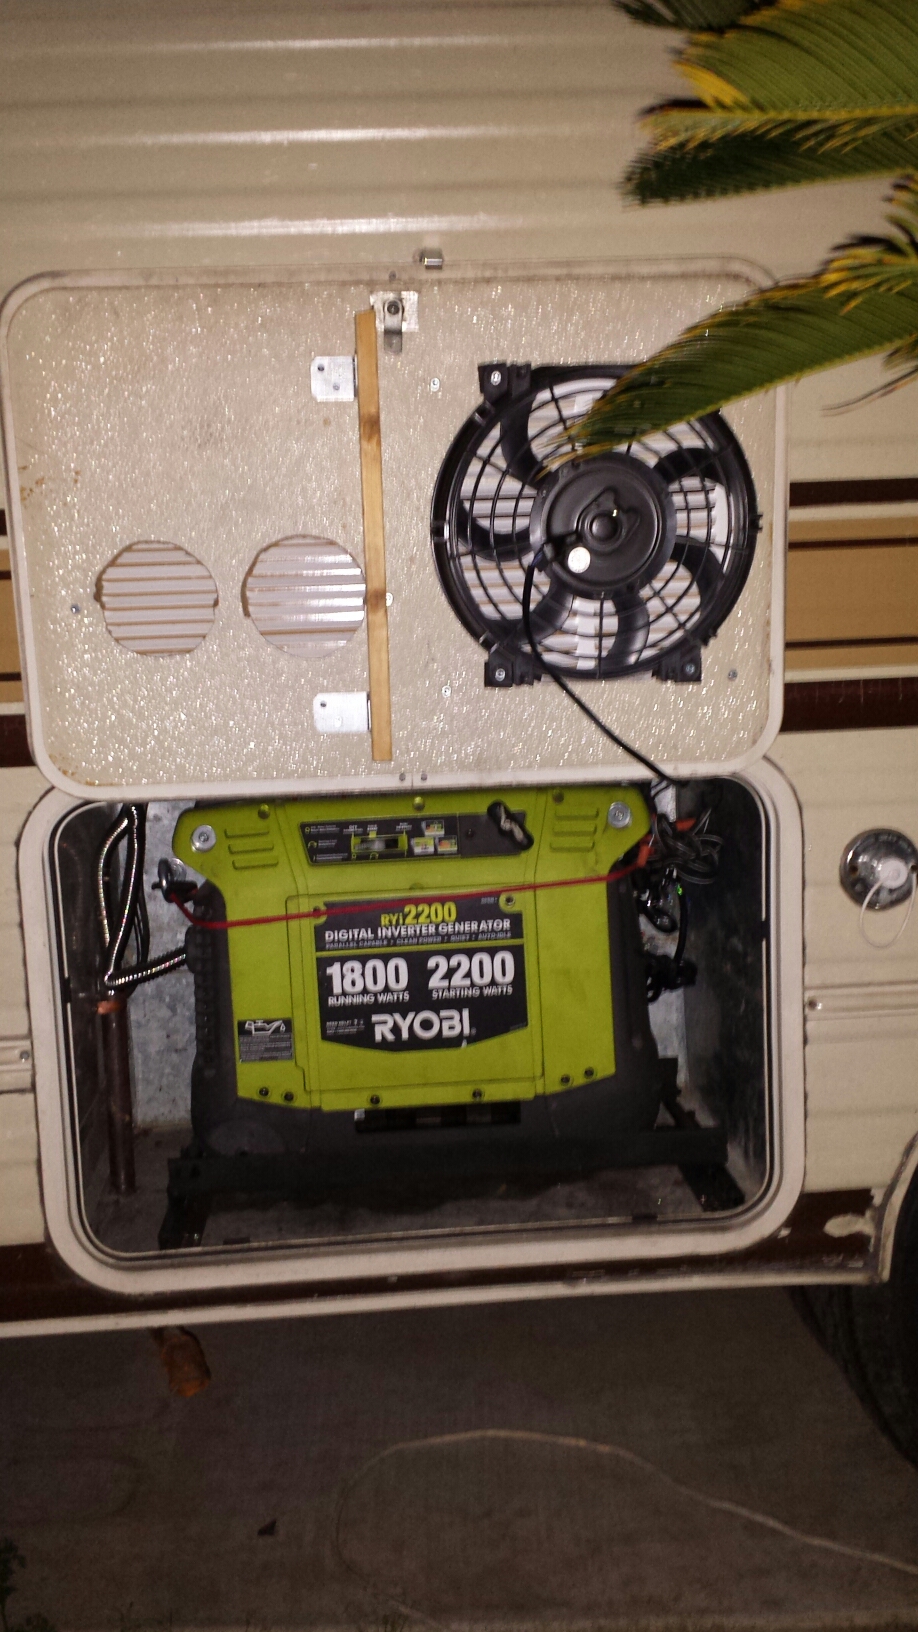
I run it with the cover down when it's not too loaded down. When it's at a high idle I open up the side and roll it out. The tray was just something I welded together with a little $80 flux welder.
-
Yup... I've had travel trailers in the past, but this is my first RV.
-
13,500. I had a killawatt monitor hooked up to it for testing, and after the hard-start capacitor was hooked up I believe it was peaking at something like 1400-1600 watts at startup. Running used significantly less watts. Not sure if the generator would work on the old original AC unit though.
-
It's a Tomos moped. It weighs about 120 lbs.
-
Yes it does. I got a hard-start capacitor for the rooftop AC and it runs it just fine.
-
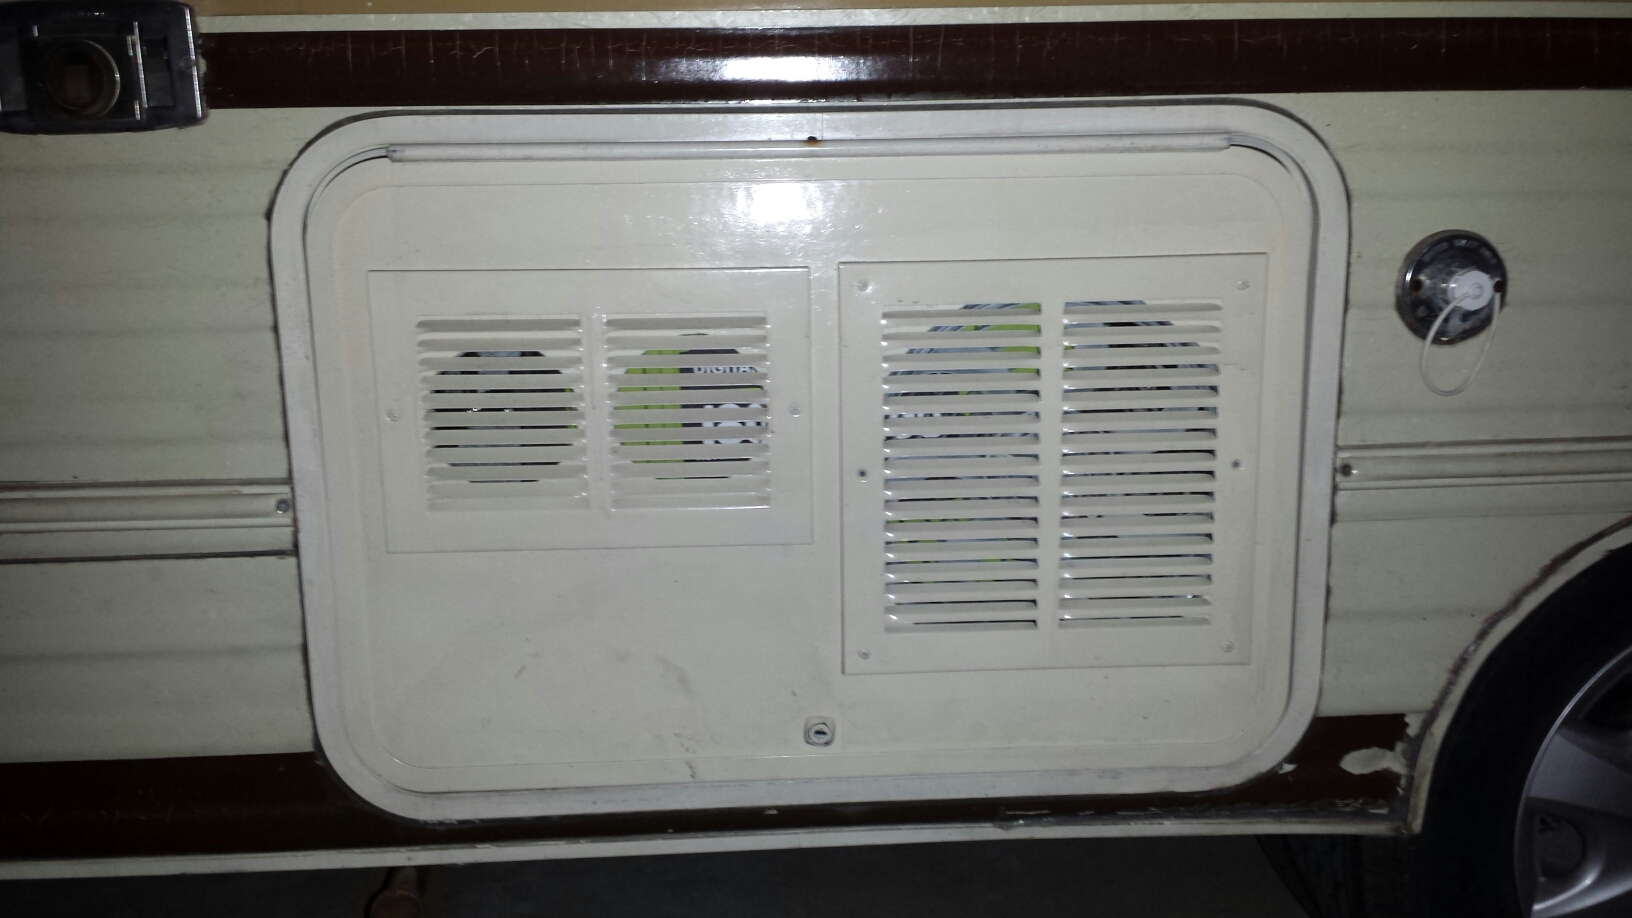
Good idea! I was thinking it moved too much air as well, and at one point I stuck something similar to that in there, but it burned out.
-
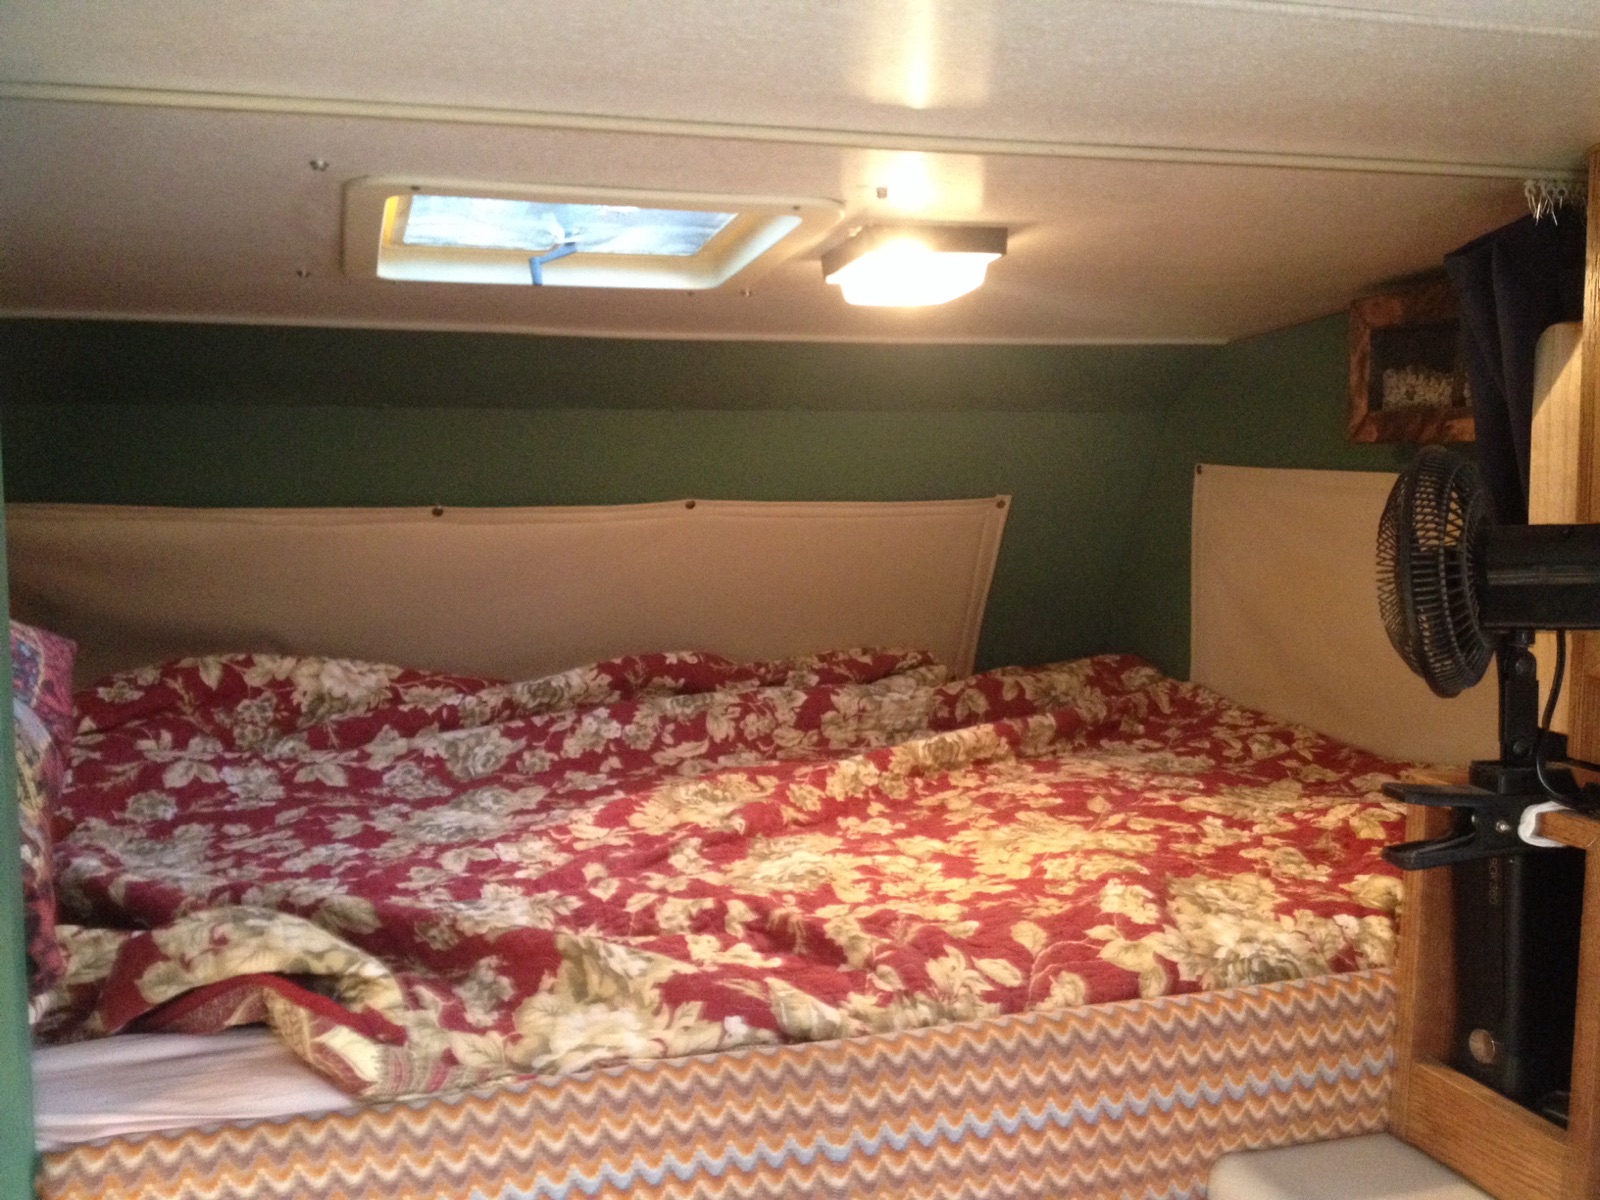
Hello all! I bought a Dolphin about 6 months ago, and have been trolling this site since then looking for advice on how to fix it up. It's been very helpful. Hope I can add to the discussion. So far I have done the following, if anyone wants some tips, let me know: 1. Added a tachometer; 2. Put in a overdrive altitude bypass (just for going downhill); 3. Re-upholstered the interior and added new curtains; 4. Added a bathroom fan; 5. Carpeted the "living room" area; 6. Added an entertainment center; 7. Rigged up an inverter generator to run either inside or outside generator box; 8. Fixed sagging roof with a method used by one of the members on here; 9. Put in new dometic AC unit and rigged up a hard start capacitor so that it can run off the generator; 10. Reinforced the bumper to haul my moped; 11. Shelved the closet; 12 Replaced the toilet with a foot-flush model; 13. Added a little wall between the bed and kitchen; 14. Completely rebuilt the fridge (new heating unit and thermostat) and wired in an interior circulation fan and exterior fan for the heating unit; 15. Replaced all the hinges and pulls for the cabinets; 16. Rigged in an AC/DC inverter to fuse box when operating off grid; 17. Replaced the upper bunk with a bed and memory foam mattress. So far I'm enjoying this little RV. I'm thinking of ways to add a secondary fuel tank in the future so that I don't have to fill-up so much. The last picture is of what the interior looked like when I first bought it.