Zarleno
-
Posts
10 -
Joined
-
Last visited
About Zarleno

Zarleno's Achievements
")
Newbie (1/14)
-
Thanks, WME. I think a water heater bypass is already installed (see photo below), and I'm guessing I need to turn both the upper and lower valves to bypass the tank. Is that correct? If I drain all the water lines and use a blow out plug, do I still need to pump antifreeze into the system? Thanks again!

-
This will be my first winter as the owner of an Itasca Spirit motor home, and I'm wondering about how to best protect the water system. It's parked in a somewhat moderate climate, but the temperature will drop below freezing several nights during the course of the winter months. My understanding is that I should drain the fresh water tank and lines, and put some fresh water antifreeze into the tank and run faucets until the output is pink. Here is what I'm not sure about: How many gallons of antifreeze will I need? Do I need to additionally pour some into the drains? Do I need to put antifreeze into my black or gray tanks (otherwise empty at the moment)? Do I need to do anything to drain the water heater? Do I need to do something with the city water hose attachment to drain it? Thanks for any advice!
-
I used Dicor lap seal. I'm not exactly sure what the previous owner used when he installed the vent fan and revealed the roof, but I assume it was an appropriate product. It was a little gummy in the sun when I scraped some off to install the brackets.
-
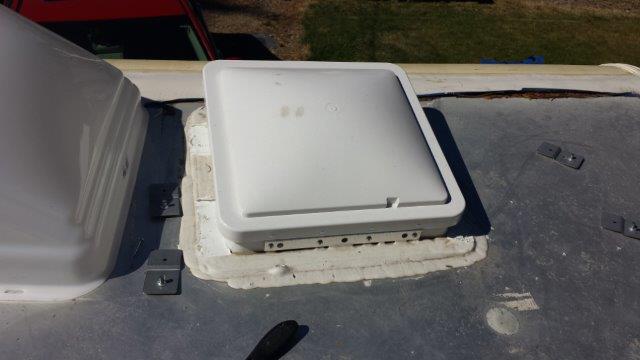
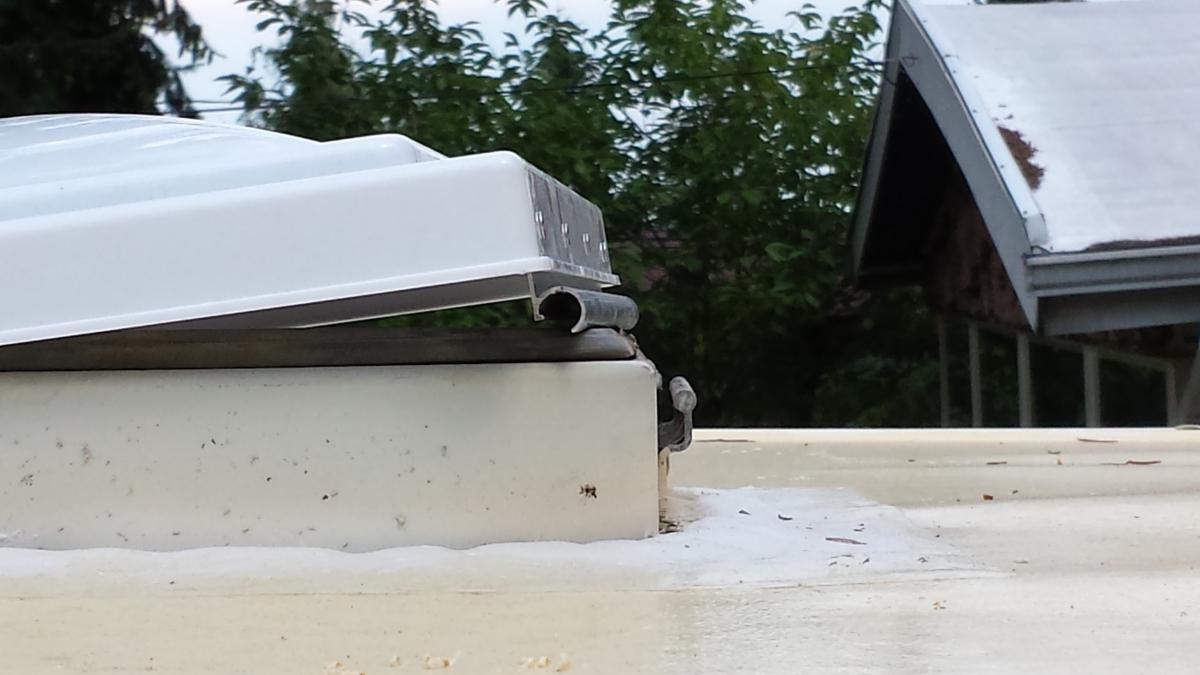
Here is the MaxxAir on the front, then the rear vent with the putty scraped, then with the new brackets, then with the hood. I had been wondering if this would add drag, but I already have a rooftop air conditioner and these are in a line with it, so I don't think it will be any worse. Perhaps the curved leading edge of the MaxxAir will lessen the resistance created by the more boxy A/C unit a few feet behind it.
-
I replaced the front roof vent lid with the official Winnebago part, which is not cheap, but it actually fits. I put the MaxxAir vent hood on the front vent. It went on without incident. It is held in place by some aluminum brackets that have to be bolted into newly drilled holes in the sides of the vent frame. The hood is then bolted to the brackets. It really doesn't take long, just as the manufacturer's video shows. I used a Fan-Tastic UltraBreeze hood on the rear vent over the bathroom. The previous owner had installed a new Fan-Tastic roof vent with a high speed fan and I found that some folks say that one really needs this slightly larger hood in order to open the vent a little higher and provide better air flow. The UltraBreeze took a little more time and trouble, in that one must scrape the caulking putty off four of the screws in the vent frame, squirt a little lap sealant in the holes, and then screw on the four brackets using those holes, with a little more lap sealant after that on the screw heads, etc. After that, the hood sits on pins on the ends of the brackets and attaches with a spring cotter pin. Again, not difficult, but a little scraping and caulking is required. The only mishap was that I managed to crack off part of the little roller/washer that fits in the stock Winnebago lid track and raises and lowers the lid. Since the roller is now flat on one side, it does not work as well as one would hope. I suppose some day I will drill out the rivet and attach a new washer/roller unless there is a better solution. Photos to follow.
-
We are using those for our microwave, too. They work very well and, when the oven died and had to be replaced, I learned just how difficult they are to peel off of an appliance! Even then, there was no marking or scarring of the oven or the counter top above the fridge. I recommend them highly!
-
The lid and vent hoods should arrive early next week. I'll post a few photos after I install it all (or perhaps just some pathetic whining if it doesn't turn out well). Judging from the installation videos, it just takes a few minutes with a drill, pencil, screwdriver, wrench, and a little caulking, and the only real challenge is to avoid falling off the roof while performing the post-installation victory dance.
-
Thanks, Dan, Linda, and River. I bit the bullet and ordered a new stock Winnebago vent lid (now $63), and some vent cover hoods. I'm putting a MaxxAir on the front and a larger Fan-Tastic Ultrabreeze on the rear to accommodate the high-speed fan in the bathroom roof vent. We live in the Pacific Northwet, where it is drizzling at this very moment, and I'm not very good at remembering to close the vents nor do I often want to. Vent cover hoods look like a great idea!
-
Thanks! It appears that the cover is #055218-01-000 (page 101). If it costs in the neighborhood of $50, then I may just as well off replacing the entire assembly. It looks like Camping World has a generic 14x14 unit for $45. Though there would be a little more work involved (scraping, sealing, caulking, etc.), would I be better off with something that has more widely available replacement parts in case of future damage, or should I just order a Winnebago lid?
-
I recently bought a 1991 Itasca Spirit. The previous owner had recently replaced the front roof vent cover, but it seemed to be stuck shut. After a little puttering around, I'm thinking that the problem is that the hinge mechanism of the vent cover isn't compatible, and that the leading edge on the cover tube butts against the support of the rod before the hatch can lift. Forcing it open pops the hinge apart. Do I need a different cover, an entire vent assembly, or am I just doing something wrong? Thanks