getout
-
Posts
107 -
Joined
-
Last visited
Content Type
Events
Profiles
Forums
Gallery
Everything posted by getout
-
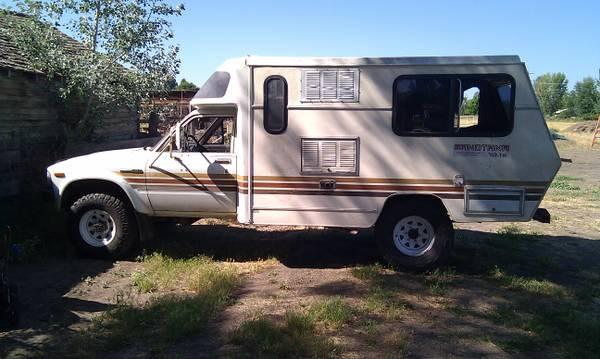
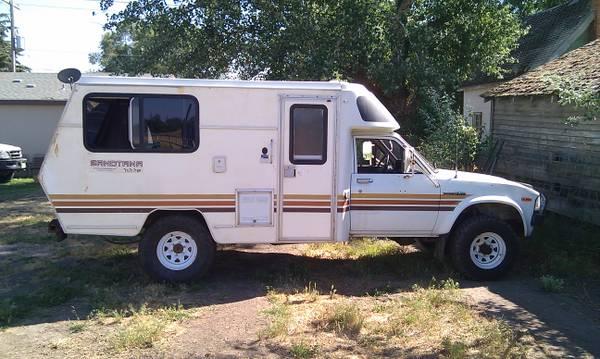
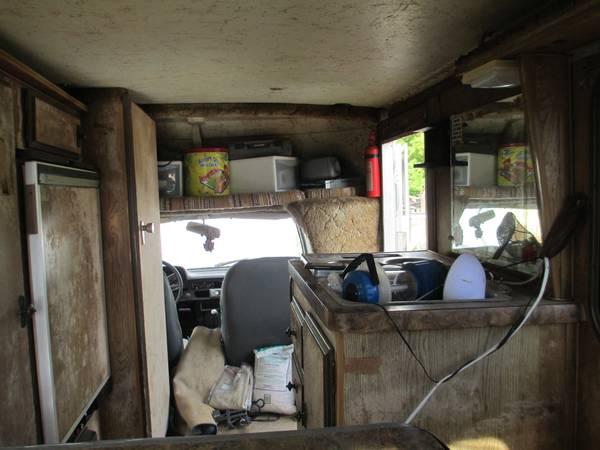
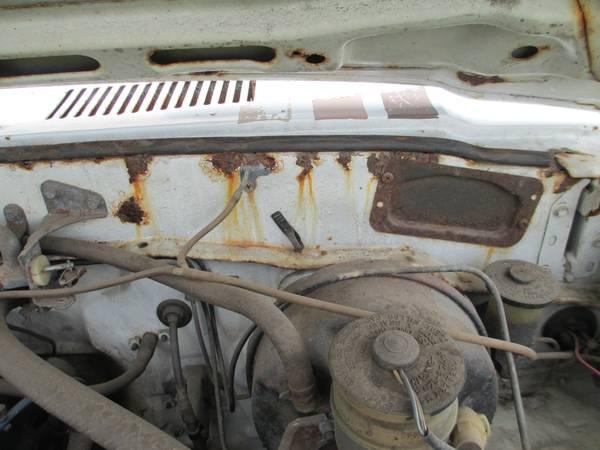
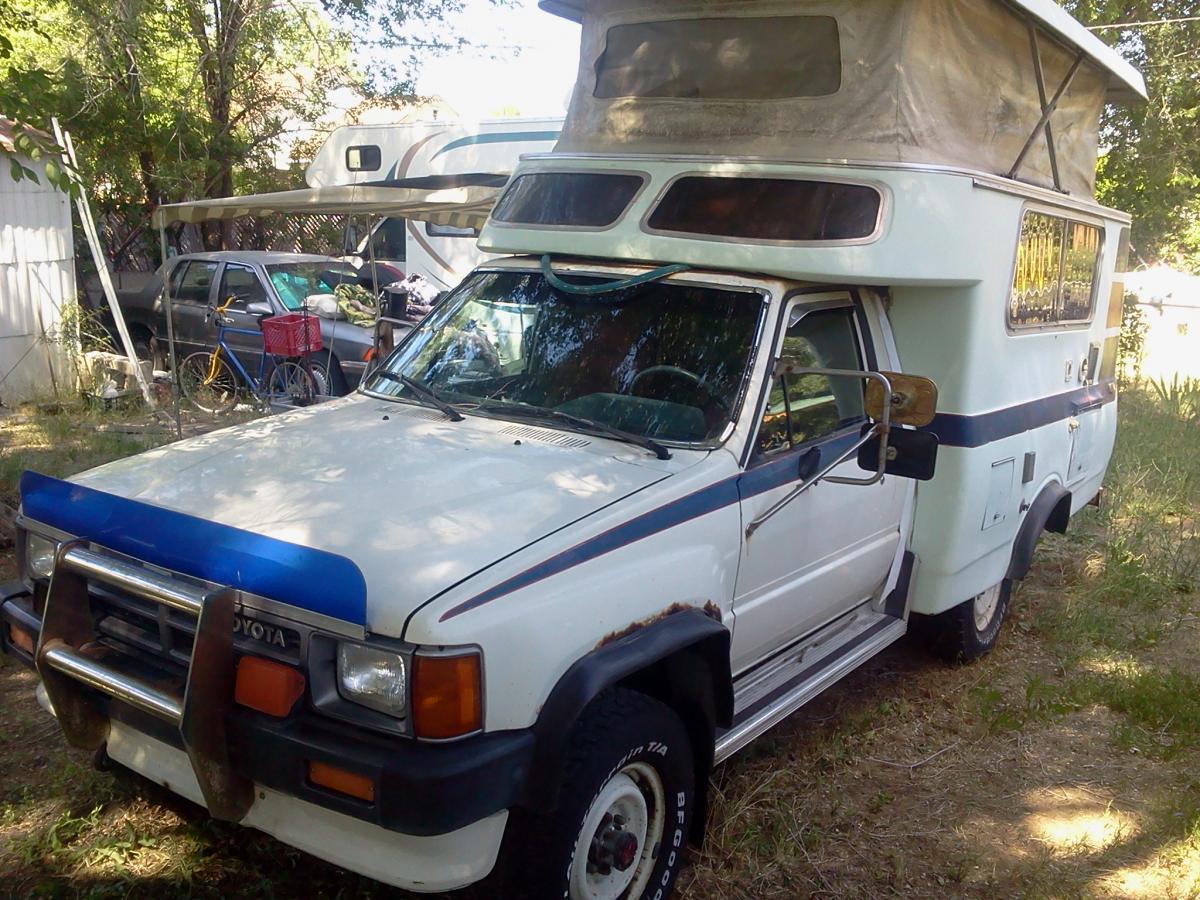
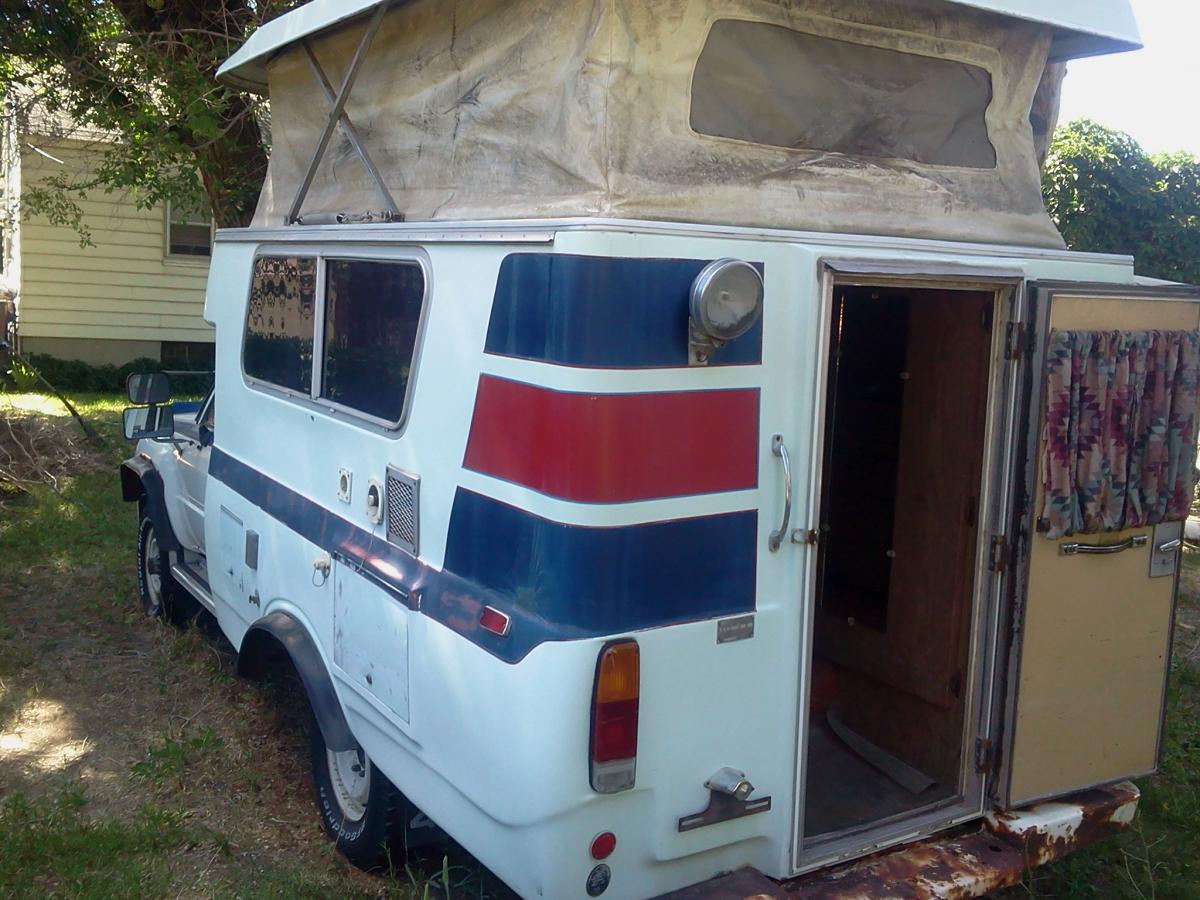
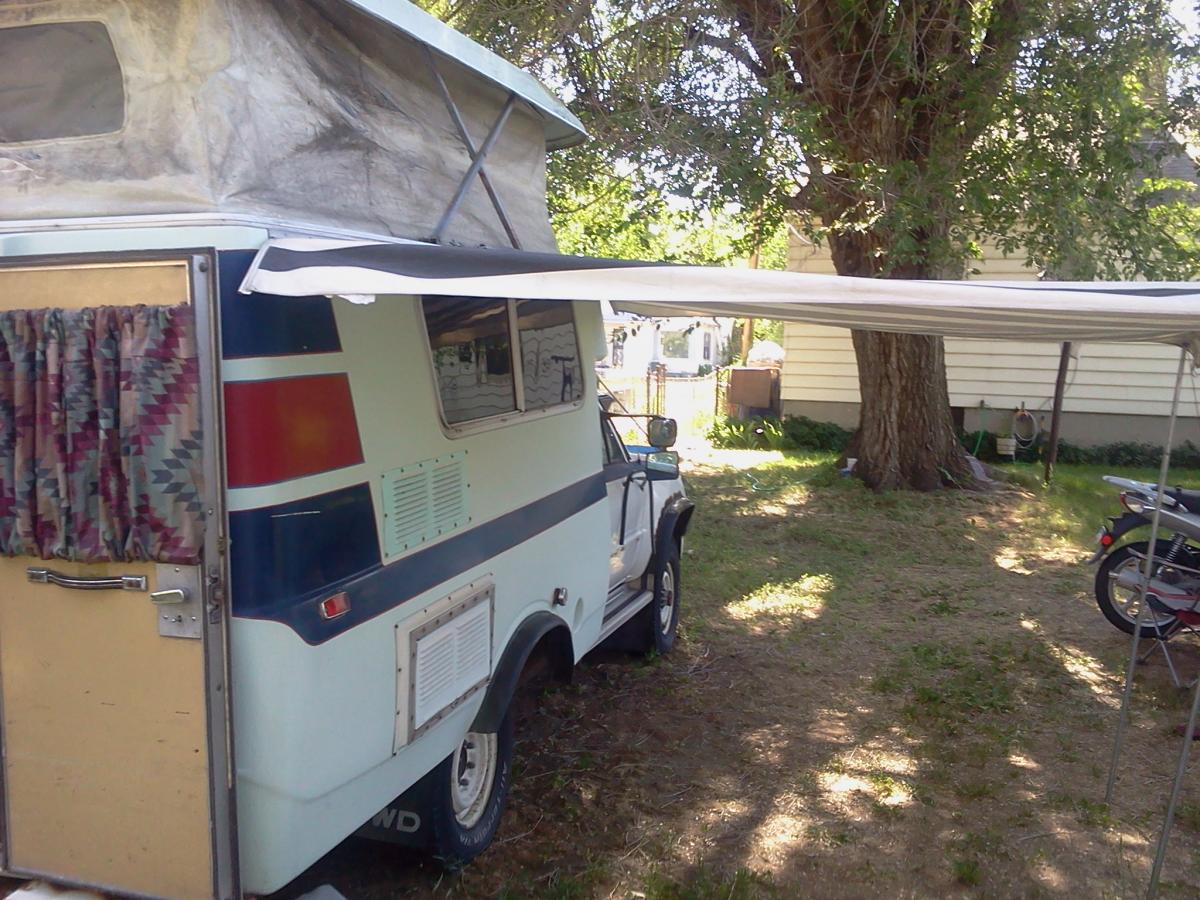
A friend of mine sent me a link to this today. http://portland.craigslist.org/clc/cto/3893233542.html Text from the ad: So I have a stock 1983 Toyota Sandtana 4x4 motor home. It has the 22r Motor with a new crank kit. Could probably use some carb work. 5 speed transmission. Stock straight axle. 4.10 gears. It has the tilt top. Body is really straight. cd player. Perfect dash with no cracks. Under 100k miles. I think about 83k but i cant remember off the top of my head So the rig needs to be restored. the cab has rust. I made a new tilt top "canvas" for it but it needs to be put on. fridge needs work.. I have never tried the stove. The back corners of the camper section has rotting wood. It really needs help but it runs and drives. I lived in it while mining for a summer so its definitely do able. This Toyota is something you could go a life time without ever seeing one of these, they are very rare. I know it needs work but Its a very rare rig. I love the rig and dont need to sell it nor do i really want to but im tired of it sitting around and i feel bad. im a toyota fanatic would like to see it restored. Im sure im forgetting a lot. But im open to cash offers. Dont low ball me. look at how much 2wd campers go for and then think about how much a 4x4 one would be worth... Open to trades. streetbikes, supermoto, other toyota or tacoma trucks. anything fun or fast or cool. open to all reasonable trade offers.

-
Sounds good to me. I just hope you're not planning on coming down anytime soon.
-
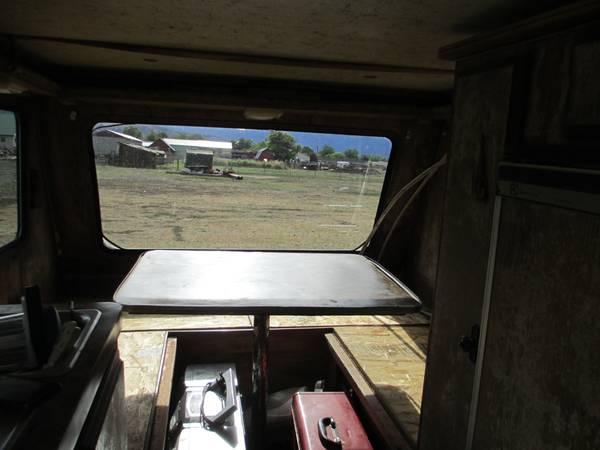
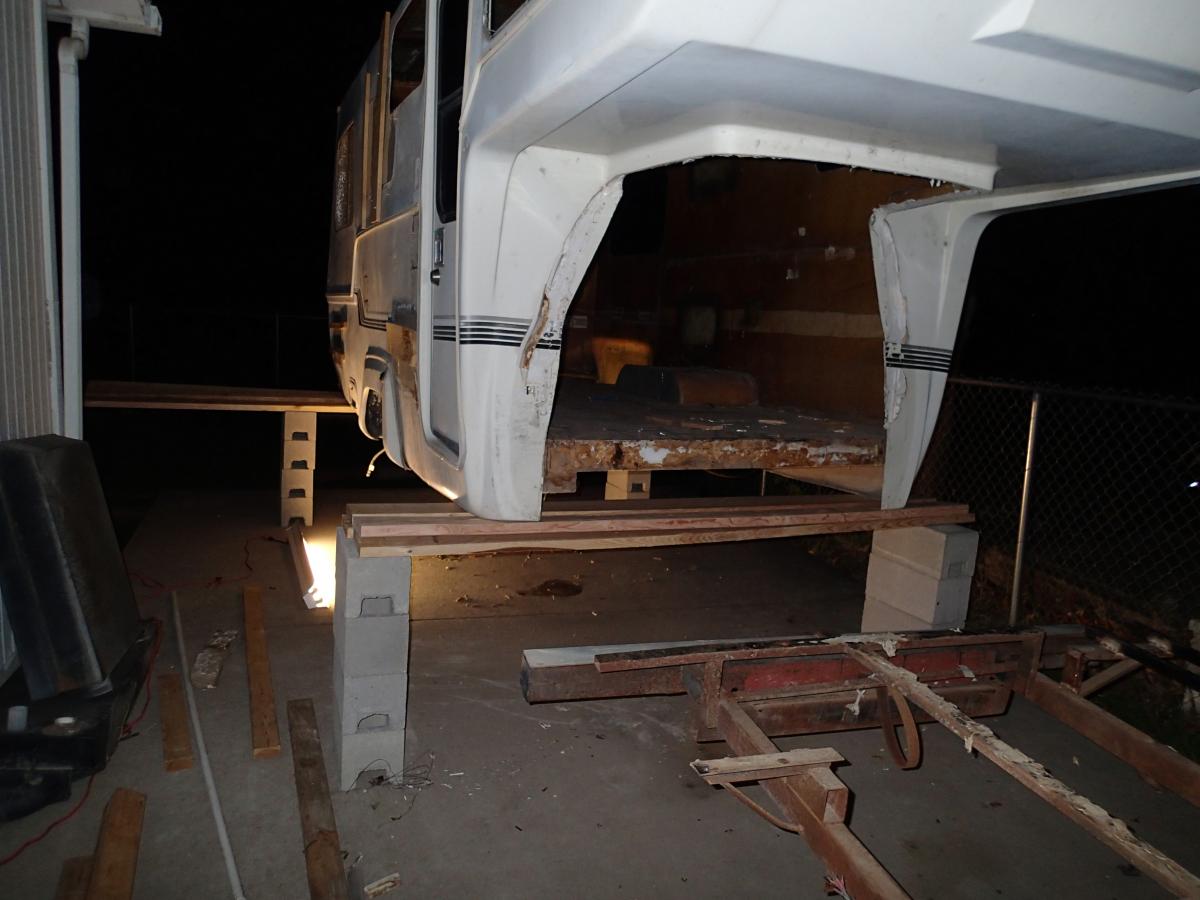
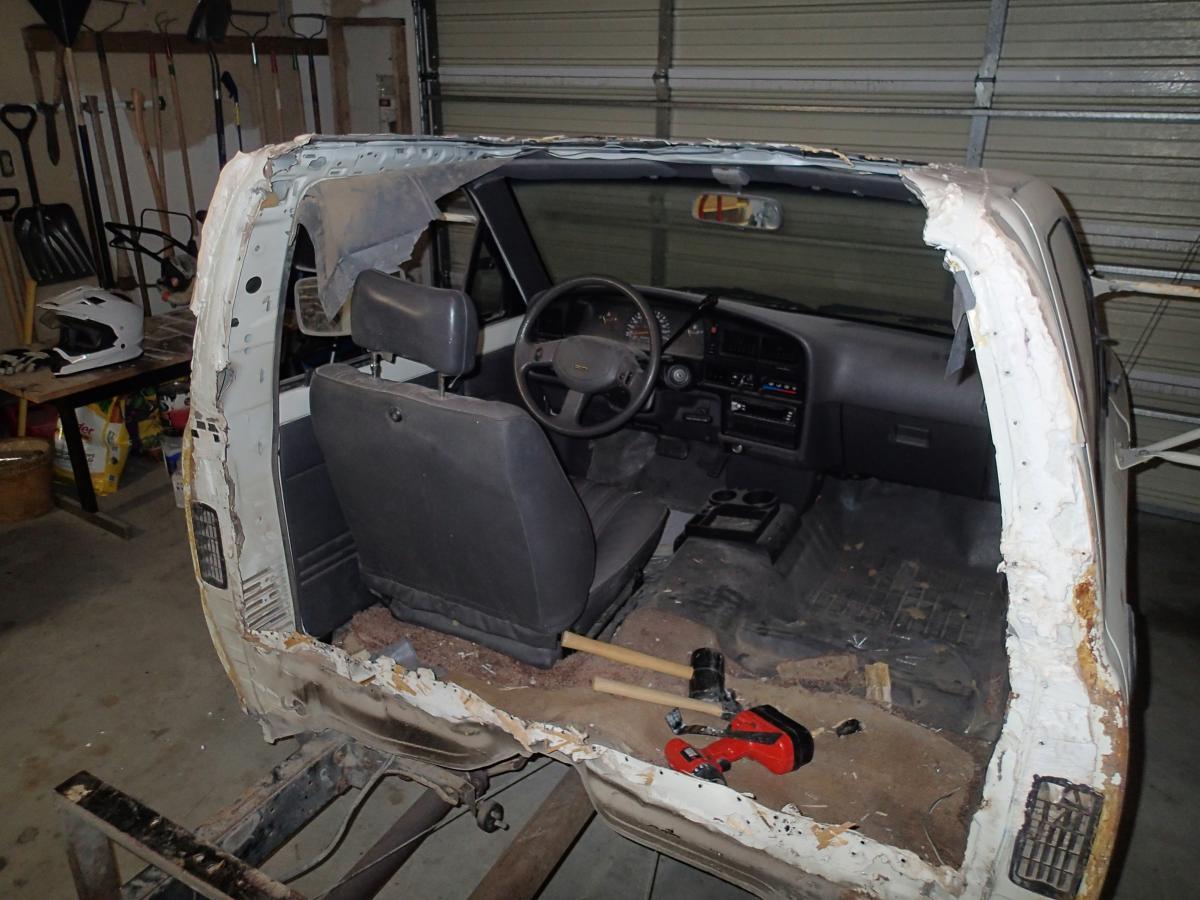
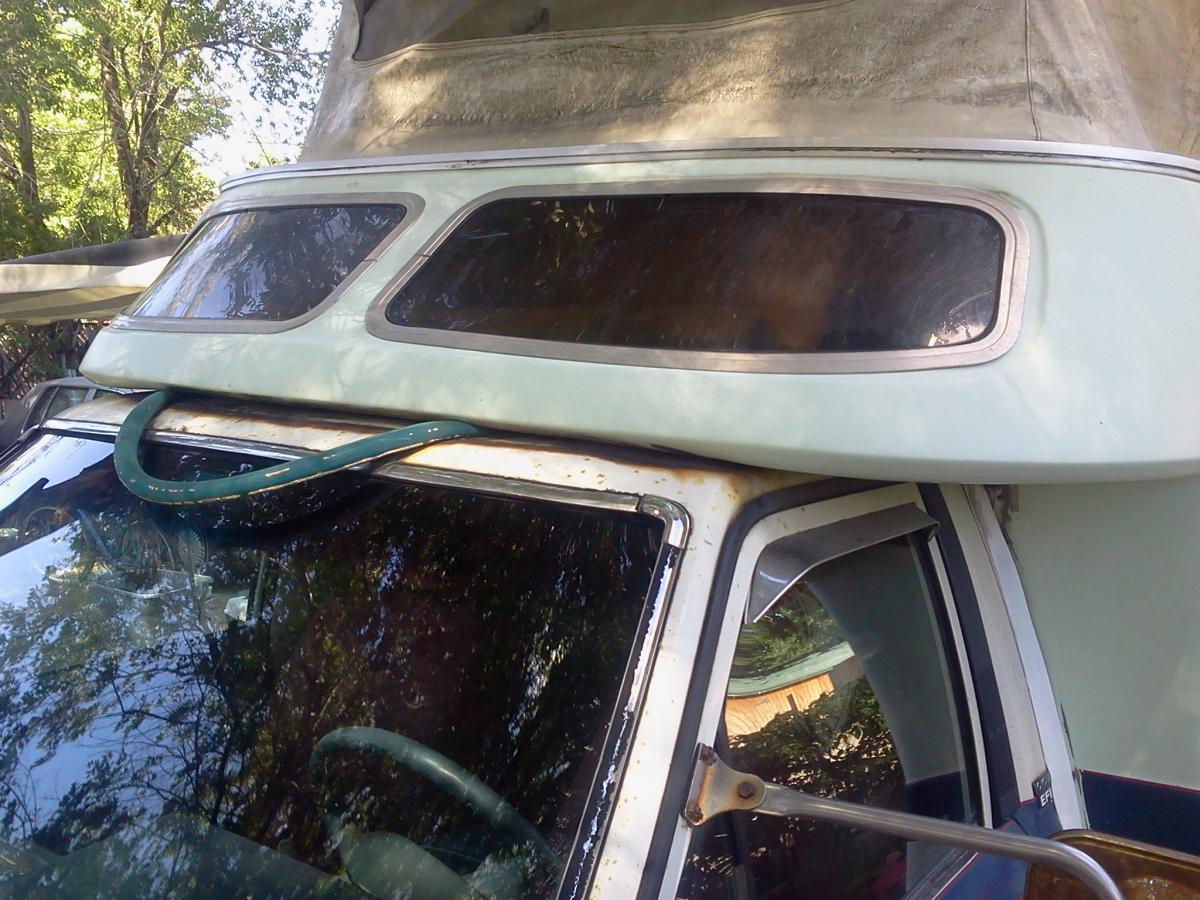
Everywhere! There were 15-20+ through the bottom of the cab into a piece of wood dropped below the floor in the camper. On the driver side, there were about that same number through the cab, through the camper, and into a piece of wood that was glued vertically to the fiberglass. On the passenger side there were about that many through the camper into the cab. All around the cut-out roof section there were screws about every 2-3 inches screwed through cab, through the fiberglass, into and into wood that framed the opening of the roof pass-through section. Every time I thought I had gotten all the screws, I ended up finding more. When I finally freed the shell, there were about 4 screws on the driver side that I tore through the glass. Two were pretty deep in the bottom corner that I didn't see. The other two I just hadn't seen the heads of when I was unscrewing. The hardest part about the separation was actually all the glue. If pulling the two pieces apart at an angle, the glue released fairly easily. It got more difficult and I had to 'break' through it with the pry bar when I was trying to pull the two pieces apart without the advantage of being able to angle the pieces apart. About half way up the cab, the cab slopes at more of an angle than directly vertical. I couldn't get the shell high enough in back to put any kind of angle on the two attached pieces enough to detach them. Thus the pry bar through the gap, lowering the back down, and jacking up the front to break the last bit of glue free.
-
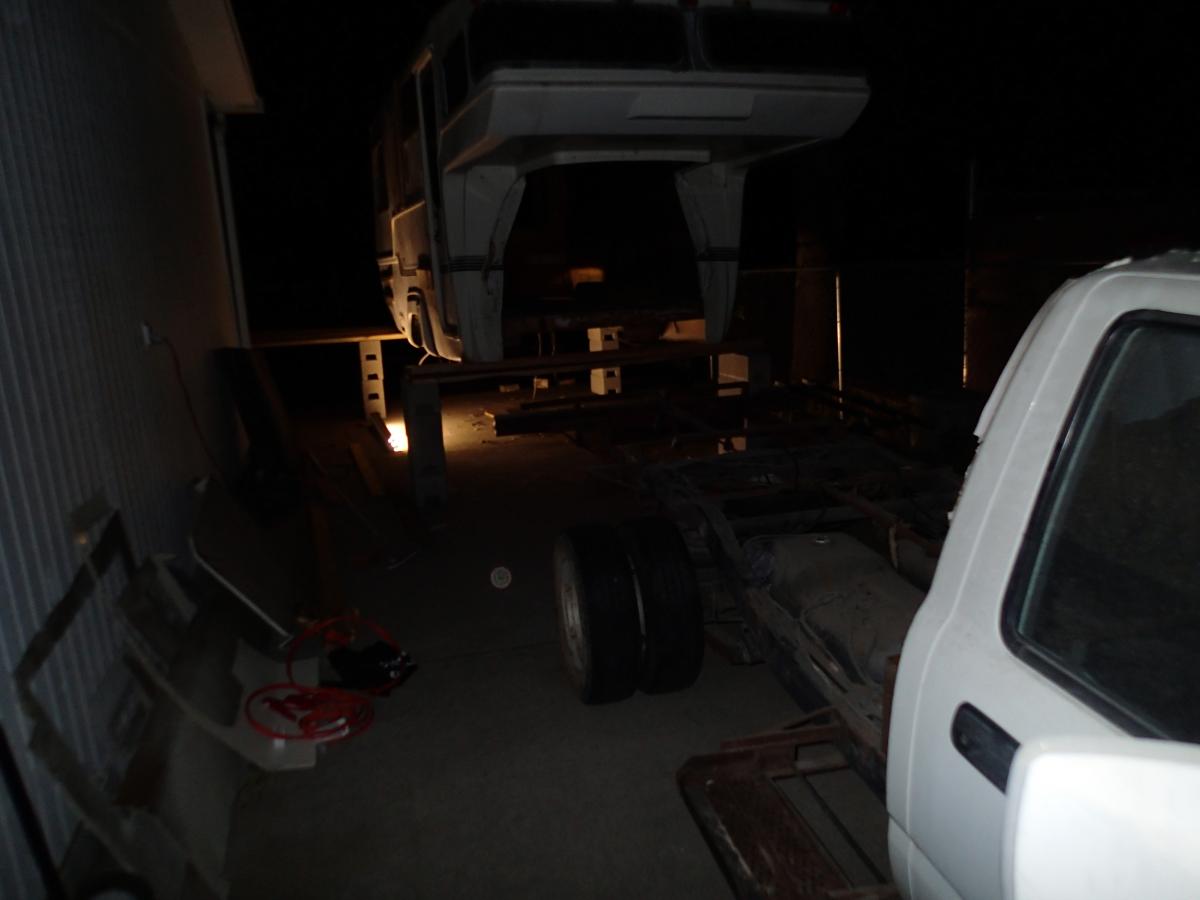
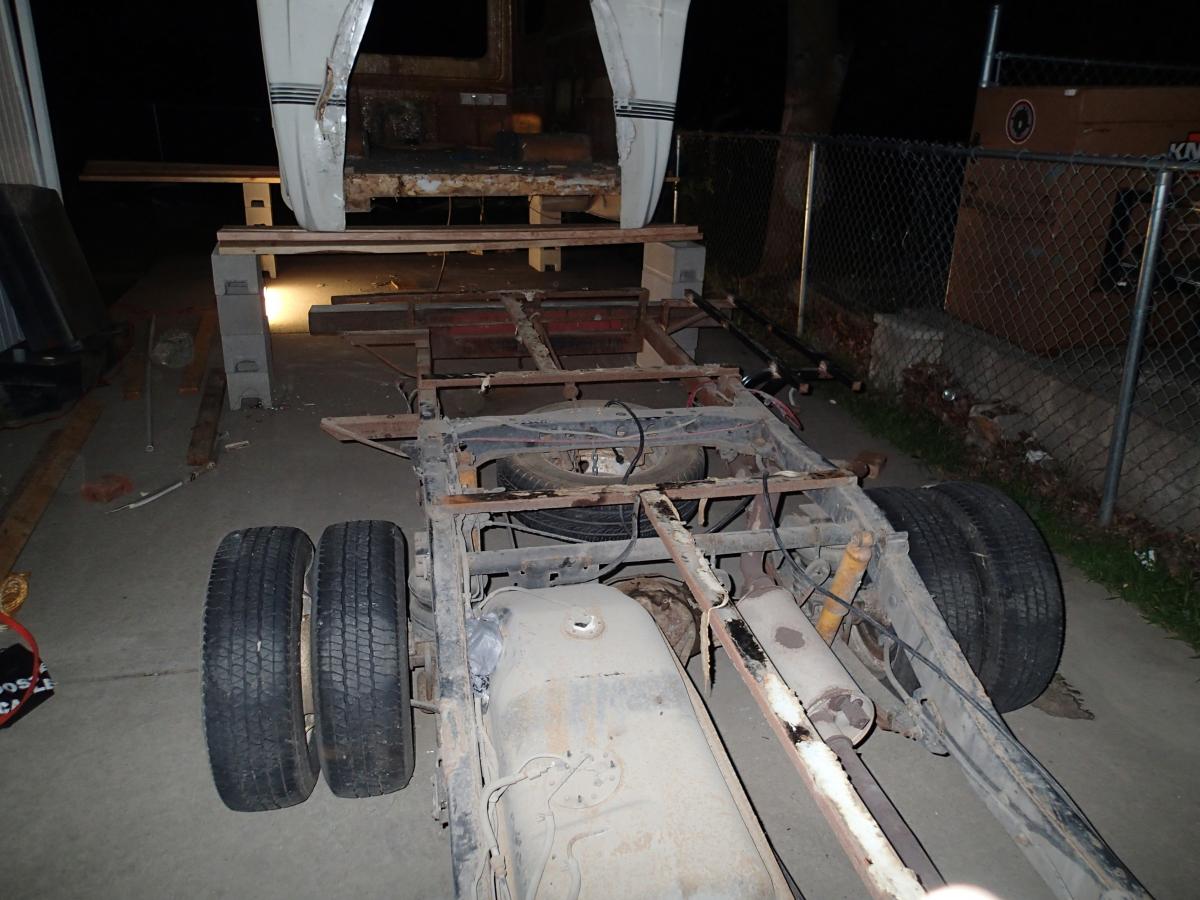
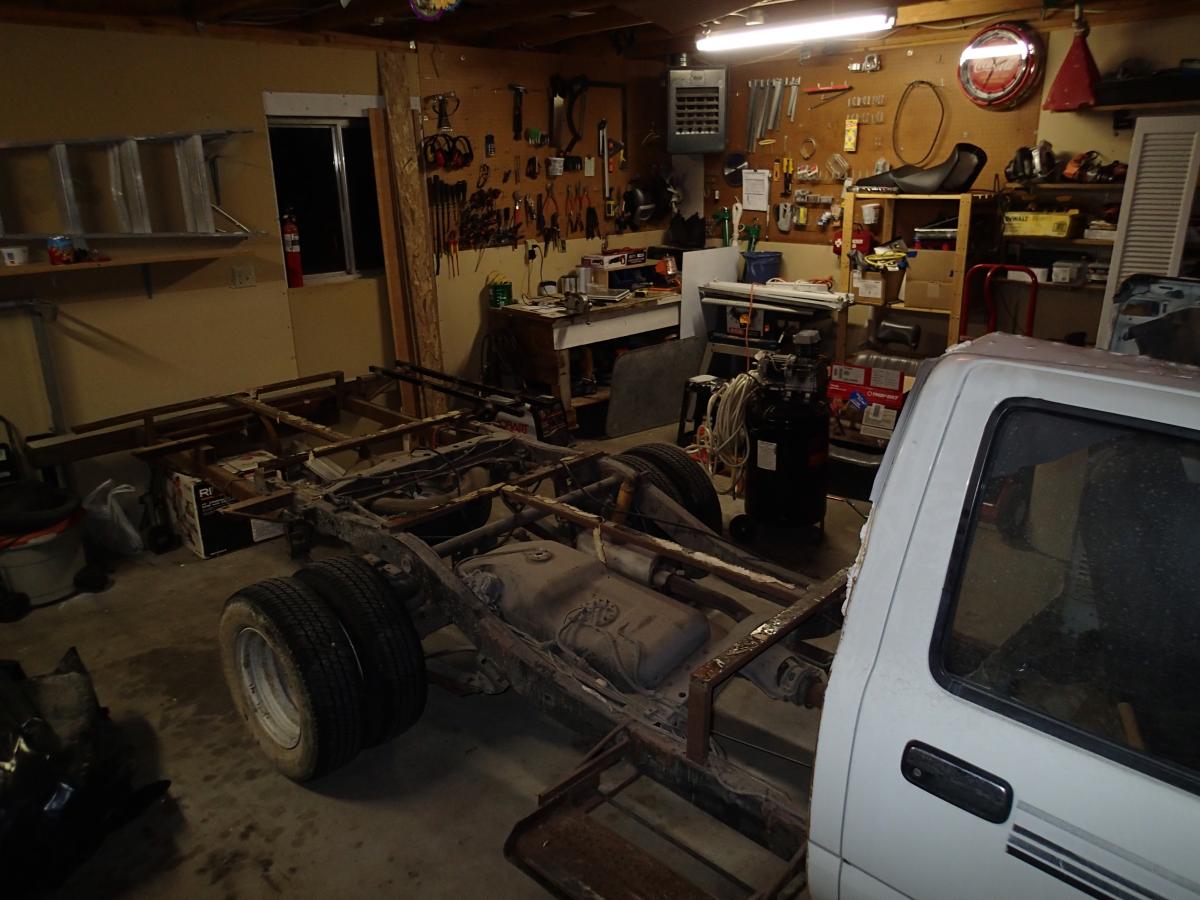
Got the rest of the shell off last night. The truck is now in the garage since it has no back. I ended up using 7 6x8s all they way under the shell sitting on 4 cinder blocks at each corner. The shell is resting on the fiberglass and not the floor at the moment. I think I'm going to build a frame using some of the the 6x8s to sit the motorhome on until it's ready to go on it's new ride. The 6x8s came from the Lowes 'scrap' wood area and they gave them to me for 75% off so I got 9 16 footers for $30. They're not very straight but for this it didn't matter much.
-
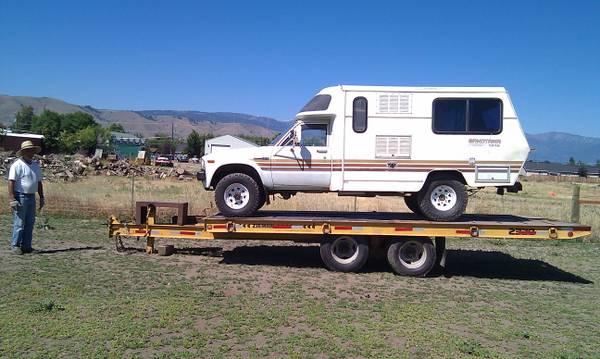
1987 4x4 with Chinook for $750 - Blown Head Gasket - SLC, UT
getout replied to getout's topic in General Discussion
Linda, you must be local...or somehow know everyone in the U.S. with a Toyota motorhome. I'm starting to believe the latter is true. I was pretty excited about this thing. The owner had said a guy was thinking about buying to flatbed the truck. I told him if that guy bought it that I would buy the chinook shell from him. If your friend gets this thing cleaned up, I'd love to see pictures of it. It looks like a blast. I'm back to working on my project again: http://toyotamotorhome.org/forums/index.php?showtopic=5249http://toyotamotorhome.org/forums/index.php?showtopic=5249 -
Well, it's been a while. Lot's of house and baby stuff going on during the winter. When you don't work on a project for months because you're working on other things, you have a lot of time to think...and I think I'm going to 4x4 this guy. I'm still trying to decide how to do that, but in the meantime I'm taking the shell off the truck so I can do some welding to the support structure and frame underneath. The floor is sagging pretty good on the sides so I think I'll build some more support for that. Anyway, in case you wanted pictures of the removal, here's what I've got. Please note: the picture with the screws represents maybe a quarter of all the screws. If you're doing this and you think you've taken all the screws out, you've probably gotten about half of them. There are always more and they're hiding. To take the shell off, after removing as many screws as I could find attaching the cab to the shell and the 8 bolts through the floor to the frame I started to jack up the rear of the camper from the floor. As shell would go higher and higher, the adhesive at the cab would release a little at a time starting from the bottom. I also used a thin pry bar to hammer into the gap to loosen up more adhesive. I didn't do much prying with it and wouldn't recommend it as it started making a cracking sound. With the back about 6" off the frame, I used the pry bar to cut through the adhesive around the roof area and then jacked up the front of the camper. It released and the shell was free. Now I'm trying to figure out how to get the truck out from underneath it.
-
1987 4x4 with Chinook for $750 - Blown Head Gasket - SLC, UT
getout replied to getout's topic in General Discussion
The owner emailed me and told me it went to a longtime Toyota Motorhome owner so it will hopefully get a new life again. -
1987 4x4 with Chinook for $750 - Blown Head Gasket - SLC, UT
getout replied to getout's topic in General Discussion
Yeah, it took a considerable amount of self control. -
1987 4x4 with Chinook for $750 - Blown Head Gasket - SLC, UT
getout replied to getout's topic in General Discussion
Yep. we're technically in Bountiful now but were in Salt Lake for years. -
Saw this online today and went to take a look. My wife would kill me if I brought another project home but I thought it was a pretty good deal and I got some pictures. http://www.ksl.com/auto/listing/657006?ad_cid=1
-
New Toyota motorhome article on full-time living...
getout replied to Odyssey4x4's topic in General Discussion
So you know, I had a friend text me a picture of your rig to show me how cool he thought it was. He was surprised I recognized it from your blue bumper. -
1979 Sunrader for $1,200 - someone buy it before I do!
getout replied to getout's topic in General Discussion
Linda, did your friend say anything about the rear end? -
Found this in the local classifieds. I don't need another project...I have one already that got lowered on the priority list due to home upgrades. I called and he couldn't remember the number of lugs on the rear axle, but I imagine it's not a floater. It's in Salt Lake City. $1,200. I'm surprised it's lasted more than a day. http://www.ksl.com/index.php?nid=218&ad=25074422 1979 Toyota mini motor home new drive train, engine needs some work. Great on Fuel and will park in the same space as most cars. Body is good -has been kept in a garage most of the time
-
Where did you get new window gasket material from? My windows are in decent shape but the gaskets are dry and shrunk.
-
I'm excited for this one. I saw this beast on craigslist but couldn't convince my wife that I needed another shell of a motorhome at our house...even if it was 4x4. I've got mine I've got to get back together this spring sometime. Thanks for posting on here. Always fun to see pictures.
-
HAHA! I keep thinking the exact same thing!
-
This looks like it's going to be fun. I started into a Sunrader project but haven't gotten too far yet. It's been cold and I've been doing house projects. I've always really like these tiny toyotas. I'll be excited to see what you do with the rebuild.
-
So you're all starting to convince me to go 12volt. My next question, could you use this in place of rear brake and turn signal bulbs? http://www.ledmarketing.com/p/36-1210-smd-led-car-light-panels-980-37399106.html
-
Do you not need to install a voltage regulator on those LEDs? Can they handle the extra voltage from the alternator?
-
I'd really like 12 volt lights but they're not cheap. We don't have any fixtures anymore in our motorhome so we'd have to buy all new fixtures as well. Also, it would be nice to turn some lights on while keeping other lights off. I thought about doing the Ikea LED pucks but are they any brighter than what I've got? How can I do this without breaking the bank? I figured I'd run a switch through a relay before the voltage converter. Shut all the lights off in the whole unit. I'm going to put the switch close to the door though. The remote sounded like a nice luxury item. It's probably going to end up in it's little holder on the wall 95% of the time. Brighter lights would be nice, but I seem to have a hard time finding an affordable solution to that. Going the Costco puck light route looks like it will cost me $30/pack x 4 packs for a total of 24 lights and $120. A $10-$15 voltage converter and I've got all my interior lights for around $140 or so. We're used to tent camping so any mounted/permanent lighting will be a plus. I'd be willing to dump the idea of the remote and ability to turn on individual lights for brighter ones if I could light the motorhome for about the same price. Any ideas?
-
Haven't ever had a motorhome and it didn't have an oven when we got it so I guess we'll find out once this thing is all put back together. I hope so. I like cookies.
-
We actually bought the stove and oven combo because of the four burners and oven. We cook a lot at home and use four burners for many meals of camping/rafting trips. Big griddles and another pot or two depending on the meal. We thought the oven would just be a bonus...for cookies.
-
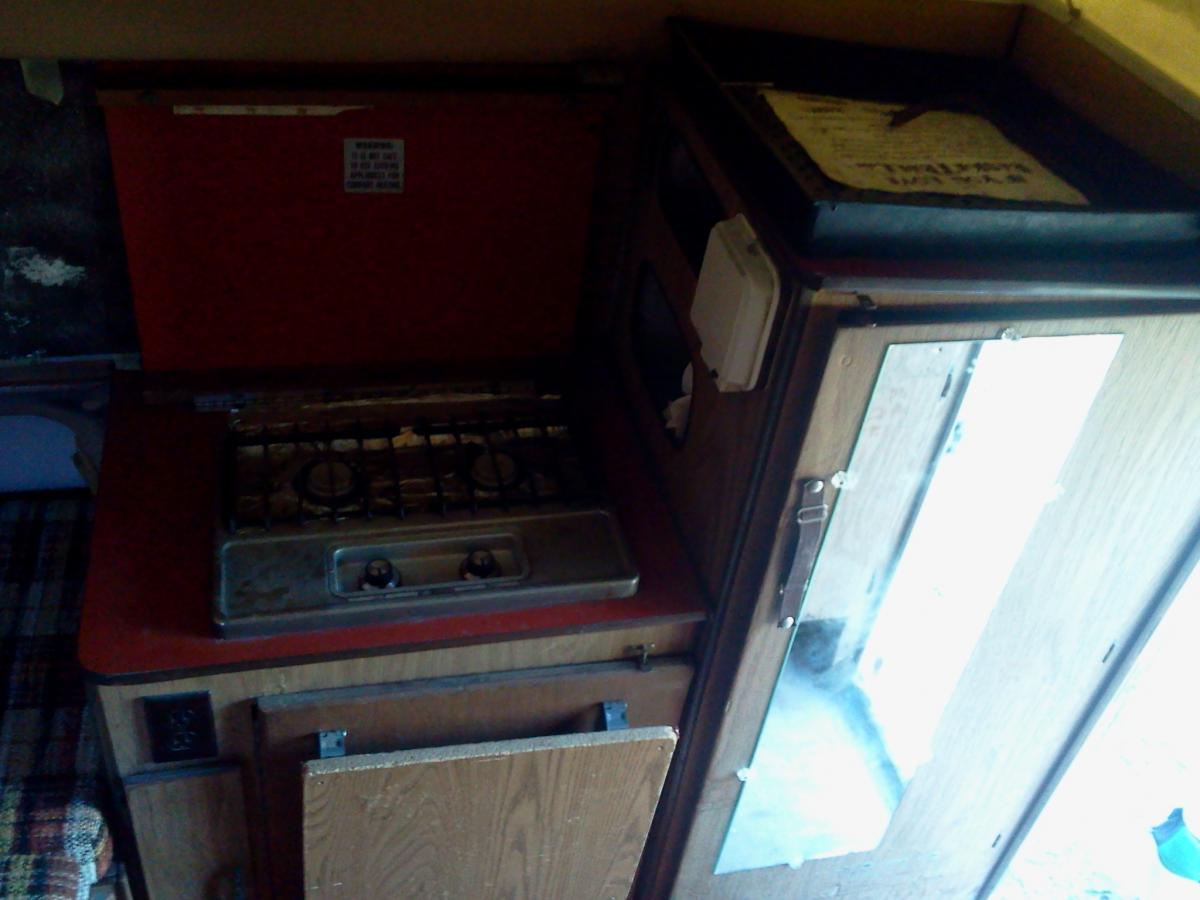
Here are some more stove pictures. It doesn't look like it would be too hard to cut the top off and just leave the burners. There's a picture of the hoses that go to the oven too. I guess you could just plug those. Take pictures if you do it. http://postimage.org/image/6eq2r1ect/'>http://postimage.org/image/j7e6qypyl/'>http://postimage.org/image/8ylpl51wt/'>
-
Ok. I did some more research. Tell me if I'm thinking about this all correctly. I want to run the lights in parallel because they'll be on and off individually and not all together. Doing that also means they need the same 5 volts delivered to each. As more of the lights are on, the amps will increase. So, if each light draws .1128 amps, if all 24 were on at the same time it would draw just less than 2.8 amps. I should be able to get a 5amp, 12v to 5v converter like the one below and run all my lights from this one converter without regulators or resistors. http://www.ledoes.com/product/203008-52388877-dc-converter-step-down-buck-module-12v-24v-5v-5a-25w-waterproof-car-led-display-power-supply-converters-wholesalers.html My next question, how does the 30-60 feet of wire affect all this? How am I doing? Am I getting this figured out?
-
Could you run all 18-24 lights off one converter as opposed to wiring voltage regulators into each light?