Ritabago's Dad
-
Posts
79 -
Joined
-
Last visited
Content Type
Events
Profiles
Forums
Gallery
Everything posted by Ritabago's Dad
-
Thanks for the input, everyone. Here's an update: water had gotten low in the coach battery. Topped it off and did invest in a surge protector. It was still noisy for the next couple of state parks, but it's gone back to being quiet.
-
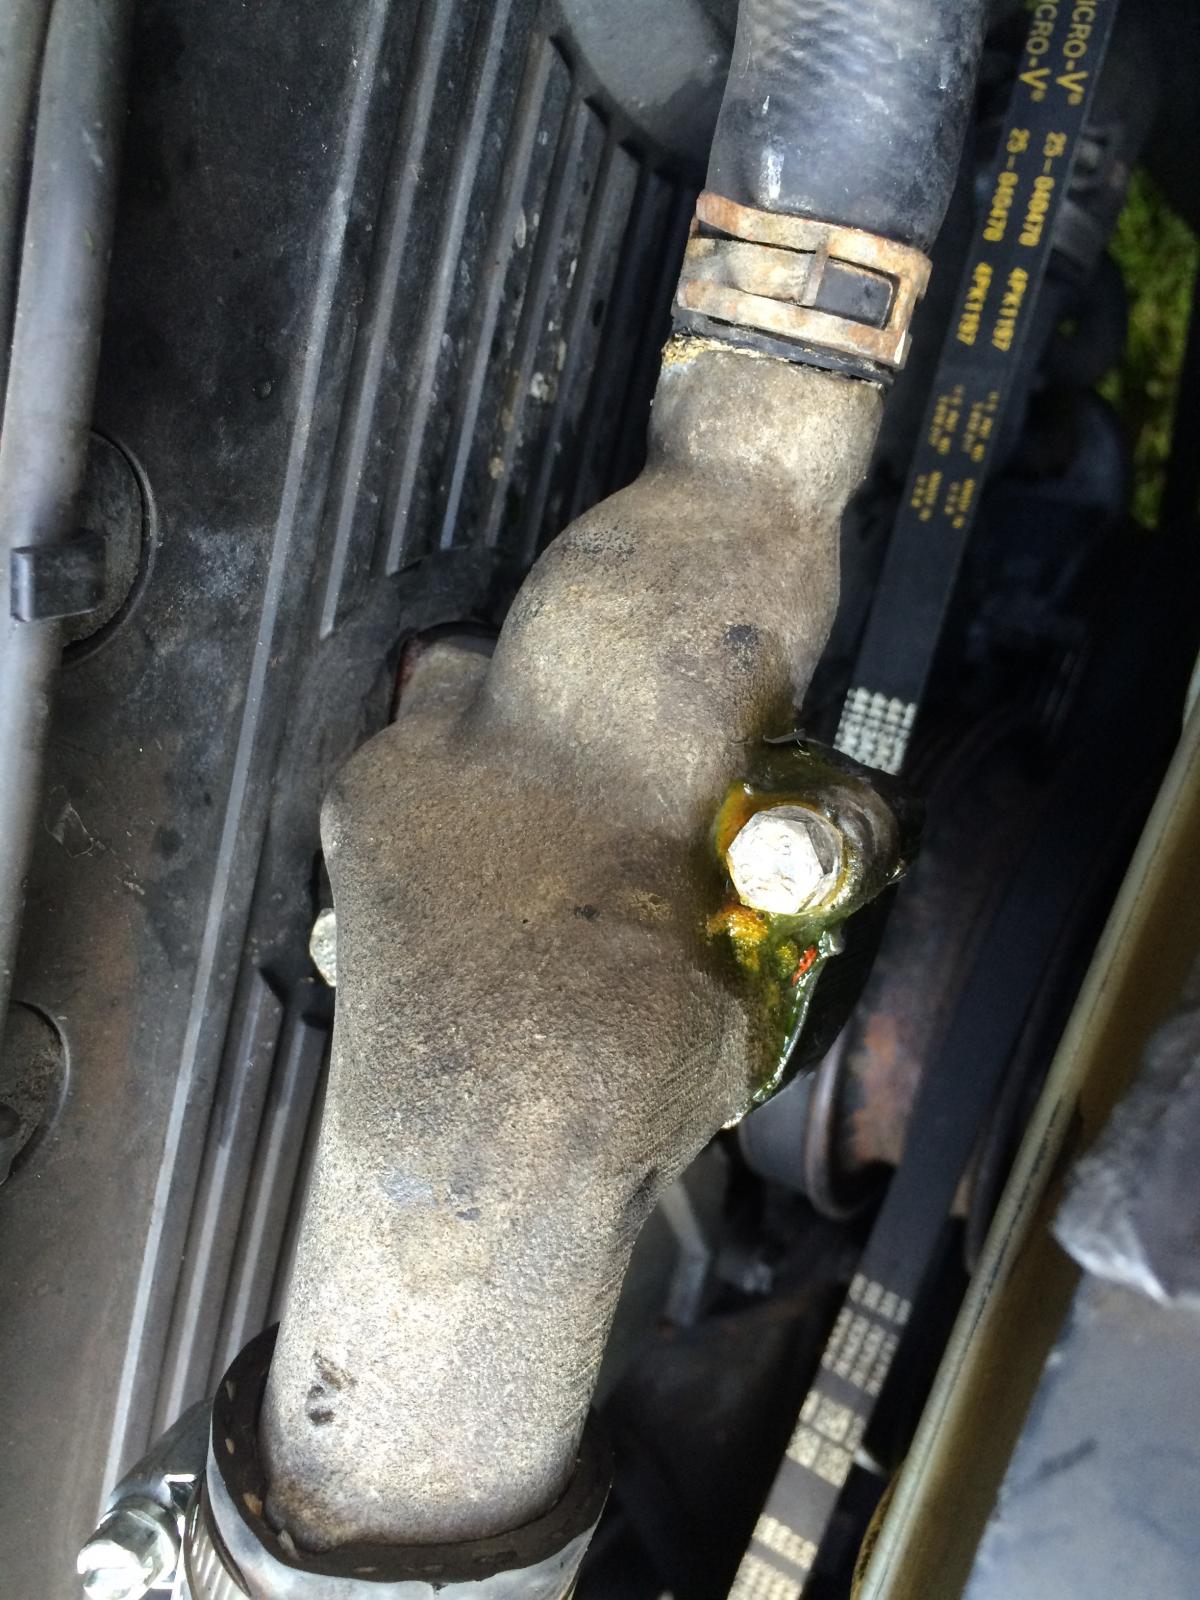
 We opened up the casing and there's no gasket present - the leak appears to be coming through the screw.
 -
Thanks for the info! Okay, so the thermostat is located lower on the engine and the photos I've posted; that's definitely not it, but that's what's leaking. Nothing but a cavity inside that housing. Suggestions on sealing that? RDV?
-
A friend is helping me with some engine matters today and I'm looking for some specifics on this thermostat situation. As you can see by the pictures, I've got a leak at the thermostat. I know there are thermostats rated for different temperatures. For a '91 Warrior, what am I looking for? Would like to replace the unit and the gasket but want to make sure I get the right one. Thanks for any help!

-
Should I be worried about the fan giving out and the converter overheating, causing more problems? I'll be passing through Nashville soon and have a guy there who can work on it. Just have to get through a few days of shore power with this 100 degree heat index!
-
My power converter, located at the base of the couch in my '91 Winnebago Warrior has always had an audible hum, but lately, it has taken to making a louder, sort of rattling, grinding sound occasionally. Not all of the time. Usually when I turn on the roof A/C and then turn it off. I go outside and unplug, then plug back in and it goes back to a quiet hum. My meter will show differing voltages from the same pedestal. For example, at the camp site I'm at now, it's read 116 to 123 each time I do a reset. Here's a link to a YouTube video showing the reset. What am I looking at here? Is that a fan noise? Fan going bad? Something worse?
-
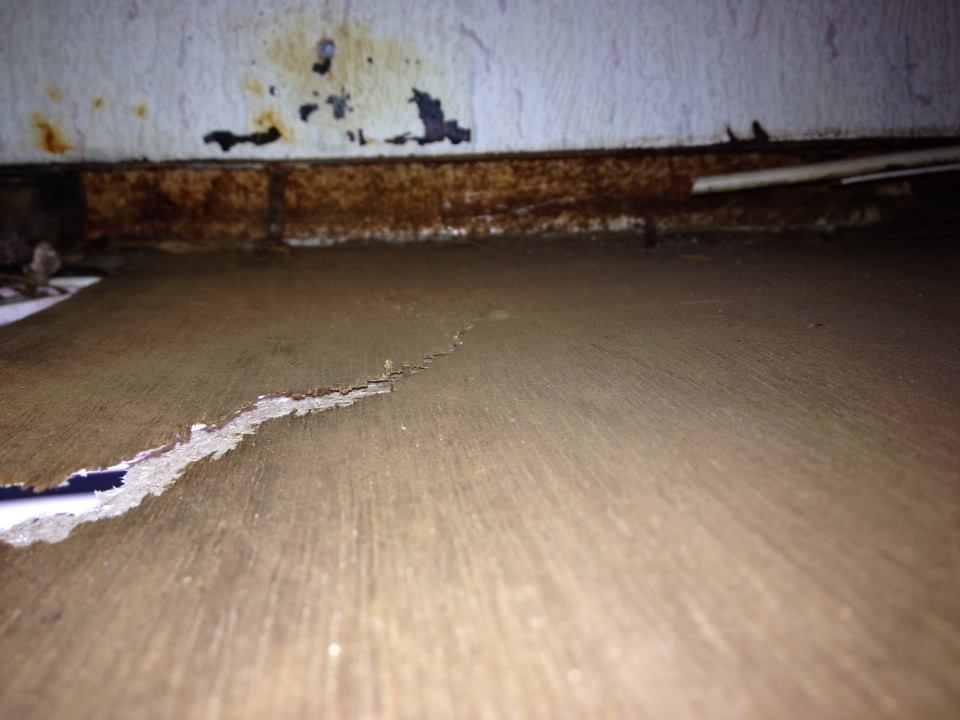
Well, I took my rig to Marshall RV in Marshall, MI and we're all fixed up. Rita had a major leak right at the water pump (fitting sheared off - tech said bouncing down the road will do that after a while) and a minor leak at the low-point drain. The major leak is fixed and I've been able to have a look at a part of her that I've never seen before, so I better understand the anatomy in that part of the coach. The low-point drain leak is the one responsible for the soggy floor in the bathroom and it's a unique five-way configuration that would require extensive work at this point, so I declined. However, since the other leak has been fixed, the low-point drain doesn't seem to be leaking any more. Any ideas on why that would be? The floor under the sofa was wet, but not spongy and is already drying out - I've got a container of Damp-Rid under there. Thanks for your attention to this - I was right in leaving it to the pros this time around, and the price was very reasonable (also had some spot sealing done on the roof, sides and in front.)
-
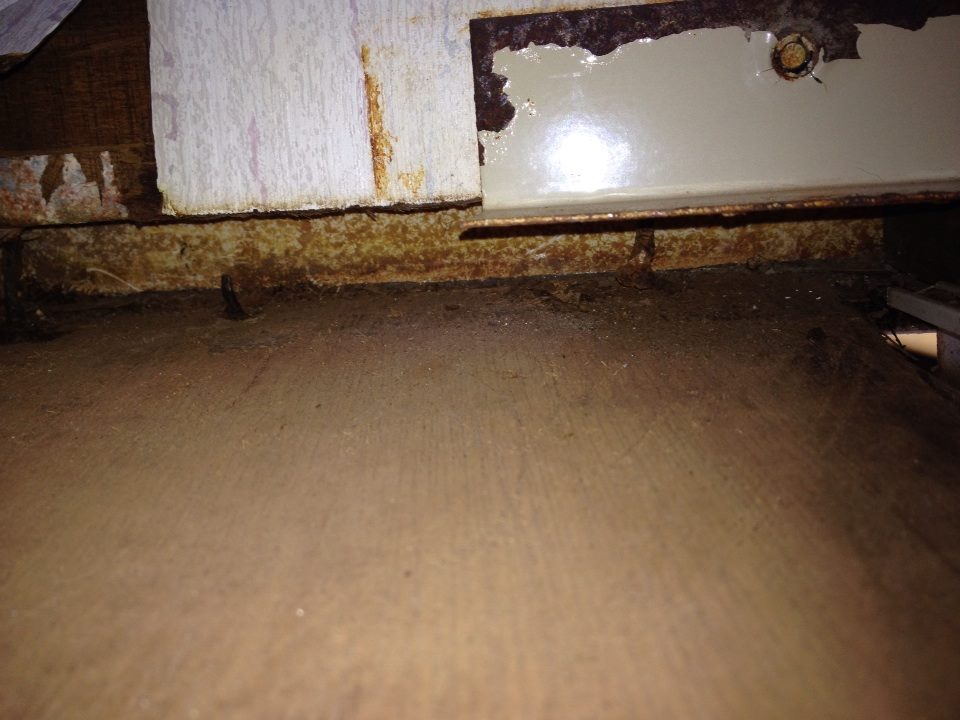
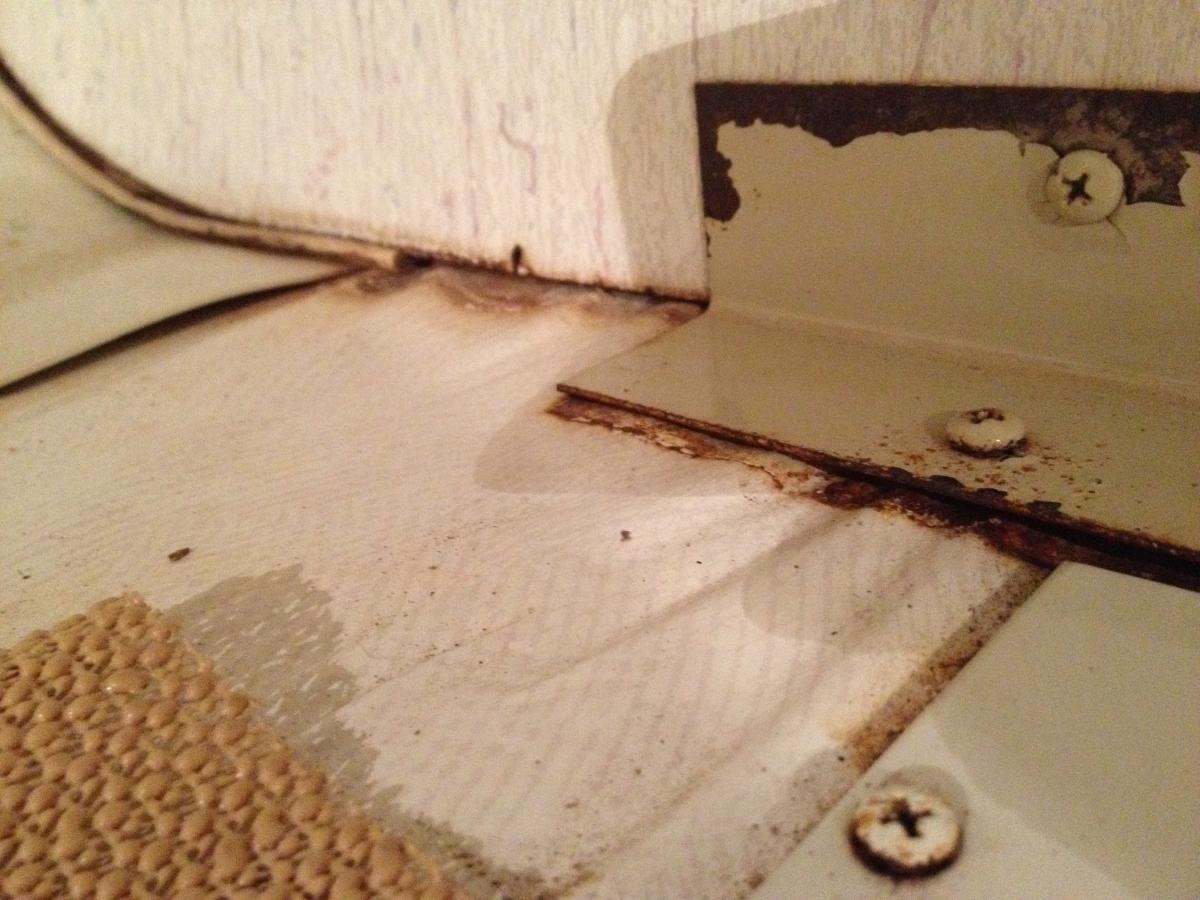
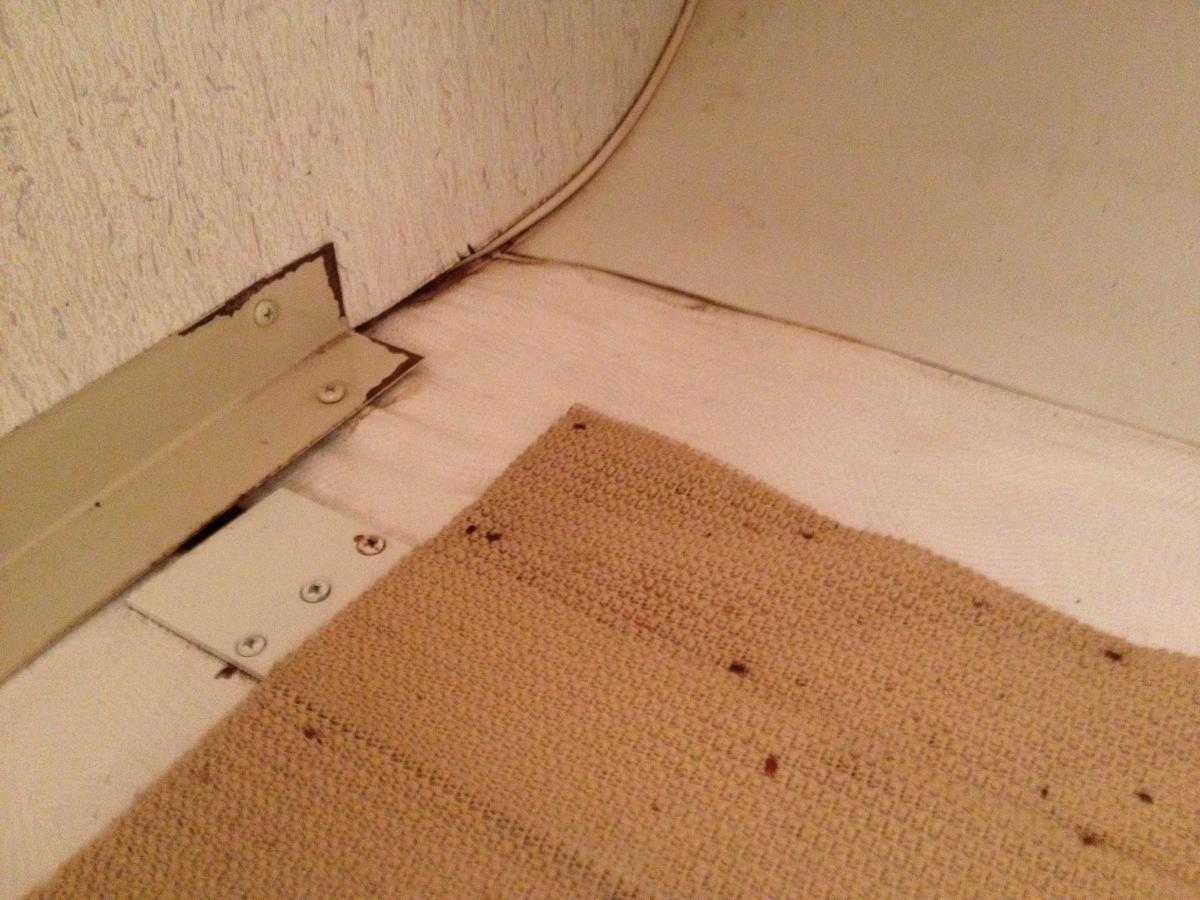
Thanks, Jim! My sofa is unbolted, but supported by some sturdy wood blocks that a co-op tech fabricated and installed; shouldn't be a problem to pull it out and have a closer look. How might I get a look at the actual water pump? Is it under that big plastic cover or located someplace else? I've looked through the sliding door under the shower pan and have felt around for wet carpet there but haven't been able to either see or feel any water, which makes the soggy wood under the bathroom tile sort of a mystery. It doesn't ooze water when I step on it, but it definitely is moist when I lift the tile. The water lines next to the water heater, as well as the carpet under there, are completely dry. Getting underneath the coach, the water is dripping mainly from the undercarriage on the driver's side. Some comes from the winterization drains, but most of it travels through the lower part of the faring and exits between the driver's door and generator door. I'm parked on a slant towards the passenger side to encourage rain water off of my bowed roof (it tends to pool at the roof air unit and leak through the vents there. I had the gasket replaced, but a Camping World tech said that the unit isn't sitting flush due to the bowing.) Two more questions. One, I see the user serviceable plumbing under the cabinets in the galley and shower. Where are the other lines located? Two, what's under the floor wood? I'm a little concerned about the wood disintegrating and punching through to open air when I step out of the shower. If I don't run the water pump, there's no dripping/leaking. When I turn on the water pump for anything more than a toilet flush, hand wash or brief dish cleaning (really, it's the showers that cause the deluge) that's when the flow becomes readily apparent. There are no schematics for my rig on the Winnebago site, so I'm really flying blind here. I appreciate any help that you and others can offer. Thanks for your speedy response. I'll post some pics when I poke around some.
-
Yep, I'm using one, but haven't always. I might've blown something out some time ago.
-
I've had minor leaks since I bought my '91 Warrior (spongy floor near shower, visible dripping near generator on driver side, etc.) but it has definitely gotten much worse. Now, if I hook up to city water, there is a near constant series of drips that come from underneath the coach near the generator and (since I'm camped on an angle today) also running from underneath the sofa towards the door Can anyone give me some insight about the big plastic box underneath the sofa? I'm assuming my water tank is there along with the water pump, since the rumbling of the pump comes from that area. Since the water pump "burps" even when a tap isn't open, I'm guessing that my main problem is underneath that box, which is bound by a metal strap and bolted down with screws. What can I expect to find when I take out the couch and remove the strap? Should it be easy to spot the leak and replace the worn part? Or am I in for something way over my head? Any help would be greatly appreciated. I'm currently thousands of miles from home and afraid that the rare instance of hooking up to city water has made an existing problem horribly worse.
-
Thanks, Linda. Now, the rest of the interior is begging to be done. : )
-
That's the place I saved a ton of money by doing a lot of the work. I was hearing quotes of $3000-$4000 for just the cabover rebuild. I got the cabover done, sofa fixed, plus new airbags installed and all-new marker and taillights for under $1000.
-
All done! Thanks to Ryan Masterson for the custom work (and for fixing the jackknife sofa.)
-
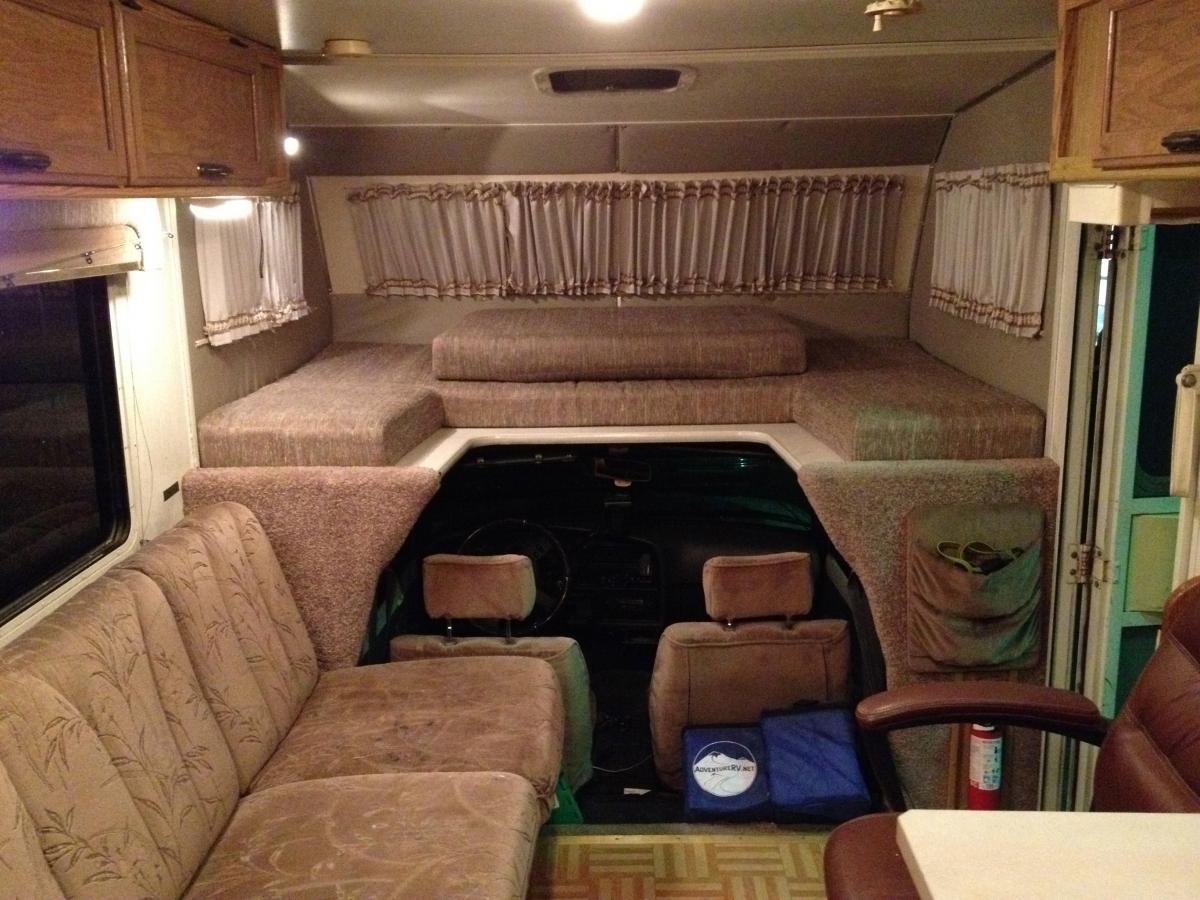
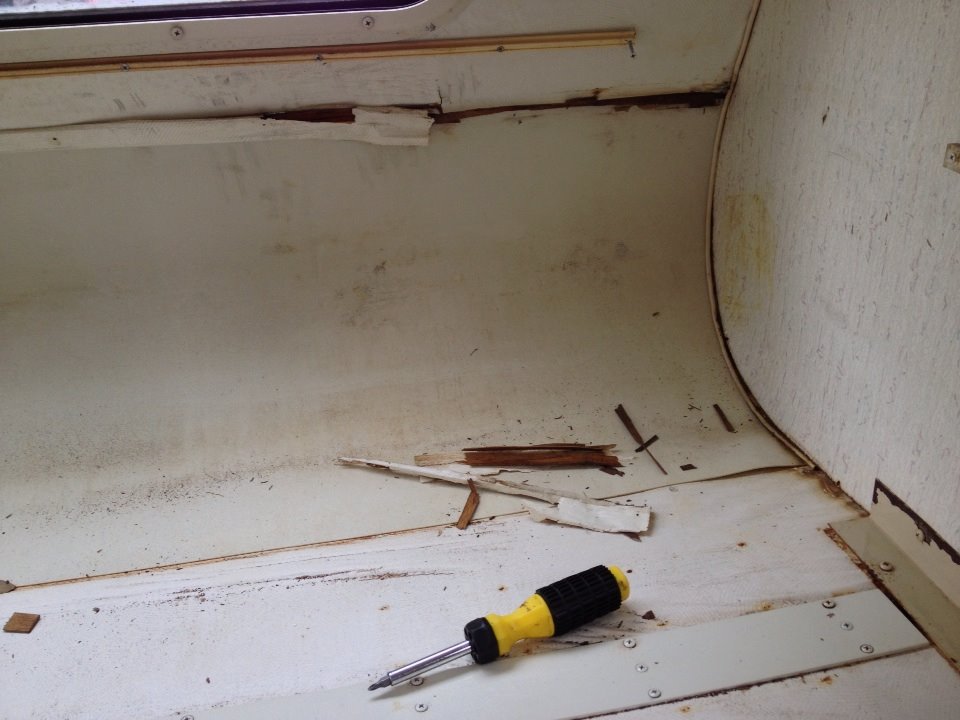
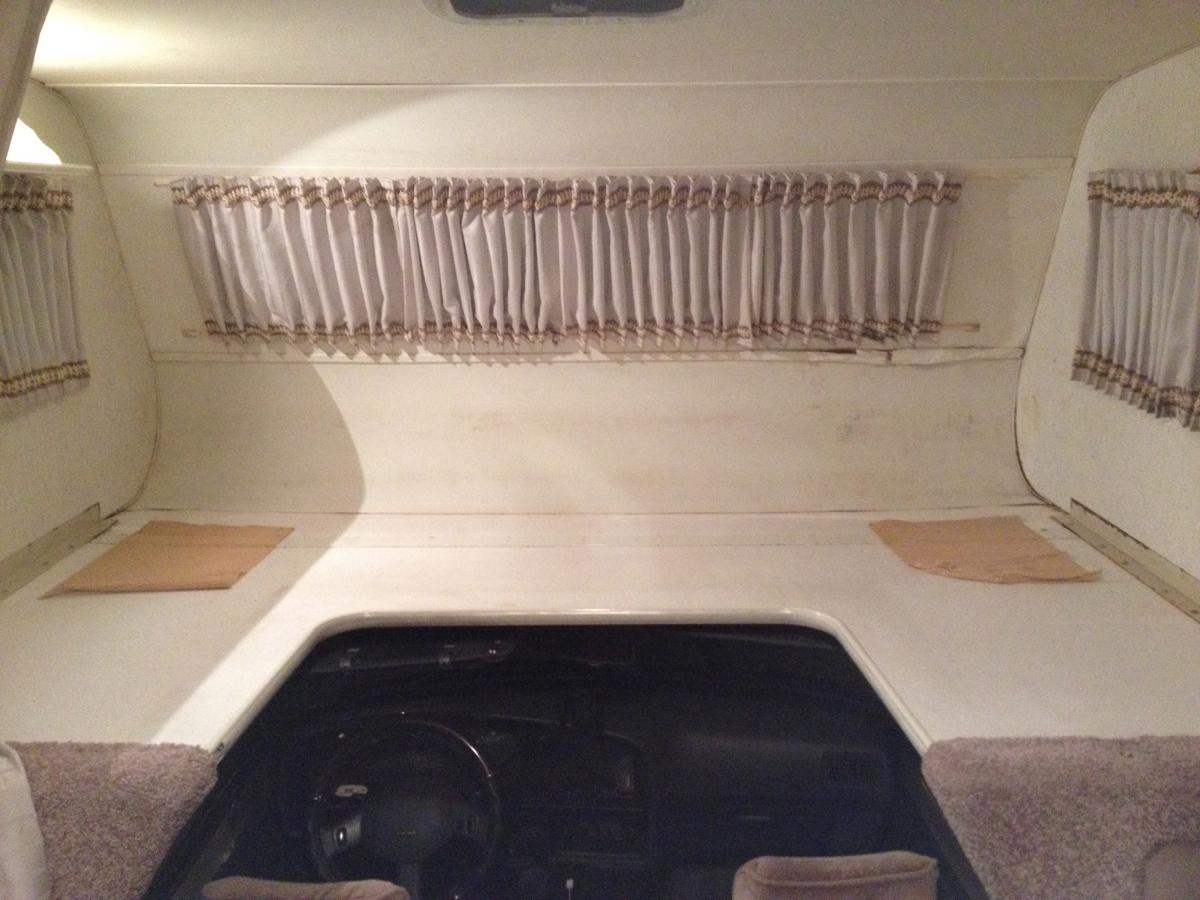
I'm definitely getting an education - and she's getting fixed up in the process. Got replacement air bags from 3-T's on Friday and had them installed. What a difference! Continuing on with the cabover work tomorrow - cut some luan to fit around the window and we'll use either bend board or vinyl for the radiuses. Same for the side panels - don't want to mess with wallpaper. Gonna look at fixing the jackknife sofa, which has come completely off of its supports. Anyone have any experience with fixing or replacing these?
-
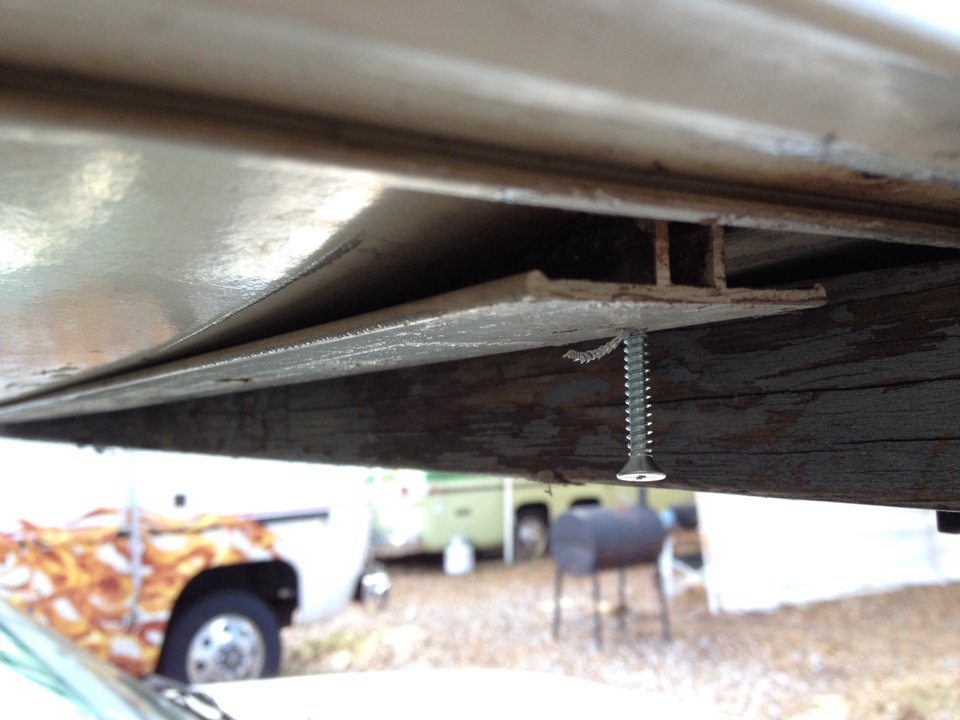
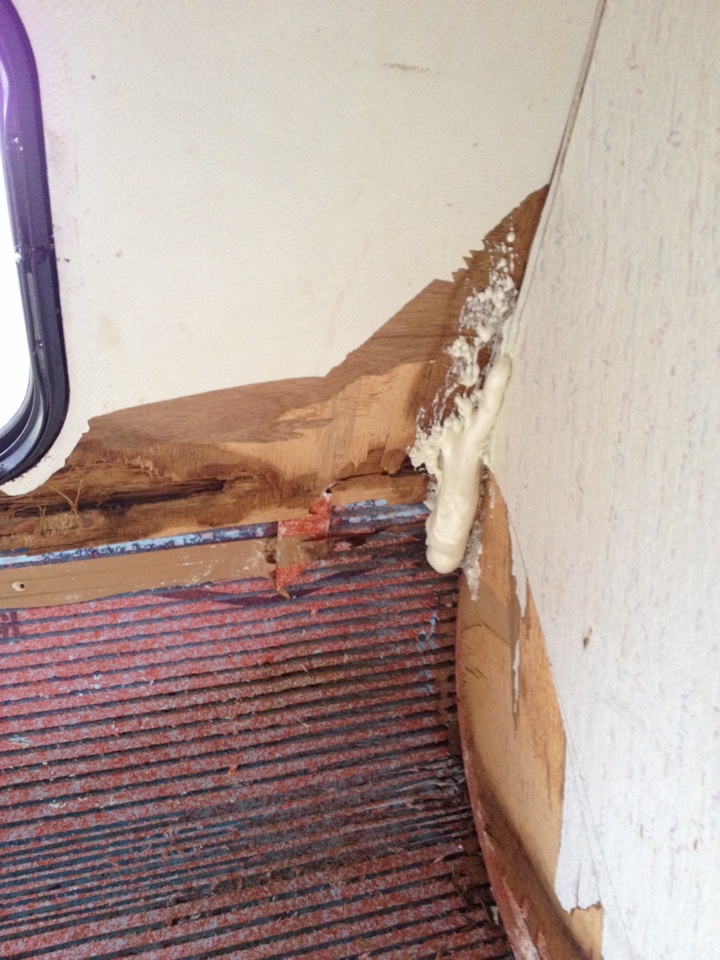
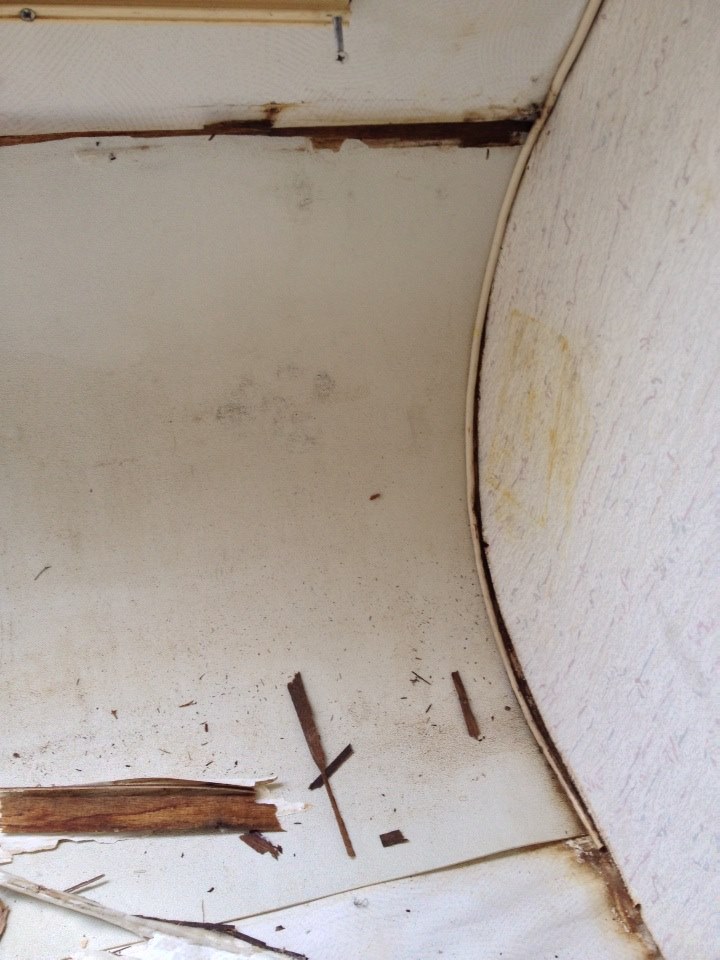
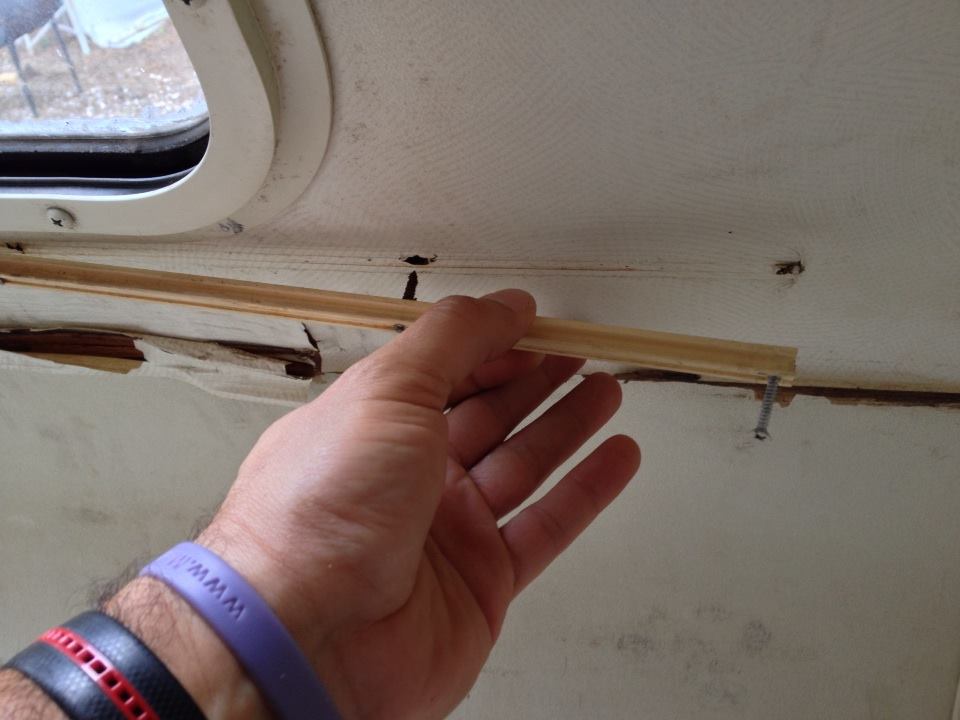
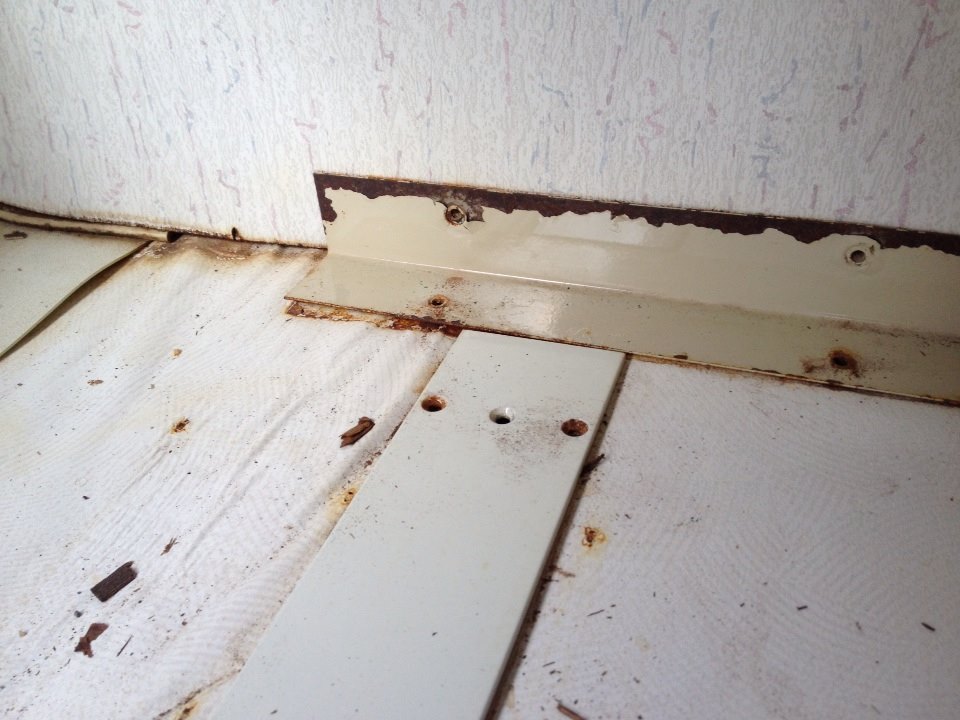
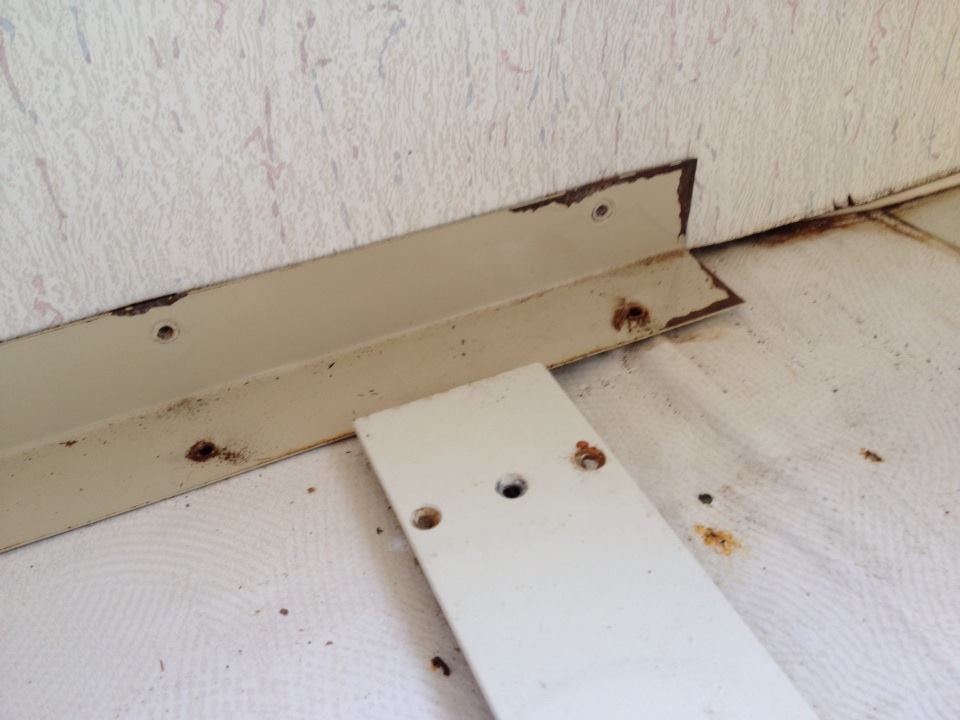
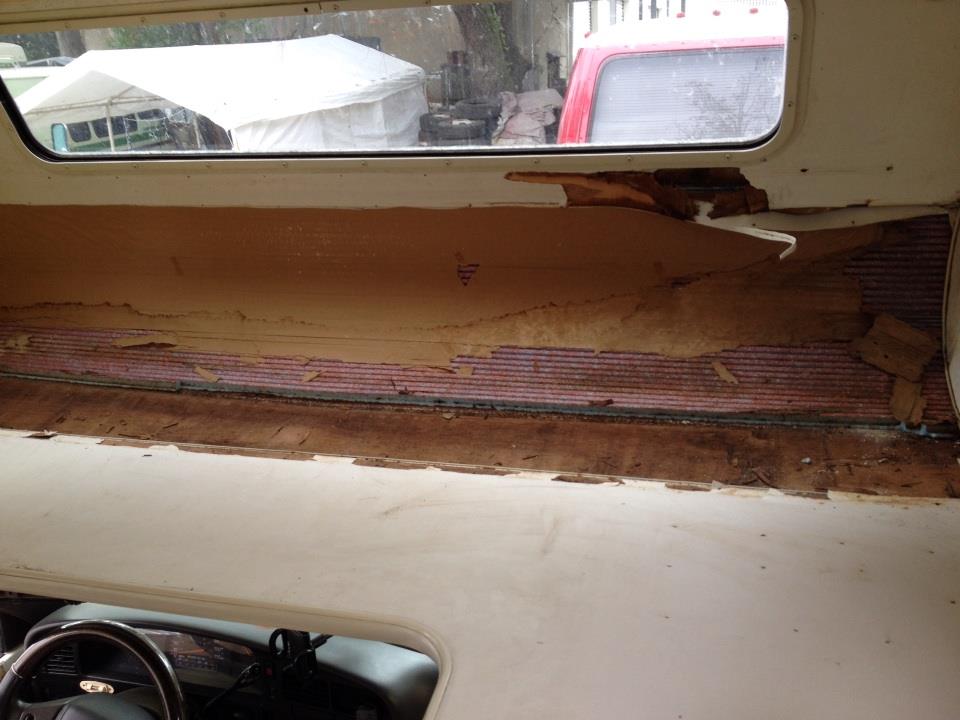
Here's some catch-up: 3/4" boards laid in to replace the rotted wood and sealed with silicon to the "skin" - screwed with self-taps through "skin" and up into the board. The aluminum t-bar is now secured back against the underside of the loft. The majority of water damage was on the passenger side front. With the floor replaced, I looked to the front and side; not too shabby. The bottom radius was a piece of plastic over the styrofoam curve and same as the top. There's a little surface wood rot on the passenger's side of the window piece and a fist-sized cavity in the passenger side loft wall after taking out the crumbly stuff. There was a big opening in the molding outside so I sealed that with silicone, the inside as well. There's a metal rail that runs around the outside wall of the cabover, awesome to know and styrofoam in the middle with thin layers of ply on either side and the shell of the coach. I wanted to give the foam a shot (ha-ha) and sprayed some into the cavity. The soft spot that I felt from the outside firmed up and I caught a couple of areas where the silicone hadn't reached. Here's my rig parked amongst the big GMC forest. Another shot of the main yard. These guys pimp out old GMCs. A fun crew - it's been a blast this week getting my hands dirty. You never really learn until you actually do it. Cut a big piece of luon? Is that what they called it? 1/8" thick, I think - 80.5 wide by 19.5 tall. Will take the window out tomorrow and get it traced, then cut the hole out and shore up that section; seal it. Plan to cover the styrofoam with something with a bit more weight than plastic - I don't want to go the wallpaper route. Jim's got ideas on some overlays. I'll get some more pictures tomorrow. Thanks for all your help! Bing - P.s. Anyone know a good cleaner for mold?
-
Thanks! They don't have the molding here. It's not bad, just needs to be resealed. The 3/4" is down and secured with screws on the underside of the loft (just above the window.) Good news is: there is metal supporting the curve of the cab over. The area where the main leak was is mostly styrofoam. After getting out the rotted wood, there is a small cavity on the passenger side next to the molding. Would expansion foam do to put some support on the interior of the loft frame? They are talking about using bend board for the radius inside the loft and then finishing it with something like Formica. Thoughts?
-
Is the corner molding this stuff? With space down the middle for the insert molding? Thanks for the link! I think they have it here, but I'll still want to invest in some.
-
Not yet - gonna put in some 3/4" board today and then secure it. We may be half-way done. What's the name for the stuff that covers up the screws around the curves/trim of the cabover? It comes in rolls like tape, I think. Mine is pretty hardened and when we pulled it to get access to the screws, a lot of ripped. Looking for a replacement source for that - might as well replace it all around if we're going in deep.
-
So here's how it's gone down - I tore up the rotted plywood after taking down the curtain rails, L-bracket and T-bracket. There were boards underneath - thick like 2 X 4, but just mummified. Cleared an area from side to side across the bottom of the loft where the T-bracket seam is. We've retucked the skin and will lay in some thicker board tomorrow. I've ordered marker lights, new tail lights (all LED) and new air bags for my System Air. Gonna get some paint after that. I've learned a lot today, thank God they've got the materials and tools. Tearing this thing open is kind of scary for me, but I've good great backup. Thanks again -
-
Dan, you mean outside or inside? I'm starting the tear-down today at the place that does GMC. They have materials here and will let me do the labor to save costs. Thing is, I don't know exactly where to start. Took off all the curtains and am looking at the passenger side of the loft. This is where the leak is. There's one big bracket across the bottom of the loft that does not connect with the L brackets on either side. The lower piece of wood trim is water damaged and that covers a seam, right? Generally, all of these little wooden trim pieces are covering seams? Then I've got what looks like speaker wire running along the inside edges from bottom of loft to behind the cabinets past the coach door. I know they're not speaker wire because they terminate at the loft and aren't connected to anything. Obviously, the bottom drapery tracks have to come out because the wood behind it is rotted. So am I pulling the trim piece off completely? Thanks for any help. The guys are gonna help here too - but they don't know these rigs like you guys do. Wish I could post pics of what I'm looking at from my phone.
-
I'm taking notes on all this, thanks for the input!
-
Thanks, Steve! Your job looks great; but I just don't know anyone as talented as your brother to do that kind of work. I'm in Orlando, Florida. There's a group here in town that specializes in the old GMC RVs and they do radical refurbs on them. They've been kind to do some minor work on my toy (appliances, mainly) because they don't really do toys - but I'm wondering if they might take a crack at this. If not - I would be very appreciative to any Florida-based toy owners to give me referrals of shops who have done wonderful work for you. Thanks again! Bing
-
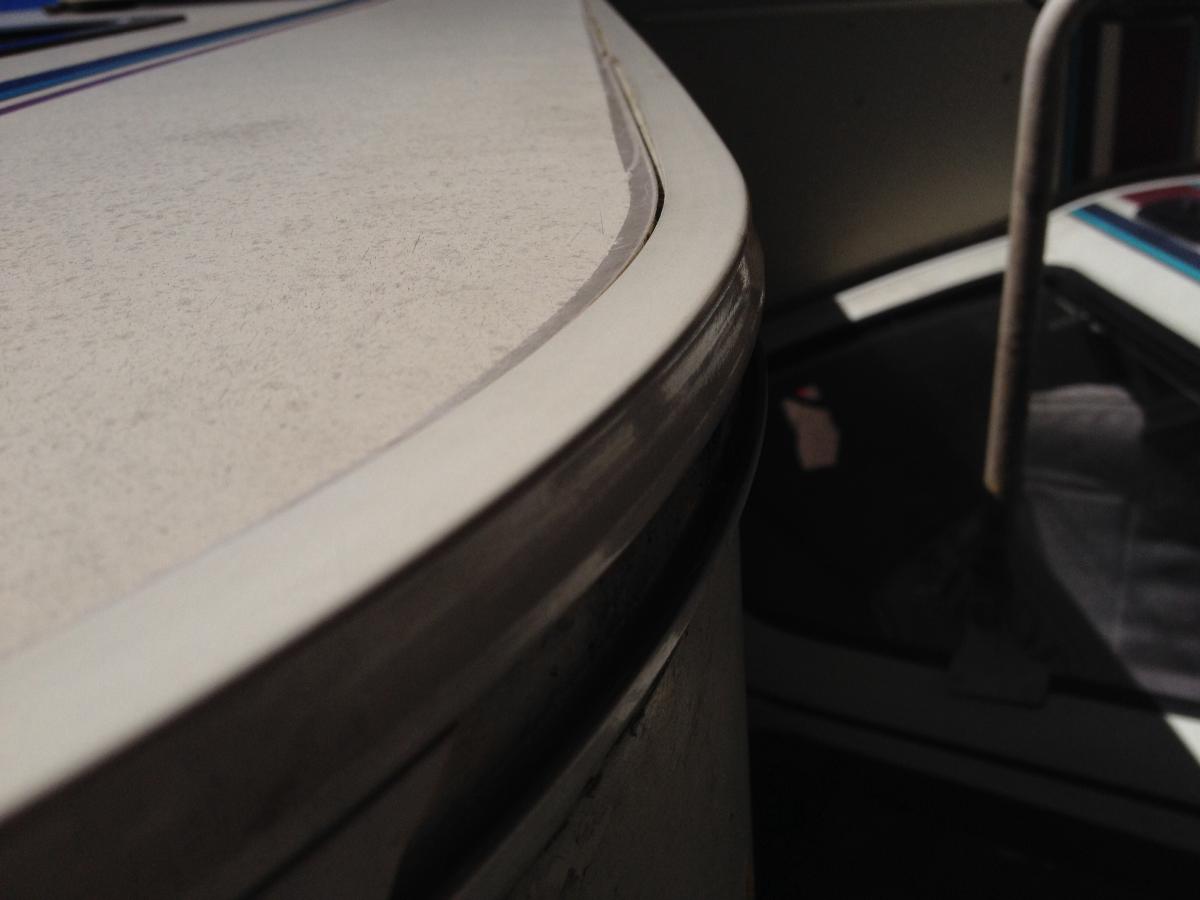
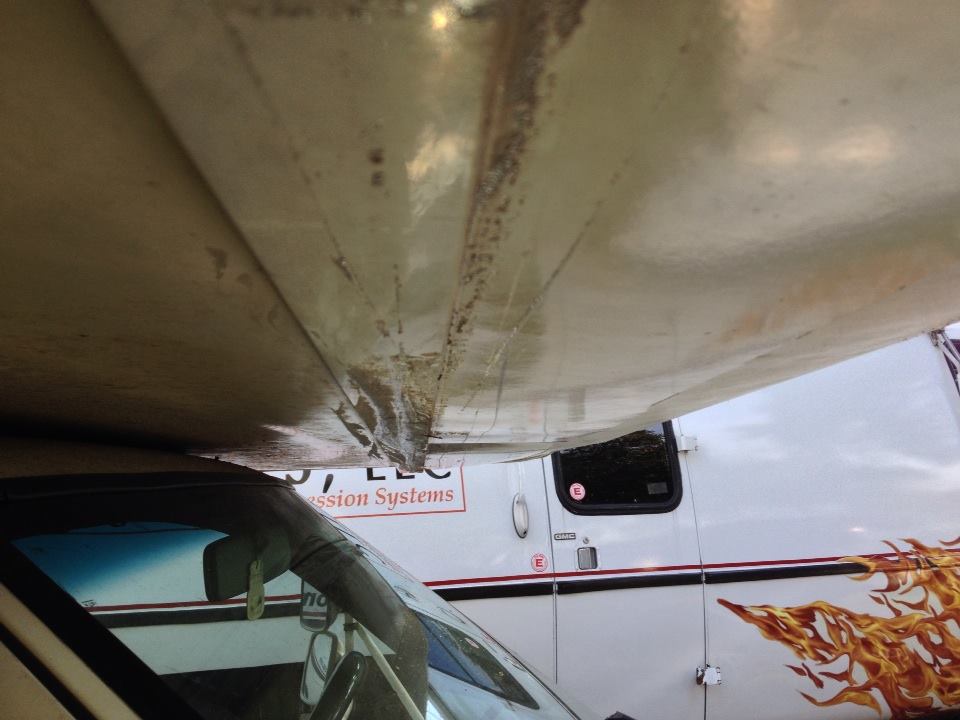
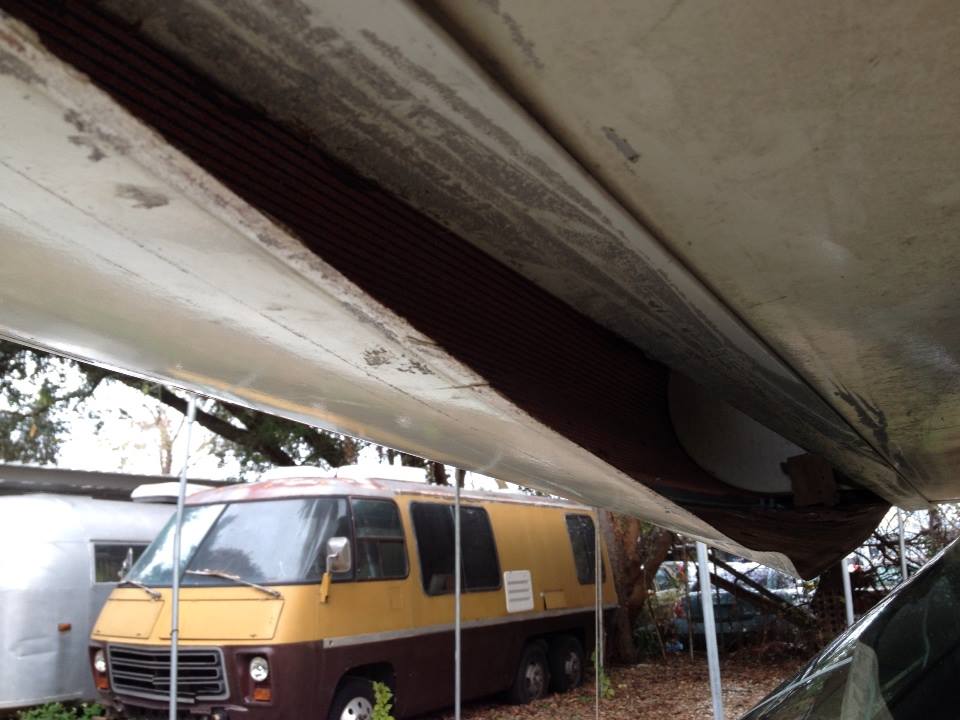
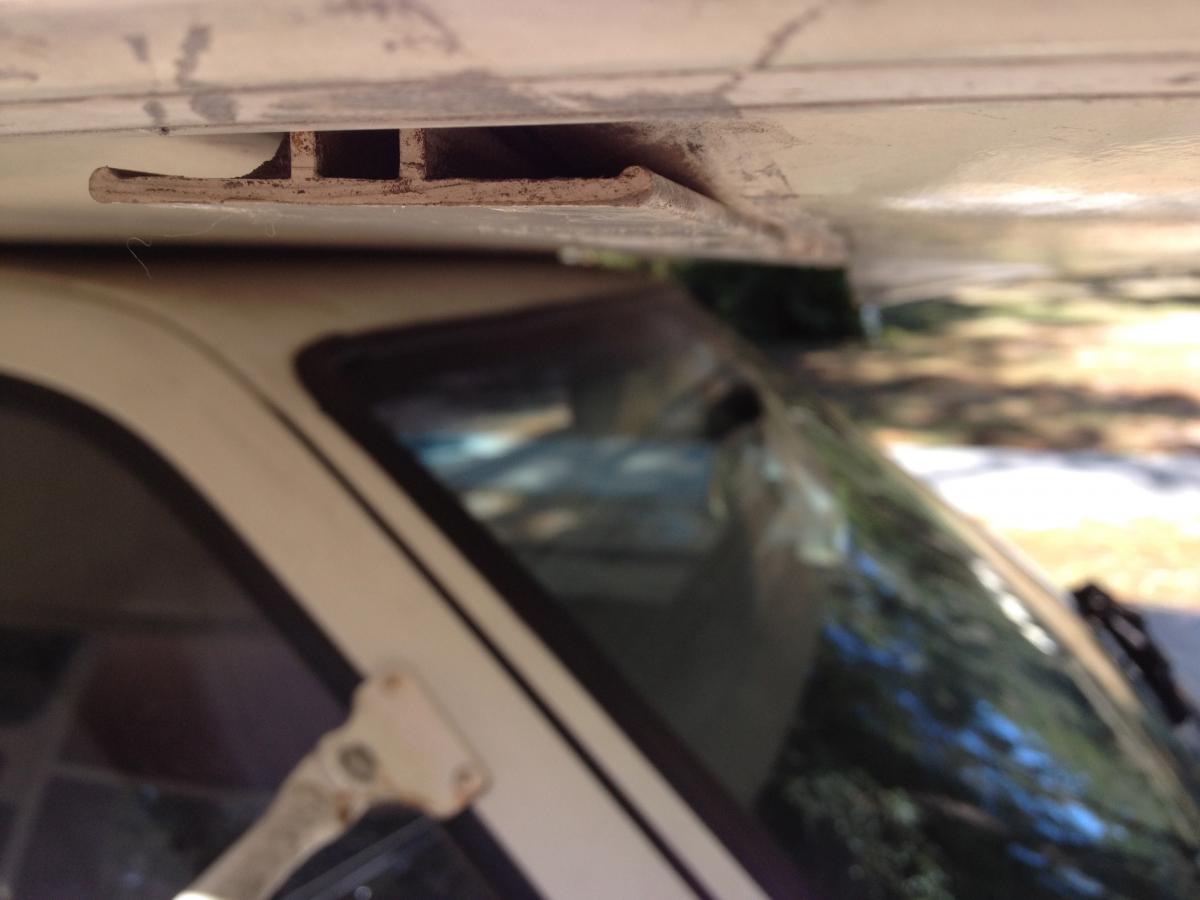
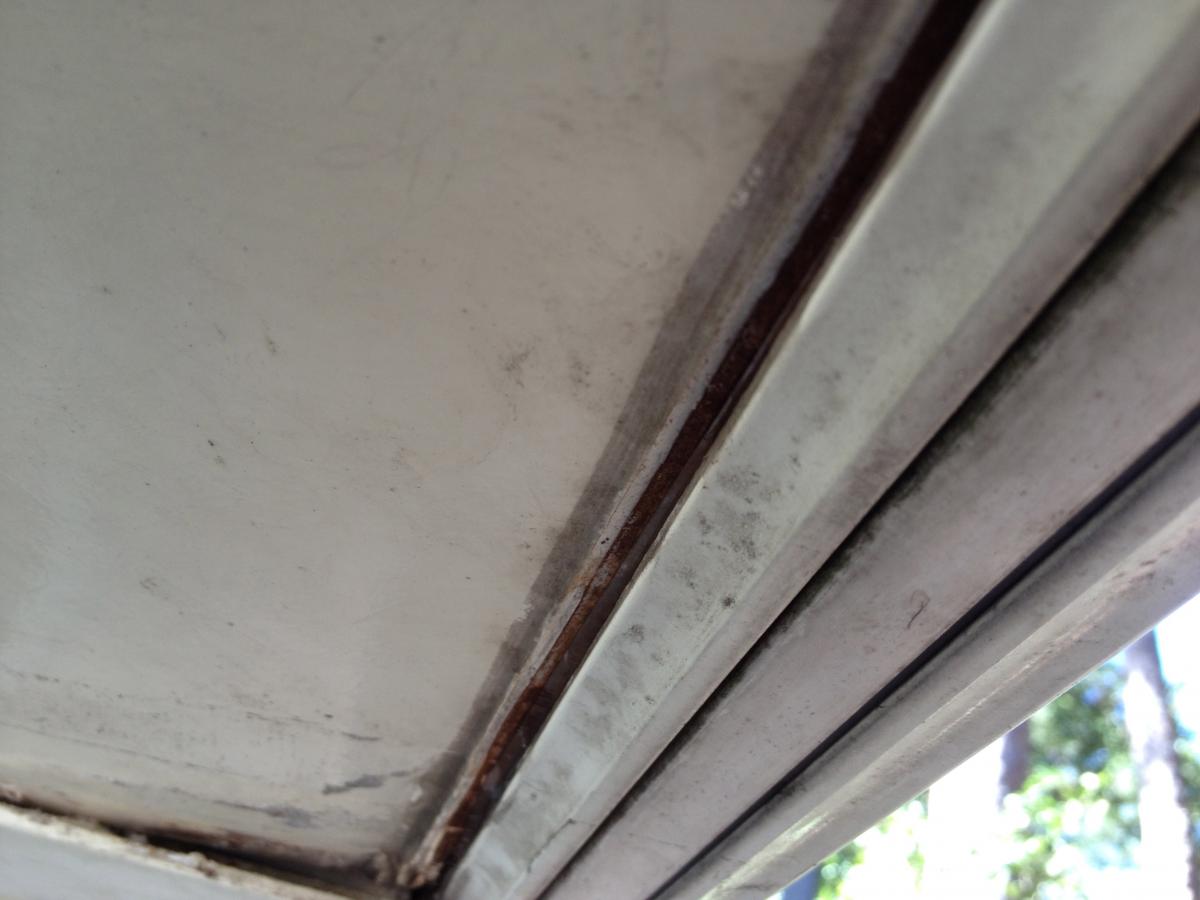
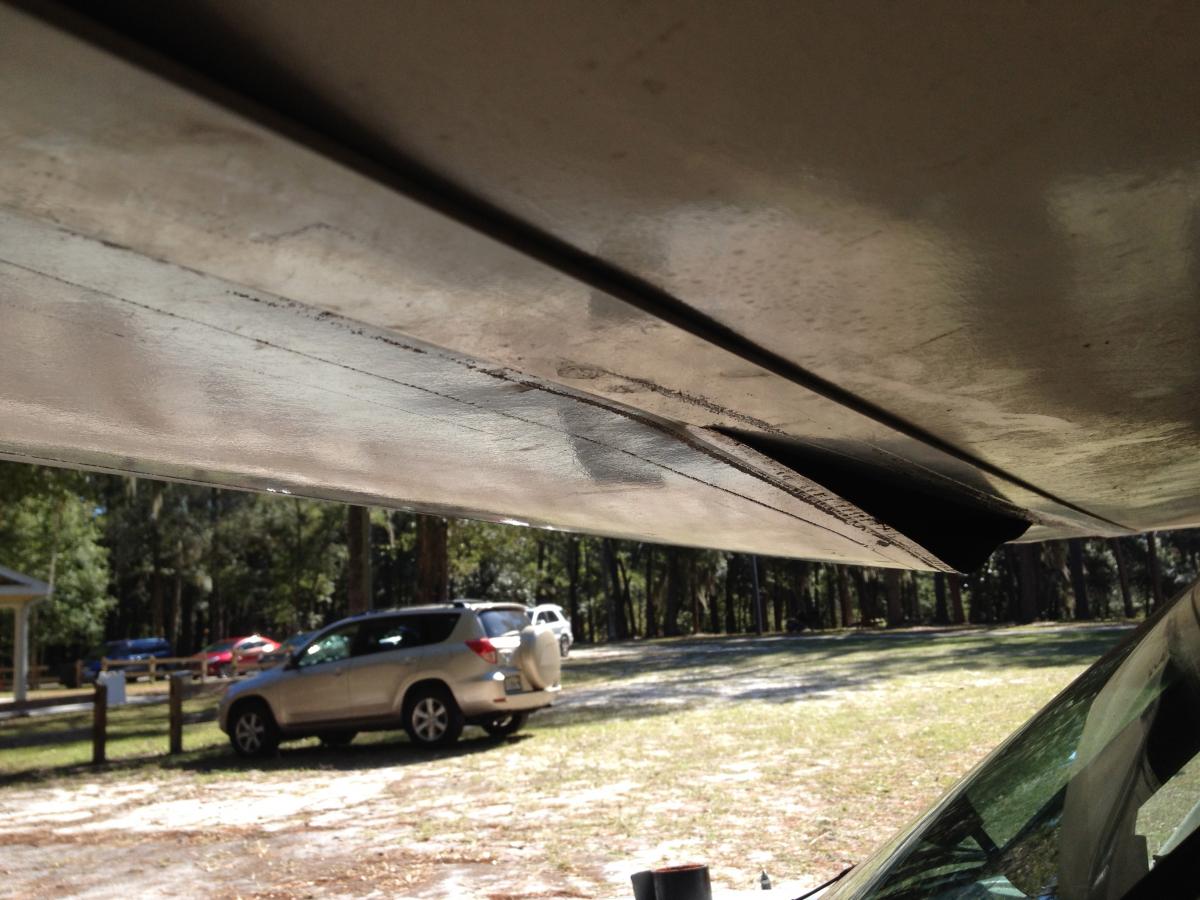
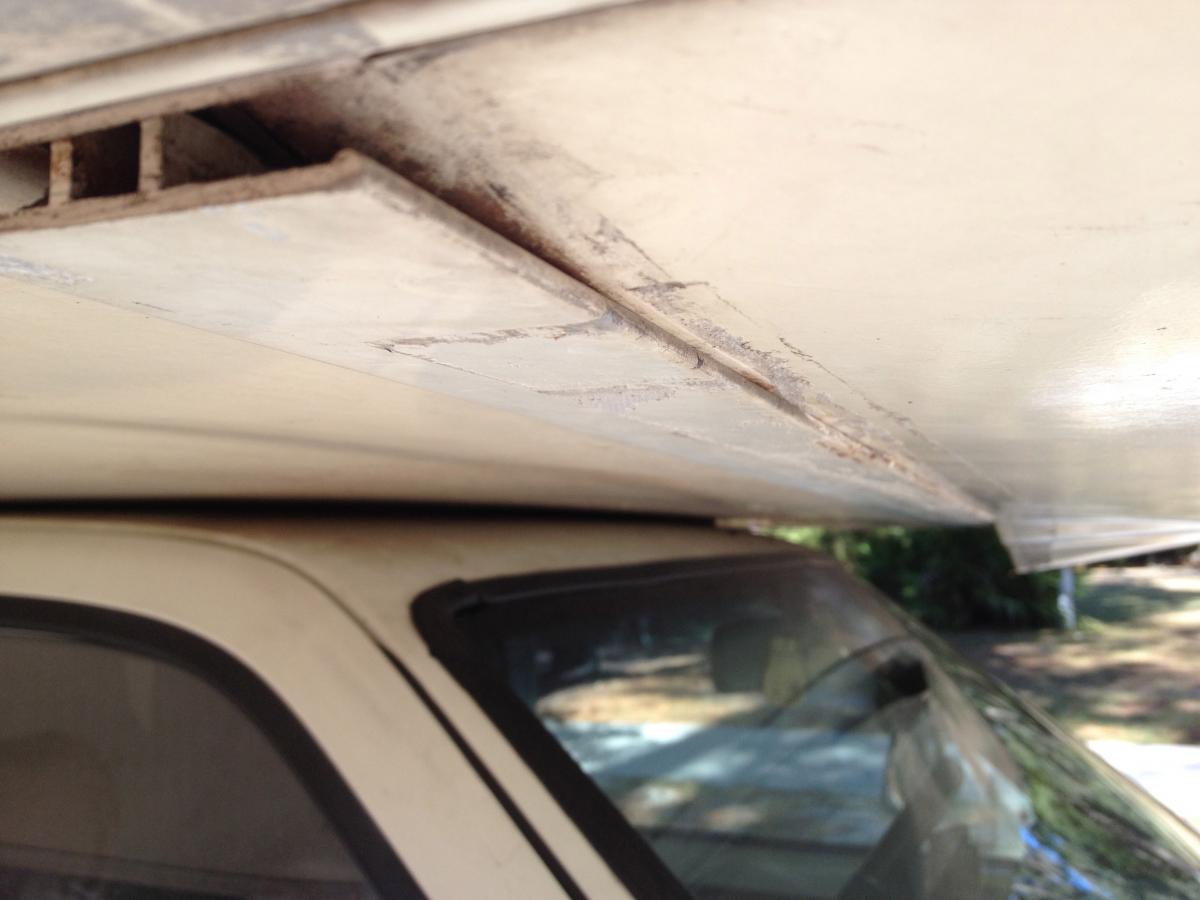
I'm the third owner of a '91 Warrior and the prior owner took care of a leak on the passenger side of the cabover. Feels like I'm getting some moisture in there now, but only when driving. I lost one of my marker light covers, so I'm guessing that's where it's coming from. Anyway, that's not the problem. The big deal is the sheet of fiberglas that runs outside from top of the coach to just in front of the windshield. It's come untucked and I can't get it to go back in. You can see in the picture with the SUV in the background how it's hanging down; it's actually much worse than that now and I'm using Gorilla tape to keep it from completely sagging off. First of all -what's that piece called? Second, what am I looking at to get it fixed? I'm not very handy in this way, so I'm just going to take it somewhere. But who might be best equipped to deal with it? Thanks for any help! Bing -
-
Just wanted to share how things have gone since my last post. First, I got home and plugged in to shore power in our backyard for three days. When I hit the road again a week later, all lights and gauges were great - 12 v appliances ran with vigor and didn't drain the coach battery. Second, at my next stop, the gauges wouldn't light at all. I checked my coach battery and the screws had come loose. This particular battery came with one hex and one wingnut. I always figured finger-tight was good enough. I still thought it was odd to have only one wingnut. Anyway, I got a wrench and got just a bit past finger-tight (Highway 49 in Mississippi probably jarred them loose) on the nuts. Tried the gauge - all good. So, I'm thinking a combination of lack of a full charge (via shore power) and loose connections probably contributed to my issues here. So far, so good on this leg (I'm in Missouri now) and boondocking a lot. Thanks again for all of your help!
-
Maybe there's a short somewhere? I jumped the coach battery and fired the Gennie up for an hour. Haven't had any issues with the cabin electrical since. Granted, I haven't tried using the furnace, but the water pump doesn't sound labored like it did before. Got me through festival. Definitely going to plug in when I get home tonight.