wetboy
-
Posts
43 -
Joined
-
Last visited
Content Type
Events
Profiles
Forums
Gallery
Everything posted by wetboy
-
I have a 1985 New Horizon...quite comparable to yours. I got mine off Ebay with 29,000 mi on her. He was asking $4k and I got him to $3200 because it didn't have a 6 lug axle. It DID have the 5 Lug upgrade, however, and that was just fine for me as these have no reported problems. He didn't know that though, so I got him to knock $800 off because of the axle. As he was a shifty used car dealer, I felt no guilt about that. 1985 was a key year as that's when Toyota, due to recall pressures, started retrofitting the old 5 lug or putting on new 6 lugs. Some made earlier in the year though still squeezed through and were never upgraded. My Engine purrs like a kitten even after the 4K miles cross-country I've put on, and the low miles was probably the biggest selling point for me... after I knew the axle would be OK to drive cross country with a motorbike on the back. Of course, I've put in at least 2K in upgraded interior, paint, drawers, solar& wind power, inverter, batteries, etc. but that was by choice. I hear the rear kitchen layout (rear door) is in higher demand. After that, it just comes down to condition of interior, and to a lesser degree, the paint. By the way, the upgraded 5 lug looks as follows... If you don't have at least this, or a six-lug...I'd be surprised to see you get over 3K for it from someone who knows about this issue. Cheers Mate!

-
Forgot to mention...an absolute NECESSITY for our poor lil trannys. I put on an aux tranny cooler, and it had made my shifting much less jumpy, and my fluid isn't burnt after 500 miles. The minimal cooling thru the radiator is just inadequate when pulling 6000 lbs up a mountain pass! Also Seafoamed the tranny, and flushed it first...then filled with synthetic ATF. So far, she seems to like it better. For those who don't know yet, NOTHING kills a tranny faster than heat. So from here on she rides cool. Mine is an absolutely over-sized unit from Imperial Econo-Cool. Covers half the radiator, but I've had no engine cooling issues, even in Florida. While it may be overkill for normal cruising, I know it will pay off as I get into long Colorado mountain climbs and the desert southwest. The only thing left mechanically...repack rear wheel bearings and synthetic differential change.
-
Yeah...not the cheapest, but it's very thick... Like creamy peanut butter once mixed. So far, I've done most all my cabinet and bathroom doors with the quart kit, and I still have half of it left! Good thing, I still have bunk cabinets and gun safe to make! A lil goes a long way. You can do all the woodwork you can think of in our Toys with a quart kit. Considering the extreme use they get compared to home service, it's worth the $40 to me.
-
The Panel (for now) either rides inside the coach for looong trips, or in the back behind the bike for shorter day trips. It is 37x54...about 40 lbs. I'm a big bloke who works out everyday so its not much of a problem, but folded in half with a handle to carry... that would be bargain! Just have to solder 6 tabs joining the cells that run transverse to the cut and weather proof them, and hinge the frame. Probably do that my next foray into the Nevada outback when I have plenty of hours on my hands. If you are looking for the cheapest solar in the U.S. I suggest http://sunelec.com . I went to their storefront in Miami and picked up my panel since I was in the area. I briefly learned all about their operation and they mainly ship around the world. As a drive-up customer, I was definitely a novelty, but they were all friendly, environmentalist types. The bloke at the warehouse even took a "special" interest in helping me, where upon I decided it was best to drive off as fast as my 4 cylinders would take me. All in all...a good experience with them though. Do keep in mind one thing tough...the ratings of most of these panels in watts is their open circuit volts times amps. 20 volts x10 amps= 200 watt panel, for example. Under load, of course the real voltage is about 12.5 to 14 depending upon your battery levels, while the amps remain fairly constant. So, you won't get a true 200 watt hours charging. More like 130 watts. So you should use THAT as your true wattage calculator. I mainly look for the highest amp rating I can get, as I know the volts will be down near battery charging voltages in real life. I find panels rated around 17+volts open circuit to be adequate under load to charge batteries. Example: I'd get a 17 volt, 13 amp panel before I'd get a 21 volt, 10 amp panel. Just get all the amps you can. My wind gen is a custom design. A small, fast turning VAWT (savonius design) at the end of a fabric windsock like structure that funnels the wind into it. This allows much more energy capture, with ultralight weight and better low wind performance. Also easy folding for travel. I had this idea on the drawing boards for years. It captured for more potential energy than I calculated, so I need to build a bigger 3 phase alternator to keep speeds reasonable. Added to my mile long list of things to do...Someday, I'll be rich with this design, so for now I'll comfort myself with that. Oh, and noise isn't much of an issue for this design, but for a typical wind gen you can isolate alot of the noise by using a thick rubber pad between the base of your mount and your RV frame member. In fact, a rubber pad sandwiched between two wood blocks would be even better. Just avoid metal-on metal as the vibrations through metal just tend to amplify. I learned this flying wooden aircraft vs. metal. Ooooh, the ride was nice! Experimental Aircraft use many of these types of engine vibration dampeners, so look for those as good source of inspiration!
-
These are 3 of the 4 coach batteries. Deep cycle, 120 AH from wal-mart. Total of 5800 watt/hrs on board. These batteries are being relocated to where the old hot water heater was under the old couch inside the coach, with some ventilation for the hydrogen gas. ( A new on-demand system for $150 replaced the old inefficient, leaking heater). This will free up this old gen space for more storage! So, how do I power this without a gen set? Easy, I built a pop-up wind generator (down for upgrade), have a portable 200 watt solar panel, and a PowerMaster 170 amp alternator. The alt puts out 90 amps at idle, so I can top off batteries even with no wind or sun with an hour of idling. When boondocking out in the desert, it's rare I gotta do that. Also, small trips to Walmart can fill my batteries from 50% discharged in about an hour and a half. With wind and solar, it's rare I get that low. If you want to see the upgrade in detail, go here. http://www.rocketcit...%20Project.pdf. I didn't need to make the new bottom bracket like this guy did, just needed some spacers. You WILL need to upgrade your wiring though, mainly to the coach batteries. I used 2 guage marine cable from the boat store to take the + juice to the back. Old 4 guage jumper cables I had about tie all the batteries in parallel. Remember to ground your new pack to the frame with equally thick cable! The factory 10 guage crap isn't going to cut it! I just drilled a new hole in the frame, sanded to bare and bolted a 1/0 ground wire from one of the - terminals there. Paint over for rust prevention. The new isolator...a NOCO solid state 200 amp. The old isolators are only rated to 30 amp, I believe. They MUST be able to handle the total your alt can put out. Since the new alt senses voltage off the main output wire, I wanted it to sense the coach battery pack most directly, as that is what I'm usually charging. So I direct wired it to that. Solid state isolaters have one drawback, voltage/current drop to whatever battery they are charging as the current flows through the diodes, heating them up. That's why they have big cooling fins. By direct wiring to the biggest load, the house batteries, I have no voltage/current loss and they get filled quickly. The engine battery still stays isolated from the coach side. The solar panel is portable so I can park in the shade (where possible) and still get full sun. It adjusts for tilt, and every few hours or so you just point her more directly toward sun. This allows MUCH more total energy capture (from sunup to sundown) than a flat installation....about 75% more. If you are consider going solar, I would suggest several smaller panels to add up to what you need, rather than one big one like mine. Better for transport, storage, and setup. I just got it half-price, so I couldn't complain. Still, I'll probably cut it in half and hinge the frame so I can fold it in half.
-
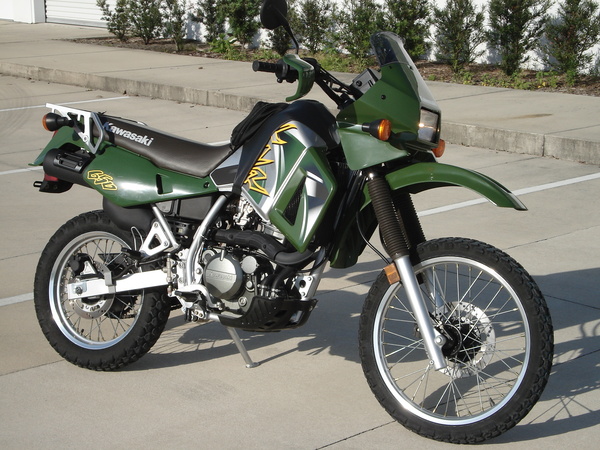
The motorcycle carrier I built onto the back using the old bumper/ hose holder and some c-channel I found dumped. Welded that onto the back frame rails. Everything painted in lots of hammered black finish. The carrier itself is bolted onto the c-channel so I can repair it if necessary and because I may make a bolt on hitch so I can do some light towing in the future should I desire. The lil shelf hoding all the nuts n bolts is the 1x6 wood ramp that, when loading, is pinned to the rack with a 3/8" bolt. In transit, a simple bungee holds it fast to the beams. You can push the bike up, but I'm usually lazy and just drive it up onto the carrier. So far she has handled over a thousand miles with a #400 bike on the back. Much better than I predicted given how overloaded our real axles are already!I do offset that weight with as much of my tools and heavy stuff up front as possible. A really fat wife would work as well... ;-) And the motorbike... Oh, if you have an old horizontal tank without OPD valve it is exempt from the new rules and refillable. Section 58 of the national propane rules. However, you MUST have it recertified every 5 years?, I believe. Mine got a shiny new 99 cent paint job and that's all it took at Suburban propane, as long as she is still holding gas. After handing me my sticker, the blokes at the suburban forgot about me at the propane filling station outside. So, I forgot about giving them their $10 dollar recert fee and quietly drove off. hehehe. Back home we call that an Outback discount. No worries, refilled at Ace hardware cheaper anyway.
-
This was my test shelf in bunk area before I built a whole cabinet to match others. I will make one on both ends of bunk. Quite a bit of storage and NO head bump in the morn! At the foot I will use the old 12 volt light wires for a custom fan I'm making from 2 10" comp fans ( I like a breeze whilst I sleep) and together they only draw 1.2 amps with TONS of breeze. the other end obove my head will be a 12 volt LED reading light. oh, the dimensions are 10x10x42 These are the living room cabinet doors and veneer. Made with 1x4 whitewood from HD, sawn and sanded to shape (after being epoxied together). The veneer was obtained locally at specialty wood shop. I think the species was poplar. Go very light, as the poly will take you several shades darker. The glass was just simple window glass cut just bigger than the inset and glued into place with silicon. Had to nibble a bit inside on the glass where the hardware attached to get it to line up right. The smoked look came from simple Limo tint I had lying around. Haven't done the stainless
-
Here is a good Before and after comparison. The old bathroom door next to the new closet and drawers. I made the door with the original mirror that came with coach, just moved it to a better spot. Nice etched glass. The pulls on everything are brushed stainless from HD. The drawer fronts are just 1x6' whitewood sanded and poly'ed like everything else. The bathroom door is a focal point when coming in, so I'm spending a bit more time on just the right design. Should be done a few weeks after all my other myriad of upgrades. another view
-
RIGHT....Let's try this again...with ALL the pics!! Work with me Toyo Forums! Speaking of the floor, Out came that 80's chocolate carpeting, and IN with the easy to clean, modern Bamboo flooring. The old outdated cabinetry was too dark and depressing. While I had it apart I dropped in a new contemporary countertop I picked up for $40. Before After.... Doors are simple 1x4 whitewood from HD. sanded and topped with Minwax clear gloss Poly Urethane. Insets are glass mirror attached with silicon sealer to allow for flex and vibration on the road. Found out you needed this flex the hard way when I tried epoxy the first time. Wood should be epoxied. I use t-88 as I have used it in construction of some of my experimental wood aircraft designs. Nothing is stronger and more forgiving than t-88. Oh, the trim is brushed stainless contact paper from HD.
-
I was thinking of photobucket...but assumed this would be easier (how wrong I was), since some of it is better with explanation of what I did. But after I'm done, I'll upload to Bucket so you can keep some ideas on file. I took alot of my ideas from photos I did at the RV show and some pics of newer coached online....since, as a real Aussie man I have no interior design skills of my own. I just know how to use tools!
-
OK...figured the avatar and batch resizing thing...will start posting some more tonite.
-
anyone that can tell me how to change the avatar pic...I'm opened to suggestions. I added my toyo pic in my profile, but it doesn;t show up here. This is NOT one of the easier forums I've ever been to I must say. Oh, currently resizing my pics so they are more viewable. The huge ones I uploaded are difficult to see in that silly viewer and there is no option to right click....so...I am spending lots of time resizing.
-
OK...I'm gonna try this again. I just spent 4 hours uploading pics and adding commentary just to find it all disappear with the click of the submit button. Could not even go back to copy/paste what I'd already written! Grrrrrr!!!! I'll try just a photo or so per post and see what happens. This is the original chair setting atop the water tank. Unless you were a dwarf you had to turn your legs 45 degrees to the side to put them on the floor while using the table to eat or write. Dumb setup. Out it came. So, I moved the water tank to behind the driver's seats, which now provide convenient step up top bunk, nice ottoman for the recliner, and additional sitting space for any drinking mates I come across in the desert...In place of the water tank, a single swivel recliner I picked up on Amazon. Cut off feet and welded swivel post into old chairs base plate. Bolted that onto floor. (Painted the walls and added pleated shades too)
-
will do! I have plenty of OLD pics of her before I started but I will take some today. Standby! will post them tonite.
-
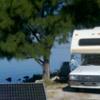
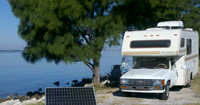
Hi There I am a full timer here in Florida in my 85 New Horizon 21 footer. I have extensively modded her for boondocking. I have 4 120 amp/hr deep cycle batteries.... 2500 watt inverter..... 200 watt solar panel and a pop-up wind gen I built myself. Most importantly I switched out the anemic alt for a 160 amp PowerMaster and upgraded the wiring going to the coach battery bank. All lights have been switched out to LEDs. Usually just lil trips to Wal-Mart and the like top off the batteries nicely if there is no sun or wind. It puts out 90 amps at idle, so I can just idle her for an hour and she becomes my 4 cylinder generator! The rust accumulation in the gas tank is HORRIFIC and am currently doing my second tank cleaning in a year. This time I am coating the whole inside with a tank sealer and putting in a new sending unit as I have never had a working one yet. I just know I can go 200 miles on a tank so at 150 I start looking for a station. Also gonna weld on a bracket on the frame rail behind the passenger seat to mount an extra rectangular 9 gallon plastic boating tank I have. You can get these at Boaters World for about $50. Just a big empty space there waiting to be filled! Then I'll drill a hole and weld on a fitting to the bottom of the main tank while I have it off. The two tanks will be joined by a connecting hose and as I fill the main tank, it will fill the aux tank. No need for fancy pumps or pricey aux tanks...just let gravity do all the work! That'll give me about another 130 miles range. Got my 1985 30lb horizontal propane tank recertified at Suburban after just repainting it to make it look nice. Saved me $300 for a new one. Sprung for a new regulator though... I could smell a slight leak from the original one. The big change with the interior was ripping two old seats bolted to water tank cover (on right side) and replaced it with a single comfy recliner chair. Moved the water tank forward just behind the driving seats and now it makes hopping up on the bed a cinch! Ripped out old couch (on left side) and leaky hot water tank under it. Now has on demand hot water from a unit I bought for $150...much better though I usually shower at one of the AnyTime Fitness gyms that are all over the country. This setup allows me to use that space under the couch as storage. Save the foam and you can build a nice new sitting area over that with plywood, get some updated fabrics, and get space to boot. Also built a pair of simple cabinets in the bunk area over the windows for additional storage. Had to move the lights that were there but I didn't use them anyway. Speaking of updating, I got new veneers at a specialty store (almost whitish poplar for me), poly-urethaned ithem, and applied it right over that old 1980's dark paneling. I rebuilt all the cabinet doors and epoxied smoked glass insets to some, mirrors to others to update the look. I am currently rebuilding the bathroom door to match everything else. Obviously this is not necessary to full timing, but I'll be living in here for a few years at least, and the beautiful interior was worth it. My specialties are electrics, engines, and shop work...the woodworking was a bit new, but fun. I'll be adding additional storage on the roof making my own box. One last thing, for those of you considering a rear carrier. I made one for my 400lb motorcycle but was not sure what the handling would be like and if the rear axle could take all that leverage. It was definitely lighter steering but manageable. However, I emptied my rear tanks & moved every bit of weight I could as far forward as possible. A really fat wife would probably work too... The point is, if you just want to add on a light 150 lb scooter or something you shouldn't have any issues. Cheers!
-
Hi Barrett, I have an 85 New Horizon That I have gone completely redone. I know you have already bought it, unfortunately I just saw this post. The NUMBER ONE thing you need to look at on your rig is the rear axle. Make sure it is NOT the original 5 lug. Most of the cheap rigs I've seen have been the older axle. they will come off on you the second you put a lil weight on them. These were subject to a DOT recall, and for good reason! Your rig should either have a six lug axle, or a 5 lug upgrade. There's lots of info with pics on this particular issue. Just make sure it is your FIRST check. Other than completely redoing my interior to get rid of the outdated dark wood, and installing Bamboo flooring, I upgraded the Alternator, DC wiring, and isolator. This was necessary because I like to stay out boondocking for weeks at a time, and I put in 5 -120 amp/hr batteries and 2500 watt inverter. The lousy 30 amp alternator was BARELY putting out 5 amps to the coach batteries while on the road. Now I have a 160 amp, and it charges them up quick. I don't like running a loud generator. So my battery pack takes up the gen area. Other than that, just flush everything in the engine/tranny, Seal everything on the roof you can find, then run a hose up there to flood the roof and look for leaks. I had a few, but nothing that wasn;t sealed with some silicon. I'm going to be Coating the roof with Kool-Seal before I move out west with it. Oh, one other thing. When I got mine it had been sitting for years and the gas tank had tons of rust in it. As I tried to drive on the Interstate, the filter in the tank became clogged and The engine would quit or choke regularly. I was stuck all the way cross country and after finally having the problem correctly diagnosed, had the tank pulled, cleaned, and a new pump and in-tank filter replaced. An 8 hour, $600 job in San Diego, but I was able to drive all the way back to Florida with no problems after that. If I was at home, I could have done it myself for the cost of a new pump. It's really easy to drop the tank. I highly recommend dropping and cleaning it. You are gonna be shocked at what you see floating in there! As soon as I can find a bigger tank, I will be installing that along with a new sender unit. Mine is rusted out and inoperative. That lil 18 gallon tank only gives me a max range of 200 miles. I'm looking for a 26 gallon or larger. I'll make one if I have to as I can weld my own.... Get the inside the way you want it. Makes living so much better. I put a recliner in mine and it feels soooo good to kick your feet up with a beer after a full day! Anyway, good luck and enjoy your rig!
-
One thing to keep in mind if you are replacing your Isolator...If you are adding batteries (I have 5- 120 Amp hour bats in my 85 Toyo), you will need to make sure your Isolator has an Amp rating AT LEAST that of the full power of the Alt. Really, you should go over by 30 or 40 amps so they are not working at their Max all the time. Most Coach builders put the least powerful isolator they can get away with. Fine for one battery (usually), but not a several. Those batteries, when depleted, will suck the Max power from your Alt. On that note, make sure your Alt can handle the extra demand too. A lil 30 or 40 amp alt will be straining to keep up with Engine, lights, radio, and wiper demands going down the road while trying to charge a hungry pack in the back. I went to a monster 160 Amp Alt that puts out 90 amps idling, and my piddly old 30 amp contact isolator was replaced with a 200 amp solid state one.
-
I currently run 5-120 Amp/hr batteries in my 85 Toyo New Horizon. I spend alot of time boondocking as a full-timer and I run an inverter. If you add more than two batteries to the coach, I'd recommend upgrading to a more powerful alternator. I just installed an 140 Amp Delco using a mod I found online. With two batteries, a 60 amp should charge just fine. After pulling my original, I found it was a piddly 30 amp Nippondenso. When I hooked it to an amp meter with near dead coach battery, it was barely putting out 5 amps! Now I can run my engine for an hour or so and charge my batteries daily. Make a run to the store... that usually tops of the battery bank pretty well. I got rid of my Generator as my new Alt combined with my pop-up wind generator provides all the juice I need. Esp out at the beach where there is constant wind. So...YES! You can add batteries, you just have to size the alt to match. if your stock alt id charging your coach battery now, you should be fine with one more. After that, try to upgrade your alt by 20 amps or so per battery at least so it can recharge the bank by the time you reach your next destination, or if you just need a recharge at a remote location. Also, I have a 40 amp Smart Charger that charges my batteries properly whenever I am hooked to shore power. This is important as Alternator and older converters don't "top off" batteries properly, and this is critical to long battery life. Esp if you're a heavy user like me...( I used to build and drive electric cars, so batteries are a passion of mine) Also, VERY IMPORTANT...make sure the coach batteries are the same amp hour rating, and the same brand and batch if possible. If not, one will always reach full charge before the other and you will quickly destroy the unbalanced pack, cooking one and undercharging the other. I use wal-mart deep cycle trolling motors, and rarely let them fall below 70% state of charge. They usually last me 3-5 years easily. Drain your coach batteries regularly, don't recharge them fully,and they will die within a year. Hope that helps