Diesel_Aggie
-
Posts
173 -
Joined
-
Last visited
Content Type
Events
Profiles
Forums
Gallery
Everything posted by Diesel_Aggie
-
If the leaf springs are sagged, I'd suggest having new leafs custom built at a local spring shop. They can help you dial in a ride height and stiffness of the spring. New springs will also last you for years and you don't have to worry about metal fatigue in the 25 year old leafs you have now. On the shocks, I really like Bilstein shocks. I do not have them on the Sunrader (yet) but have them on four of my Ford trucks and have installed 3 others sets on friends vehicles. www.eshocks.com has great prices on them. What I like about them is that they are stiff which gives you a firm ride and good control over the vehicle. Bilstein also provides excellent customer support/installation help should you need it. The adjustable Ranchos sound cool.....at first. Do you really want to crawl under the vehicle to adjust them? I found that I just left them on stiff all the time. Then I replaced them with Bilsteins and got much better life out of them. The Bilsteins will likely be cheaper than Rancho 9000s too. My experience with Monroe shocks is they make a decent product but they are not that stiff.
-
There are several styles and colors of 14" vent caps. It would be best to pull yours off and take it to your nearest RV dealer. They run about $15-25. On top of the RV on the hinged side I have see screws on either side holding the hinge pin on or fold down tabs that will lock the pin in. You may also have to disassemble the the inner crank mechanism to maneuver the vent off. If so there is typically a square plastic cover inside the RV with a phillips head screw and each corner. The plastic cover now pulls down. There may also be a screen above the inner cover which is held on by phillips head screws. The crank handle is typically held on by one screw and then pulls away. The actual crank mechanism above this handle is usually held on by two screws. You can now freely move the assemblys around from the top until you can slide the large wheel on the vent lid off thru the corresponding hole on the lifting mechanism. Now just reverse for assembly. Sometimes you can accomplish this strictly from the top without extra disassembly. I highly recommend replacing both and them always having a spare with you. They get brittle from the sun in a few years in southern climates and even the smallest hail or impact can crack them. Once I figured out how they work I can easily do them in less than 15 minutes. On the exterior compartment (I'm assuming you mean flip up door?) look at what the original seal was. It is often just thin foam like you might see in the door/window insulation aisle at Home Depot. It only lasts a few years and gets brittle, compressed and starts flaking apart. Others have a better quality rubber seal. Most of these doors leave you a variety of options for fixes. Just see how thick you can go and still have the latch work properly. I like either using rubber seals or the EPDM sealing strips from Home Depot. More expensive, but a better seal and longer lasting than the cheap foam. A larger RV parts department probably has a variety of seals to pick from as well. Most Home Depot stuff is peel and stick....just make sure you clean the area well first. If you find a rubber seal that you need to glue on, 3M Weatherstrip Adhesive is outstanding. Comes in yellow and black and large and small tubes. Most any auto parts store should have it. I like the black as it blends in better. It's a little tricky to work with as it's very tacky and stringy. It's often referred to as "gorilla snot"! Make certain you wear chemically resistant gloves as it is very irritating to skin. If you skip this step your fingers feel weird, tingly and numb. In case your leak is around the fixed frame of the door, the part that is screwed to the outer wall of the RV, that is a little different. You will probably have a 1/2" or so plastic cover that is easily pried out with a screw driver. Under this will be screws. Often they are square head bolts. These screwdrivers can be found at Home Depot. Be aware there are 3 sizes. Unscrew these and the outer frame will pull off the exterior of the RV with some work/rocking. Be gentle as many frames are easily bent aluminum. Almost always there is a putty like substance under here called butyl tape. It can be found at RV dealers and is cheap. Clean the old stuff off, get the proper width tape, apply it to the frame, stick the door frame on and insert screws. This should reseal it for many years. Left out something important. Stick a few screws thru first to help you get lined up when you stick it to the RV since you won't be able to see the holes. Looks like your RV is in great shape from the pic.
-
As Maineah said, crawl under the back of your Sunrader and look at how the frame rail extensions are added on to the original frame. Your 81 is probably identical to my 83. I'm no engineer or welder but it's downright scary to me how it's done!
-
I'm also interested in your question for a slightly different reason. I have a similar bathroom set up as you on an '83 18' Sunrader. I don't need the extra driver seat room but want more shower room. My thought was to take the larger bathroom from a 21' Sunrader that is in the same place but twice the length and includes a sink with room to move. On your question you at a minimum have to move or change the piping on the black water side. If you are an 18' model like me then you also have a vent pipe in the closet directly behind the bathroom. This would have to be relocated with a new hole in the roof and the old one plugged. You also maly have to move the black water tank as on mine it's directly under the bathroom. Maybe you can use elbows to reroute the pipes but I kind of doubt it. In looking at my Sunrader and one at a salvage yard it seems the bathroom is all one large piece of fiberglass. I pulled my medicine cabinet out and there is a substantial gap between the back the bathroom wall and the exterior wall. No insulation there I might add. Looks like the shower pan is just build on top of the regular floor that runs under the whole house part of the camper. The problem I see for what I want to do is I'd have to remove the upper half of the clamshell to get the old bathroom assembly out and the new wall in as it seems to be one piece. Maybe you could get lucky and have just enough room to slide yours back. Hopefully someone who has gutted a Sunrader will reply with more info. Oh, there are companies that will custom make black/gray water tanks to your dimensions.
-
It could be Toyota or aftermarket. You may search some old posts concerning fuel tanks and fuel capacity. If memory serves me on some brands you could option for a 26 gallon fuel tank. This was built by Transfer Flow Industries in California. An old post said they still had the engineering drawings but it would take ordering in quantity for them to build them again. My 1983 Sunrader appears to have a factory Toyota tank. It's the smaller tank, something like 17 gallons? You might get on www.1sttoyotaparts.com and use the parts look up feature. They sell wholesale to everyone and it at least gives you an idea of what one would cost. I"m sure shipping would not be cheap. I'd also suggest a Google search on Toyota fuel tanks and checking with your major chain auto parts stores. Toyota trucks have pretty good aftermarket support. There are companies that cut open, clean and reweld the tanks. http://www.gas-tank.com/ is an example. I know nothing more about them and I'm sure there are a few competitors. You seem to be familiar with this process already. There is also a product call Kreem http://www.kreemproducts.net/c-3-fuel-tank-liner.aspx that coats over the rust. It's a 3 part system with a cleaner, etcher and sealant. We had decent success with it on motorcycle tanks when I used to work at a dealer. Much easier to pull a motorcycle tank and turn it every which way than a car tank though. Post your results when you find a solution. I'm curious and I'm sure others are too.
-
With an original Toyota tank I'd suggest www.1sttoyotaparts.com They sell wholesale to everyone. Having your VIN number would be helpful when you call. You might check the chain auto parts stores websites as well. They may have one. I personally prefer new Toyota parts especially on something where you have to drop the tank. You might post the part number, price and where you got it to help others in the future. Just used the part lookup on 1st Toyota Parts and the sending units run $60-110. There are so many variations you'll definitely need a VIN number to get the right one. Short bed, long bed, with guages, no guages, carburetor, injection and on and on with the choices.
-
My brother recently did a successful swap of an SR5 cluster with tachometer into his 1990 4x4 22RE 5-speed pickup. I'm not sure which set of directions he used but it did specifically say DO NOT even install the dash without first unhooking the old oil pressure sensor. The writeup also talked about some trucks having the tach wire in them and some not having it. He got lucky and had the wire. He swapped the oil pressure gauge, swapped the cluster (after replacing all the bulbs as preventative maintenance), fired the truck up and all worked well. I left out that his donor was from a 6 cylinder and there is a toggle switch that had to be flipped to work on the 22RE. Just confirmed he used the same instructions as previously posted. I believe he purchased his cluster from a member of the Yotatech forums.
-
The coach owners manual is probably the hardest thing to find. You might look in the pictures section here. I vaguely remember either seeing some brochures or manuals there. Set up a saved search on Ebay and maybe you will eventually get a hit. There are a few companies that specialize in selling auto literature and a Google search on "auto literature" will turn them up. I'd start asking every owner of a similar rig you come across if they have the coach manual. Maybe they will be willing to scan it for you. Then it could be shared with the 50 other people who probably need the same thing. I assume we are talking about the house battery that is not charging off the alternator and not the battery that starts the truck. I see no reason the house battery couldn't be wired to charge off the truck. Some 7 pin RV plugs for travel trailers are set up to do this. My concern would be the alternator may not be powerful enough to charge the truck battery, run the A/C full blast, run all the running lights, stereo, etc. and still have reserve capacity to charge the house battery. I don't know what output the alternator is on the Toyota RVs. I'm sure there are local alternator shops (also some national ones like http://mean-green.com/products/index.html ) that can increase the output of your alternator.
-
Thanks for the pics. I'm very interested in the shot of the metal bracing across the roof. I'm assuming this is what the later Sunraders had to keep the roof from bowing down with an A/C unit installed. Do you have more pics of how these attach and maybe the radius? Thanks. Floor looks beautiful.
-
If it ends up being a bad sending unit you might look at the link below. They rebuild fuel sending units. I believe most of the Toyota motor home fuel tanks were installed by the RV Converter (Dolphin, Sunrader, etc) and may use a sending unit which would likely be unavailable. I know nothing about this company, just had it saved in my links should I ever need it. There are probably a few others that do this as well.
-
Hi all, I've been watching this brand new Toyota true dually axle with 4 new wheels for sale on Dallas Craigslist for a few weeks. The price has dropped from $1000 to $950. There are pictures in the ad and I have posted the text below, minus the phone numbers. Didn't want them to still be posted on here 5 years after the item is sold! You can find the ad by going to dallas.craigslist.org then clicking "Auto Parts" under the "For Sale" area and searching "toyota axle". I know nothing more about it. This seems to be a very good price as I had to pay $600 plus $300 shipping for my used one about 18 months ago. Wish this one had shown up then! I thought this would be of interest to many on the board. If anyone does buy it and there are any labels, part numbers, directions sheets, etc. please document these for the rest of us. I've been trying to track down these part numbers so I can see if anything is available by part number from Toyota. The kit maybe discontinued but Toyota is pretty good about keeping individual parts available. "For Toyota motor home or delivery truck. Convert your 1970's or 1980's Toyota chassis to heavy duty rear end with 4 truck type dual wheels. Items have never been used or installed. Built by Toyota to convert the motor home chassis."
-
What type of lifts do they have? The "[ ]" style where adjustable bars slide in from each side to the frame? The drive on type where there are two wide ramps on each side? I've had regular Toyota pickups on the second style at an exhaust shop with no problems. What about finding a shop with a pit? Have you gone down the list of shops in the Yellow Pages to confirm no one can do it? Seems odd in a town the size of STL. I'm not sure if Toyota ran the exhaust all the way back on the chassis cabs or not when they were shipped to the motor home converters. If they did, have your local Toyota dealer look up the parts. Taking your VIN in will be a big help. The Toyota dealer parts software is great and has VIN # support back to at least 1983! You might also contact www.1sttoyotaparts.com They are a dealer that sells wholesale to everyone. 25% off Toyota MSRP, no sales tax, you pay shipping. Now keep in mind some dealers mark up considerable above MSRP so yo might save even more. You can also look at http://www.toyodiy.com/parts/ which is a rather cumbersome older version of the Toyota dealer parts fiche. You'll have to have your VIN number to get anywhere unless you know all sorts of Toyota chassis numbers. Remember that you have a HiLux.....that's what the pickup is called in the rest of the world. Last option is pull the bad parts yourself and have a shop duplicate them and reinstall yourself. Most auto parts stores have generic hangers that can be made to work. If you have a Toyota system with nice factory style hangers welded underneath I'd keep that if I could. Much nicer set up. Just as info I ordered a section of pipe from Toyota from the catalytic converter to the back of the truck including the rear hanger attached to the pipe for something like $160. This was for a 22RE 1990 Pickup extended cab 4x4. Obviously a different part, but not much newer. It was in stock at the Dallas parts distribution warehouse.
-
Have you tried calling Hellwig and asking? I don't have an answer other than they do make high quality products. Let us know what you find out when you call!
-
Was just digging on www.rockauto.com and found a picture of what may be your rear brake drum: http://www.rockauto.com/catalog/moreinfo.php?pk=490569 This is a Beck Arnley drum part # 0832172. Rock Auto allows you to add it to the cart but there is no price listed so I'm not sure if it is available. A Google Search of "Beck Arnley 0832172" returned the following link where you can purchase the drums: http://autoparts.nissanreports.com/auto-part/173937-nissan-beck-arnley-083-2172-brake-drum Note that this is for production from 11/82 so check the Certification label that should be visible on the door jamb when you open the door for the Datsun production date. The Mirage part my have a later production date but that won't apply to chassis parts. Play with Rock Auto more. I just found a cheaper version of the drum. Beck Arnley is a quality well known brand so you probably get what you pay for. I suspect you can find the rest of the parts like this. If you need more help, just ask. Just found Beck Arnley shoes on Rock Auto....they are on closeout for $7.69 so if you can confirm they are correct you might want to order soon! BECK/ARNLEY Part # 0812446
-
what is this stuff on my motorhome??
Diesel_Aggie replied to impending doom's topic in General Discussion
#4 is when you have a water faucet to run a hose form where you are parked.....such as an RV park or your house. This gives you an unlimited supply of fresh water provided you can leave your drain open....for instance an RV park with sewer hookups. The pressure from the water faucet provides you water pressure much like your house. #7 is to fill the onboard water tank to take water with you when you won't be able to use a hose in #4. This was you have water if you stop at a rest area or camp somewhere there are no hookups....such as the middle of a National Forest. You only have as much water as your fresh water tank holds so you must conserve its use. Water pressure is provided by a 12 volt electric water pump that runs on demand. You open a faucet, the pressure drops and the pump kicks on. Your house battery (not the one that starts the vehicle) powers this. The pressure reducer used when the hose is hooked up to an external faucet limits the amount of pressure the internal plumbing is subjected to. You don't need to have any faucets open unless you wish to use them. Once the system is pressurized water stops flowing assuming all faucets are closed and there are no leaks. All the pressure reducer does is reduce the pressure inside the RV. The system will work exactly the same without the pressure reducer but if you have a faucet with exceptionally high pressure it MAY create leaks inside the RV. -
help finding a toyota odyssey on NADA
Diesel_Aggie replied to terryplys's topic in General Discussion
You are in the right place for what you are looking for, it's just that there are 8 sub models. These are likely either different trim levels or floor plans. You would have to find some markings on the RV in question telling you the specific model or find a brochure for a 1991 Odyssey and match the floor plan to the model the brochure shows. The only other option I can think of is to post pictures of it and see if someone who is very familiar with the 91 Odyssey RVs can tell you which model it is. The photo gallery on this site has some brochures but I'm not sure if any are for the Odyssey. -
I did a Google search on "1983 Nissan dually" and found a little bit. "Datsun" might be a better search term. It seems Nissan did offer a dually pickup so I strongly suspect you have a Datsun/Nissan axle. I also looked at rear brakes on www.napaonline.com and they show two different dimensions for rear brake shoes. You might pull your wheels and measure what you have and see if you get a match. Other options might be a Nissan dealer if you can find one willing to look up older parts. Also try a local auto parts store that specializes in foreign cars. Foreign Car Parts in Dallas has been able to get me some very odd VW Rabbit diesel parts for a fraction of what VW sells them for. Chain auto parts stores just looked at me funny when I asked for the same parts from them. You may also see if you can find a Nissan/Datsun pickup forum. Your dually may still be an oddity to them but I bet you can at least get some good leads. Also do a Google search for "brake shoe relining" and you will find people who can reline the shoes you have if you can find no other options. A spring shop can make rear leaf springs, metal brake lines can be made. You'll need a tubing bender though. A knowledgeable well stocked NAPA will have various lengths of straight brake lines in both metric and standard that can be bent to match. You might also hunt up Ebay for a copy of the microfiche for the 1983 trucks or a Nissan EPC (electronic parts catalog) and then you can look up your own Datsun/Nissan part numbers. Then call a dealer with the part number and ask if part XXX-XXXX is still available. Where are you located?
-
I can't offer any insight on the transmission. One thing I'm curious about is has the camper been regularly started over the last year? Gasoline degrades pretty quick and may no longer be good. If a battery sits for a long time without being charged they can go bad too. Just want to bring these up so you are prepared to deal with them when you get there. Where are you? Do you have access to a truck? I successfully towed my 18' Sunrader on a U-Haul auto transport last year when it would not start due to bad fuel/clogged carb. The was the trailer, not the tow dolly. It's not an approved vehicle to put on the trailer but it seems I meant to tow a Honda Civic on the trailer and just got mixed up when I was loading. It was not the most stable set up but it made it 400 miles. Just kept speed below 60mph due to stability issues. If you are anywhere near Texas, PM me and I might be able to help move it.
-
Tires - Load Range C and D capabilities
Diesel_Aggie replied to bufbooth's topic in General Discussion
Tires can be very confusing but critically important to RVers. There are several links below with some great information. Most modern tires will have a sizing something like P185/75-14 78S or LT185/75-14 88T. The first part of this description tells what type of use the tire is for. P=Passenger car tire also know as a P-Metric tire. The LT means it is a Light Truck tire. Generally speaking an LT tire is going to be of stronger construction than a P-Metric tire. You may also run across an ST at the front of a tire size. This would be a Special Trailer tire intended only for use on a trailer. After the initial letter or letters the first number, in our example "185" is the width of the tire in millimeters. This measurement is taken at the widest part of the tire, not at the tread. Remember the sidewall (side of the tire) almost always bulges out wider than the tread. You should also know that this measurement is taken on a specific width wheel. If you mount the tire on a wider or narrower wheel it will not be the same width. Most tire manufacturers will tell you on their detailed spec sheet what width rim they measured the tire width on. They also typically give an approved minimum and maximum wheel width. After the slash we see a "75" in the example tire. This means that the sidewall height (also known as aspect ratio) of the tire is 75% of the width of the tire. In this case 185mm X 75%=138.75mm sidewall height. Some older tires like the original equipment 185-14 tires on the earlier Toyota motor homes are missing a number. What this means is that the sidewall is the exact same height as the width of the tire. Essentially 185/100-14 if you will. You'll never see the 100 on a tire it's just understood that when this number is missing that is what it means. After the dash we see "14" in the example. This means the wheel size is 14 inches in diameter. Back to the first example we see "78S". This tells us two things. The two (sometimes 3) digit number is the Load Index NOT to be confused with the Load Rating. The Load Index allows us to directly compare two tires to know which one has a higher capacity to carry weight. A higher number ALWAYS indicates a tire with a higher weight capacity. The Load Index is the more modern system. Now the last thing we have on example 1 is "S". This is the Speed Rating. In this case "S" means the tire is rated for sustained speeds of up to 112mph. The "T" in example 2 is 118mph if you are interested. Speed Ratings are not straight forward, you just have to compare the letter rating to a chart to determine the speed rating. Generally speaking a tire with a higher speed rating will run cooler at a given speed which reduces pressure build up and tire wear. Unless you've put a small block Chevy in your Toyota this really is not that important to us! The last thing is the Load Range which is found on most truck tires. We typically see C and D in our applications. Generally speaking the higher the letter, the higher the weight carrying capacity of the tire for a given tire size. The Load Range is the older style of rating this and loosely correlates to the number of tire plys or more often tire ply equivalents. Decades ago before steel belted radials you had nylon, rayon, etc. plys in the tires and more plys usually equaled a stronger more puncture resistant tire. Load Range also tells you the maximum inflation pressure you can run in the tire. To get more load carrying capacity out of a tire you need more air pressure. A Load Range C has a max pressure of 50psi, Load Range D 65psi and Load Range E 80psi. There are more load ranges for other vehicle types. If your are still with me here are two great links for reference and to help document what I have said. The first will show you Speed Ratings, Load Ratings and Load Ranges. There is also some other info I didn't cover. Note at the bottom this info was obtained from Bridgestone/Firestone. It's a dead link but I found the original info which you will see in Link 2. The charts in Link 1 can be found by digging in Link 2. It's not real easy to find (or link to) but I did verify the links in Link 1 came from Link 2. Link 3 page 47 shows LT Tire Inflation vs. Load Charts which I talk about further down. http://www.dualport.com/bustech/load_tires.html#anchor-load http://www.tiresafety.com/ http://www.tiresafety.com/images/Tire%20Replacement%20Manual.pdf There are a few more important things to discuss. You only get the full load carrying capacity of a tire at a certain inflation pressure. It is VERY important to weigh your rig fully loaded and know how much weight you have not only on each axle but each wheel. Only then can you decide on an appropriate tire pressure to run based on the tables for your specific tire model and size. Not all tire manufacturers make this data available on the web. Usually calling the corporate office will get you the info you need once you get past the secretary who has no clue what you are talking about. If you are upgrading in Load Range you need to consider what is the max PSI your wheels are rated for. Sometimes this is stamped on the wheel itself either on the outside or the inside (as you have to dismount the tire). If you have aftermarket wheels a call to the manufacturer may answer this question. If I have a blowout on the dual rear wheels, I can just keep driving right? Well, not necessarily. Let's say for example the left rear of your rig weighs in at 2500 pounds. Your tires are rated at 1800 pounds single and 1500 pounds dual. With both duals in good condition inflated to where they will achieve the max weight capacity we have 500 pounds reserve at the left rear. Let's look at the math: 1500lbs load capacity X 2 tires = 3000lbs available minus our 2500lbs load at this corner. Now if we blew one of the tires we only have 1800 pounds of available load capacity. Unless we shed some weight or move some weight around we are absolutely overloaded. What can happen in this situation is that we damage the remaining tire by driving on it overloaded. This weakens the structure of the tire and it now has a much lower failure point. We might now set up a situation where we get a new tire to replace the first one we blew and then 200 miles later we blew the tire we overloaded. This is more of a problem with heavy 5th wheel trailers but you should be aware of it. Old tires are failure prone tires. Tires age in many ways. One is sitting in the sun under UV rays that drys them out. Another is thru moisture inside the tire that may start to rust the belts and weaken them. A big one for RVs and trailers is sitting for extended periods in the same spot. Each tire manufacturer has a recommended (not required) age for discarding their tires, often 5-7 years regardless of how much tread is remaining. I personally don't run my RV or trailer tires over 5 years and that has dramatically reduced my rate of blowouts. If you do some searching in the RV.net forums you will find many people who agree with the 5 year point. Do you really want your vacation ruined by a blowout? Even more importantly for us Sunrader owners can you afford to destroy your really hard to find fender flare if the outer tire blows? I hope this helps provide some insight on tires and clear up some misconceptions. If you are a Tire Geek like me you might want to check out http://www.tirereview.com/ It's a free industry publication for those in the tire business. I've read the print version for 17 years and learned a lot. I believe you can access articles on the site and subscribe electronically. -
I'd like to thank you VERY much for posting this link. I was able to get the left fender flare I've been hunting for a year and a half. I just happened to log onto the forums after Christmas when I was bored at relatives in GA and saw the post. Sellers were very easy to work with. What's left is now on Ebay. Thanks again!
-
http://www.toyotamotorhome.org/forums/inde...ic=1132&hl= titled 18' Axles *DO* Fail..... has some good info that helped me in my swap. If you get a pre '89 axle, springs, wheels and driveshaft the springs fit into your original spring mounts. Getting the driveshaft will give you the correct flange where you mate up to the axle. You can drill out your existing flange, but I chose to do it with the correct flange. www.car-part.com is a good place to start looking for axles. Do you have more details on the diesel in your RV? Was this a factory install? I wasn't aware of any factory diesels! Very curious to learn the fuel mileage and how the performance is.
-
Thought there might be some Toyota Huntsman owners interested in picking up the brochure to go with their RV. I have no connection with the seller. It is Ebay item 370102472123 and ends on 11/23/08.
-
Toyota (Rader) Outside Mirror replacement
Diesel_Aggie replied to twokelleys's topic in General Discussion
http://velvac.thomasnet.com/viewitems/mirr...?&forward=1 and http://www.ryderfleetproducts.com/cgi-bin/...duct_detail.jsp and http://www.ryderfleetproducts.com/cgi-bin/...ecategories.jsp are all sources. Also if you go to the search feature (it's at the top right of your screen when reading this, click it) and type in "mirror" you will get several threads discussing the mirrors. -
I would look at houston.craigslist.org and search "vehicle storage" "rv storage" "parking" and similar. When I was looking in Dallas a few years ago there were several people advertising storage. Some were normal commercial places and some were just people who had an extra spot in their driveway or whatever.
-
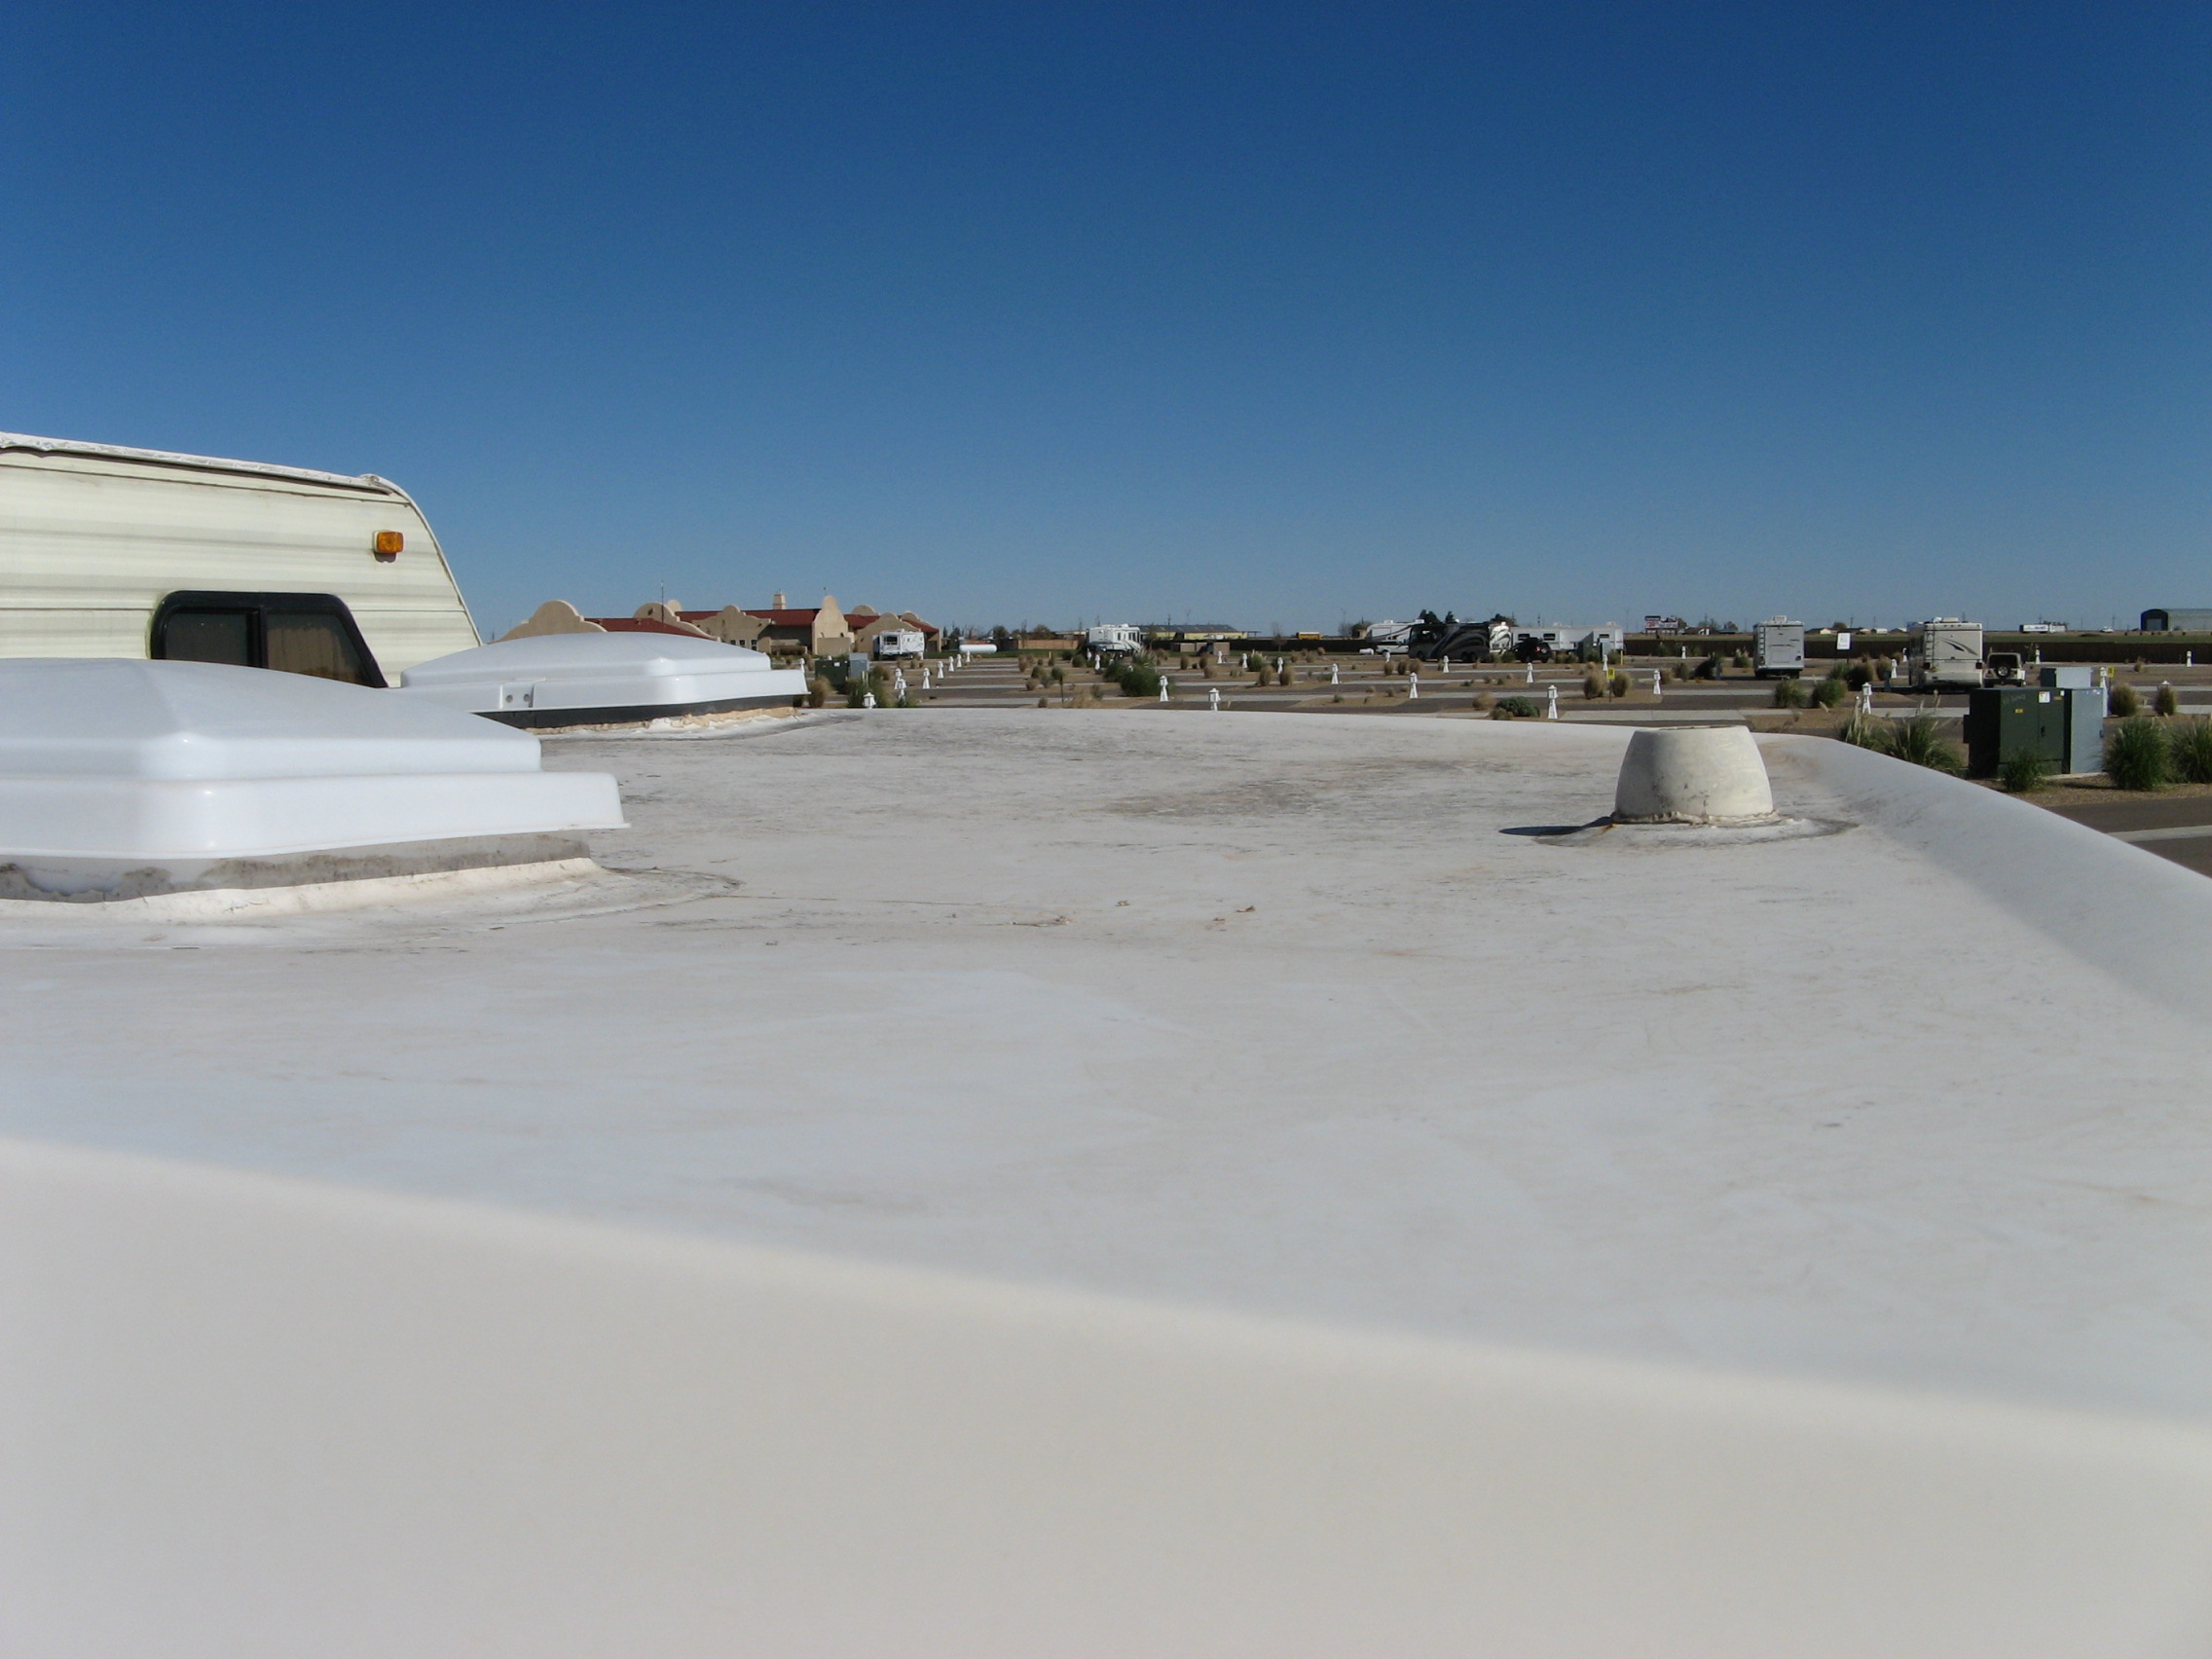
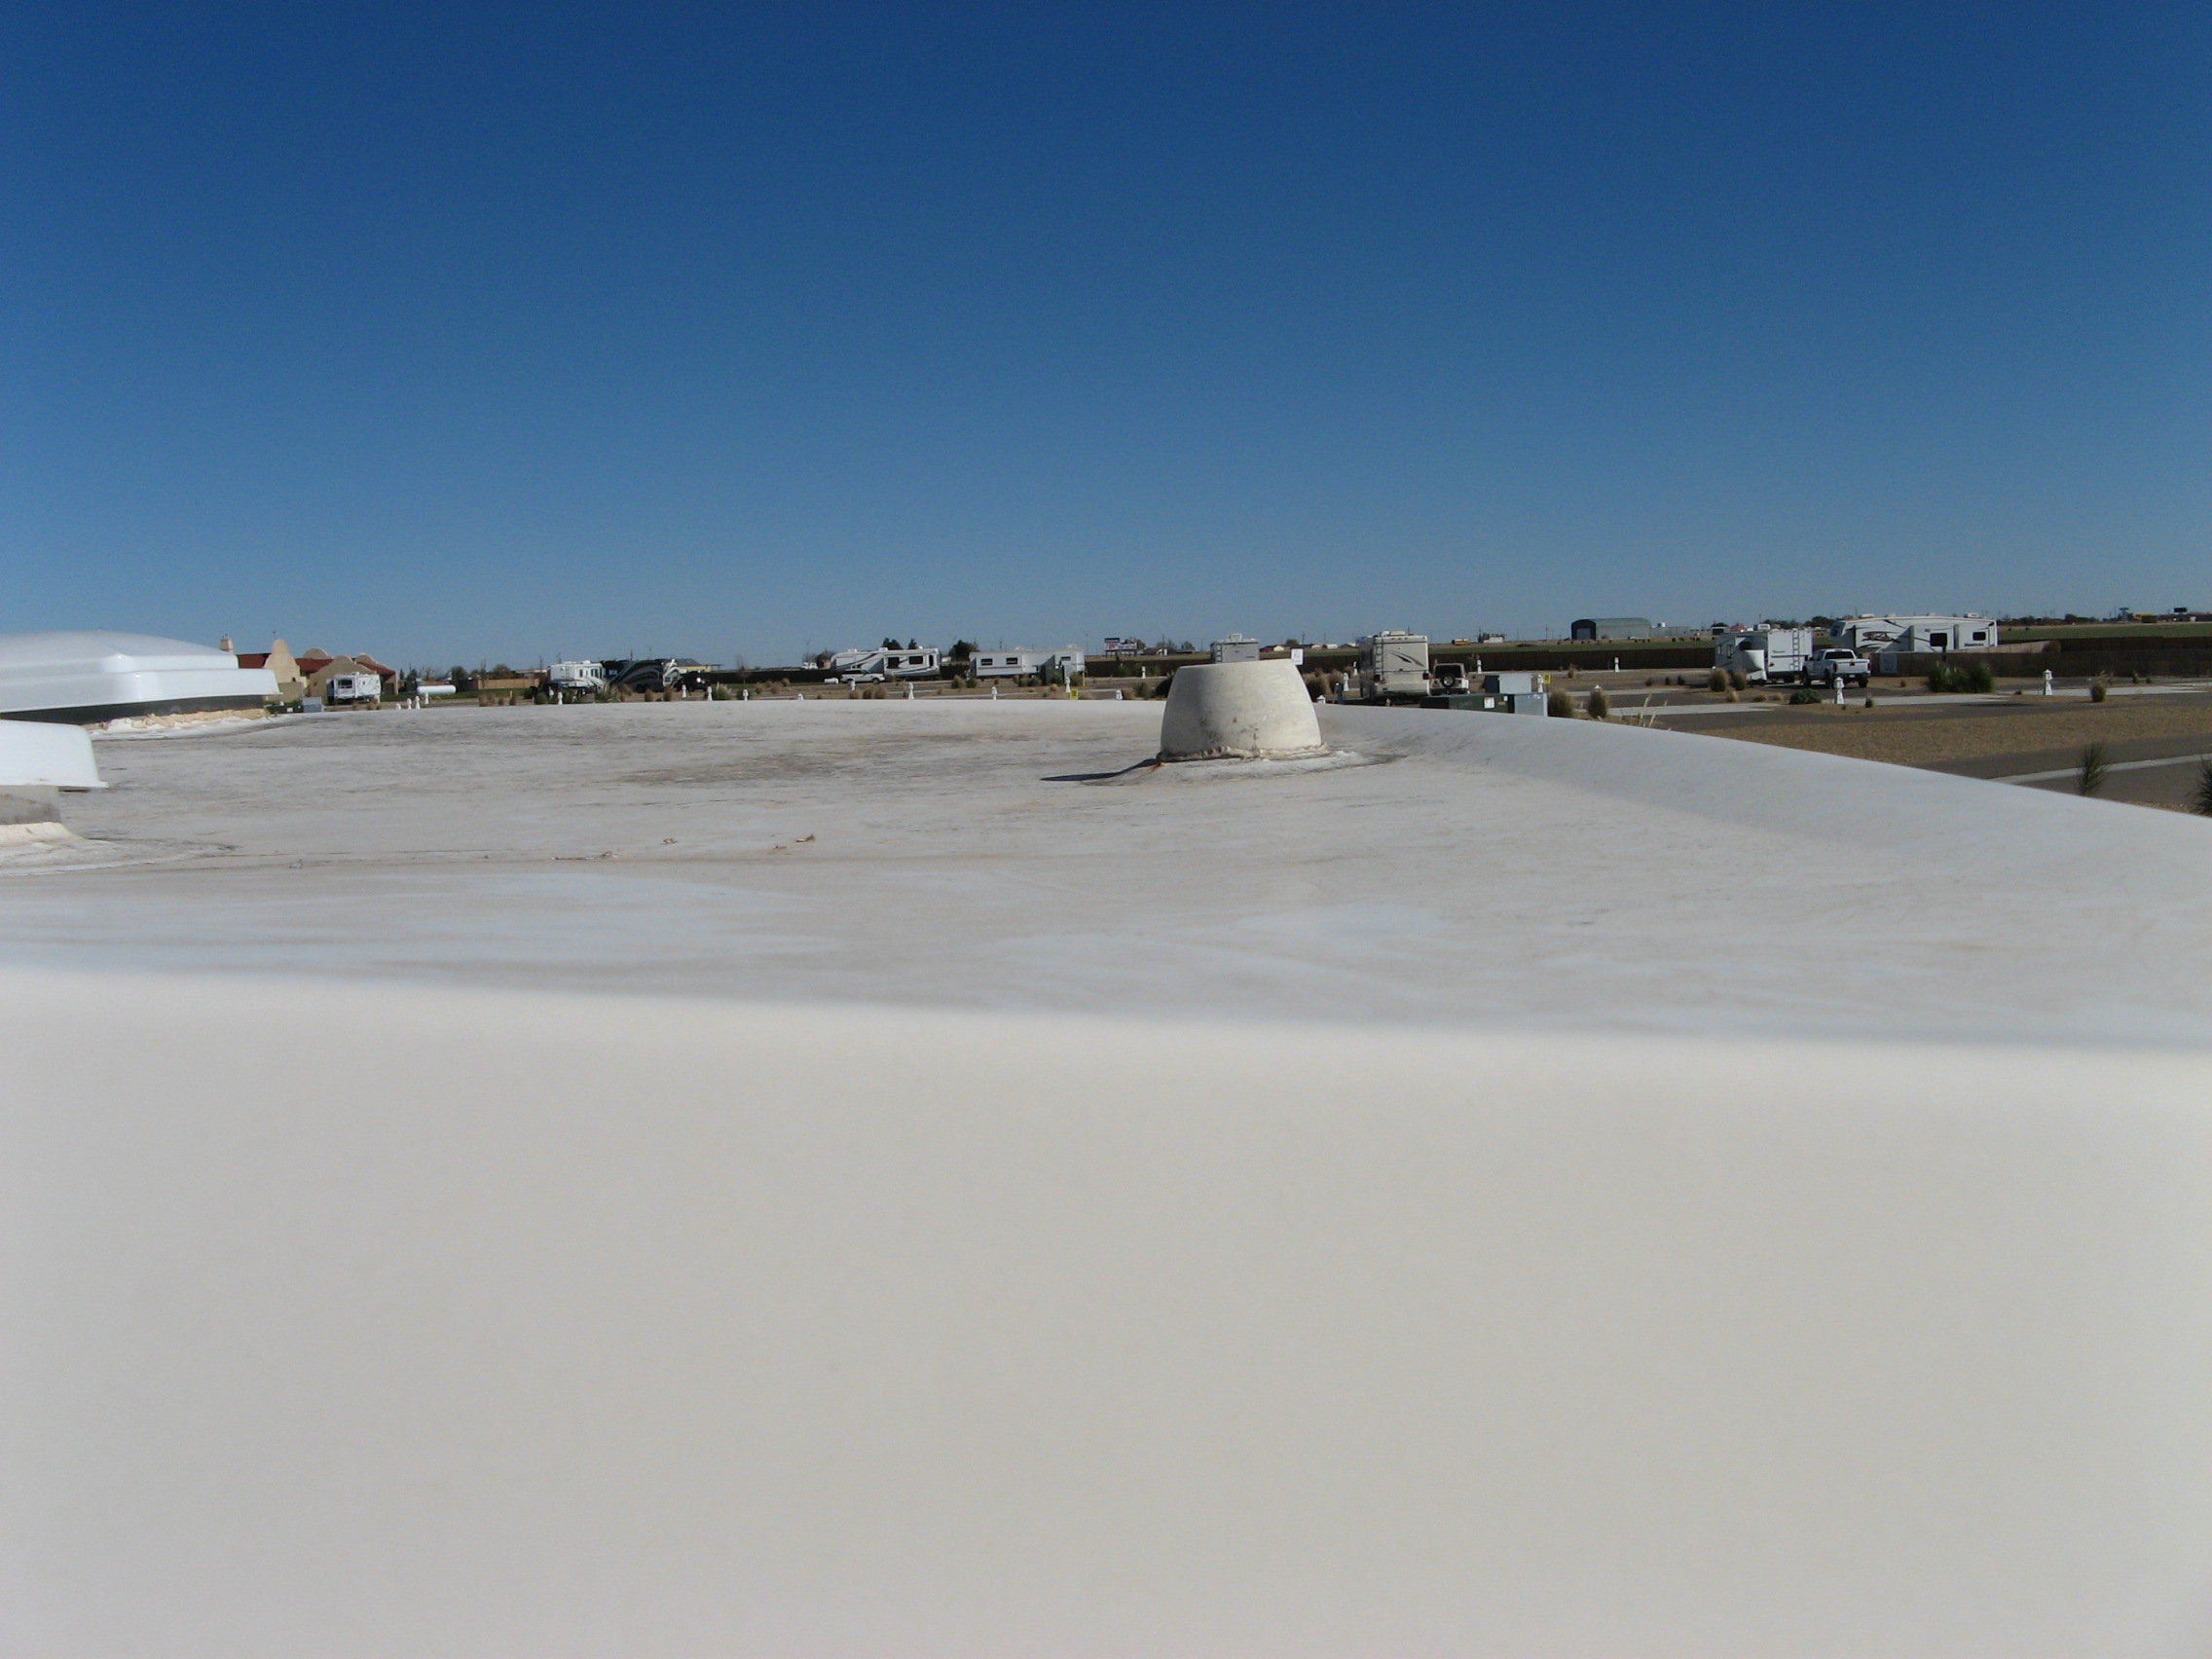
Here are finally some pictures of the roof on my Sunrader to compare. Note how mine has a depression in the center and there is no arch left to right. If anyone else can contribute pictures this would be a great resource for those in the market to purchase a Sunrader. Water pools on my roof between the front and rear vents.