


Mohave
-
Posts
13 -
Joined
-
Last visited
Content Type
Events
Profiles
Forums
Gallery
Posts posted by Mohave
-
-
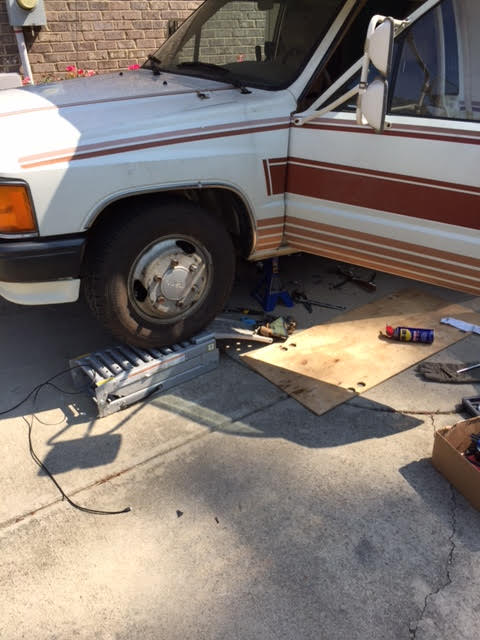
I got delayed with my project with an electrical problem that you can read about. But I got it all fixed thanks to the advice of many. Then I had an accident. Thankfully, no one was injured. I was driving from Phoenix to Flagstaff on a cross country trip home from LA and came upon an accident where vehicle parts were all over the road. I was forced to run over someone's battery and some other stuff and it severed my high pressure line to the AC; ripped a hole in the exhaust pipe; ripped up the catalytic converter, and completed ripped out my gray and black water waste system pipes and valves. All that at going only 25 mph. I was able to tape things up and drove on to my home in Charlotte. Drove at night to avoid heat.
Below, please find the pictures of these repairs. I had a friend of mine do the AC repair because I don't have equipment for that. I had Midas weld up a section of pipe w/ a flange on one end and flare on other (they wouldn't charge me so I paid the guy $10). Bought a new catalytic converter from O'Reilly's - $150.00 and did all of that repair in about 4 hours. The estimate from a professional was $600-$800ish. So I saved a little but learned a lot. She runs quiet as my wife's 2011 Honda. Truly does.
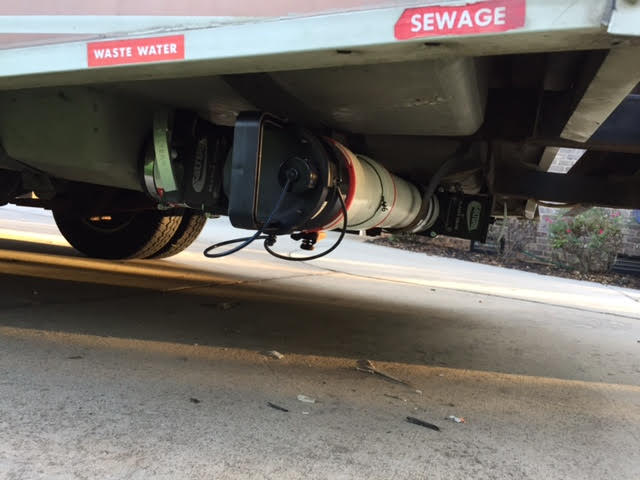
Then I went to the web and priced out new 3" valves and flanges; went to Lowes and bought 3" pipe and a T along with two 3" rubber pipe connectors. Now, full disclosure, it took me 3 freakin' weeks to figure out what these valves were called how the heck to find flanges - etc....Interestingly, two professionals at the parts department of a nationally known RV repair store had no idea. They got it all wrong. Soooo I realized being a novice isn't so bad after all. I bought and returned and tried on parts and whatnot until I had it right. I was able to locate a schematic of my model on the internet which gave me an illustration of exactly what I needed. Everything is leak proof and flushes and drains beautifully.
And remember - if I can do this stuff, anyone can.

-
Picture of hood and fender removal where I epoxied seams and also used "Brushable Seam Sealer" from the auto store. Anyone reading this remember - I'm a pianist and a choir director. Never done this before. If I can do any of this, YOU can!!!
-
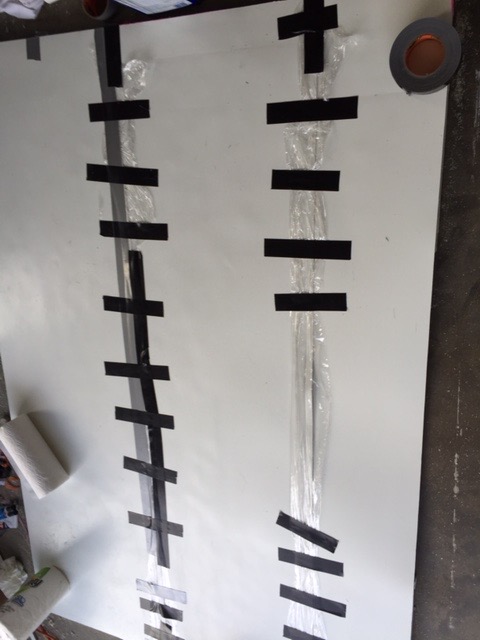
Stopped the leaks. Took several weeks of trial and error. But patience won the day as I took the advice of DanAtTheCape and sprayed a hose at very low pressure over every inch of the front end. I began by putting silicone around windshield. Here's the process I went through.
1. Isolated the leaks - coming from far upper right corners of cab along seam and from higher behind the dash.
2. Silicone on windshield seams - no change.
3. Dismantled wheel well plastic and marine epoxied all seams - some change.
4. Took off hood - marine epoxied every seam behind engine block and under and around the windshield wiper housings; changed some gaskets - a little more change.
5. Took out all the carpet and took out the electric boxes under the dash. Then went over all seams, screw holes etc... with waterproof caulk and marine epoxy. Then sprayed the entire floor and all the metal up as far as I could reach with Flexseal spray - several coats - no leaks!!
Right about that time the hurricane came through so I took her out and drove through torrents and nasty water holes on the road. Took her onto the interstate - nothing! Not a single damp spot.
Thank you everyone!!
-
When I bought this RV, I knew it had bad water damage. The original owner's wife had died and he let it set outside, unused for over a decade. His mechanic, who had done all of the maintenance on it since it was new, bought it from that owner shortly before he died. The mechanic rebuilt the engine, transmission, fixed the leaks, new cab air, new water pump, etc....But after a few months of ownership he needed to sell due to severe health problems. I had been looking for this very thing: This model of Toyota w/ a good engine and trans but something I could work on. It has taken me to LA and back from Charlotte, NC humming like a bird mechanically. A friend of mine in Tucson who is an RV mechanic put in a new hot water heater for me and re-did the wiring w/ new power supply and breaker box. So now the slow fun is left.
-
I'm real proud of my seams but I added what you suggested because that option is certainly more professional. Thank you again for your input, Back East Don! JEH
-
On July 20, 2016 at 9:23 PM, Back East Don said:
Too late now but you could have probably found a sheet metal (think HVAC duct work fabricator) guy who could have done interlocking seams to the aluminum to join them then trim them to size on a sheet metal brake. Posting as it might help out the next guy looking for an idea.
You are absolutely right and I know a good HVAC guy. It was important to me to do this job on my own. But I am going to add your input to my post for those who may want to use your advice. JEH
-
Honestly, I'm a pianist. If I can do it, any one can!
-
Thank you, Back East Don. I have three more days off to get the floor in and seal things well. Then I'll be working more slowly. This has been very educational and I've enjoyed every minute! JEH
-
On July 12, 2016 at 5:09 PM, Mohave said:
Well everyone, my daughter moved to Tucson and I purchased this for her. She lived in it for 6 months and loved it. We drove from Charlotte to Tucson then to LA and back to Charlotte. Ran like a new vehicle. Absolutely the greatest vehicle I've ever owned. The owner had the engine and trans. completely overhauled - new heads, new cab AC, new belts, hoses, new tires brakes - all completely re-done. But the camper portion was heavily water damaged. I knew that if the engine and trans was good for crossing the country back and forth, I could gut and remodel the inside and outside. I did a quick repair on some plumbing as well as a new hot water heater and leak repair - making it nice and cozy for my daughter's 6 month residence. Now I'm going to begin to overhaul this beauty inside and out so that my wife and I can enjoy it together. I will post pictures and my comments as I go. Hopefully I will get most of the work done before September, 2016.
QUESTIONS:
1. ALUMINUM SIDING: Advice on restoring the aluminum siding from those who have done it. What is the best way to repair fairly significant hail damage? If I need to replace some aluminum siding, where do I purchase it?
2. SHOWER DOOR: I'd like to install a shower door to replace the curtain. Has anyone made one of these or retrofitted something?
3. INSIDE DECOR: Should I try to restore the inside original or gut it and go with a contemporary look?
4. BUNK AREA REBUILD: The bunk area is completely rotted from water damage so I must rebuild. Any suggestions here - pitfalls, things to do, avoid etc? As in the above question, where do I purchase the aluminum under-siding. It is rusted substantially with many rust pinholes etc....
5. ADDING WINDOW: Does anyone have any experience cutting a new hole for a window and adding one? I'd like to add a window in the bunk bed area for better ventilation.
_____________________________________
BELOW I AM SHOWING THE PROGRESS OF THE REBUILD AS I GO.
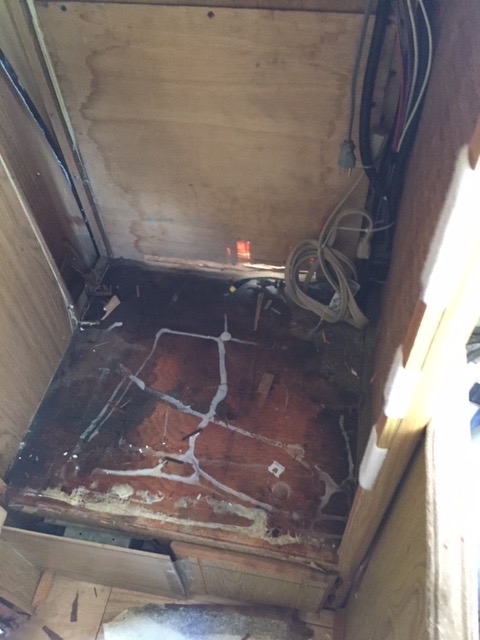
Some pictures before I started.Cosmetically, things seemed ok but underneath was a lot of damage.These pictures are out of order sorry. This is demolition day. Totally gutted the overhead cab bunk area.
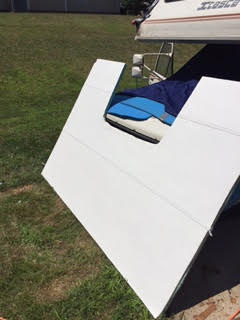
This is the new aluminum roof/floor area and bunk area being fitted.
This is the new aluminum roof/floor area and bunk floor before initial fitting. (It was important to me to do all the work on my own. But I need to advise (per the advise of Back East Don) that what I did w/ these seams can be professionally accomplished by a professional HVAC individual or another metal worker who can make interlocking, reversed seams. In fact, the entire aluminum piece can be fabricated by a professional for those who would prefer to take that route.)
Gutted cab and bunk area due to considerable water damage.
QuoteGutted bunk area before extraction.
Damage in refrigerator compartment
Water damage of ceiling
Water damage in bathroom
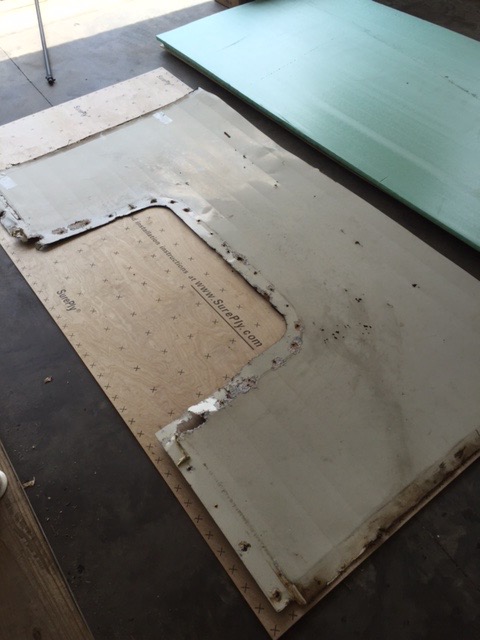
Extracted aluminum cab overhead (notice rust holes) now being used as template for 1/4 inch sheet of ply.
Foam ready for gluing
Measuring out an additional inch each side of aluminum template so that complete bunk piece can be screwed to metal framing.
Laminated bunk piece with sheet of aluminum for fitting.
Aluminum sheets glued down with double aluminum seams with double marine epoxy seams.
Roughed out aluminum seam
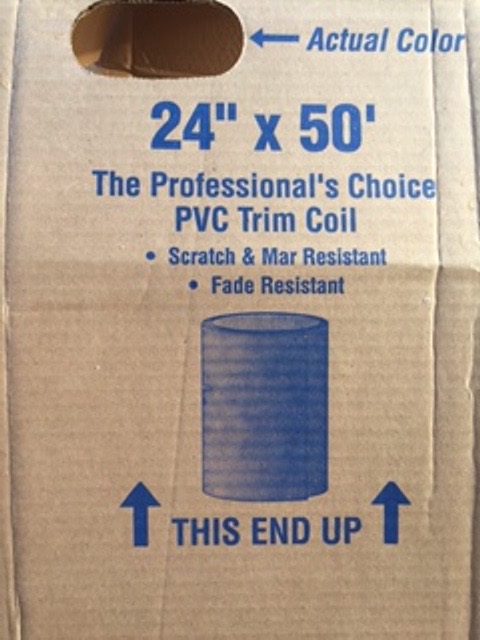
Aluminum sheeting that I used
Favorite adhesives - Gorilla Construction adhesive for foam/ply/aluminum lamination. Marine epoxy for aluminum seams.
Completed laminated floor with aluminum skin (please see my comments above on the duplicate picture re: using a professional to create overlapping seams.)
First fitting of floor and new aluminum skin.
The laminate: Top, 1 sheet 1/4 inch ply; middle, 1/2inch foam; bottom 1/4 inch ply; aluminum skin. The black piece is a steel brace.
-
My 1986 Toyota Itaska has perpetual leaking on both driver and passenger sides. I can tell that up under the front corners of the floor behind the dash, it is slightly damp. For those of you who have had similar issues, what is the order of prognostication you'd go through to determine the leak(s) source(s)?
-
Thank you, Back East Don!! This is extremely helpful!
-
Well everyone, my daughter moved to Tucson and I purchased this for her. She lived in it for 6 months and loved it. We drove from Charlotte to Tucson then to LA and back to Charlotte. Ran like a new vehicle. Absolutely the greatest vehicle I've ever owned. The owner had the engine and trans. completely overhauled - new heads, new cab AC, new belts, hoses, new tires brakes - all completely re-done. But the camper portion was heavily water damaged. I knew that if the engine and trans was good for crossing the country back and forth, I could gut and remodel the inside and outside. I did a quick repair on some plumbing as well as a new hot water heater and leak repair - making it nice and cozy for my daughter's 6 month residence. Now I'm going to begin to overhaul this beauty inside and out so that my wife and I can enjoy it together. I will post pictures and my comments as I go. Hopefully I will get most of the work done before September, 2016.
QUESTIONS:
1. ALUMINUM SIDING: Advice on restoring the aluminum siding from those who have done it. What is the best way to repair fairly significant hail damage? If I need to replace some aluminum siding, where do I purchase it?
2. SHOWER DOOR: I'd like to install a shower door to replace the curtain. Has anyone made one of these or retrofitted something?
3. INSIDE DECOR: Should I try to restore the inside original or gut it and go with a contemporary look?
4. BUNK AREA REBUILD: The bunk area is completely rotted from water damage so I must rebuild. Any suggestions here - pitfalls, things to do, avoid etc? As in the above question, where do I purchase the aluminum under-siding. It is rusted substantially with many rust pinholes etc....
5. ADDING WINDOW: Does anyone have any experience cutting a new hole for a window and adding one? I'd like to add a window in the bunk bed area for better ventilation.


1987 Itaska Overhaul Progress and Input
in Improvement and Do-It-Yourself Projects you have done to Share!
Posted · Edited by Mohave
misspell
So then, after being delayed by over a month with electrical, plumbing, and exhaust issues (learned so much, though, I really had a blast!!) I got back to work rebuilding the inside. Here's some pictures of my progress. I made a magazine rack and a little shelving unit - all out of 1/8' ply. I rebuilt a section of the inside roof and also began adding trim to my liking. More later