candace
-
Posts
71 -
Joined
-
Last visited
Content Type
Events
Profiles
Forums
Gallery
Everything posted by candace
-
 1984 2.4 liter 4 cylinder 22r bottom/20r top carbed
 -
About half the time when I turn my RV off, it rattles and shakes from under the hood in a way that doesn't give me confidence. Any ideas?
-
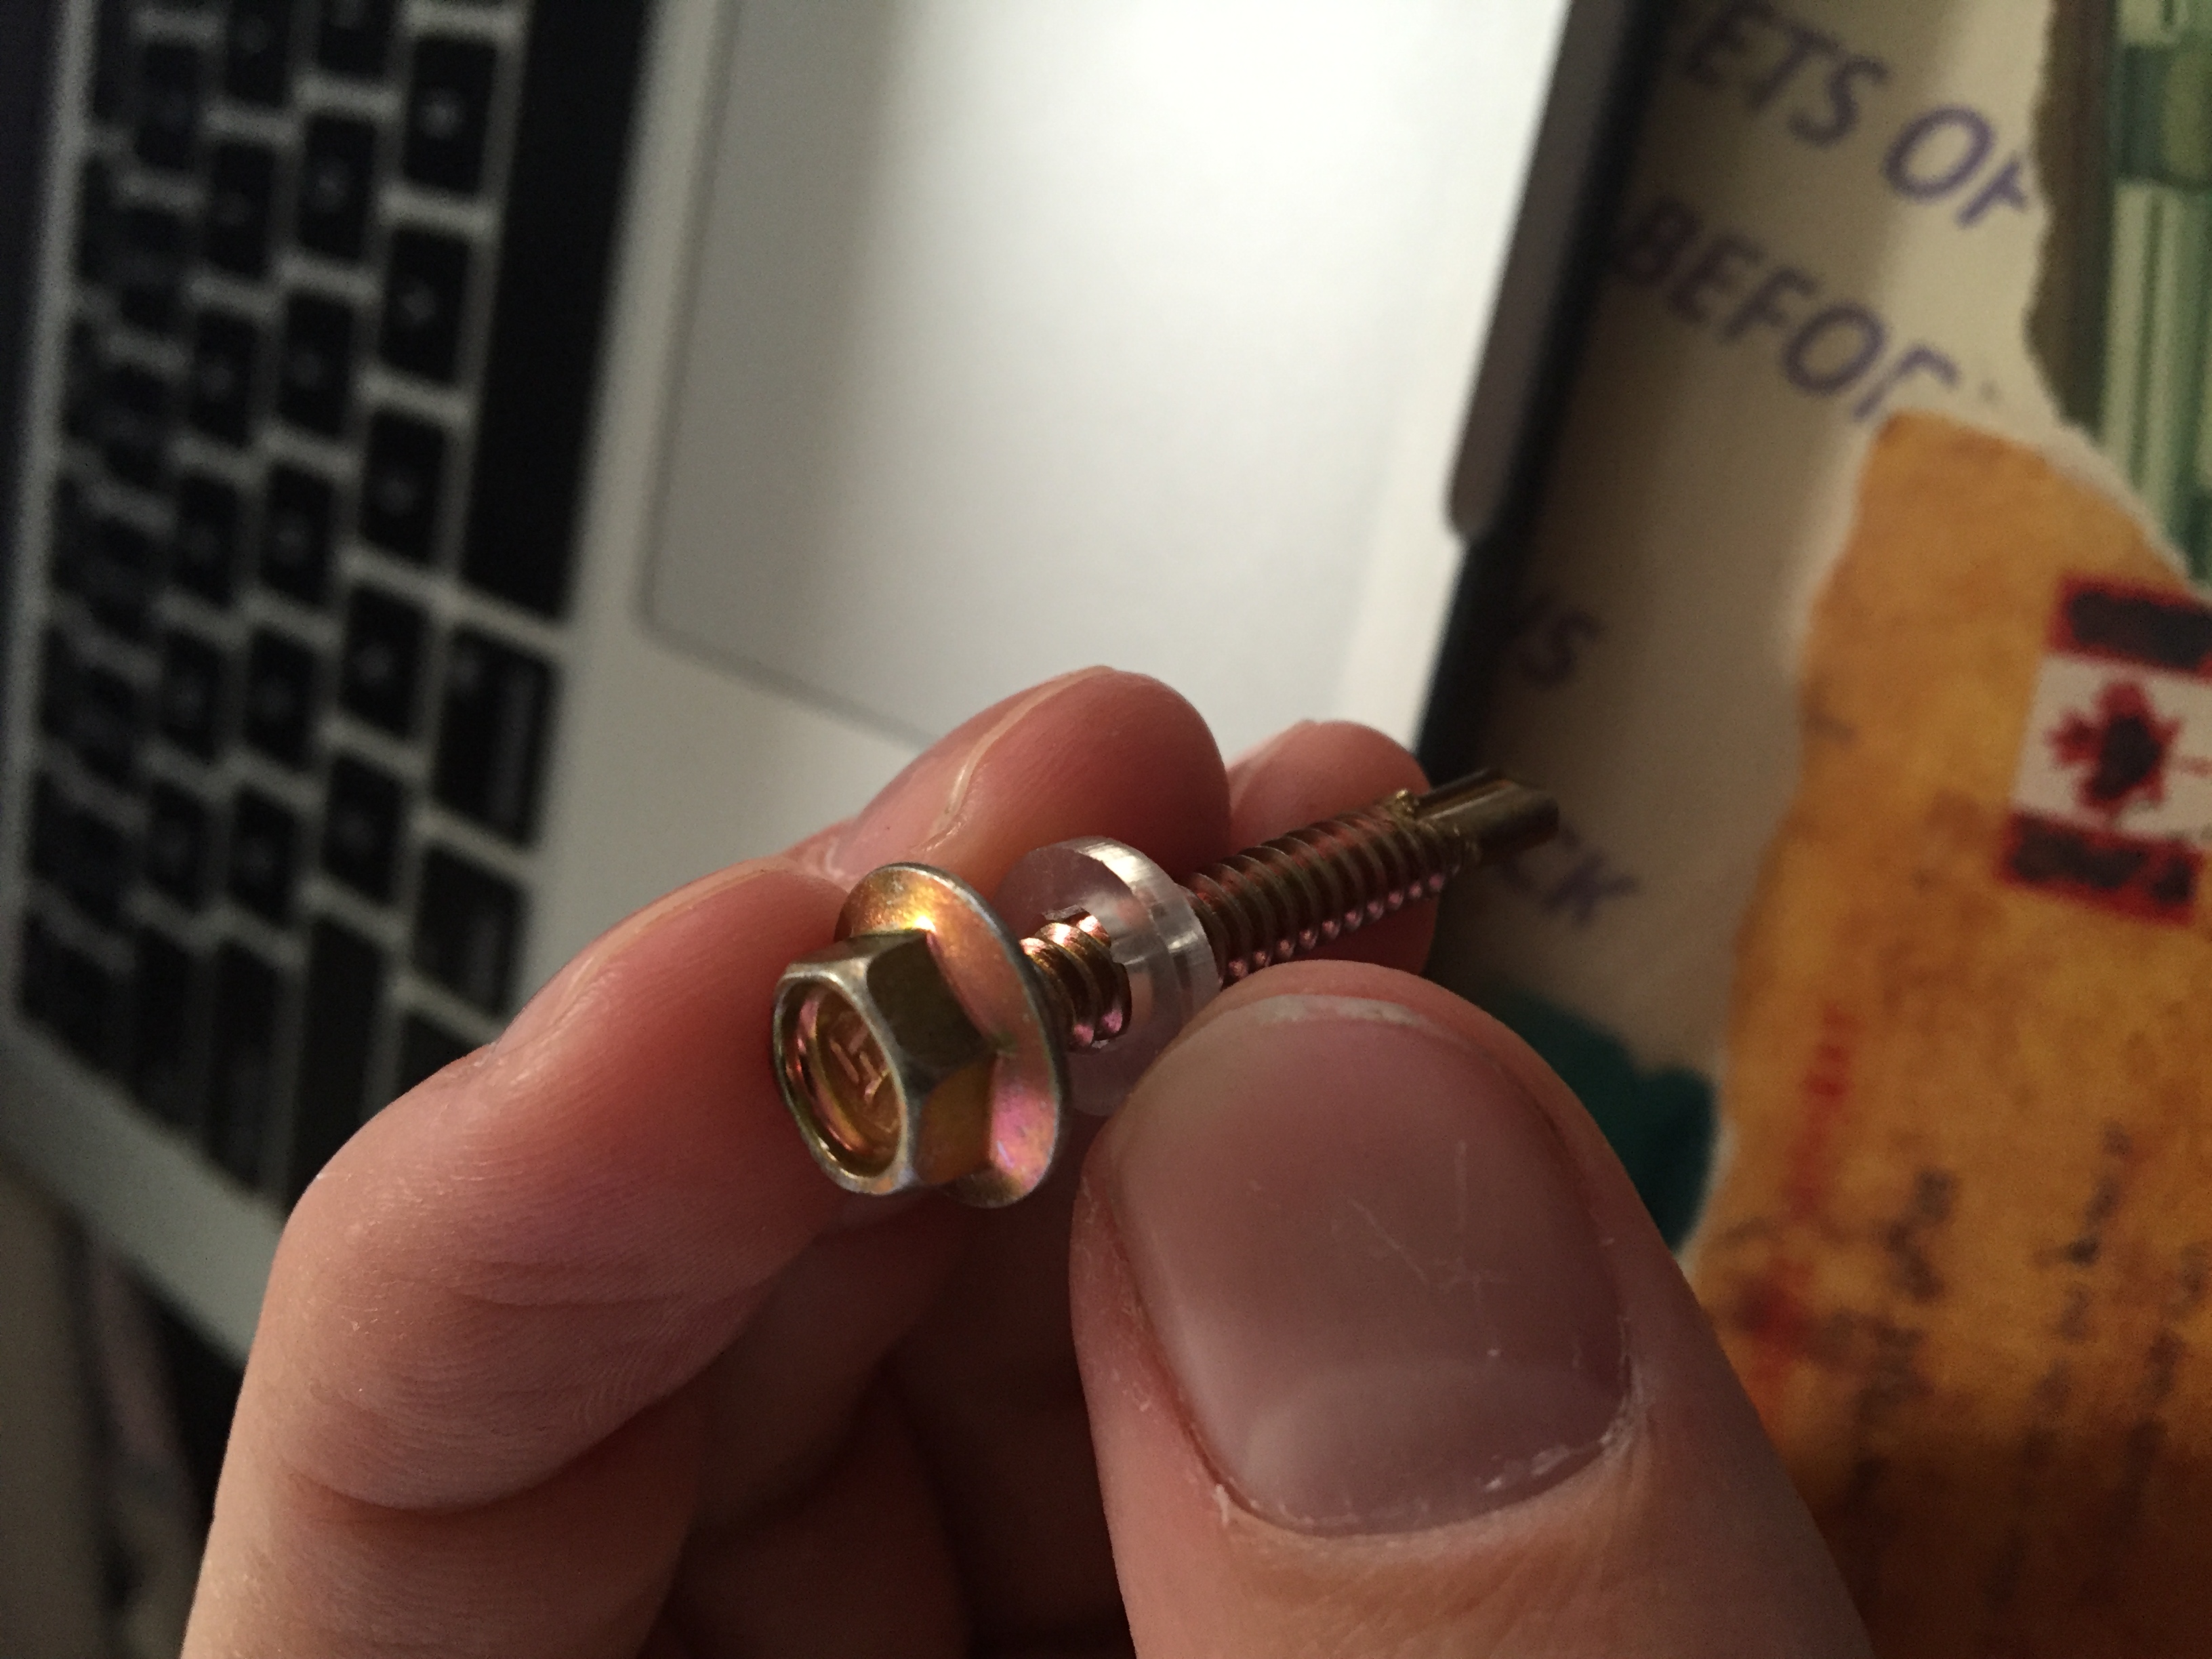
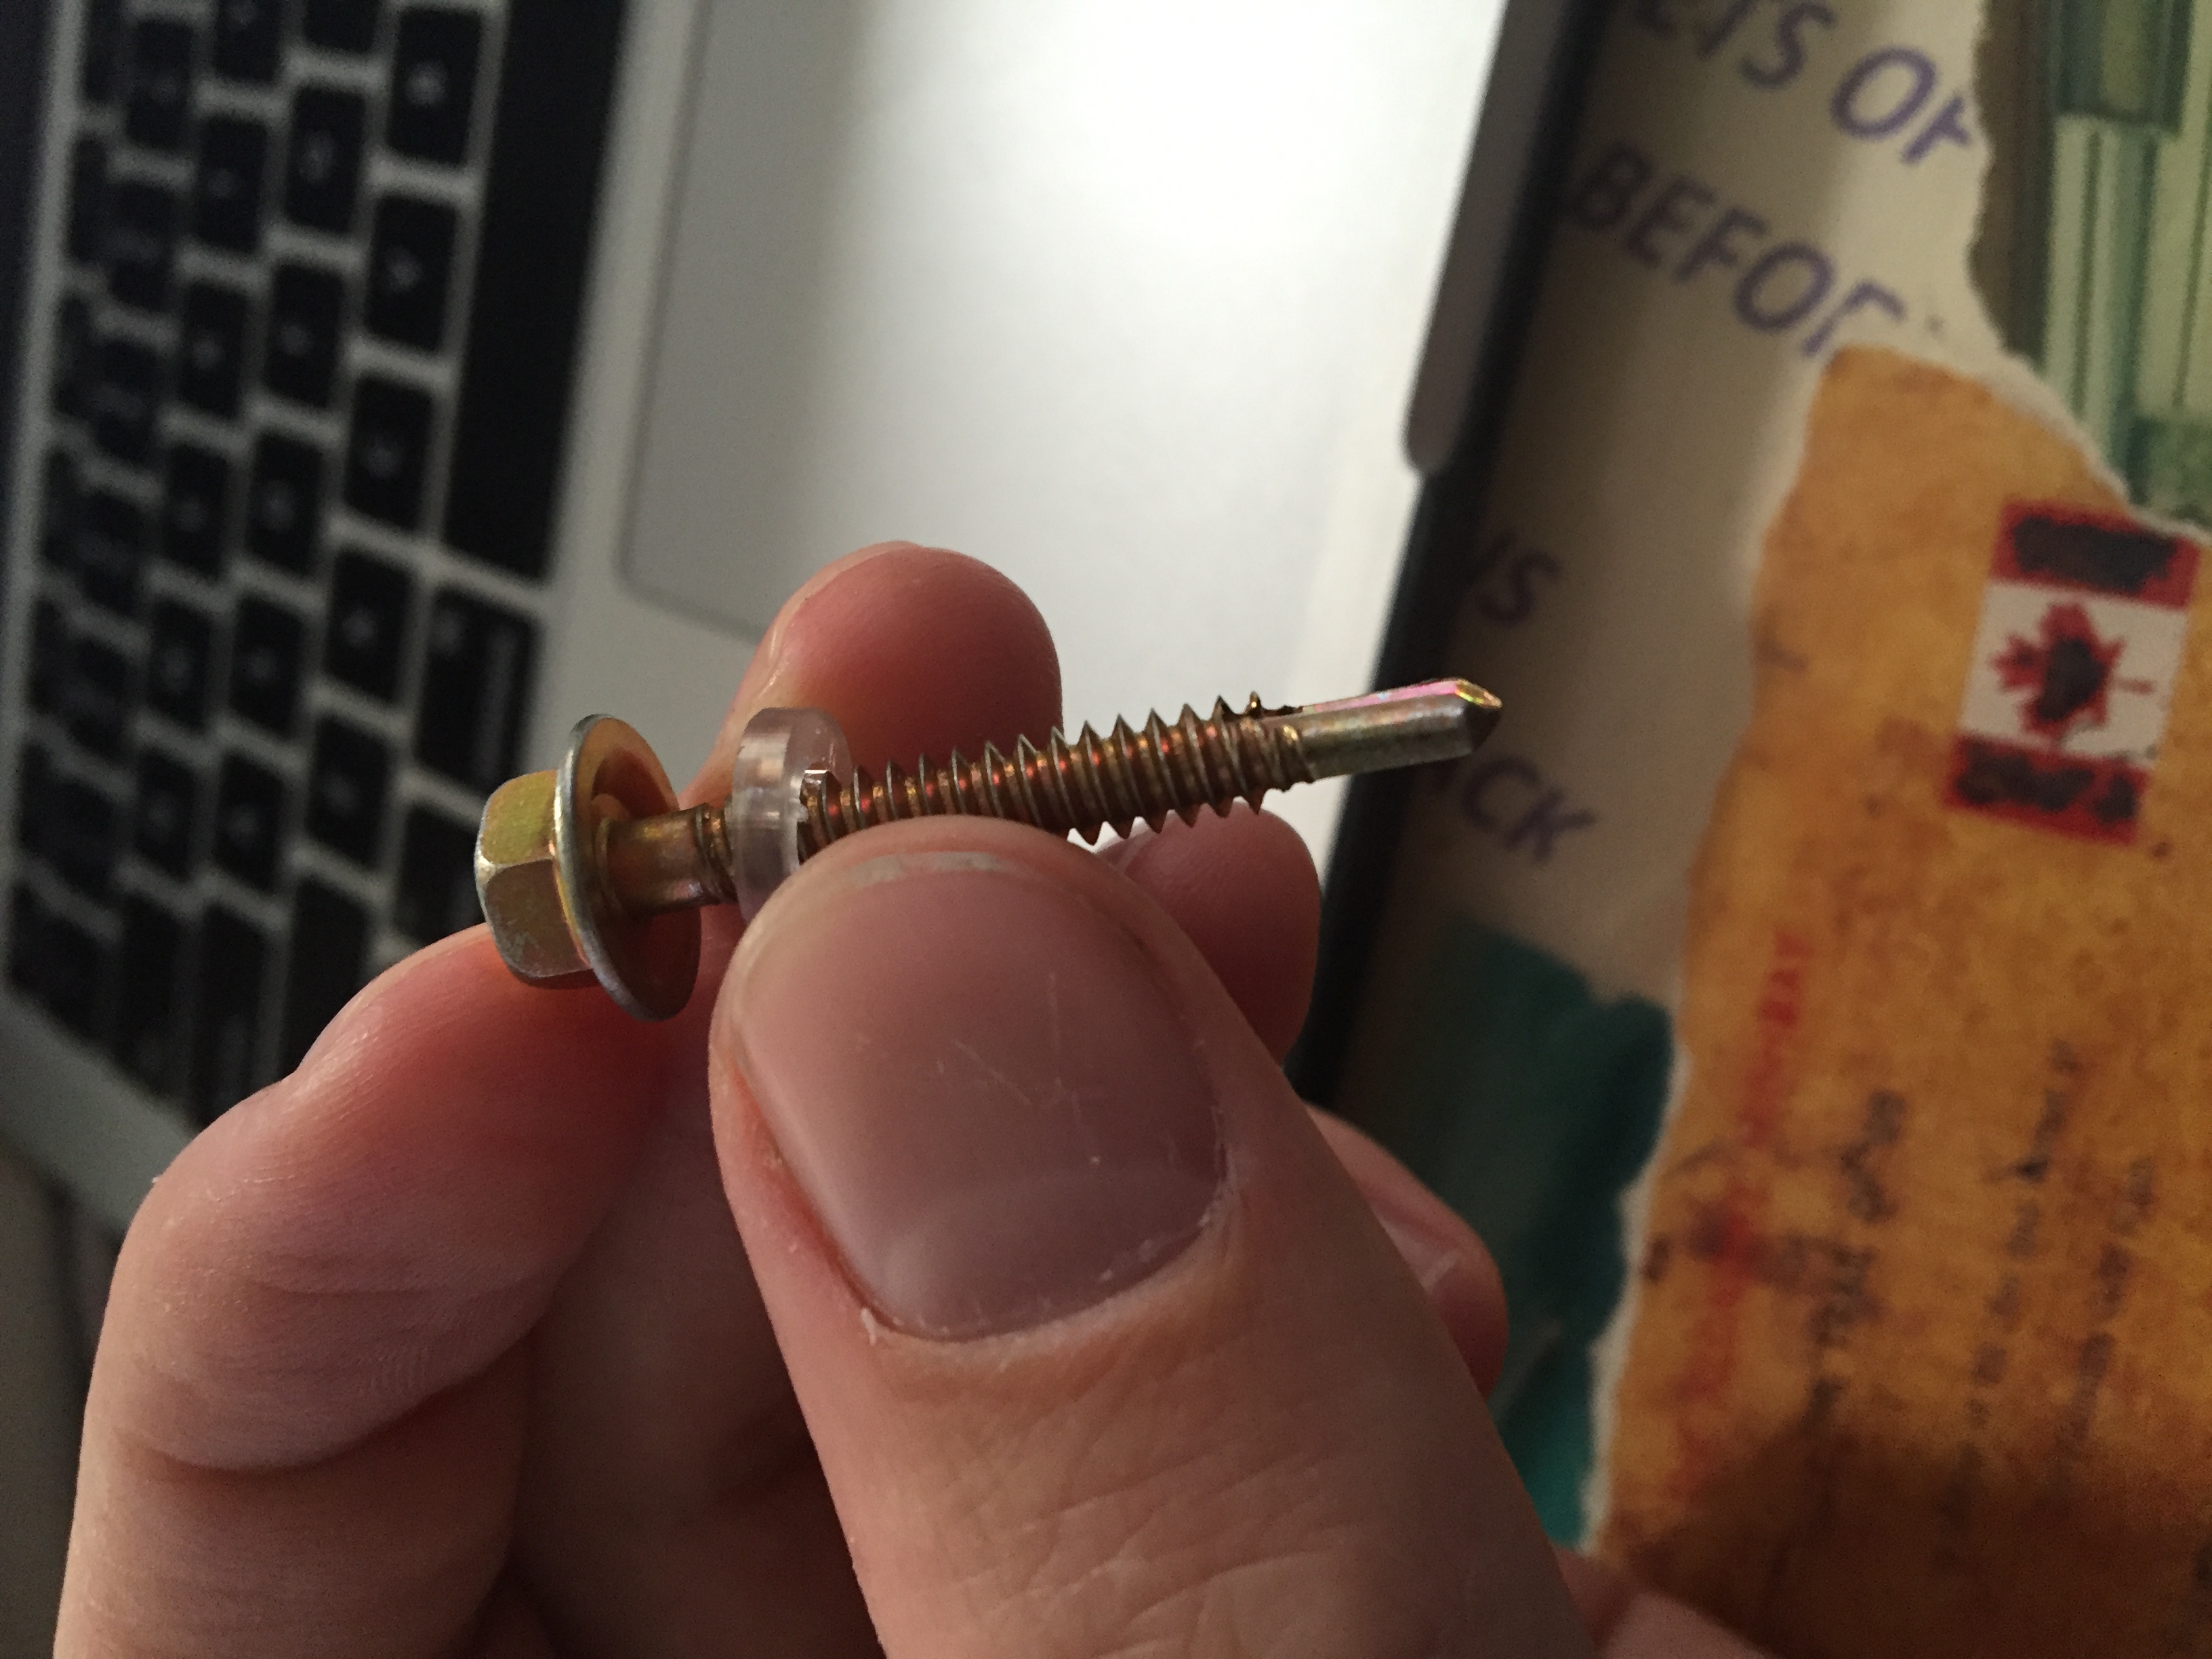
Yes, controller came with the kit. Here's a pic of it and the screws. Screws have an iridescent/rainbow shine to them. Not sure what they're made of. Online manual doesn't say. Were you able to screw solar panel brackets into he roof without the screws being visible inside the rv? What size screws? Looks like you drilled a hole through the side of the rv where you upper cabinets are located. I like that idea. I already have a hole for the tv's coaxial cable which I never use. Could run it through the there. how do I find the rafters? with a stud finder?

-
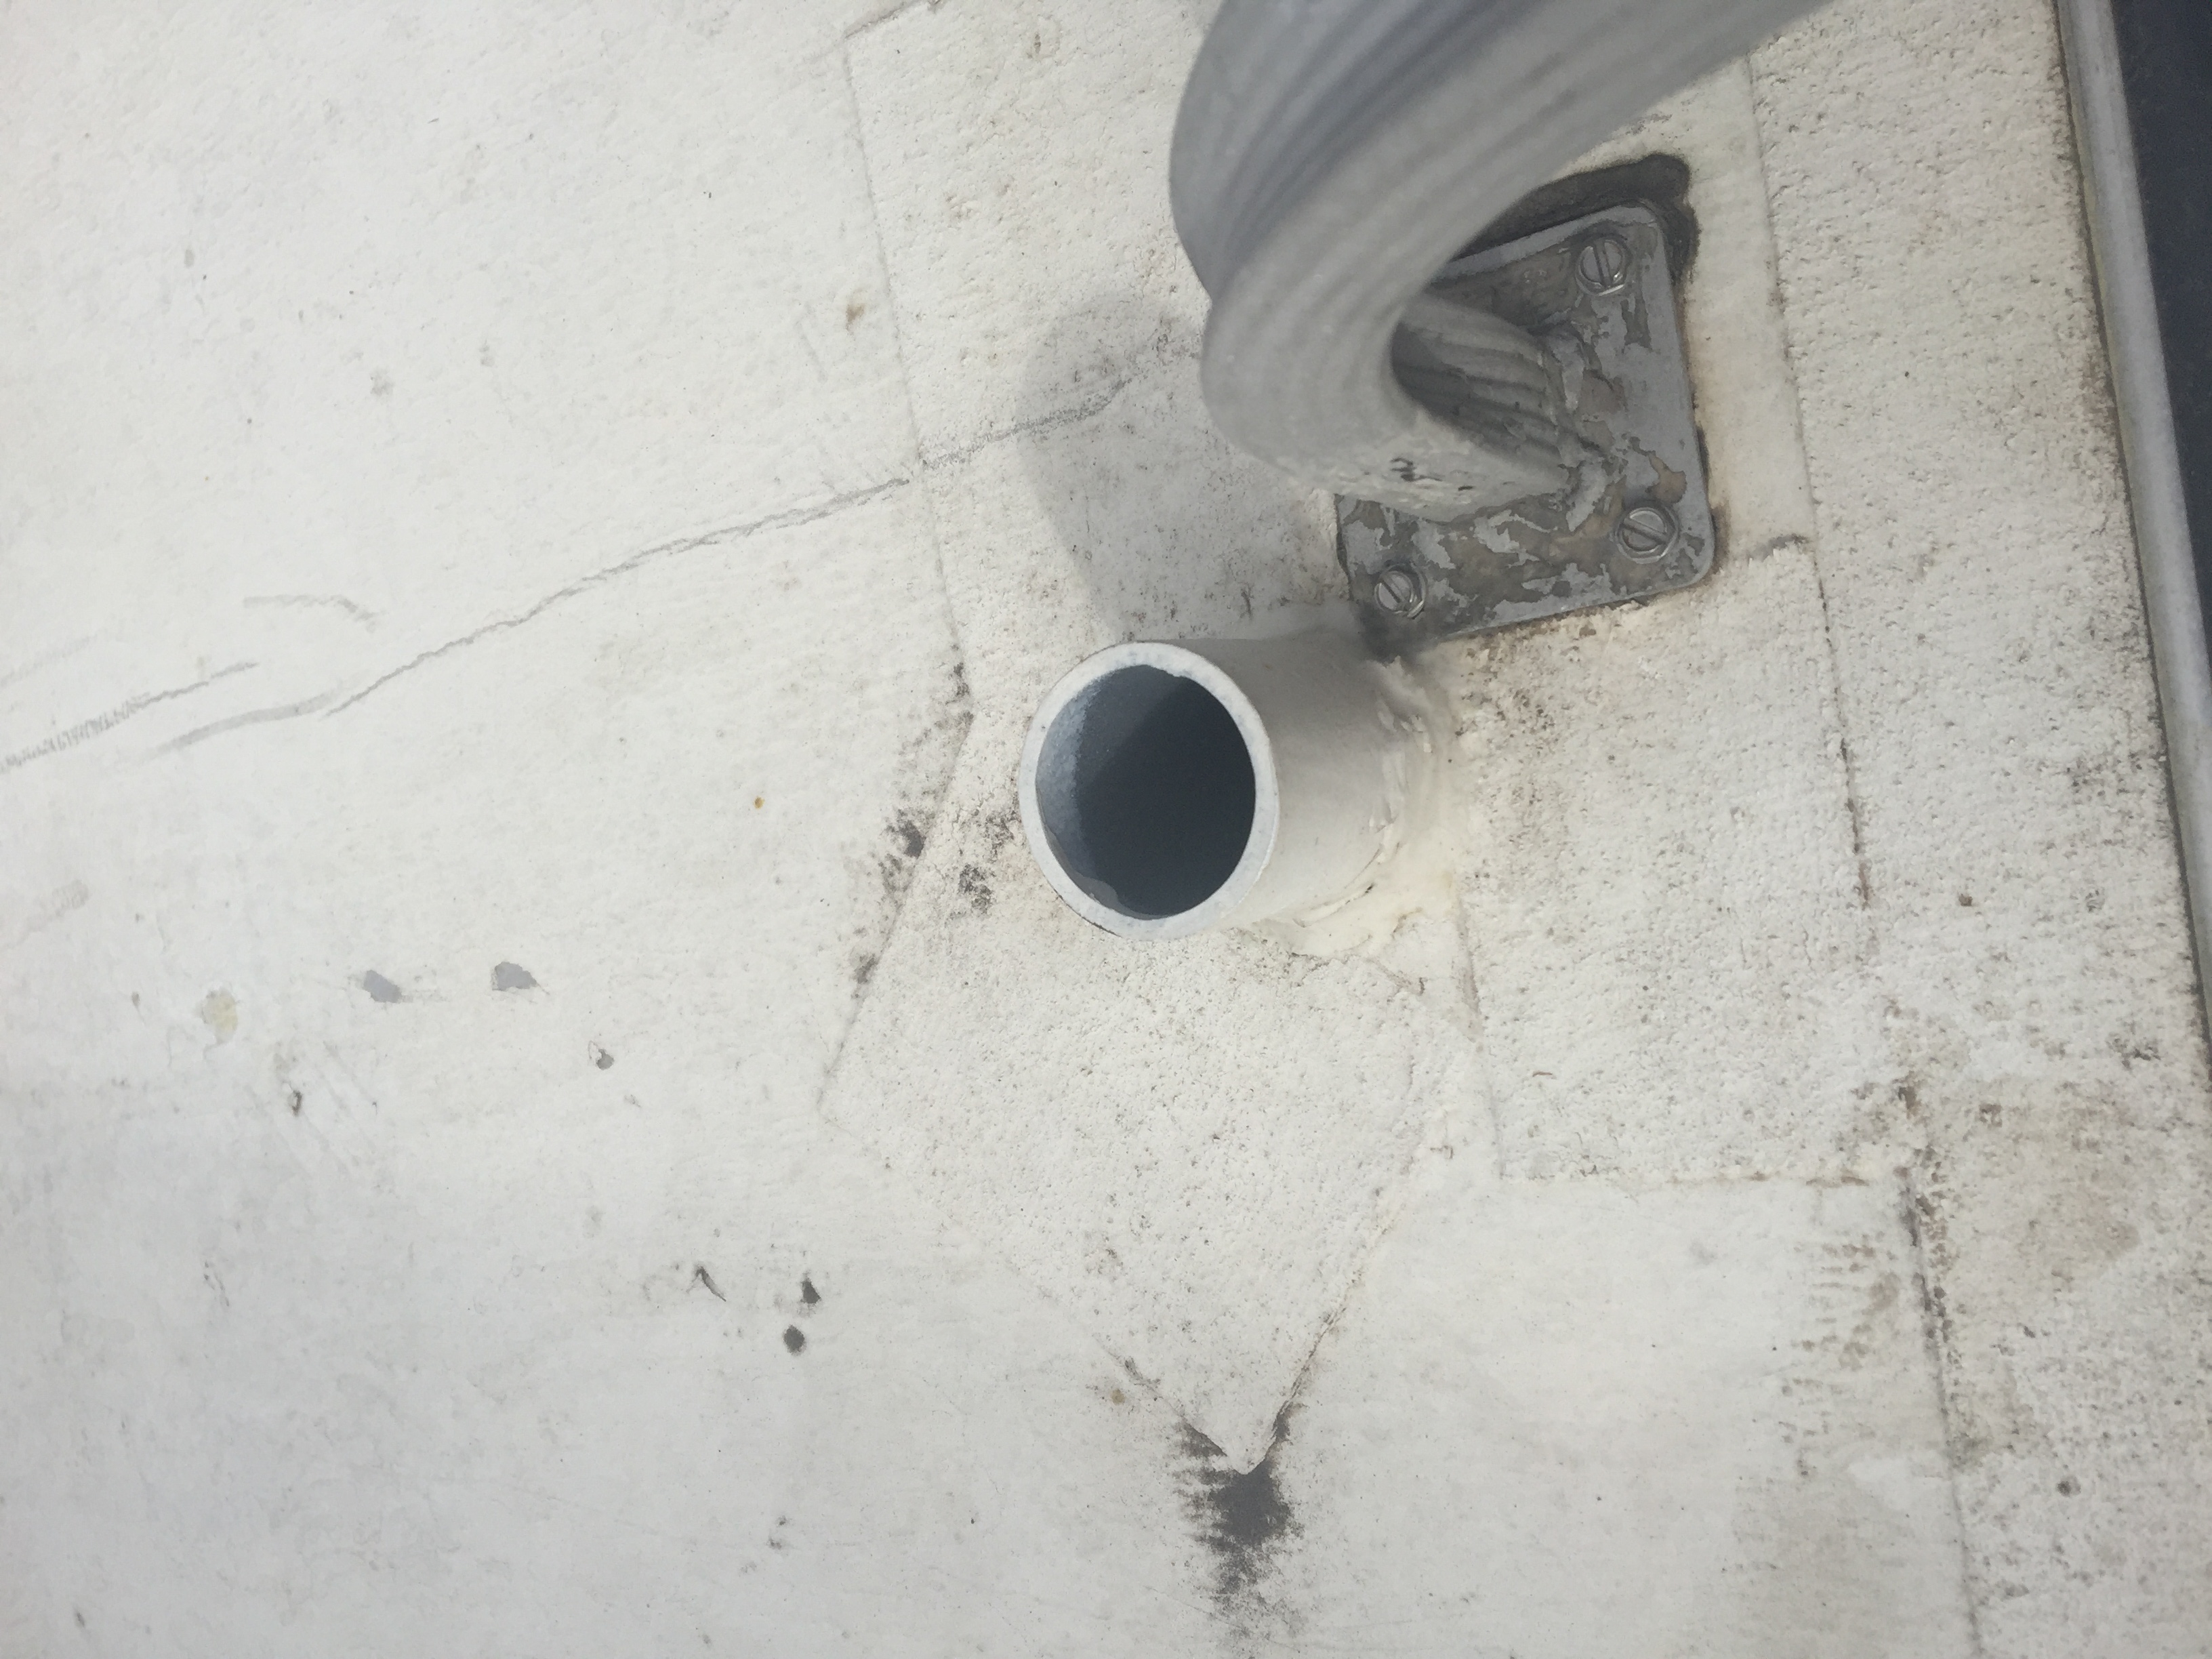
Eternabond or lap sealant first on the roof
candace replied to candace's topic in General Discussion
Now I know I have some rotted wood in the closet ceiling. Seems like a big job to replace that wood. It seems to me that it's not absolutely necessary I replace the wood right now. Am I wrong? -
Eternabond or lap sealant first on the roof
candace replied to candace's topic in General Discussion
Looks like tears, but they are deep scratches. thanks for your help! -
Eternabond or lap sealant first on the roof
candace replied to candace's topic in General Discussion
I should have known to use Quad OSI. I just worked for a month on a tv show called Treehouse Masters and we used quad Osi. I bough the rv stuff thinking I needed rv specific sealant. Oh well -
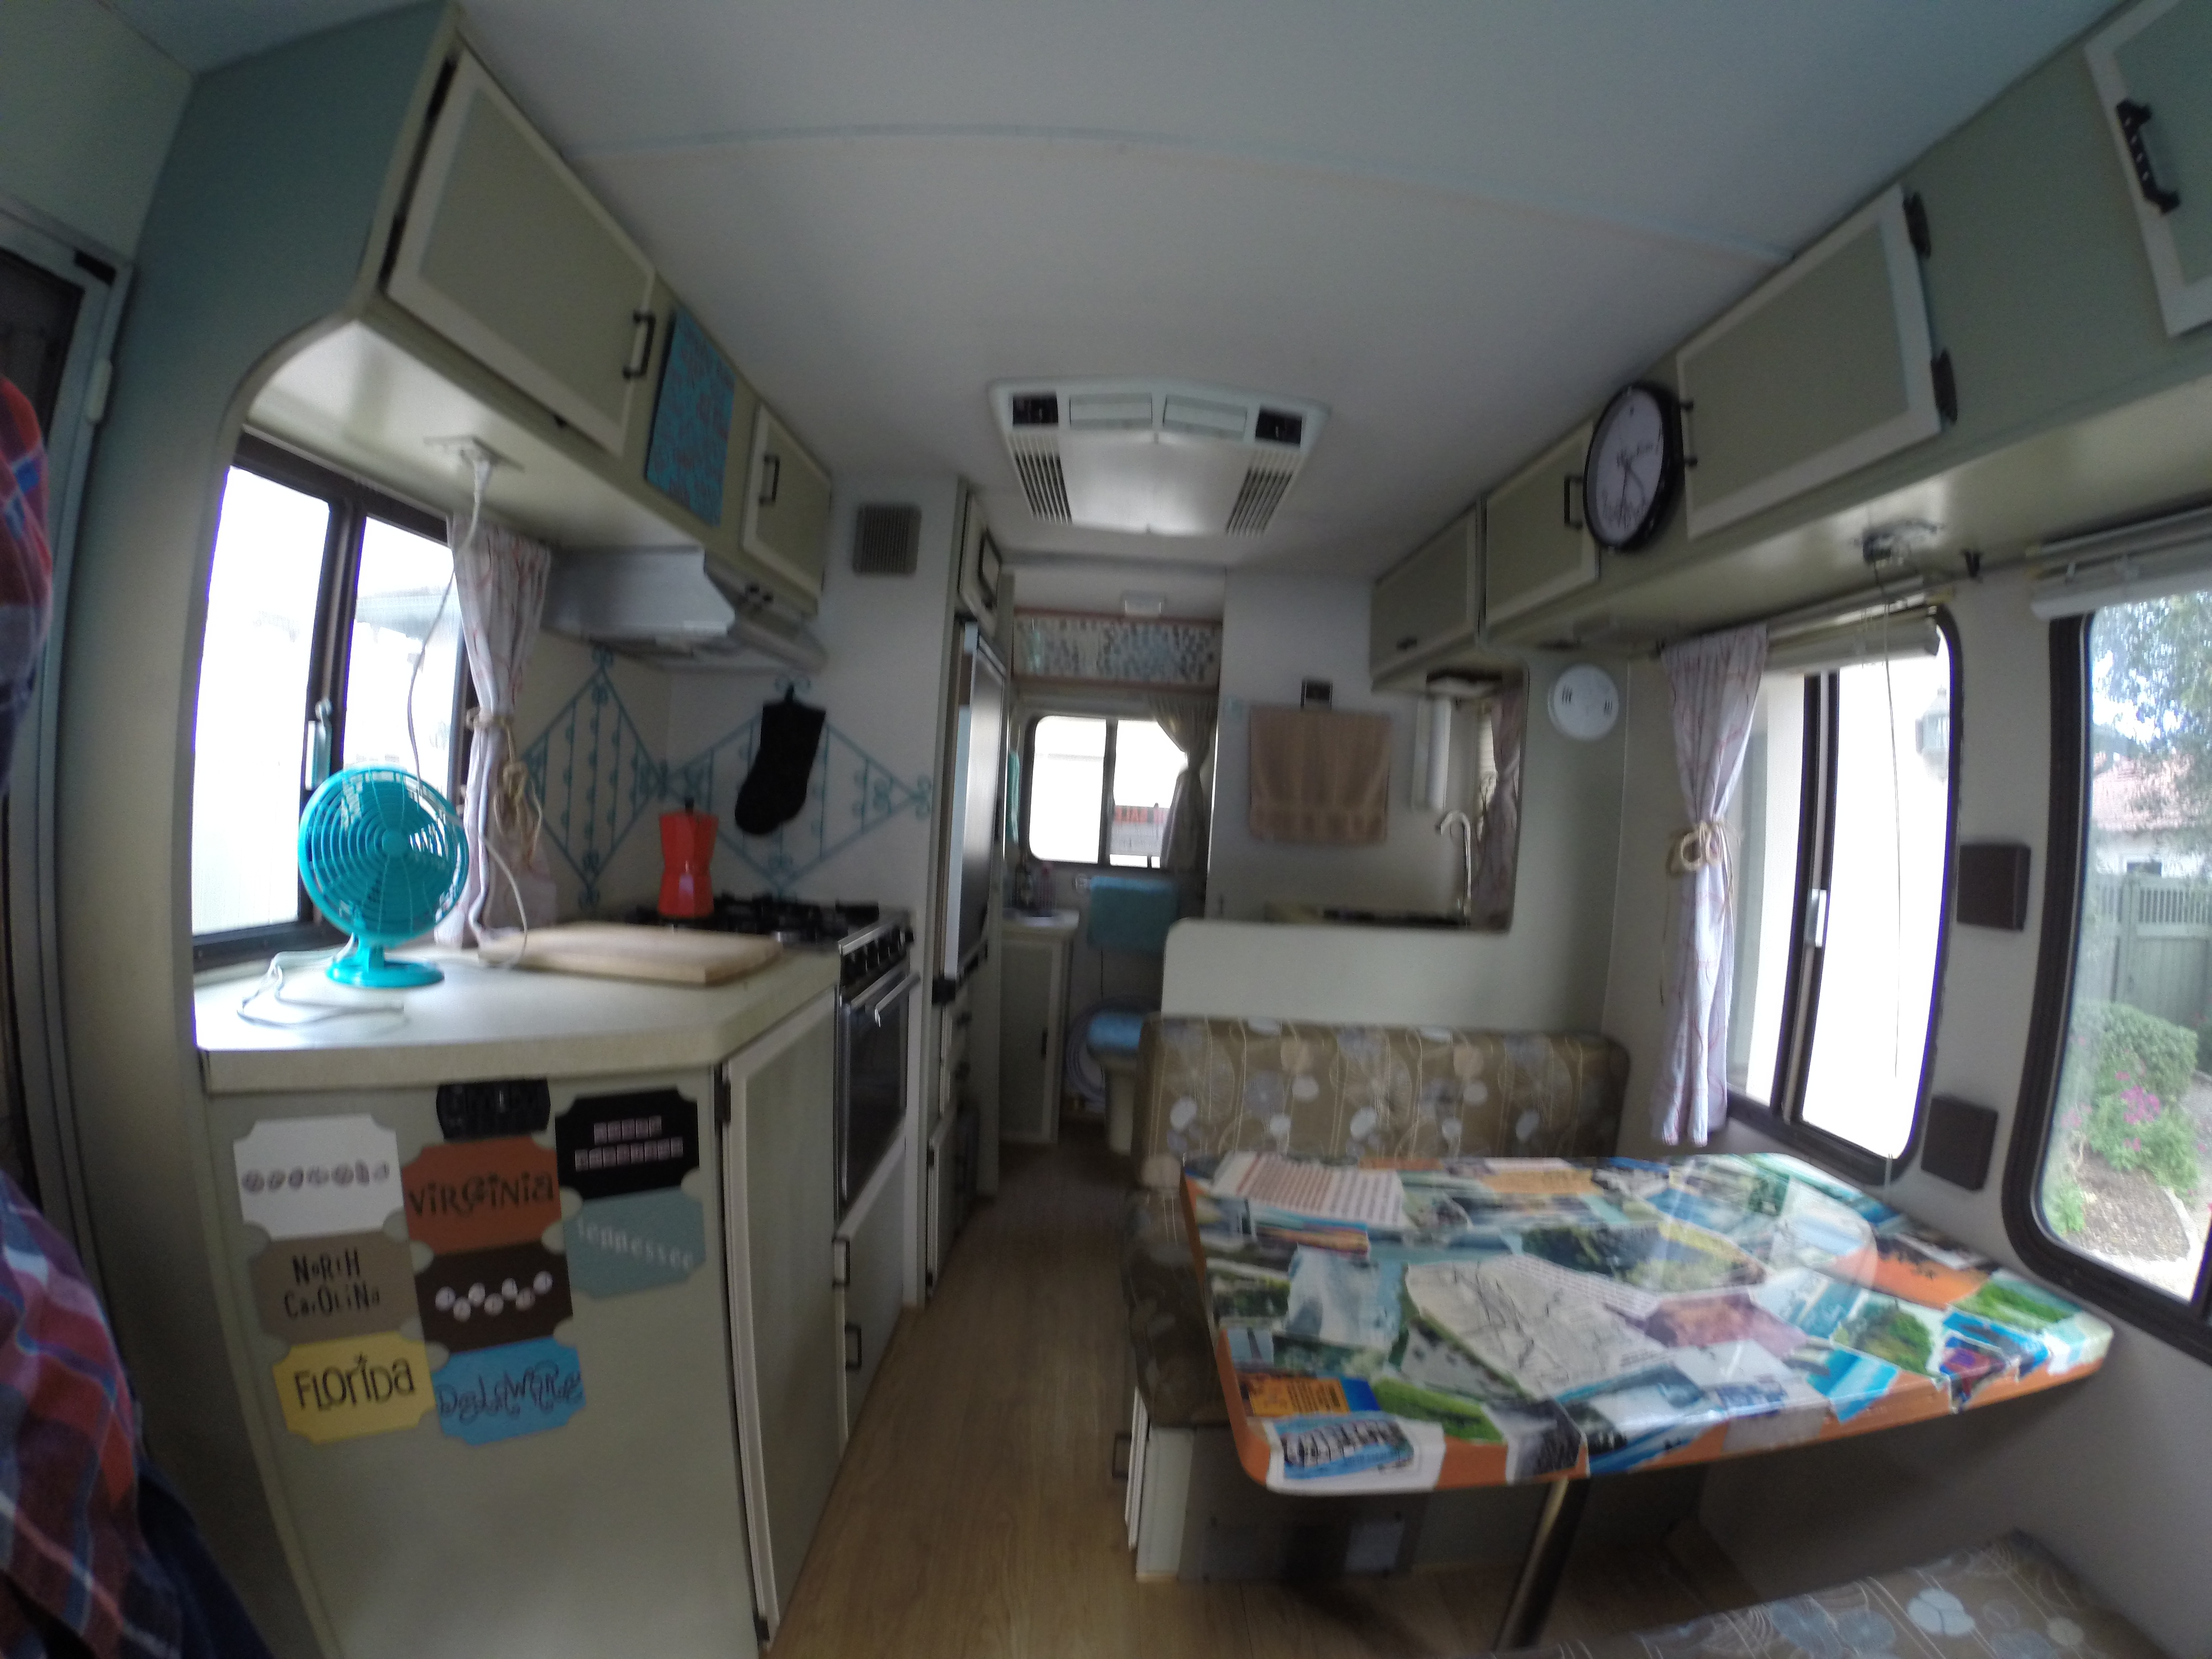
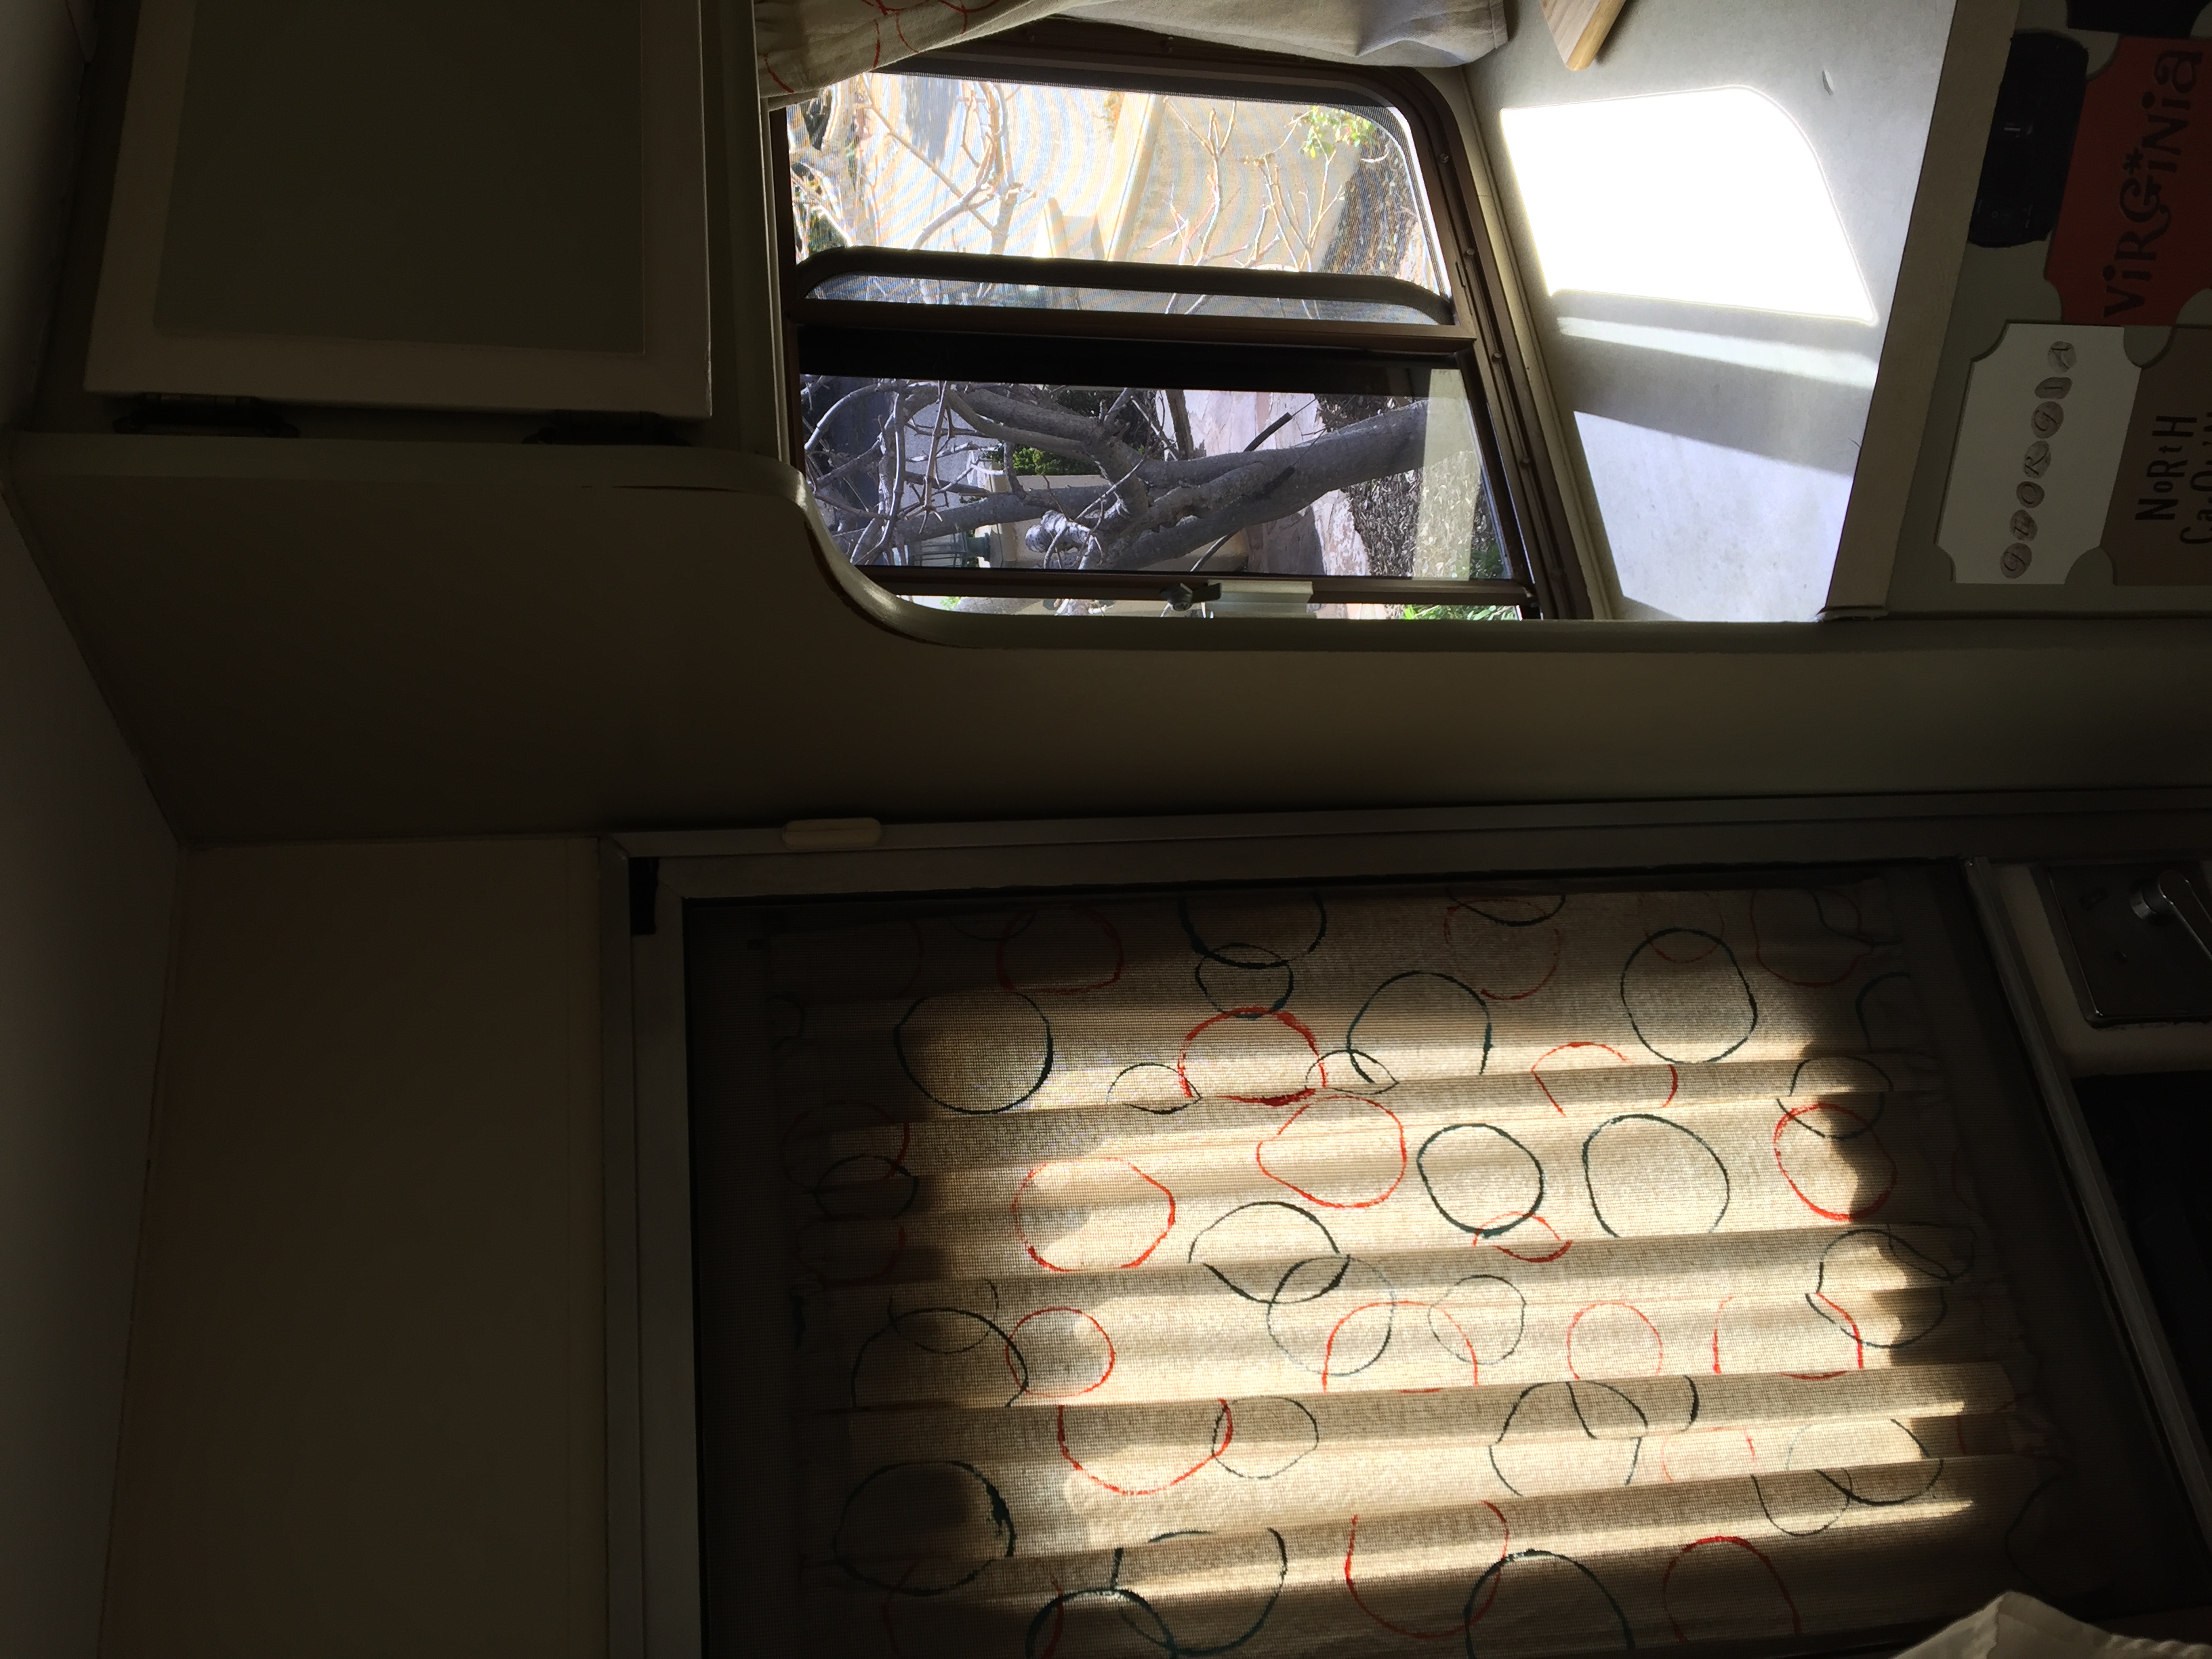
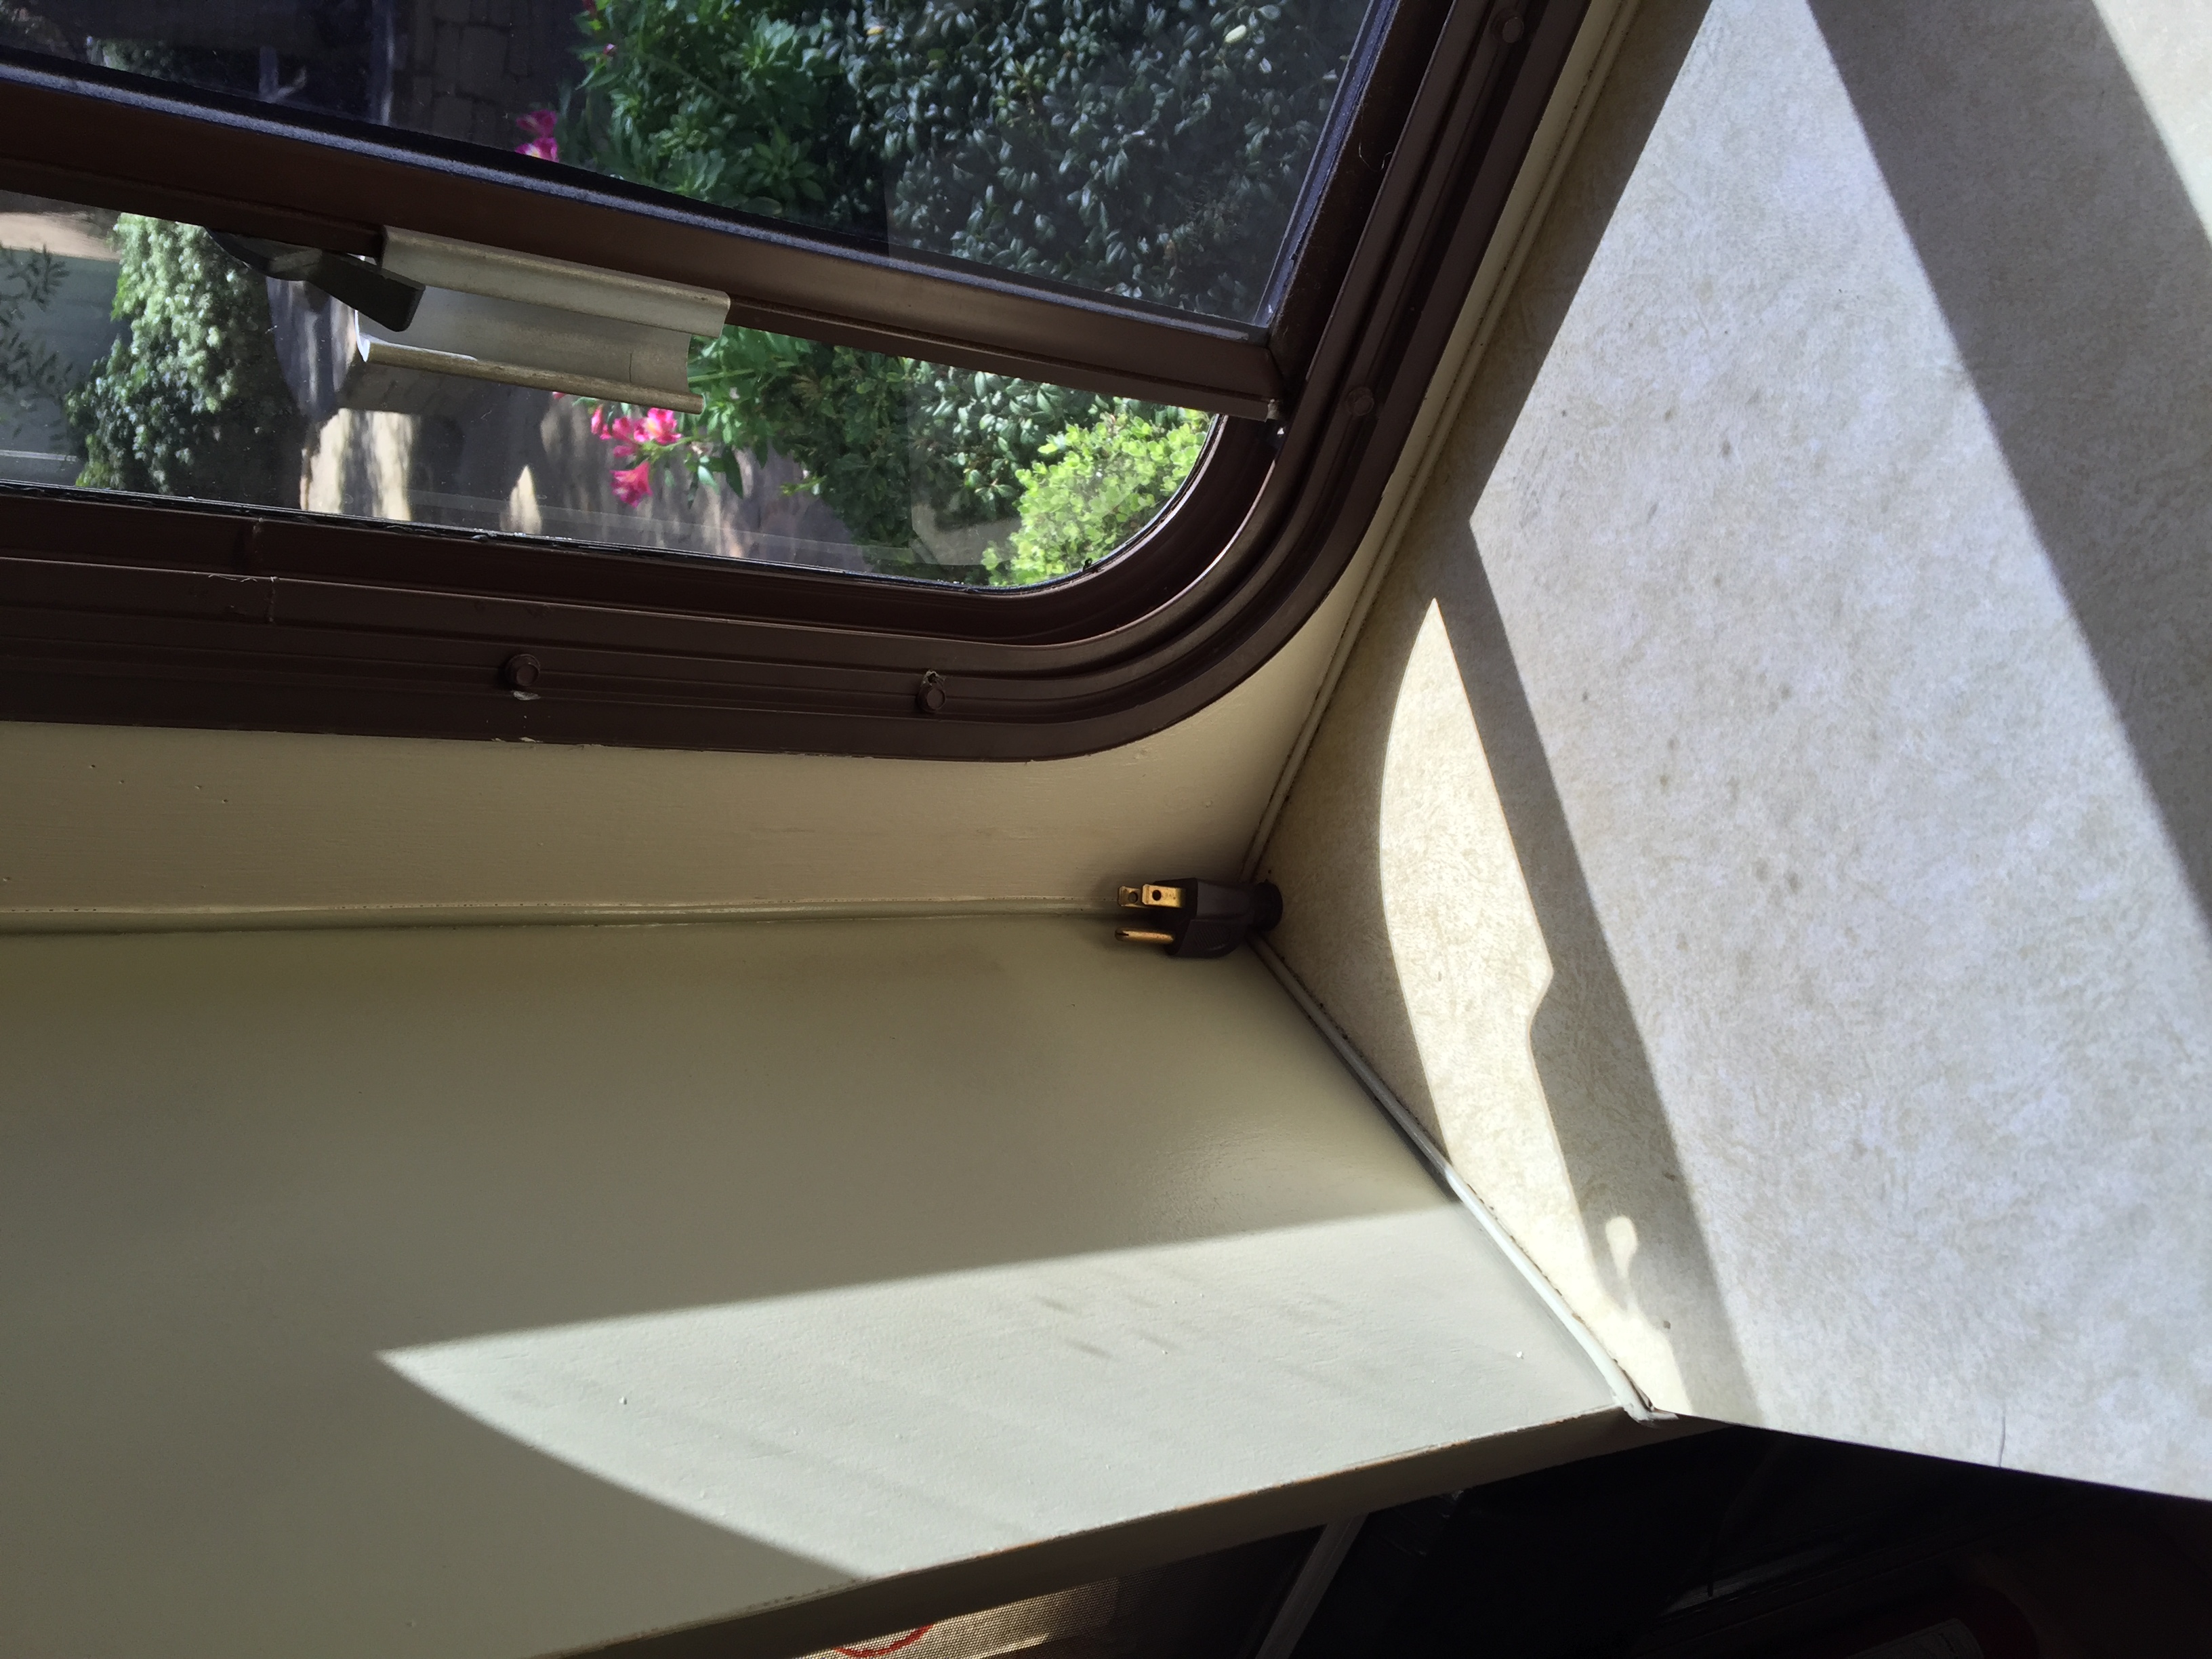
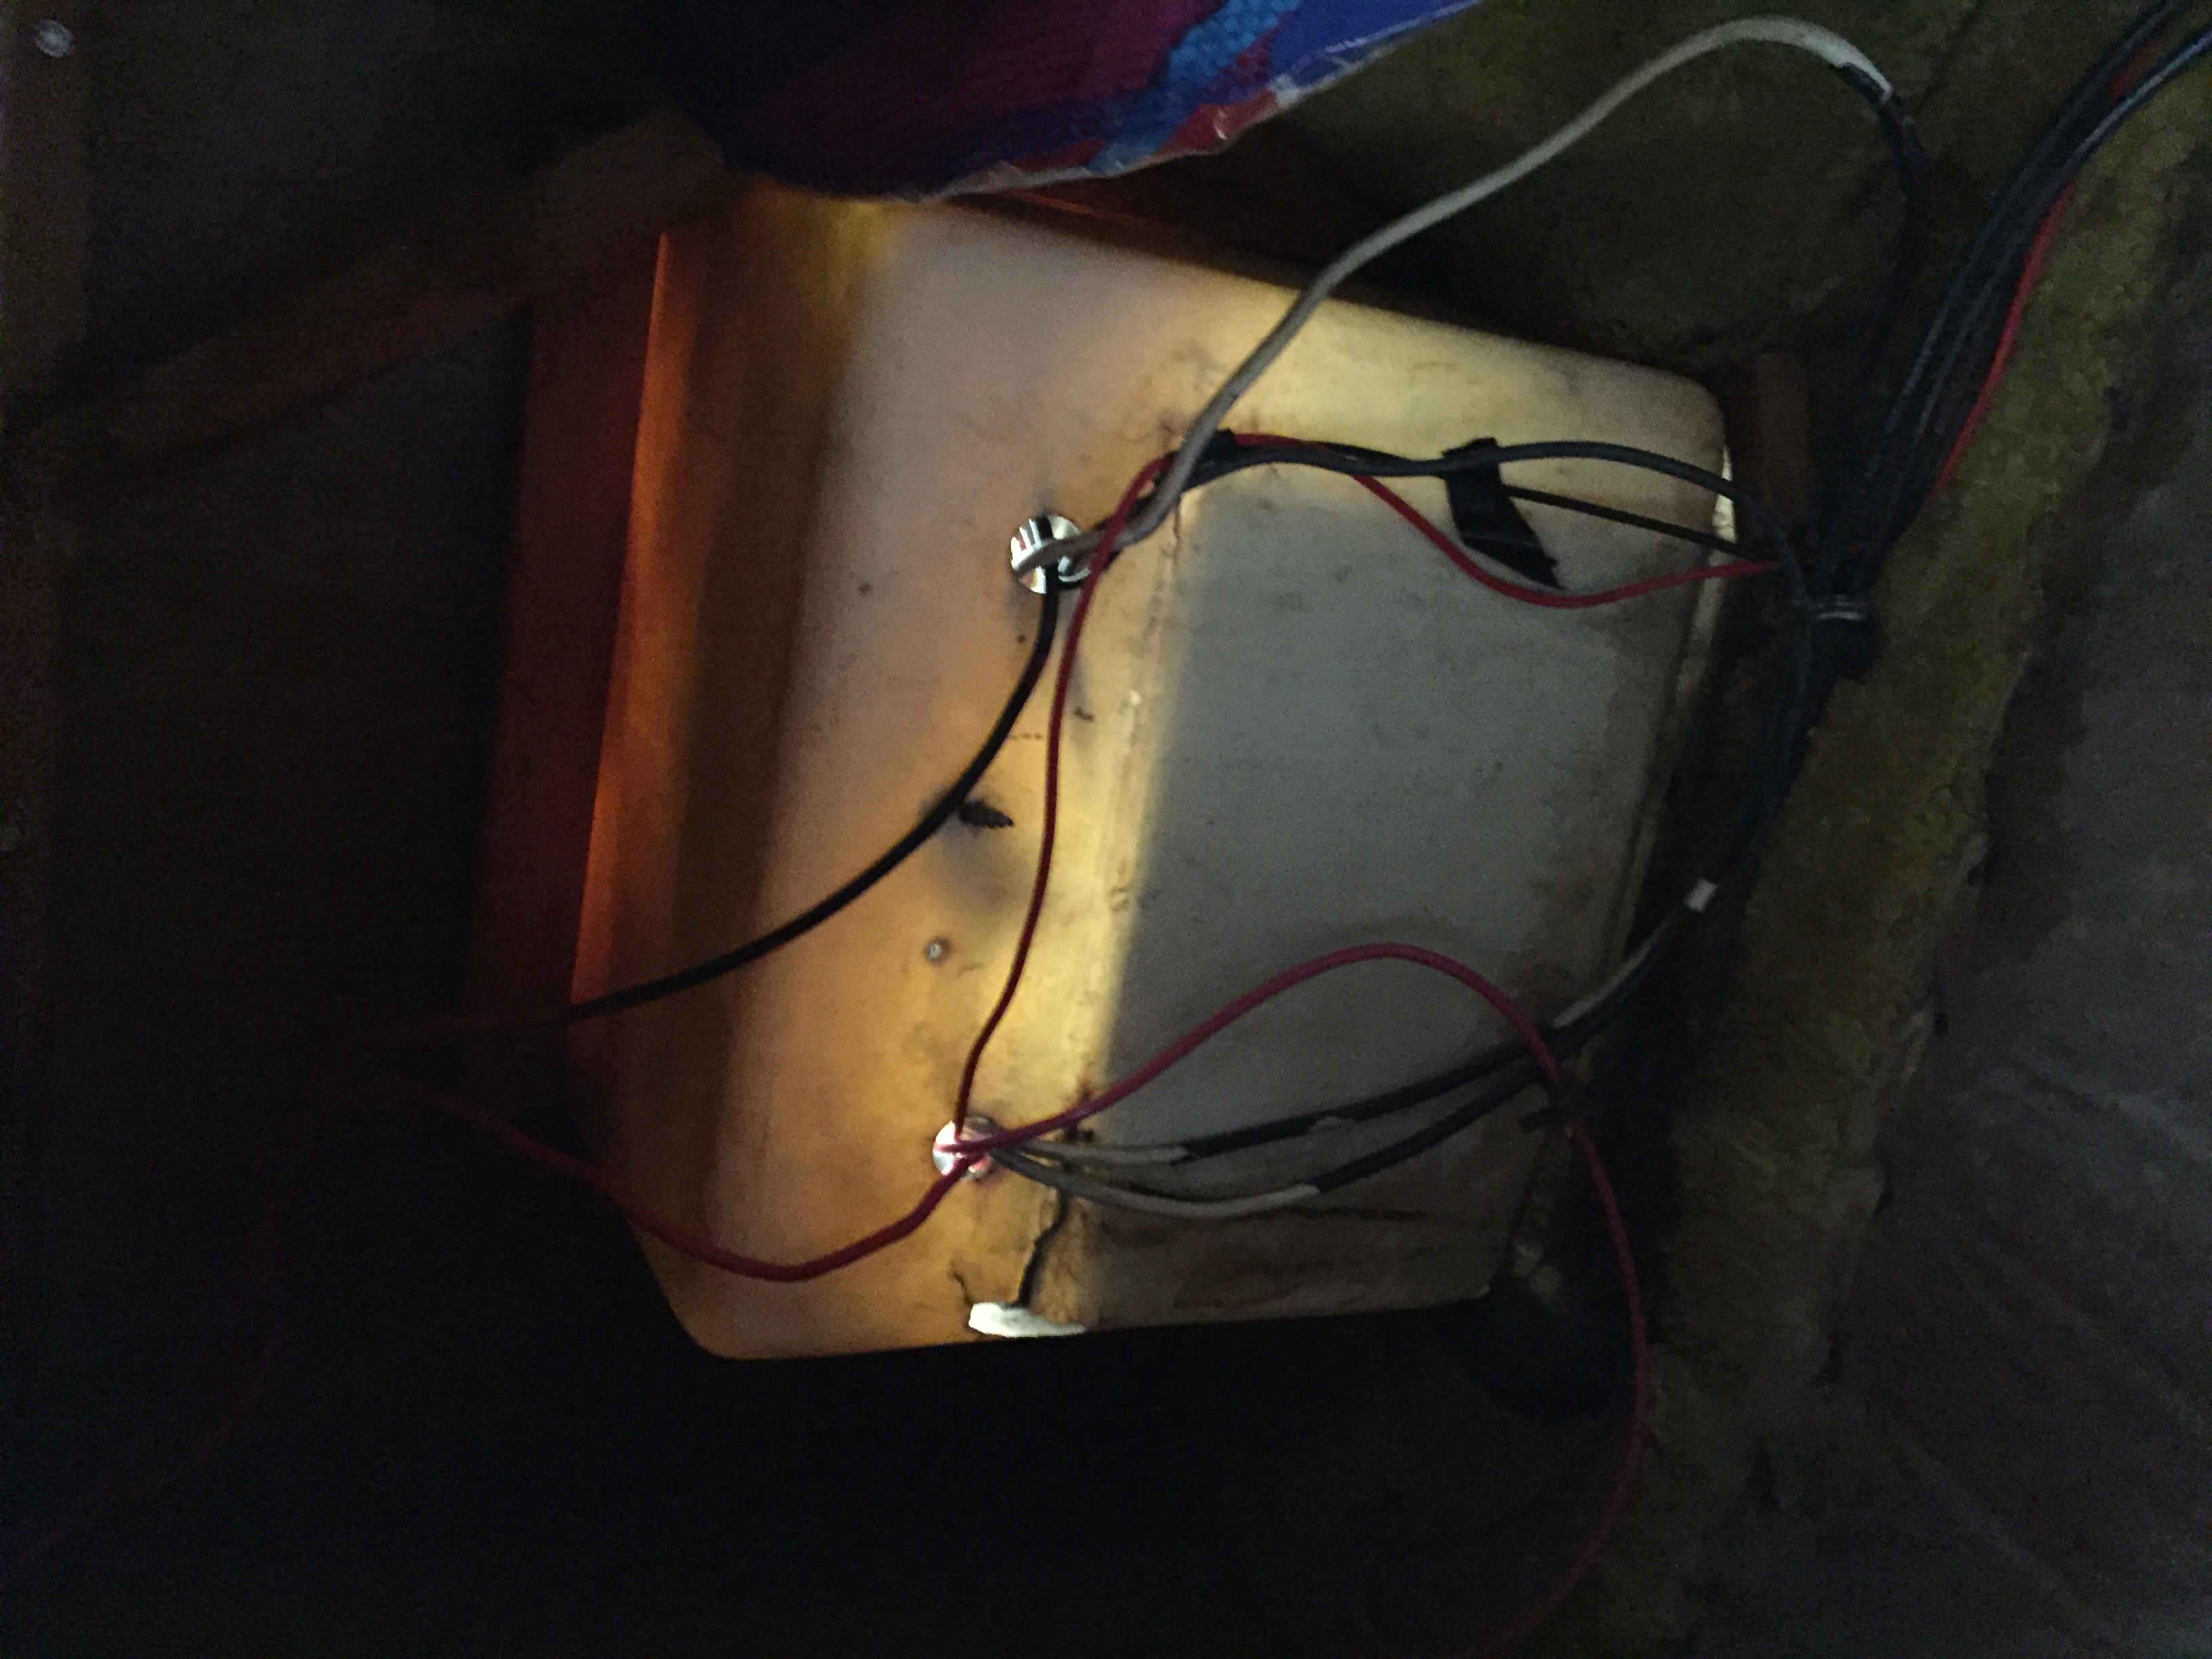
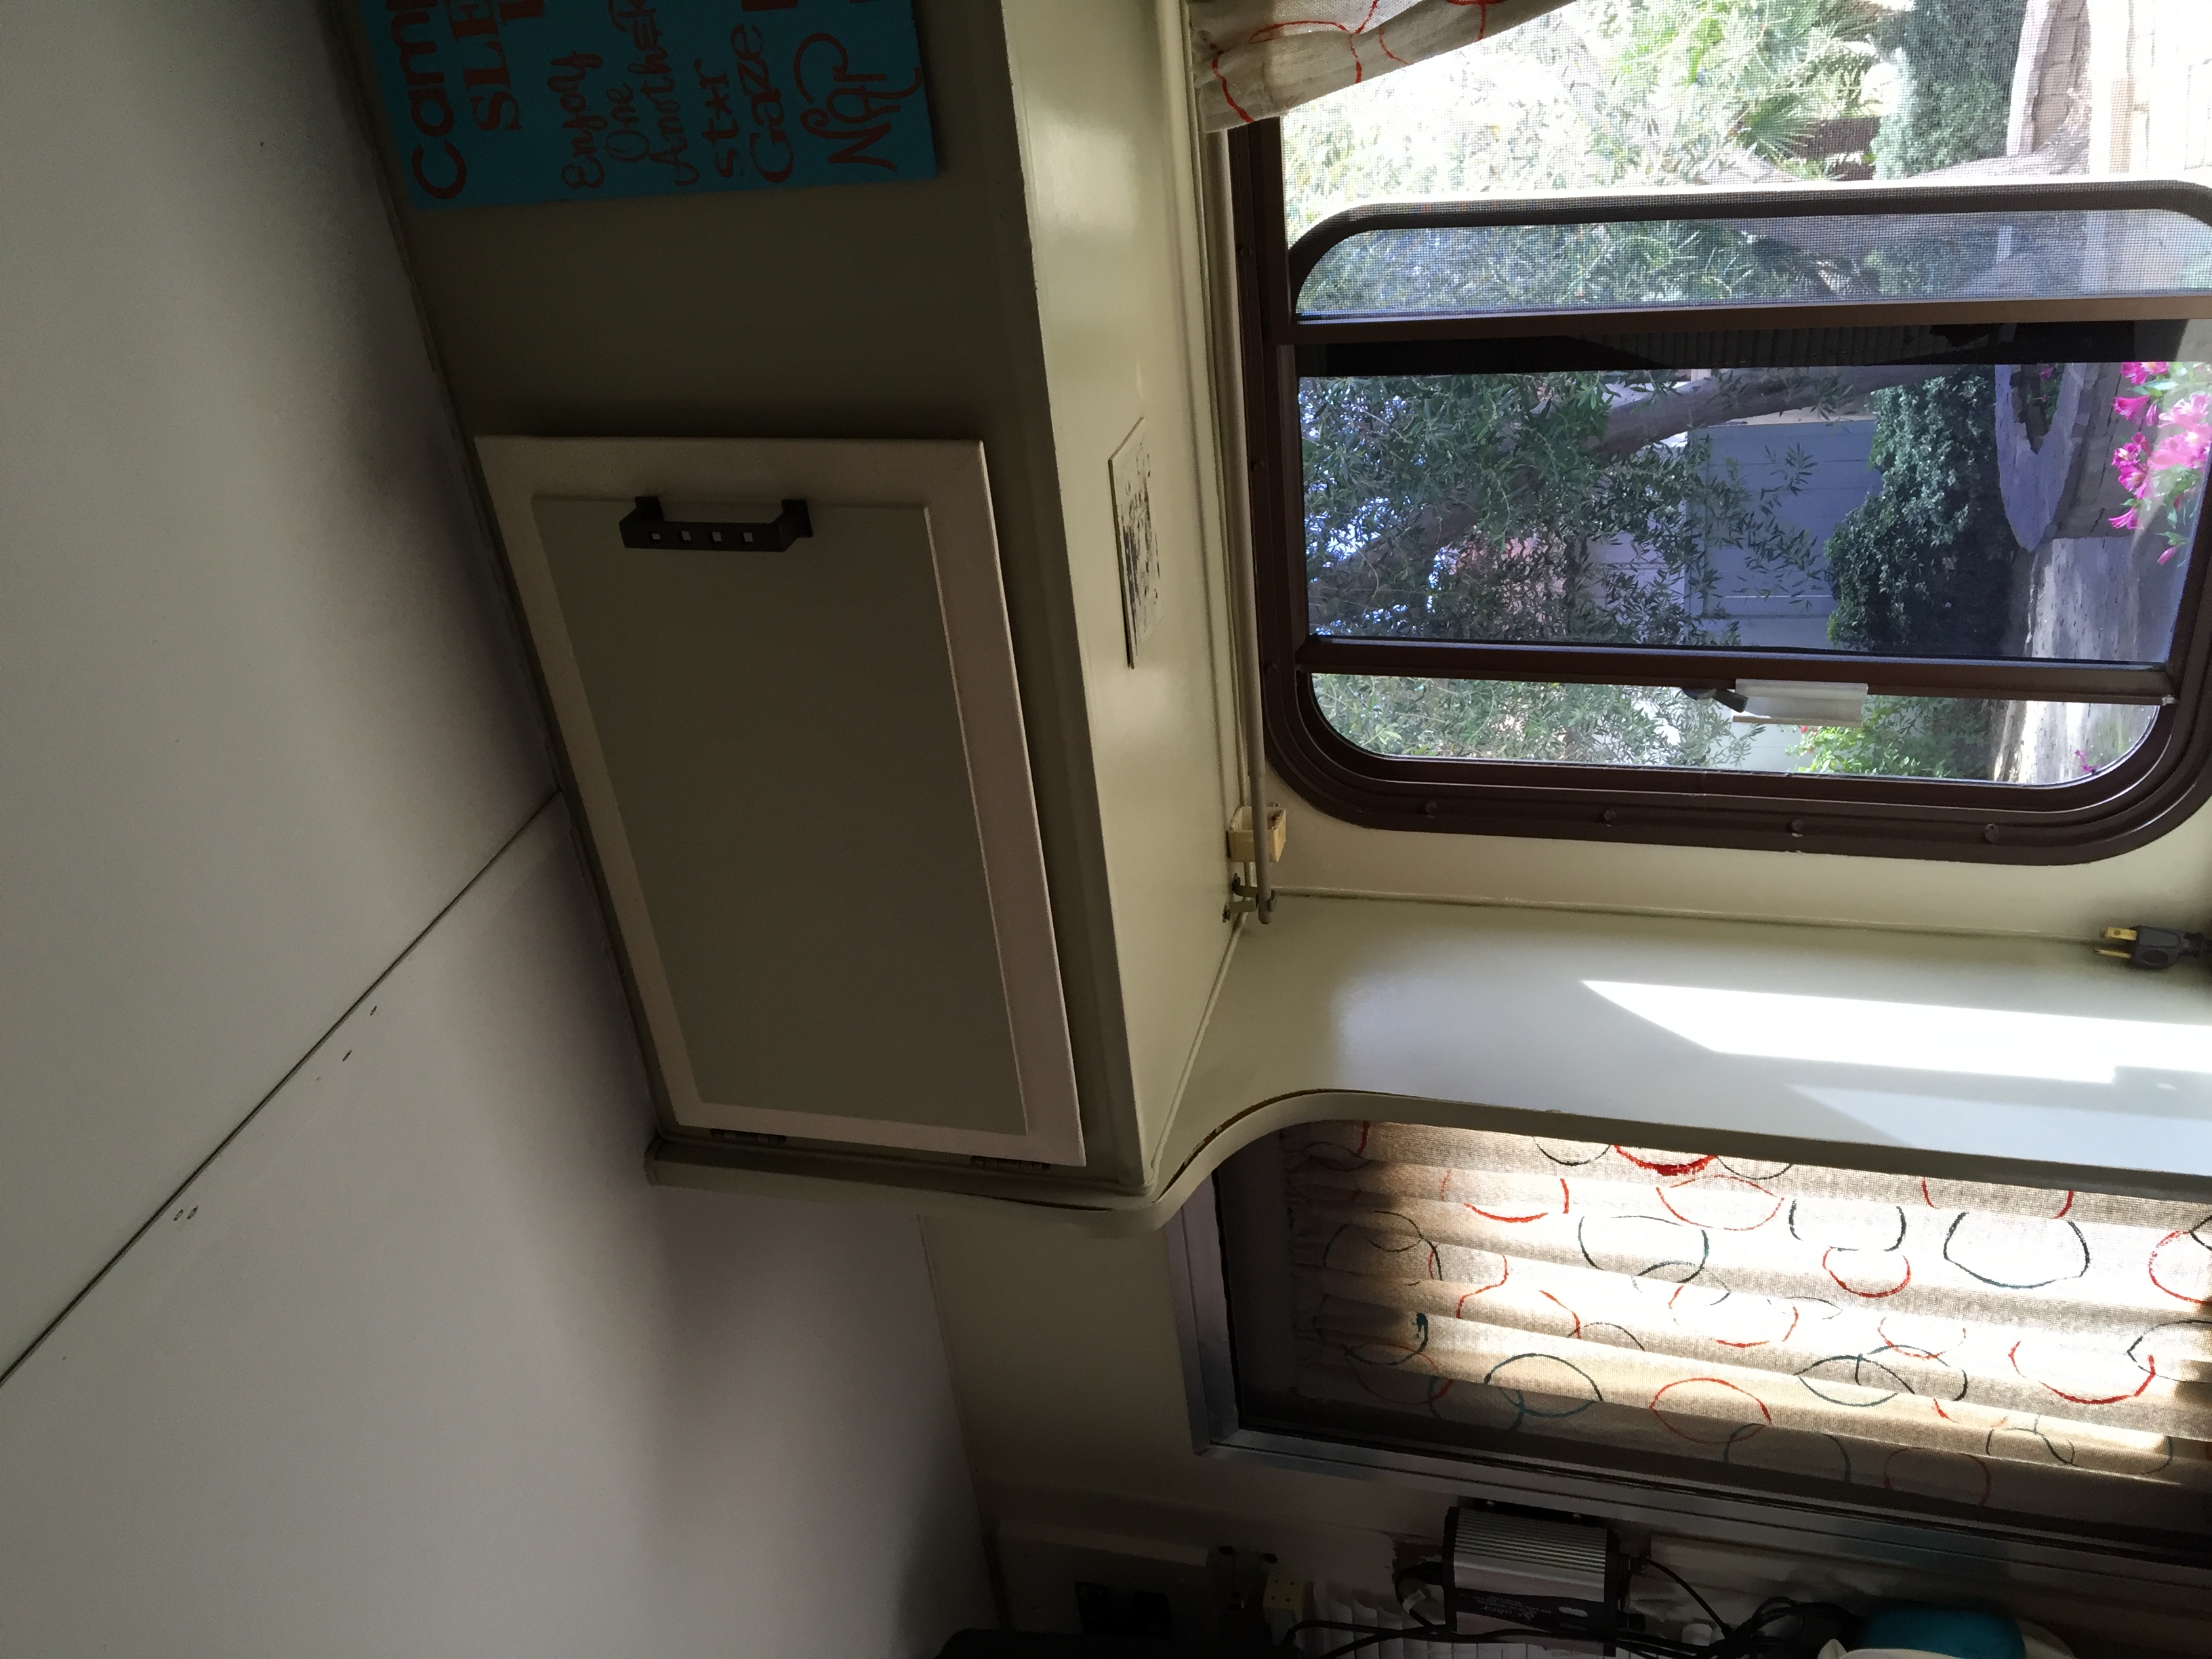
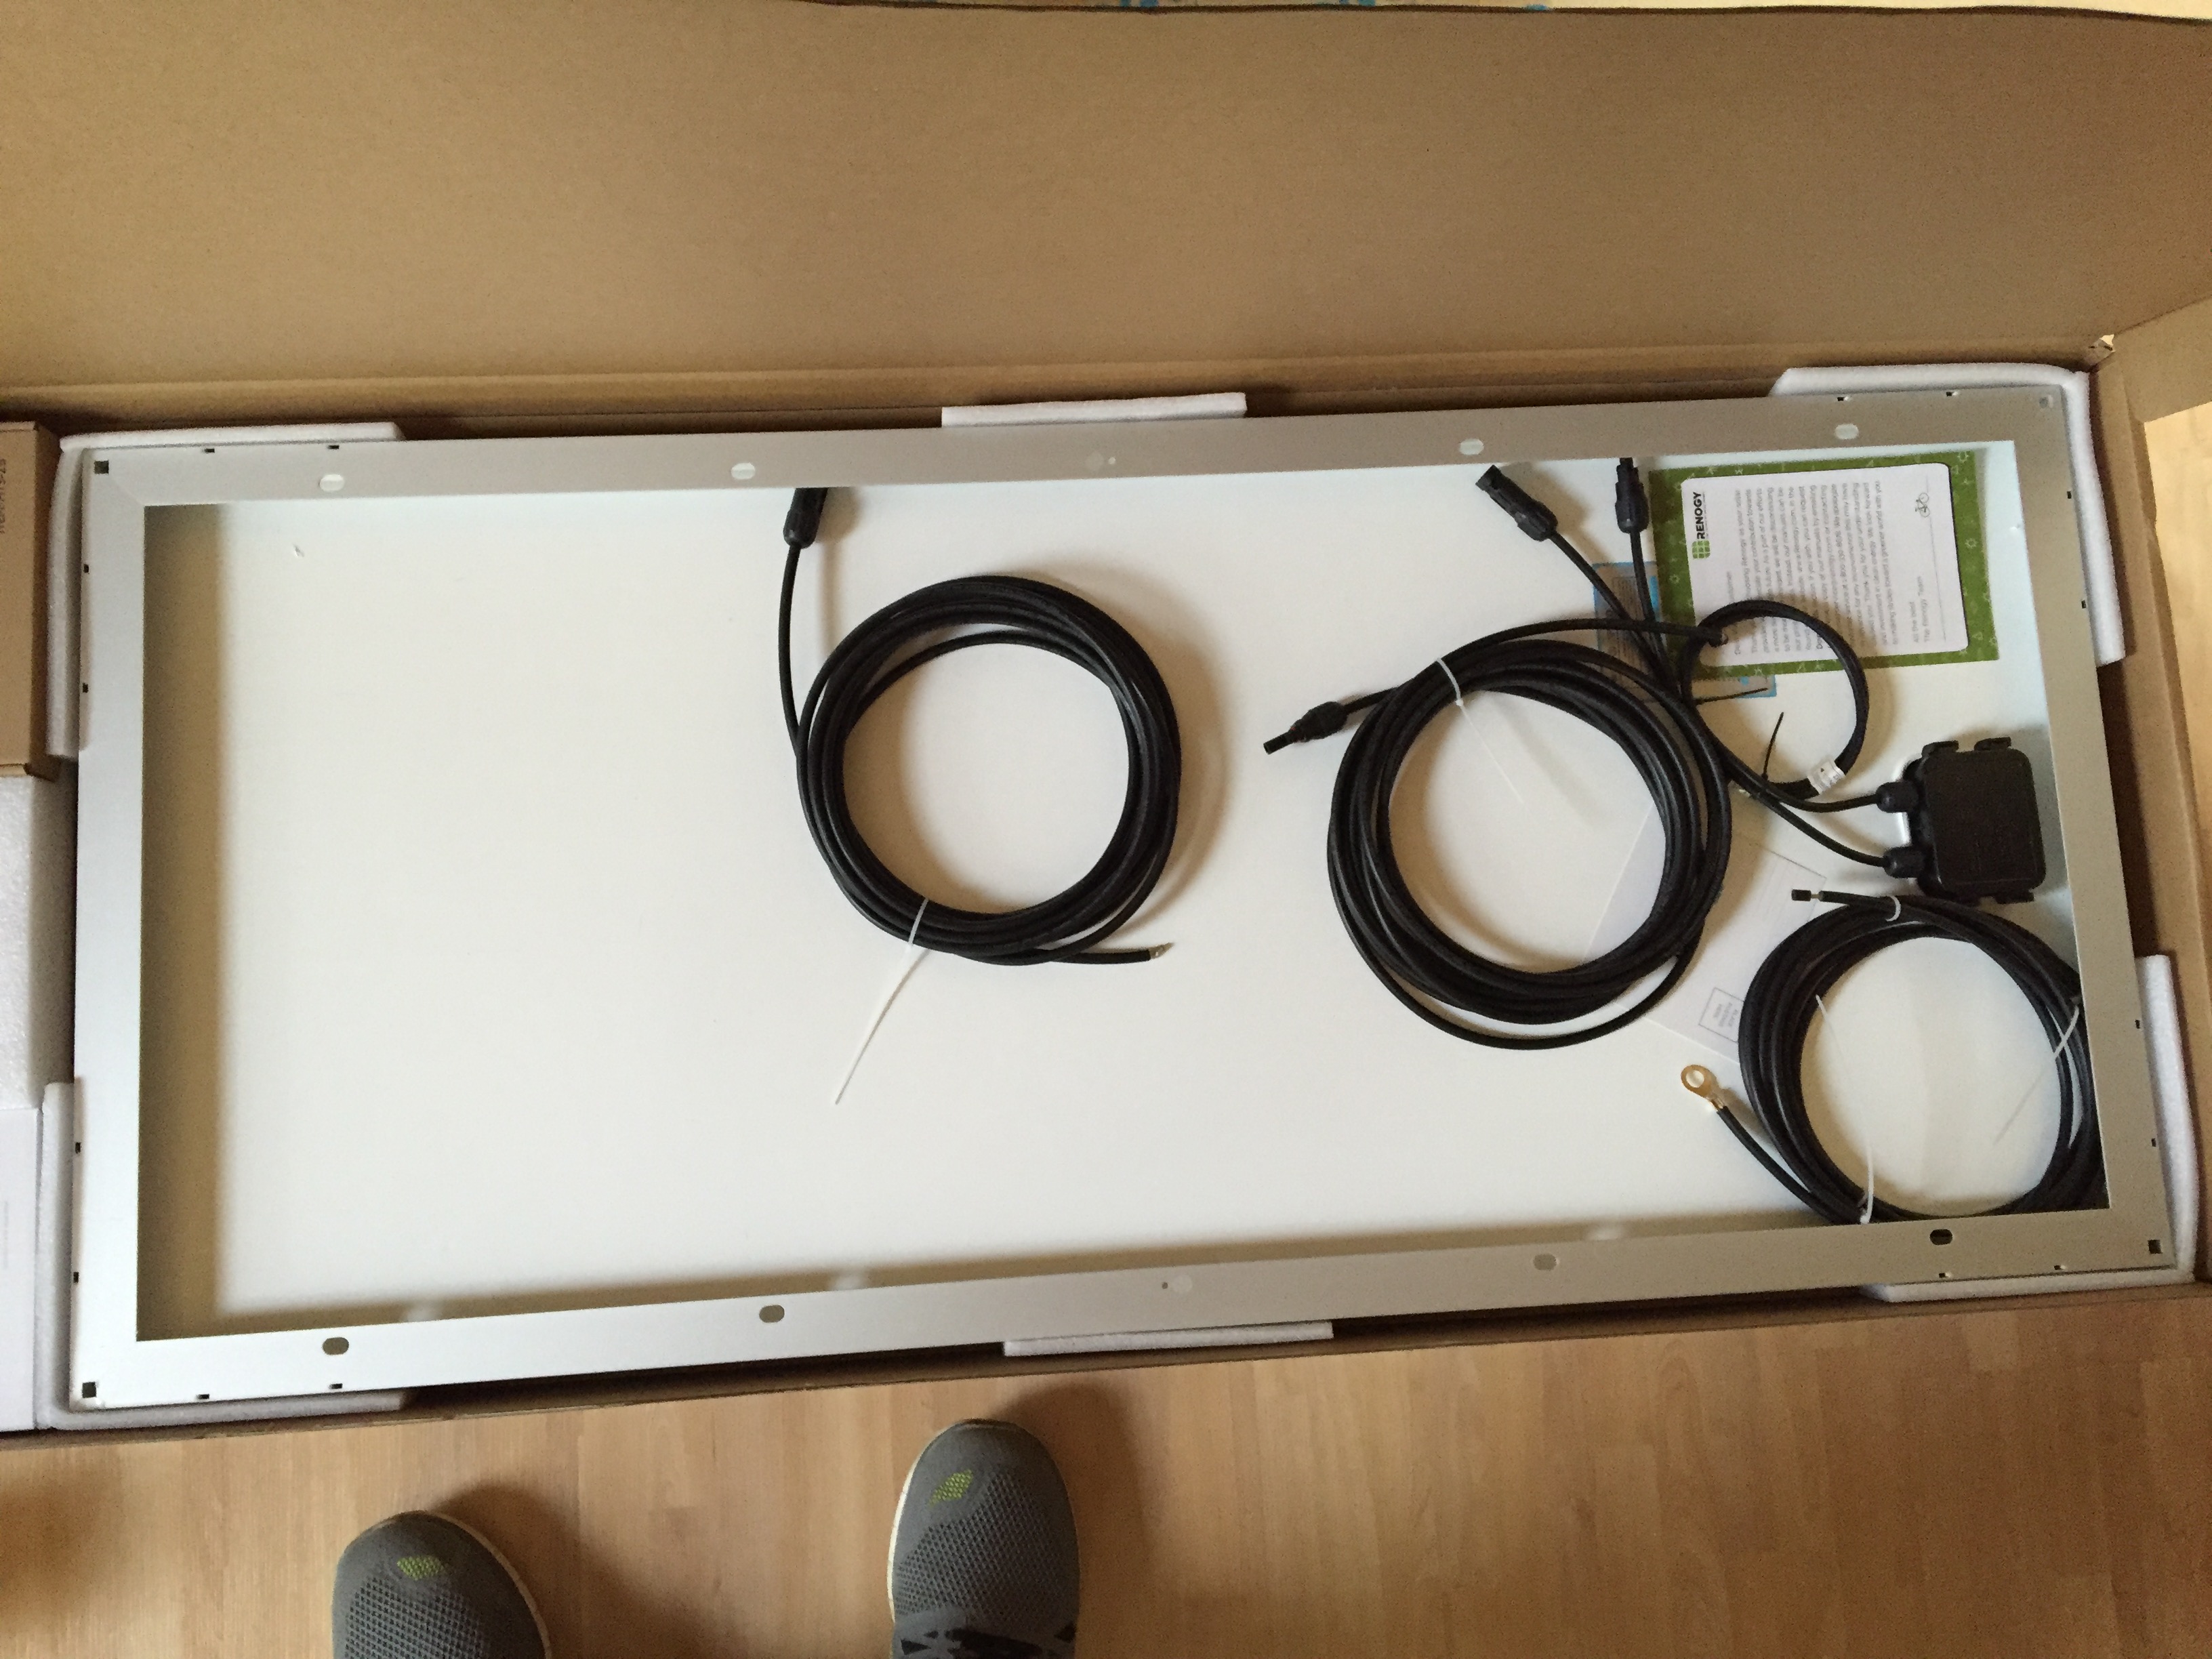
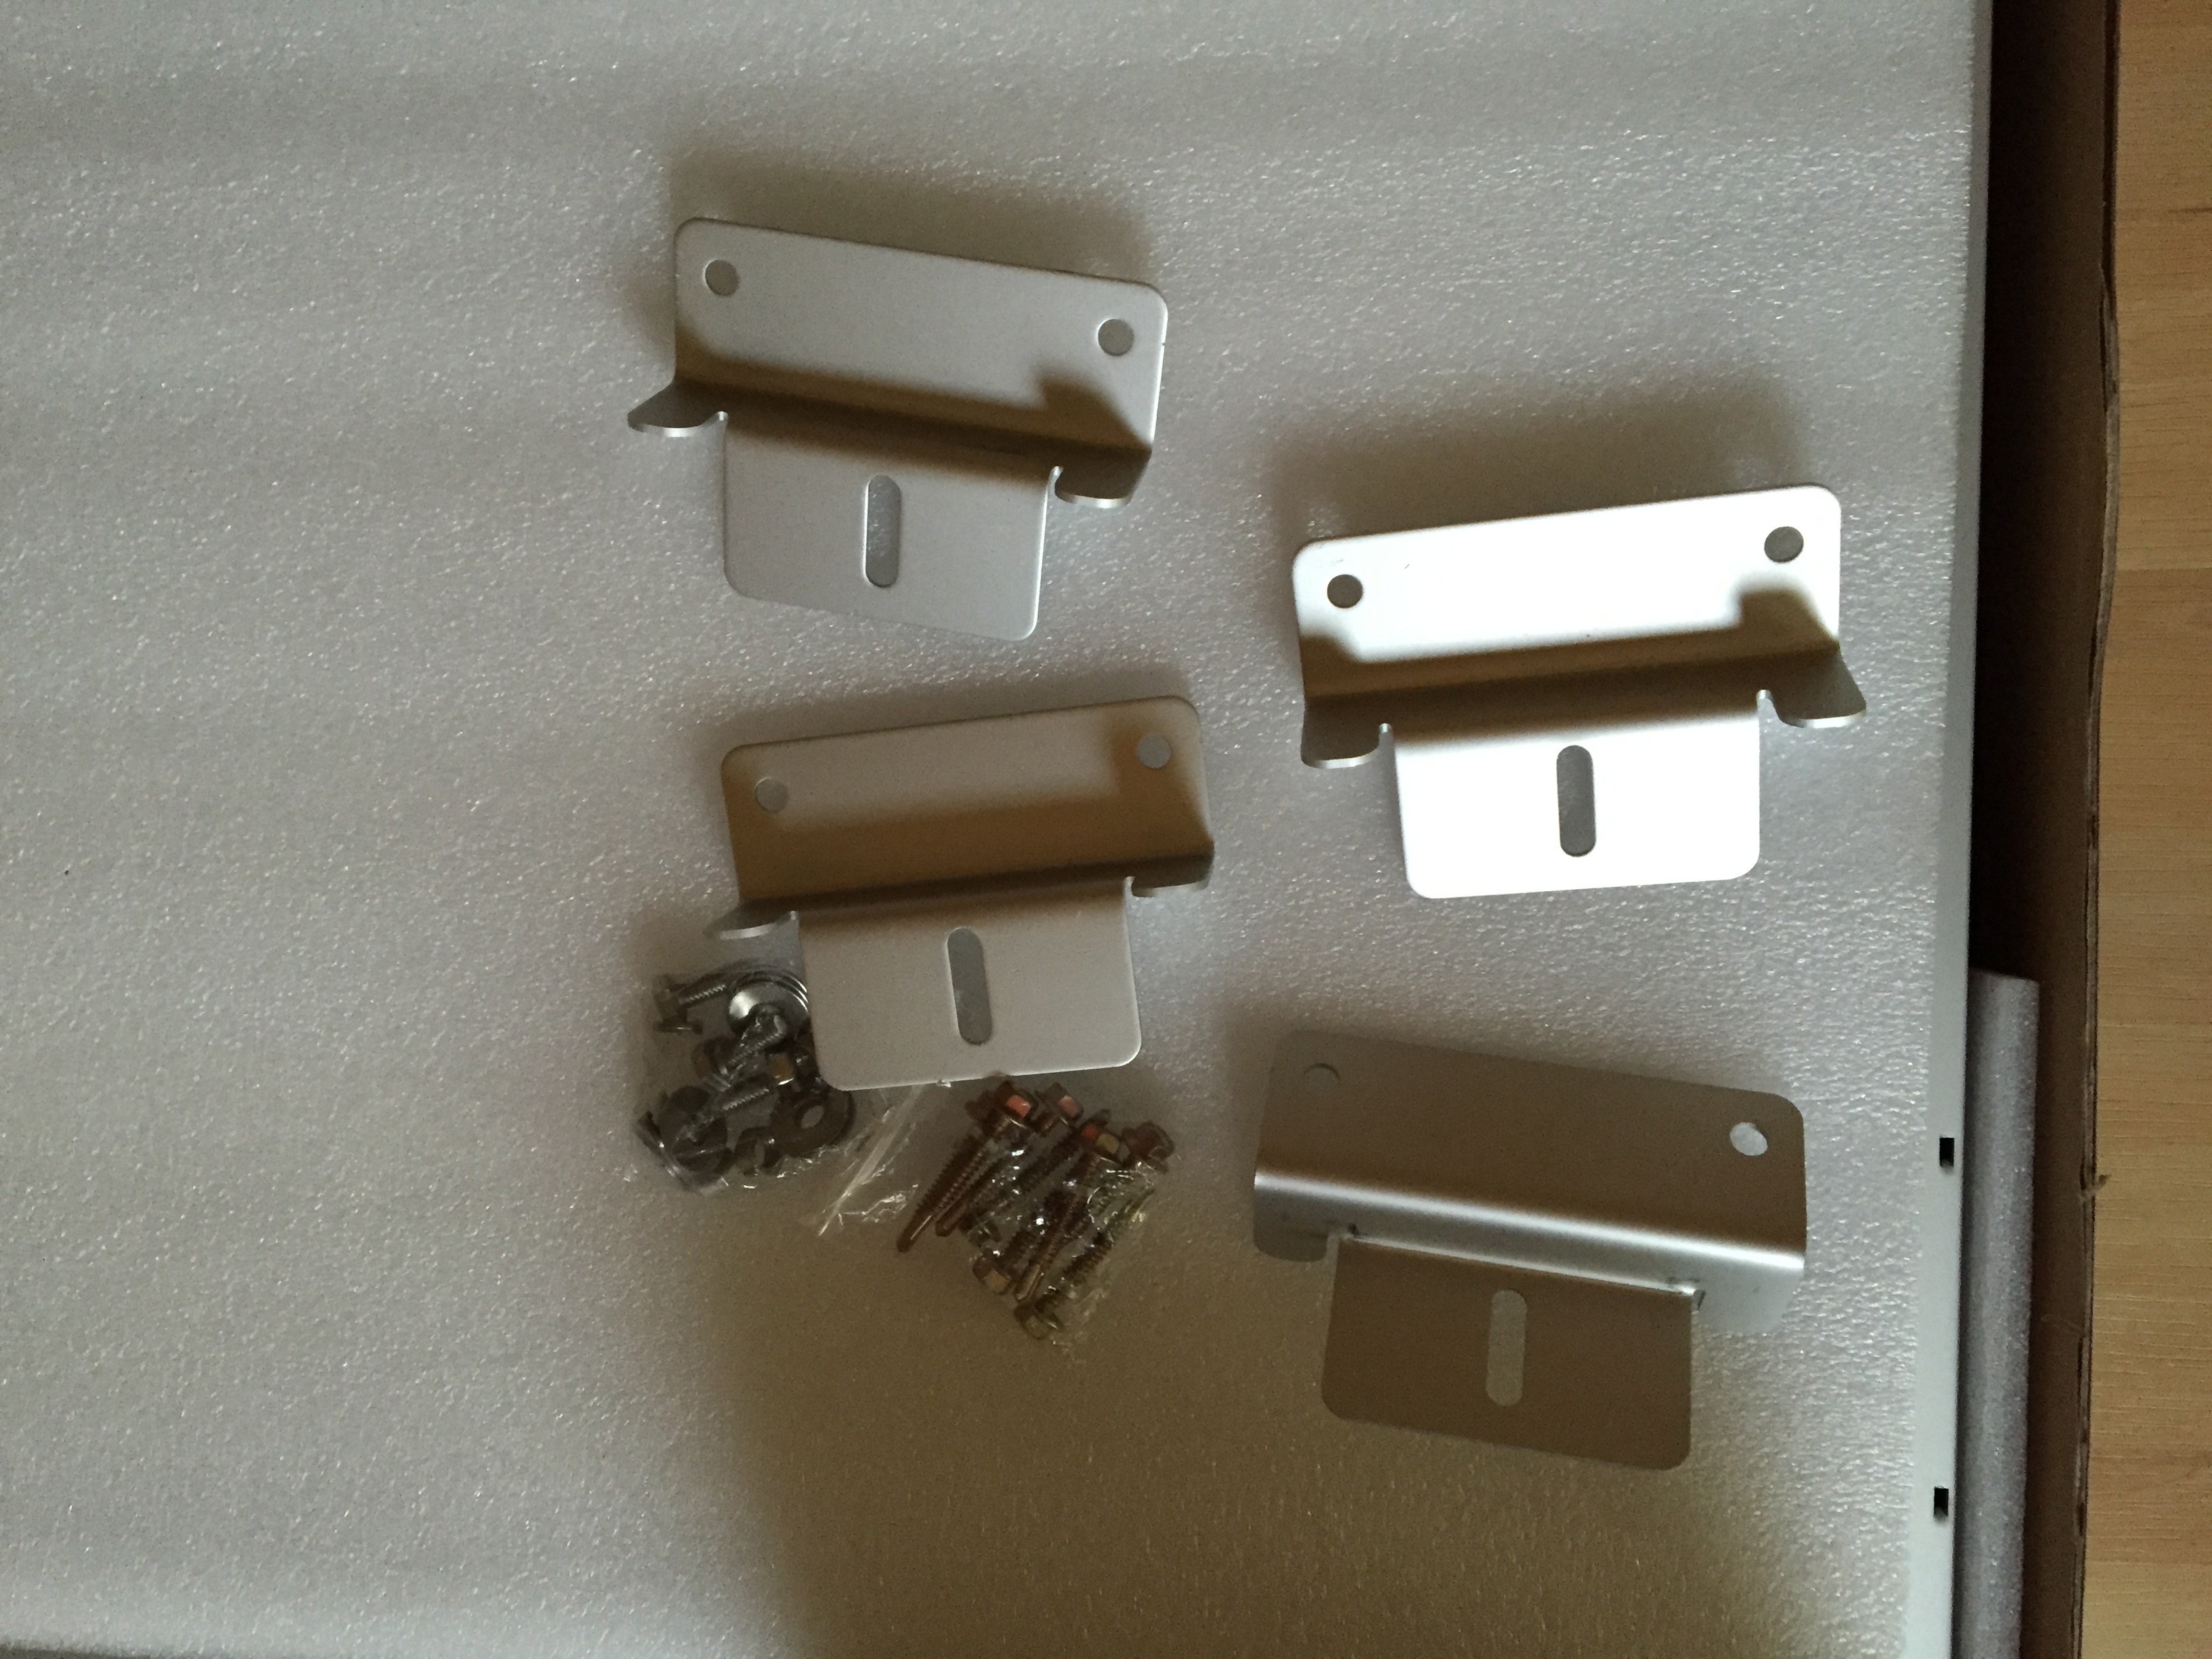
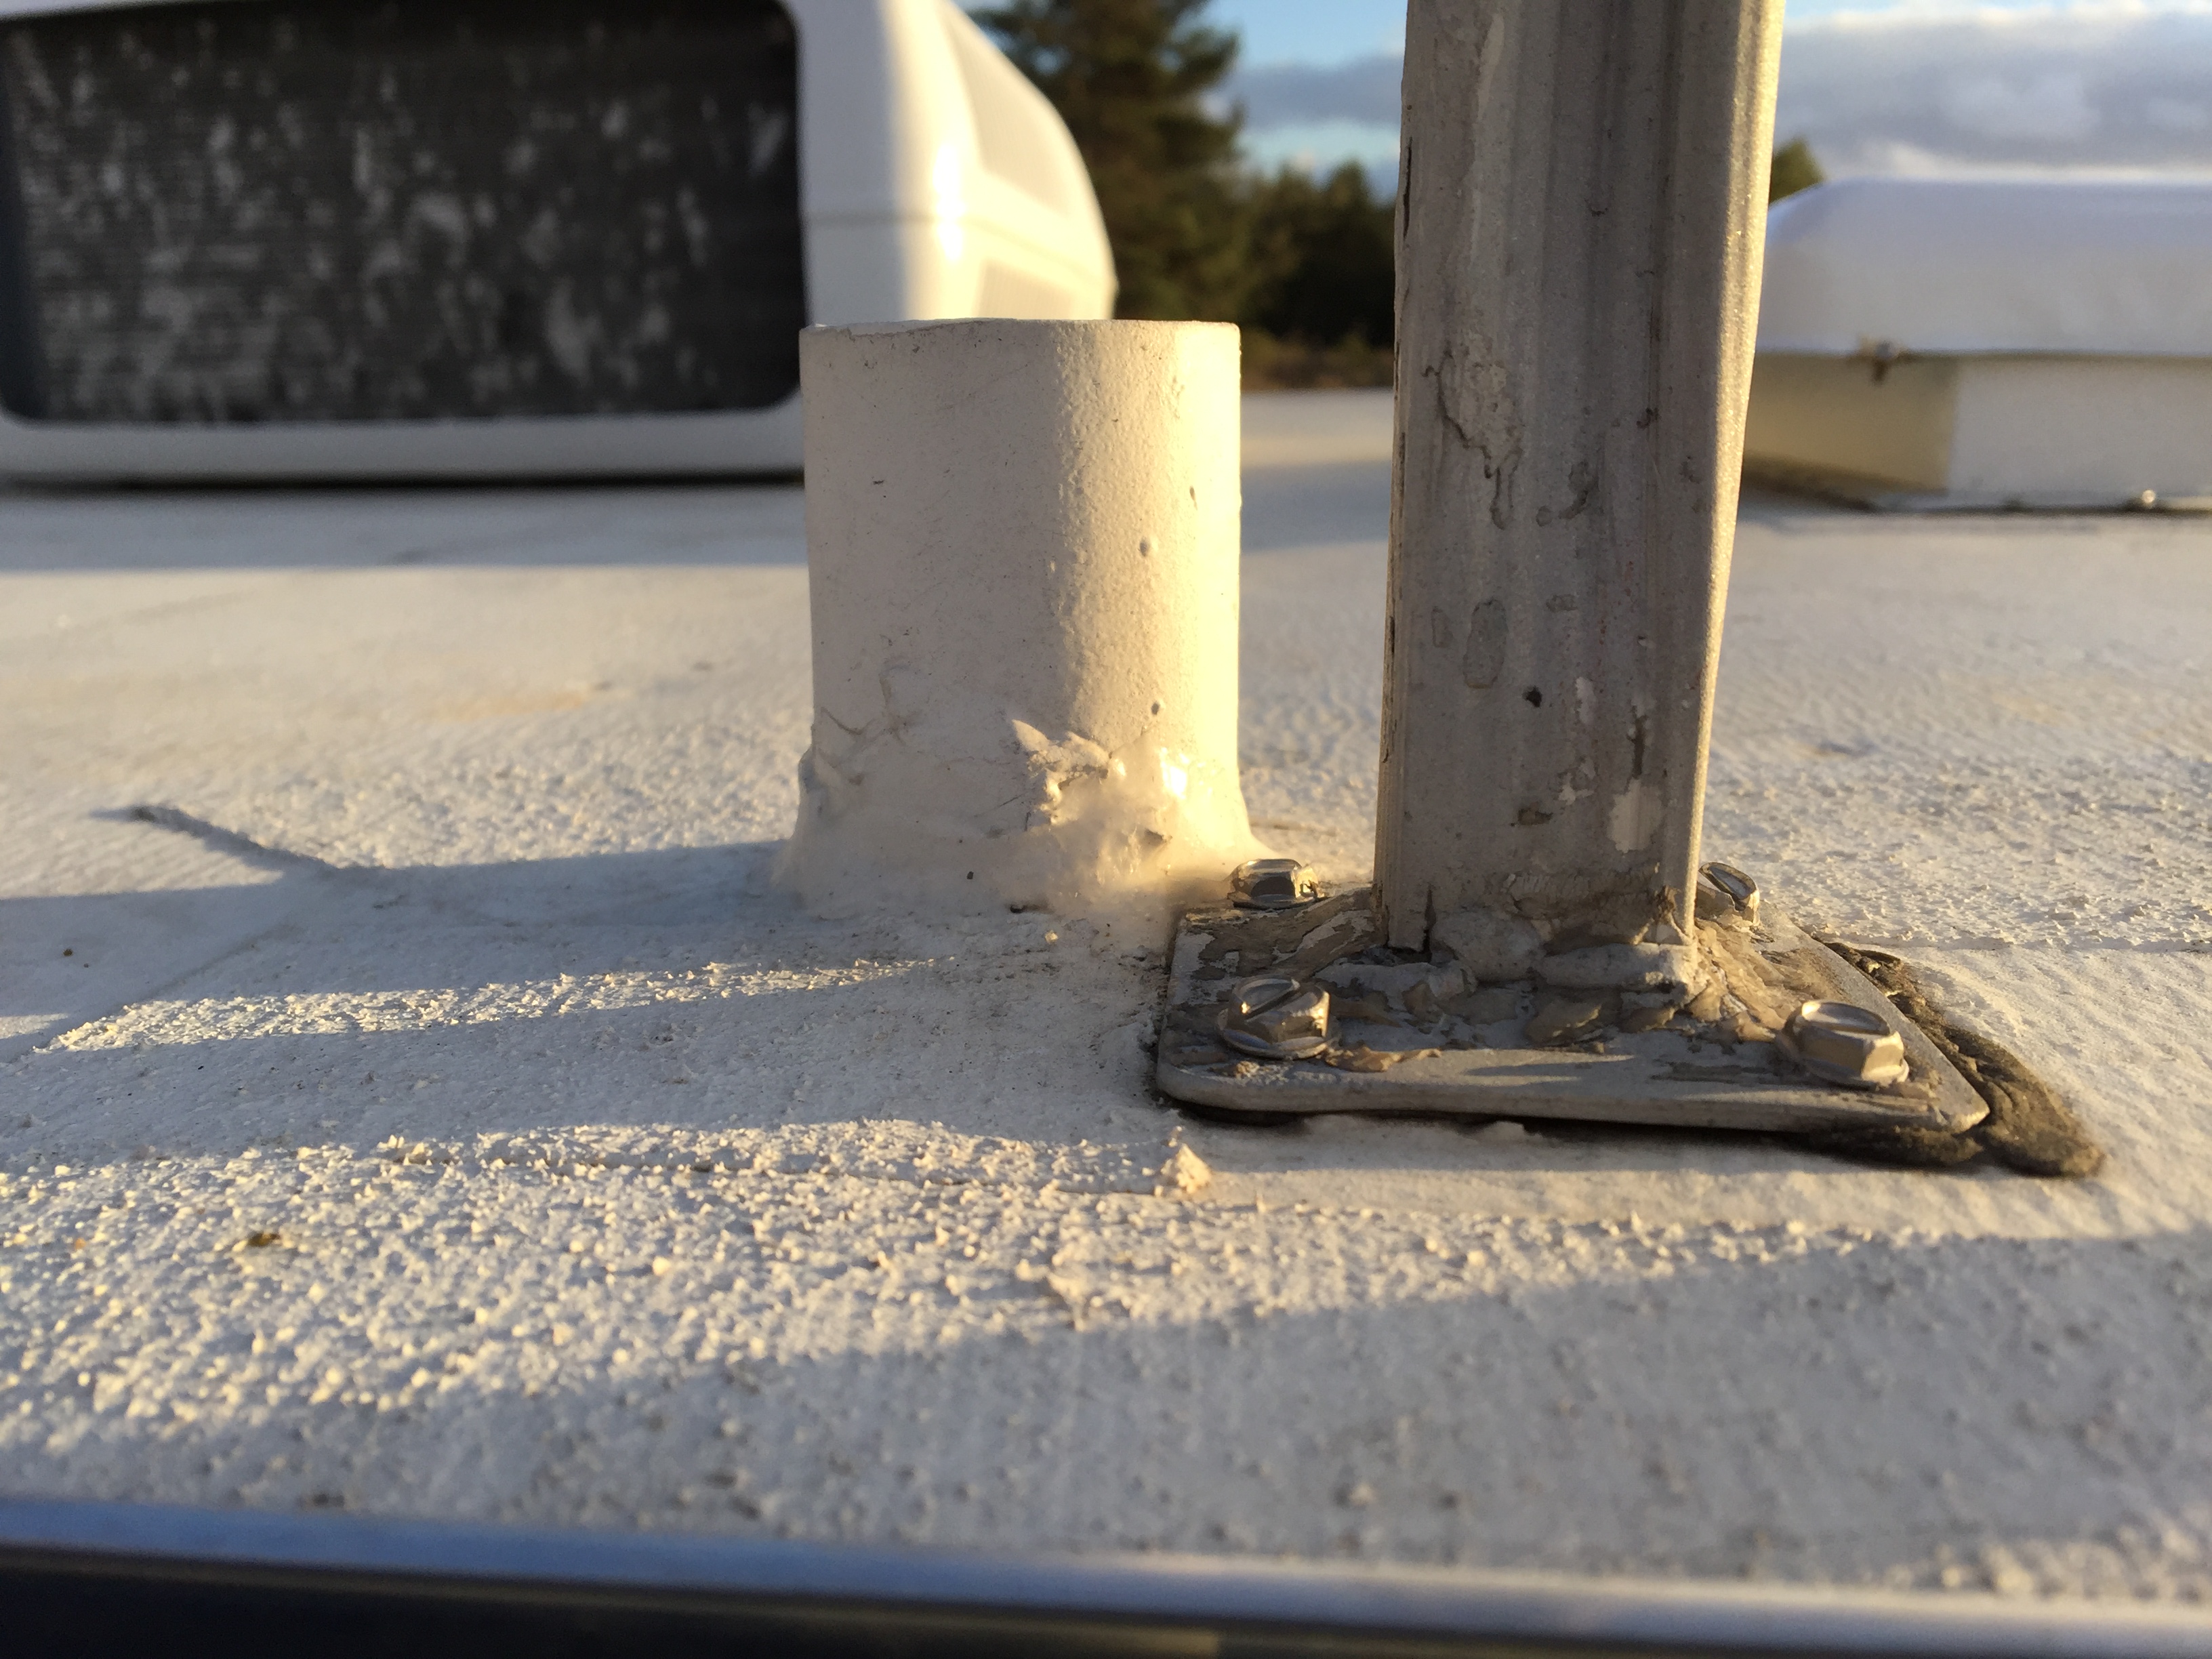
I won a drawing for a Renogy 100 watt solar kit. It just arrived in the mail and I'd like to mount it. Not sure where to position it and how to run the cables. My house battery box is under the counter next to the stove (approximately under the blue fan in the first picture). I'm thinking I could a.) run the cable through the roof and down the side of the door frame, then drill a hole into the side of the big cabinet under the countertop to feed it into the back of the battery box. Or b.) Run the cable through the roof and through the ceiling cabinet above the counter, then another hole through the countertop and down to the battery box. The mounting screws are 1 1/2". I won't be able to mount the brackets without puncturing the ceiling wood all the way through. Trying to determine the best place to mount it and hide those screws from view. The solar panel is 22" X 47". Any advice would be much appreciated. Here are some pics to show you what I'm working with.
-
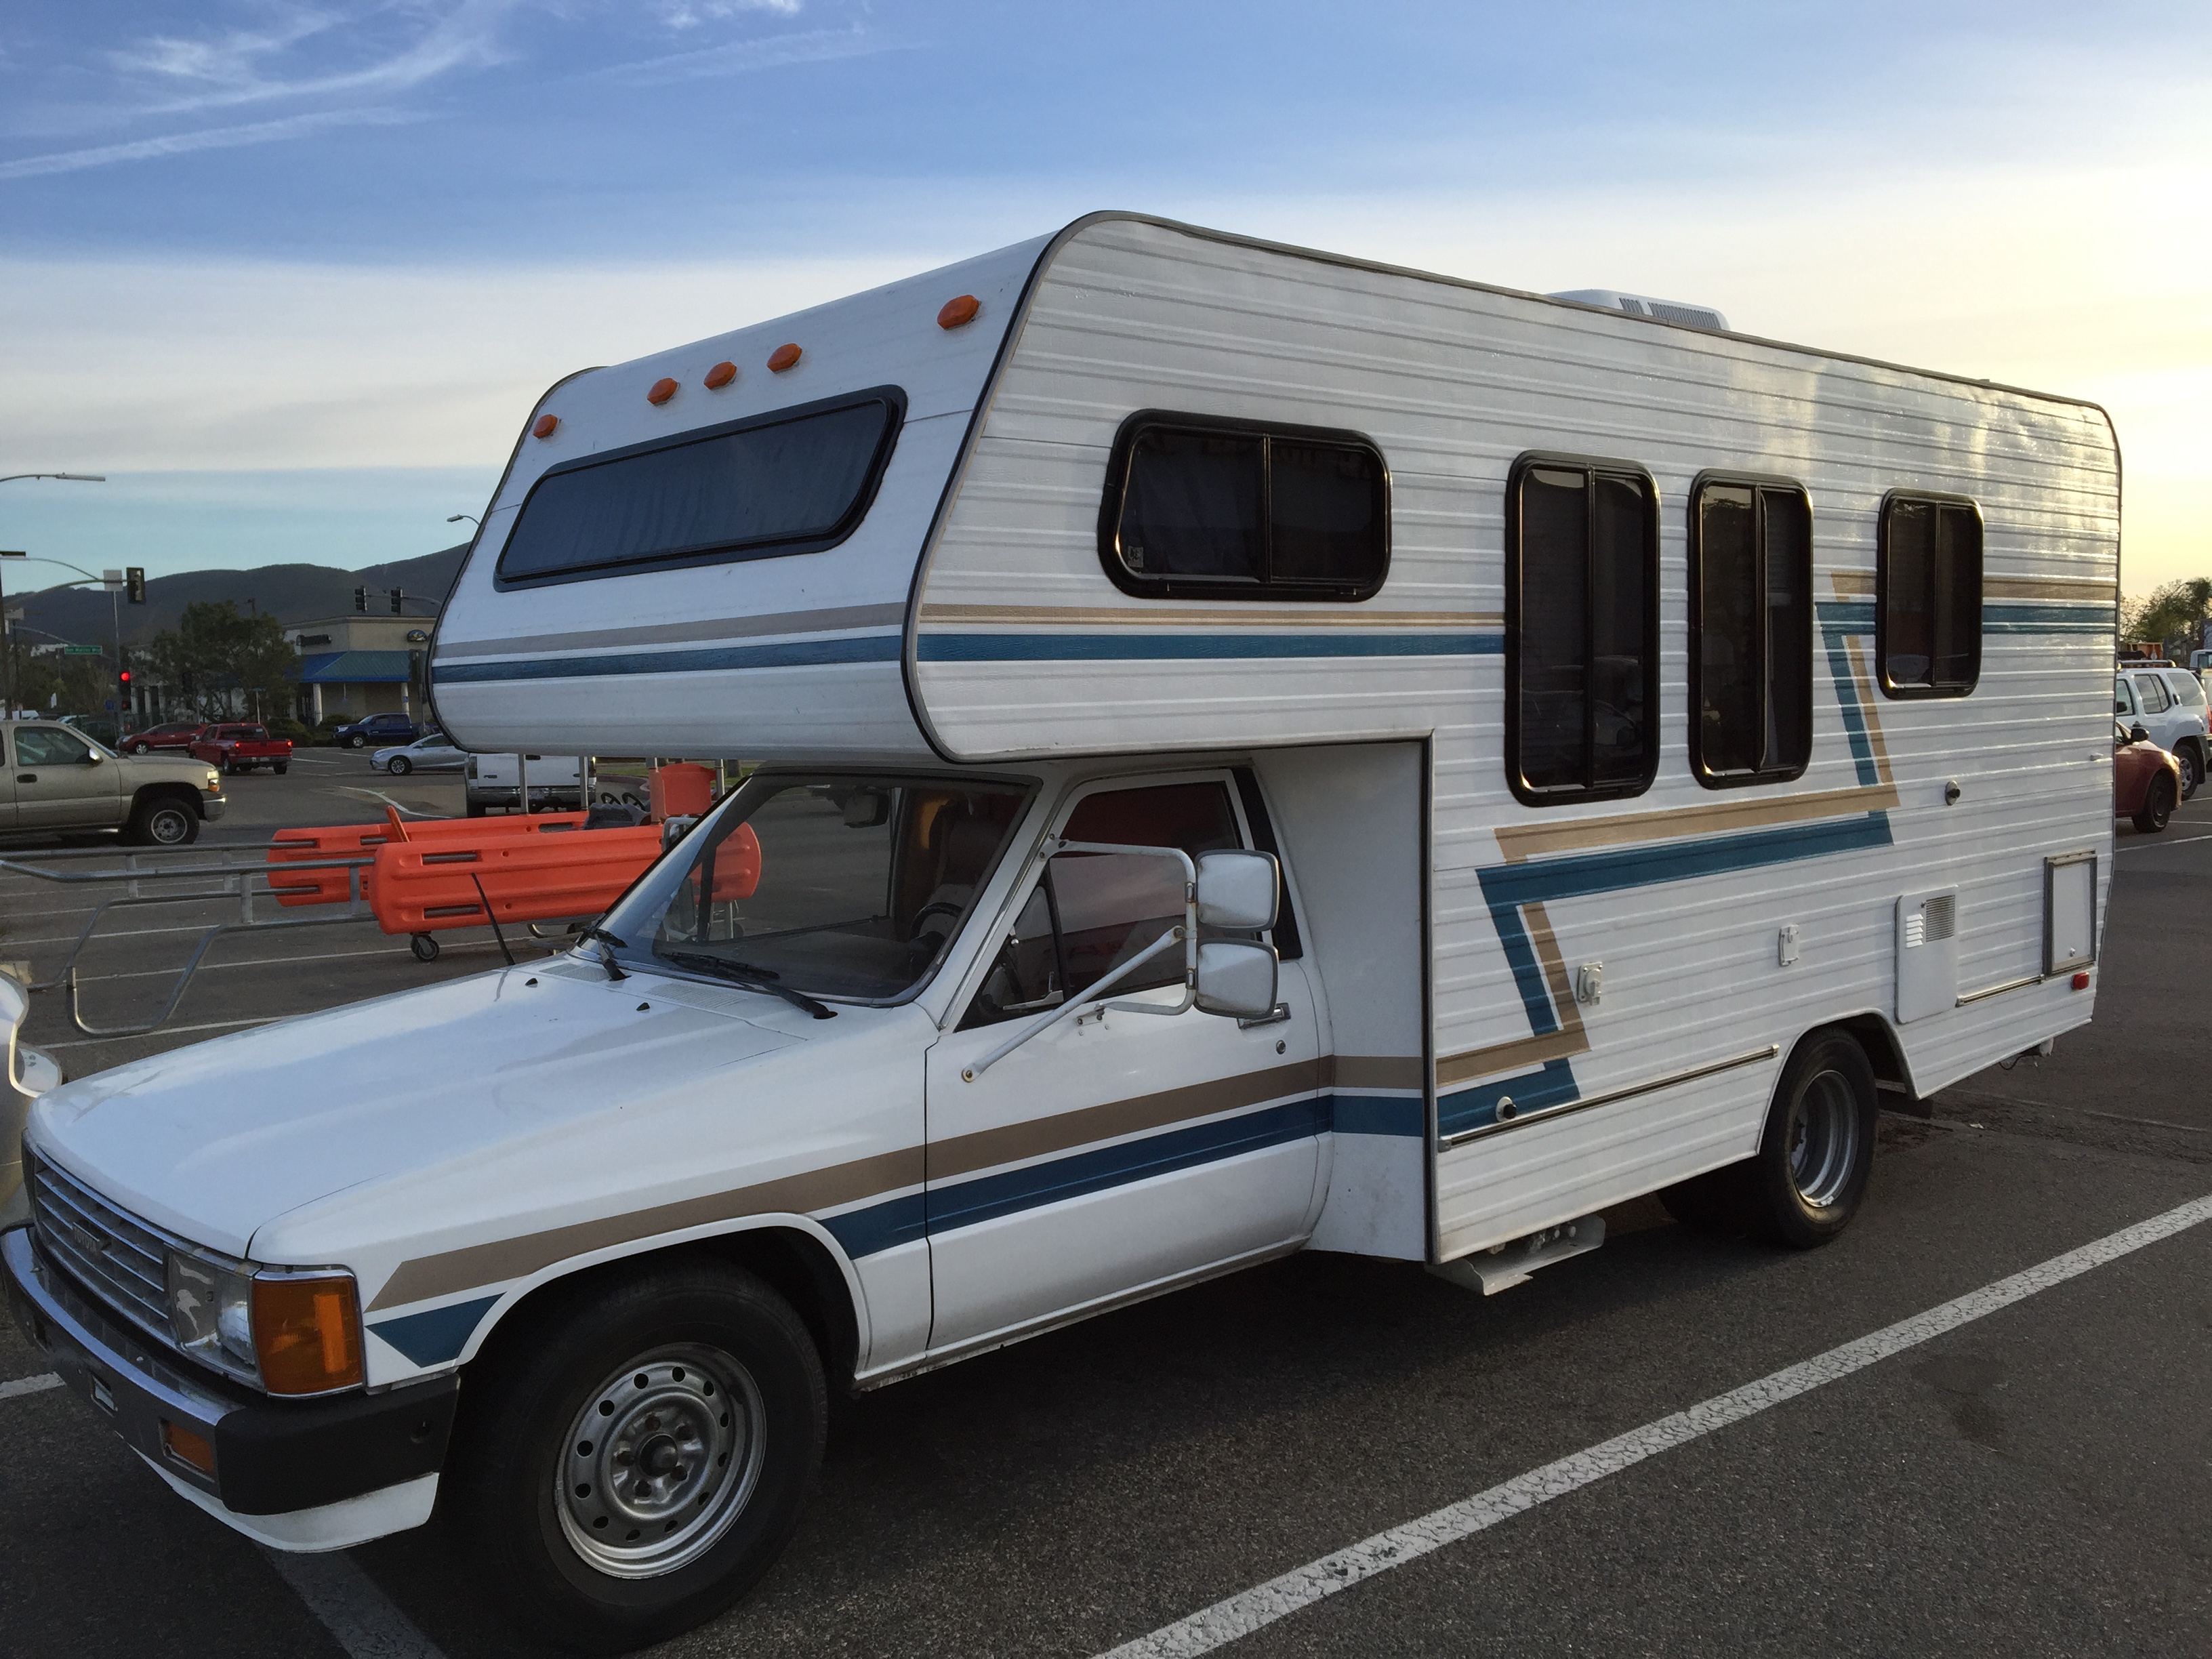
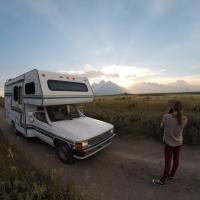
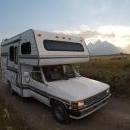
We've been full time traveling in our 84 Toyota Huntsman for 6 months. Now, I'd like to stay put in the San Diego's north county for a month or two. There are several rv parks near the beach and prices aren't bad, $550 - $650 month. But they all have RV age limits. Some will only allow RVs 10 years and newer, some 20 years and newer. Ours is a beautiful 32 year old with no place to park. Needless to say, I'm not happy with this discrimination of older RVs.
-
Eternabond or lap sealant first on the roof
candace replied to candace's topic in General Discussion
Okay, here's what I did. Put tape down where I had removed it before. Cleaned under the ladder mount area. Put a piece of tape under the ladder mount. Screwed it back in. Then put down a bead of lap sealant around the vent and around the ladder mount. I applied the sealant late in the day and noticed that moisture covered the motorhome within a couple of hours of of application. The sealant feels like puddy or foam. Is this how it's supposed to be? thanks for all of your helpful replies!
-
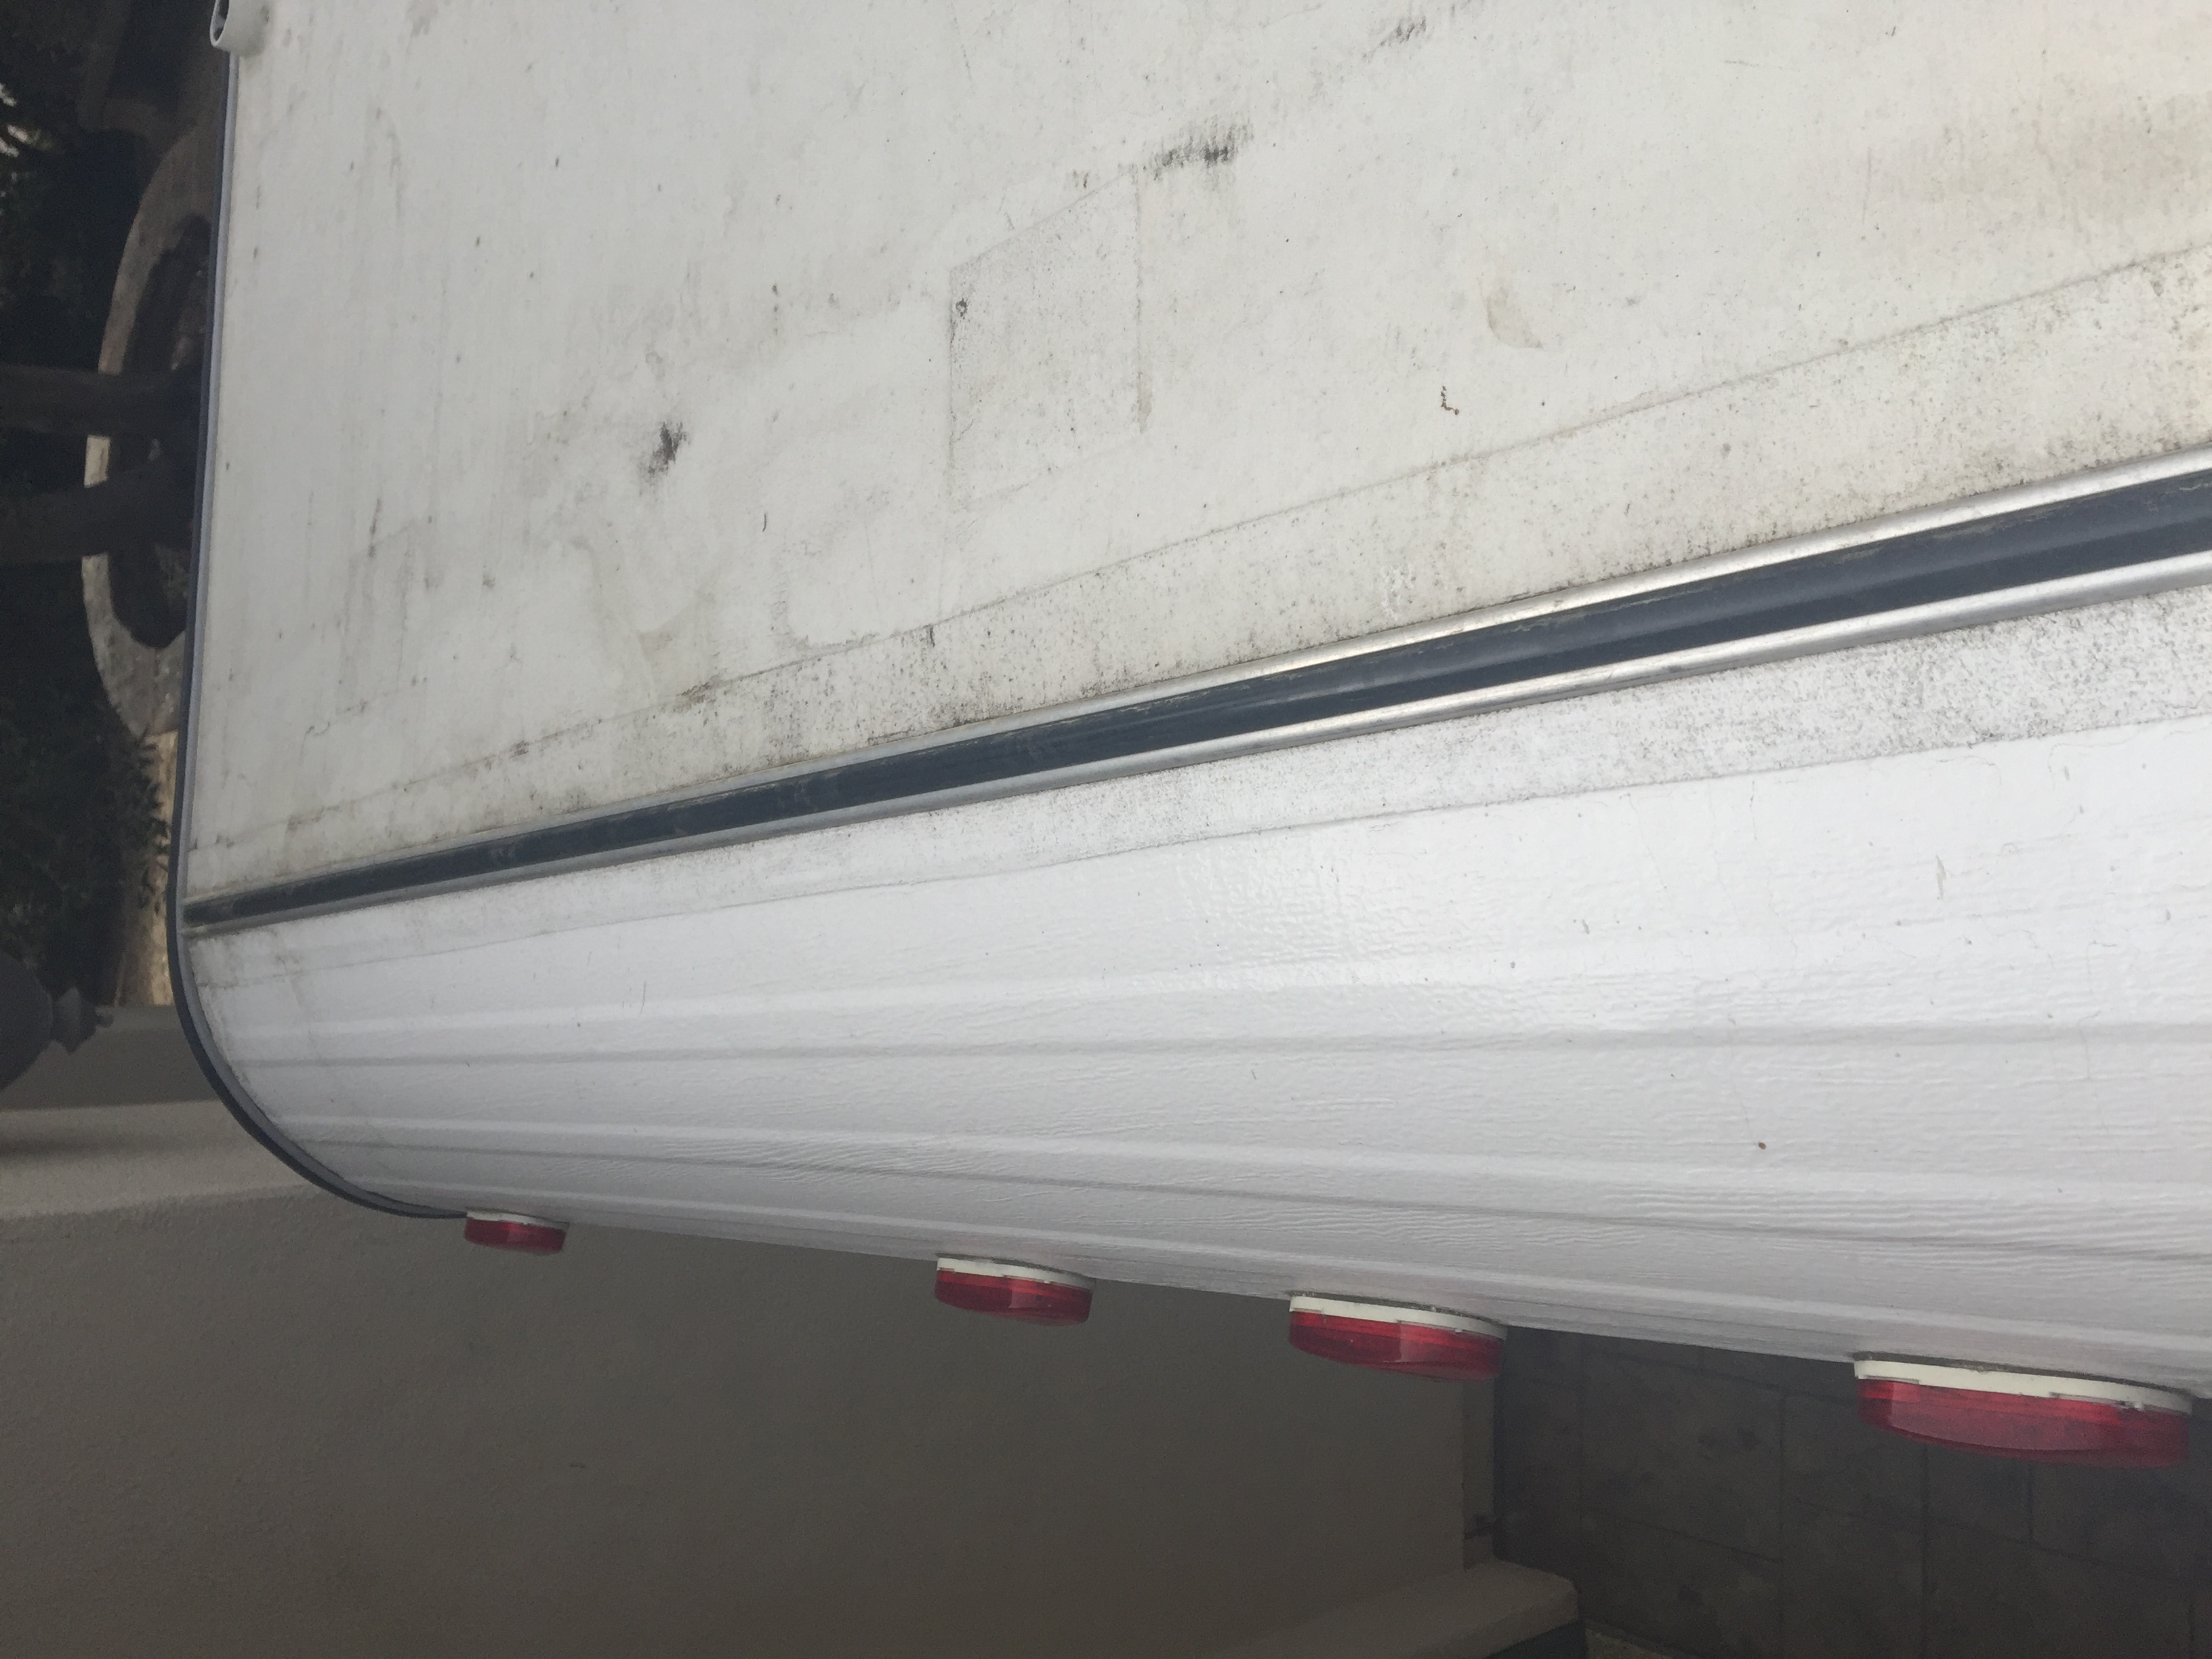
I have a leak that I believe is coming from where the black tank vent comes through the roof. I have removed the eternabond tape (covers old drilled holes) and silicon caulk that surrounded the vent. My plan is to put new eternabond down, including a piece where I will screw the ladder (next to vent) back in, and put a new bead of Dicor lap sealant around the vent. Looking at the photo, should I put eternabond down first or the lap sealant around the vent?
-
Thanks.. is there a specific caulk you recommend?
-
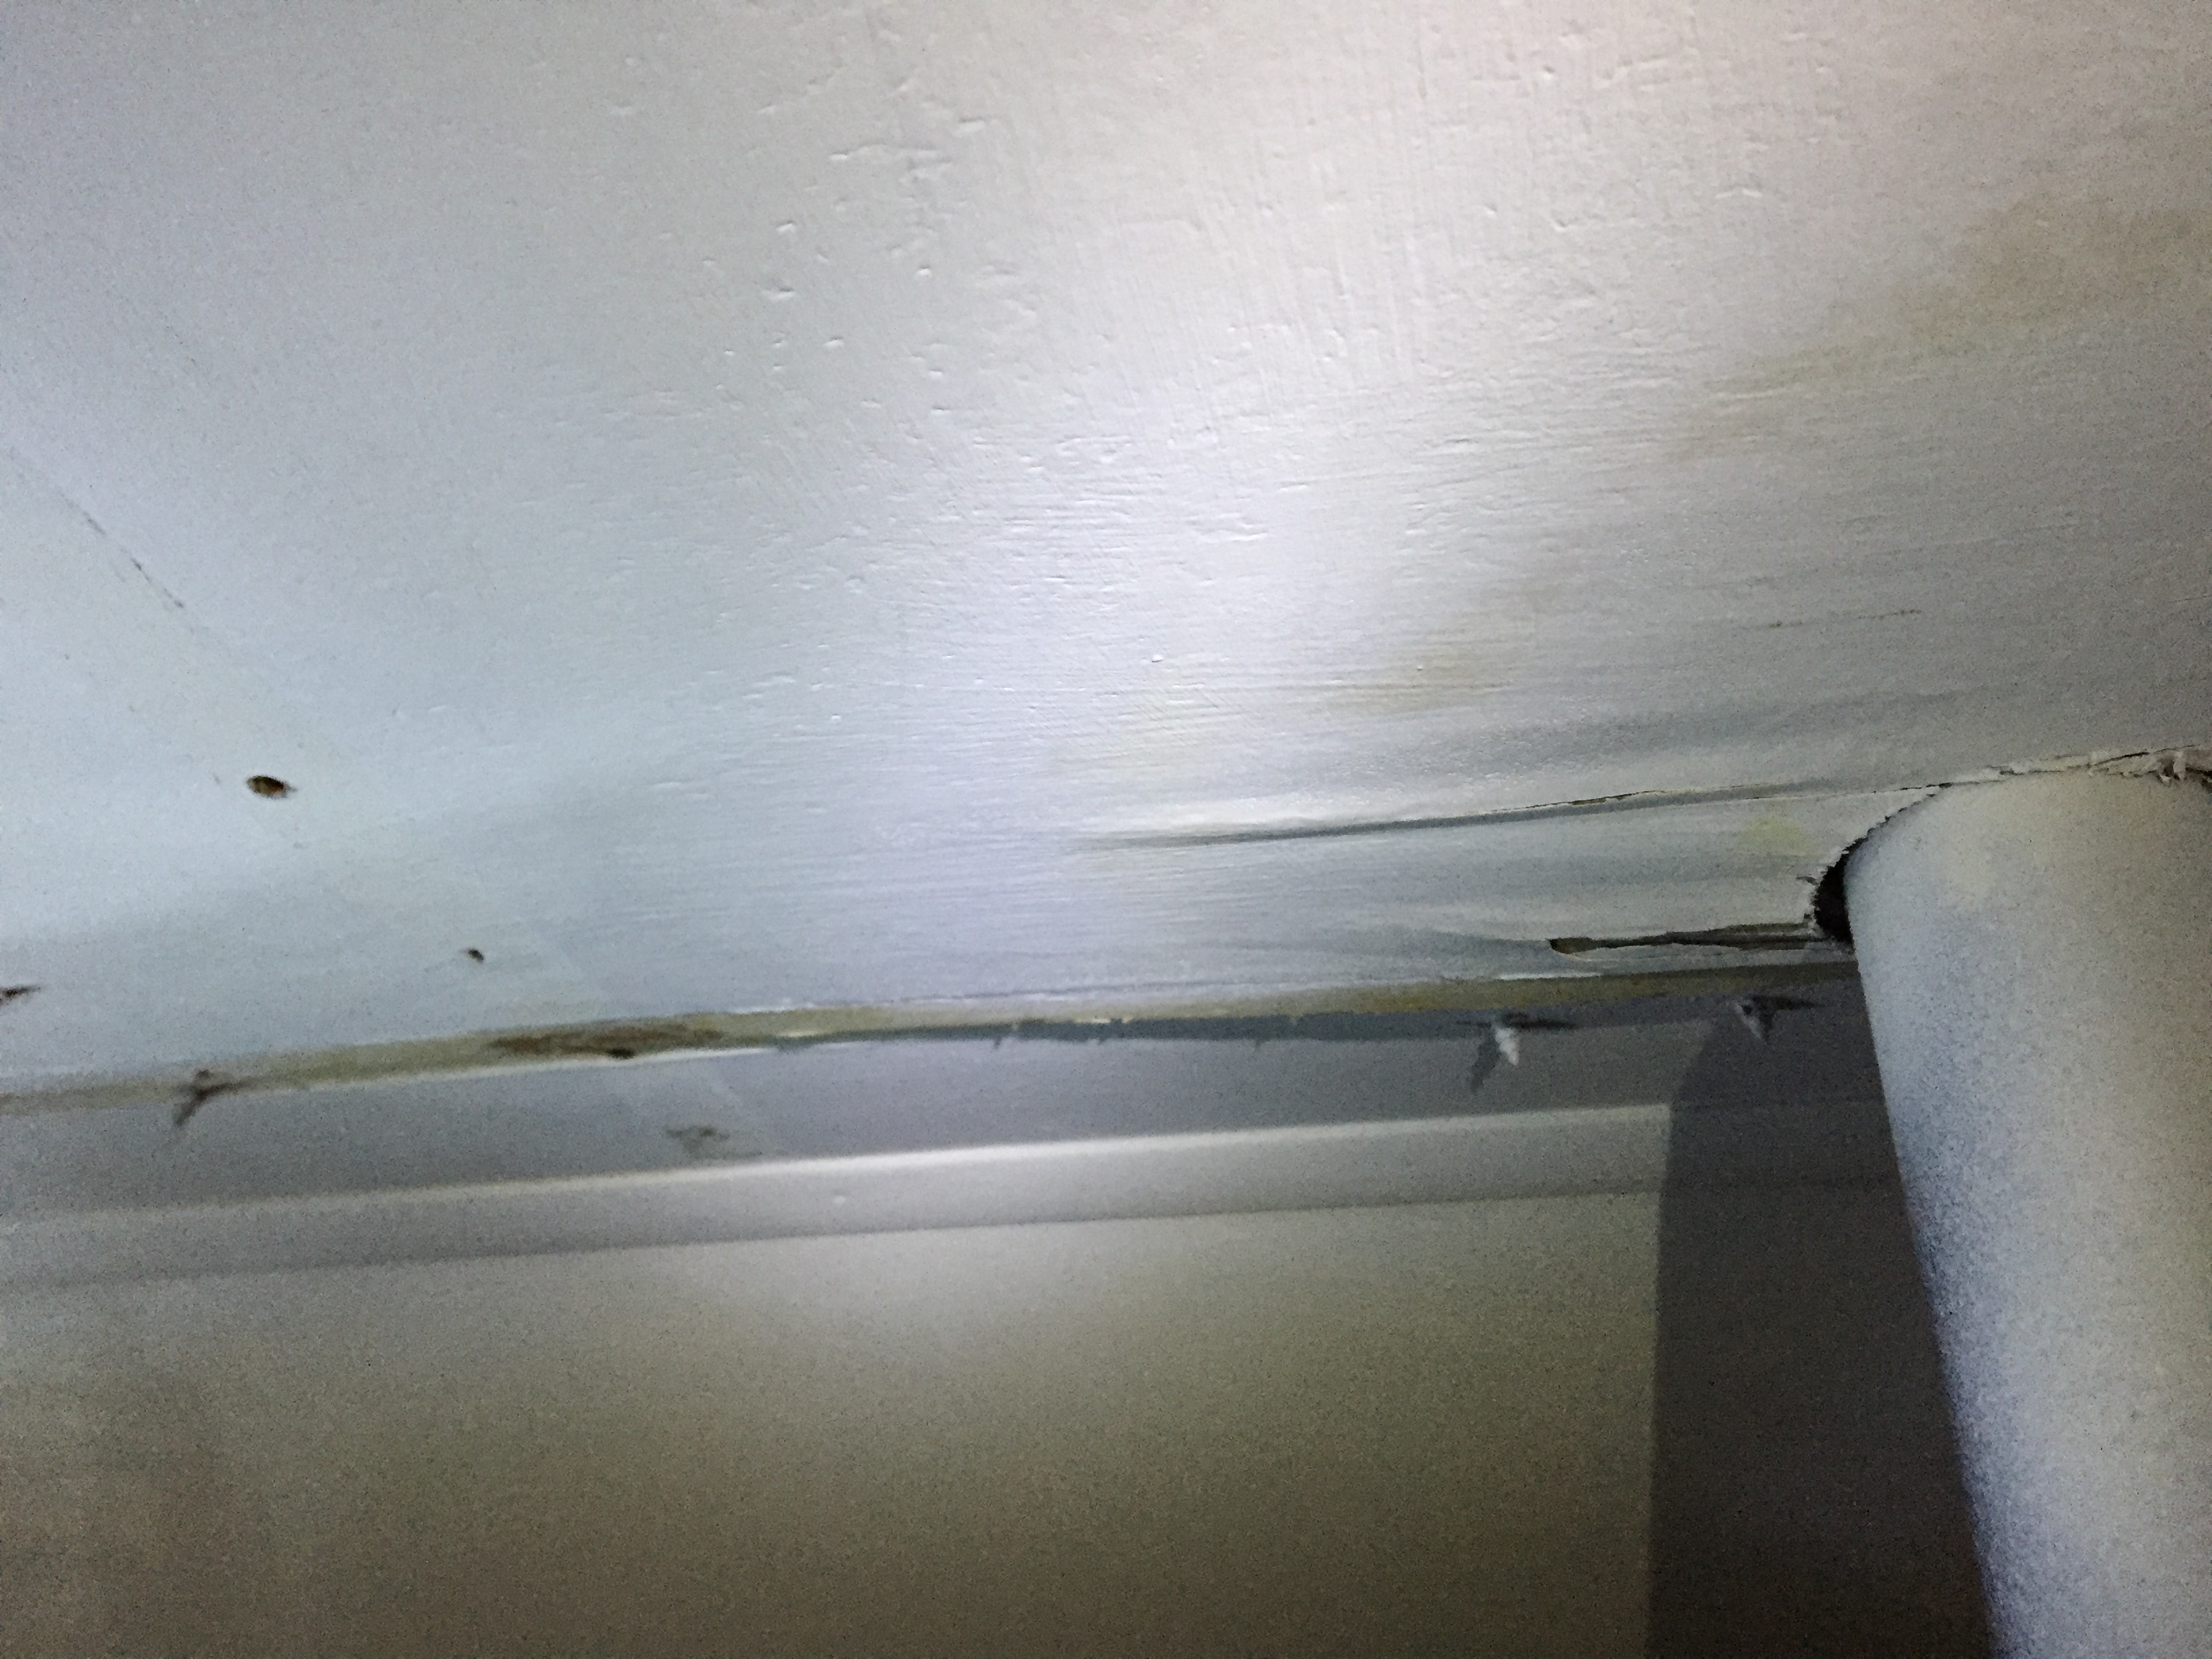
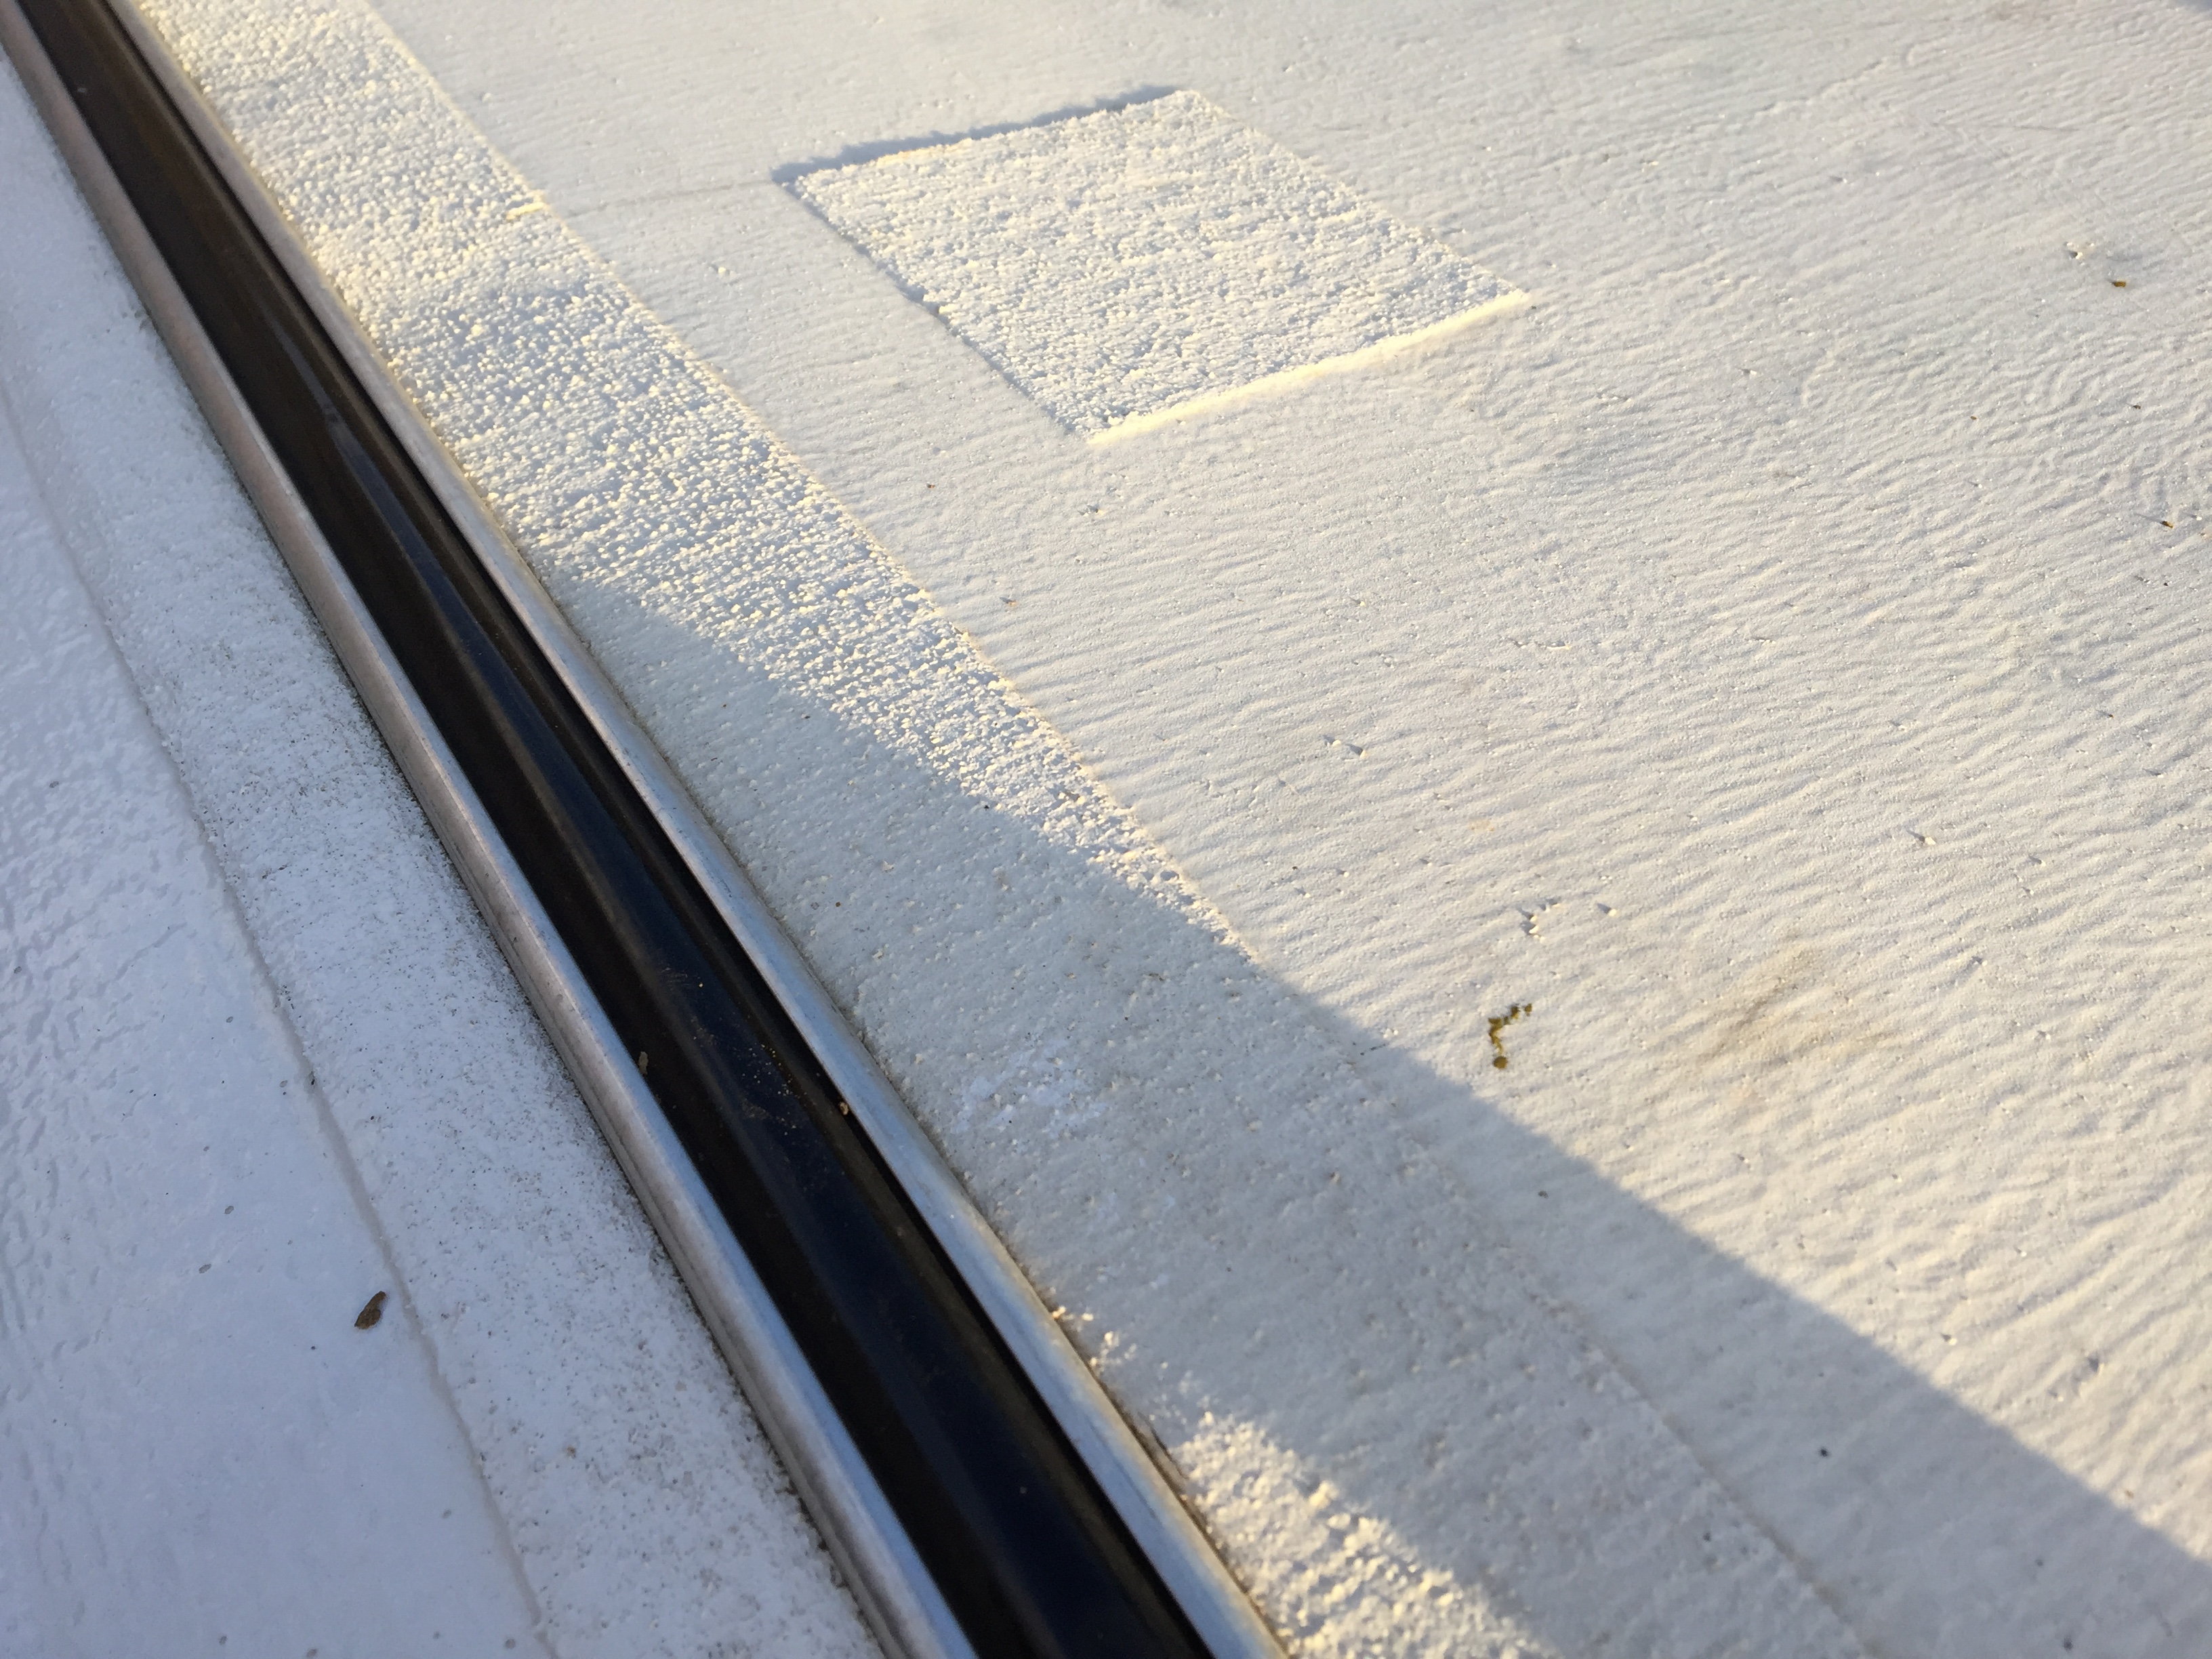
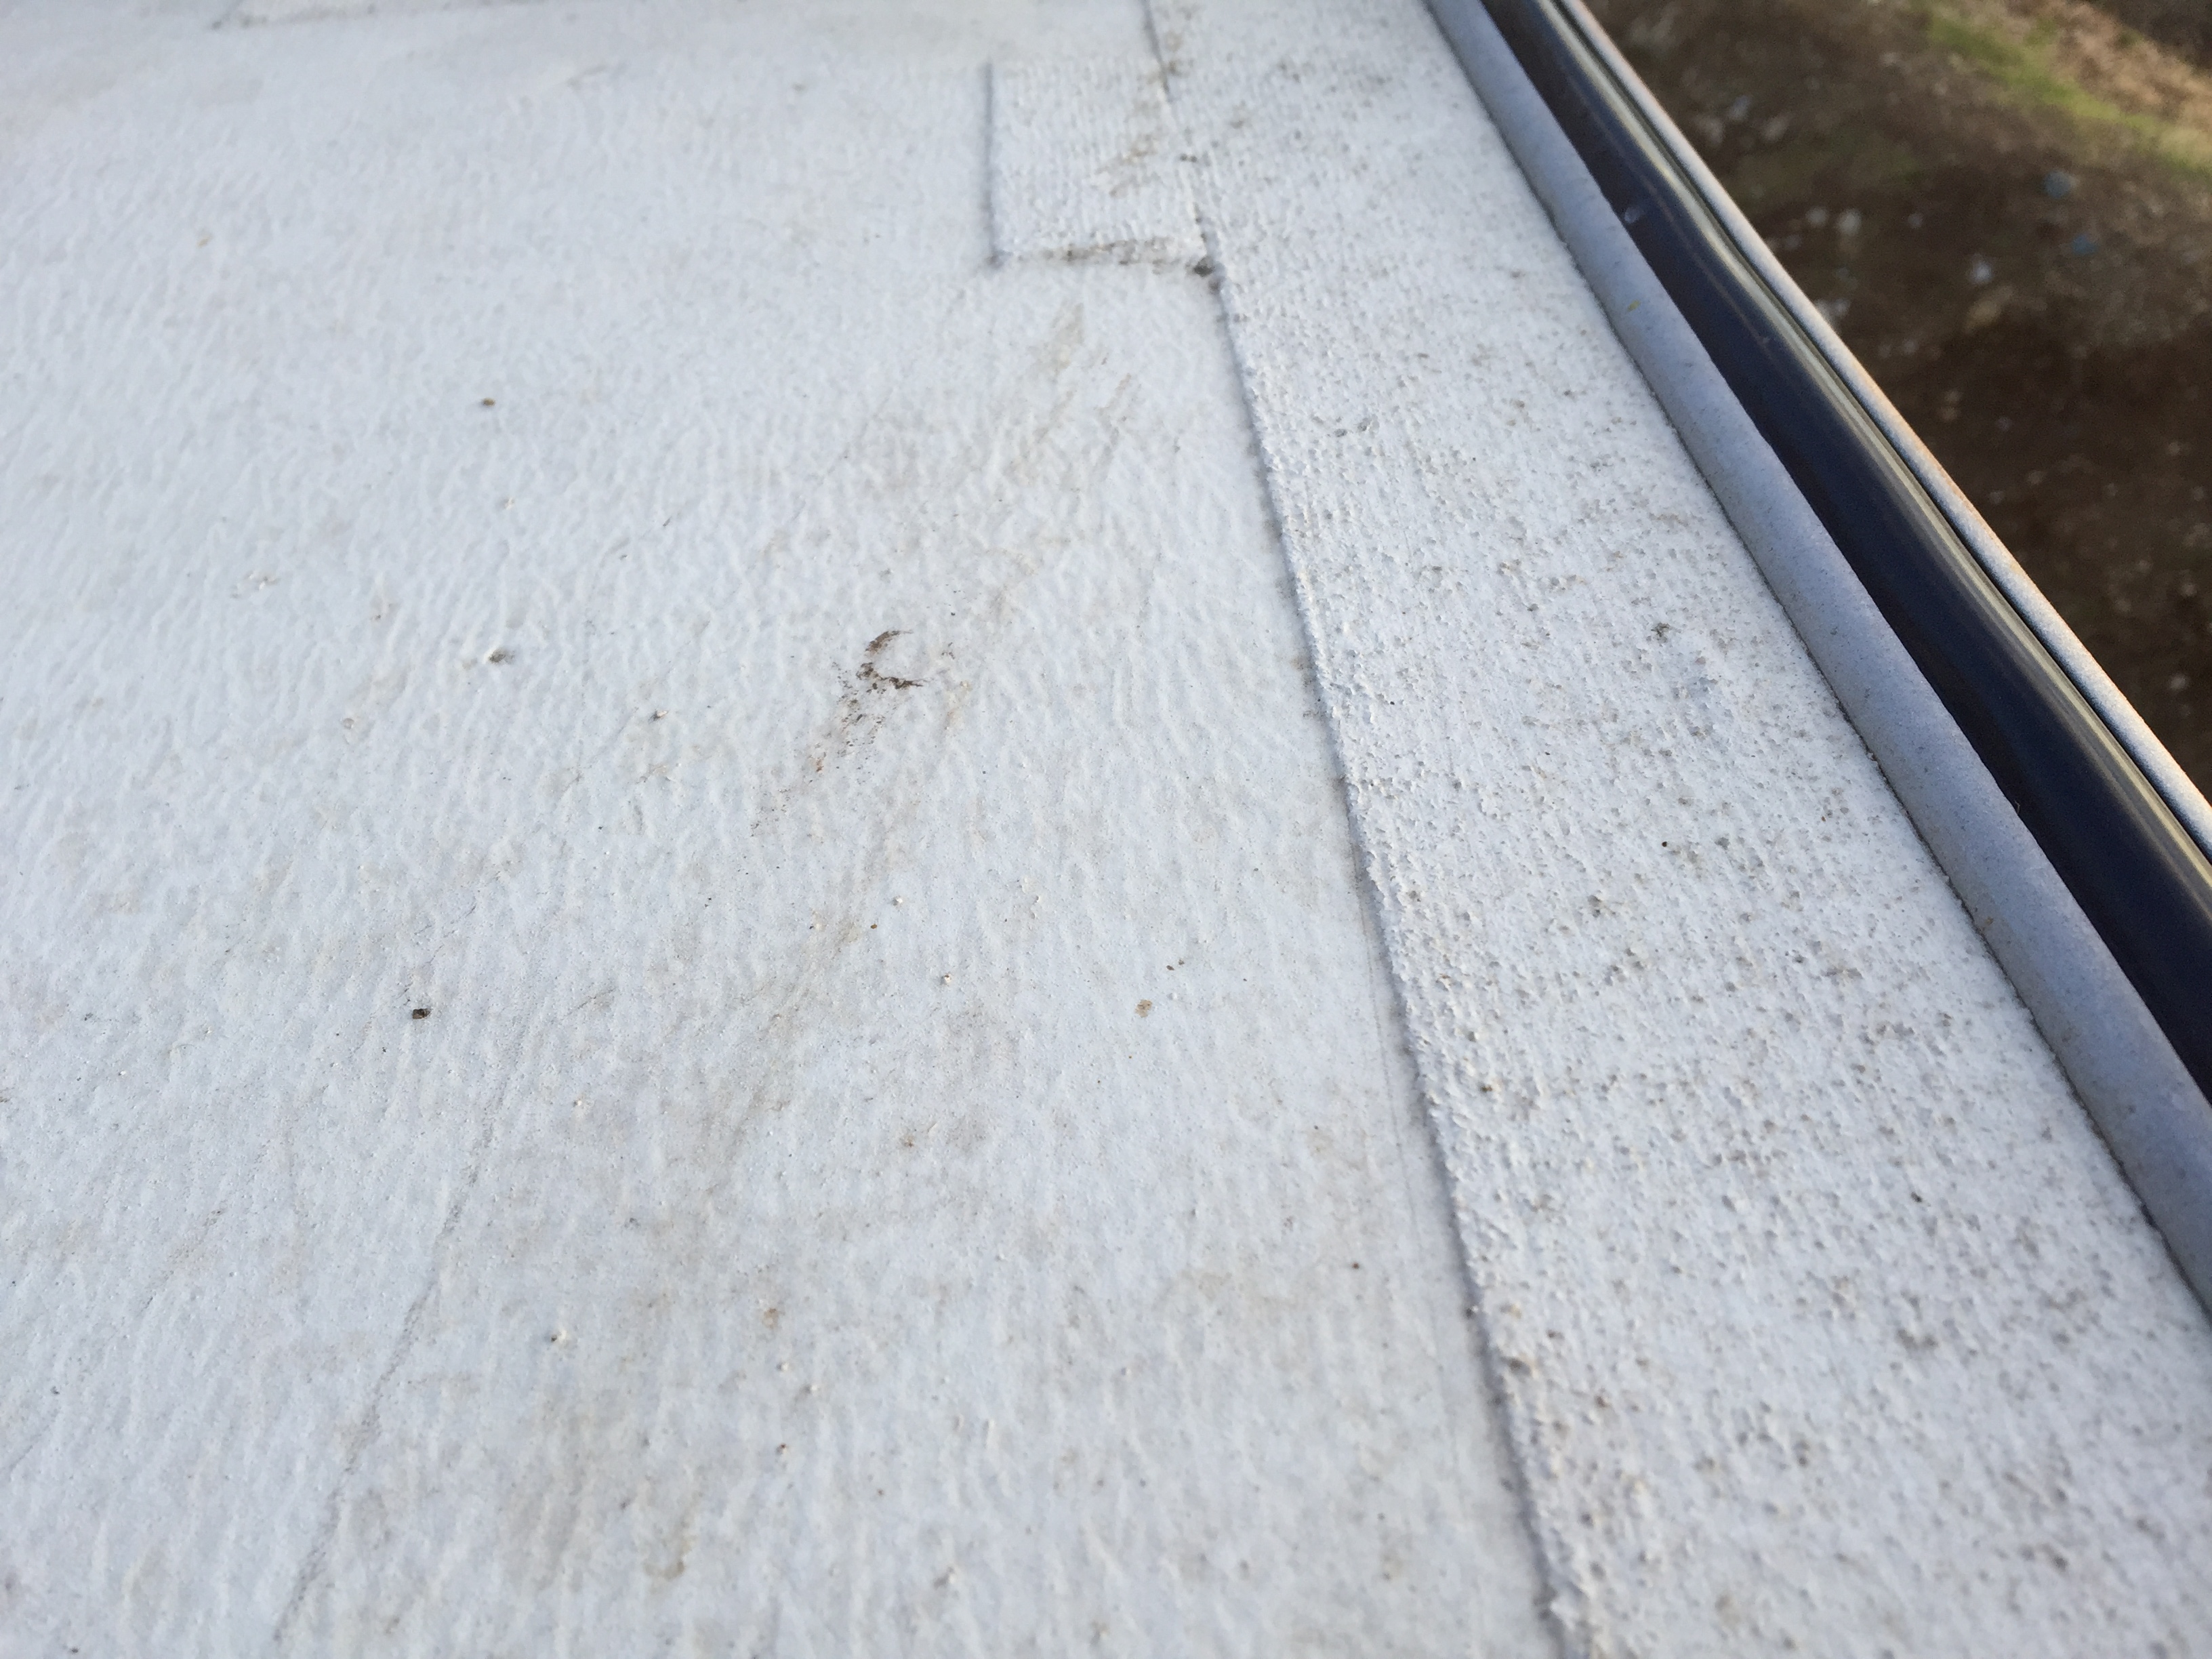
We traveled in our little Huntsman for exactly four months from August to December. We never experienced water penetration of the roof until we were on the Oregon Coast when it rained heavily for days. The lateral windows on each end of the bed leaked. I could see a water stain directly above the bed at the seam where the front of the rv starts to curve. The worst area of penetration was in the bathroom closet. This area had leaked before we bought it.The ceiling wood surrounding the pipe that serves as a vent for the black tank is rotten and splintering. But the previous owner sanded the roof down to the metal and sealed with eternabond tape. It looks very well done up there. So I can't figure out where the water is entering or what the first step should be in remedying the situation. When I stand on the roof, the area in the back above the bathroom feels weak. I haven't seen water penetration in the front of the rv since the heavy rain in Oregon. Is it possible that the rain entered through the back of the roof and moved it's way forward? I've read on the forum that the windows leaking in heavy rain is common. I'm hoping I can seal the rear of the roof once I find where it's coming in from and then replace the panels of ceiling wood in the rear of the rv where the bathroom is located. I've attached some photos in case anyone can offer some advice.
-
Does it make sense that a bad battery is the cause of our furnace not blowing hot air? It seems strange that it will continue to blow at all when the battery is discharged. But sure enough it starts out hot and then blows unheated air. Plugged in or with the gen on it blows hot.
-
We have been traveling for four months in our 84 huntsman. We rarely paid for camping and therefore only plugged in a handful of times. I suspected we had a problem with our coach battery because after driving long distances and after plugging in overnight a couple of times we just didn't seem to have as much power as we should have. For example, when plugged in, the furnace blew hot air all night. But if not plugged in, it blew hot for a 5-10 minutes and then would continue blowing but blow cold air. Also, when the inverters are on they almost always beep if the ignition is not on. None of this really bothered me because we were able to charge electronics while driving using the inverters. The lights and water pump always worked when boondocking. Occasionally the interior lights dimmed significantly. I finally had the battery tested and the machine said it's bad. The battery indicates it was purchased May of 2014. It's a cheaper autocraft deep cycle battery. Unfortunately the warranty only lasted one year. It has 550 cold cranking amps and a reserve capacity of 140. What kind of battery should I buy to replace it? I don't want to spend too much.
-
The engine is a 22r bottom with a 20r top. It is carburated. We've solved the problem. There is an oil leak which soiled the motor and prevented a good ground connection for the starter. Cleaned it up, added a ground wire from the battery to the starter. Starts right up
-
Thank you for the tips. I have the Haynes manual. Trying to test the ignition assembly using their troubleshooting guide. I've been unable to unplug the primary leads in order to test with a multimeter. Still trying to wiggle them free
-
Yes, I suppose it's turning over. It feels and sounds like it's about to start. I don't just hear the ticking of the battery trying to start. I don't know how else to describe it. I don't know if that's considered "turning over".
-
We've driven 10,000 miles in the last 3 1/2 months. Today our beloved Toy RV decided not to start while parked on a cliff in Santa Barbara. We were able to roll start it to drive to AutoZone and test the battery. Battery was tested and is fine. Took the starter out and they put it in their testing machine. It works but doesn't sound good according to the AutoZone folks. Replaced the starter. It still won't start. It sounds like it's just about to turn over when I turn the ignition. Seems like we might have an electrical problem. But I haven't been able to chase it down. Any ideas?
-
I'm so happy! It worked! I made a powder out of a little piece of abs I found at home depot using sand paper. Mixed it with abs cement. I found the best way to do this was to take a little bit of abs cement from the can on the little brush that comes with it and dab it in the abs powder. Then apply to area that needs repair. repeat as needed. I also tried mixing it all together at once but found it dried more quickly than I would have liked doing it that way. Black tank no longer leaking! Thanks for your help, forum
-
OK, I tried many things to get the leak sealed. None of them worked, not even fiberglass cloth used with the abs cement. However, I ran over a metal object in the freeway which tore a hole in the bottom of the black tank. I used the advice given here to combine ground up abs plastic with abs cement. It worked great. So, to fix the leak that I still have where the pipe connects to the black tank, I've removed all of the old epoxy and silicon that attached the pipe to the tank. My plan is to use use abs plastic which I sanded down into a powder combined with abs cement to connect the pipe to the black tank. Will this work? Or is this method only for patching holes in the tank itself? Both the pipe and the tank are made of black abs plastic. It looks like originally the pipe was connected to the tank using epoxy. Then a bead of Silicon was added around the edges. Should I do that instead?
-
Turn Off Propane Flame For Fridge When Filling Gas Tank?
candace replied to candace's topic in Coach ApplianceTech Issues
I left the flame on while filling the gas tank and I'm still here to tell the story. The pump nozzles in California are designed to keep fumes from escaping. -
Our fridge only works on propane. We always turn off the fridge when filling the gas tank. However, to turn it back on, one of us has to push the button inside the rv while the other lights the flame. I'm by myself this week. Can I leave the fridge flame lit when I fill up? I've read other opinions... Most people say it's not a problem to leave it on bc the gas fill is usually far enough away from the refrigerator flame. But on my toyota it's no more than two feet away.
-
Has anyone ever seen or know where to find a toy/model of a toyota motorhome?
-
Had to bleed the brakes the first time because the fluid boiled going down a very steep gravel road. Just took it in to a Les Schwab Tire in Bend, OR. The mechanic was great. He took the time to investigate and thought it was probably a problem with the brake master cylinder. Turned out the brake master cylinder had a lot of rust on the inside and was not allowing fluid through to the back brakes. So the front brakes were doing all of the work and that's why they were burning. Replaced the BMC $120 parts and labor. I couldn't believe how much the pedal came up and how well it stops now. I just thought these rigs were difficult to stop all this time. Now I smile every time I push the brake pedal. It's the little things in life
-
We just had our brakes bled and fluid replaced two weeks ago.all of the sudden, I lost the pedal yesterday. Having to pump brakes a few times to get the pedal back. Just pulled over and noticed steam coming from under the Hood. Brake fluid was coming oozing from the rubber cap on the brake master cylinder reservoir. I smell a burning smell. What to do?