


fudimo
-
Posts
10 -
Joined
-
Last visited
Content Type
Events
Profiles
Forums
Gallery
Posts posted by fudimo
-
-
On 5/17/2016 at 5:17 AM, jjrbus said:
Is the $100 a tire mounted and balanced, installed? Jim
Sorry for the late reply. The tires were Hundred bucks ea without mount and bal, I took the MH to a local tire shop and had them done.
-
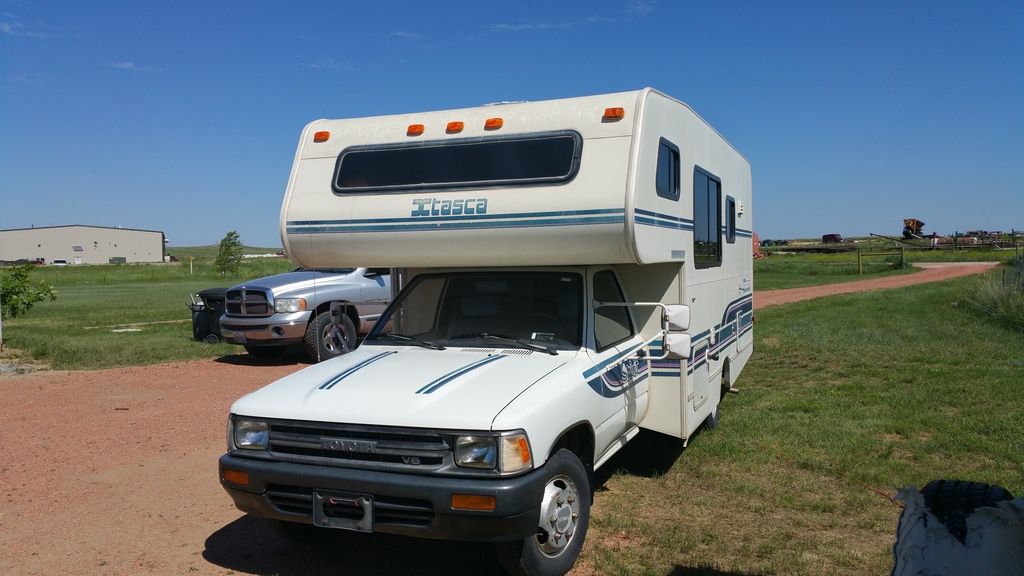
Well this 92 Toy is in Beulah, WY today. Sand Creek camp area to be exact. Just enjoying some outdoors and a little fishing.

Here is a pic of the creek.
And another picture of the rig.
Here is a picture of today's front yard.
Here are some interior shots of the Itasca.
I took out the original couch and built a base for a new place to sit or for a Grand kid bed. My first attempt at re upholstering.
This is the storage under the new couch. It is now very handy to access tool box and assorted stuff.
I added an aftermarket console and a wireless back up camera. I will be putting in a gauge and a switch for the air suspension in that console.
A new blue tooth digital radio is on it's way to replace the POS that came with the rig.
Here is a picture of the new flooring this was done before the couch rebuild.
-
I just bought some Yokohama 185 r 14 D's from tirerack.com $100.00 ea.
-
I was skimming through a catalog at an RV dealer and came across an identical camera set up I purchased from Amazon for $57.00
The RV dealer catalog had it listed for $540.00 The ad in the catalog had the same picture on the monitor screen
as the one that was on the box my monitor came in. -
As an Owner of a newly purchased 91 Itasca I approve of your remodel. It looks fantastic.
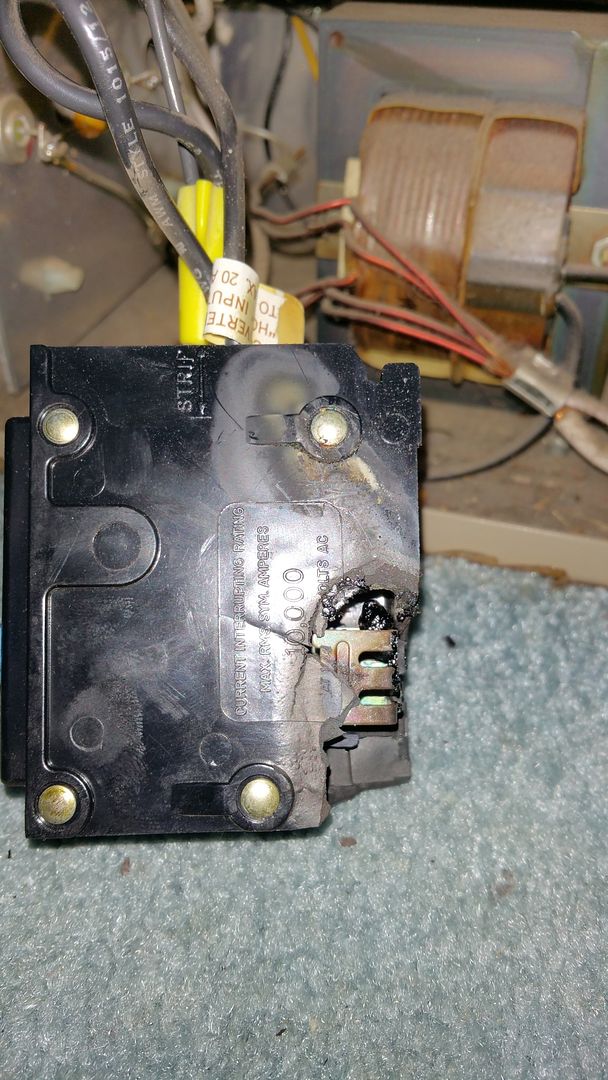
FYI. One thing I learned today you need to check the tightness of all the electrical connections in your electrical
panel under the couch. I turned on the AC and Fridge today and the wiring on the breaker panel smoked and started to melt the 2 circuit breakers.
I had to shut down shore power and found the wire to the main terminal breaker panel overheated due to a loose connection at the terminal lug.
Edit to add links to photos
-
That thing looks great.
-
I was just looking at the 4" monitors at a local store. Everyone on here is right, thankfully I read your posts before buying one. It would have been pretty small and hard to see. 7" will be now.
Let me know how your camera instal goes. If you need any help post in this topic and I will get back to you I have set this topic to forward to my phone.
JP
-
I installed this system on my Itasca.
AGPtek® 7 inch TFT LCD Car Rear View Monitor With Wireless Night Vision Car Backup Camera
Instalation is easy. The System works OK but gets a little fuzzy if left on for too long.
I may try moving the transmitter to a better location. It is now mounted
behind the left tail Light housing and connected to the parking light circuit.
The camera is mounted on a storage box attached to the rear bumper.
-
!991 Itaska I'm in Gillette Wyoming.


1993 Warrior graphic removal/restore
in Improvement and Do-It-Yourself Projects you have done to Share!
Posted
Try one of these wheels. They will do the job for you.
https://www.amazon.com/AES-Industries-Pinstripe-Adhesive-Removal/dp/B0020HQRQC/ref=sr_1_16?s=automotive&ie=UTF8&qid=1467042473&sr=1-16&keywords=decal+remover
I have removed the decals from the entire cab and some of the house of my Itasca. Use a corded electric drill a cordless won't run long enough.
Use the rubber wheel to remove the decal it may leave a residue at the edges. For this you will use goo be gone and a plastic scraper.
After the decals are removed there will be some ghosting or color drift. Use a small buffer with some rubbing compound to blend out the ghosting.
Go easy with the compound don't burn the paint.
The polisher I used. http://www.walmart.com/ip/WEN-6-Waxer-Polisher/22053050