YoungSage
-
Posts
59 -
Joined
-
Last visited
Content Type
Events
Profiles
Forums
Gallery
Everything posted by YoungSage
-
Yes. THank you, WME. THe strip came with a remote but it seems that in order to use that I need to use the AC adapter and accompanying IR RGB control Box (small white box in the picture). It seems the wisest move would be to connect the strip directly to the wiring of one of my existing lights, use the light switch to turn it on and for go the remote and dimming capabilities. This strip apparently can be cut to create at least two strips out of the one long one so I suppose I could set up two of these. I will probably not use all of them as I don't believe I need 300 LEDs in here and, as you mentioned before, the draw from my batteries would be substantial.

-
Thanks WME. Just what I needed.
-
Hello friends and electricians, I have an LED light strip that I want to instal in Louise, my 88 Sunrader. How do I wire it into my 12 volt system? Is this an easy DIY? Anyone done this before and have ideas? Thanks in advance. This is the package I got: https://www.amazon.com/dp/B00B2F3KDQ/ref=asc_df_B00B2F3KDQ5197706/?tag=hyprod-20&creative=395033&creativeASIN=B00B2F3KDQ&linkCode=df0&hvadid=167141615005&hvpos=1o1&hvnetw=g&hvrand=33233298191203561&hvpone=&hvptwo=&hvqmt=&hvdev=t&hvdvcmdl=&hvlocint=&hvlocphy=9033109&hvtargid=pla-314546532451 Gracias
-
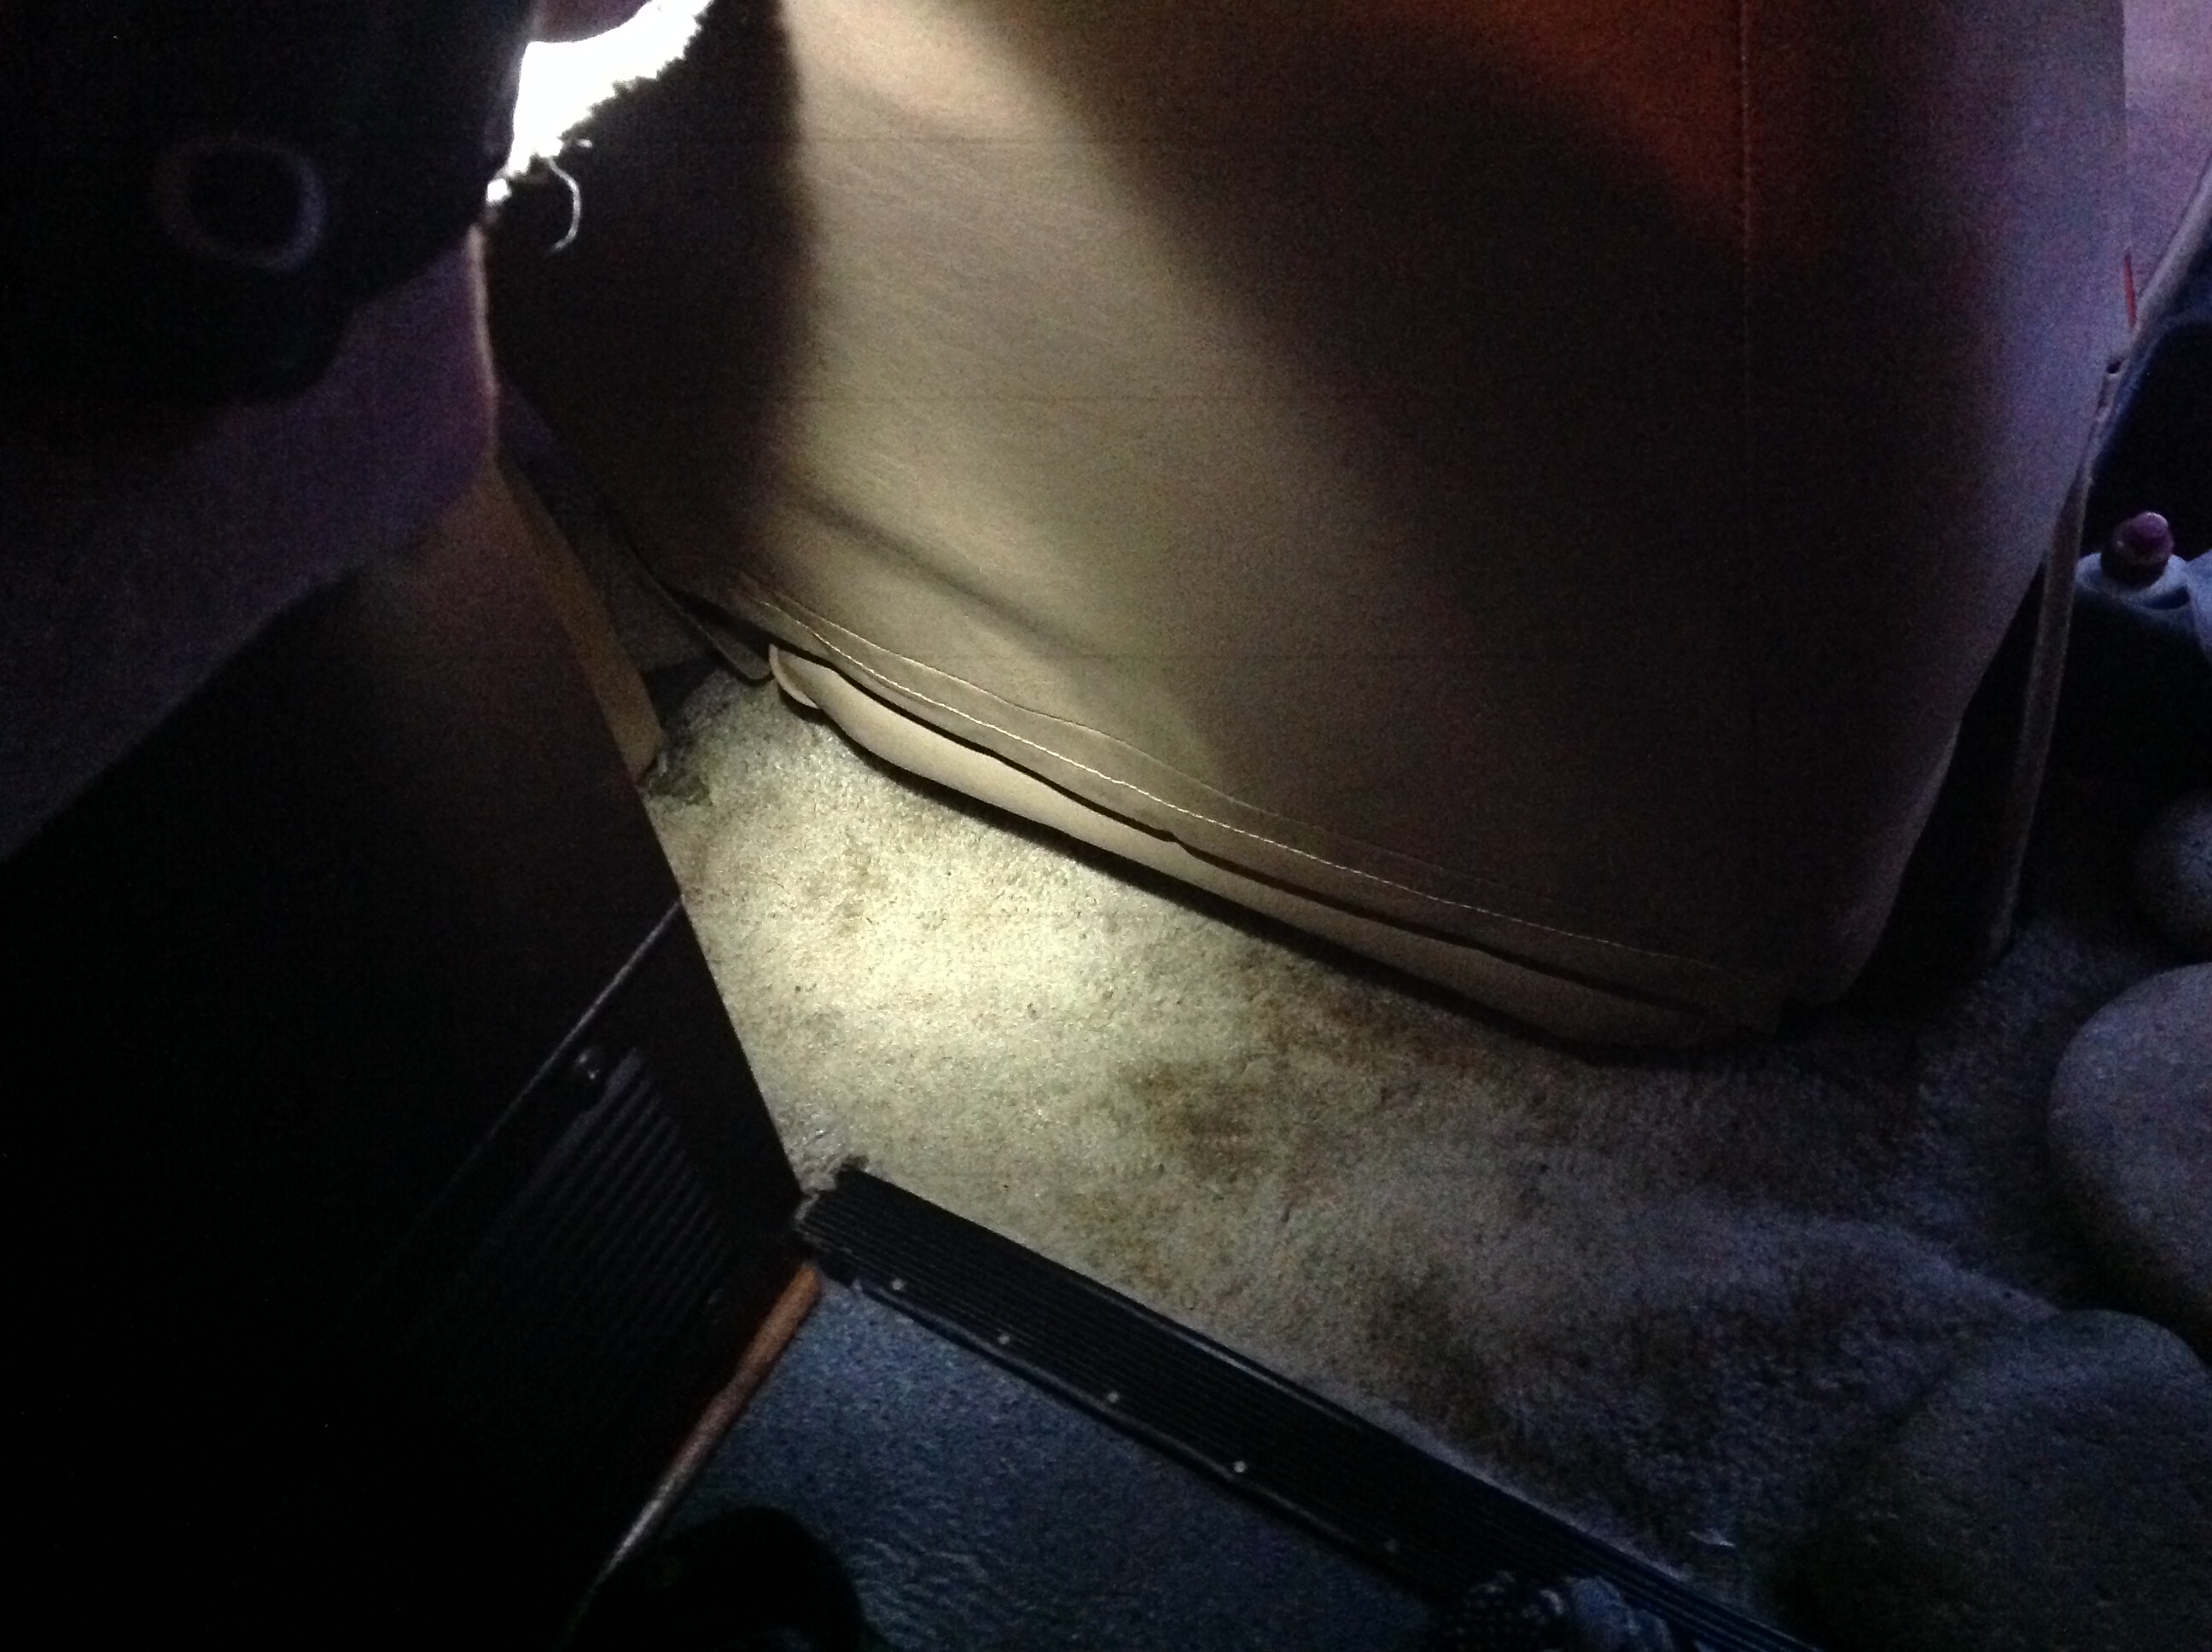
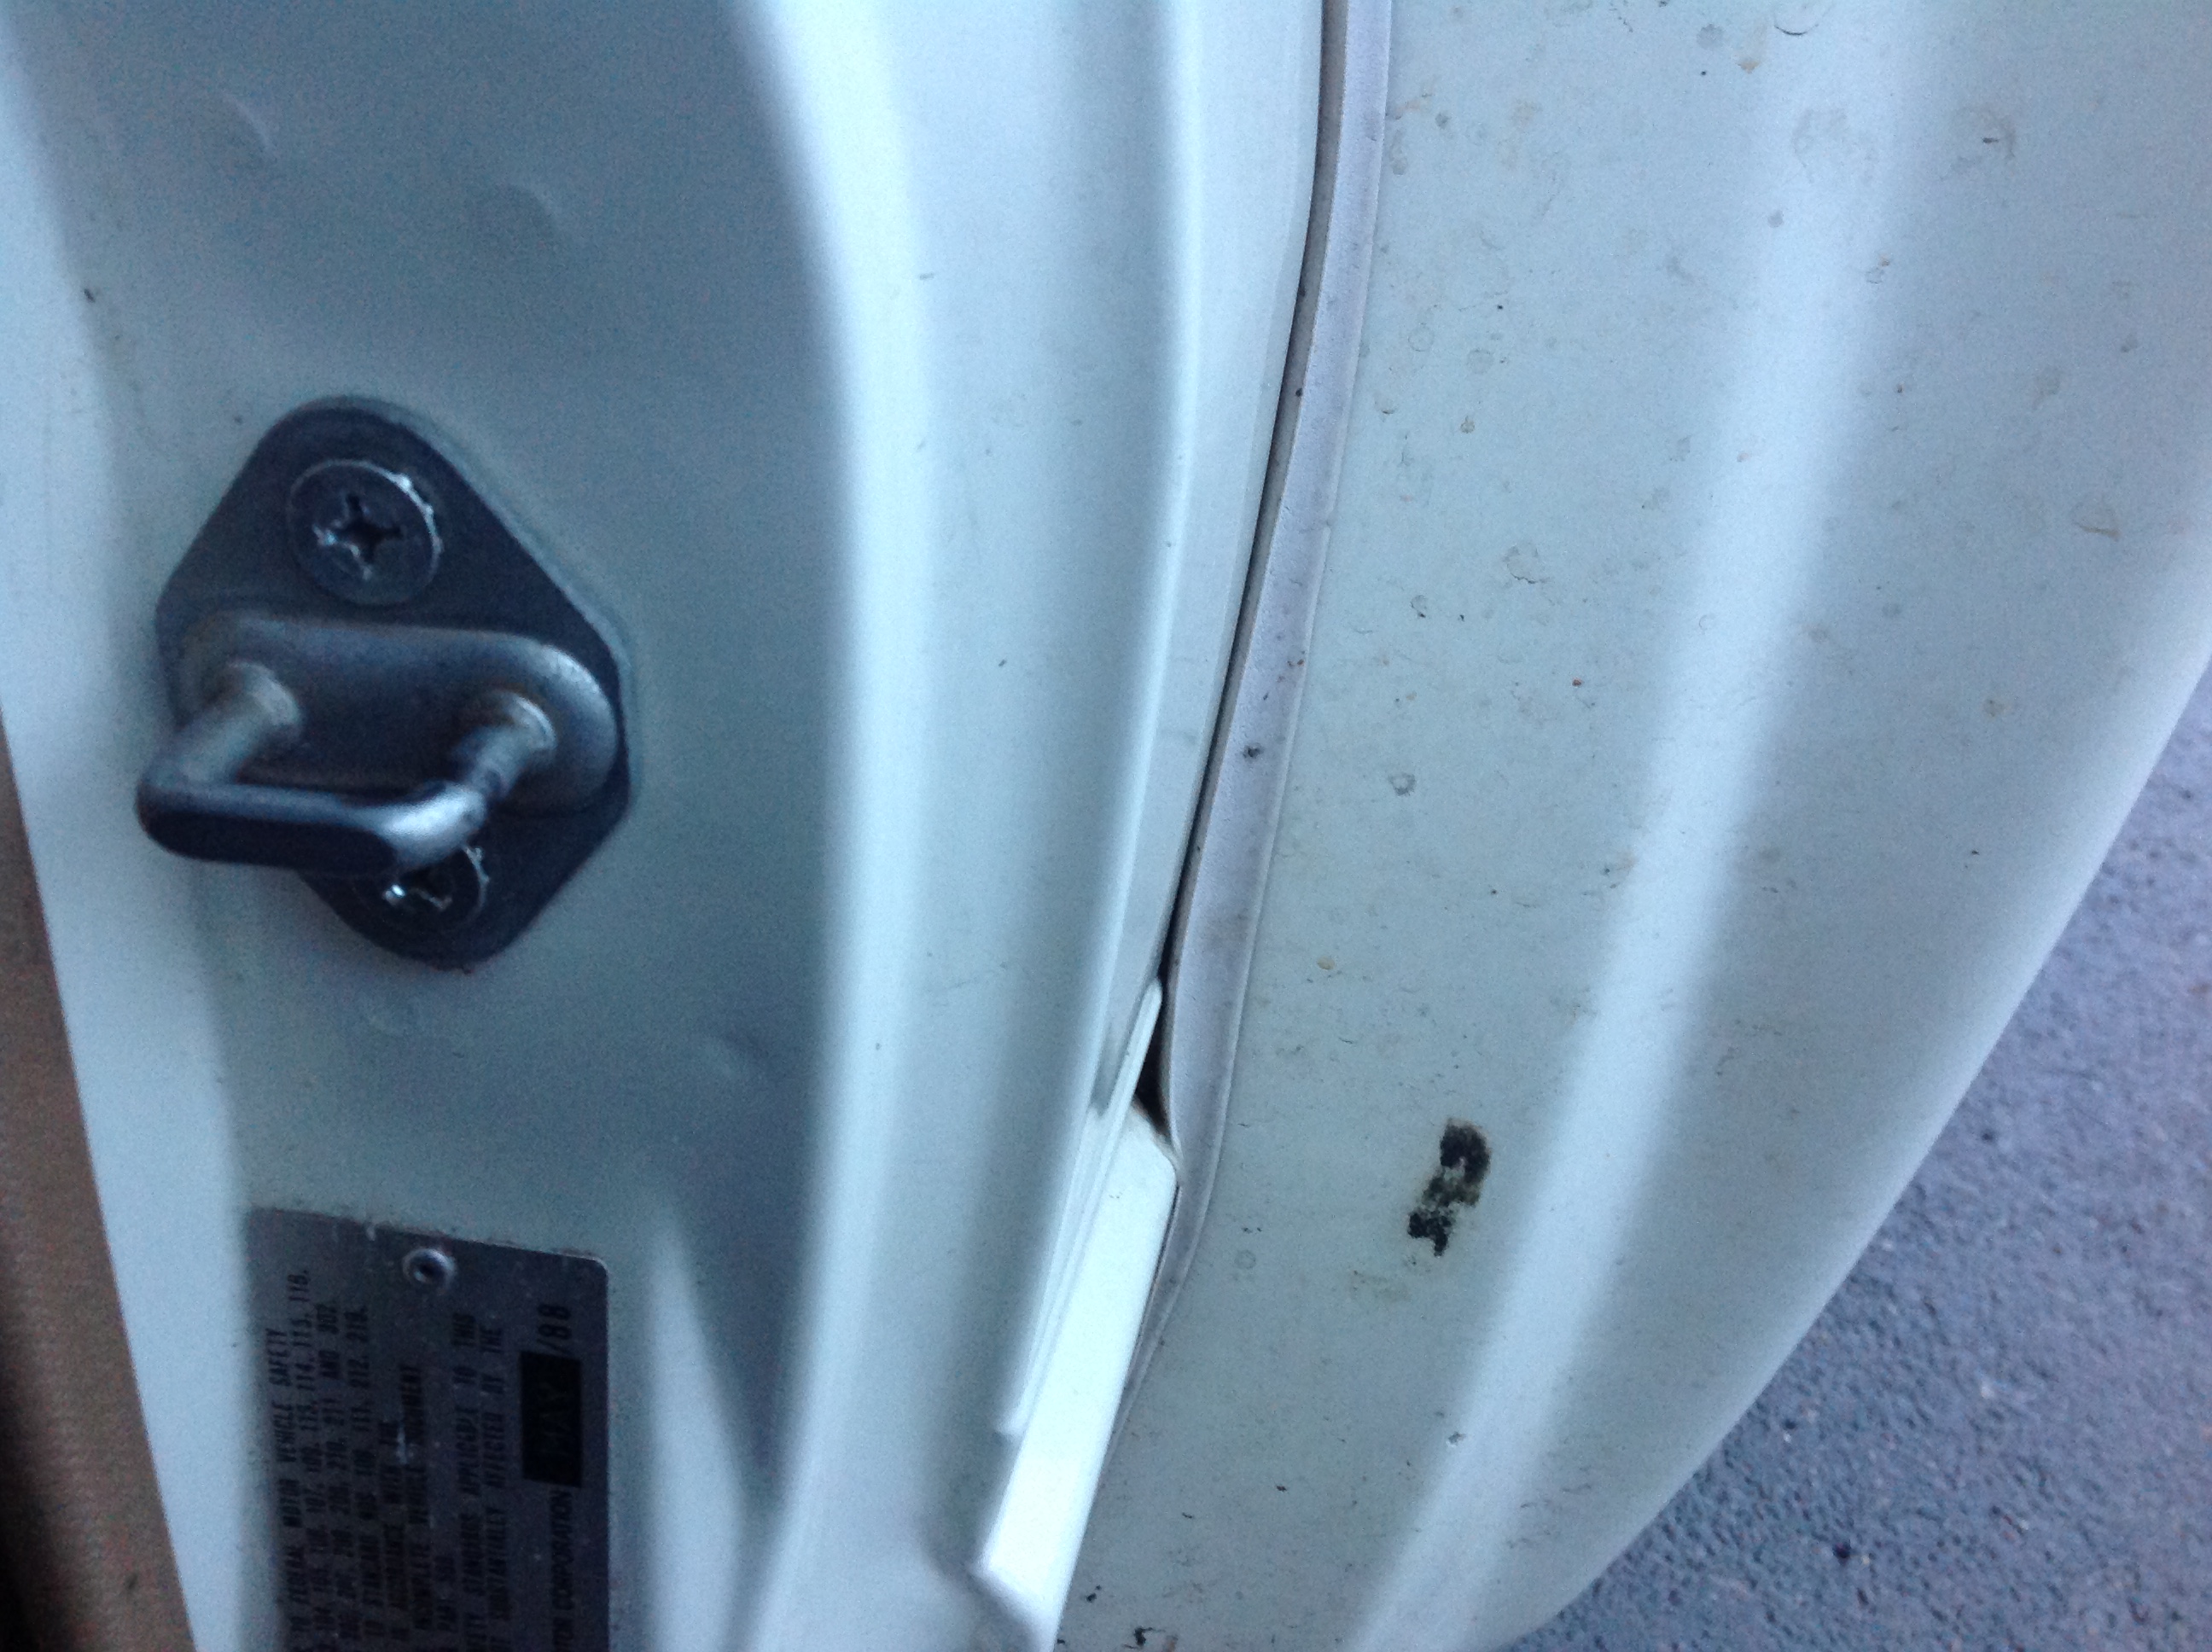
 I seem to have a leak in my 88 Sunrader that is soaking the carpet in the truck cab, behind the drivers seat - down in that nook. Where might this be coming from? I notice that the 1" wide rubber gasket on the outside of the rig that seals the cab to the Sunrader fiberglass is a little buckled. I was considering going after those small gaps with my caulk gun... or is it necessary to replace the 1" rubber gasket? Anyone have any experience with a leak of this nature? Thanks in advance!!
-
I got two sets of chains from LEs Schwab for my rig - one set for the front and one for the outside dually tires. The ones in front are doing fine but the ones on the rear have decomposed after only a few uses. Anyone have a suggestion for a beefy set of chains for the rears that will hold up to the weight back there? Thanks team!
-
I bought some of the sticky foam backed LED panels and installed them tonight. In about ten minutes of running them the sticky back melts due to heat - creating smoke - and the LEDs are running HOT. Strange. I have not heard anyone report this here. I am a little sketched by these things and will be putting my regular bulbs back in till I can find a solution. Thoughts?
-
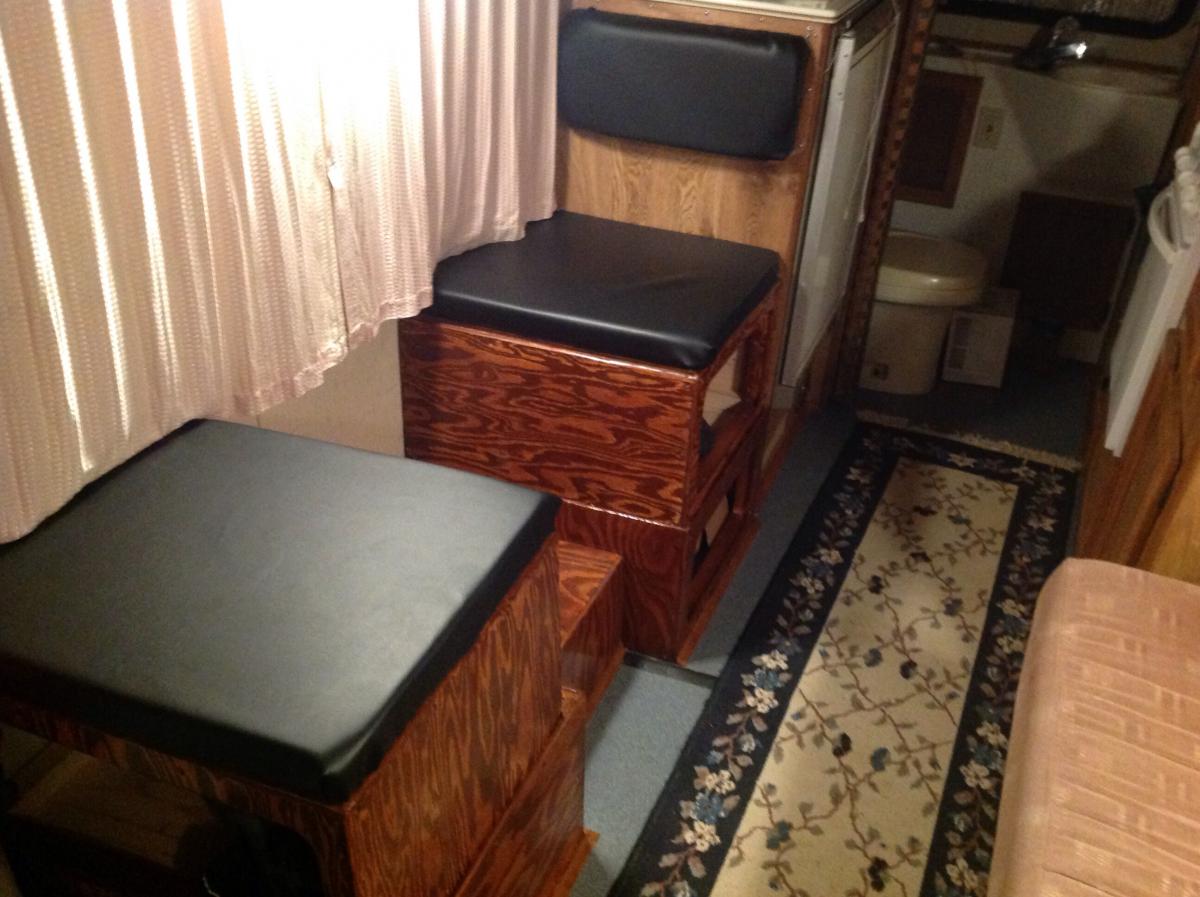
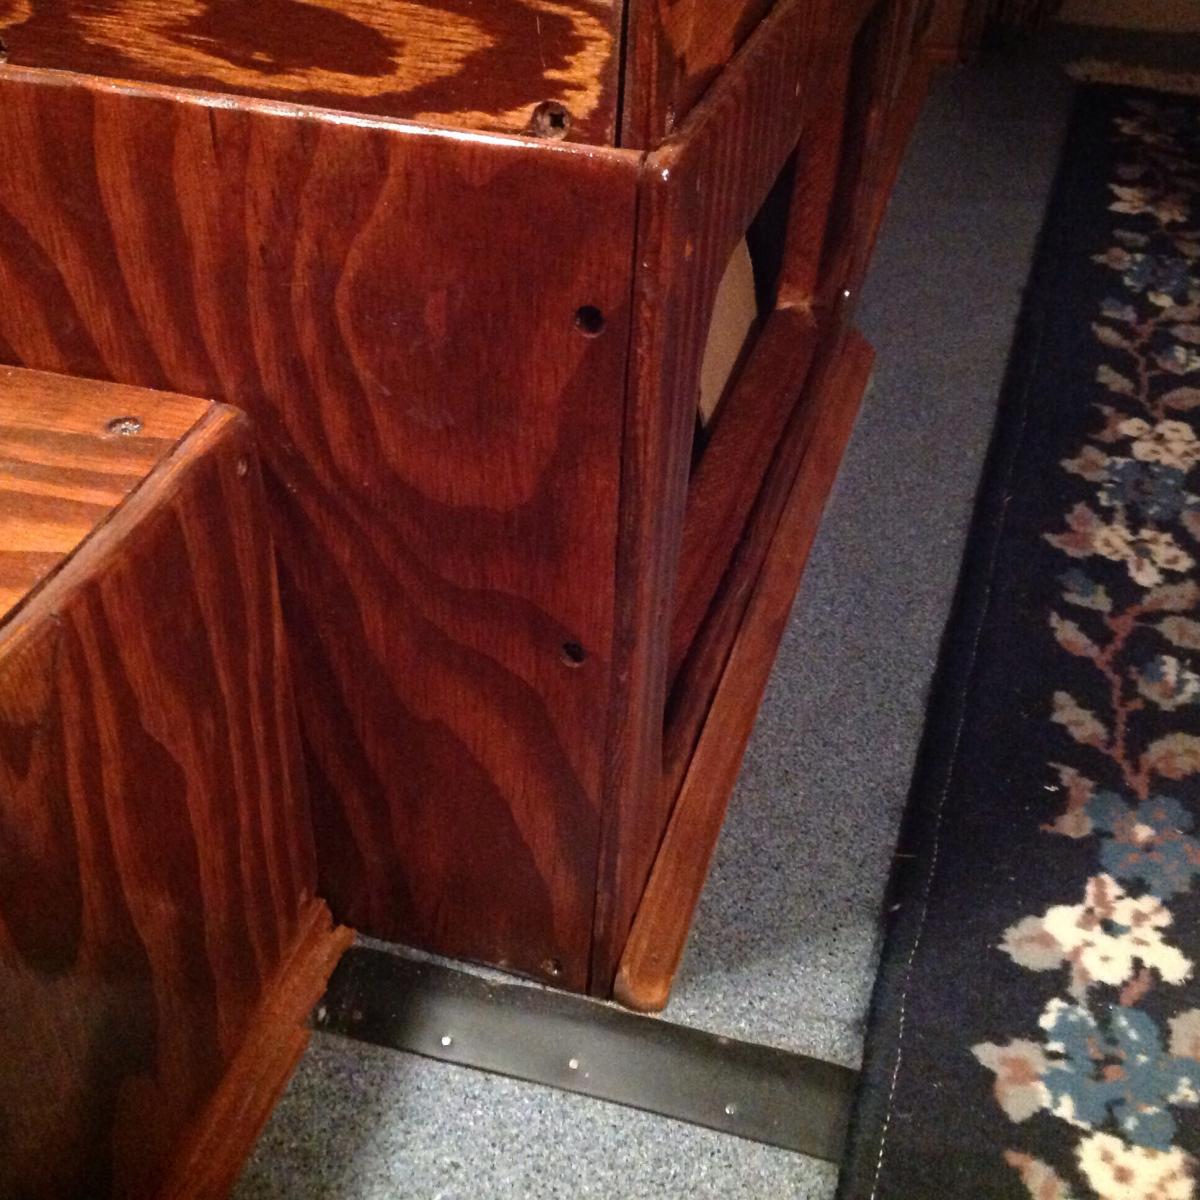
I did it! Tore out the dinette, the marshmallow chairs and the carpeting. I installed an industrial strength linoleum floor, built storage box/seats out of genuine plywood and upholstered them in basic black naugahide. I am very pleased with the resulting organized and clean, sweepable space. Stoked. I even put a "sweep out" in the doorway for easy,no-dustpan sweeping! I anchored the boxes in with molding on the floor and a slightly larger box on the lower level with 1/2" lips that hold in the upper boxes. Barring any catastrophic stopping they are locked in place and yet easily removable. Thanks to everyone that offered advice and suggestions in this process. It would have been far more difficult without this wondrous community of enthusiasts. Hats off!
-
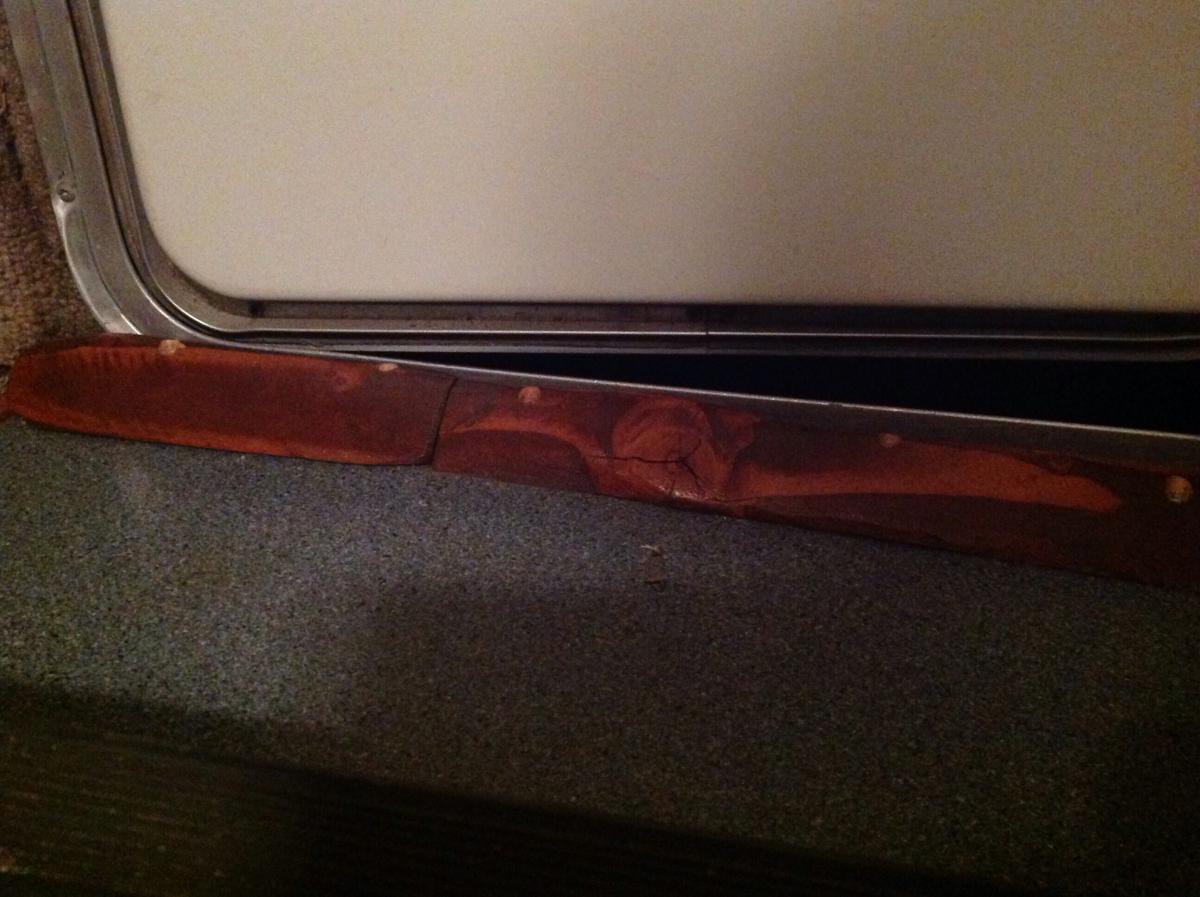
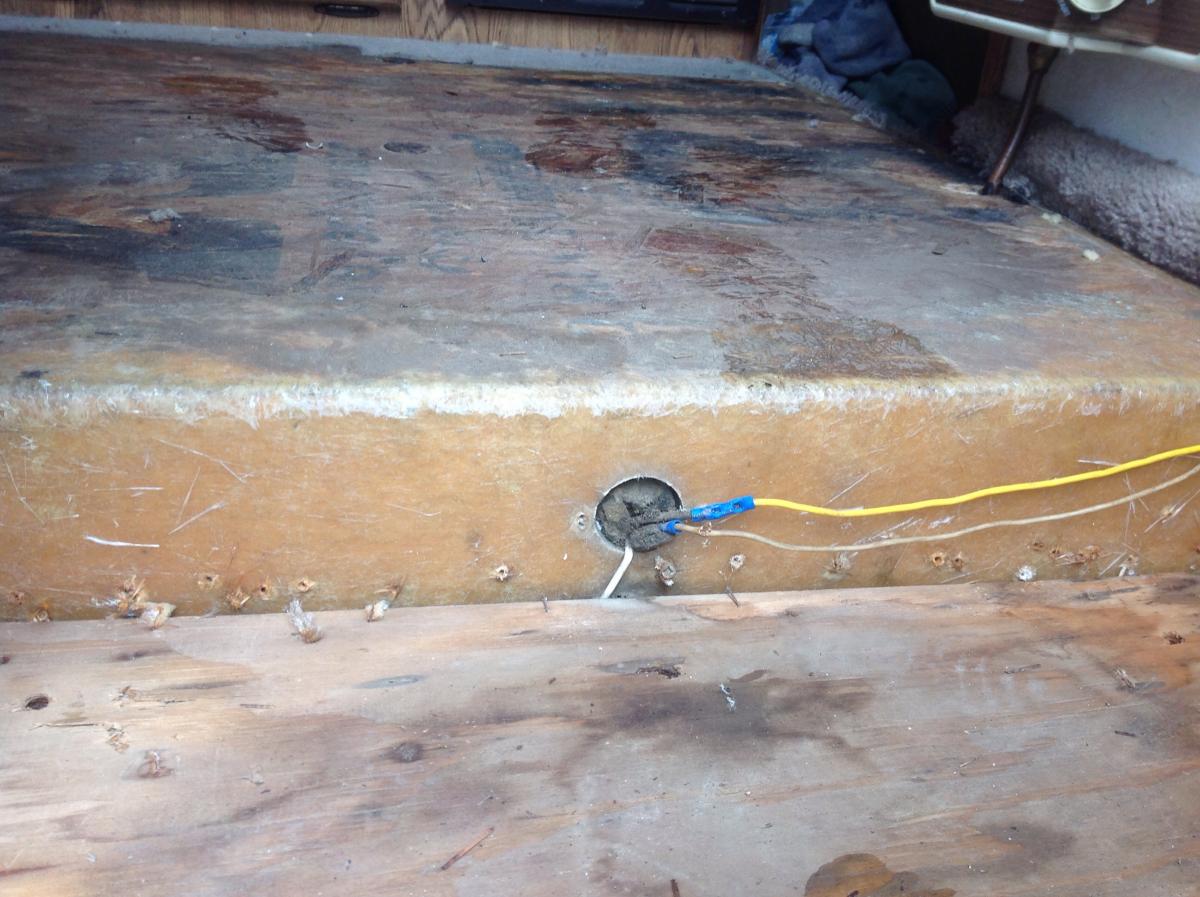
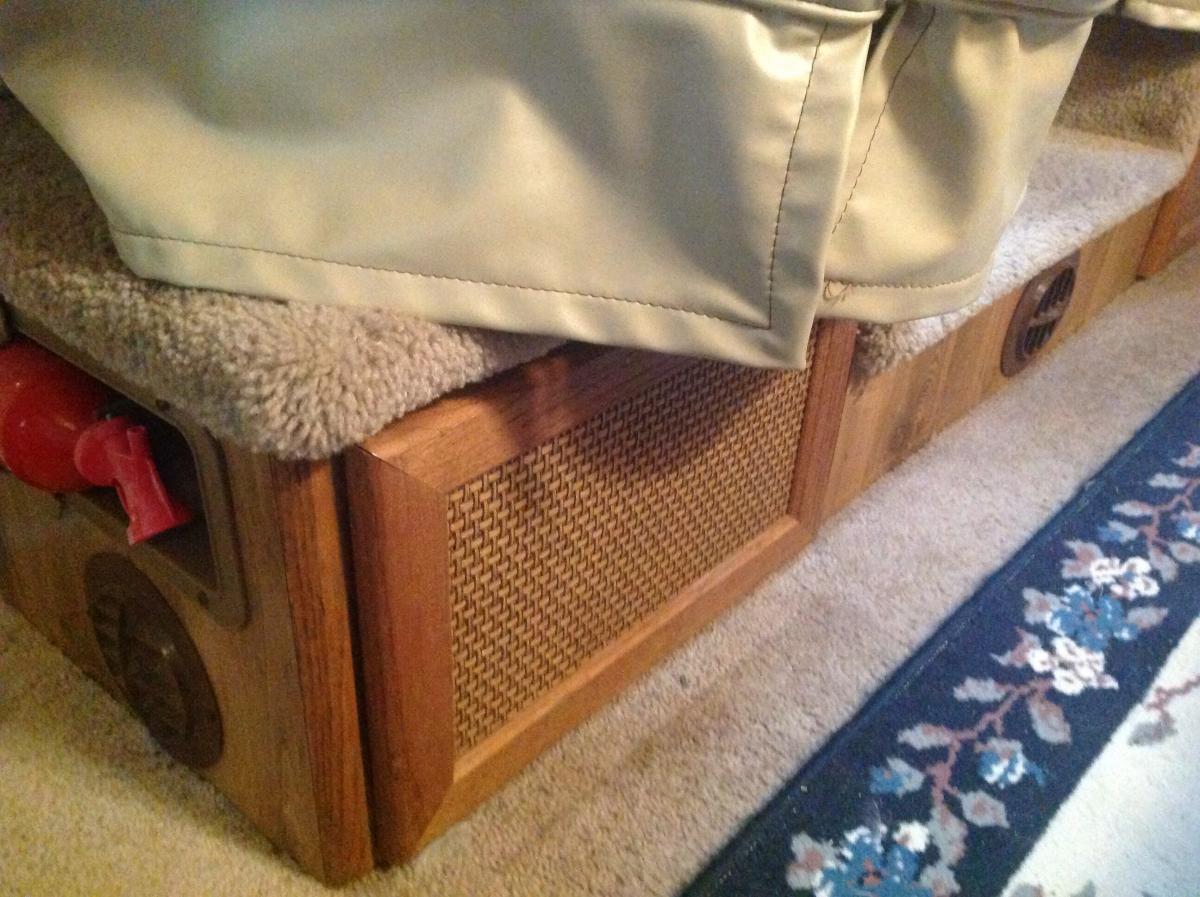
I have removed the dinette and carpet and readying to install a laminate wood floor. Upon removing the carpet in the doorway/step I noticed this electrical wire coming from a hole in the coach. One of the wires looks a bit worn. Anyone know what this wire is for?
-
If I were to remove my Dinette I would close-off the heat vents that are in the dinette base - thus leaving only two vents to blow into the rig when the forced air furnace is engaged: One at the base of the fridge in the living area and one in the bathroom. Is there a problem with closing off and eliminating those two vents under the dinette? WIll this put undue backpressure on the furnace and mess it up?
-
I found this one... Kinda steep though - http://www.scanmarineusa.com/wp-content/uploads/Wallas-XC-Duo-2014-Dealer-B.pdf
-
Whoa! Corbin K! You really shared some significant extra special super cool lightweight upgrades. Where did you find that diesel furnace/cooktop unit? And your cooler sounds tremendous as well - I would be heartened by some links if you feel like sharing more. I think I would feel more free to create space and rig I really want if I too were to abandon all concerns of "resale value" as you mentioned. I would love to clear out most of the stuff in here. You have given me more courage. Thanks. Your suggestions and stories are always rich. Much gratitude Corbin K!
-
Hey MWKELSO, Inspiring! You are firing me up to take this further. . . . Your post brings up for me the old harbinger of "resale value" that I have been clinging to sort of - the feeling that I need to keep and maintain the vintage 80's theme in here. In reading your post I am reminded that this is MY SPACE and I can create more space by getting rid of more of the outdated and inefficient and LARGE technologies they had available in the eighties. Electric coolers for the fridge. Pee bottles and wag bags for a toilet system - making due with one sink in the rig instead of two - reconsidering the shower - take it outside and free up some more space. If I take it too far I may end up driving around in an empty fiberglass husk with a laminate wood floor. Sounds pretty good. I will find the middle way. Thanks for your thoughts and sharings.
-
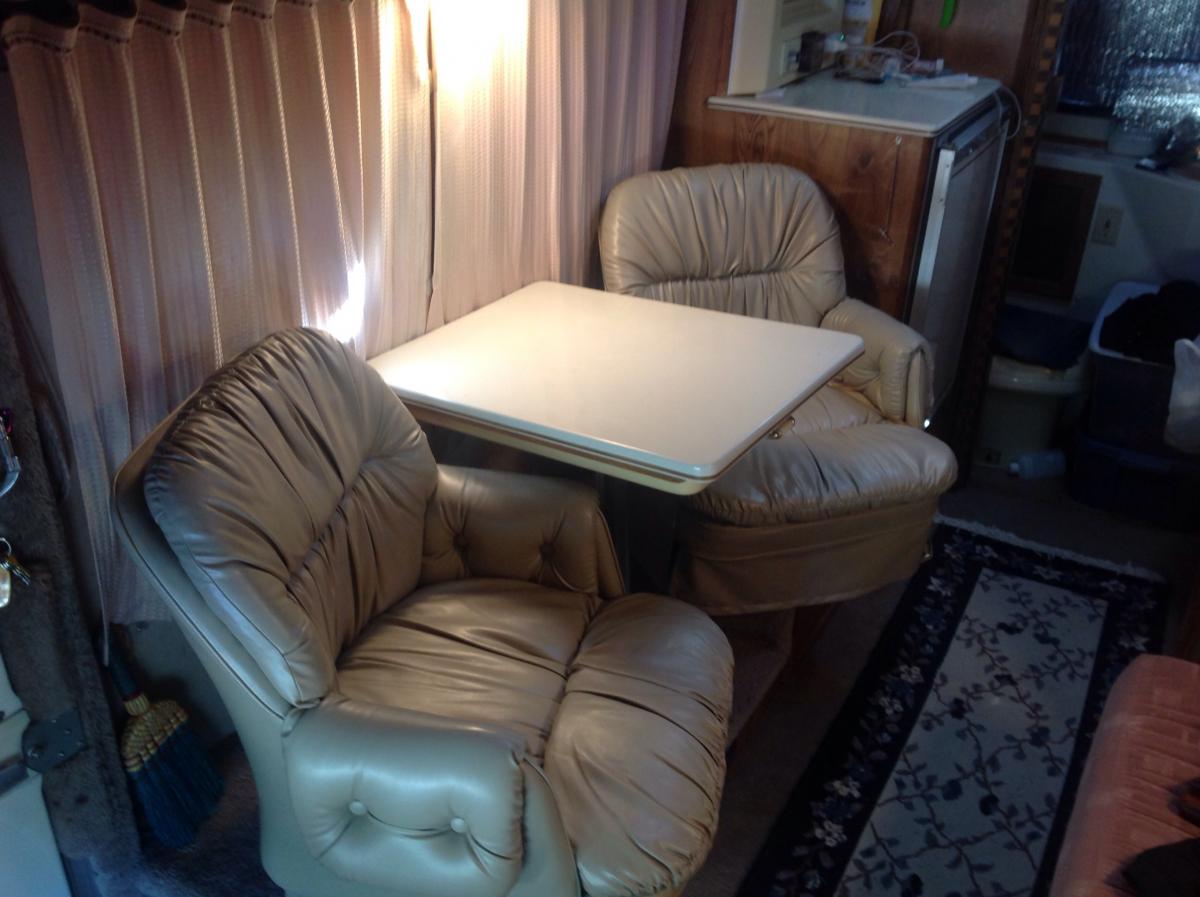
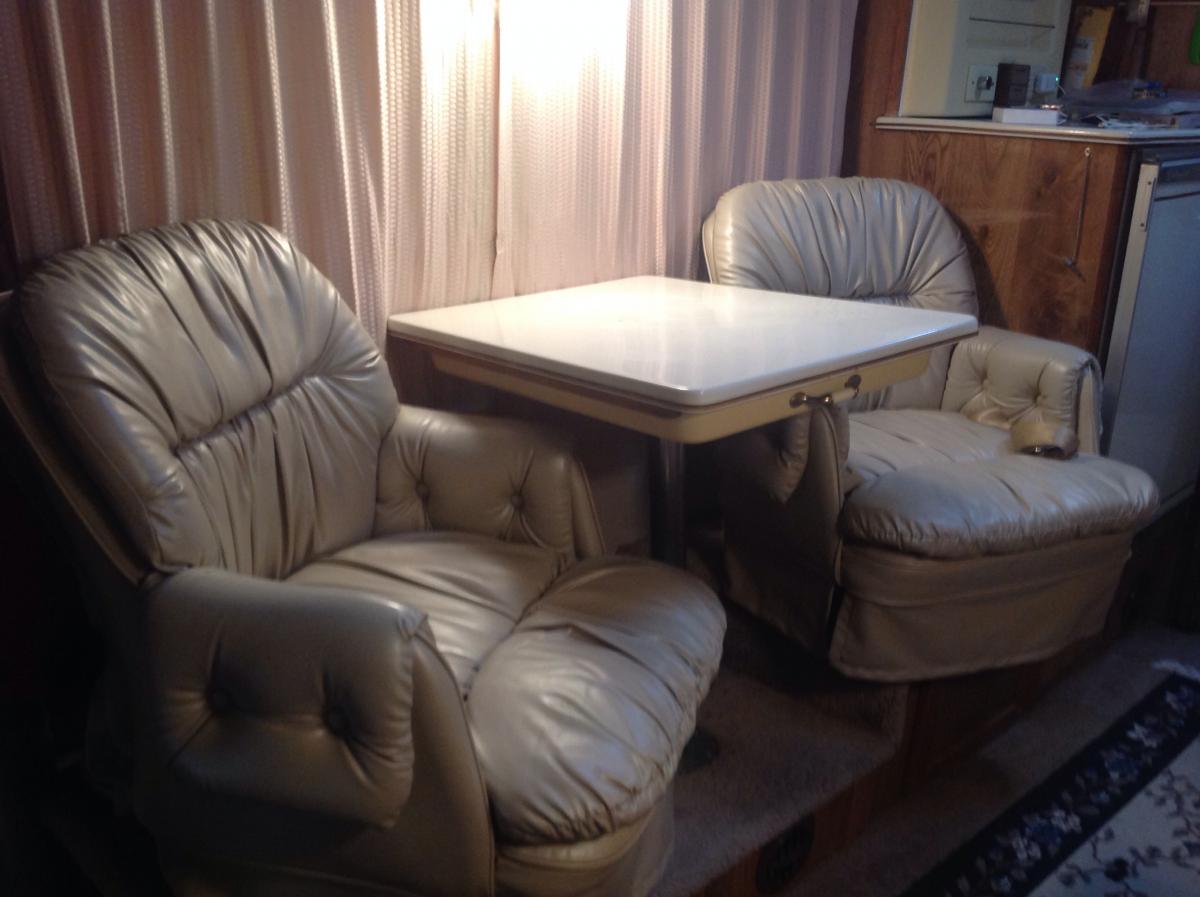
I've posted my marshmallow dinette for sale over at the classifieds on this site and on Craigslist here in California. Waiting for any nibbles. Over and out. http://www.toyotamotorhome.org/classifieds/listing/2327/Pristine_Dinette_From_1988_Sunrader_Classic_Toyota_Motorhome.html https://goldcountry.craigslist.org/rvs/4855979444.html
-
Sweet. Got it. A fine box building recipe! Now, who wants to buy my marshmallow chair dinette from the late eighties? Time to start the demo!
-
And I could put a draw latch on the fridge wall and the coach wall right? Latch the two boxes together when stacked. Latch the stack to the floor and to the wall. Latches to attach the boxes to the floor when deployed as "dinette chairs" Latches all around. I think I see the vision, Corbin k. Am I getting your drift? Thanks immensely! I was wanting to make the boxes strong yet light. What gauge plywood would you recommend?
-
Wow! So many great ideas and support! Thanks team! Corbin, I think I will incorporate your latch and nesting boxes ideas. I can see that being quite solid. I can visualize the strong connection between the boxes but what of the boxes being anchored to the floor and wall when underway? I was thinking of dowels .... maybe fat ones.. 2 inch diameter pieces a half inch long, with a corresponding peg hole I would drill through the laminate and sub floors. Or... I could just slide the two stacked boxes into the corner made by the fridge and the wall, then use some kind of cam-strap tie-down from the fridge to the wall to snuggle the boxes into that corner... Might be more clean and simple... No holes to sprain a toe in or collect rice cake detritus. I'm excited to start! Of course it will take more time and focus than I imagine right now, but it will be most beautiful and functional once finished! I guess the next step is seeing how much interest others may have in those sweet eighties marshmallow chairs. They are in great shape as is the table. .... To the classifieds section of this wondrous website I go!!
-
I am planning on removing the carpet in my 88 Sunrader and replacing it with laminate floor. Since I am considering that project I am also thinking of making a clean sweep and removing the imitation leather "marshmallow chair" dinette. It is in great shape - just kind of a clunky use of space. My thought is to build two movable wooden boxes that would take the place of the chairs - these would have openable lids with pads for sitting. I would be able to store stuff in the boxes and also be able to stack them having placed sections of dowell that interlock when stacked so they won't topple. The table will be a fold up style attached to the wall with one or maybe two supports that can hinge down to the floor. Questions: - is this wise considering the ever present concept of "resale value"? - the rarely used forced air furnace ducts would also be removed - leaving only one duct in the bathroom and one on the floor beneath the fridge. Es bueno? - do people ever sell or buy dinettes?
-
Greetings Homer! Thanks so much for sharing your cool idea about using the foam board. Is the foam board you speak of that blue insulite foam people use to sleep on when backpacking or is it another product? IIs it more board-like or foam-like? Thanks again for all that you do!
-
Holy moly Derek Up North! That link was great! Thanks! I may go that route if spending more time in the colder environs. Another question about reflectix installation: I am looking for the ideal installation method. One that would be solid, not flapping-off in case of a breeze, and easy enough to remove, not leaving sticky films or window marring. I am considering three approaches: 1. Double sided scotch tape. ---The easiest to remove and seemingly the weakest. This is what I have attaching the reflectix currently and it seems to be working ( about eight hours so far). 2. Double sided carpet tape --- very strong. Will leave an adhesive film upon removal, probably requiring razor blades and solvent to remove. 3. Dollops of Shoe Goo attaching stiff velcros to the glass and small dollops attaching the soft velcros to the reflectix. This would leave small, unobtrusive velcros on the glass. This method would require more time: cutting, dolloping, and waiting to cure AND it would be solid and simple to remove. Downside is time spent and the unobtrusive velcros. I remember someone on here mentioning soap film to stick it on. Anyone hear of this or try it? I'm intrigued. I could clean the windows and get the reflectix installed with that method, if it were secure enough. As always, thank you all so very much for your thoughts, ideas, and contributions in this forum. It is a true treasure trove for we toy home geeks. I giggle frequently and get much inspiration from all of your thoughts, words, and stories. So thanks!
-
Thank you very much Montana Chinook for your informative answer. I will be attaching reflectix to the insides of my windows, right up against the glass. I think I will employ velcro to ensure a solid installation. I purchased some velcro at a fabric store (non sticky back) and will be using small dollops of Shoe Goo to mount the stiff velcros to the glass and the soft velcros to the pieces of reflectix. I may post some pics of the process in case it is of note. Thanks again for the wisdoms.
-
I'm installing reflectix window coverings in my 88 Sunrader for warmer winter sleeping and living. Any opinions on most effective install? Should I leave an airspace or put it right up against the window glass? Thanks in advance for your wisdoms.
-
aanyone know the best way to use reflectix on windows? Right on the glass or a few inches from the glass?
-
Is that genuine wood on the floor or a laminate? Love it.
-
Thanks team. I went with the panels with the 3m sticky back. Should have them soon.
-
Greetings friends! I am planning on replacing the incandescent bulbs in my rig with the LED bulbs. I have found two products I am curious about: one a panel and the other a bulb.... Which would be the smoothest option? Here is a picture of my existing bulb and two links to the LED options I am considering. Ideas? http://www.ebay.com/itm/10X-Warm-White-1156-BA15S-27SMD-5050-LED-Light-RV-Camper-Car-Backup-7506-/201109734158?pt=Motors_RV_Trailer_Camper_Parts_Accessories&vxp=mtr&hash=item2ed313030e http://www.ebay.com/itm/10X-RV-Trailer-48-SMD-Warm-White-High-Power-LED-Light-Panel-1156-BA15S-Adapter-/201086212273?pt=Motors_Car_Truck_Parts_Accessories&hash=item2ed1ac18b1&vxp=mtr