

turtle
-
Posts
590 -
Joined
-
Last visited
Content Type
Events
Profiles
Forums
Gallery
Posts posted by turtle
-
-
Just your basic items such as:
Tires (age) - check inflation (even the spare) and make sure you have a Jack and lug wrench
Brakes (should have enough pad showing to get you home)
Belts and hoses (checks - cracks - stiff)
Oil change (before you leave with it)
Everything else can be dealt with once you get it home.
-
I purchased a new microlite 2800 a couple years ago for $2k delivered.
I also have a prosine 1.8 KW inverter installed. Does not run the AC off of battery but does everything else I need
Microlite 2800s regularly sell on eBay for under $1k used.
-
The listing says "Does not include differential"
At $650 for a used housing minus the diff you will be getting in very deep by the time you build it up to use. 8" Toyota diffs run $350-500 from salvage yards
-
If you do paint the hubs use high temp BBQ paint (flat black). You can also spray the brake drums with it. I found that it holds up very well to the high heat generated by the brakes.
I like using the "hammer finish" hamerite paint. It has a built in "fish eye" component that gives a very NICE look and hides any imperfections (old rust pits, welds, etc). As an old car sprayer the word fish eye gives me the willies but it looks super slick on the rims.
I think the look of the hamerite paint on the rims looks much nicer then the stainless simulators. I have had both side by side and the painted rims appeal to me more than the "Hollywood" look of the simulators.
As with any painting, prep your surface well. Clean with a good degreaser then wire brush and sand any rough spots. 90% of any paint job is the preparation. The finest spray job will look awful if applied to a badly preprepared surface.
-
A 2500 "may" run an ac and nothing else. It also "may not" even run your AC alone unless you modify the AC unit first. You can always downsize the AC unit to a polar cub. Many people who use portable generators do this to cut down on the size and weight of the generator they need to drag around.
Portable generators are not designed to be run in an enclosed space so they need to be removed from the vehicle before they can be run safely. The only advantage to a portable is that they are very inexpensive. Some portable generators are so noisy that they are not allowed in campgrounds
An RV genset can be run while in motion, started at the flip of a switch from within the vehicle, and do not require any special setup before use (i.e removed, gassed up, plugged in, and started).
It is a trade off. Cost vs convenience.
-
The rear simulators are a 2 piece unit (the hub and outer rim covers).
You can call Eagle Flight and see if they will sell you just the centers. http://www.jaeeagle.com/
I'm not sure if the centers can be used without the outer rim section. It depends on the size of the holes. I know that the outer rims hold on the centers and the outer rims have 3 holes that are smaller so that the lug nut holds the whole unit on.
I would make sure that you can use half of a simulator before you put out your cash.
-
Your coach should already have a wired generator compartment for an Onan Microlite 2800.
http://www.cumminsonan.com/rv/products/gasoline/compare?gensetId=119
This is the "normal" small RV generator.
-
Wher can a person by center caps for the wheel on these one ton axle. Especialliy the back ones. I have the one ton with the extended hub and six bolt wheel
1 ton front wheel center caps are still available through your Toyota dealer. Pic of stock 1989-1995 (6 lug rim) font center cap is attached.
There never was a factory rear 1 ton "hub cap". Some people have used standard 14" hub caps.
There are aftermarket stainless steel "wheel simulators" that are still made in small limited runs by the Eagle Flight company (http://www.jaeeagle.com/). They just ran a small run of these so if you are interested you should contact them before they are sold out again.
Simulators are like hub caps on steroids.

I have simulators on my 1991 Sunrader.
On my 1981 diesel (which I have sold) I used silver Hamerite paint.
-
You should be able to get it through any automotive glass shop.
This is the company that makes it but they only sell it in LARGE rolls
http://www.trimlok.com/SearchResult.aspx?CategoryID=16
I used the 1 piece gasket when I replaced mine
-
Just currious, but how the heck do you find these things like this, and the ones you listed earlier in this thread? I have called every salvage in this area and a lot of them actually tried to claim Toyota never made a floating type axle, and searching on the internet generally comes up with bubbkis, so just how are you able to locate these so readily?
Voodoo black magic.....
and a little help from this....
-
There are plenty of motor swap kits out there. Small block V8, US made V6, Toyota 3.4 V6, you name it.
I would suggest that you go with a complete swap kit rather than reinventing the wheel.
To find them just google for Toyota engine swap kit
If I were going to do a swap I would go for the small block Chevy V8 as there are more kits out there for this swap, it is the most common swap, and it has been the most popular for the longest time.
-
Now we are wondering whether to store it were it has spent his winters or to keep it at home on our RV parking. It will cost $350.00 for about four months. We're also looking at tarpaulins to cover it but are not sure it this will be enough. We're also wandering about 'winterizing'. What does that entail and could we do it ourselves.
Winterizing:
Winterizing the water system means draining all of the water out of the fresh water system and out of both holding tanks. Using compressed air to blow through the water lines (there are adapters that screw into the hose connector on the outside for this). Putting on a Water heater bypass system (I bet it already has one if you look so you should only have to throw 2 valves). Getting some RV antifreeze and running it through your fresh water pipes and putting some down the drains and toilet into the holding tanks. there are systems that allow you to Pull RV antifreeze directly from the bottle into the lines so that you do not have to dump gallons of it into the fresh water tank.
Only use RV antifreeze NEVER use automotive antifreeze. Automotive antifreeze is used in car radiators. Automotive antifreeze is POISONOUS. RV antifreeze is for winterizing fresh water systems in cabins and RVs and is harmless to drink.
Storage:
Get a metal car port, erect it, and keep your RV under it when you are not driving it or camping in it. I say metal rather than metal frame with a canvas cover as you are in the great white north and canvas may collapse under a heavy snow load.
I was looking at Versitube car ports http://www.versatube...l-carports.html
I decided to build a garage to keep mine in.
-
I put a bug deflector on the diesel and it caused it to slow down... I took it off and it went faster.... I don't think it did anything for the fuel economy.
-
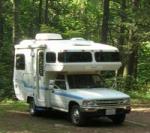
My 1991 V6 shorty (18 foot) Sunrader can be found either in the garage or in the woods
-
Remember when you order them that the driver side may be left handed threads
Only if the rear axle was manufactured in 1985
-
You could clamp one of the Valterra hose carriers to your rear ladder. Mount it low and pull it out from the top (you don't want to pull the bottom plug out after you have used the hose a dozen or more times).
If all you need to do to get into the original compartment is change the fastener from angled to straight I would suggest that you do this and put it where National RV gave you a place for it.
There are all kinds of sewer hose couplings out there.
-
Thanks for the feedback. I looked really hard at the rear bumper and I don't think I can make that work. Can't even mount a carrier on top of the bumper cause the spare is right there. I've looked at several locations to mount a hose carrier but it won't be really easy to get to. However it's not like ya gotta haul the thing out everyday. It looks like you have to take the 45 degree sewer hook up off the hose to use the carriers which I was hoping to avoid. The less I have to handle it the better IMO.
Maybe I'll throw the darn thing on the roof . Anyway time to put on the thinking cap and come up with a real solution.Thanks
Barb
I am sure you could fabricate something that would fasten it to the bolts that hold on the spare tire.
Do you have a hose bumper or does your Dolphin have a bumper like a Seabreeze (molded fiberglass/ABS)
Got a picture of what the back of your RV looks like (one that shows the bumper)?
-
I remember back in the late 50's when I was young my parents would travel across the US on Route 66 to visit family (we lived in L.A. and the family was in Virginia). We carried a flax water bag and my dad would close the hood of his Buick Roadmaster on the rope that held it and it dangled in front of the radiator. Being flax it leaked and the air going over it kept the water inside cool to drink (and the evaporation cooled the engine).
-
Valterra makes sewer hose carriers in a number of sizes if you can find a suitable location to mount one.
http://www.valterra....se_carriers.htm
Mine lives inside the rear bumper.
I don't think her RV has a hose bumper
-
So what do thes alu tracks & vinyl covers cover (other than the screws that hold in the track)?
Is it purely cosmetic? Or does it provide mechanical fastening for two parts of the fiberglass shell?
Im having a tough time finding replacement vinyl for my Nova Star (there are two types, A flexible single piece U-channel with outer flanges that pops in to the alu track, and a u-channel with interior flanges that pops over the track). Most of the flexible stuff that I see in rolls at RV supply places is flat that pops into a channel....seems like this *might* work for some of it but there is alot of it missing from the rig and Im not finding replacement vinyl for the pop-over stuff. It seems like someone was a little over-zealous when they decided to add this 'feature' because it is everywhere....
What Id really like to do is pull it all off, fill the zillion screw holes with white pigmented epoxy and then some day, down the road paint the sucker.
I had to go look at my pics of Nova Stars to get the idea of what you are talking about.
The metal channels go where 2 pieces of body work come together. It covers the joint/seam. It uses butyl putty tape under it to seal out water and moisture from getting inside. The vinyl screw cover is just that, a cover for the screws. It is mostly cosmetic but it keeps water/moisture off of the screw heads.
I can't see from the pics I have where there is any outside groove molding.
here are a couple of places that have different screw cover (that is what the vinyl insert material is called)
http://www.rvsurplus.net/catalog/display.php?category_id=70
http://www.shoprvparts.com/product.do?no=14182F
http://www.approducts.net/21screw_covers.htm
It would not be a good idea to remove the aluminum panel joint covering and make a permanent cover. This is where panels need to come apart in case you get a "boo boo" in one and need to replace it so it needs to be able to be taken apart.
-
If you are talking about the 4" square sewer hose storage bumper these are not securely attached to the frame as they are only designed to carry a 1 lb plastic sewer hose.
I would suggest that you take your RV to a qualified welder who specializes in fabricating class III hitches. Have them strengthen the frame extension and weld on a class III hitch.
Anything else is foolish as someday someone will hook up a monster cabin cruiser to what ever you put on and be surprised when the RV pulls apart.
OR.......
At least take the RV to a qualified welder who knows about hitches and have them inspect what you now have (if you already have a receiver hitch) and ask them their opinion after they inspect what you have.
No one can give you advice over the internet as this medium does not allow for visual inspections over long distances and even photos of what you have cannot tell the same thing as a hands on inspection can.
-
So it looks like these guys are not stocking(manufacturing?) these any longer. Any other lines on 6 bolt rims?
You can do a salvage yard look up from this URL
Pick a year between 1989 and 1993
Toyota truck (not T 100)
put in your zip code to get ones closest to you
Select -> 14x5-1/2 (4x2, 1 ton)
I came up with 4 pages of salvage yards that have 1 ton rims and prices starting around $30 going up to $80
You may not be able to get new rims any longer except though Toyota (and maybe not even through them)
-
The odometer is mechanical so if it stops working it is a gear issue.
Sounds like you are a candidate for a SR5 gage cluster
The SR5 dash cluster has a a nice gage set in it and it is a direct plug in with the original "truck" gage set.
The 2nd series truck deluxe clusters do no pop up on eBay as frequent as the 3rd and 4th series do but I have seen a fair number of them over the years.
You can always get your odometer repaired if you want to keep the original.
Here is a thread on Yotatech where someone with a 3rd series replaced their cluster with an SR5 cluster. Removal should be similar for you
-
Your horn "should" be behind the grill at the top passenger side (at least that is what I remember on my 1991).
I replaced the squeaky little Toyota horn with a pair of Hella supetone horns (they are LOUD and OBNOXIOUS sounding). This is easy to do but requires using a relay to pull the extra current they use from the battery (everything you need comes in the kit).
I have a set of Hadley Bullys that I am thinking of putting in also but I need to get a larger air tank for them


 Maybe I'll throw the darn thing on the roof
 . Anyway time to put on the thinking cap and come up with a real solution.


tail light diagram
in General Discussion
Posted
There is a link to the 1985 Toyota truck factory service manual on the yahoo toyota-campers group links section
http://autos.groups....a-campers/links
If you go under the rear of the truck/coach you can see where the RV lights are spliced into the Toyota wire harness. The factory manual will tell you what color wires are for what light. See what color the RV manufacture attached to each original wire color and chase it back to the light fixture.
I have found that the RV manufactures used what ever color wire they had handy that day for any of the lights so the only way to know what is what is to locate the factory wiring harness and see what color wire is attached to it.