


needsunenergy
-
Posts
18 -
Joined
-
Last visited
Content Type
Events
Profiles
Forums
Gallery
Posts posted by needsunenergy
-
-
I am looking at hitch to install on my motorhome. I know welding is the way to go. Will this hitch work?
http://sfbay.craigslist.org/eby/pts/4998802745.html
it is from a 3rd generation 4runner.
-
I have a 1983 21 ft toyota sunrader. The rear bushings are just about done and I need to replace them. Which kit is a good kit to use for this heavy little home?
-
They don't look that bad to me. Plastic polish will shine them up some. Maguire's makes a good one.
Linda S
good call!
i think ill give that a try! thank you
-
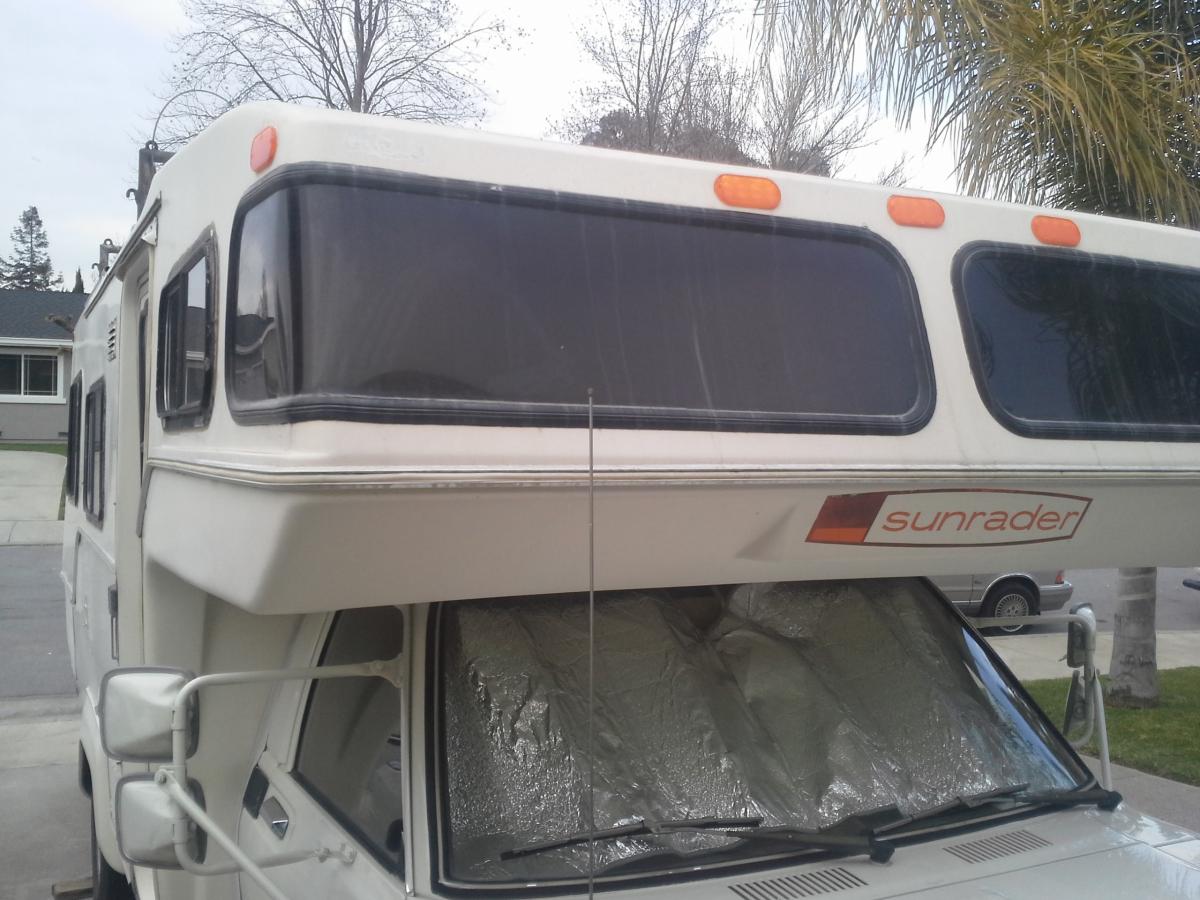
the windows look like this

-
so my overcab windows dont look the best and i really do not need to see through them... I am thinking of painting the windows with black plasti dip paint... Is this a bad idea? or do you think it might work out?
I was also possibly thinking adding some sort of vinyl decal over the windows for advertising.
-
im surprised all the diy'ers here are not using linux. Ubuntu is so easy and stable! Software should be free
-
More than likely you have Bargman 99 lights for clearance markers (they are the most common)
http://www.bargman.com/content/products.aspx?lvl=3&parentid=8400&catID=8460∂=30-99-001
Replacement lens can be found EVERYWHERE (any RV store and online)
If you want to replace, I would strongly recommend the M2 LED markers from superbright. They are 12 diode, bright, and the holes are an exact fit with the Bargman.
http://www.superbrightleds.com/moreinfo/rectangular-marker-lamps/m2-series-led-marker-lamp/572/
The only bad thing about them is they do not come with a ground wire as they ground to a big rig cab or trailer which is metal. Our RVs have the coach body isolated so you must solder on a short ground wire but the lights have a pre-tinned (as in it has a blob of solder) on the back for attaching a ground wire.
I packed mine with putty tape, screwed them down and let it ooze out and cut it off with a razor blade. No leaks, no problems and no worries about burn outs.
AND...
They are spanking bright so will make it easier for others to see you in bad weather.
i just purchased these lights for my sunrader but they dont have any screw holes on them. It also only has 2 pins in the back. How did you go about to connect these?
-
i think i will go the "shit in the bucket" compost toilet way if i better my diet.
-
I removed my stove top hood to paint it and then connected it back together. The wiring seems right because i was able to turn on one of the lights that was connected to the circuit but as soon as i turned it off and on, the fuse blew. Can it be something metallic touching one of the wires? Idk what to do. I keep blowing fuses! hah
-
Im in the dilemma of having a saggy roof on one side but cannot afford to gut the interior ceiling. would attaching fiberglass rods across the roof help? something like this
http://www.tapplastics.com/product/plastics/plastic_rods_tubes_shapes/fiberglass_rod/159
I was thinking if i can "pop Up" the saggy roof and then fiberglass these rod to the roof to keep the ceiling up.
Is it possible to jack the ceiling up if the interior ceiling and cabinets still in place?
-
What about a "roll out" type ladder. One where you attach to the rear roof rail with some sort of hooks that are attached to a rope type ladder.
One can keep it tucked away in the camper when away.
-
Not really. Need to know the year. Pre 1986 they were extended by the manufacturer and they are all over the place. Different models and years had different wheelbases. From 1986 on the 21 footers were all 137 inch wheel bases.
Linda S
what about for a 1983 sunrader 21ft with a 1984 gardner pacific coach?
-
You can just hook battery to battery in parallel. Voltage will stay at 12 volts but amps will double. You need to hook positive to positive and negative to negative for this application. That way both batteries will charge whether it is from your solar or from plugging in or driving. Charging will take longer but you will always have more amp hours
Linda S
Thats right!
haha out of the small research i did that was one of the first "lessons" on deep cycle batteries.
-
I have a second battery being charged by a solar panel. I currently just have an led rope connected to it.
I would ideally like to connect it to the the toyhome's original lights and water pump ( i don't have a water heater, furnace, nor fridge). How can i connect the second battery to these appliances? Would it be through the converter? can this charge both my coach battery under the hood and the 2nd battery that is being charged by the solar panel? would i need some sort of switch(s) to not dual charge the 2nd battery or not use both batteries if appliances are on?
I have a 1983 toyota sunrader 21ft and i have an addiction with these toyhomes. I cant stop looking at pics!
-
The fridge in petaluma is probably worth the 2 hour drive. Thanks on the info on the fridge.
I just need a fridge, wood stove and one more deep cycle battery to get this oldie rollin. Pretty excited.
-
Would something like this be sufficient?
I like that i can control the temperature therefore control the energy being used. would this work with a 65 watt solar panel setup?


Hitch For 83 Toyota Sunrader 21Ft
in Improvement and Do-It-Yourself Projects you have done to Share!
Posted
hmm
what about a hitch from an 84/89 4runner?
http://sfbay.craigslist.org/sby/pts/4964032959.html
would my welder have to weld some supporting rails for the rail extensions? I have the 21 footer.