ednelson100
-
Posts
182 -
Joined
-
Last visited
Content Type
Events
Profiles
Forums
Gallery
Everything posted by ednelson100
-
Hmmmmm, You are probably right. It was quite awhile since I did it. Maybe it was the air bag light and not 4WD that will light after the solder jumper is done. I dont think I lost my hazard lights with the new instrument cluster. Not sure what you meant by that? Ed
-
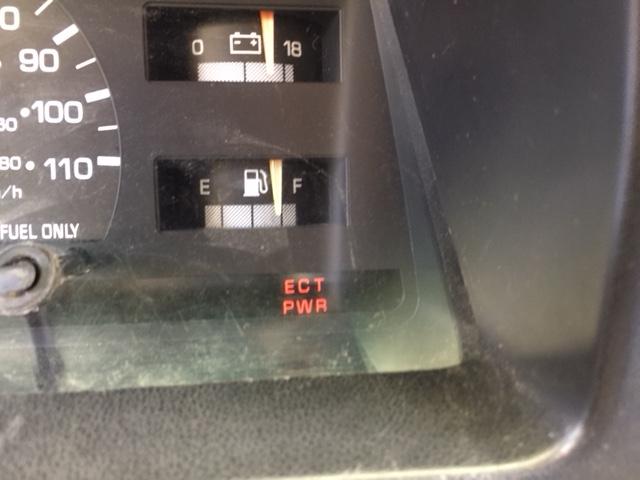
Rolling the odometer to correct reading was very tricky but can be done, just make sure you first take close up pictures before you disassemble the odometer if you choose to do that part of it. If you solder these two connectors together 4WD will then light when ECT button is pressed. Take it one step further and open the front of the instrument panel, cut out 4WD, tape in ECT in its place, and you now have your ECT light back.

-
 I had mine towed for about 5 miles twice a few years ago without disconnecting drive shaft and it did not hurt the transmission so short distance does seem to be OK. In case anyone is interested, I still have my old 1992 3.0 / A340E with 115K miles in excellent condition I would sell. I am in San Antonio but will be travelling to AZ, CA, FL, NM and OH and who knows where else this year. Ed
 -
Kim, Here is where I got my original info. on this upgrade. Rolling the odometer to correct reading was very tricky but can be done, just make sure you first take close up pictures before you disassemble the odometer if you choose to do that part of it. toyotamotorhome.org/forums/index.php?/topic/4058-instrument-cluster-swap/ If you solder these two connectors together 4WD will then light when ECT button is pressed. Open front of instrument panel, and cut out 4WD and tape ECT in its place and you have your ECT light back. It can, Just ask Mr. Speed.....James who has had it well over 90MPH after his swap. Acceleration is greatly improved also. Ed
-
I do not know about those FB experts but I can attest that it is NOT "Super Simple" well maybe super simple if you just drive it to a shop and pay them $4500 to do it for you, come to think of it that would be pretty simple, wouldn't it Derek? haha. But if you want to DIY, be prepared for a pretty big job and for your RV to be down for a month or two and several hurdles you need to jump over along the way. I know I actually dropped the motor in and took it back out I think 4 times for various issues. But I love doing this so it was not work at all, but fun for me. If I do another one it will sure be a lot simpler than this first one was (learned a lot). Ed
-
"I enjoy mechanical work, and purposely chose an older model car because I enjoy the frustration of working on cars. Not that I WANT things to break or for this to be constantly in disrepair; not at all! More that I enjoy the process of making something old run well again. " Oh man, you sound just like me. Had a dozen older cars in my life and never a new one yet. Also old boats, motorcycles, RVs, etc. I see many helpful people on this site advising you its not worth fixing up and you are going to loose money. That is good advice for most people but not guys like us. If I had your rig in my driveway right now I would totally restore it. It wouldn't bother me a bit if it took me a year. I would be excited everyday to get out there and work on it. Many on this site are great sources of expertise so you have come to the right place for advice. When you are ready to change out the motor to a six cylinder, which I just did, I would be happy to assist if needed. Ed
-
I was speaking with a Toy owner the other day and she is planning on having a mechanic do the swap for her and had some questions. I figure it was time I posted a brief summary of my swap for anyone interested. Every motor swap is different but this is how I did mine. After doing a lot of internet research I concluded that the easiest and cheapest way to DIY was to purchase an entire donor Toyota T100 PU. That way you have a complete set of spare parts. I found a damaged 1997 T100 from an online insurance auction and used that for a donor vehicle. I did all the work myself except for the exhaust pipe re-routing. The hardest part was the wiring because I was just so unfamiliar with it, but after doing more internet research, getting all of the correct wiring diagrams printed out, and working on it for two weeks it started getting easier and easier. To complete the entire swap took me around two months while still working a full time job. I did not find this swap that hard but very time consuming. There were not that many good posts to rely on and some posts from users who did their swap with 4Runners actually steered me in the wrong direction. Toyota Motor Home swap is different from a 4Runner swap. I would be happy to assist anyone wishing to attempt this by answering all questions posted. Total cost of swap: $1100 but after selling all of the leftover parts it was $0. BENEFITS: More power and better performance More reliability, with the 5VZE being one of the best engines Toyota ever produced Improved gas mileage, I am getting 14-16 MPG highway, compared to 10 from my old sick 3.0 Elimination of ECT button, ( Extra power appears to be built in and when you need extra power like climbing a hill it kicks in automatically) OBDI II receptacle for reading “Check Engine” codes Easier to work on motor with more engine compartment space Taken From 5VZE 3.4: Engine Transmission Motor/Transmission Wire Harness Battery Harness ECU E4(A) ECU Body Harness Female Connector Alternator Instrument Panel VPS / VSS Sensors OBDI II receptacle assembly OBDI II 7.5A Fuse holder assembly Cooling Fan Battery Tray (Modified) Alternator Bracket (Modified) 02 Sensors Exhaust crossover pipe (modified) Oil pan baffle (Modified) Taken From Old 3VZE 3.0: C2 Body Harness Female Connector Motor Mounts Oil Pan Oil pan oil intake tube A/C Compressor Charcoal Canister Cruise Control ASSY. Radiator Bottom radiator Hose Alternator Voltage Regulator Transmission speedometer shaft gear Other: From junk yard - A/C pulley from Jeep Cherokee (Other vehicles will have it too) From junk yard - 4 Foot Cruise Control Cable (modified on both ends) From junk yard - Air filter ASSY from 1997 4Runner From Autozone - Top radiator hose Dayco PN # 71695 Length C From Autozone - Alternator Belt NAPA PN # 25-040405
-
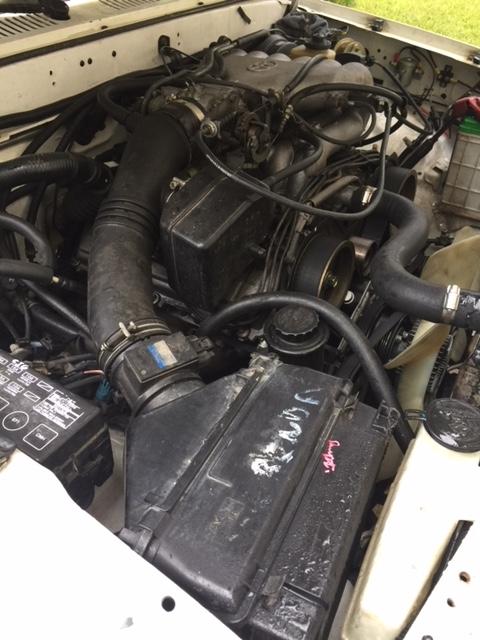
Nice to hear from you James, I thought maybe you sold your Toy and moved on. I have put 6,000 miles on mine now and am very pleased. I get a consistent 13.5MPG city and I believe 14-15 highway. Could not get a good reading for a long time because my odometer was not accurate. You may recall I took the transmission out of the T100 donor and the speedometer and odometer were always high until I finally opened the transmission tail and swapped the speedometer shaft gear with the 3.0 gear. Here is the intake filter you should look for, fit perfectly and is so quiet now. This came off of a 1997 4Runner. I am retiring from work on December 31st and will be in Quartzsite, AZ for the giant RV rally on January 19. Planning to go to Winter Haven, Florida in February. Maybe one of these days we can meet up somewhere? Ed
-
Hey James, Haven't heard from you for awhile. How did your transmission problem come out? Were you ever able to go back to the stock air filter? I tried but my T100 big box air filter is too high and hits the hood. Going to post a summary of my swap soon for anyone interested but I think we are the only two Toyota motorhome owners interested in doing this for right now. Ed
-
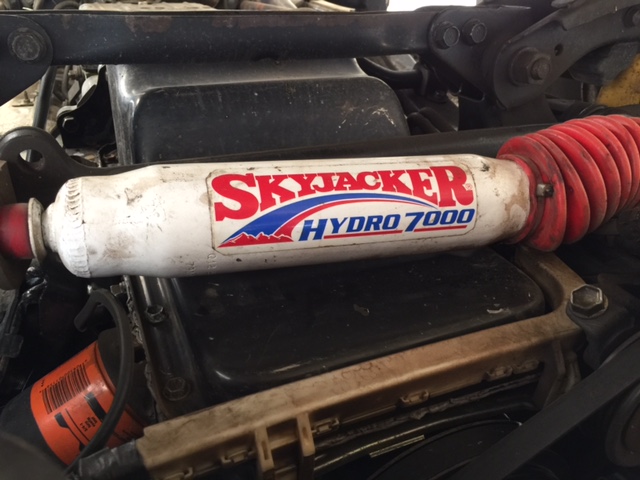
Here is what I used. An owner at one of the Toyota rally's recommended it to me (wish I could remember his name). It made a big difference, no more almost getting blown off of the road every time a semi passed me. Ed
-
My transmission seemed to be hotter than it used to get cause my floorboard was hot. I checked and sure enough I did have the cooling lines wrong at the radiator. This is correct: The front transmission line goes to the radiator and the return line goes to the back of the transmission. Hoping it will make a difference. Trying to use the 3.0 Cruise Control leaving it right where it was at on the drivers side. It is getting a little crowded on the passenger side. The cable is too short but from what I have read a cable from a 22E 3.0 is longer and will work but I have not been able to find one yet.
-
yes I noticed the loudness too, I might try my huge stock filter air box too.
-
haha, I would be scared to go over 70 MPH. I believe I am coming to the end of my swap, only got cruise control left and that can wait. Anxious to see how much MPG increase I will get. My 3.0 was only getting 10MPG before it died. For the starter top bolt I just drilled a hole straight through the engine wall and socket went right on it. then plugged the hole with a rubber plug I had on hand. Starter would not come out the top until I removed an exhaust header heat shield which is not needed anyway. So far no more starter issues. For A/C clutch you only want enough space that it spins freely when not engaged. On mine it dragged with one washer, so I added two. You should hear a very loud click if you apply 12 volts to the A/C clutch. Also don't forget to check your freon level. For your transmission that really sounds like low on fluid but I am sure that was the first thing you checked. Issue now sounds like it only happens when trans is hot and ok after it is cold, maybe a trans cooling issue? One thing I have wondered about on mine is which way do the cooling lines hook up to the cooler by the radiator? I just guessed on mine and was going to research it later. I know you used the old 3.0 transmission. I believe you have to make some modifications to get the 3.4 ECU to work properly with the 3.0 transmission. This may have nothing to do with your issue since it was it was working ok when you first tested it. This site has some of it and I think there was a link to another site that had a fix for the compatibility issue where the guy added a pulse detection set up to his tail shaft of the transmission. https://www.yotatech.com/forums/f160/superchiems-toyota-rv-5vz-swap-243241/
-
I just cut about 8 inches of the middle hood support off. The hood would close but I could feel the top of the motor hitting it. I spent all day trying to figure out why my A/C clutch would not activate. It was low on Freon and that was the problem, had nothing to do with my wiring, haha. I did not follow those instructions you posted. I followed this one and just moved one wire, and nothing else. https://www.yotatech.com/forums/f160/how-c-your-3-4-swap-251179/ I notice sometimes the starter does not kick in so I am swapping it with my spare starter, the only problem is the exhaust guy did such a good job welding up the exhaust I cant get to the top starter bolt anymore. Going to go buy a swivel socket extension tomorrow and I think that may do it. I have no leaks at all, thank god because I could not tolerate leakage and would have to fix that even if it meant pulling the motor or trans again which we are both very good at now. Week of 4th of July heading to Ruidoso NM mountains where it is nice and cool and away from these San Antonio over 100 degree days.
-
Nice to hear back from you, 2.5 hours, wow, they had better do a good job Had my exhaust ran from passenger to drivers side and they did a really good job for $80. Still hooking up wires but been driving it around and love it. I have to keep reminding myself to ease up on the gas pedal. Got to look for radiator hose tomorrow cause I could not get the ones I had to hook up without collapsing a little. Today I have to get the AC working since going to 99 degrees. Hooked up the OBD data link connector 3 and I do have check engine of course. Waiting for my OBD reader to arrive from Amazon to start working on the codes.
-
SUCCESS!!!!!!!!!!!! Finally got it started up and runs great. Wiring was harder than I thought it would be but it came down to the last couple of days I had one B+ wire going to the #1 injector causing a huge cylinder flooding condition. All the B+ wires were white red and that one injector wire was white red too, but it sure did not need a continuous 12V going to it. First thing Monday morning taking it to the muffler shop one block away and getting the exhaust pipe crossed over from passenger to drivers side. How you doing James?
-
Oh I forgot to mention the 40505 belt is very tight and hard to get on. I think I had to take the nuts off of the middle pulley or take the holding bolt off of the alternator to stretch it on to the all pulleys. Something like that. My wiring is crawling ahead at a snail pace.
-
Thanks, Yes I downloaded everything I needed from TIS
-
Congratulations I am having terrible time finding the pin and connectors for the ECU and connectors, grrrrrrrr, lots of images and info for 4runner manual transmissions. Ed
-
Well, I am almost ready to turn on the key, I am pretty excited and nervous about that. Just have some wiring at the ECU left and then checking everything a couple more times. JFYI, ECUs rarely fail.
-
Hey James, Still working on my wiring. Just wondering, have you given any thought on your cruise control? Ed
-
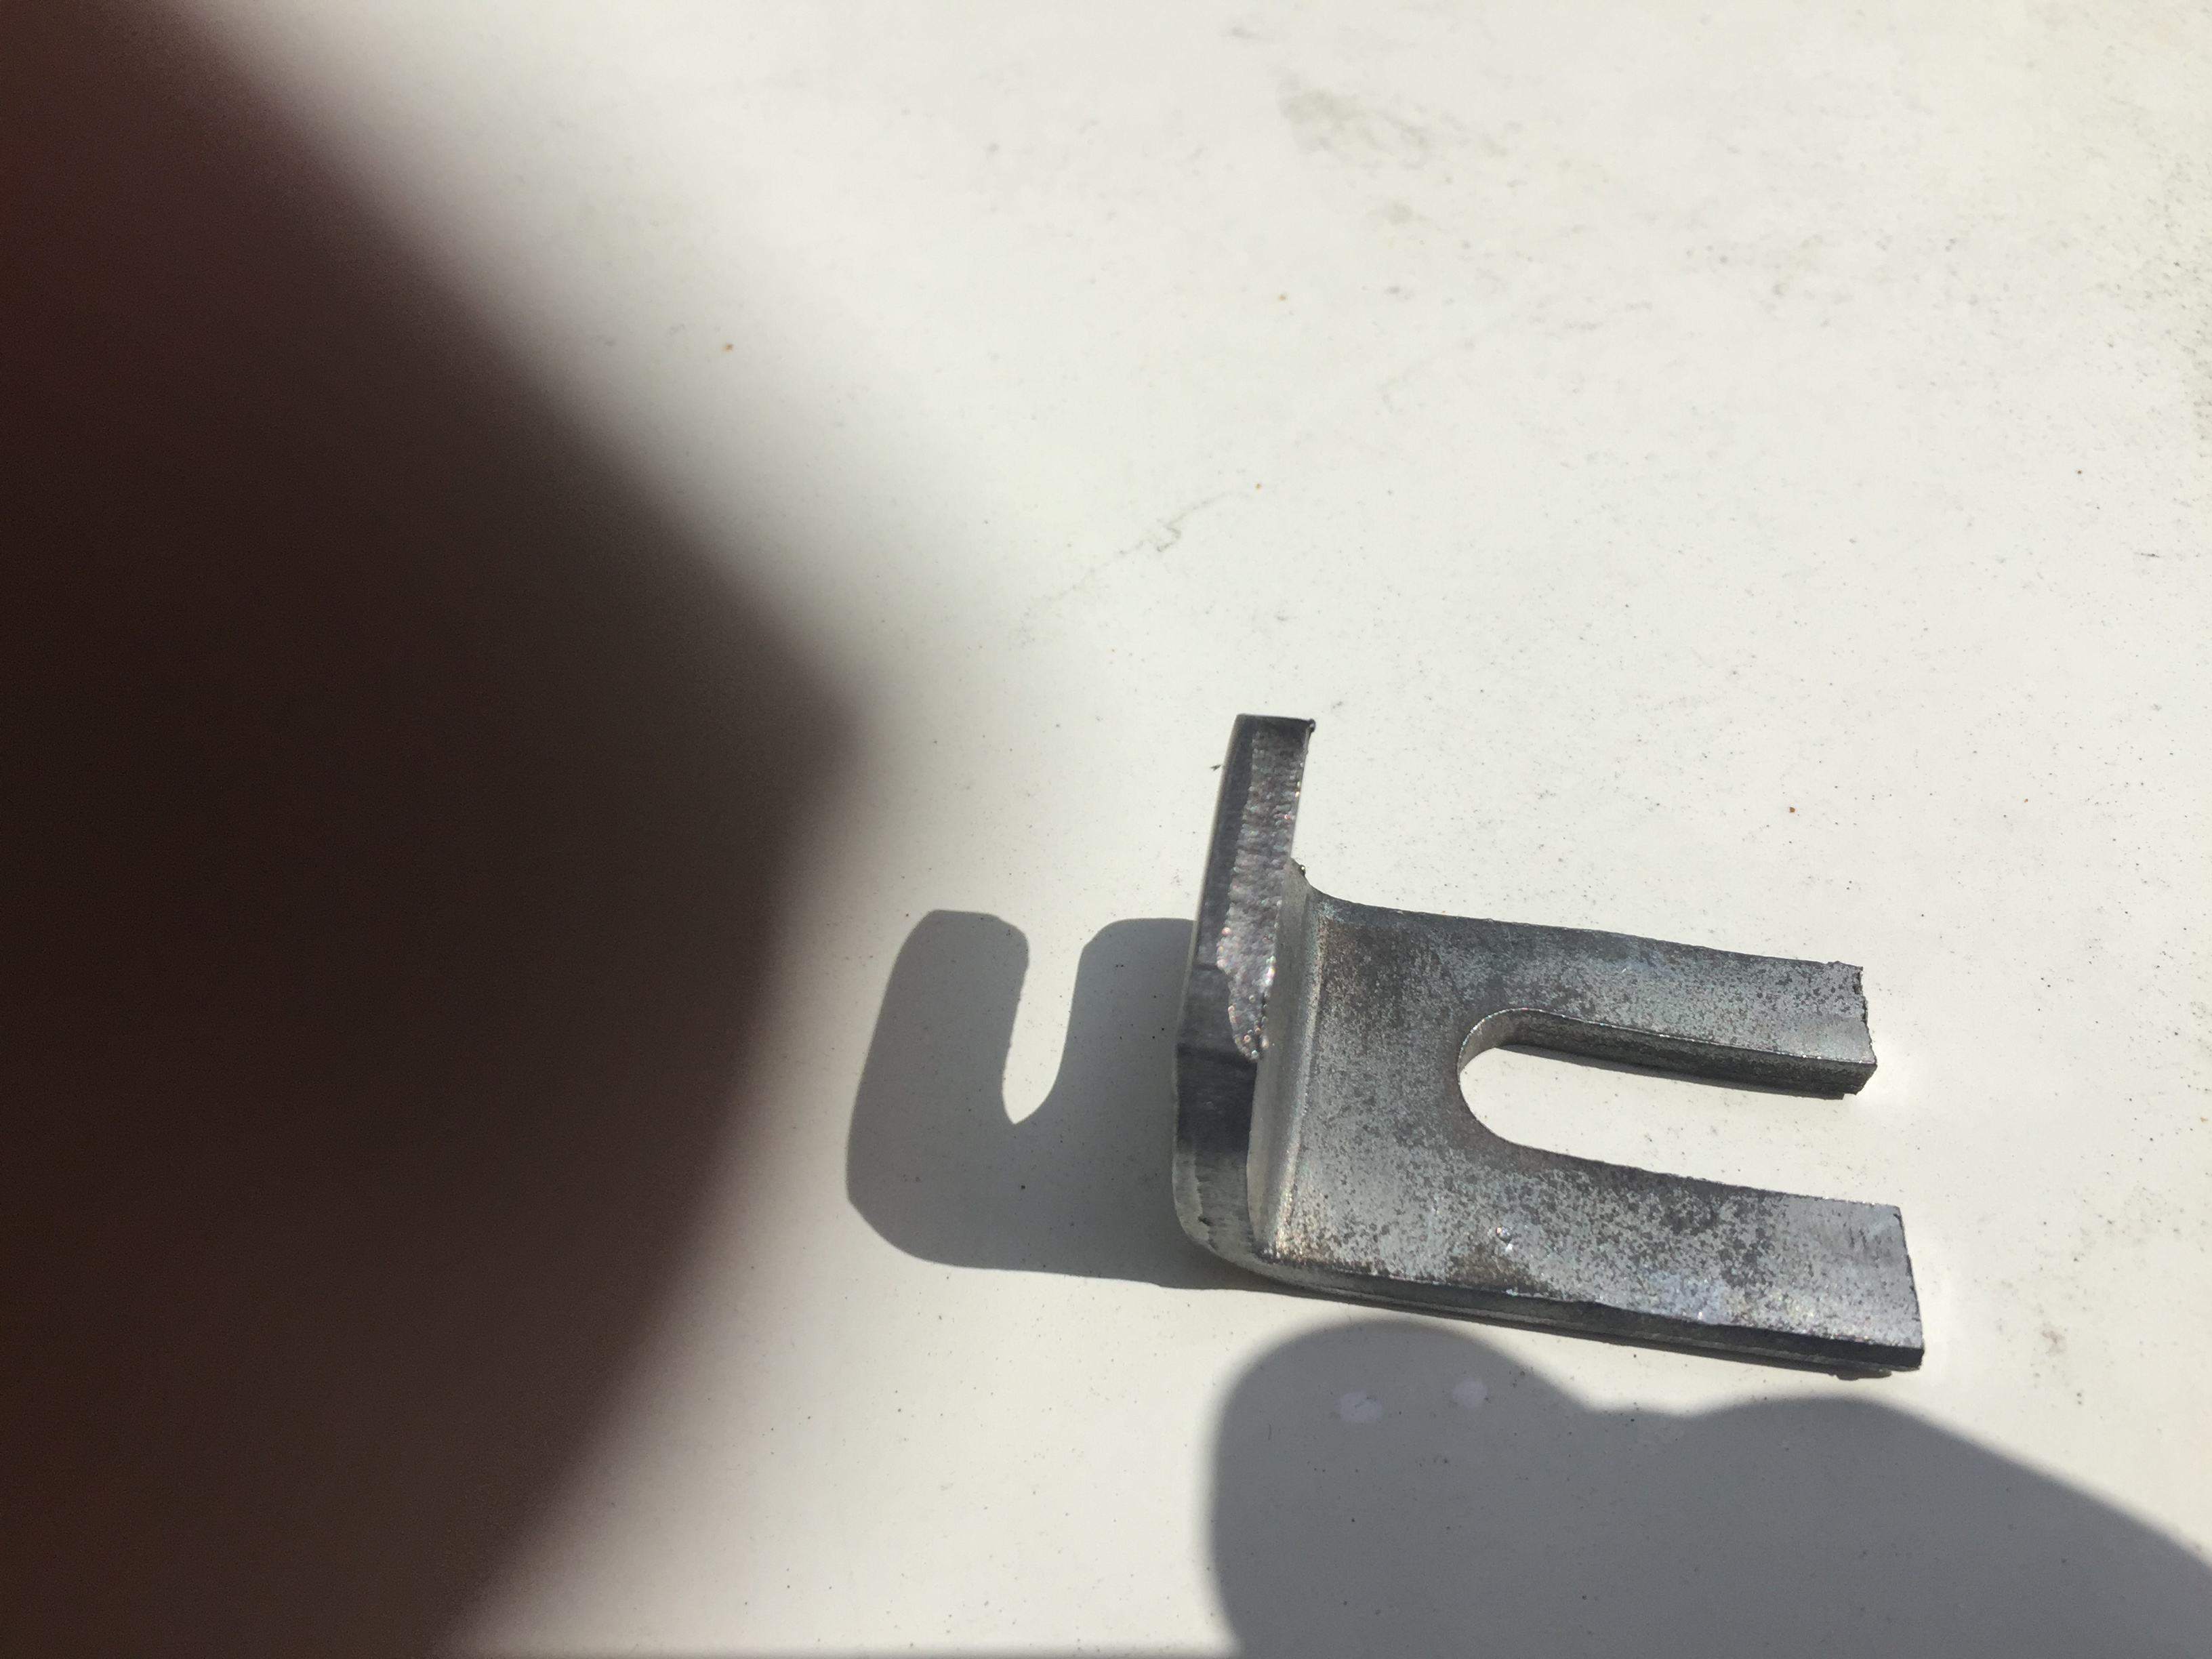
I am just down to my wiring now. Doing the starter relay today and then on to the ECU connections. I used the 3.4 alternator and bracket. So I could keep the 3.0 connector, I did like Superchiem: https://www.yotatech.com/f160/superchiems-toyota-rv-5vz-swap-243241/ I cut off the end of the 3.4 bracket and used the bottom block hole under the water inlet.(not the top hole). And the NAPA belt I told you about earlier. This is what I cut off:
-
they are not in the engine harness but come out of the body harness on both T100s beside the canister and evaporator boxes. I am going to pull mine out of the 3.0 harness and run them separately.
-
I believe that goes to the power steering reservoir thingie that is supposed to give you more power in your power steering when idling or just moving very slowly. That thingie is not needed and I left mine off and plugged the outlets.
-
Good morning James, The Pulley cost me $3.77 cause it was half price weekend at the yard I went to. For my evaporator, I am going to try and keep the original small canister like this guy did. https://www.yotatech.com/f160/elvotas-3-4-swap-128285/index4.html Ed