

dayoff53
-
Posts
147 -
Joined
-
Last visited
Content Type
Events
Profiles
Forums
Gallery
Posts posted by dayoff53
-
-
Yeah, that looks like what I found in my '92 Warrior. I used a multitester to figure out which went where. Sorry, but I don't remember what I discovered.
-
Hi! Only thing so far I've found in handling is that on sharp right turns get popping creaking noise in front end. Have a friend whose car did this & she was told it was because car sat for 5 yrs in garage of survivng spuose & some lines stiffened up, they have never recommended fixing it. Any ideas what this could be before I take to shop for overall checkup, would like a heads up before go as some mechanics think women are a free ride for any costly repair they want to do! Please advise. Thx, TerrieO
Your Toy has turning limit bolts that are adjustable and prevent the truck from turning too far. It is easy to bend them and break them off when you turn sharp and hit a bump. When it is broken, you get that creaking, popping noise because your wheels are allowed to crank around too far. The bolts are easy to replace, once you find them. On my brother's '91 Sea Breeze 900, both were broken; on my '92 Winnebago Warrior, one was broken and the other was bent. Because the bent one was still in place, it was pretty easy to find. With both broken, if you don't know what you are looking for, it may take you a while to find what you are looking for.
When I replaced ours, I just guessed at the adjustment, based on measuring the bent one I still had. Now, I can't turn as sharp, but no nasty noises!
-
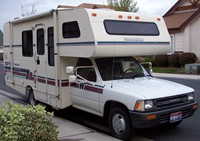
drove a '91 Warrior today..........70K miles on it
owner is a retired Preacher from Nebraska...........I'm hooked.
Hi, Monkey1!
I own a '92 Warrior WT321RL. If you have any questions about the V6 Warriors, I'm sure there are plenty of folks here who will try to answer them.
-
Mine (92 Winnebago) wasn't that weird, but all the wires from the stereo went into a nearly-square 9-pin connector, then 4 went from there to the back speakers and the rest into a standard Toyota harness. When I put in my new stereo, I also put in a standard Toyota rear speaker harness and cut out what was there, so that it is now all "standard" and any future stereo change will be easy.
-
This is largely a cut-and-paste from a reply I posted in the general discussion group. Many of you have already done this swap, but for those considering it, I am posting some of my experiences.
If you want to add a tachometer to your instrument cluster, you can swap your current cluster for one from a Toyota truck that had a tach. You can use a cluster from a 4Runner of the same era, but will find that you lose the transmission gear indicator lights, as the 4Runner had a floor shifter and the indicators in a separate unit. So, you can get an instrument cluster out of a T100 (I used a 1995), but you have to make sure it has a mechanical speedometer connection rather than an electronic one. You will lose the ECT "Power" indicator light, but that is a very minor inconvenience, as you can visually and by feel tell the position of the ECT switch.
To remove the instrument cluster, you start by removing the lower left dash - one bolt at the bottom left corner and 4 screws - disconnect the dimmer switch and maybe the speaker. Pop off the cover around the ignition switch - it just pulls right off. Remove the plate around the heater/air conditioner controls - pull the four knobs, then carefully pry the plate from the right side and pull to the right, as it has tabs that hold it under on the left side. The a/c switch will come with it. Remove the upper left dash - one screw at the upper right of the a/c switch cover you just removed, two at the top of the instrument cluster, two more (I think) somewhere - I'm writing this from memory. There are two more electrical connections to unplug and you will have to move the transmission lever down into 1st gear, which means you have to turn on the ignition and hold the brake in. Then carefully pull it out from around the instrument cluster and from under the upper dash board - there are a couple clips that hold it in, but it is not very fragile. Finally, remove the four screws that hold the instrument cluster in and pull it out enough to unplug the 4 electrical connectors and the speedo cable. As to the latter, once you find the right place to push (toward the back end of the protrusion on one "side" of the housing), it comes off pretty easily.
With the help of my brother, I just finished an instrument cluster swap on my 1992 Winnebago Warrior. For the sake of others who do this and start at the same level of ignorance as I, here's what I found out.
You MUST swap the oil pressure sender on the block - the original sender is just an on/off switch and will not work with the new gauge. I have read, in fact, that it will burn it up. There was no problem swapping the oil pressure senders (we got ours from the same donor T100 as we took the instrument cluster from) except that the electrical pig tail didn't fit the new sender, so we cut the boot off of it and remodeled the connector a little so it would stay on, then we used some butyl sealant to replace the function on the boot. To get at the sender, you will have to remove the fan belt and swing the alternator out of the way.
We DID reset the odometer to the correct mileage. This was a lot of work and required a great deal of care and patience. It was painful, too, as I had to add about 10,000 miles to the donor odo to get to the 32k on my Toy. To do this, we used a punch to carefully open up the crimped "horns" that held the odo axle and we were able to remove the unit from speedo assembly. With some playing around, I was able to figure out how to adjust the wheels, which I did one at a a time starting with the left most wheel. I won't try to explain how it is done in detail, because you really just need to play with it. Basically, though, you need to hold the little tabs in a straight line while you turn the wheel to the right of the one you are trying to adjust. Turn that wheel back and forth through it's entire travel and it will advance the one to the left one digit for each cycle. When you get to the 1 mile digit, you adjust it using the far right wheel, which has no numbers on it but would be the 1/10th mile wheel if it showed tenths. Since it does not show tenths, I set the odo to the next whole mile above the mileage on my original odometer. Then, you have to put the whole thing back together, praying you don't break off those "horns" as you again crimp them around the axle.
With the odometer put back together (and, BTW, mine reads PERFECTLY correct - in 31 miles, the 1/10 mile digit was not perceptibly off AT ALL), it was then just a matter of installing the instrument cluster in the dash... or so you would think.
Turns out the tach was erratic as all get out and registered way high once we got it all put back together. If others have similar problems, here's what I found out: When we used a diagnostic tach (plugged in to the spade connector designed for that purpose right next to the fuse box under the hood), the tach in the instrument cluster worked fine. Using the screw on the potentiometer(accesible through the face of the tachometer - you may have to bend it up a tad to get a little screwdriver on it), we could get it adjusted correctly. Then, we would put the dash back together... and the tach would be way off and jumping around all over the place. We tried removing the small add-on printed circuit board (rectangular with 3 leads coming from it and attached to the main circuit board for the instrument cluster - not all instrument clusters with tachs will have this), but the results were the same. Finally, we realized that unplugging the diagnostic tach is what caused it to go haywire, so we scratched our heads and tried to figure out why. Finally, we checked what the diagnostic tach was doing electrically and found that there was about 1434 ohms of resistance between the pulse lead and the negative terminal of the battery. We then checked the add-on pc board and found the same 1434 ohms or resistance between the black wire and the light colored wire. Sooo.... we put that little pc board back on the instrument cluster but connected only those 2 wires, attaching the black wire to its original terminal, but attaching the light colored wire to the "P" (for pulse) terminal. Ta Da! It worked like a charm! The tach is now very steady and reads correctly at all RPMs.
There is no indicator light for the "Power" setting of the ECT. Here is a work-around I haven't actually tried: The "new" instrument cluster has a "4WD" light that is not being used. I should be able to figure out what lead was designed for the "Power" indicator and pull it from the connecter it is in and replace the "4WD" lead with that one. Then, when I put the ECT in Power mode, the "4WD" light should come on. I probably won't take it apart again to do this, but if anybody does and it works, let me know!
As to the speedometer - we had to pull the needle off to set the odometer and we had to experiment to get it set correctly. Every time we would put it where we wanted it, when we pushed it on to the shaft, it ended up too low. BE CAREFUL removing the needle, BTW - pry carefully with two small flat blade screw drivers so as not to bend or break the shaft. With the needle set just below the "0" mark, my speedo registers within 1 mph at speeds from 20 to 50 - close enough for me!
Finally, the temperature gauge works differently from my original. The original generally set at about 1/3 or the range of the gauge and would crawl up to the middle or just a hair above on the longest, hardest uphill pulls. The "new" one sit just about dead center when the engine is warmed up and doesn't move more than about a hair's breadth on the nastiest long climbs. I am convinced that it is working, but it sure isn't giving much information. I only hope that it will climb up if there is ever any serious overheating.
That's it! My "new" instrument cluster looks and functions beautifully. Good luck with yours!
-
Has this been decided yet? I have a 1990 Odyssey V6 auto. Do I need to find a T100 90 -95 auto V6 that will allow me to do a direct swap? Do I have to live with the mileage of a used one or can I change that as well? Mine has 51 k on it.
With the help of my brother, I just finished an instrument cluster swap on my 1992 Winnebago Warrior. For the sake of others who do this and start at the same level of ignorance as I, here's what I found out. This may get a little bit long and tedious...
First, from my brother's previous swap on his 1991 Sea Breeze, we found we really needed the T100 instrument cluster rather than the 4Runner so that we would have the gear indicator lights (he did the 4Runner conversion first and neither of us were happy with it). We found a 1995 donor T100 at the junk yard and it had a mechanical speedo cable - don't know why, as we looked at earlier models that had electronic ones - so that was okay. Later, we came back and took the oil pressure sender from the same donor vehicle. I won't go through all the false starts and do-overs we went through, but will try to tell you just what we did that worked.
You MUST swap the oil pressure sender on the block - the original sender is just an on/off switch and will not work with the new gauge. I have read, in fact, that it will burn it up. There was no problem swapping the oil pressure senders except that the electrical pig tail didn't fit the new sender, so we cut the boot off of it and remodeled the connector a little so it would stay on, then we used some butyl sealant to replace the function on the boot.
We DID reset the odometer to the correct mileage. This was a lot of work and required a great deal of care. It was painful, too, as I had to add about 10,000 miles to the donor odo to get to the 32k on my Toy. To do this, we used a punch to carefully open up the crimped "horns" that held the odo axle and we were able to remove the unit from speedo assembly. With some playing around, I was able to figure out how to adjust the wheels, which I did one at a a time starting with the left most wheel. I won't try to explain how it is done in detail, because you really just need to play with it. Basically, though, you need to hold the little tabs in a straight line while you turn the wheel to the right of the one you are trying to adjust. Turn that wheel back and forth through it's entire travel and it will advance the one to the left one digit for each cycle. When you get to the 1 mile digit, you adjust it using the far right wheel, which has no numbers on it but would be the 1/10th mile wheel if it showed tenths. Since it does not show tenths, I set the odo to the next whole mile above the mileage on my original odometer. Then, you have to put the whole thing back together, praying you don't break off those "horns" as you again crimp them around the axle.
With the odometer put back together (and, BTW, mine reads PERFECTLY correct - in 31 miles, the 1/10 mile digit was not perceptibly off AT ALL), it was then just a matter of installing the instrument cluster in the dash... or so you would think.
Turns out the tach was erratic as all get out and registered way high once we got it all put back together. If others have similar problems, here's what I found out: When we used a diagnostic tach (plugged in to the spade connector designed for that purpose right next to the fuse box under the hood), the tach in the instrument cluster worked fine. Using the screw on the potentiometer(accesible through the face of the tachometer - you may have to bend it up a tad to get a little screwdriver on it), we could get it adjusted correctly. Then, we would put the dash back together... and the tach would be way off and jumping around all over the place. We tried removing the small add-on printed circuit board (rectangular with 3 leads coming from it and attached to the main circuit board for the instrument cluster - not all instrument clusters with tachs will have this), but the results were the same. Finally, we realized that unplugging the diagnostic tach is what caused it to go haywire, so we scratched our heads and tried to figure out why. Finally, we checked what the diagnostic tach was doing electrically and found that there was about 1434 ohms of resistance between the pulse lead and the negative terminal of the battery. We then checked the add-on pc board and found the same 1434 ohms or resistance between the black wire and the light colored wire. Sooo.... we put that little pc board back on the instrument cluster but connected only those 2 wires, attaching the black wire to its original terminal, but attaching the light colored wire to the "P" (for pulse) terminal. Ta Da! It worked like a charm! The tach is now very steady and reads correctly at all RPMs.
There is no indicator light for the "Power" setting of the ECT. Here is a work-around I haven't actually tried: The "new" instrument cluster has a "4WD" light that is not being used. I should be able to figure out what lead was designed for the "Power" indicator and pull it from the connecter it is in and replace the "4WD" lead with that one. Then, when I put the ECT in Power mode, the "4WD" light should come on. I probably won't take it apart again to do this, but if anybody does and it works, let me know!
As to the speedometer - we had to pull the needle off to set the odometer and we had to experiment to get it set correctly. Every time we would put it where we wanted it, when we pushed it on to the shaft, it ended up too low. BE CAREFUL removing the needle, BTW - pry carefully with two small flat blade screw drivers so as not to bend or break the shaft. With the needle set just below the "0" mark, my speedo registers within 1 mph at speeds from 20 to 50 - close enough for me!
Finally, the temperature gauge works differently from my original. The original generally set at about 1/3 or the range of the gauge and would crawl up to the middle or just a hair above on the longest, hardest uphill pulls. The "new" one sit just about dead center when the engine is warmed up and doesn't move more than about a hair's breadth on the nastiest long climbs. I am convinced that it is working, but it sure isn't giving much information. I only hope that it will climb up if there is ever any serious overheating.
That's it! My "new" instrument cluster looks and functions beautifully. Good luck with yours!
-
That dash/instrument cluster looks real nice, Andrew!
Craig just found an instrument cluster out of a T-100 for me, including the tach and trip odometer, and I will probably install it this weekend. At the same time, I'll install a 2nd cigarette lighter and make both of them hot all the time. We are also both going to install "oh, shit!" handles that Craig also picked up from various T-100s and 4-Runners at the junk yard.
-
We've got photos up on our Picasa site: https://picasaweb.go...uverIslandToyIn
Thank you for the pix! I hope others post some of theirs, too!
-
1100+ miles into our Nanaimo trip best tank (the last one will work out to around 18 (still need to do the exact metric conversion. Worst tank - 15 mpg exactly for 120 miles uphill almost the whole way (Boise, ID to New Meadows, ID). Averaging 16+ on almost all secondary mountainous highway at loaf-along speeds int the '92 Winnie Warriior 321RL with V6 and auto. Speedo and Odo check out w/in .5%.
Here are the final numbers from our Nanaimo trip. We drove 2,632 miles with very little on freeways. The best mileage was on winding roads at about 45 mph and the worst was on hilly roads at 60+. Best tank was 17.4 mpg and worst was 12.2. Trip average was 15.79 mpg.
-
What a wonderful time in Nanaimo! We really enjoyed getting to meet all of the folks who came - and we're truly sorry we missed the pot luck on Saturday evening.
Thank you again, Wayne, for taking the bull by the horns and putting this Toy-In together. I hope we all meet on the road again sometime. If any of you get in the vicinity of Boise, let us know and we will arrange to get together and share some of the sights around here.
We'd love to hear from you guys - and would really like copies of all your photos! e-mail me at (leave out all spaces!) day off 53 @ gmail.com.
-
If you are in the area, look for a '91 SeaBreeze with Oregon plates (Craig & Sherrie) or a '92 Winnebago Warrior with Idaho plates "2DAYOFF" (David & Kay).
BTW we can be reached on my cell phone at 2-oh-8 - ate-6-6 - 2-six-ate-9 (there! That should avoid the telephone number mining bots, yet you can figure it out...). I'll try to keep charged up and turned on, but no guarantees!
-
Sounds like you're having a good trip. If you need any info/assistance along the way, feel free to call 250-246-2006 until Friday noon or so, then 250-210-2146 (cell) which we will have on all weekend for the Toy In. Cheers, Wayne
I guess we should have made our Friday reservations for +/- 2 days... we got to the Living Forest campground just after 9:30 p.m. on Wednesday, June 22. The office was locked but the night security guy showed us to a big pull-through site right next to the office that we are both occupying for now. We'll be out and about the island tomorrow, but one of our rigs will probably spend most of the day here. If you are in the area, look for a '91 SeaBreeze with Oregon plates (Craig & Sherrie) or a '92 Winnebago Warrior with Idaho plates "2DAYOFF" (David & Kay).
We saw a Frontier as we were driving to the campground from the ferry (needed a muffler). Is that one of us?
-
The 4 Days in our 2 rigs are now at Swan Lake RV Park outside Vernon, BC (I give it a hardy "do not recommend").
BTW. Scottie's RV Park in Creston BC is fabulous! Beautiful park with lots of trees and nicely equipped. Near the railroad tracks, but we had no trains after we hit the sack (last one was 11:30 p.m. - we were up late that night) and you get a little of the mouth-watering aroma of the wort cooking at the Kokannee brewery across the street, but it truly was nice. $30 plus tax.
-
The 4 Days in our 2 rigs are now at Swan Lake RV Park outside Vernon, BC (I give it a hardy "do not recommend"). We've been on the road 1180+ miles and are still about 2 days out. Depending on stops and interest, we may hit the island Thursday afternoon/evening or maybe mid-day Friday. I brought 6 assorted bottles of home-made wine (oenophiles may turn up their noses just a bit, but it is all drinkable). We'll inquire when we arrive about what else is needed and go on a shopping trip.
The trip is pretty uneventful so far - replaced a coach battery that wouldn't hold a charge and left a gas cap sitting on a pump so got a new one, other than that, both rigs are doing exceptionally well.
See you Friday!
-
1100+ miles into our Nanaimo trip best tank (the last one will work out to around 18 (still need to do the exact metric conversion. Worst tank - 15 mpg exactly for 120 miles uphill almost the whole way (Boise, ID to New Meadows, ID). Averaging 16+ on almost all secondary mountainous highway at loaf-along speeds int the '92 Winnie Warriior 321RL with V6 and auto. Speedo and Odo check out w/in .5%.
-
Thank you! I've also contacted a Toyota parts wholesaler who has notified me that the parts for my 81 toyota are no longer in production..

Replacing this tank is tricky, aftermarket tanks for sale aren't even road legal (offroad use only). Do you have any other sources for finding parts?
You might check this eBay seller. Near as I can tell, though, they have tanks for 1984 and later Toys - no indication that they will fit earlier models.
-
Thank you! I've also contacted a Toyota parts wholesaler who has notified me that the parts for my 81 toyota are no longer in production..
Replacing this tank is tricky, aftermarket tanks for sale aren't even road legal (offroad use only). Do you have any other sources for finding parts?
You might check this eBay seller. Near as I can tell, though, they have tanks for 1984 and later Toys - no indication that they will fit earlier models.
-
We are restoring a 1991 Dolphin motorhome. It is in good condition except for the two sides of the top bunk. Hubby is doing a good job of replaceing them. We want to replace all of the outside rubber or vinyl molding. Our local RV supply store does not carry any molding that appears to be the size needed. Would someone please tell me the size needed or how to measure the existing molding. I will have to order the molding and if anyone has a special place they order these things from please let me know. Thanks for your help. Patty in Nebraska
My brother and his wife just replaced the molding around the front and back windows and the molding covering the joints/screws on their '90 SeaBreeze (should be same as yours - same manufacturer). Both were very common materials they got from the local RV parts store. The molding over the joints/screws looked wider and flatter than the original, but when it is put in place it is clearly the same stuff. Take your Dolphin with you or take a piece of the old material to your local RV parts/repair store and I'm sure they can match it.
-
Let's plan to get together around 6 pm or so and see what goodies everybody has to offer.
We (David and Kay Day and Craig and Sherrie Day) will be there! If I remember to stock the Warrior, I will bring wine. We'll contribute something else - have no idea what!
-
If I get my interior done by next weekend I am going to drive to southern CA to drop off my dolphin to aero tanks to get the larger 30 gal installed.
I am really anxious to hear how the 30-gallon tank installation goes. That is one of the big drawbacks of the Toy Homes from my perspective. Even though they get good gas mileage, a 17 gallon tank means fill-ups every 200 miles or so to be safe. I've put a jerry can on the back to give me a little cushion, but it would be great to have a larger tank. Please put a note in Fuel Tanks and ETC when you've completed the swap!
I hope you enjoy your first long trip with the Toy! I'm about to take off on my first real trip in a week - but it will only be 2000 to 2500 miles. Nanaimo, baby!
-
I've learned that people (myself included) can be passionately convinced of the "truth" of something that is entirely erroneous and it is easy to point to anecdotal evidence to support an incorrect hypothesis. For example, I long believed that higher octane fuel ("ethyl" in my youth, from the addition of tetra ethyl lead) gave more power and higher fuel economy. But I am a believer in the scientific method, and science just doesn't support that belief. There are lots of web sites that can give you good, correct information about fuel octane issues. The State of Oregon has some very good and correct (but concise and not terribly detailed) information about octane here. The scientific truth is that, in most properly tuned engines, any octane rating above that which prevents "pings" or "knock" (preignition caused by the fuel igniting from compression before the spark plug sparks) adds no performance benefits and does not increase the life of the engine. If higher octane rated fuel truly does increase your performance or fuel economy, you probably need a tune up. However, in some engines that have electronic knock sensing, there may be some slight benefit to using a higher octane rated fuel.
As to E85, even the ethanol fuel industry admits that it may decrease fuel economy by about 2% in fuel injected vehicles. The U.S. Department of Energy gives much gloomier information, stating that flex fuel vehicles usually have a 25% to 30% loss in fuel economy when running on E85 because of its lower energy content. The Wikipedia article on the subject points out that E85 has 30% less energy by volume than conventional gasoline.
I'll stick with good ol' gas - I even avoid 10% ethanol when I can, since the Department of Energy acknowledges that it will reduce fuel economy by 3% - 4%.
-
I can turn the water pump on and I get water pressure and the toliet and sinks work but nothing comes out when I try to turn the hot water side on.
...
Also I am confused about the waste tank setup. Is there two tanks one for the toliet and another for the shower and sinks? If so are there two different spots you need to empty them? I have read the dolphin manual but it only talks about draining the toliet's waste tank.
As to the water heater, it may be something very simple. If the hot water tank was drained, you will not get any water out of the hot water faucet until the tank fills again. To do this, just turn on the water pump and open a hot water faucet until water comes out - it may take several minutes. When water comes out, the tank is full. Then, you will want to top off your water tank again, because you will have taken about 6 gallons (depending on the size of the water heater, but that is common) out of the tank. If that is NOT the problem... I dunno.
As to the waste tanks, I don't know your particular rig, but most have two tanks - a "black water" tank that holds only waste from the toilet and a "grey water" tank that takes the waste from the sinks and shower. If so, there will be two separate knife valves that go into a single drain under the coach. You drain the black water tank first, then close it and drain the grey water tank. I like to flush the black water tank out with some clear water after I drain it, assuming there is some available. Some rigs have only 1 waste tank. It should be simple to find out whether you have 1 or 2 - just look at the drain pipe under the coach and see if there is only one pipe with a singe knife valve (pull handle) on it or two separate pipes, each with a knife valve. Also, you may have a status panel somewhere with a button you push and lights that indicate the condition of the battery, the fresh water tank and the holding tank(s). If you have such a panel and have separate black and grey water tanks, there should be a separate light for each tank.
I hope that helps.
-
removed the roof ac and installed a make a breeze vent, now i need to run 12vdc cables to the converter. Is there a closer source in the roof where I can get juice?
Winnebago has a lot of information on their web site, including wiring diagrams wiring installation plans going back to 1990. I don't remember what year your Warrior is, but they didn't change much year-to-year. You might find some useful information. As an example, here is all the wiring information for the 1991 WT321RB. The difficult thing with fishing wiring around through the ceiling is that it is all styrofoam filled. I like the idea of using the 110 wiring that you are no longer using for the air conditioner.
What is the largest inverter I can use?
in Electrical
Posted
I doubt the alternator will be a problem - I don't think the fridge will use more than the alternator puts out. The question is how much can your batteries handle and for how long. I put a small inverter in mine just to run my LED TV and blu-ray. I also added a 2nd extra heavy duty deep cycle battery. My brother put 2 commercial 6-volt batteries in his, along with the original 1 12-volt, and put in a 1500 watt inverter. He runs his microwave off his with no problems.