


JustJosh
-
Posts
35 -
Joined
-
Last visited
Content Type
Events
Profiles
Forums
Gallery
Posts posted by JustJosh
-
-
My mistake with the fiberglass method was probably not getting a good enough slurry and too tight a weave on the fiberglass.
-
3 hours ago, Scott iv said:
My 1987 Escaper 22re cruises best at 55-60. I do ride the interstates here with a 70mph speed limit and will hold it at 65. Wind and hills are significant factors in the vehicle.
Mine will typically hold 65 without a problem on the interstate as well, I just get jumpy when when a wind gust hits or I start getting buffeted around by the airflow from rigs. Of course, I try to stay off roads during high traffic times as well.
-
Earlier in the spring, I actually succeeded (on the third try) fixing my black and grey water tanks which were both cracked at the top of the pipe where it meets the tank. There are a few videos on Youtube with recommendations involving a combination of fiberglass and ABS glue. This method just didn't work for me. Maybe operator error, but it would appear to work and then it just wouldn't hold, and I had to clean the area off with a multi tool and start over again. This method just didn't work for me.
Here is what did: heat welding. Here's the basic steps.
1. Figure out what kind of plastic your tanks are. My understanding is that this is usually either ABS or Polypropylene. This in of itself is a bit of a trick. See: https://engineering.stackexchange.com/questions/6682/how-to-determine-whether-plastic-is-abs-or-polypropylene
2. Buy a hot air gun style plastic welder. These work best because it's easiest to get the tank and the welding plastic up to a temperature where they will seal together. This one worked fine for me: https://www.ebay.com/itm/254290766066. Do not buy something that looks like this: https://www.ebay.com/itm/311585701819?hash=item488bf47fbb:g:CvoAAOSw7GhelqBr. I tried these, but they just didn't work because it's not possible to get the tank and welding plastic hot simultaneously.
3. Buy the appropriate plastic for the repair. In my case, it was ABS.
You will need a sheet of appropriate plastic. I used this: https://www.amazon.com/Pack-Plastic-Moldable-Textured-Technology/dp/B08RXJHJK7/ref=sr_1_2_sspa?dchild=1&keywords=abs+plastic+sheet&qid=1623637610&sr=8-2-spons&psc=1&spLa=ZW5jcnlwdGVkUXVhbGlmaWVyPUExMFM0NFQ2SEJWRUxSJmVuY3J5cHRlZElkPUEwNzM2MjE0MkhWMVRSVTNEMFBTSiZlbmNyeXB0ZWRBZElkPUEwNzUzODYyWlFHU1hXMlU3S0lTJndpZGdldE5hbWU9c3BfYXRmJmFjdGlvbj1jbGlja1JlZGlyZWN0JmRvTm90TG9nQ2xpY2s9dHJ1ZQ==
You will also need some welding rods. I used these: https://www.amazon.com/Matrisen-50PCS-Plastic-Welding-Rods/dp/B08VHLV97S/ref=sr_1_1_sspa?dchild=1&keywords=abs+welding+rods&qid=1623637644&sr=8-1-spons&psc=1&spLa=ZW5jcnlwdGVkUXVhbGlmaWVyPUEzNFRJVjJSTlk1V1dNJmVuY3J5cHRlZElkPUEwNjQ5NzU5T1NDR0ZQVzFKUkFDJmVuY3J5cHRlZEFkSWQ9QTAxNzA4NjkyNTBNTjlENU1JMjJQJndpZGdldE5hbWU9c3BfYXRmJmFjdGlvbj1jbGlja1JlZGlyZWN0JmRvTm90TG9nQ2xpY2s9dHJ1ZQ==
4. Heat the tank area with crack. Keep the heat steady and push some of the plastic welding rods into the crack. They should melt quite easily as you push in if your heat is good. BUT, don't get it too hot or you will ruin your tank completely. Let it sit and cool.
5. Heat up the repair area again, and then weld a custom cut piece of the plastic sheet over top of the entire repair area. Let it cool.
6. Melt some more plastic rods into the seam between the custom cut sheet and the tank. Let it cool completely. I mean 100% completely. Then, check your work by throwing a gallon of water in it and letting it sit.
I strongly suggest goofing around with the rods and heat gun and do a few practice welds before doing it for real. Also, don't rush. Also, also, apologies for not taking pics or videos.
-
I just got my 1986 Toyota Escaper out on the road again after replacing shocks and springs. This improved the ride a lot, but of course I still get blown around a bit, and uneven roads aren't fun either. I've made it a habit to not drive faster than 60 mph. I was curious what everyone's typical cruising speed was.
-
Assuming the temperatures are Celsius here, my guess is that two days very close to freezing isn't going to be a big deal. If your climate is such that this is only going to happen a couple of times through the rest of the winter, a temporary solution might be a Mr. Heater/Little Buddy (self-contained propane space heater).
-
I know this might seem completely elementary to most folks here, but I've recently discovered the magic of https://parts.toyota.com/ for identifying parts numbers and basic mechanical diagrams combined with toyotapartsdeal.com for actually purchasing them.
Also, after ordering the wrong u-bolts for my leaf springs, it seems that generalspring.com has the most logical system for finding what I needed. So many people and websites pushed towards the OEM u-bolts, which of course, I found out don't work because we have a completely different axel on our rigs. Rookie mistake. I feel so dumb.
-
I just wanted to highlight the great experience I had with them. I'm not the most mechanical person in the world, so the process of buying leaf springs and all of the required hardware to go with it was pretty intimidating. When I called them up, they walked me through my order piece by piece to make sure I had everything that my mechanic would actually need. Then, when I accidently forgot to order two sets of bushings through the online portal, they actually emailed me to let me know I needed another set, and they wanted to make sure that another set got added to the order before they shipped out everything. Shipping was also faster than expected.
Awesome people.
-
Hi All,
It's been a few months, but I finally got my 86 Escaper up on a lift at a mechanic willing to work on it. The good news is that he went over everything from engine maintenance to brake systems didn't find any expensive issues that I didn't already know about.
He agrees that it needs new leaf springs (Unless there is a reason not to, I'm going with the Old Man Emu CS010Rs from Summit Racing), but he also wants to replace the shackles and u-bolts. Does anyone know if the shackles are just the standard Toyota ones, or is there something else I should be looking for? Similar question for U-Bolts.
Also the rear emergency brake cables need replaced because they snapped right behind the y-spring mechanism, but the wires evidently need to be longer than then the ones typical Toyota ones available from the local parts supplier (which makes sense--considering the extension and conversion of the vehicle). Any suggestions here?
As always, thank you for any help!
-
Thank you. It's useful to know that this isn't normal, and I'll add a converter update to my to-do list.
-
Hello everyone,
The family and I took our 86 Escaper out to a state park for the first time over Halloween weekend, and had an absolute blast. I highly recommend it if you have kids. The one quirk we ran into was that even though we were hooked up to shore power, but the house battery completely drained anyway. The plugs all continued to work fine the entire time (We had a small electric space heater going all night, and an electric hotplate worked fine for cooking). However, the house dome lights didn't work the next morning and neither did the water pump, even while still plugged in. Is this normal? Or is this a problem I need to track down? My guess is that the space heater drew so much electric that it was pulling from both shore power and the battery, but the lack of water was a bit of an interesting surprise when we attempted to use the bathroom. Thank you for any guidance here. I'm hoping we don't run into the same issue next season when we run the AC while plugged in. -
18 minutes ago, Ad45 said:
And automatics are worth more surprising. Manuals I could find all day for around 5-7.
Not many people drive manuals anymore. I'm a newbie at this as well, but it sounds like you did fine, especially if it was owned by someone who kept up with maintenance and has the records to prove it.
-
I can't really tell from pictures, and I'm not a mechanic, but the back end looks like it's hanging low. How's the suspension?
Just to give you an idea as to what you might be in for, I recently bought a similar rig for $5,800. Now, mine's a manual transmission with no cab air conditioning, but it only has 72,000 miles. I'm budgeting $4,000 for basic road-worthy items that I think are necessary for safety (e.g., suspension, breaks, tires, etc.).
-
My recently bought rig doesn't have a built-in generator. So, I read through all of the generator-related threads (that's quite a rabbit hole...), and went looking online. One of my searches returned a used Honda EU 2200 for $350 plus tax and $15 dollars shipping on offerup.com. I've never used this site, I have no idea whose selling it, I'm only pretty sure it will run my AC because I've got the small 7,100 BTU Mini Mach Coleman. Supposedly, my credit card doesn't get charged until I receive the item and certify that the item is actually in the same shape as promised...so...gamble. I let everyone know how it turns out. From the website description of policies and timelines, it could be three weeks before I know if everything worked.

-
5 hours ago, Maineah said:
Some has been there before you. The 30 is the main it is the breaker that protects everything else. Generally you would see a 30, 15 and a 20 amp breaker. So with 3 20 amp breakers it would be easy to overload the 30 amp. The AC would require a 20 amp for the start current a 20 for the microwave and a 15 for everything else. The AC is direct wired no outlet boxes. A cheap tool that pretty much any hardware store would have is a little $5 plug in gidget with 3 little lights, plug it into any outlet a start turning off breakers till you find the one that has no effect that will be for the AC. (there should be an outlet for the microwave also) Be sure the AC is set for max cool. Save the little tester and leave it plugged in I have one in my camper it will tell you right away if the campground screwed up with their wiring I have see that more than once.
Hello Maineah, Thank you for the info. I'm still going to figure out what goes where to label the breakers and figure out where all the wiring goes, but it turns out that this was operator error (the breaker in my garage subpanel tripped).
-
16 hours ago, WME said:
Next step, remove the ground wire on the house battery. Plug the RV into shore power. The house lights should still work, flip breakers until the lights go out. Mark the breaker.
Plug something into the ac outlets flip the last breaker. They may be an outlet in a cabinet for an optional micro wave, soooo look. a power goes out.nd see the
It's a little painful to admit this, but there is another set of circuit breakers in the mix: my subpanel in the garage. I was plugging into a set of outlets that didn't have any current going into them. UGH. I guess the silver lining is that I won't make that mistake again, and I now know my RV a lot better.
-
1 hour ago, WME said:
OK with the understanding this is from a old guy 15 year ago memory.
The AC runs on 115v ac so you need a generator or have things plugged to shore power. So plug it in and report back.
The 30 amp breaker is the Main breaker, it protects everything. The 20 amps should be for the AC, a micro wave and the converter/battery charger.
So if the AC works, turn off a 20 amp breaker and see what quits. The label the breaker. Then do the other breakers.
Your memory seems okay to me. I just double checked, and the unit does run on 115VAC at 60Hz. It is plugged into shore power. There isn't a microwave, so it looks like I'm going to just have to test for current at various spots with different breakers on and off. Of course there doesn't really seem to be an easy way to access to any of the wiring without taking the closet apart.
-
Hello everyone,
So, when I was I buying my 86 Escaper a couple of weeks ago, I turned on the air conditioner and it worked fine. Fast forward to yesterday, and I try to turn it on...and nothing. Won't go. This seems likely to be operator error. Am I missing some kind of switch? Does it matter if the truck is running or plugged in?
Of course there is still a possibility that this isn't operator error and the unit just decided to fail a week after I bought it. So I bought a multimeter (that I don't know how to use yet) and started trying to trace the electrical. There is a circuit breaker panel with four boxes and a separate fuse box. The breaker panel is 1 30 amp and 3 20amp. The Fuse panel is 1 30 amp and four 15 amp. So, it doesn't appear as a 1-to-1 conversion where someone upgraded to a panel just left the old fuse box in. Maybe it is. Any help with understanding what I'm looking at here would be appreciated. Is there any standard for what each of these circuits would be?
As always, thank you.
-
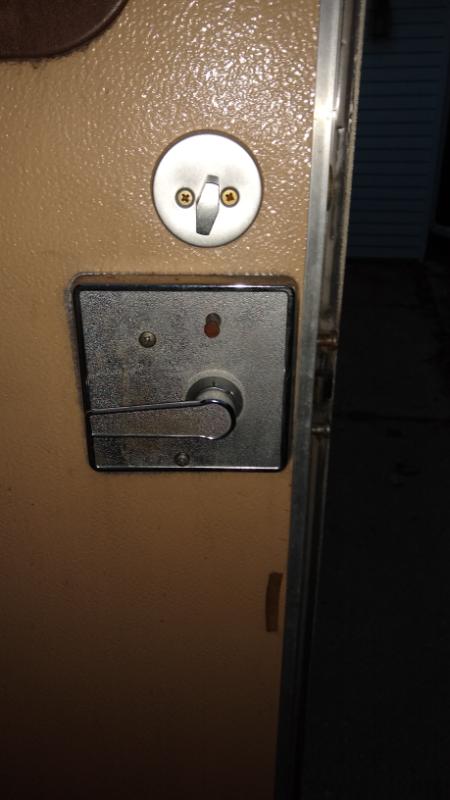
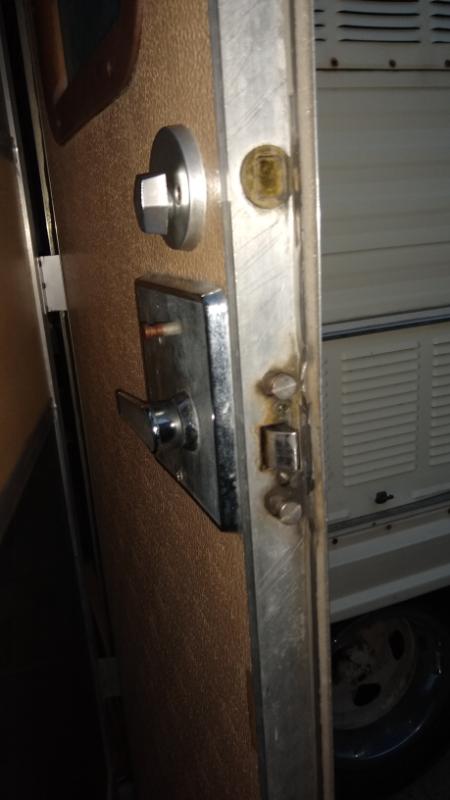
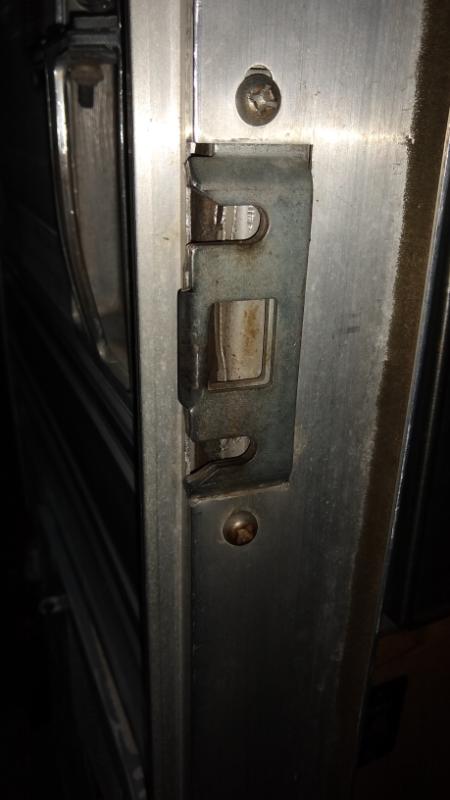
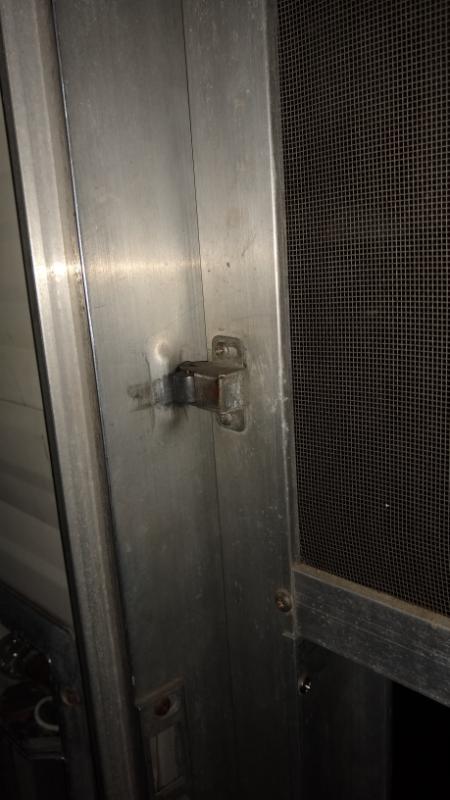
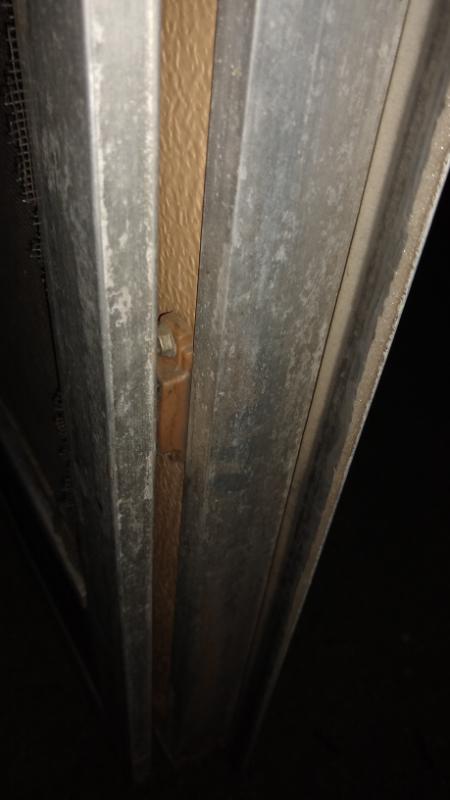
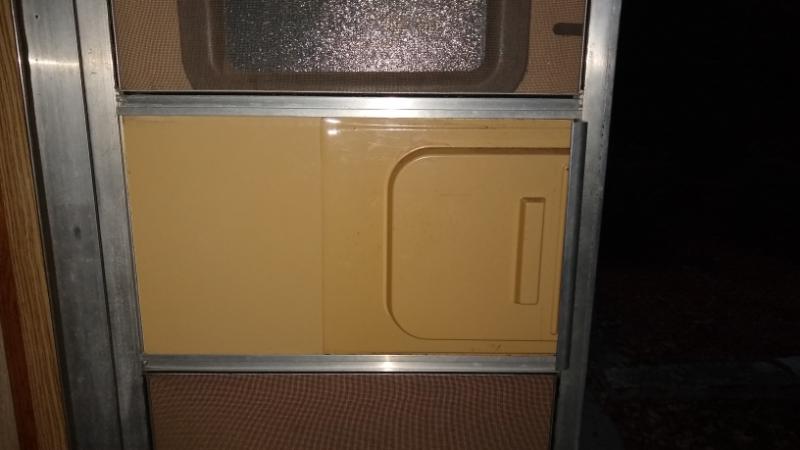
Mines an an 86 Escaper, so it probably won't help, but I took some pictures of my whole door handle and latch assembly just in case. The screen door is just a cabinet magnet down towards the bottom and a small roller near the door handle.
-
1986 Escaper. Wisconsin. 72,000 miles. Four cylinder. Four speed manual.
Recently purchased for $5,800, looking at about $3-4,000 in updates with the intent to drive it cross country north/south, east/west, and maybe even to PEI. Thank you to everyone answering my posts and helping me figure out what needs done.
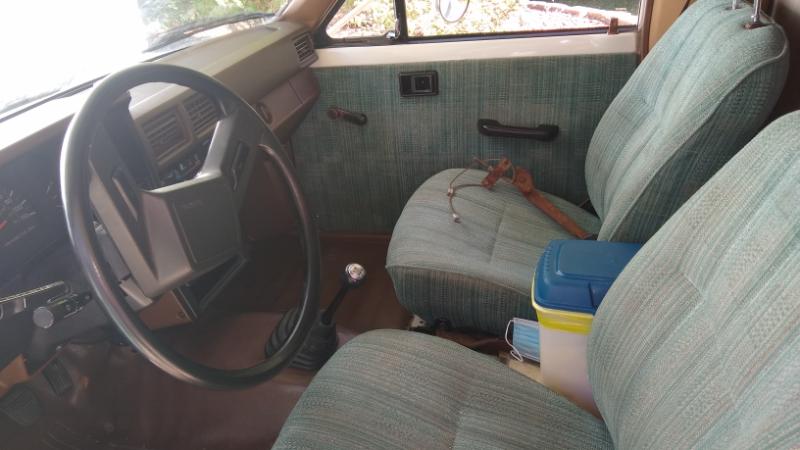
Edit: That's part of the emergency brake in the front passenger seat.
-
1 hour ago, Scott iv said:
Change the oil to the rear differential. Renew power steering fluid and brake fluid (hopefully fluid will be done with brake job). Rotor and cap. Inspect battery terminals and ground wire. Inspect exhaust system. Drive the vehicle a bunch locally and listen to your machine closely prior to the trip. Look for fluid leaks regularly for a few months so you can get after them.
I agree with Linda and the valves. Important. Replace the valve cover seal.
PCV valve. Cheap and easy replace.
Front bearings were shot on my machine.
The exhaust system and battery were one of the few things already done. I'll add others to my list. My guess is that front-end stuff is going to have to wait till spring.
-
1 hour ago, WME said:
Add a thought.. When you have the rear brakes done, give a serious thought to replacing the rear axle seals. Seals are cheap and the mechanic almost has things taken apart to that point. The rear bearings are grease packed and not lubed by the rear axle oil. Save a bunch of labor $$
4 seals and 4 bearings in the rear axle.
New wheel cylinders might be a good idea too.
I'll add it to the list. This is kind of my thought process, might as well bite the bullet and get it all done once the rear end is basically going to be taken completely off any way. My guess is my bill is going to run close to $4000, but buried in there is probably a few hundred dollars savings from only having to take everything off once.
-
34 minutes ago, linda s said:
Those are the wrong shocks. Even with the EMU springs it still doesn't translate to a 4 inch lift. The regular size for our campers is
Only the drivers side rear wheel is left hand
Double oops. Thanks!
-
34 minutes ago, linda s said:
Those are the wrong shocks. Even with the EMU springs it still doesn't translate to a 4 inch lift. The regular size for our campers is
Only the drivers side rear wheel is left hand
34 minutes ago, WME said:Only the drivers side has left handed threads, thus all the confusion.
Those Bilstein shocks you picked are for LIFTED trucks. These are 4" longer than normal shocks. Is your Toyhouse stock ride height or have you lifted it?
Correct P/Ns for stock ride height are front 24-184830 and rear 24-002585
Oops. Thanks you.
-
Hi WME,
Unfortunately, I'm the complete idiot here. I've never been involved with a mechanical project like this before. I've remodeled a house down to the studs, but I think I've only ever changed my own oil twice in my 47 years.
Anyway, a few questions...
- "Red finger nail polish on driver side nuts, red magic marker on finder skirt "LEFT HAND THREADS"- My understanding is that both of the rear nuts are left-handed, but this makes it sound like there is a driver passenger side distinction. Am I over-reading your comment, or am I misreading previous threads?
- "Bilstiens very best, a little stiff. KYB very good. Monroe fergettaboutit"- I'm probably getting these: https://www.bilsteinlifts.com/shop/toyota-pickup/86-95-toyota-pick-up-4wd-bilstein-5100-3-4-front-3-4-rear-lift-shocks/
- "there is a small hose behind the alternator that NEVER gets changed, CHANGE it. It has ruined more engines than I care to think about."- THANK YOU!
I really appreciate how helpful everyone is being. This is a situation where the mechanic asked me to get the parts because he hasn't worked on one of these in 20 years (he actually has worked on one). I'm completly fish out of water here and scared that I'll mess it up.

.jpg.246c3aae69615a86fe3b25c6b1c15e2d.jpg)
.jpg.ff015ac08408a7a06e1e3cf1abbe02b9.jpg)

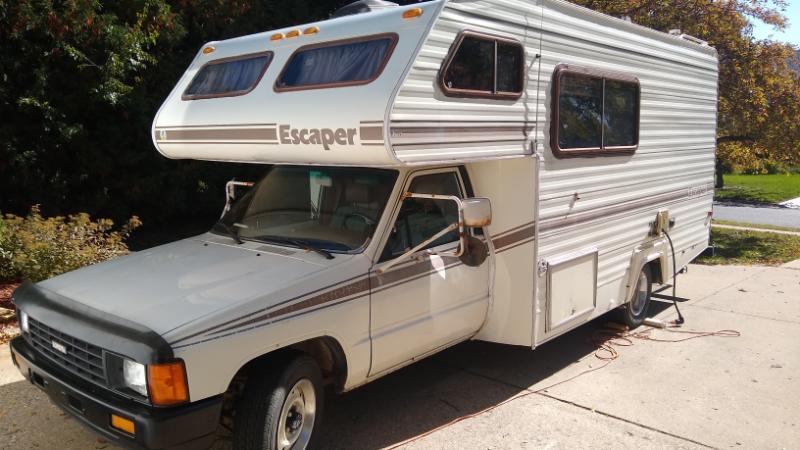


SOLD: 1986 Toyota Escaper. Located in South Central Wisconsin
in General Discussion
Posted · Edited by JustJosh
Sold
FYI to everyone. This sold to the first people who actually came and looked at it for $7000. Thank you everyone for your help and advice over the last year and a half. I wish my visit wasn't so short, but family needs are the priority.
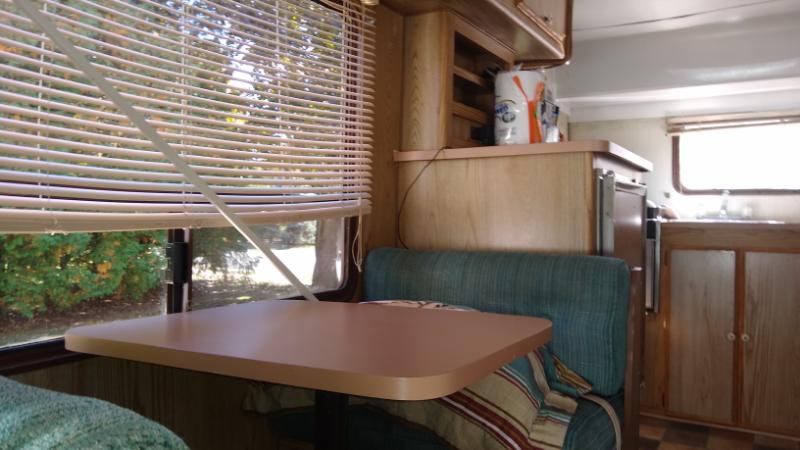
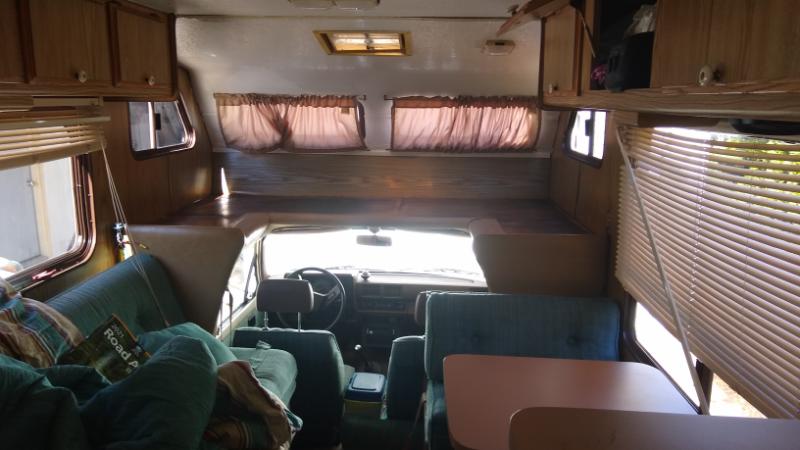
1986 Toyota Escaper RV. 72906 original miles. Manual transmission. $7,900
Runs great. I’ve only had it about 1.5 years, but a lot of the expensive work that comes with age has already been done. The time has come for our family to move, and the new house doesn’t have a space to store it.
• Correct 6-lug dually axle.
• Electrical system works.
• House AC works.
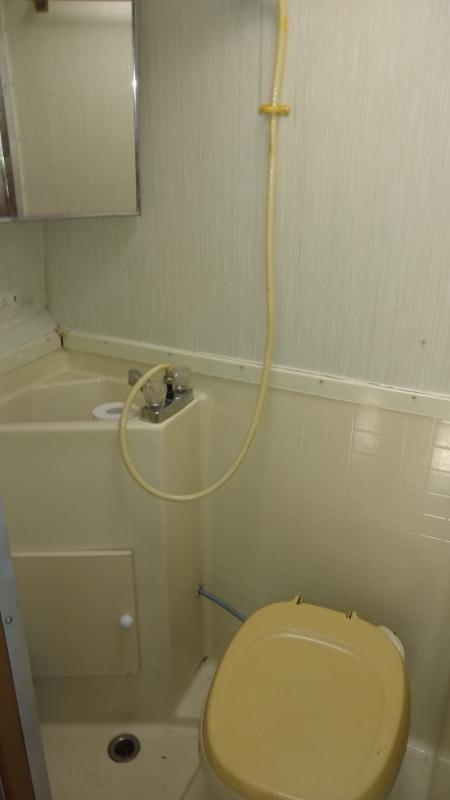
• Water, toilet, and tanks work.
• Refrigerator works on electric, but never attempted to operate on gas.
• The burners on the stove works, but never lit the oven, and the gas has never been updated.
• I have never attempted to start the hot water heater, but neither has anyone else in a long time. It probably doesn’t work.
• Comes with cover, hitch bag, leveling blocks, water hose and pressure regulator, fire extinguisher and few other odds and ends.
Recent Work:
• Exhaust system repair (2020).
• New house battery (2020).
• New tires (2021)
• New Leaf springs (Old Man Emu by ARB CS010R) (2021)
• New shocks (2021).
• New front and rear brakes (2021).
• New spark plugs, wires, and cap (2021).
• Steering stabilizer kit (2021).
• New truck Battery (2022).
Keep in Mind:
The one thing that I didn’t get around to addressing while I've worked on it during the time I have owned it is the roof and windows. Over the years, leaks have been addressed as they arise with a variety of caulking and rubber sealant paint. To my knowledge, it is not currently leaking.
If Interested, contact me through Craigslist: https://janesville.craigslist.org/rvs/d/fort-atkinson-1986-toyota-escaper-rv/7474960377.html
Terms of Sale: Cash or bank check only. No electronic forms of payment.
Wisconsin guide to private sales: https://wisconsindot.gov/Pages/online-srvcs/other-servs/seller-notify.aspx
Wisconsin guide to temporary plates, including out of state buying: https://wisconsindot.gov/pages/dmv/vehicles/title-plates/nolaf.aspx