

Grime_Divine
-
Posts
30 -
Joined
-
Last visited
Content Type
Events
Profiles
Forums
Gallery
Posts posted by Grime_Divine
-
-
7 hours ago, Sandune24 said:
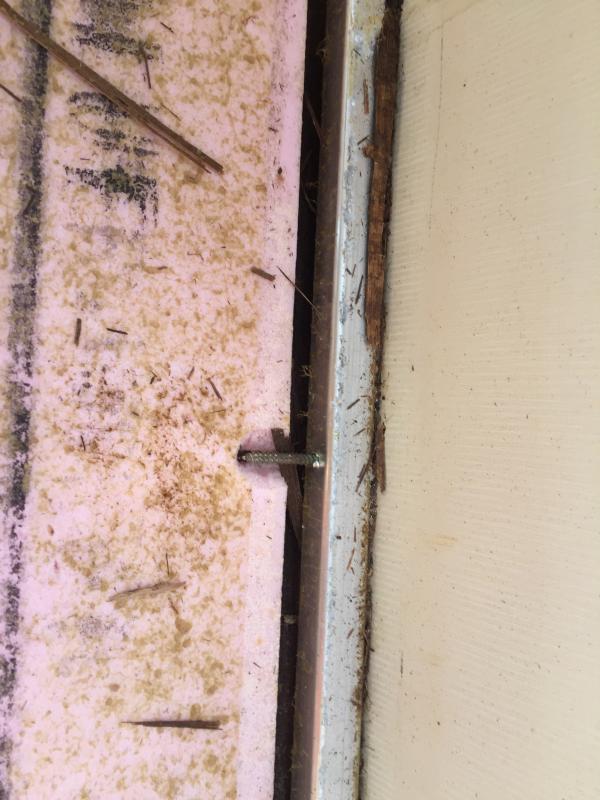
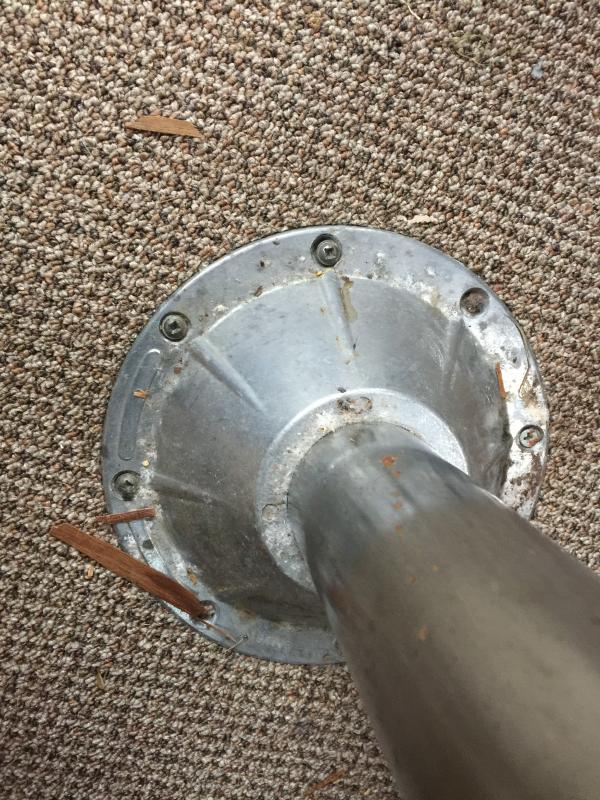
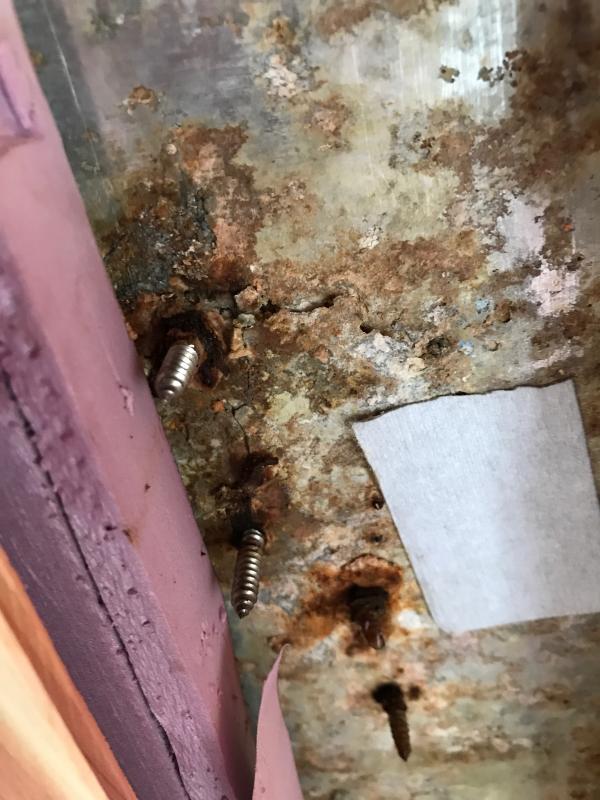
Hi Grime, very nice job by the way and thank you for your response🙏 Attached photo should help with the question I’m asking about. In photo that is the front of cab over and those screws looking at the insulation are no attached to anything. How do I approach this ? I do not know how to get those screws out of the metal frame, it looks as though it was or may need attachment to a piece of wood. Thanking you in advance for your response 🙏

Looks like those screws are coming from the outside and securing whatever that white colored panel is (and possibly more, including the outside of your camper) to the metal tubes. I would say dont mess with them. Simply place insulation around them in the manor already shown in your photo. If youre just replacing your bed space you shouldnt need to screw anything into the sides of those tubes, whatever you put should simply rest on top and then be screwed down into the tubes in order to keep it from moving around.
-
3 hours ago, Sandune24 said:
Hi all, I hope that everyone is safe and healthy ♥️.
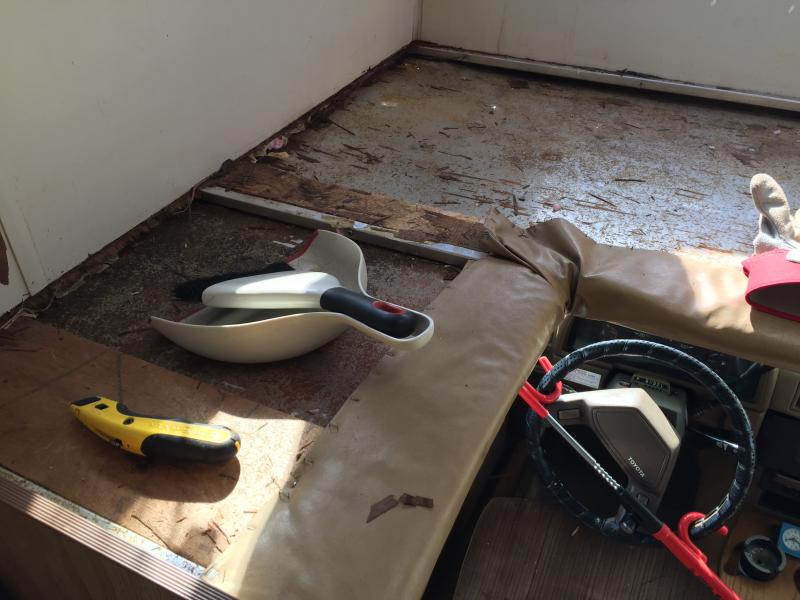
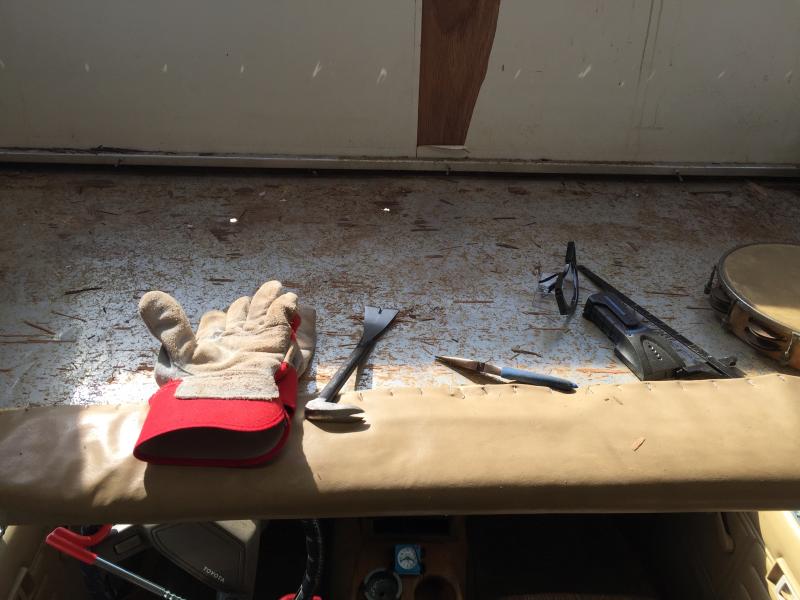
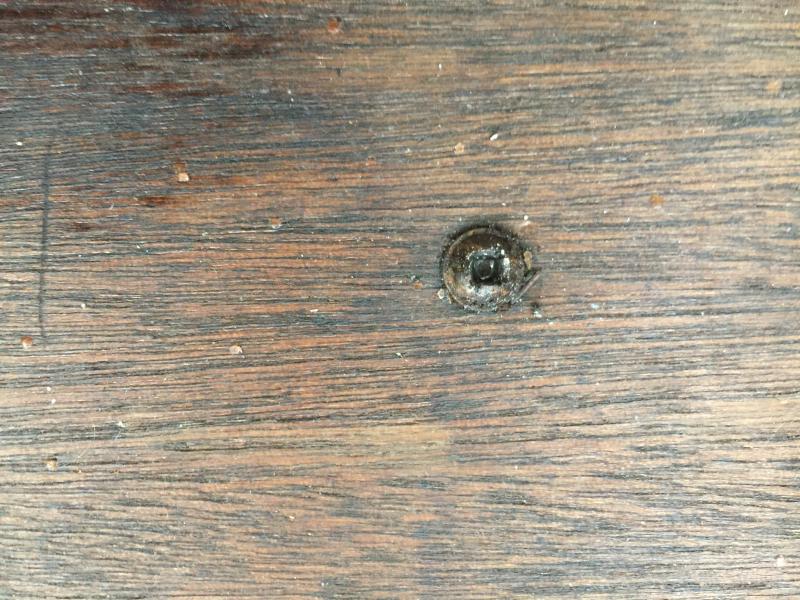
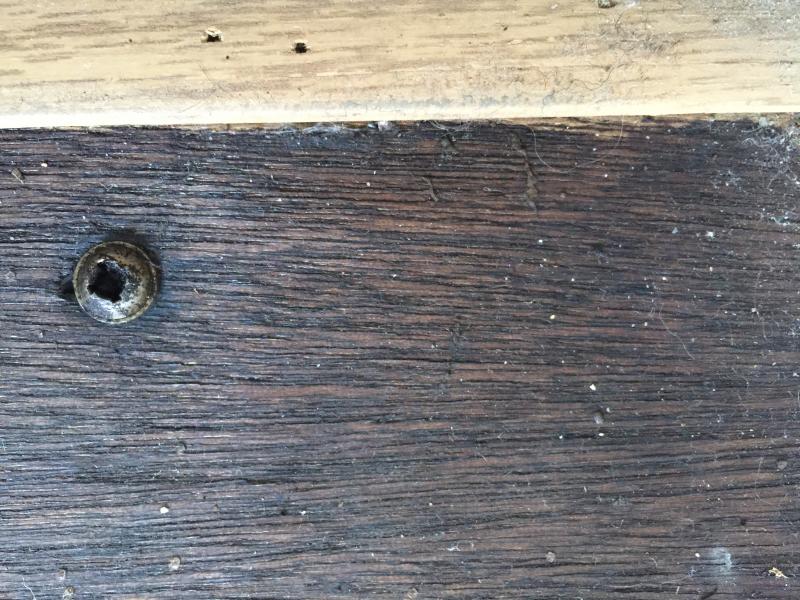
So, my progress on the over head cab is going good . I have a few questions though (of course lol), there are big spacings between the floor bed of cab and the screws have nothing to screw to. What do I put in the spaces, I have new screws, I have the wood to support the frame? In the front piece there are screws in the aluminum frame, that I believe I will have to remove and re- attach to new wood. How do I get that part out ? Thanking you in advance 🙏
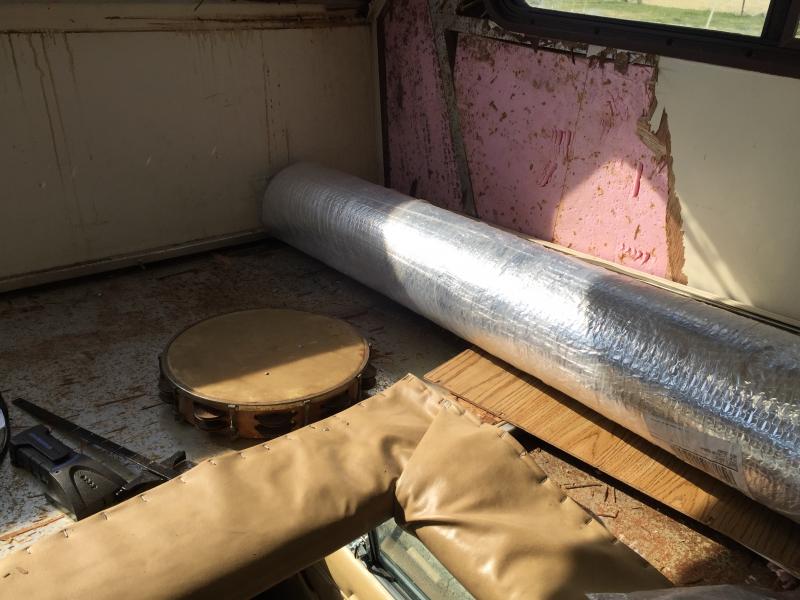
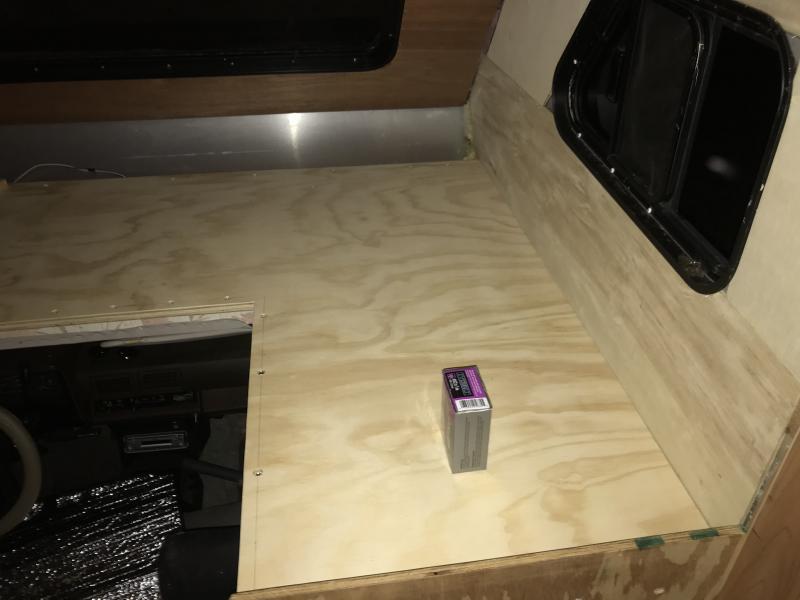
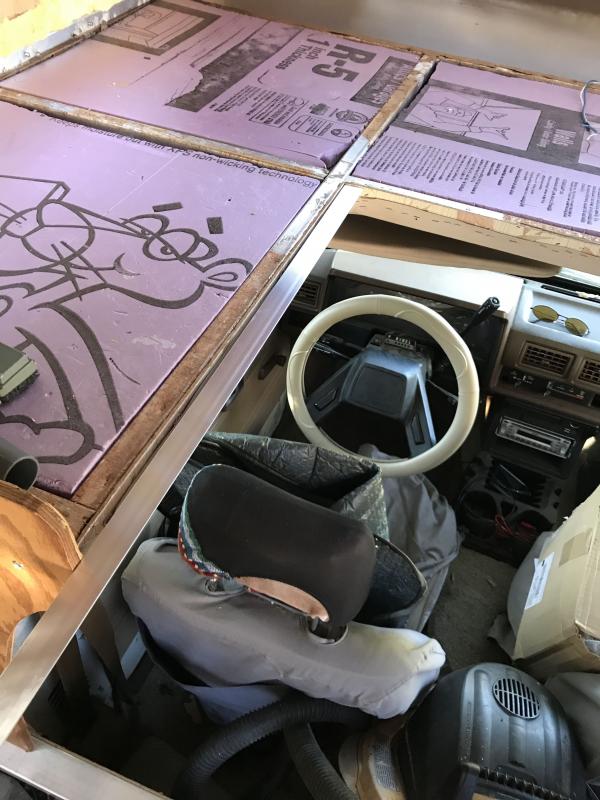
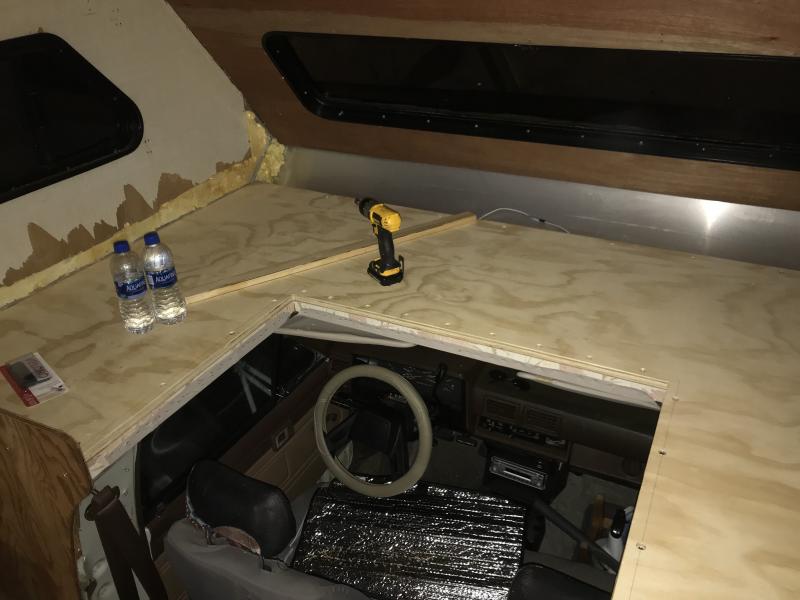
Im not sure exactly what youre asking, but basically when i re did mine (recently, with metal tube frame just like yours) we just filled the big open space (1" deep voids in between the square tubes) with 1" thick pink insulation. All the weight of the bed up there needs to be transmitted directly to the square metal tubes only and nothing else. so the space between the bed and the metal exterior is just void you can insulate. What we did was basically get a nice thick sheet of 3/4" sanded plywood from home depot, and had it cut to the exact dimensions, then after i secured it to my metal tube frame using self tapping screws (screws meant to pierce metal). If you want and have the ability you can also cut out a removable portion so you can access the front 2 seats easier.
-
Hola, yo habla muy pequeno espanol, No entiendo tu pregunta. Cual is tu problema?
Tu tienes baja presion ? O ninguno en absoluto?
El bomba de agua leges el agua desde el tanque y da presion cuando tiene a motor. O si la agua es de el "city water" (presion en el manguera) tu no neccesites el bomba de agua.
-
Looks like you have some bad water damage here, dont worry though, if you have some time and just a little know-how with simple wood construction, this isnt a terribly difficult fix.
As Dolphino pointed out, you ought to use the R-5 Pink Panther insulation at home depot. As far as the spare tire mount is concerned, yes use common sense and get a heavy board, maybe a 2x6 in 6ft length and cut it down with a chop saw. Make sure it is supported good by the floor (assuming its still solid) Also as stated by the above, youre probably going to want to rebuild that whole section of wall. these things were built cheap, so if you simply frame it out with 2x2s or 1x2s (or best is 2x4s planed to exactly 1" thickness, which works great because the pink insulation is 1" actual thickness and 1x2s are only .75", 2x2s 1.5" ect. note: tablesaw required) you can rebuild a solid wall. You may also want to use expensive grade liquid nails (not the 1$ tubes)to make sure the exterior fiberglass is actually in contact and stuck down to the wood frame pieces.
When you have a simple stick frame wall with insulation, I recommend covering the lot with 5mm sanded ply (~25$ for a 4'x8' sheet) and painting or using wallpaper or whatever to your hearts content. A nail gun is handy to tack it down to your wood framing pieces, but finishing nails and a hammer will work fine as well.
As far as the cabinet? again simple 2x2s, a drill and a chop saw is enough to reconstruct the cabinet to a higher quality and strength than it ever had.
If your floors are mushy, cut and score and remove bad sections, replace with 1/2" or 3/4" ply and make sure the edges of the ply are supported by framing from the subfloor framing. Cover with LVT tiles or click laminate as you like.
oh, and assuming the water was coming from the window. FIX THE DAMN THING. buy some butyl tape and watch a youtube video, it doesnt take too long to fix either.
-
That thing will sell quick enough on facebook marketplace and craigslist.
These things are a hot commodity when properly remodeled, and even if not. When we were looking for ours last year often we found by the time we reached out to the sellers they were already sold.
-
2 hours ago, Sandune24 said:
There are kreg screws, and very small hex cap screws inside and outside. Has anyone figured out the best way to remove them ? Suggestions greatly appreciated. Making moves on my interior
Im confused by your issue, why dont you just use a square drive size 2 drill bit to remove these? My interior was riddled with them before I remodeled, think theyre almost all gone now. Square drives are actually quite nice because they have alot more gripping power on the bit compared to phillips or cross recessed.
-
On 6/11/2019 at 9:54 AM, wemit said:
Well, for starters, why not remove the ladder entirely? Most Toyota RV roofs aren't really that strong so having a ladder for access to the roof doesn't do your roof any favors. I removed my ladder and "roof rack" (what could anyone possibly store up there that would require a roof rack?) and covered the holes with "Eternabond" tape. Seems to be doing the job-no leaks.
For your roof, I'd look into covering the bad portion with sheet aluminum firmly bedded down with butyl tape and screws plus trying to get rid of the sagging part any way you can.
Hm, do you suppose it would be better to place something on top, or to cut out the bad portion and replace it?
-
Please Help Me!
As title suggests. I am looking to see if anyone has before "patched" their roof, or anyone who has any ideas for me. My situation is this. After a hot and very dry May in Florida rainy season is finally here. Come to see I have 2 leaks at the rear ceiling of my Toy. Water is coming in around the screws where the ladder is attached to the roof, essentially just screws straight through the sheet metal. PO must have done some sort of half whit cover up to years of water damage. Now the thin aluminum roofing is totally rusted, oxidized and flaky. In no state to stop water, even though the roof above and the ladder attachments have been totally resealed, seems like the sealant doesnt stand a chance with nothing solid underneath it. Does anyone have experience with this sort of thing? I am wondering if it is possible to DIY patch this with a smaller piece of sheet metal, or perhaps use a 1x6 or so board to elevate this area and avoid water pooling in the first place. Is there any possibility of a better sealant up top stopping this for any amount of time, or would that just be a temporary bandaid at best? Luckily I have pretty much the entire camper torn apart at this moment, so im open to most ideas. I've even considered sawing off the top portion of the ladder (I dont use it, and I highly doubt this rotten sheet metal is providing much stability when I do) to make some sort of patch job more permanent.
-
Nice. everything looks fresh. Sticking with the original upholstery and interior?
-
12 hours ago, AtlantaCamper said:
When you leave your foot off the accelerator pedal when going downhill a vacuum is created in the intake manifold. The drivetrain spins and the vacuum in the intake created by the cylinders/valves creates the braking effect. It doesn't hurt the engine and takes some of the load off the brakes. It works best if you shift manually, typically into second (or first on really steep parts). RPM/speed is the same as going uphill so max ~25 in 1st and ~45 in second.
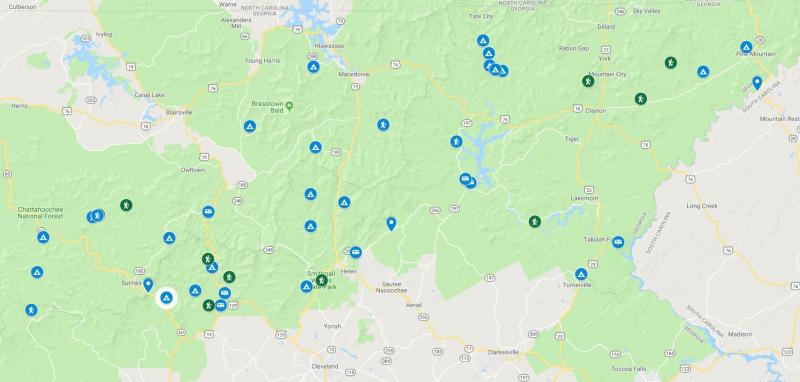
Both Moccasin Creek State Park and Tallulah Gorge State Park are fantastic spots. These are Georgia State parks inside the National Forest so you can make a camping site reservations at both state parks here: https://gastateparks.org
Thanks alot!
-
13 hours ago, Maineah said:
Ok suggestion, canoe trip on the Saco river. The campground is Woodland Acres (woodlandacres.com) there are several but many are party campgrounds Woodland is more family friendly nice quiet campsites, pool etc. There are lakes accessible from the river, great for side trips and fishing. The campgrounds along the river all rent canoes they will take you up river drop you off and the current will take you back to the campground. I have land along the Saco and my neighbor is a state owned 6000 acre wildlife management area with plenty of still water fishing some pretty good size fish, the river floods in the spring and the big fish get trapped in the still water! My area is 1 hour from both Mt. Washington and Portland. Mt Washington is a good trip no RV's up the auto road but they have both a cog railroad and coaches to access the summit that's all most a must see in the Mt Washington area.The Conway NH area (less than 1/2 hour) has something for everyone dozens of really good restaurants and brewpubs, acres of outlet stores scenic train rides etc.
Thanks alot, I think well do that!
-
On 5/30/2019 at 11:37 AM, AtlantaCamper said:
I've taken my 21 foot 1987 Sunrader with a 22re and auto trans up and down the hills of N Georgia - typically right along the Appalachian Trail. Yes, you can do it and you have already had some good advice about how to do so. The climb is not long, but near the top at a few places it does get pretty steep for a short bit. It's not uncommon for me to be in 1st gear doing about 24 mph right at the top. Second gear is my typical climbing gear on those roads. I manually shift through the hills. They are mostly two lane roads with the occasional passing lane.
I generally end up getting up to about 210F on trans fluid temp at the top, which isn't that bad. I put a trans fluid gauge in specifically so I could monitor temps on these hills. That's the most common location to take my rig and I've been doing it quite a bit. For a little while I was concerned that I was heating the trans fluid too much but I don't think that's the case. Hot, yes, but not too hot. Without a temp gauge I'd just stop at the top and put a hand on the trans to make sure it wasn't too hot. BTW, I pulled my trans fluid pan the other day to check/change the filter and have a look. Pretty sure the original factory gasket was still on there. At 87k miles everything was perfectly clean, no indications of overheating, no metal bits in the pan except for a small amount of black metallic 'paste' stuck to the magnets. The filter was completely clean, but I changed it anyway.
Brakes are another thing to be aware of of course. Make sure they are working decently. The first time I came down the other side of the hill I experienced some 'brake fade' and that was a little disconcerting. I often use engine braking on the way down now. I've re-done my brakes and now I have no problems coming down. Fortunately the hills in these here parts are not very high so even if you have some minor issue the overall climb/decent time is short.
FYI, there are quite a few WMA (Wildlife Management Areas) and Federal campgrounds in the Chattahoochee National Forest that are really fantastic - but these are first come first served and don't have reservations. Many are boondocking type places. We always manage to find one open though. Here is a snapshot of a map of places we visit in the NE corner of Groegia in the Chattahoochee National Forest, PM me your email and I could send you a link to the Google Map if you are interested:
Thanks for all the info. Sorry I’m new to these 22REs but sounds like it’s pretty easy to check out the trans?
Also what exactly do you mean by using the engine to break?
thanks also for the snapshot. I’m thinking moccasin creek park actually as im slightly familiar with the area and enjoyed the place on recent trip and want to check out Tallulah gorge.
-
On 5/30/2019 at 9:08 AM, Maineah said:
Wow good question what are your interests? What direction are you coming from? There is a nice campground in my neighborhood right on the Saco river about an hour from Portland. The waterfront in Portland is a great place to visit it still is a working waterfront along with shops and pubs.
Interests are anything really, I love to see beautiful nature and like fishing or outdoors. Looking forward to eating out a few nights in Portland too. And sounds like an interesting place to watch. What is that campground called?
-
4 hours ago, Maineah said:
It'll be slow but it will do it! I'm I the mountains of western Maine and often go to VT through Crawford notch (read Mt Washington) the old boy would do it in 2nd. Sometimes they may want to upshift you'll need to manually shift it in to a range that won't allow it like say second range then if the engine is laboring just slow down a bit to match the engine speed and leave it in a lower range until you crest the top.
Best sites to see? we're heading to Portland actually as a final destination before heading back home to FL. Anything you recommend in western Maine?
-
Thanks all, Ill be sure to keep it in 2nd gear when things get steep. Mostly worried about Virginia and not Ga, which I am a little familiar with. We're trying to go near Mt. Rogers if anyone is familiar, there's a campground called Grindstone something or other.
-
Recent owners of a 1987 Gulfstream Toy. We have plans to take our MH up through Georgia and into Virginia, stopping at some campgrounds in the forests on the way up, mostly close to the Appalachian trail. Can we make it without any trouble? Anyone with tips and tricks for driving an auto tranny up hill would be appreciated. Thanks!
-
30 minutes ago, Imajyn said:
I did know the camper backs were separate, but i don't know how to verify the manufacturer. I only have the previous seller's word that it was Gardner Pacific and to be honest, he was about as trustworthy as a hungry crocodile so I'm skeptical. Thank you for the reassurance and advice on the window.
I'm also trying to track down the rear hatch which, I fear, is model specific, along with the window frames, weather stripping, and a few other interior parts I'm sure I can get after market.
I know... Needy. Sorry. I appreciate anything you offer. Thank you
Is the "full lift gate" you describe a door that folds up to open and is hinged at the top?
Just look up " Sunrader rear hatch" and you should be able to find plenty of images and some resources if you dig. also search up "Nissan Mirage motorhome" and see if that matches yours better. Sounds like it might.
Truthfully I dont know much at all about the all fiberglass shell toymos/nissans, but there are plenty of folks around here who do.
-
Going through a rebuild of my 1987 Gulfstream right now, there are a few smaller sections of ceiling (interior) we need to replace from water damage. Looks like the original make was using a mixture of glue straight on the metal sheet and sparse galvanized steel flashing to hold up all of the rigid insulation, ceiling board and everything. Im looking for the right glue to use, but came to wonder, is there any type of double sided tape that is sufficiently strong and durable for this type of application? or is there some sort of quick drying or spray glue that would be much better to use?
Thanks guys.
-
Where did you get the foam? Looking at doing a bench seat in place of my dinette and Id like some good material for cushions.
-
4 hours ago, neubie said:
By the way, did you get any original manuals with yours? Conquest paperwork isnt yet discoverable in the wild.
No, I wish!
so youre telling me the roof has overhead aluminum tube framing and also the rear wall has some aluminum tube framing?
this sounds like great news.
-
Thanks everyone!
1 hour ago, linda s said:Here's a picture of the overhead of an 87 Conquest stripped open. Sure looks like aluminum framing to me.
Linda S
That's what im looking for. thanks!
-
1 hour ago, Odyssey 4x4 said:
I am unsure about the Gulfstreams but I can tell you that my Odyssey has aluminum wall framing. Here is a current pic...
Interesting. I definitely have some over the overhang, but not sure otherwise. Did your odyssey have aluminium framing for the back wall as well?
-
3 minutes ago, linda s said:
Well the later V6 models certainly did. Here's a brochure that says tubular aluminum framing.
https://www.gulfstreamcoach.com/media/uploads/1/11066_1991-Conquest-Toyota-Micro.pdf
Linda S
Thanks Linda! I actually came across that brochure from my own research but wasnt sure if my earlier model still had the same stuff.
Ill keep looking, if no one seems to know. Worst case ill just rip the wall out !😉
-
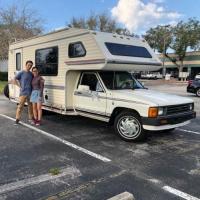
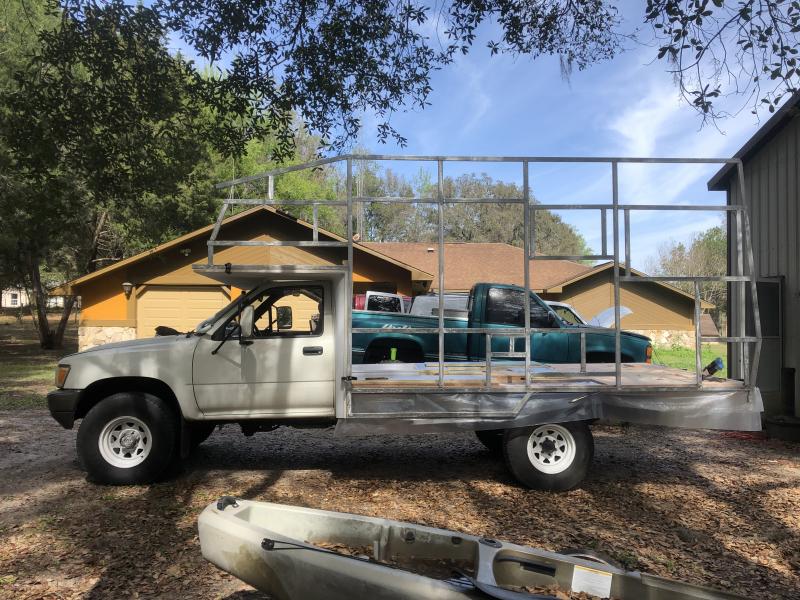
We finally took the plunge and recently purchased a 1987 Gulfstream Conquest Toymo. As we are going though the complete interior overhaul and replacing a few water-damaged areas, I’m noticing aluminum tube stock on the bottom floors and in the cracks of some wall board. Does anyone know if these things have an aluminum frame for the Coach?
Update: By this time we've torn out almost everything in the coach. I can confirm there is complete aluminum frame all around, with only a few wooden frames around roof elements and windows. I will be posting a full build and teardown series when we're all finished!
Screws and Bolts 101
in General Discussion
Posted · Edited by Grime_Divine
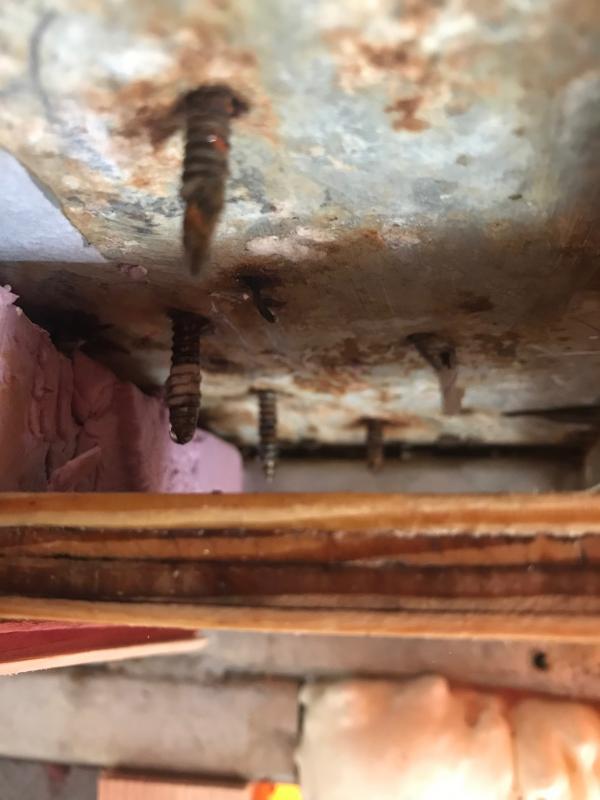
I dont see your picture, it must not have uploaded, but I presume the metal frame of your overhead cab is attached to the rest of your campers frame. Usually all of the metal tubes are welded together, creating a full skeleton around the entire cab that is supported by the main camper's frame (varies by builder) The screws that come from the outside are just meant to attach to the tube metal frame holding your exterior fiberglass tight to the metal tubes. They are screwed into the metal, screwing into metal tubes like this provides alot of strength. The metal frame is where all the strength is. Unless im really misunderstanding you, im not sure why you would elect to remove the screws you pictured earlier and then replace them, Wood behind (in the voids where the pink insulation is on my pictures) the metal frame is just filler to support the bed basically. The original idea being screws from the metal frame (which is where the real support and strength is) can also support a piece of wood on the other end of the frame which the original bed goes on top of. If you simply use a thick piece of plywood (3/4") to sit on the edges of the aluminum tube frame, the wood attaching to those screws isn't necessary anymore. What is important is the exterior connection made originally by screwing into to the metal tubes not be disturbed. Those screws are coming from the other side of the tube metal frame, or maybe even from the exterior of your overhead cab, so there is no way to remove them of course if the head is inaccessible to you. The metal tube frame at the base of the long white wall (the one pictured earlier by you, where some of the white has peeled away showing an old wood grain panel) this piece of metal tube frame plus the tube frame nearest to the house section of the camper should be enough to support a bed if the weight is distributed via a thick sheet of plywood.
As for how to approach this. If the entire tube farthest to the front of your vehicle is strong, feels like it supports weight, that means all your tubes are welded together and everything is in order. All you have to do is use the strength of that frame to place plywood on top which will sit on the frame and youre done. Im not sure if im misunderstanding you or if the way your camper is built is significantly different to mine, but thats about all I have to say on it.