


thepager5
-
Posts
125 -
Joined
-
Last visited
Content Type
Events
Profiles
Forums
Gallery
Posts posted by thepager5
-
-
Hey there lostinbama,
My bushings have not come in yet. Probably Friday or Sat. $31.00 inc shipping.
Here is what I ordered. From an ebay store: http://stores.ebay.com/Foothill-Offroad

TOYOTA TRUCK REAR LEAF SPRING BUSHING KIT
1984-1988 PICK-UP TRUCKS ONLY
This is an Energy Suspension polyurethane rear leaf spring bushing kit used to replace your worn out spring bushings.
Kit includes:
- 4 large polyurethane bushings
- 8 small bushings
- 2 sleeves
- 2 grease packets
- instructions
Here’s what Energy Suspension says about their product:
- Polyurethane allows suspensions to work positively 100% of the time…giving the driver that “in control “ feeling
- Soft enough for a smooth ride yet firm enough for the demanding driver
- Makes a dramatic improvement in vehicle handling
- Maintains proper suspension geometry throughout its travel
- Each component is designed and formulated for its specific application (different firmness and strength properties for various applications)
- Will not rot or deteriorate from atmospheric conditions such as smog, ozone, road salts etc.
- Impervious to gas, oils and other petroleum products
- The most asked for name in performance polyurethane components
Will post pics when starting and finished project pics.
My next item to look at is the stabelizer shock/bar on the front. How do I know if it needs replaced?
Talk to you later,
Pager
Arkansas
- 4 large polyurethane bushings
-
Hey guys, here is my start to replacing my leaf spring bushings.
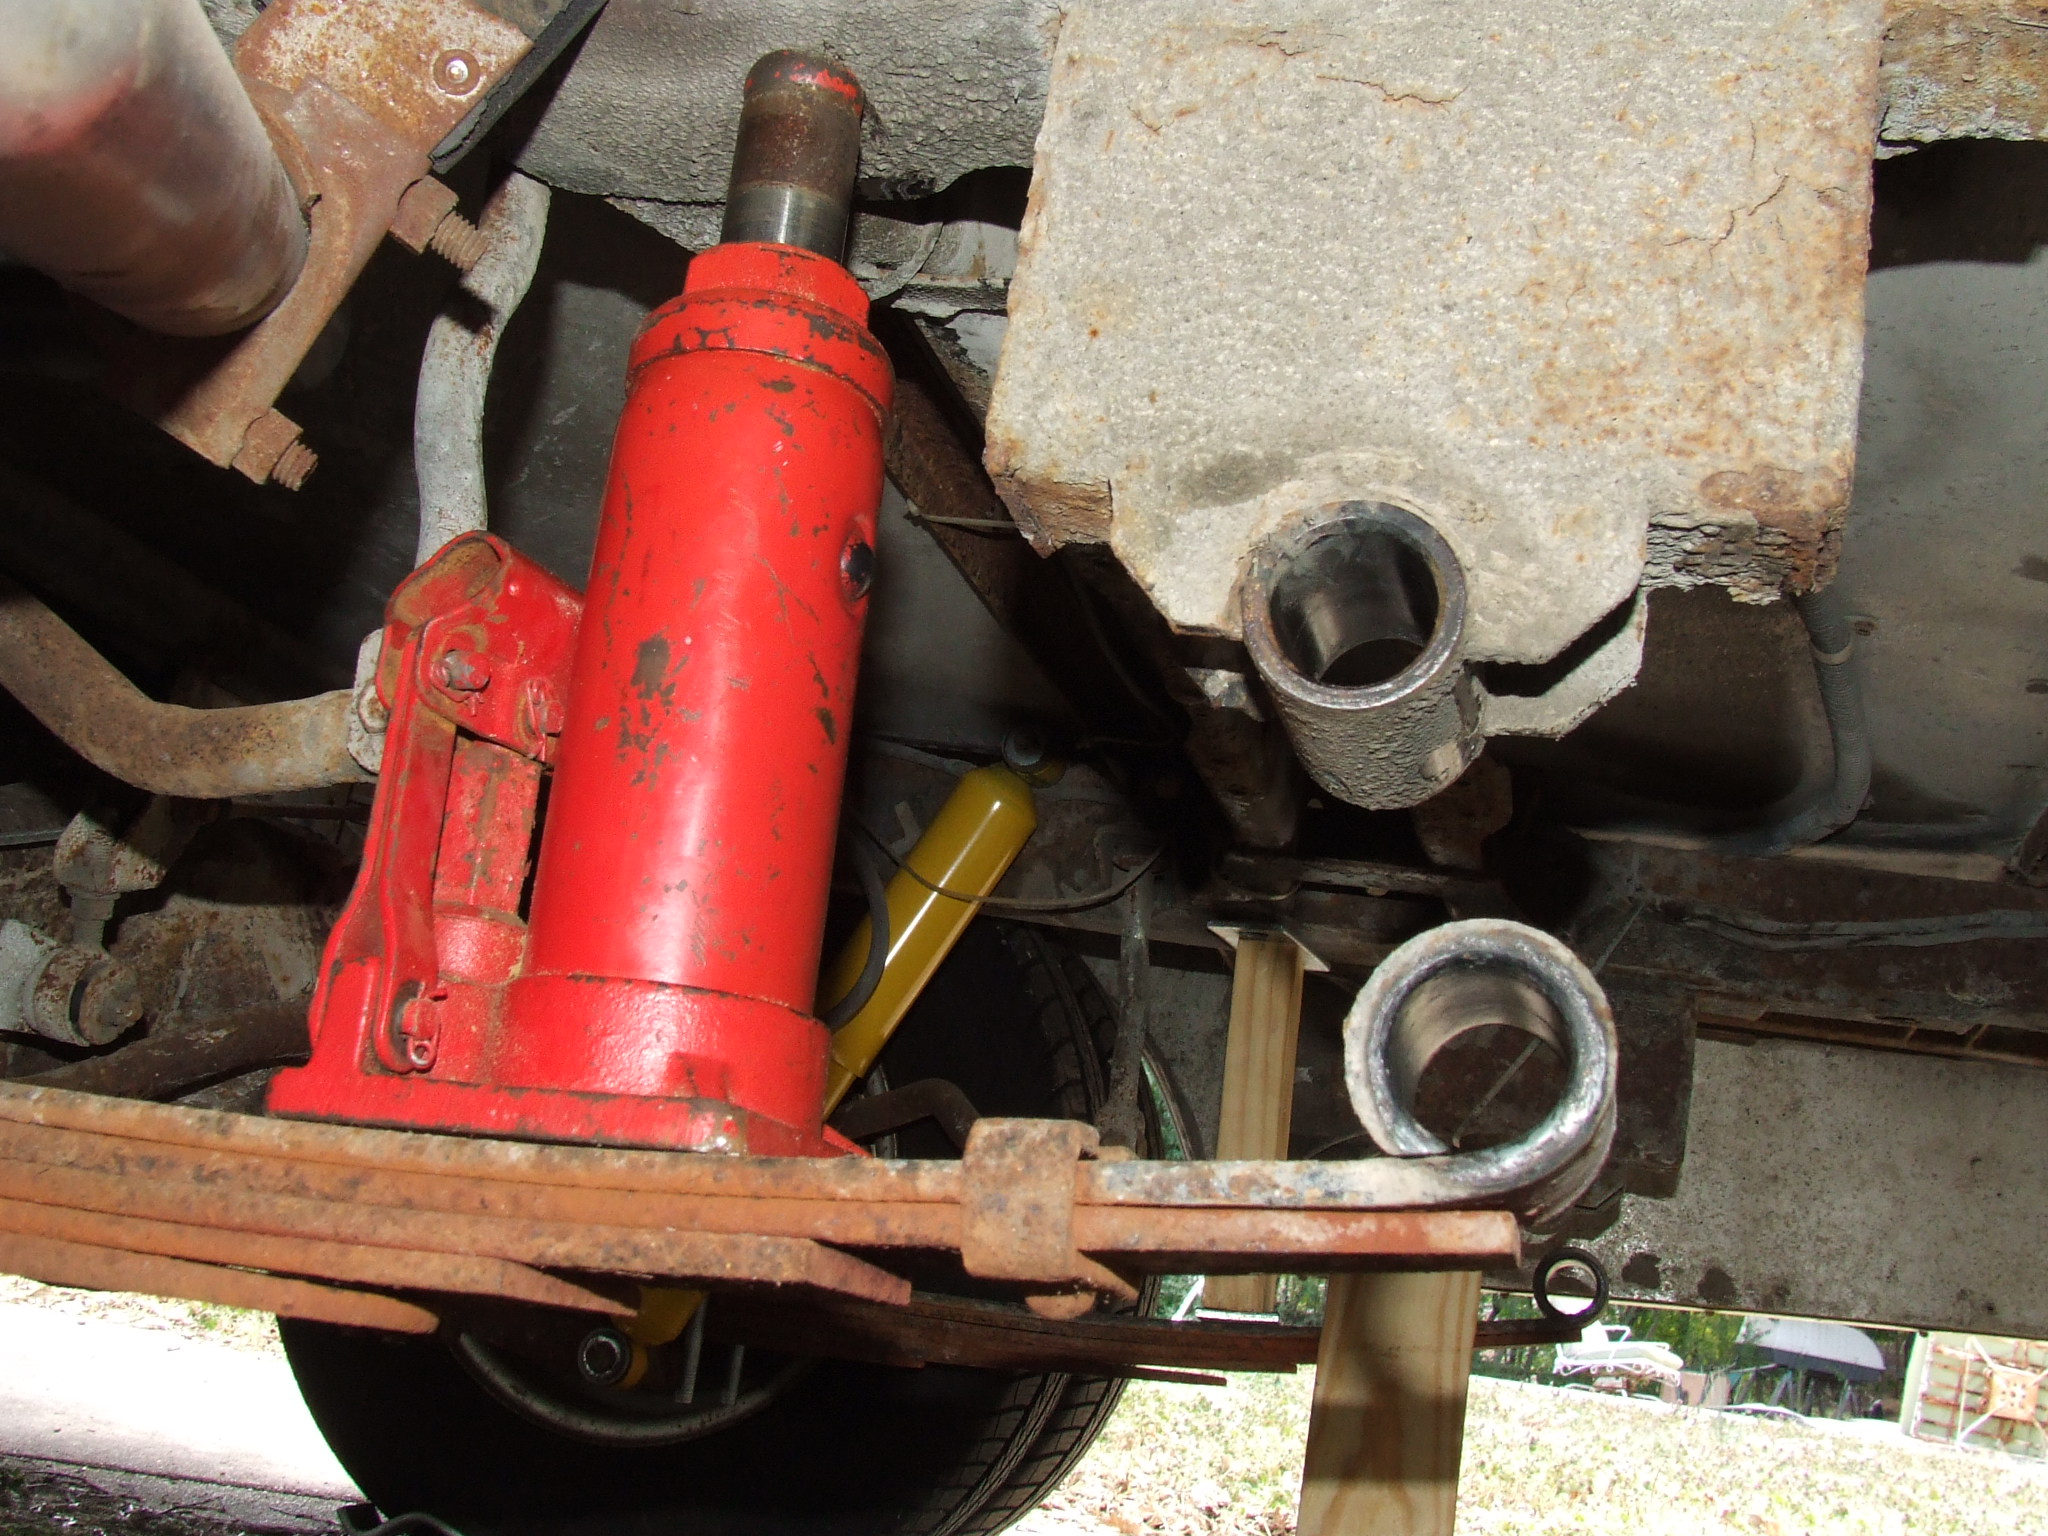
First I had to remove my leaf assist bars. Next I placed my small hydrolic jack between the leaf spring and the frame to relieve pressure between the two. Nuts had to be sprayed to be loosened. I then had to place a block of wood over the bolt ends to drive them out with a hammer. BE CAREFUL NOT TO HIT THE END OF THE BOLT WITH A HAMMER. You will mess up the ends and the threads. This will keep you from having to buy new bolts. Then I took the rubber bushings out.
LostinBama, you were right - they need to be replaced! see pics.
I took the bolts and brackets and steel wooled them to clean them up. There were lots of "gunk" on them. I have located replacement bushings on the internet but not at my local auto parts store.
I will follow up with the complete repair pics later.
Thanks,
Kevin - 86 Dolphin
Arkansas
-
Hey there,
I have found a near new Coleman 2000/2500w peak ultra, really small, for use with my 86' Dolphin.
Here is the big question . . .
How loud is 75 dba?
The honda eu2000i rates at 59dba.
If this is true - how do I quieten the coleman down? can it be encased? The deal is too good to consider a $500 plus honda.
Is it worth saving up to $400 to make a little louder noise?
Thanks,
Kevin
Thepager5
-
Hey there guys,
I also have wondered if I need to replace the bushings on my leaf springs. I went to AutoZone and they had a set instock for the 2wd toyota. But, not sure about motorhome.
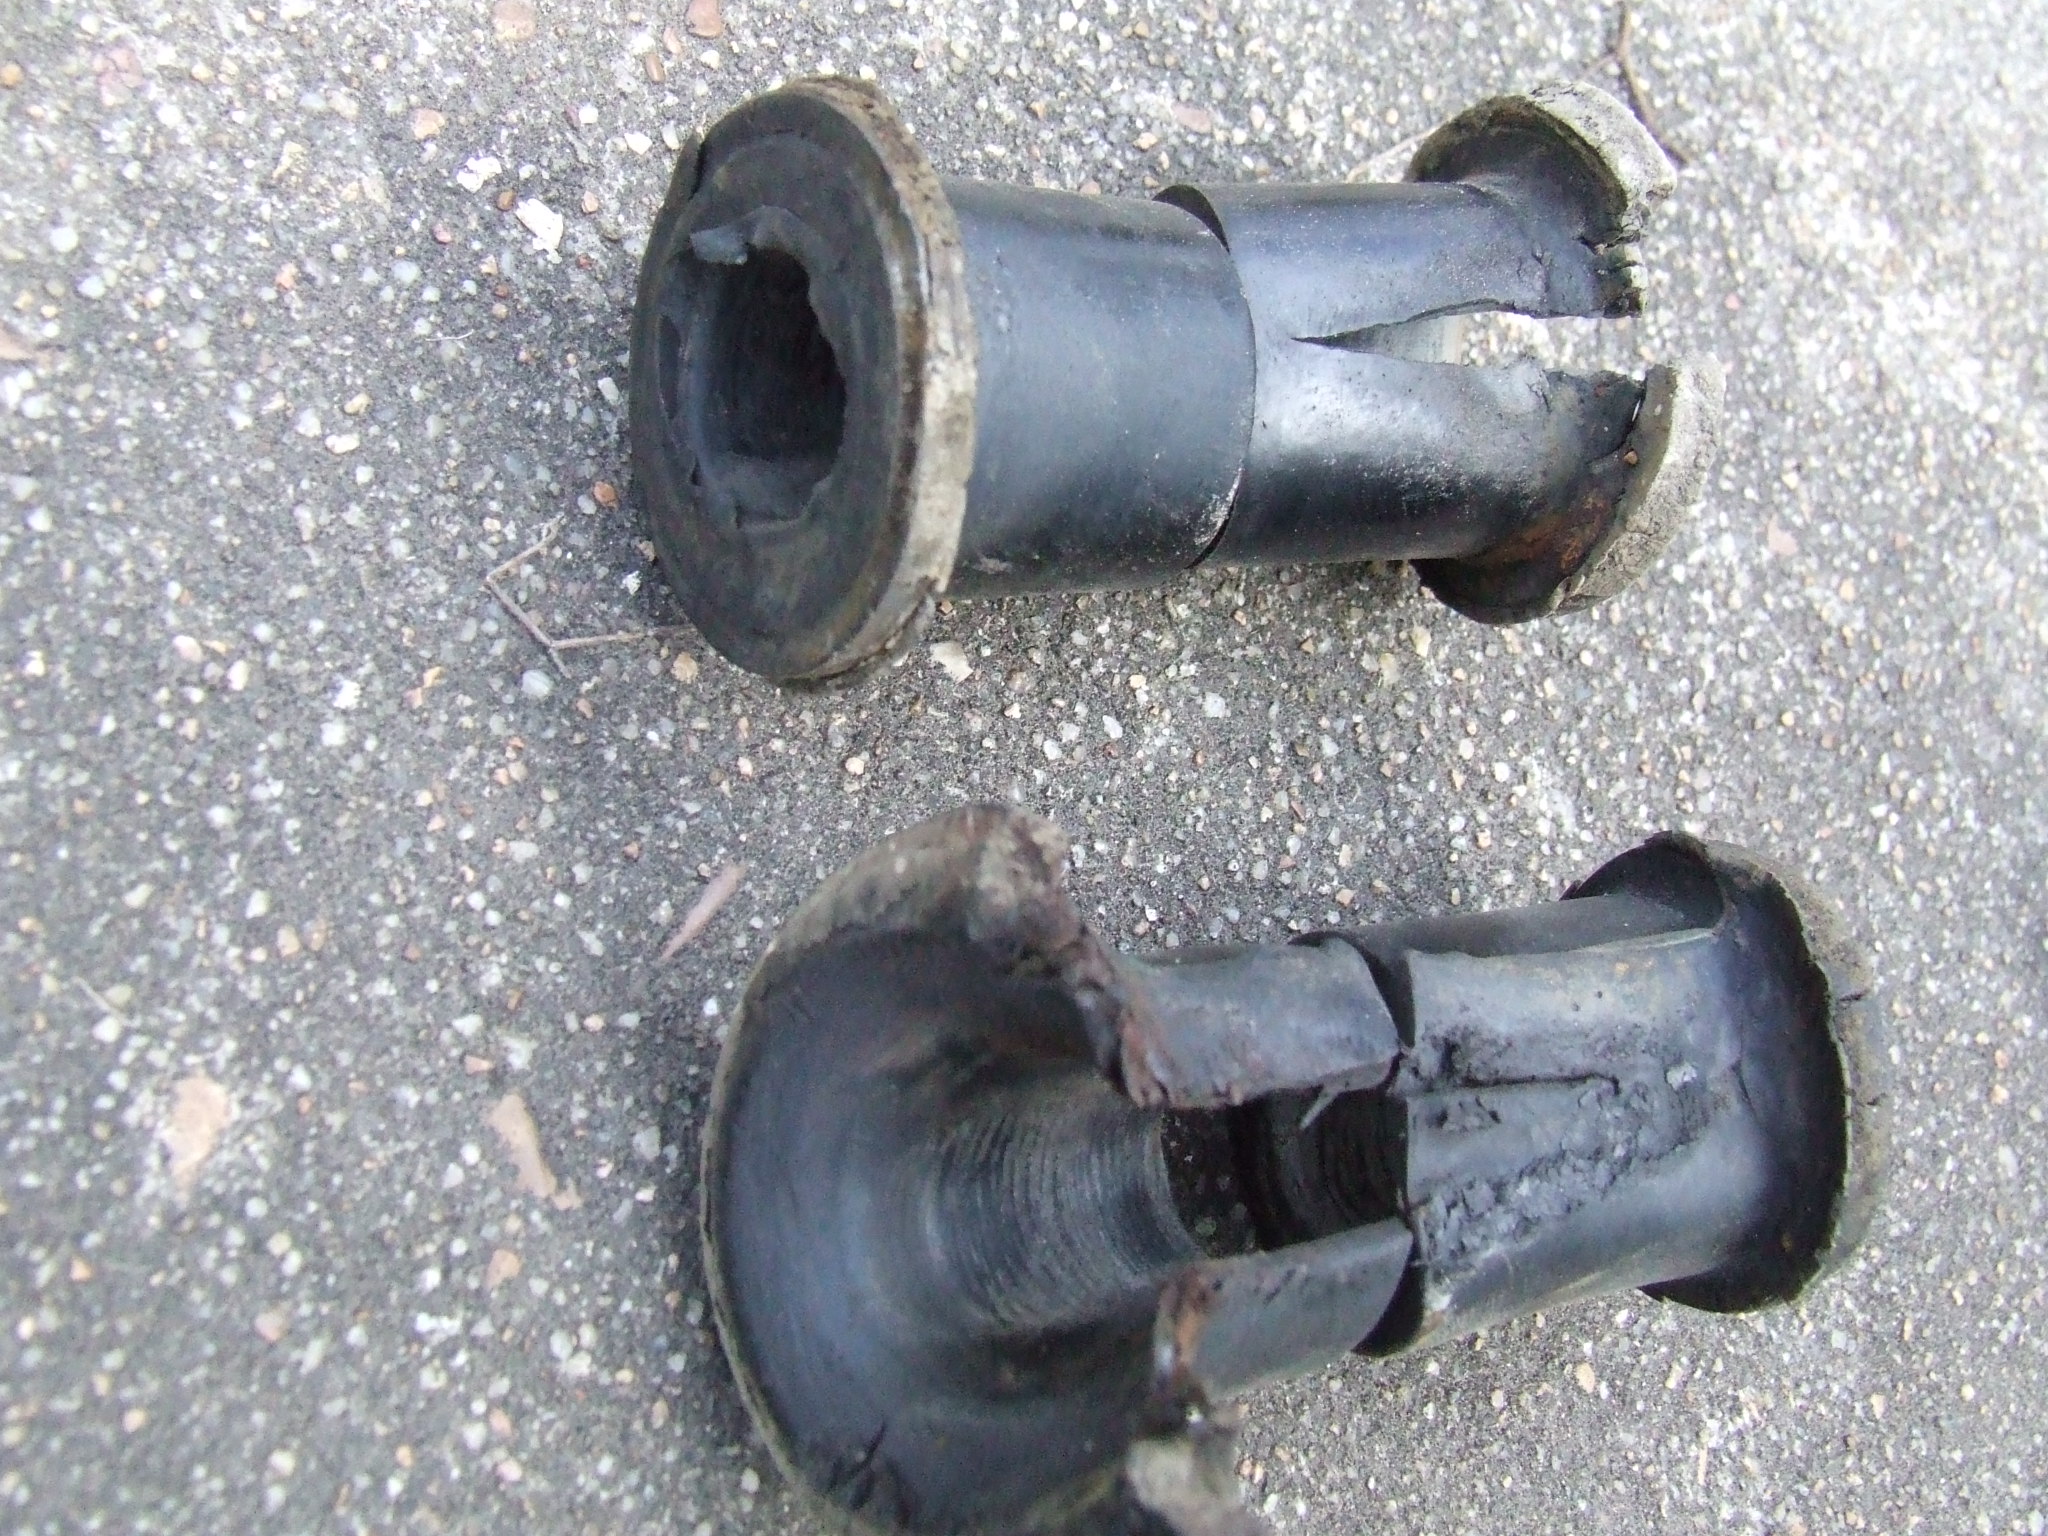
My bushings are (appear to me) in good shape. No wigglin' or wallerin' as we say. BUT, HOW DO I KNOW IF I NEED TO REPLACE THEM?
I have attached a pic that shows the back of the leafspring and if you look at the edges, the rubber bushing has "squeezed" out the side and has detached a little, or been cut off.
QUESTIONS . . .
HOW DO I KNOW IF I NEED TO REPLACE THEM?
WHAT ARE THE CORRECT PART NUMBERS FOR THE REPLACEMENTS?
ARE THE RUBBER ONES BETTER THAN ANOTHER TYPE?
Most importantly,
WHAT ARE THE PROCEDURES TO REPLACING THEM?
Thanks as always and good to know your still out there "lostinbama"
Pager
86 Dolphin - Arkansas
-
Hey guys,
Where would this trany cooler be located? I have a warning light on the dashboard that has been added aftermarket. So I think I have one.
Do they need serviced? How do you tell if they are working properly?
Thanks,
Kevin
Arkansas
-
Hey everyone,
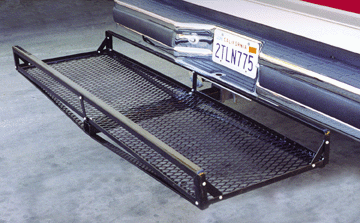
I have been trying to figure out how much metal it will take to build a cargo tray on the back of my 86 Dolphin. I noticed a cargo tray that is bumper mounted in the local Harbor Freight Tools circular. BUT, when I got there they were out of the advertised one for $59.99. They showed me another one that was larger and would hold 500lbs. Here is the best deal I have found for a cargo carrier.
500 Pound Capacity!
Solid steel platform has detachable side rails and braces let you carry items you have no room for (or don't want) in your vehicle - extra-large coolers, lawn mowers, suitcases, and more. Fits all standard 2'' receivers.
-
Capacity: 500 lbs.
-
Dimensions: 20'' x 60''
-
Total weight: 52 lbs
-
ITEM 34313-3VGA
$59.99 $49.99
This is the online price - the store price is advertised at $39.99. THIS IS A BARGIN! http://www.harborfreight.com/
I took it by a buddy and he said he could have this mounted with 2 extra side supports in about 30 minutes and a labor cost of $25. There is no way I could ever build this and have it complete for under $70.
Hope someone finds this useful - I sure did.
Kevin
Arkansas
-
Capacity: 500 lbs.
-
Hey there Robert - Supurcar,
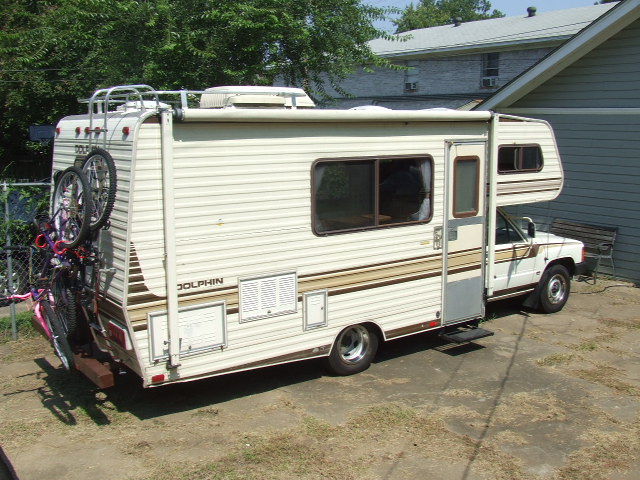
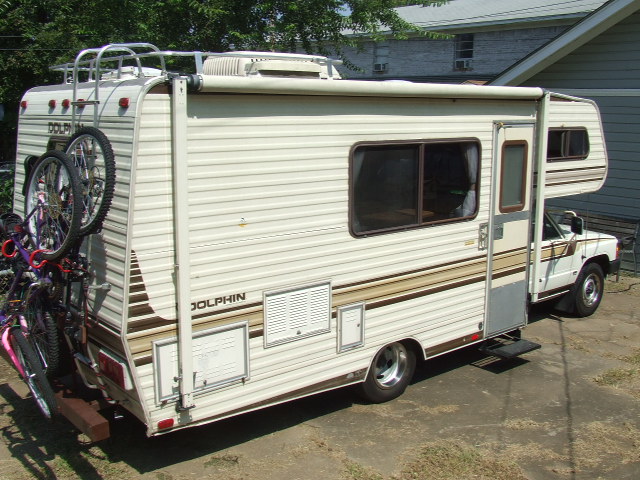
I also have the airbags - you can see mine in the first pic i posted that you noticed the rust in. I checked mine as well and they are in excellent shape. I have been running them at 70psi but with the new suspension upgrades, I am sure I will come off that a little.
Pic below is before new shocks and Leaf Assists - My toy sits about 5" higher now!
As far as the rust, I purchased this rig in Dallas, but, it came from mid-state illinois from Iowa in the '80's. I am assuming the surface rust is from the winter road salts. Do you have any suggestions for me as to how to spot or where to look for trouble areas? Also, can you be more specific on what you had done to undercoat yours? Is this like the "can" undercoating you would buy at the local autoparts store?
Thanks for the advice
,Kevin
'86 Dolphin - Arkansas
-
Thanks for the info!
I had trouble finding shocks at my local stores by just telling them I had an 86 toy motorhome, so, I took the shock off the rear and the shock/strut off the front and took them to Advance and AutoZone. THESE WERE THE ORIGINAL PARTS AND THEY WERE NOT FOR A MOTORHOME - THEY WERE FROM THE ORIGINAL TOYOTA PICK-UP TRUCK!
Here is what I replaced the FRONT with. From Auto Zone - Front Shock/Strut - Gabriel ProGuard #61509 @ $21.99 each. Fit perfectly - Used same mounting bolts and holes.
Here is what I replaced the REAR with. From Advance - Rear Shock - Monroe Gas-Matic series #59541 @ $22.44 each. Fit perfectly - used same mounting bolts and holes.
Installed a set of Leaf assists (in pic).
New shocks and the additional leaf spring assists added 6" heigth to the Dolphin. This really gets the RV close to level and WOW - it drives and is steady like a new rig!!!!
Hope this is useful info!
Kevin
'86 Dolphin
-
Hey guys - Hope all are doing well.
I would like to replace the shocks on the front and the back of my 1986 Toyota 21' Dolphin. The owners manual says "GABRIEL" but does not note the part numbers. The front shocks are different from the back. The MH seems to be sitting a little lower in the back. The leaf springs are not bowed much but there is still plenty of room between frame and axle. I might need a leaf assist? Airbags are working and holding air properly.
Does anyone know what the part numbers are for these?
I found a "MONROE" #32383 that says its for a 84-93 chasis for motorhome class C. Does anyone know if this is right? and if so, what is the Monroe # for the rear.
Thanks as usual for the input!
Kevin
-
Hey everyone - longtime no post. I am looking forward to spring already!!! I purchased my 86 Dolphin last June and previous owner had the roof sealed. I have attached 2 photos that shows what he had done. The grey "stuff" is starting to crack and the white "stuff" looks like it was just globbed on. I do have a couple of spots that hold water on top around the A/C unit. During a 3 day long rain in Nov it did leak inside around the A/C unit a little. The roof is still the original metal overlay and has been caulked on the edges and then sealed. The metal is loose and moves when walking on. The rook is very sturdty and I have walked it all. I am concerned about the A/C area.
WHAT TO DO NEXT? Thanks for all the advice - look forward to 2008 Camping! kp
-
Hey there Allen and Lew,
Thanks for the advice. I ran the furnace off and on for 2 days. We are on the edge of the ice storms just inside the Arkansas Line in Fort Smith. Temp is 39 and I set the thermostat on 50 and just walked away from it.
I just checked and it is cycling just fine. No more "Scare the crap out of me" moments.
I guess I just got some soot over the gas ports or something like that.
Thanks again,
KP
86 Toyota Dolphin
-
Hey guys, thanks for the advice. I called the previous owner and he informed me he had the camper two years and never turned on the furnace. SO, I unhooked the gas line and took the two screws out on the exhaust (outside). I then slid the furnace out until wires were able to be taken out of the wire nuts. I then dusted off the outside and began to take the screws out of both sides of the fan and motor housing. I used wd40 on both sides and then turned furncce on its side and put oil on the shaft and let it seep in. I then stood the furnace on its nose and inspected the exhaust end. I then returned to the camper to reassemble.
Upon inserting the furnace into the cabinet, I inadvertantly put it in upside down. when I realized this, I immediately took it out and reinserted it correctly. NOTE: a small pile of black exhaust/carbon dust fell out and was on the carpet. I was not sure what this ment until . . .
I started it up after full reassemble. It ran fine the first 2 times. The third time it would not fire. The fan runs fine AND QUITELY. After leaving it off for a while, I turned it back on. It fired fine and heat came out.
PROBLEM: after it had run for about 20 minutes and warmed the camper, it seemed to refire and each time it "BACKFIRED" and sparks came out the exhaust rather loudly. This happened three more times over about a 30 minute period. I then stoped the furnace and restarted. As it fired, when the flame cought there was one loud backfire and then it ran fine until I turned it off.
Am I OK turning it on? Have I caused a problem by turning it upside down? It heats fine, is it ok to use it? Have I got dust in the gas ports? GOT A REMEDY????
Also, do these furnaces neet a window open or ventilation? I do not have a CO2 detector.
Thanks for any help with this one,
kp
-
Will the furnace need to be pulled out, or can the fan motor be reached while installed?
kp
-
Hey guys - finally had to fire-up the furnace. Heat works, Blower blows and all working after replacing the wall thermostat. (its a hydro flame located under the sink, at floor level - see photo)
But, there is this terrible squeeking coming from the fan compartment/blower. Is there a way to quieten this? It does seem to get a little quieter as it warms-up.
By just looking in, I can see where the blower is located but it looks difficult to reach. Any help will be appreciated!!! (i have no operator manual)
As usual - THANKS GUYS!!!
kp
86 Dolphin 21ft model 900
-
hey there 85seabreeze,
I have not found this cover yet. currently i have contacted 2 parts house and are awaiting a reply.
I will let you know as soon as I can.
National built mine and has reccomended taking the orignal out and replace it. The problem is that the new one is outside dimension smaller. That would look great with a ton of caulking around it right by the door. Other than that, I am finally pleased to stop working on it.
Been camping lately? I am starting to plan a 2 week from Arkansas to Yellowstone and back. Any suggestions would be great.
thepager5
-
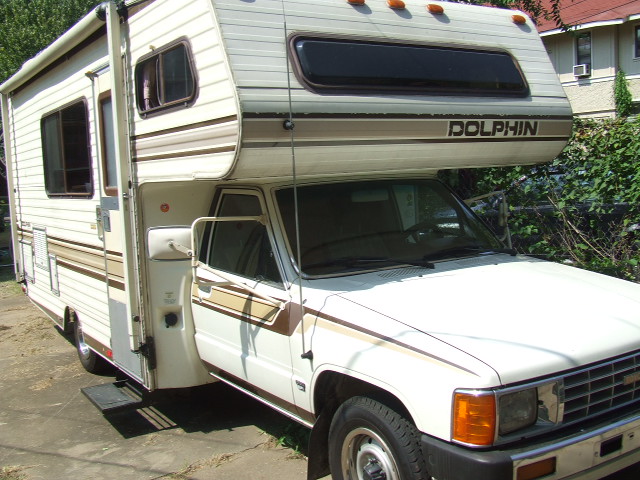
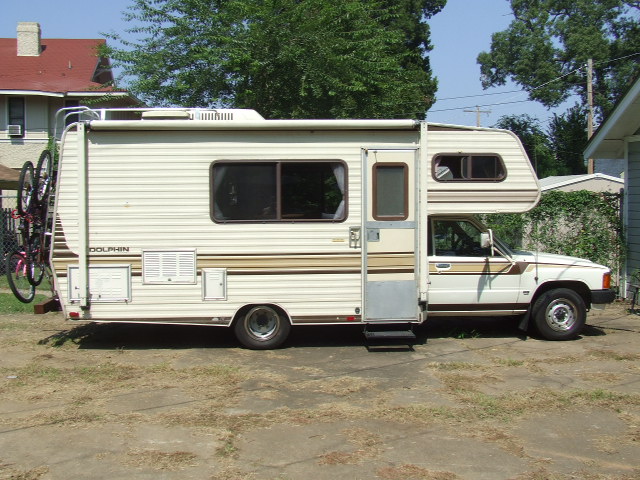
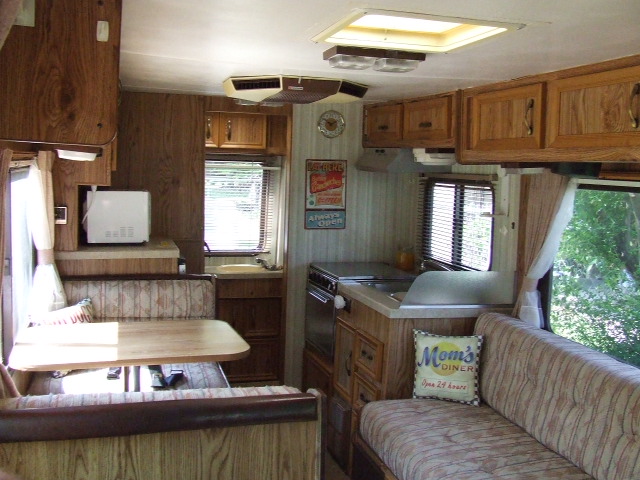
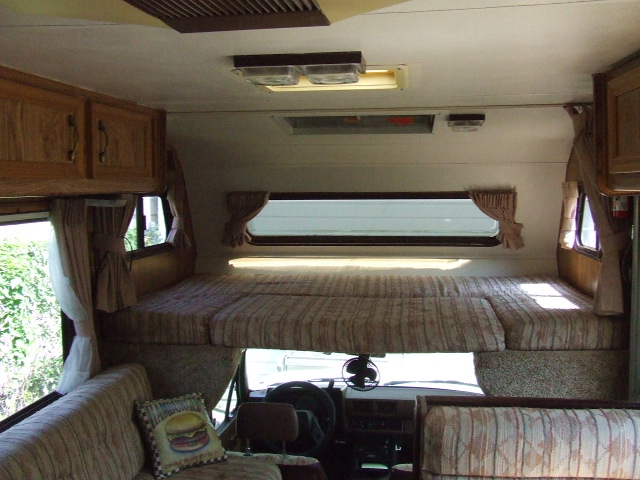
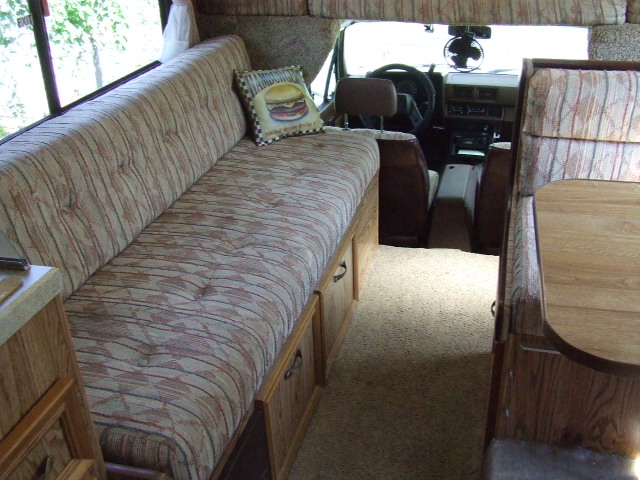
Hey there, we have an 86 dolphin. queen bed, couch makes double, and table lays down for single but could be double w/small kids. 21' in length. We have 3 kids - 16, 12, & 8 we are cozy but fine.
-
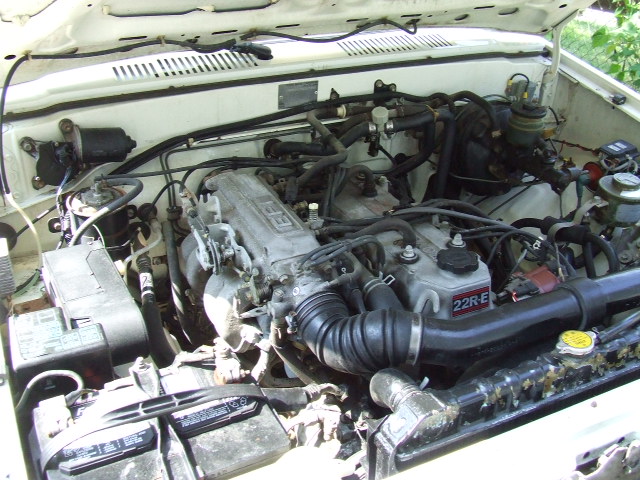
Hey there Bama, I did notice some oxygen sensors on the e-bay store where we bought our manifolds. They do not seem to have a flange. Go to exhaust, then to oxygen sensors, then in the search box put Toyota. There are lots at this heading:
OXYGEN SENSOR toyota PICKUP 67-95 truck 94 93 92 91
Price:
price: US $15.67 w/ $8.60 shipping (one wire)OR
price: US $25.58 w/ $8.60 shipping (four wire)I guess once you take yours off you can tell if you need 1 wire or 4.
Let me know how easy this is to install. It looks easy compared to re-tapping holes in the engine head for a new exhaust manifold bolt!
Pager
-
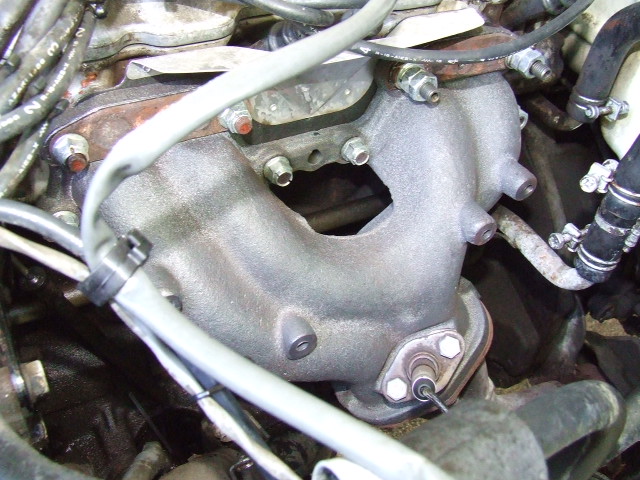
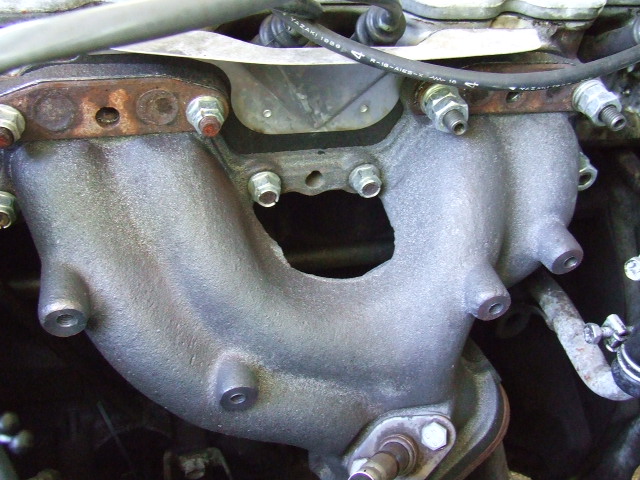
Hey there Bama,
sorry no posts lately but have been traveling. New exhaust manifold is working excellent! I did not have any issue with my sensor, only to wonder if it needs replaced. Not sure what you mean by a flange there. I placed the gasket right on the manifold and slid the sensor into the hole and bolted it up.
How do you know when an oxygen sensor needs replacing? any signs or will it be just time will tell? Thanks, kp
-
Hey Bama, I did replace the two round gaskets - they came in my kit. However, they are available at any auto part store for about $1 each. they are called flange gaskets. They will be a round ring of metal with the gasket inside. These will expand after heating. They do not need any gasket glue to hold into place. Notice you exhaust pipe has a flat deck the gaskets sit on. The manifold is inset so that when the bolts line-up when putting the two together, the gaskets slide into the inset. I had no problems making this connection. This is the commection though that I am having to double nut because they came loose after heating. Let me know if you need anything. Thanks for the update and good luck!! I saw your toyo finally on a post from august - NICE!!!
-All fiberglass? how about roof - rubber? send me some more pics when you can. kp -
Hey bama - hope all is going well! just an update for you. I drove about 150 miles this weekend and camped. Manifold sounded great w/ no air leaks. About 30 miles from the house i noticed a slite bubbling (like an exhaust leak). After the engine cooled I re-started and no leaks at the manifold. HOWEVER, the connection (3 nuts) between the manifold and the exhaust pipe had come loose on 2 of the nuts. I am going to double nut these as they are really difficult to get to. These are the ones you reach from underneath with an extension and a 9/16 deep socket. I don't know how low your toyota sits but mine is just low enough that I can slide under. I have to move to the exact spot to use both arms. Anyway - just a note to say you might have to double check the 3. Let me know how its going!! - kp
-
Not sure if you have found a cover that fits - i also am looking for one that fits the outside light by the door of my '86 dolphin. see the pic below - it is @ 3 3/4 by 3 1/2 but has a screw that hold it in place along the bottom. I have looked everywhere for this. any help is appreciated. PS: we don't have a camping world in Arkansas. - kp
-
Hey there everyone - After reading for hours on-line about all of the different clicking noises under the hood, I decided that since this has never happened before, I would just start with the most obvious - the valve cover. I took the cover off - checked all the springs, nuts, arms etc. Nothing unusual. I then replaced the gasket and the two half moon gaskets at the ends. Re-installed and used new valve cover nut gaskets - these are reinforced w/ metal on one side (up) the other is cut to fit in and on the valve cover - I then (as per reply to another post) hand tighened and 1/2 turn w/ cresset the nuts. Making sure the gap was even all the way down the valve cover. Hooked all hoses back - changed oil and oil filter - unhooked and reattached the sparkplugs. Started it up and - NO MORE CLICKING!!!!!!
I have driven it about 15 miles and took it out on the freeway for about three exits and 55 MPH. It is running great - thanks to the guys on youtube that posted the before and after of the engine that had the nuts too tight. This saved me from a trip to the mechanic and possibly lots of $$$$$$. -
Hey there lostinbama2x, Hope your having luck with the manifold. I received mine yesterday and installed it. I had to go to the bolt store for the bolt-up to the exhaust pipe. These are metric and you wont find these at the hardware store. After I drilled and re-tapped then installed 3 new studs, I doubled up the nuts after the 33# torque. All is well - no leaks. I then installed the heat shield. Everything was great and the savings over the local auto store was huge. Kee p me posted on your install. (ps don't forget the gasket under the oxygen sensor). - kp
-
Thanks for the info - i hand tightened the 1/2 turn with cresent - no leaks / no racket!


spring bushings
in Engines - Transmissions - Drive Train - Suspension - Chassis - Steering - Exhaust - Tires - Etc.
Posted
Hey there,
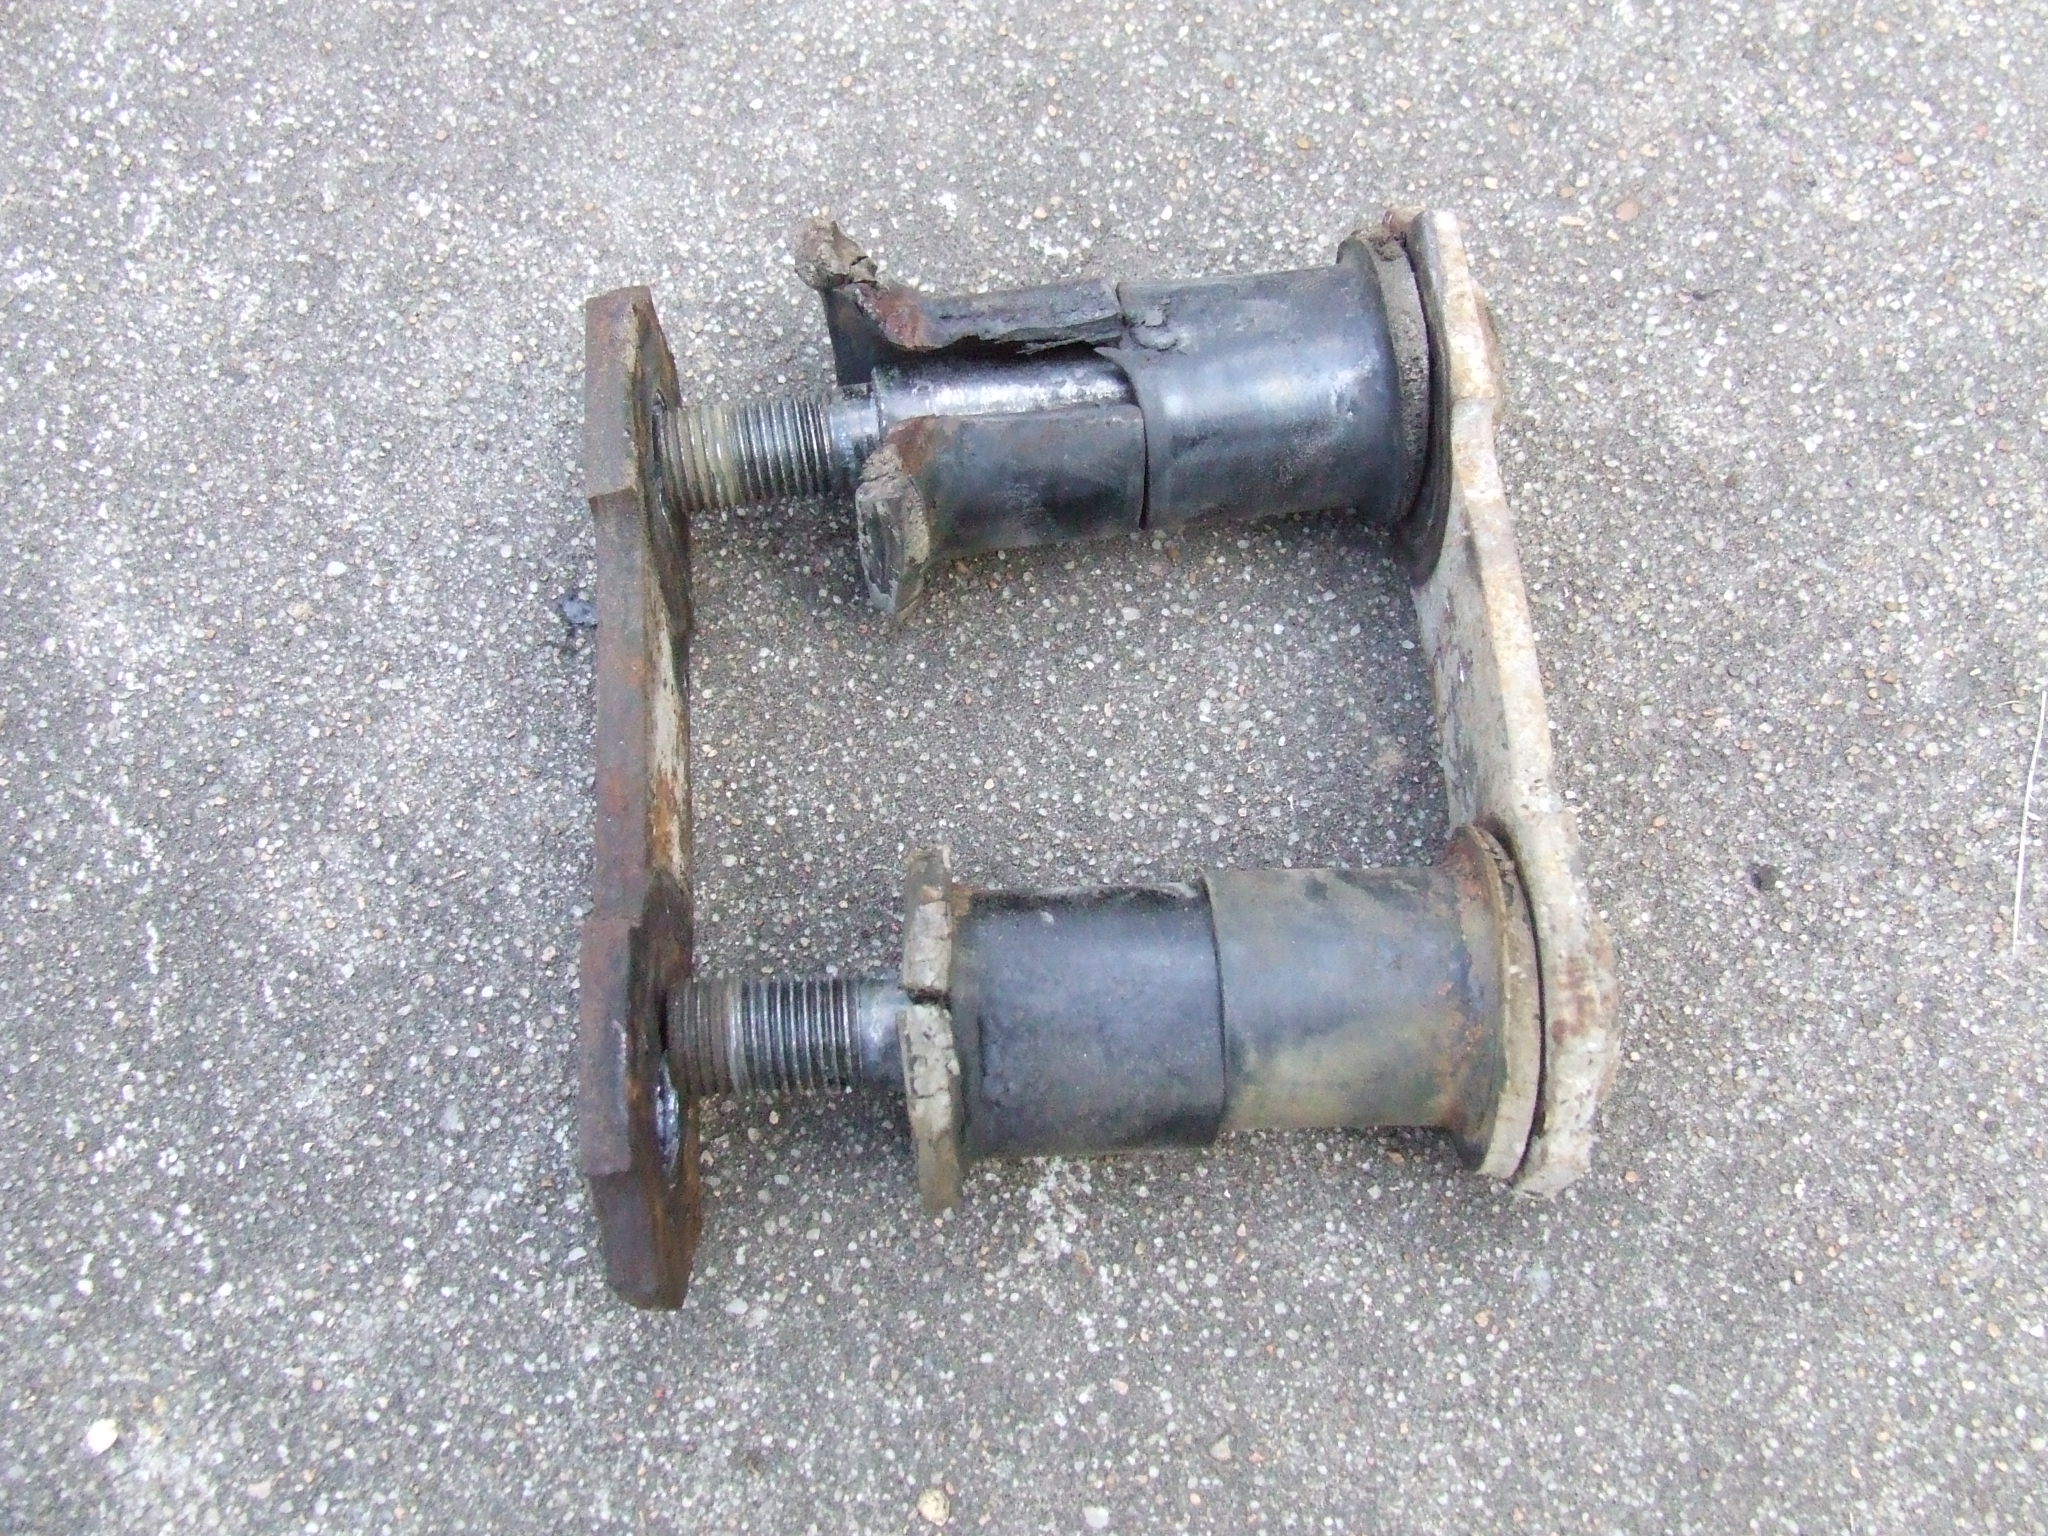
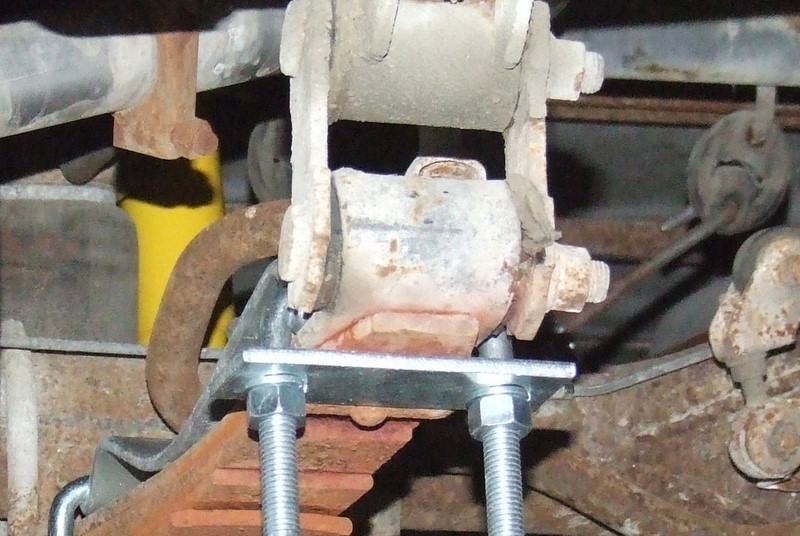
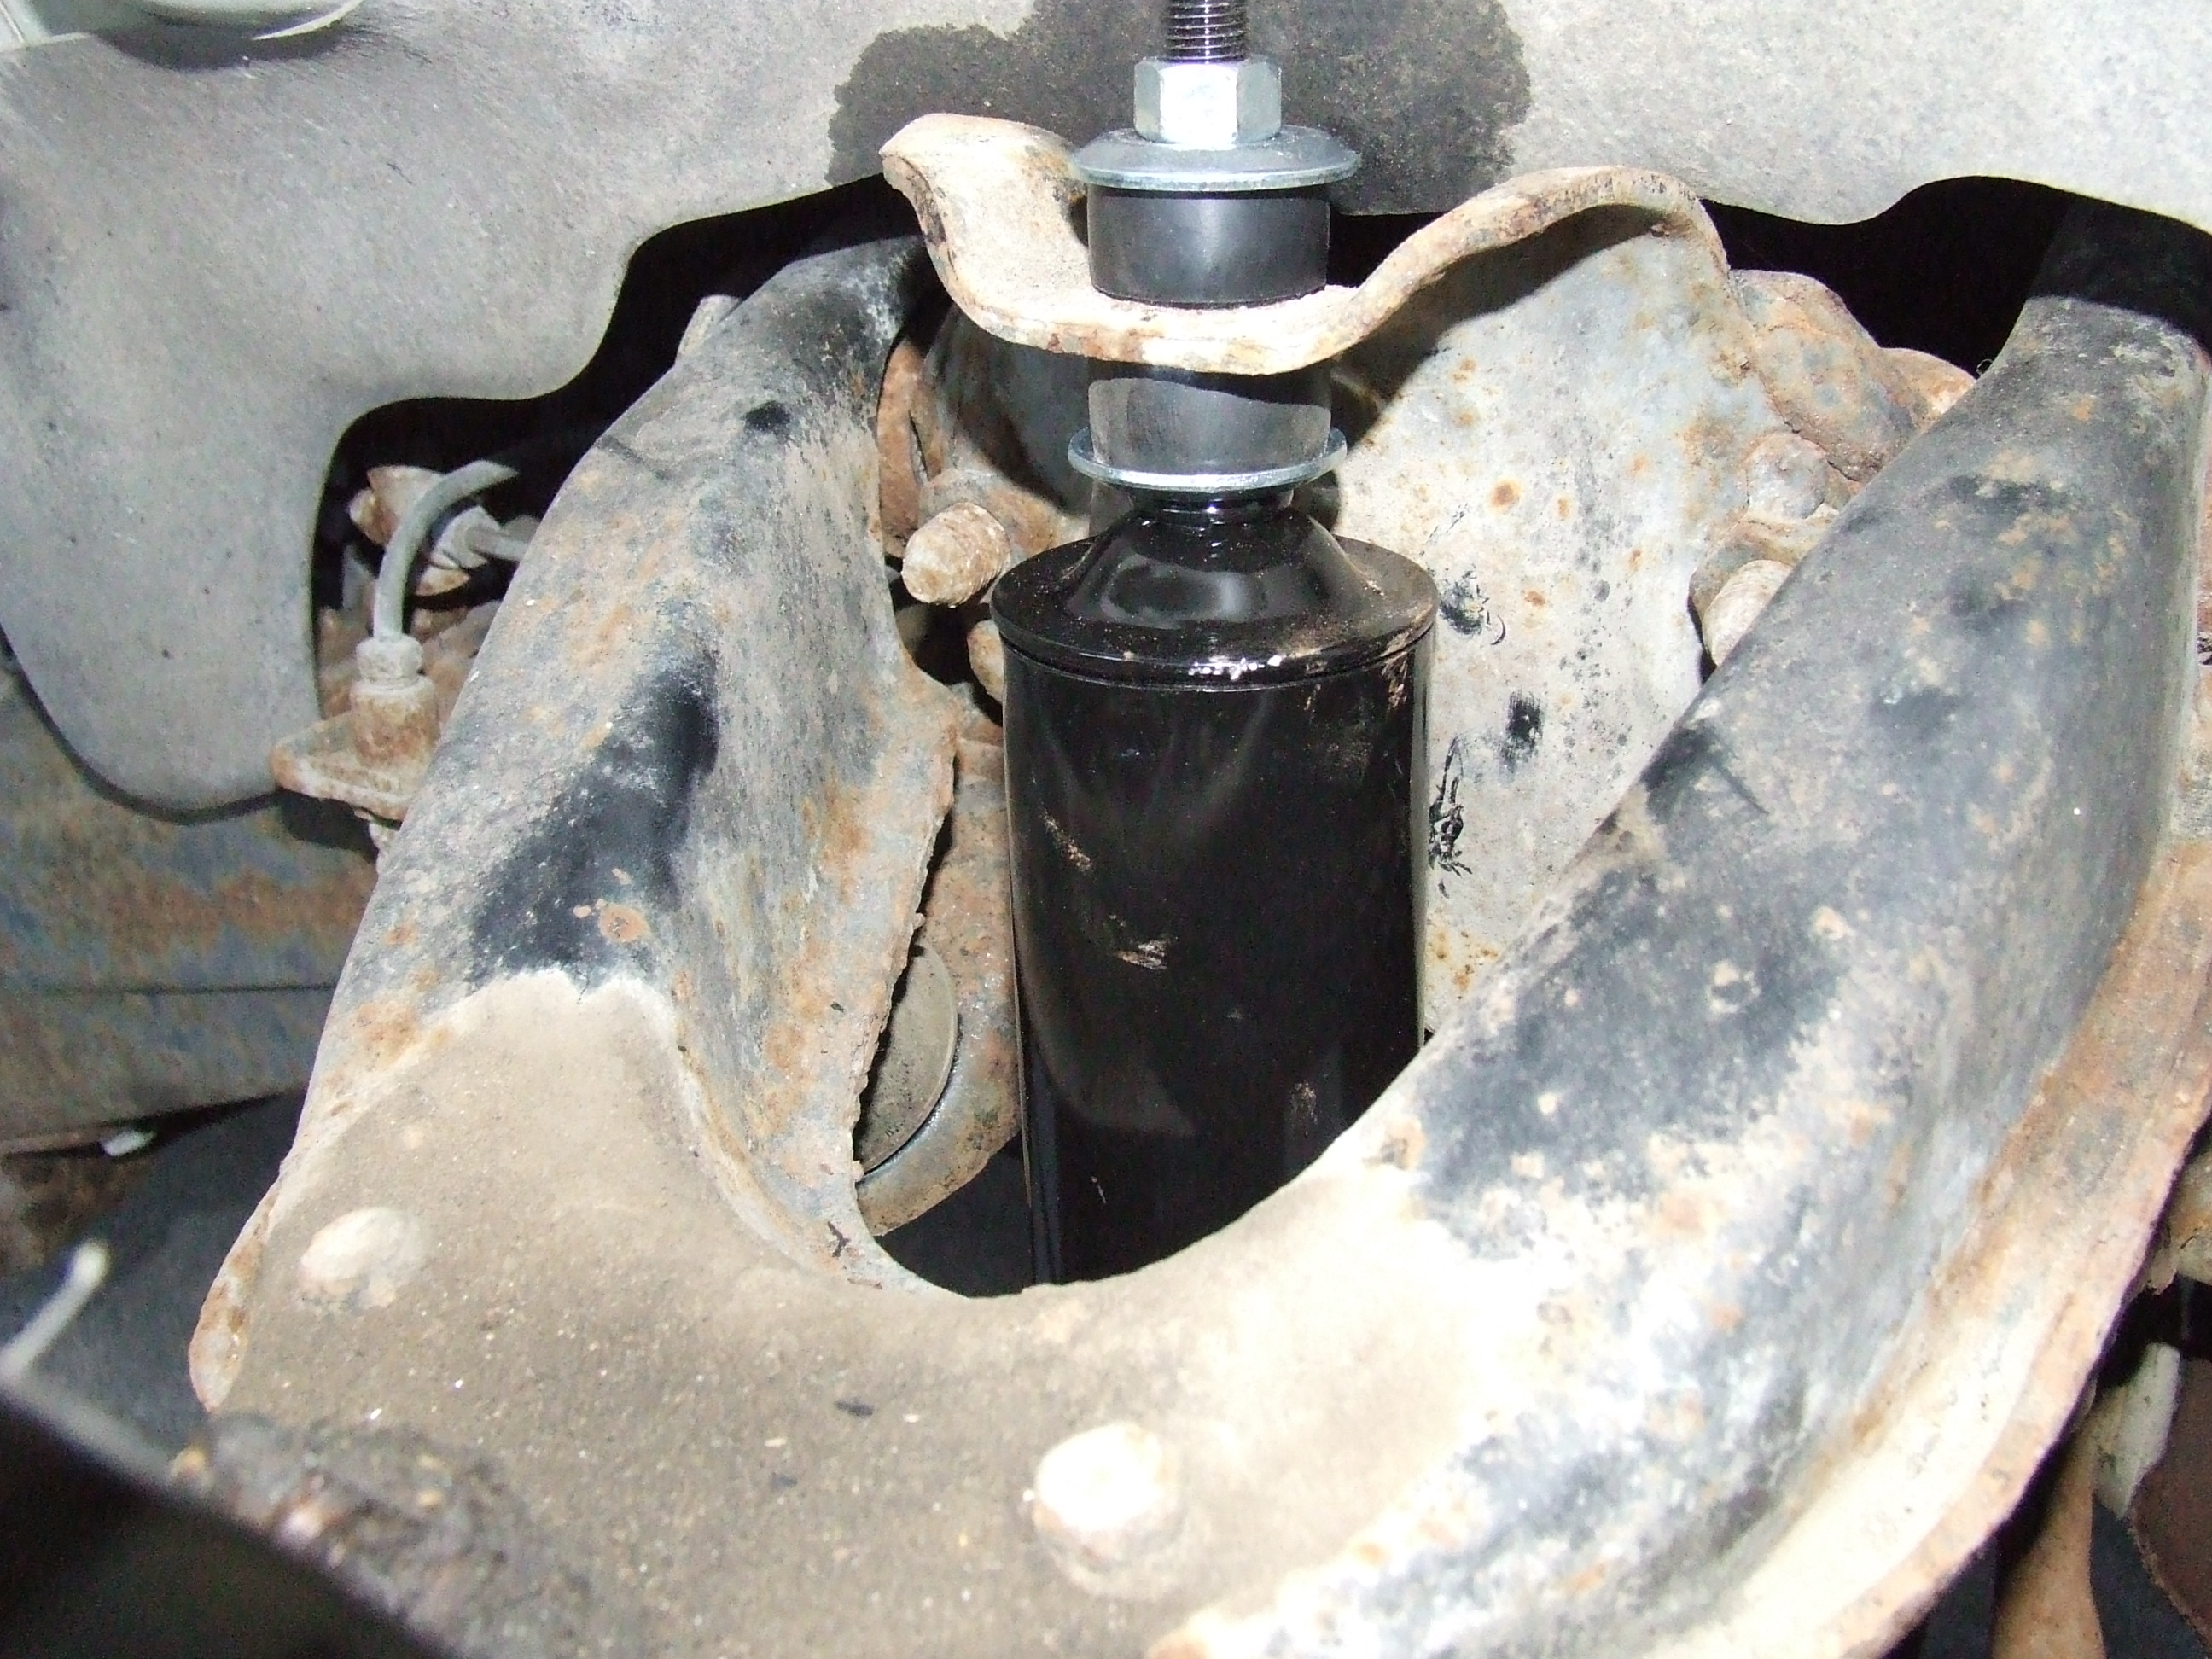
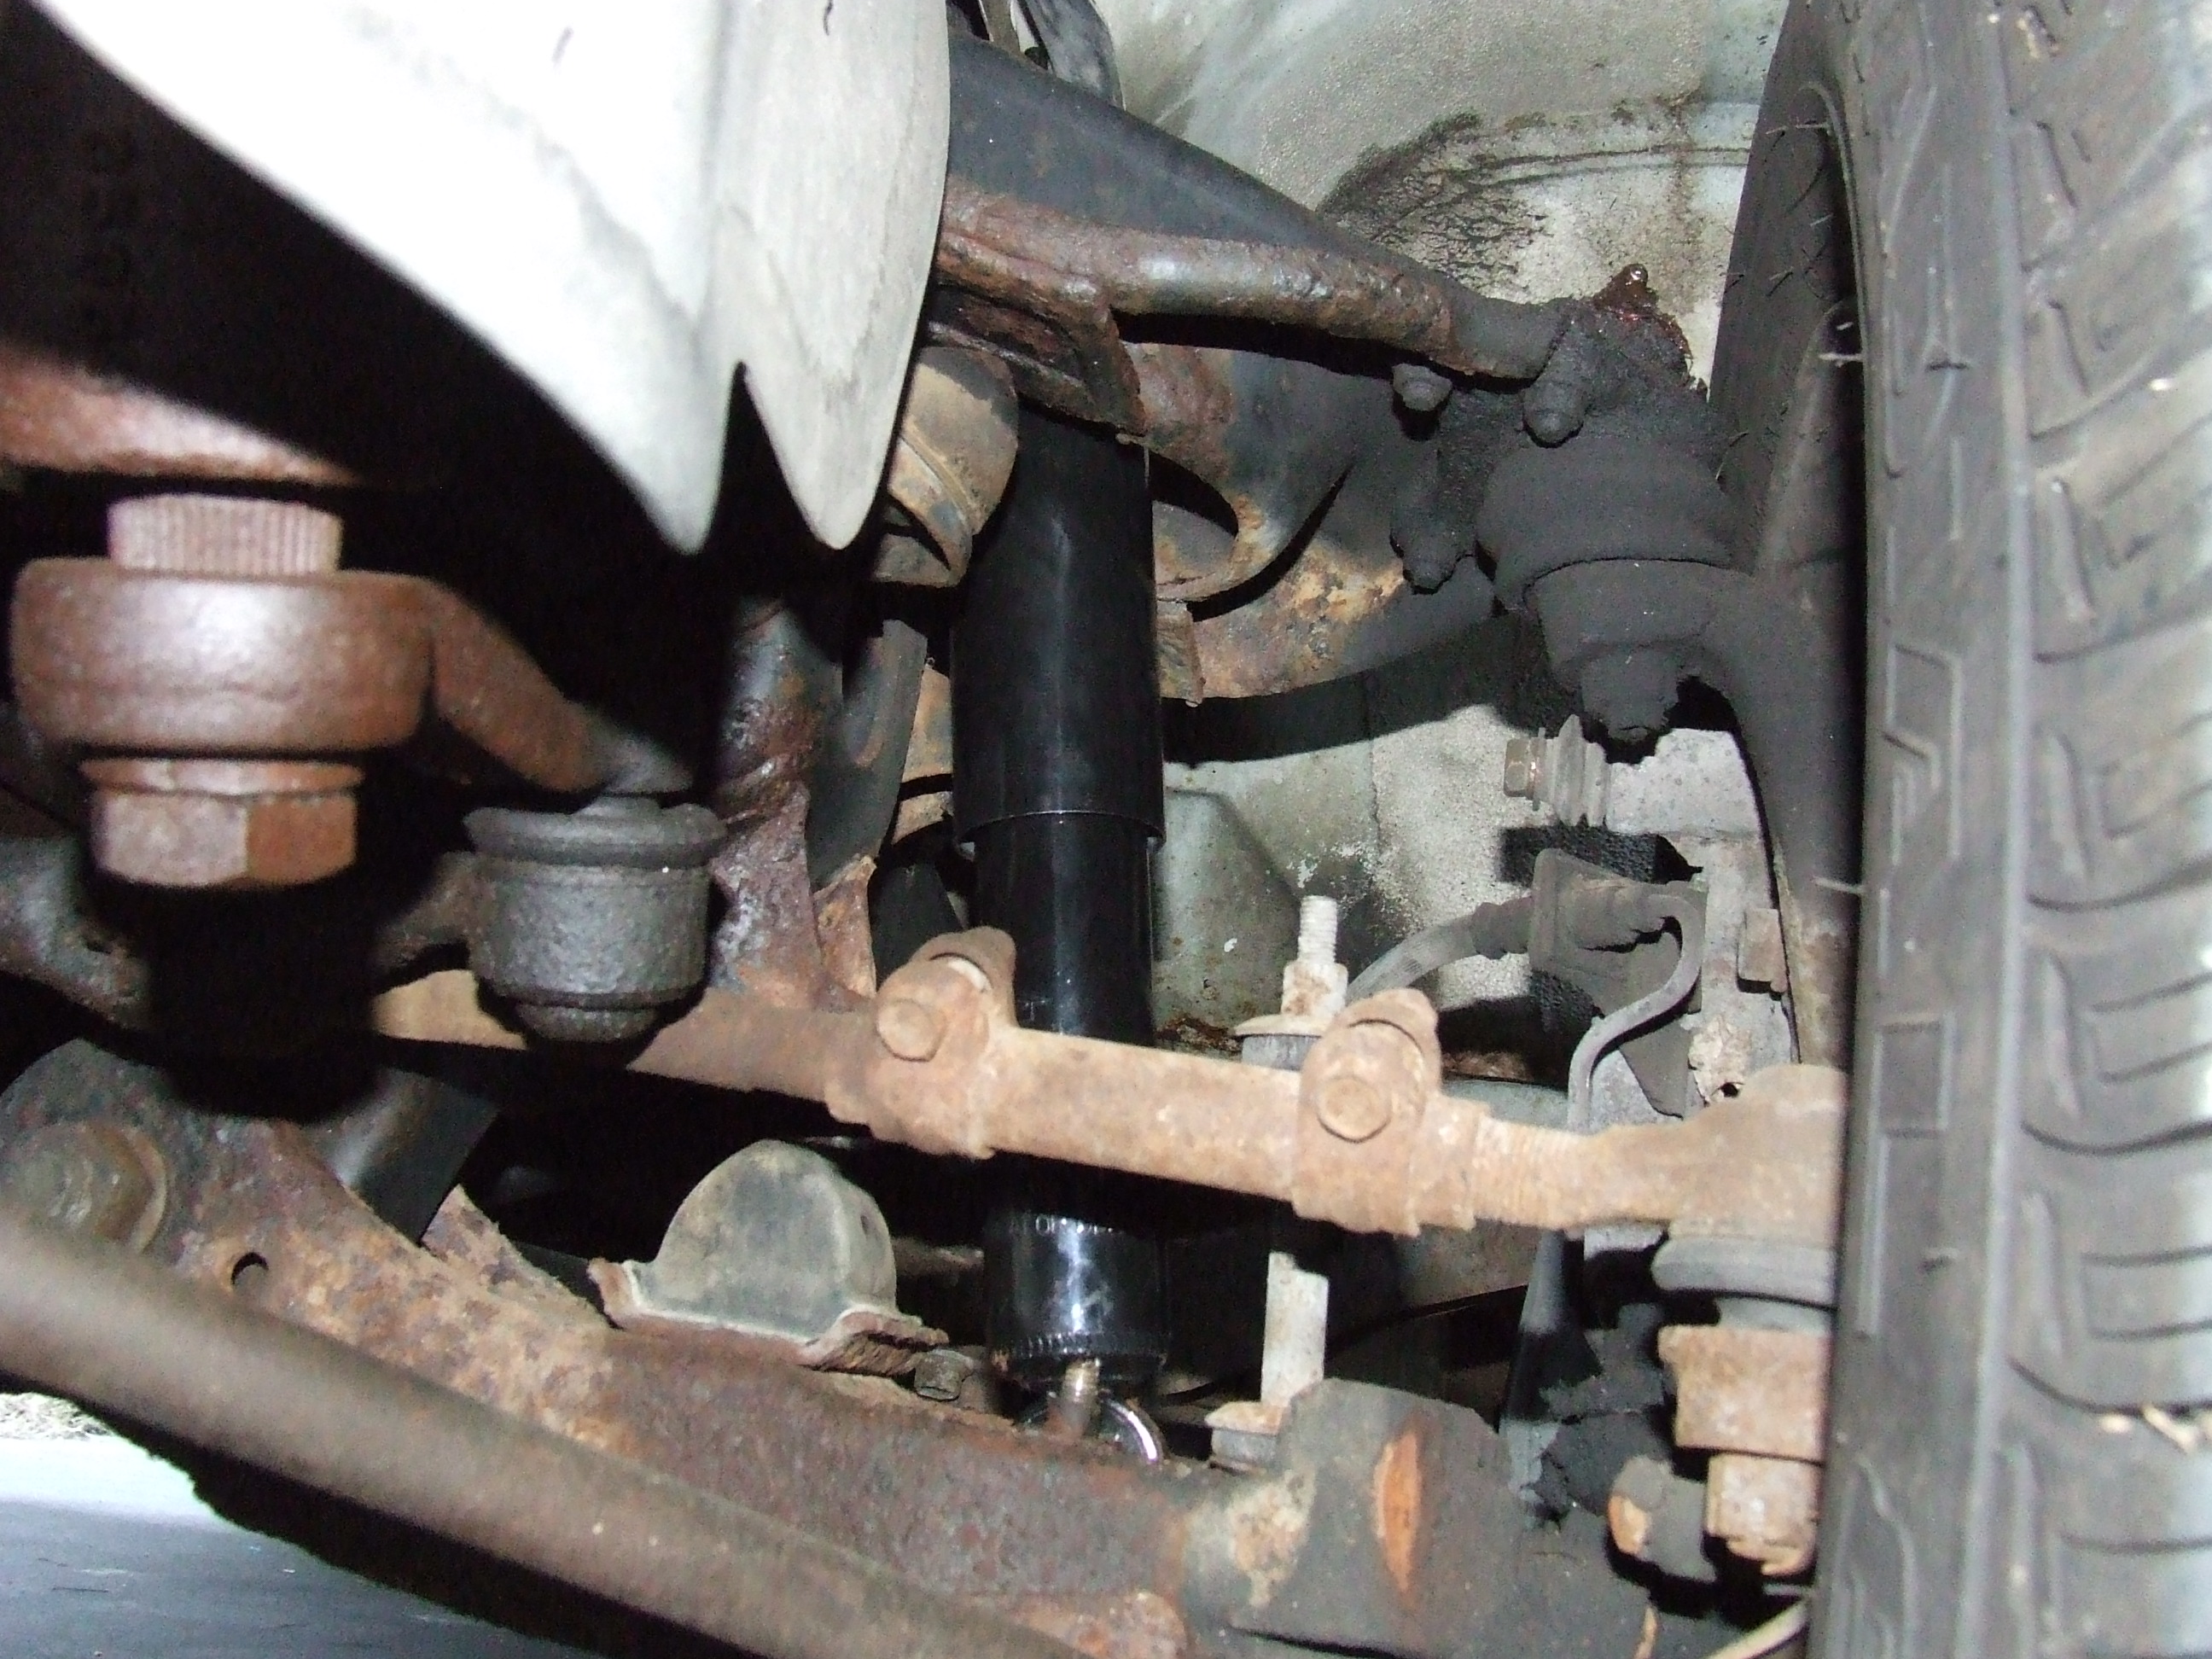
Finished the replacement of the leaf spring bushings.
Total replacement cost = $32.00 bushings
Total Hours Labor = @3.5
here are the pics shoing the item, the repaired driver side spring bushing, the before driver side spring bushing, the passenger side repaired bushing.
Pager
Arkansas