

SSBreeze
-
Posts
44 -
Joined
-
Last visited
Content Type
Events
Profiles
Forums
Gallery
Posts posted by SSBreeze
-
-
Hey Gringostar, I may suggest getting the Little Buddy (one burner) as I use that and it works great. On high it heats up my Sunrader to 75F when it is 30F outside. I then turn it to the low setting and it stays at 65F inside with 35% humidity. At bedtime I turn it down to just the "candle" flame, pilot light, and it keeps it from freezing inside and usually wake up to 45F. I mounted it about 8" off the floor toward the back door as even the small ones will heat up the floor just in front of them. I also run it off a 5 gal. tank with the "clean hose" that doesn't require the filter. Just some ideas.
-
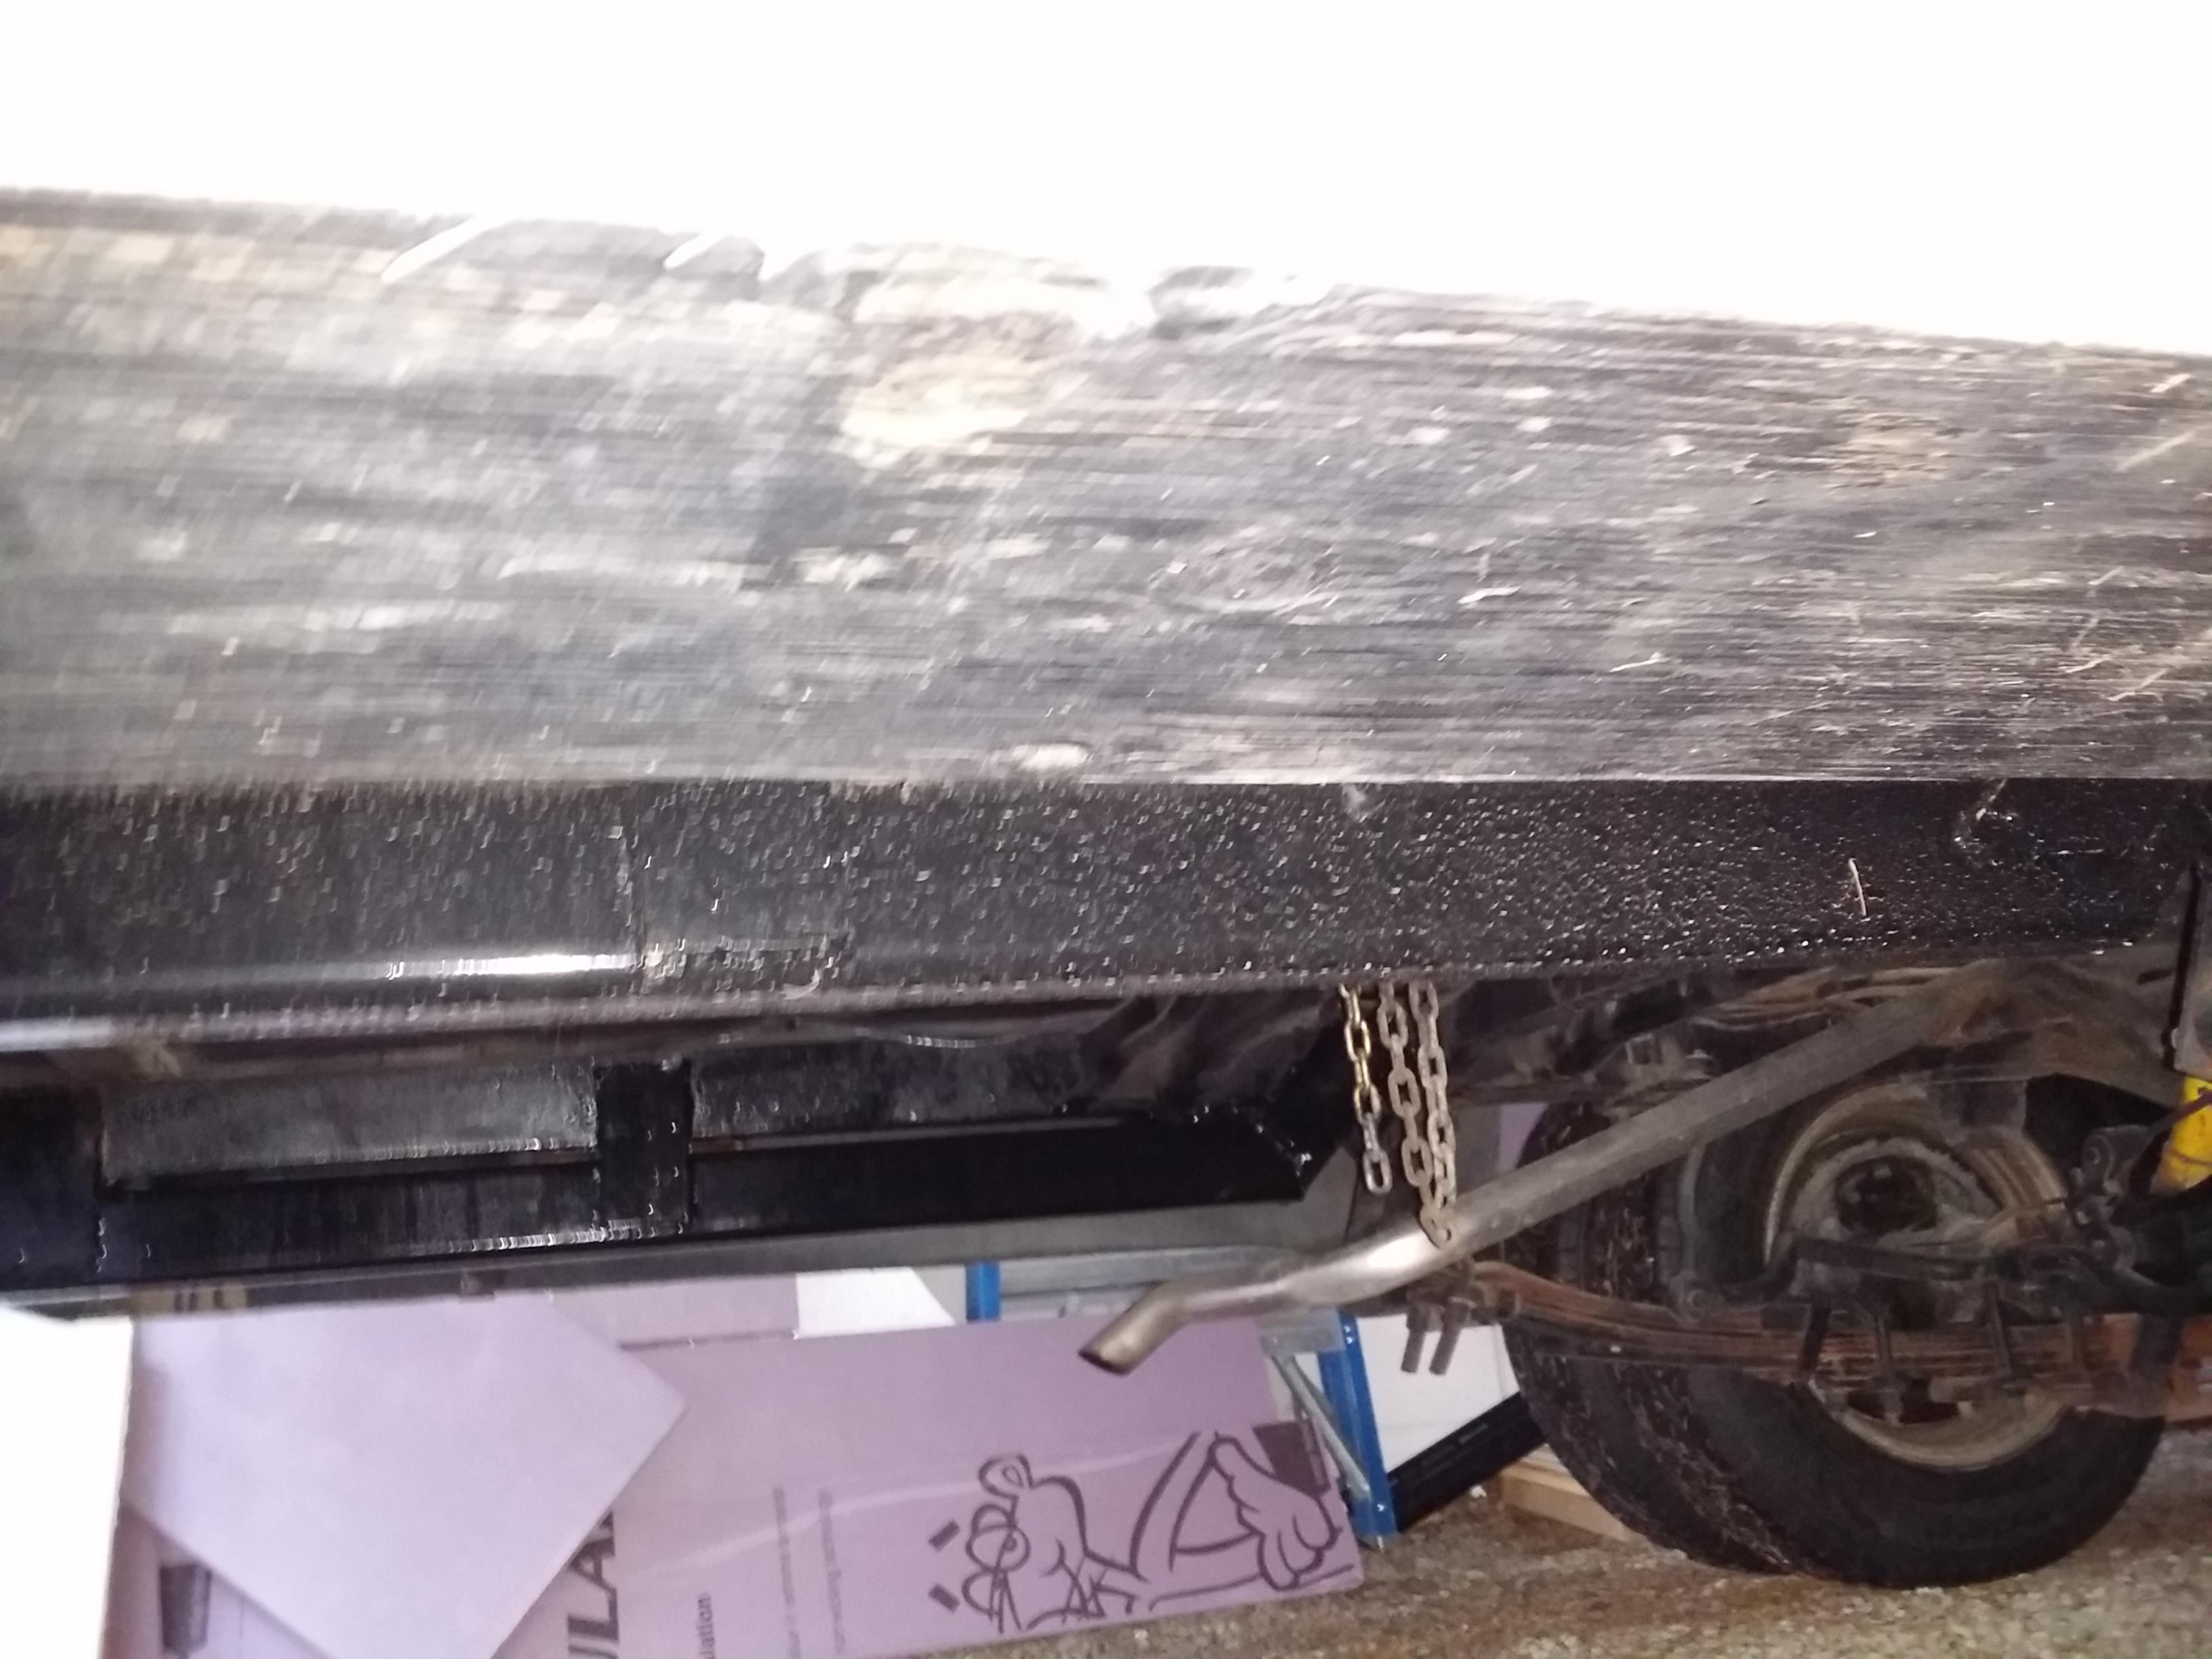
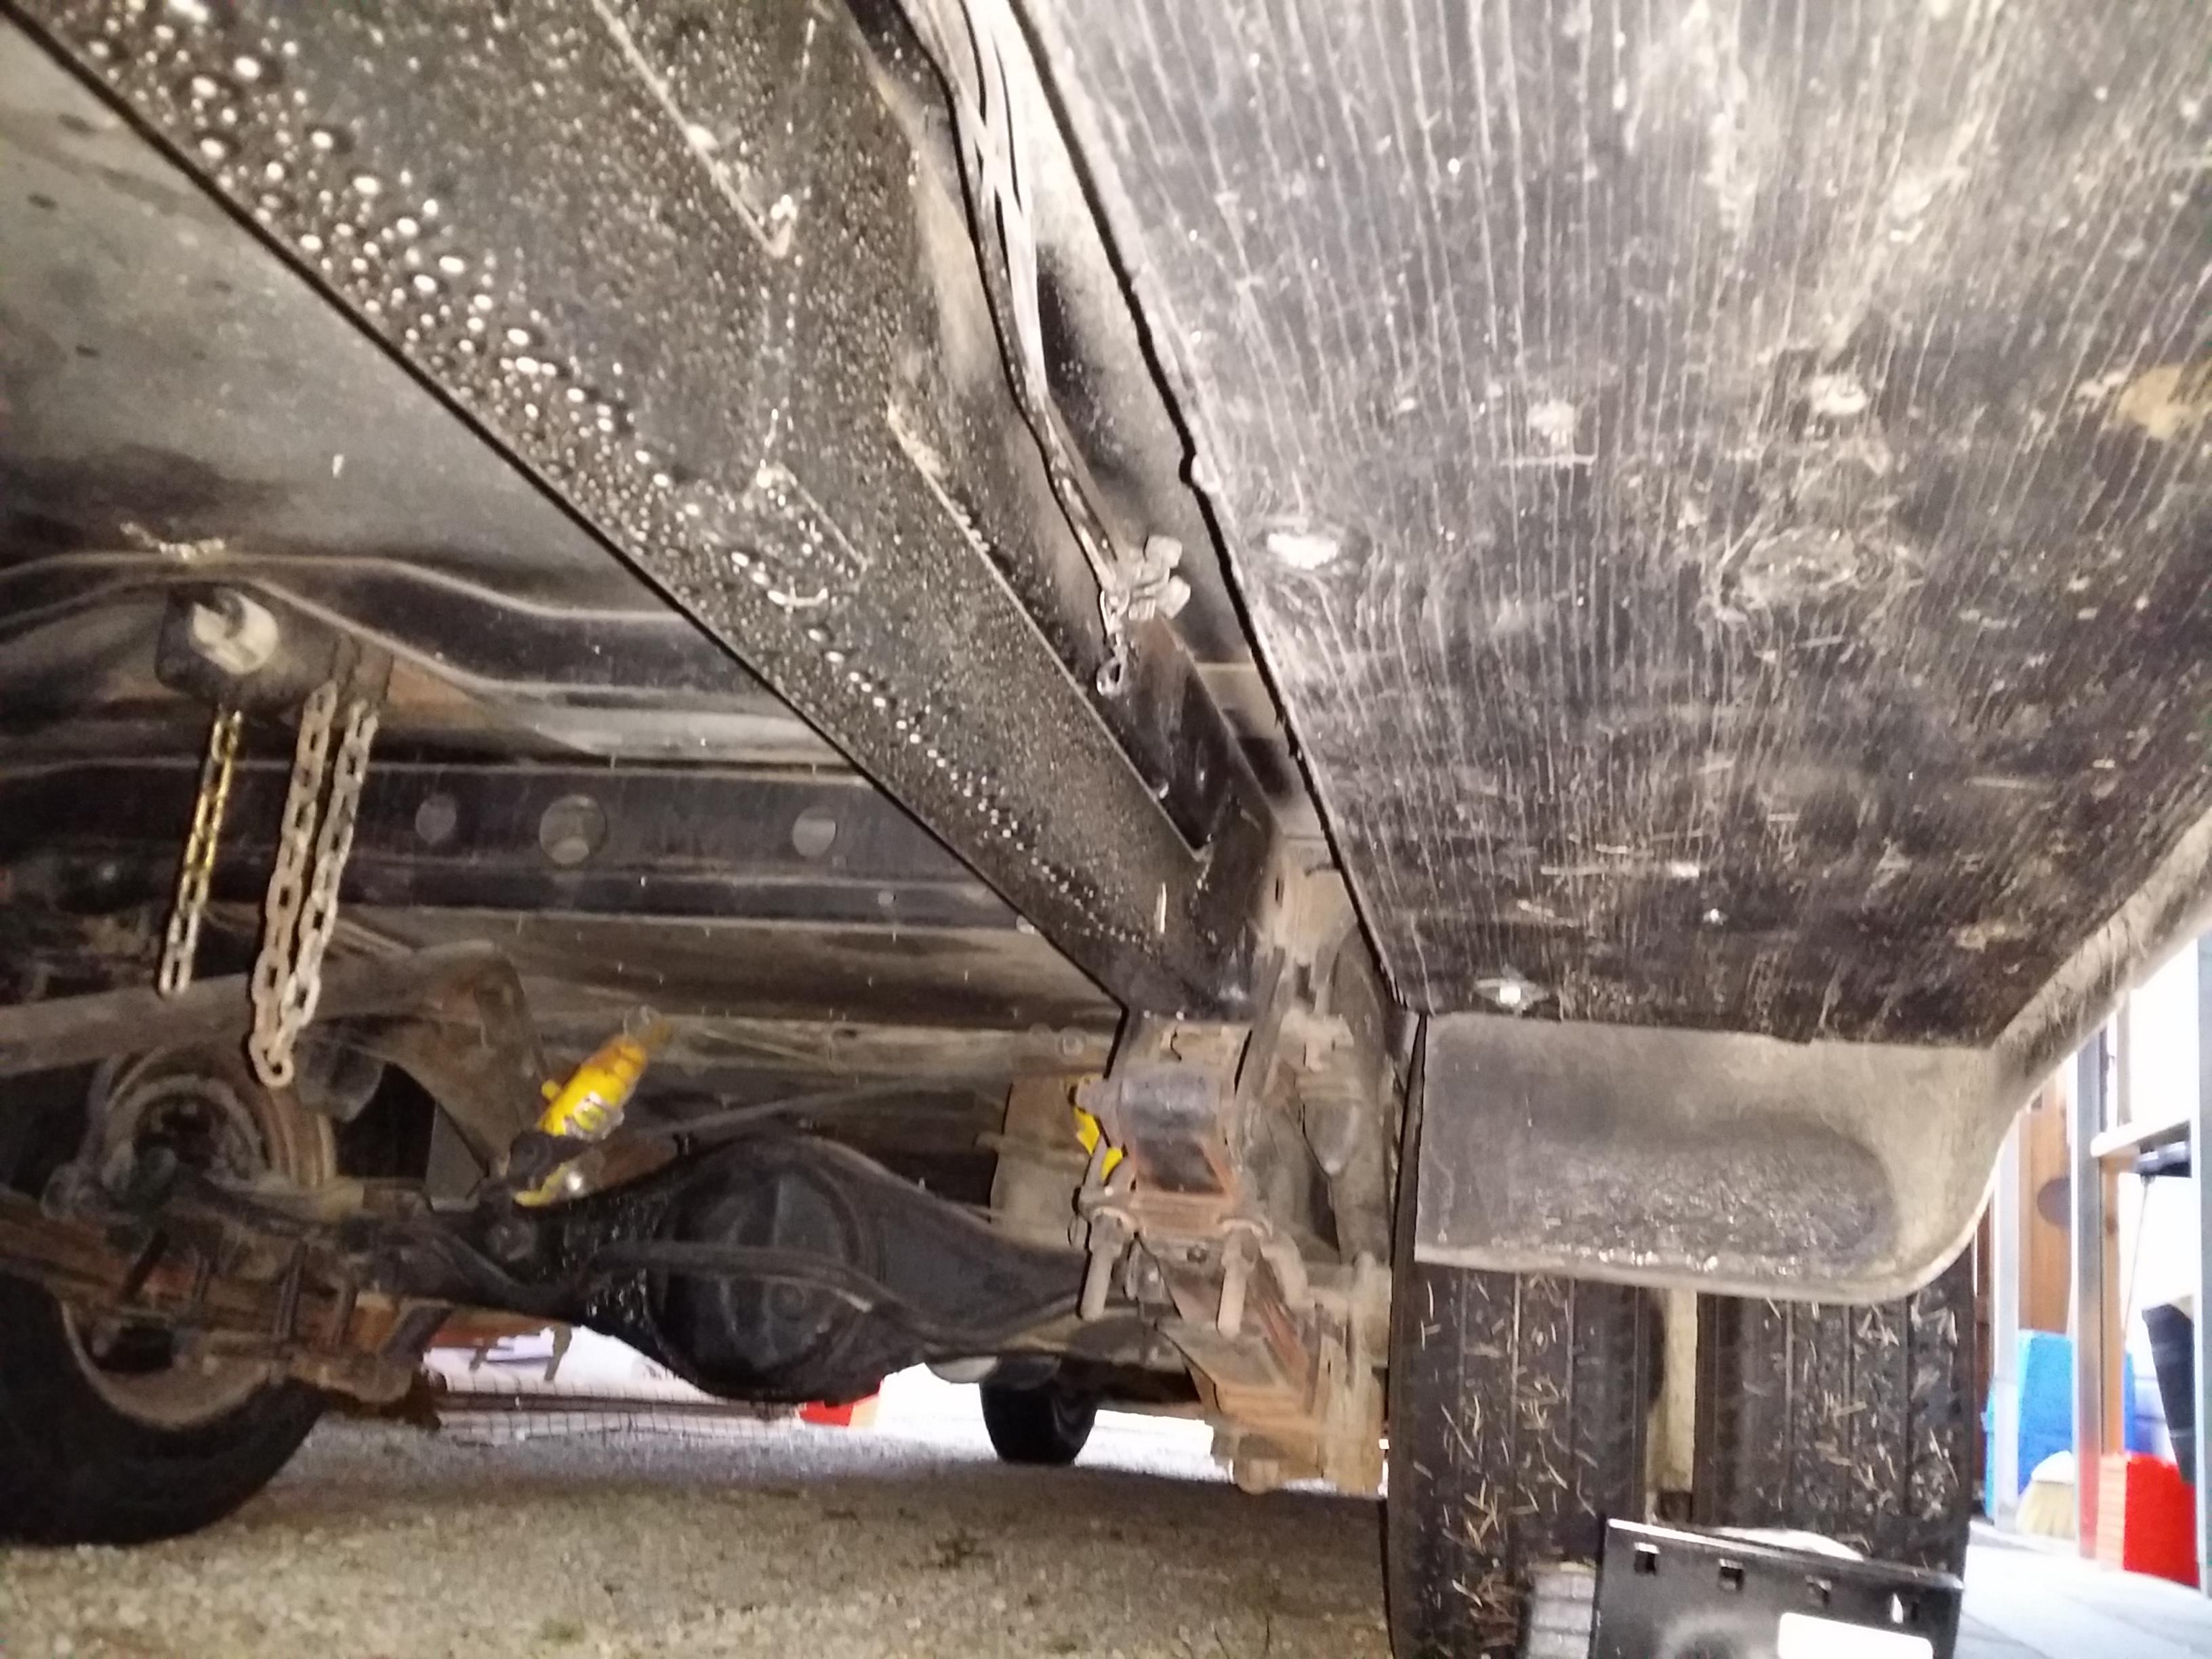
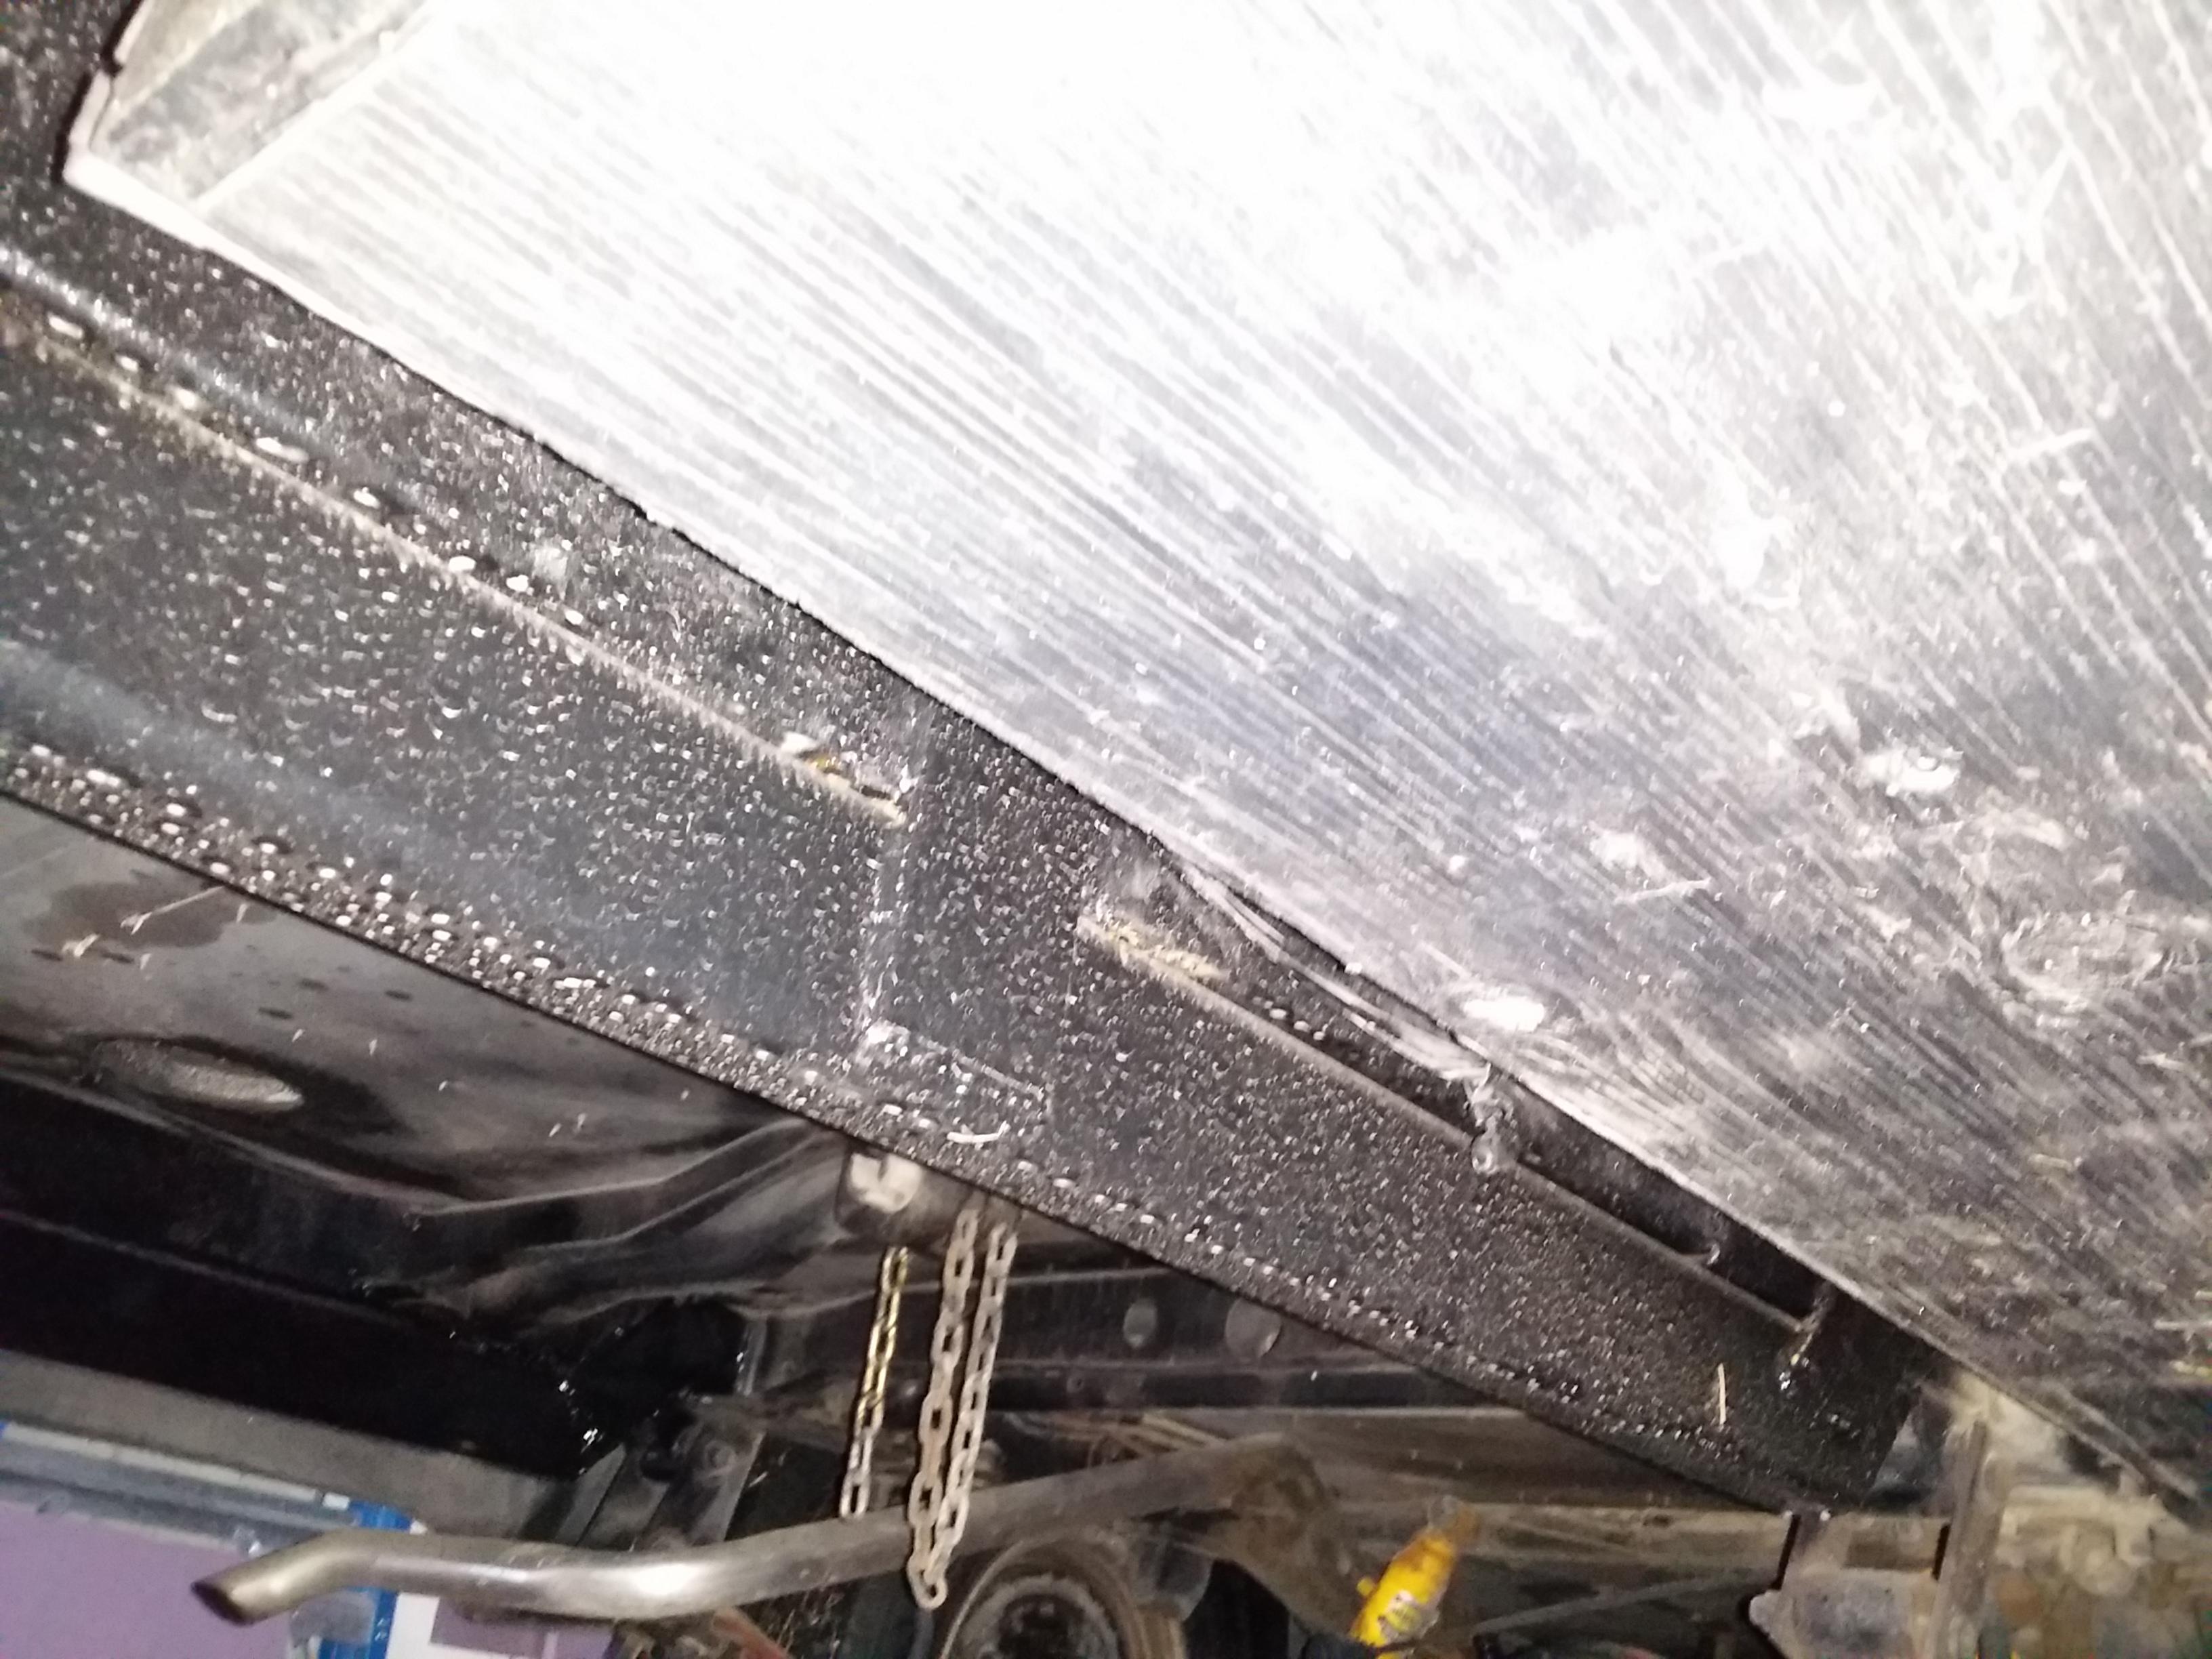
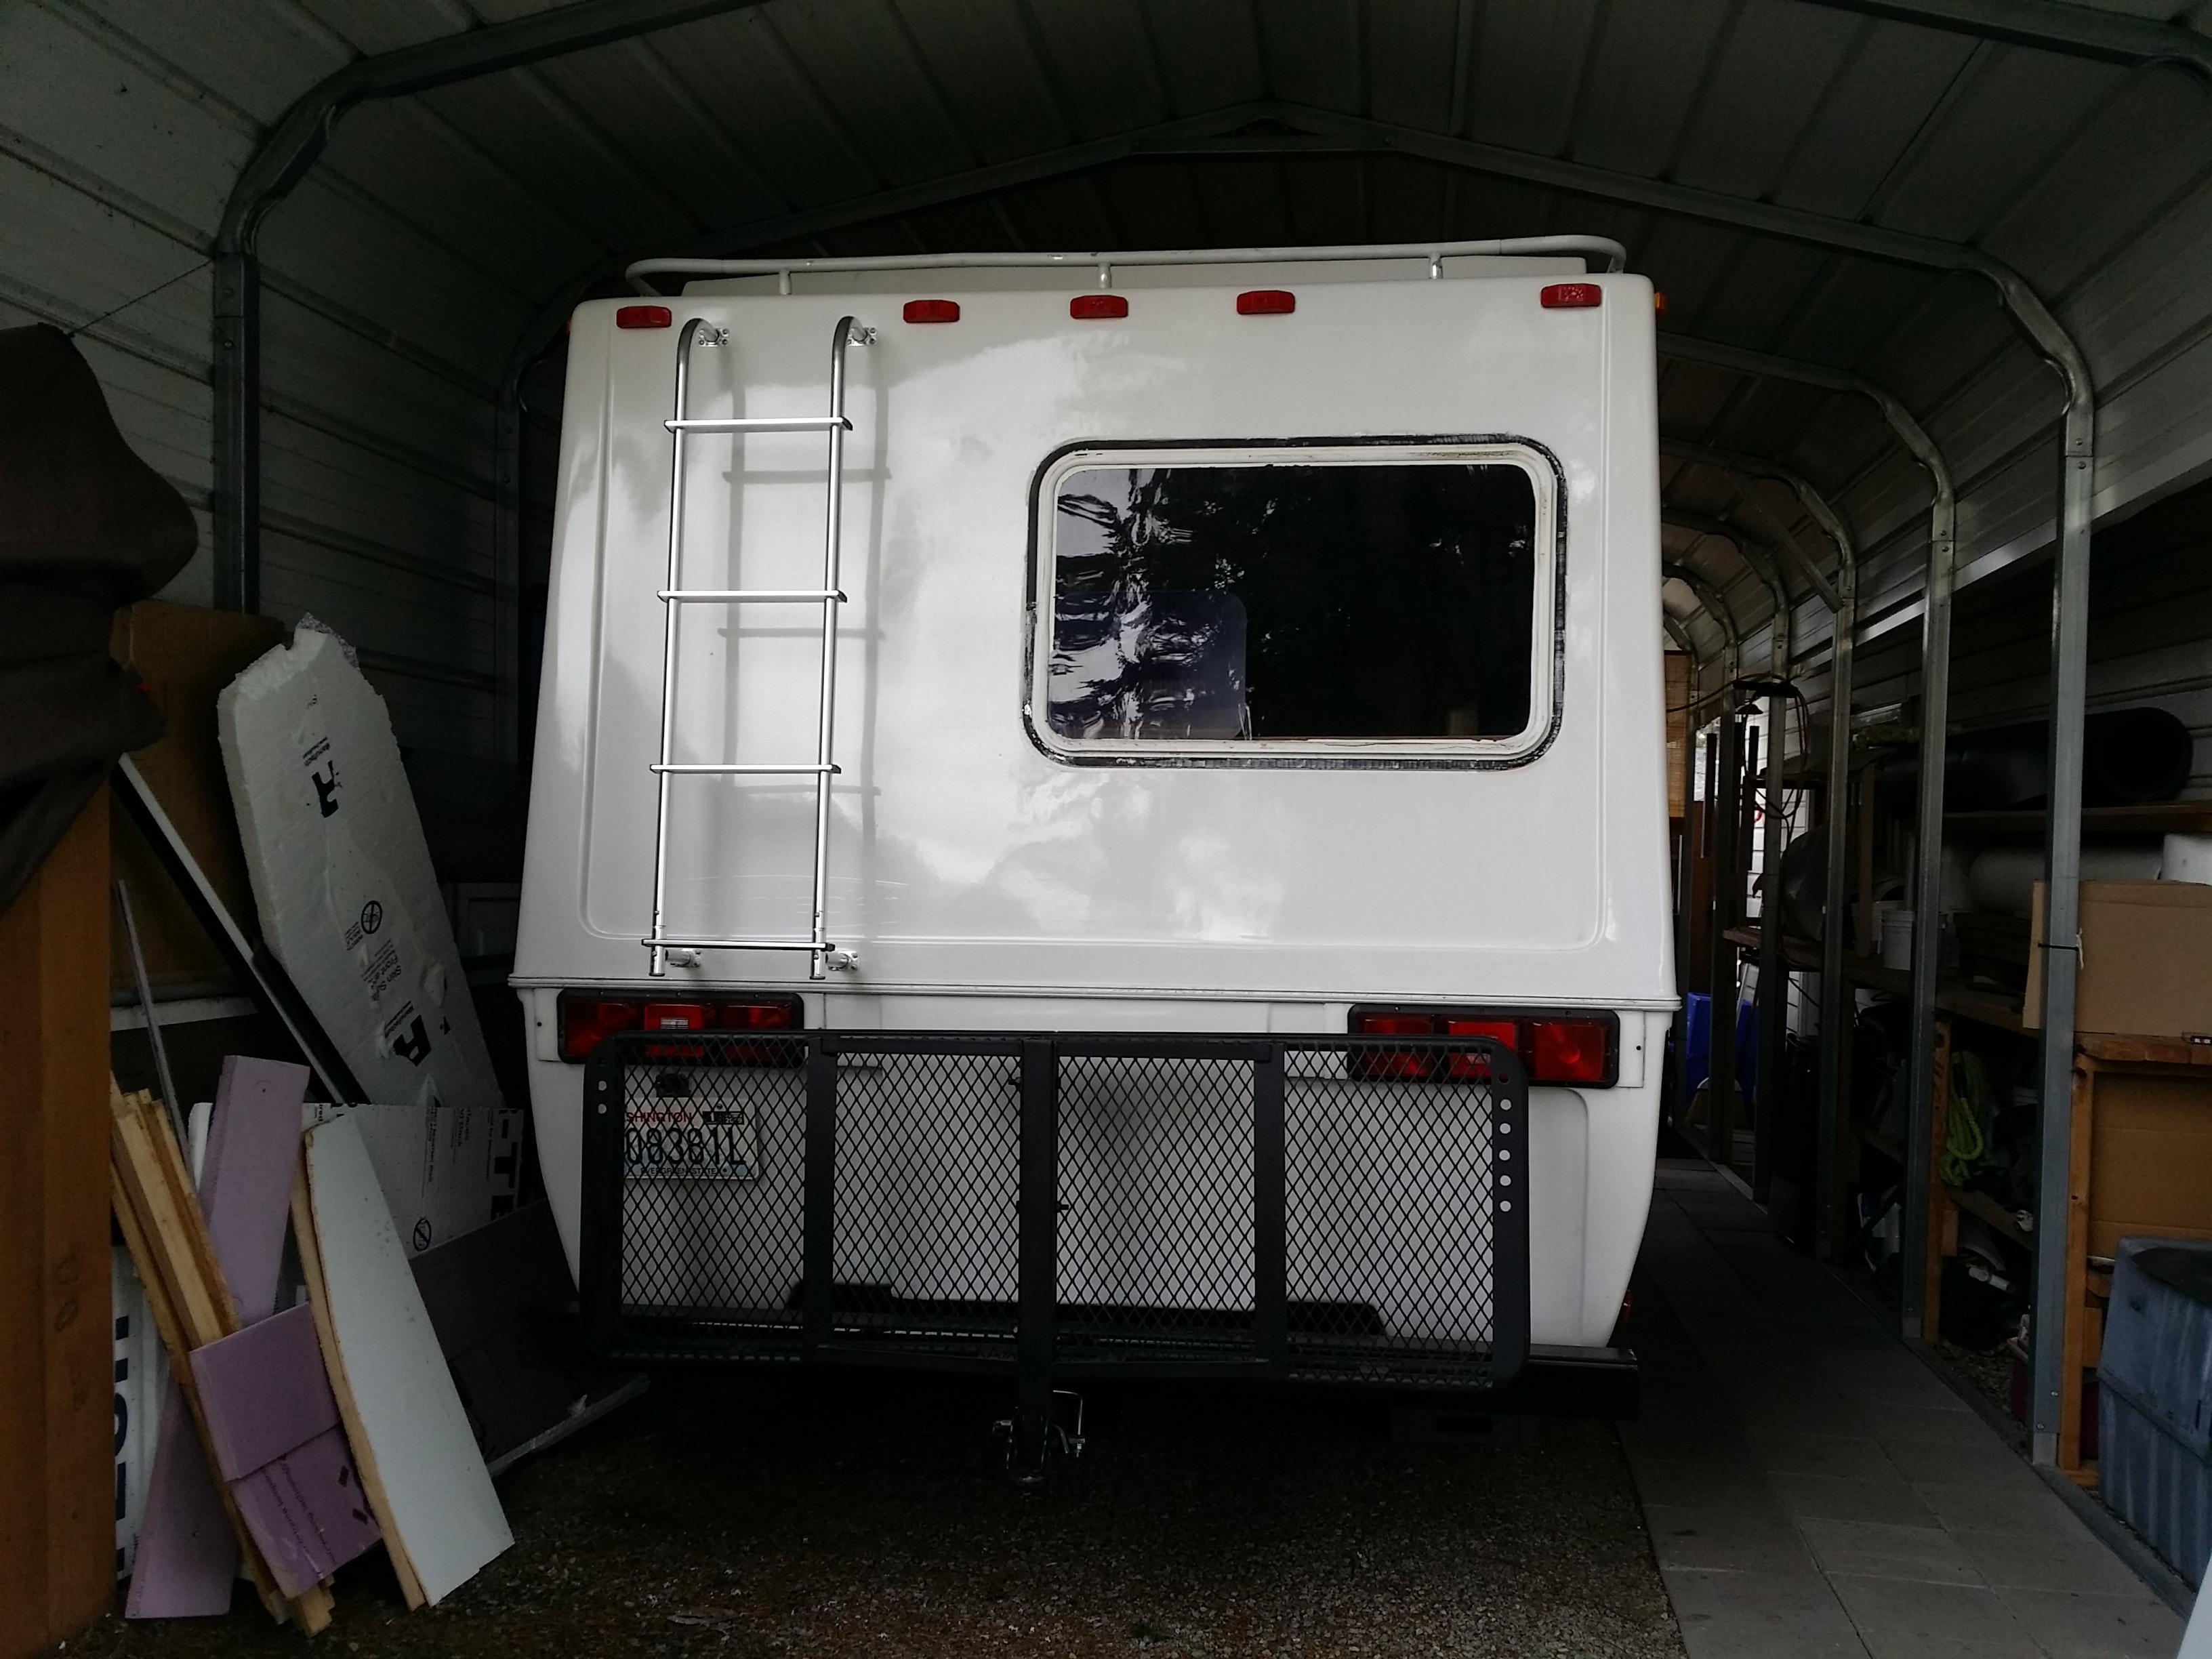
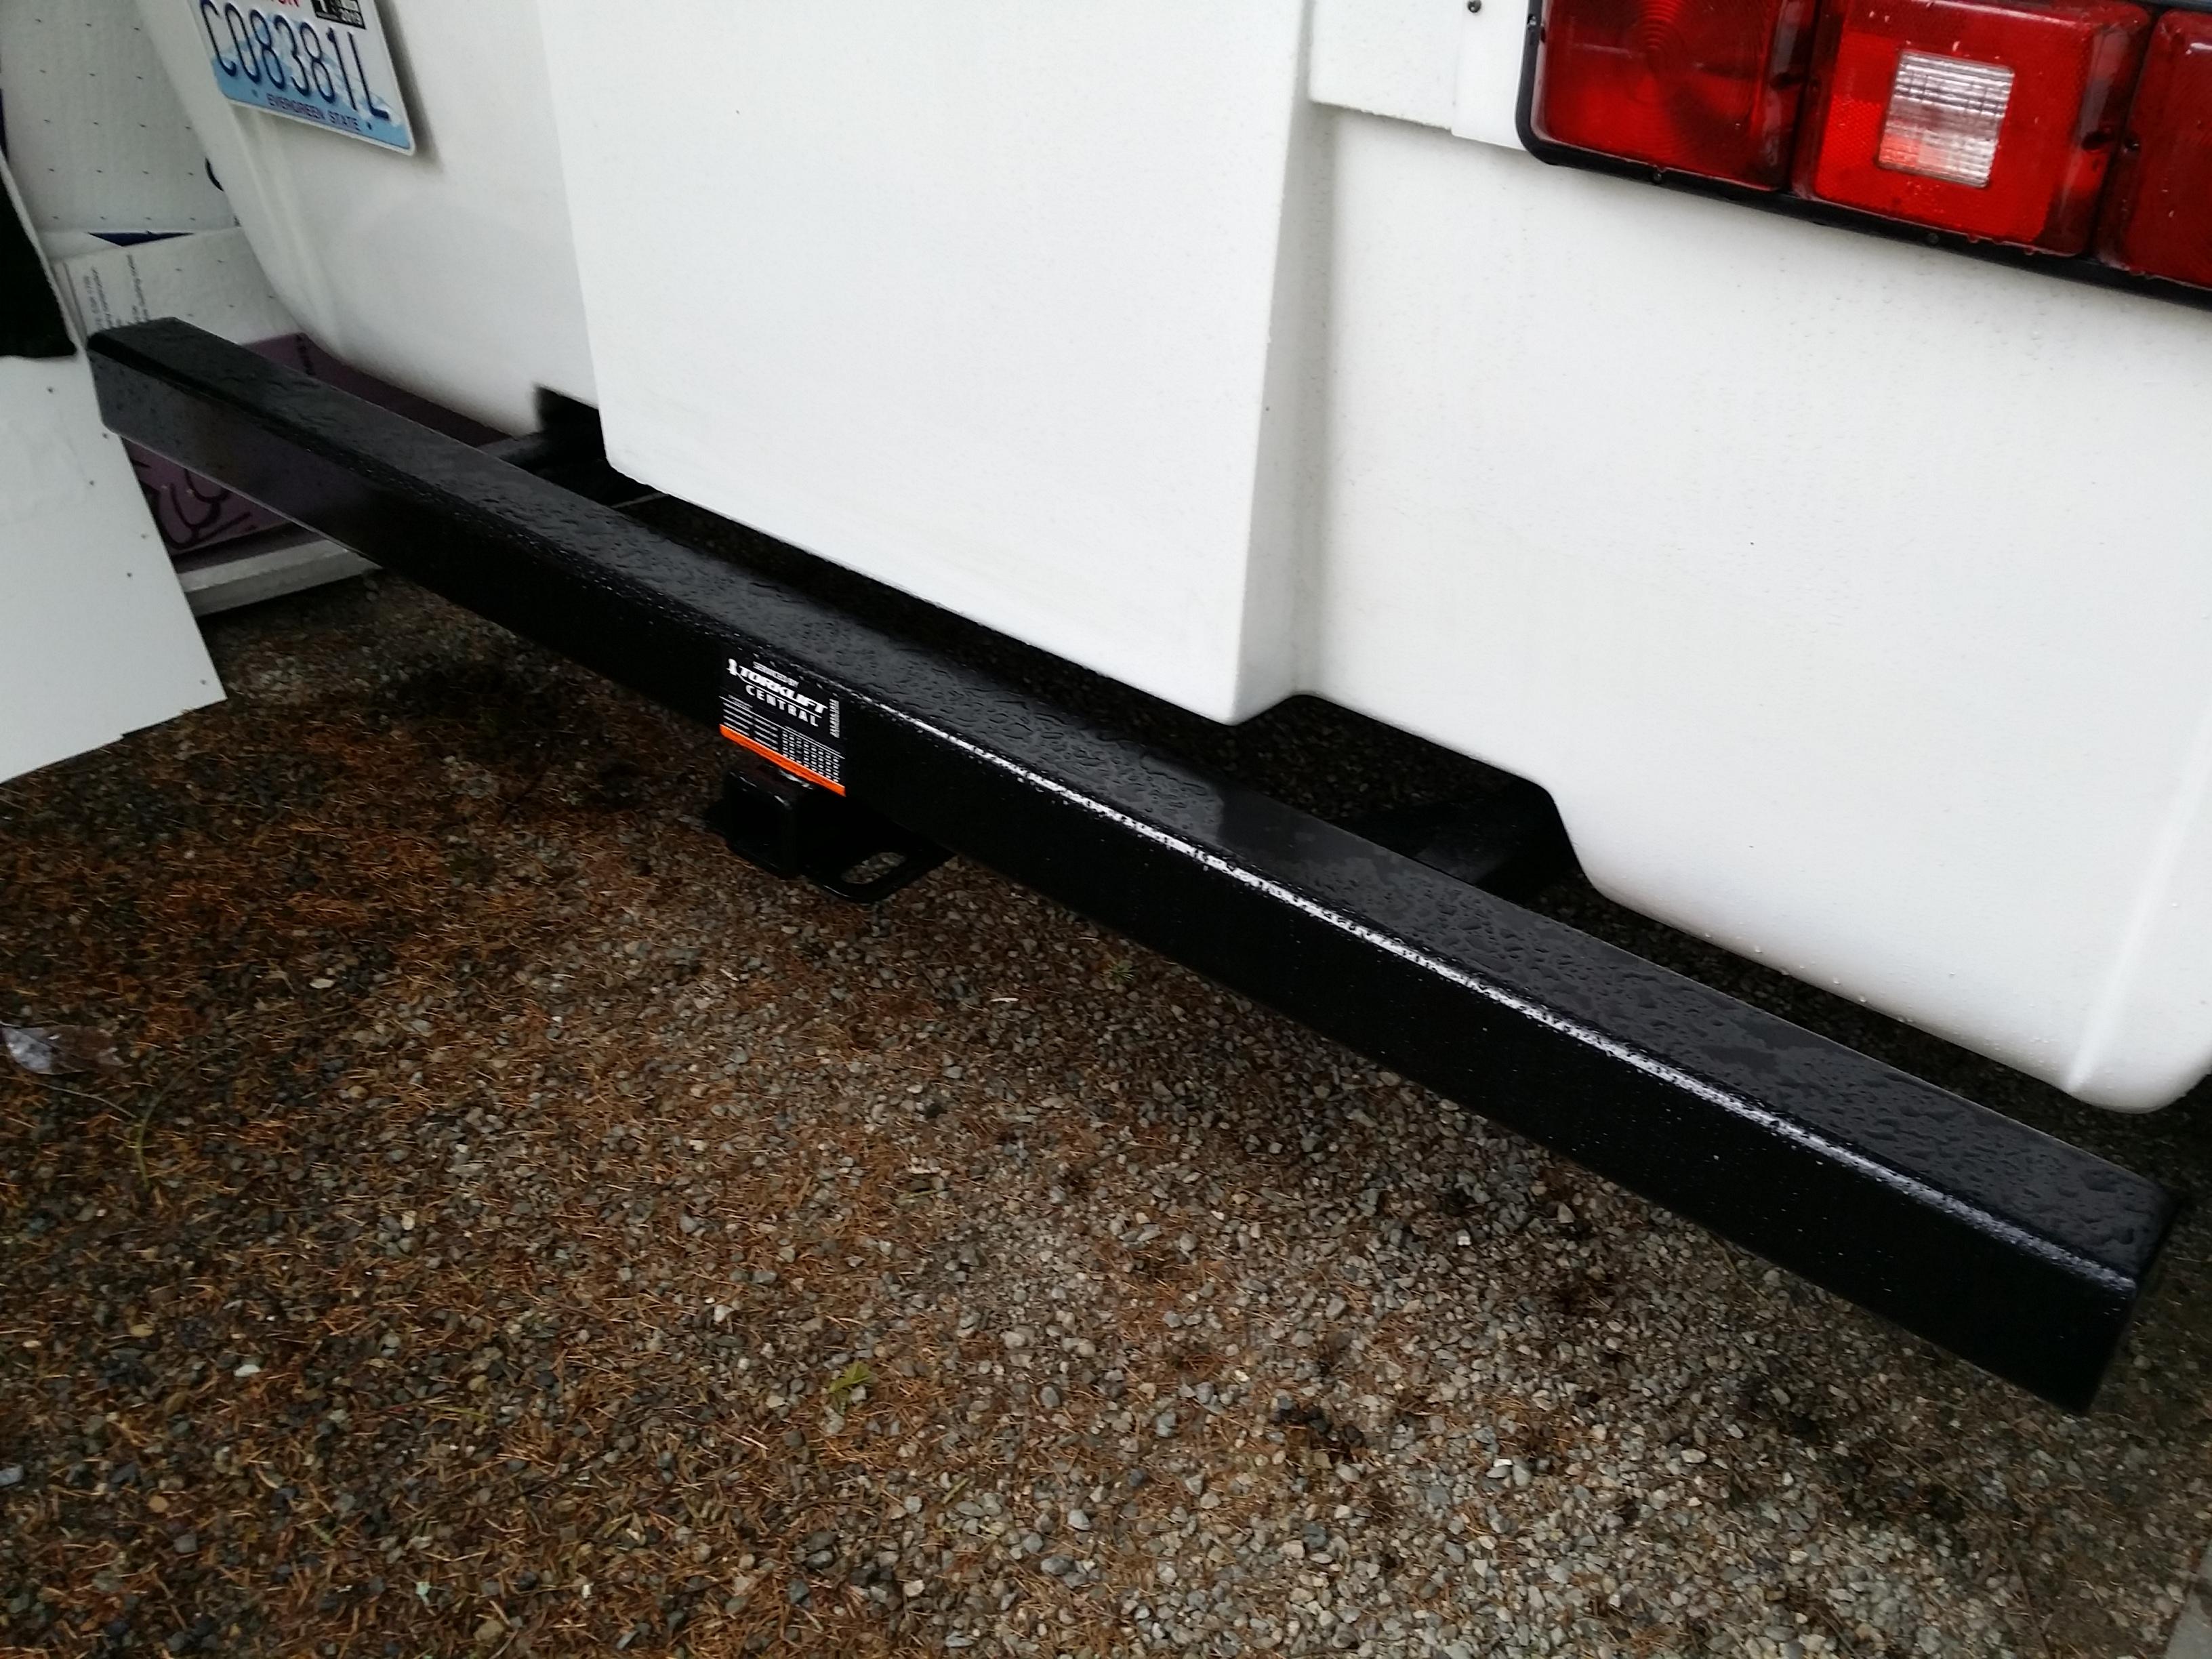
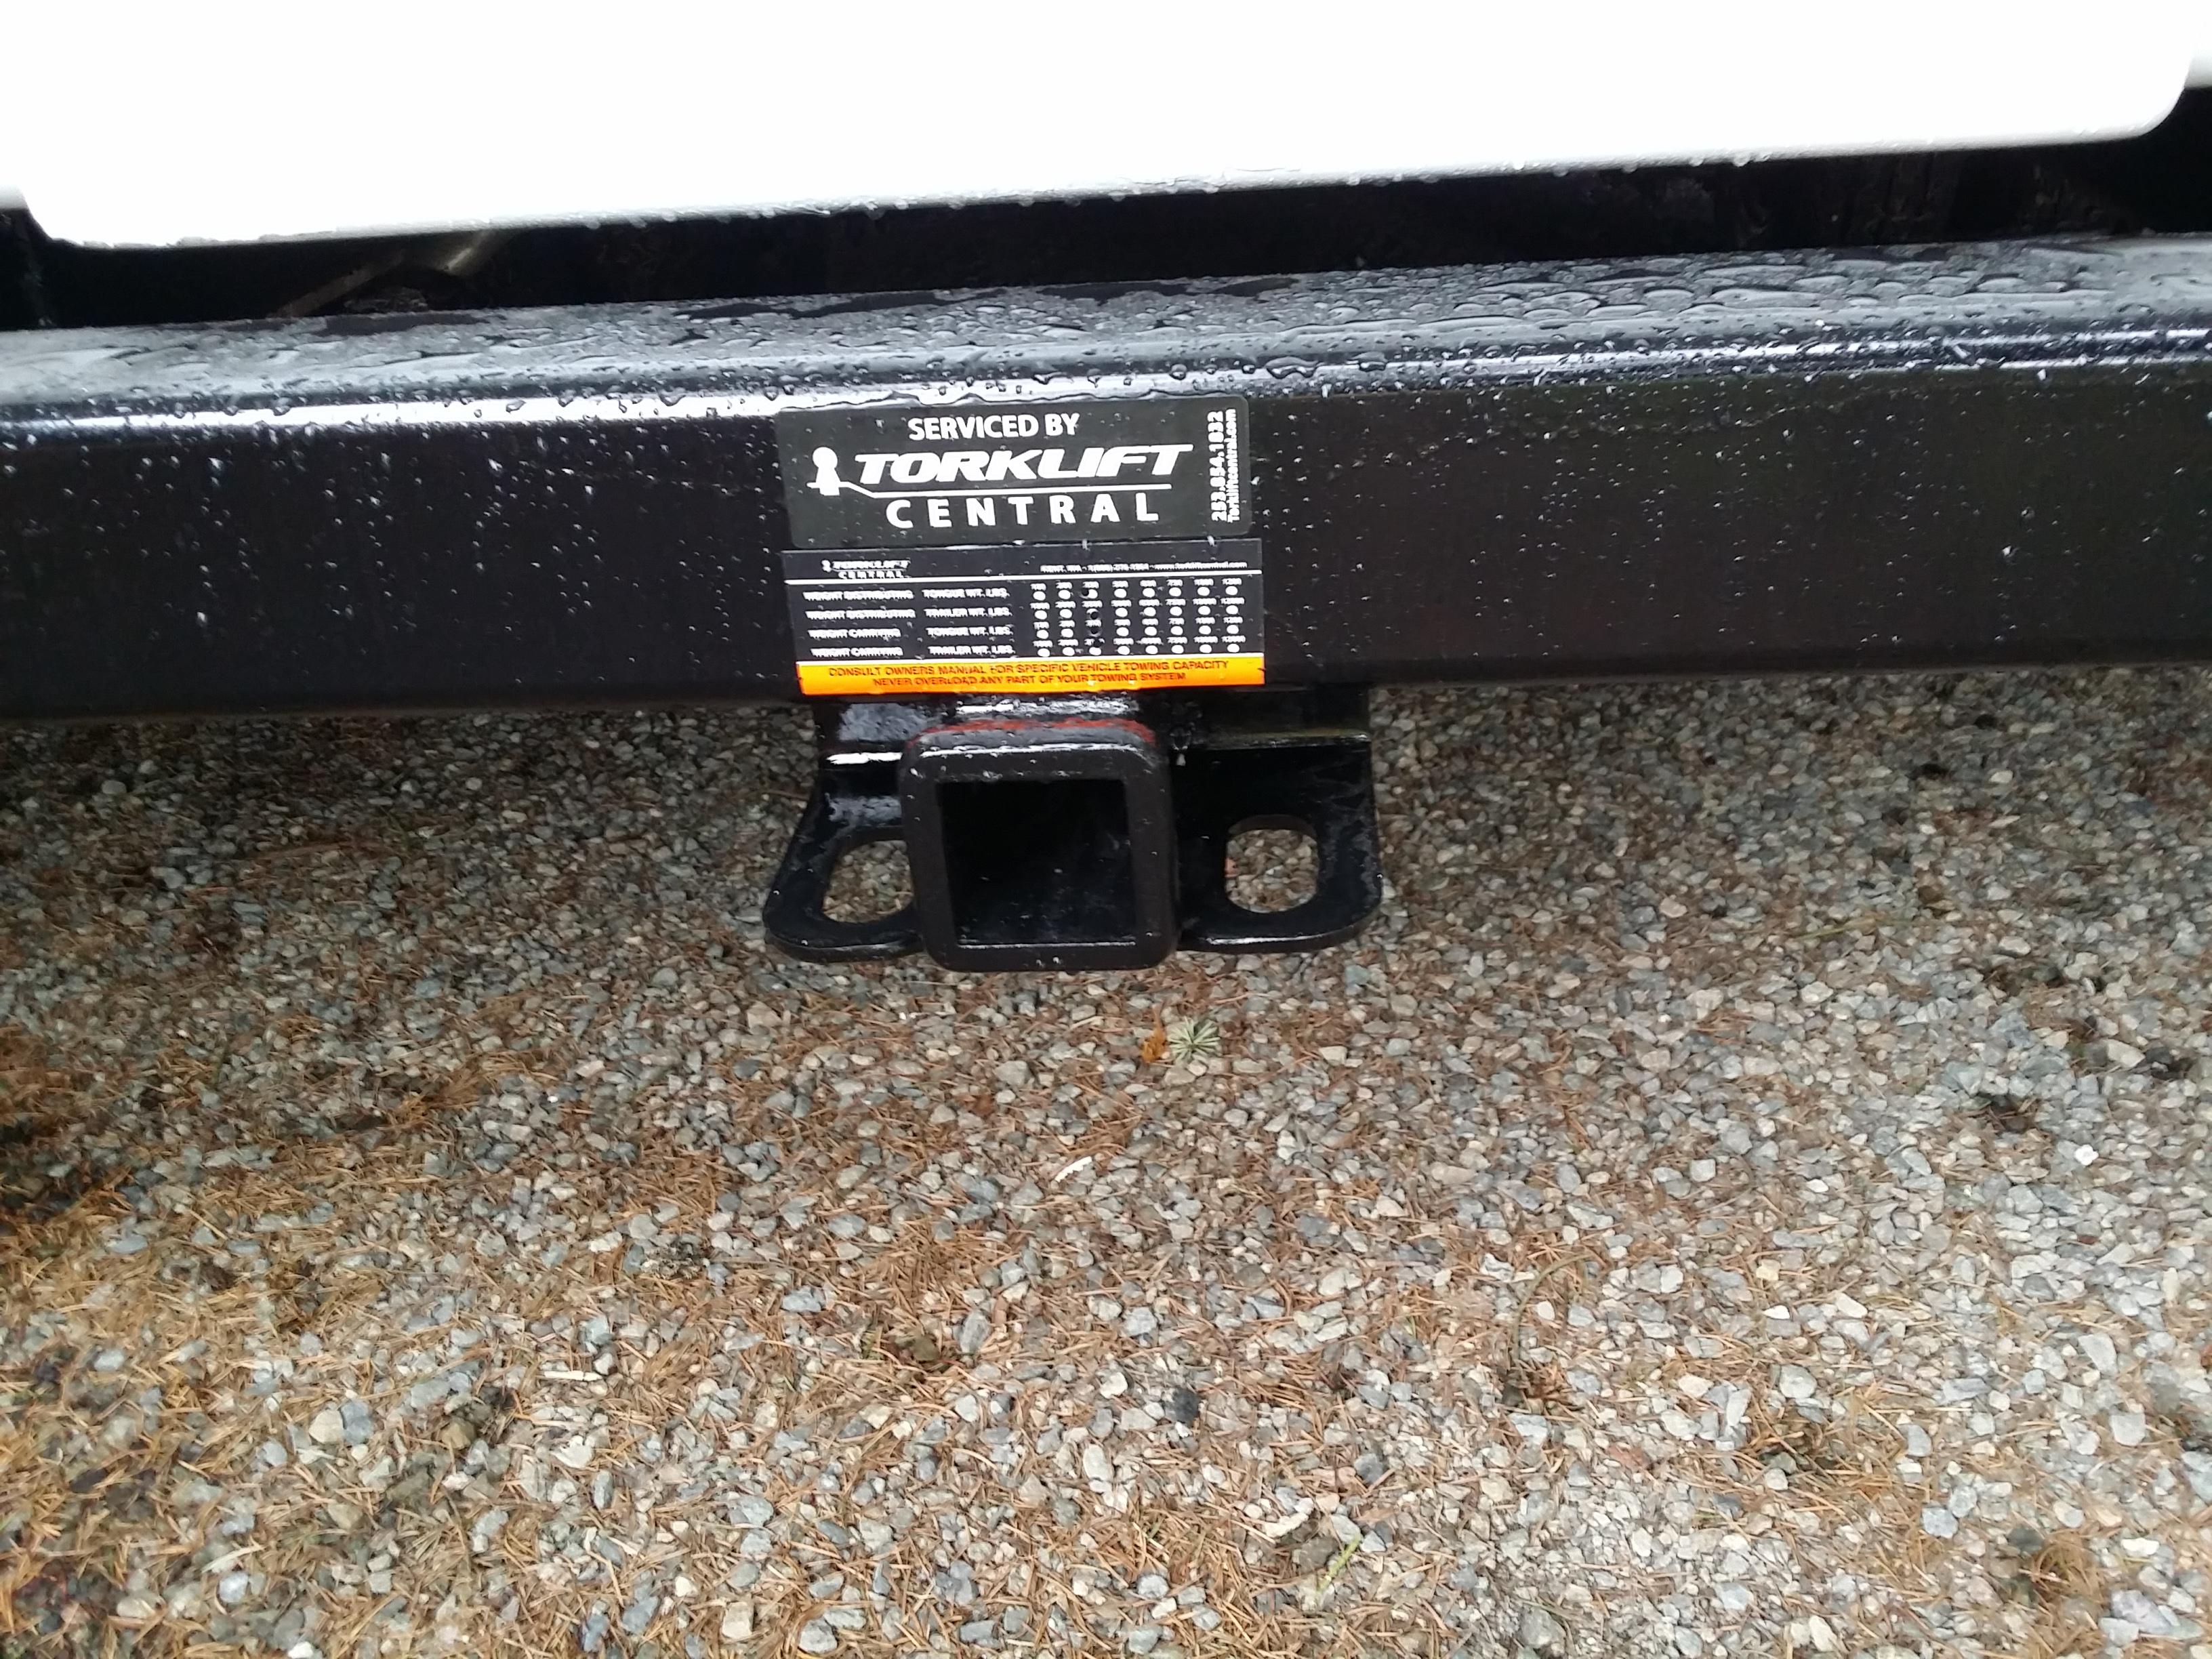
I had mine custom added for $700 by a local shop. It is tongue rated at 350#. Total towing 3500# although I won't be pulling my jet ski anymore as I sold it. The basket I carry is rated for 500# but I have only put several items in totaling about 350#. Works great. Hope the pics help. I can take more if needed and wipe down the channel material if needed? Fresh from driving in the rain in PNW.

-
Another option which I went with was a metal carport built onsite. The price for mine was $2100 for a 31' L x 12' W x 11' H. I even added the 12 gauge instead of 14 for the framing. You are protecting an investment and something you really appreciate? Just a thought.
There are also tarp style carports that I have used in the past. Metal legs and the tarp can be replaced as needed. My first tarp lasted 3 years but the legs will last about 10. Those were $100-200 depending on the size.
Best of luck.
-
Thanks...yes I put those in. The first couple pics show how I bought it...just the shell basically. Everything removed from inside and marine grade fiberglass/ sealing on the exterior and paint. I'd been looking for 2 yrs lol.
-
Yes, 4 × 6V are vmax also on different line. Best battery for $ right now. 55K on motor when I got it. At 58K now. Thanks!
-
A random pic under the hood....175 amp hr VMax battery that runs my 5 different leds on a marine rocker panel in the rear. To bad Lithium Ion batteries are still so expensive, they would be a great addition for solar also...Maybe by the time my current batteries have run their life cycles, the competition and prices will equalize....
I figure I'm about 70% of where I need to be, a bit ahead of schedule, but allowing for the unseens, and unknowns that always comes around....and I'll get more pics updated soon.
-
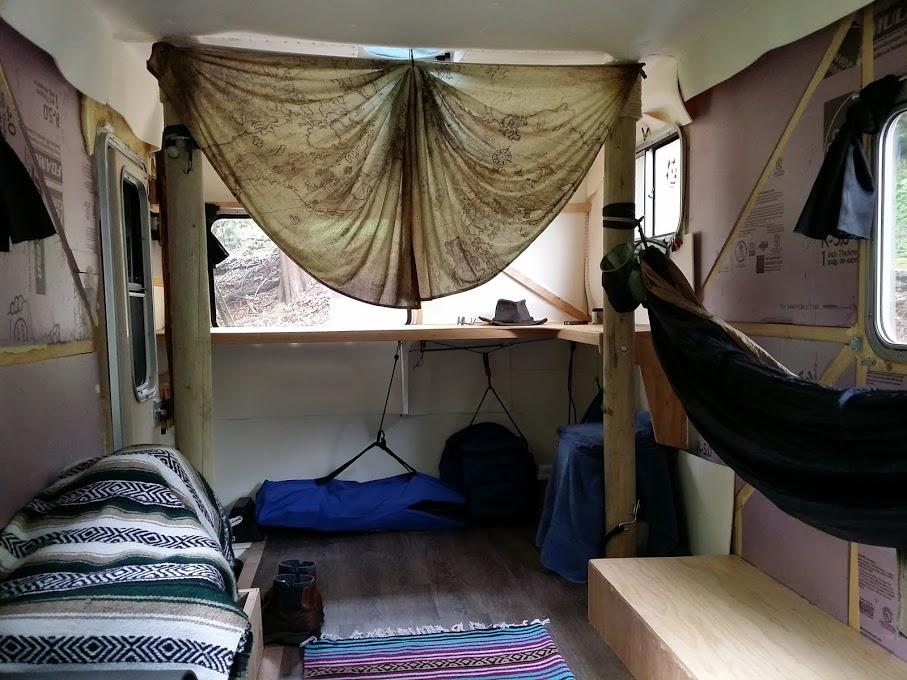
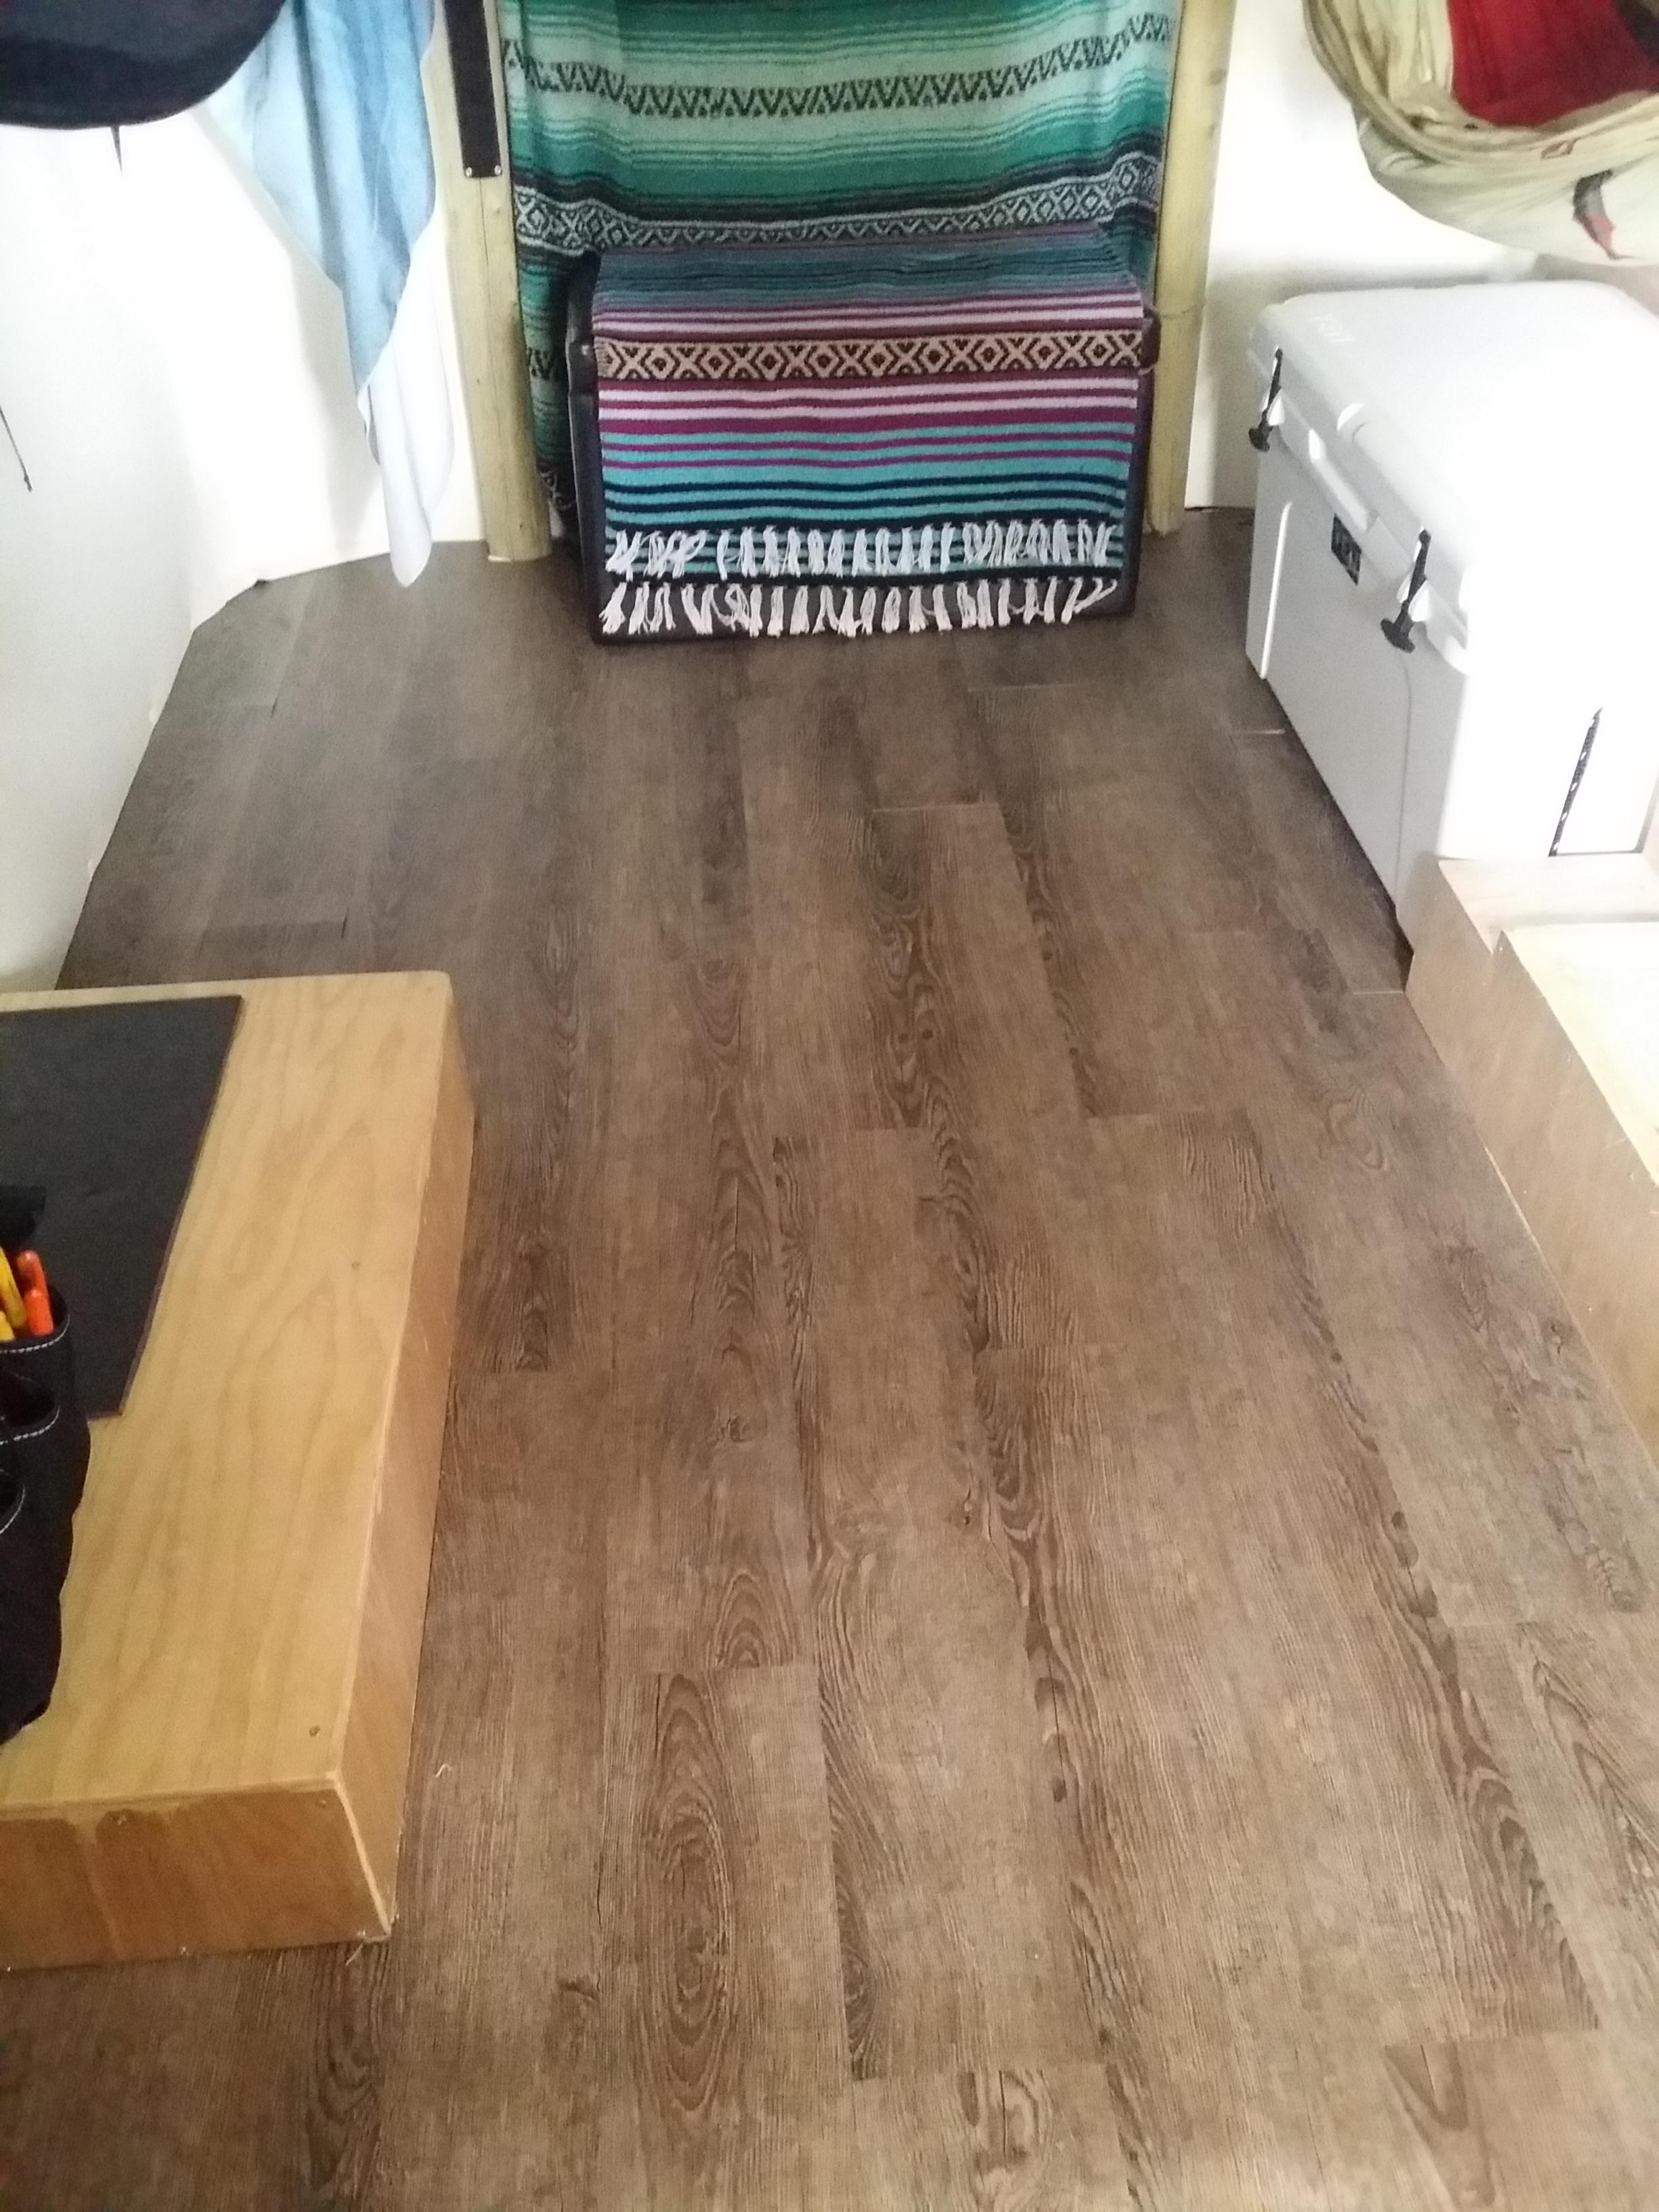
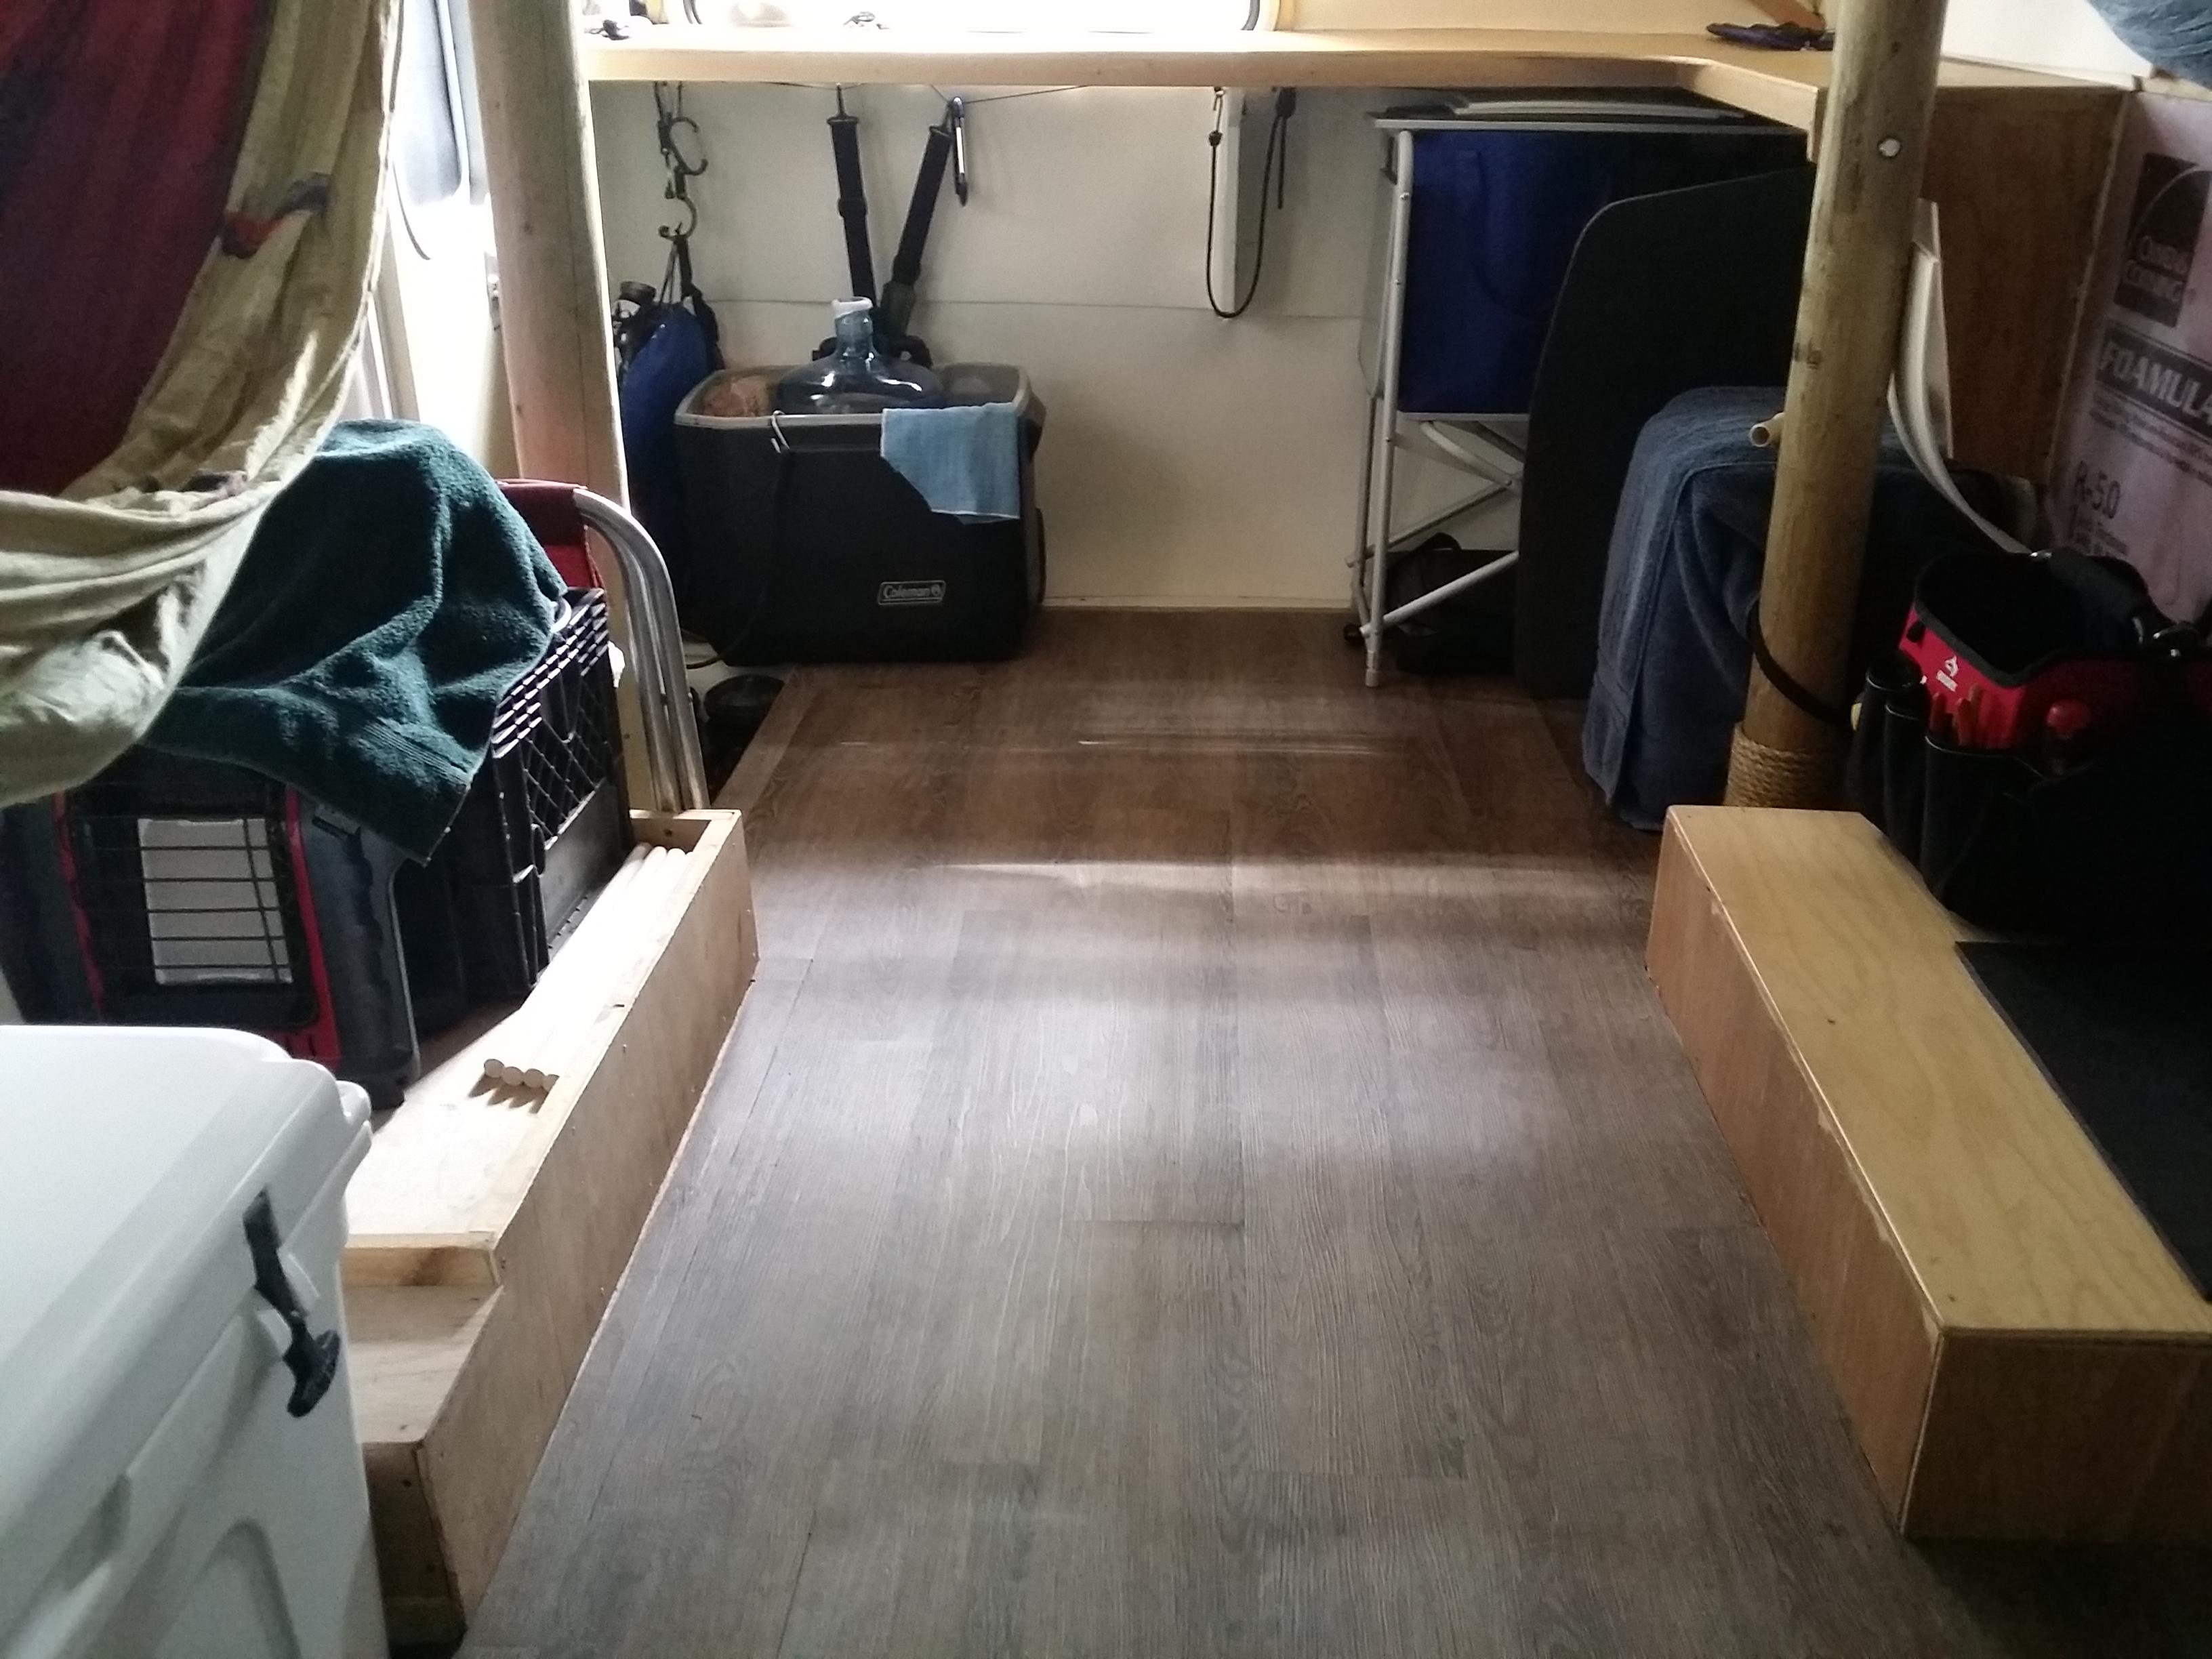
The solar shower on the back is working, but I have several other ideas in the making. I have to take some more pics of updates as I have added a multi level table for the kitchen/working area with a microwave and toaster oven. I use a 75L Yeti cooler for a frig. Ice lasts for about a week in the heat. I then use the melted ice water for everything but drinking. I get about 3 gallons of water from that. I have a great porta potti model 550E by Thetford for nature's calls. I have several tapestries that serve as curtains as needed, but it is just me, so usually not.
-
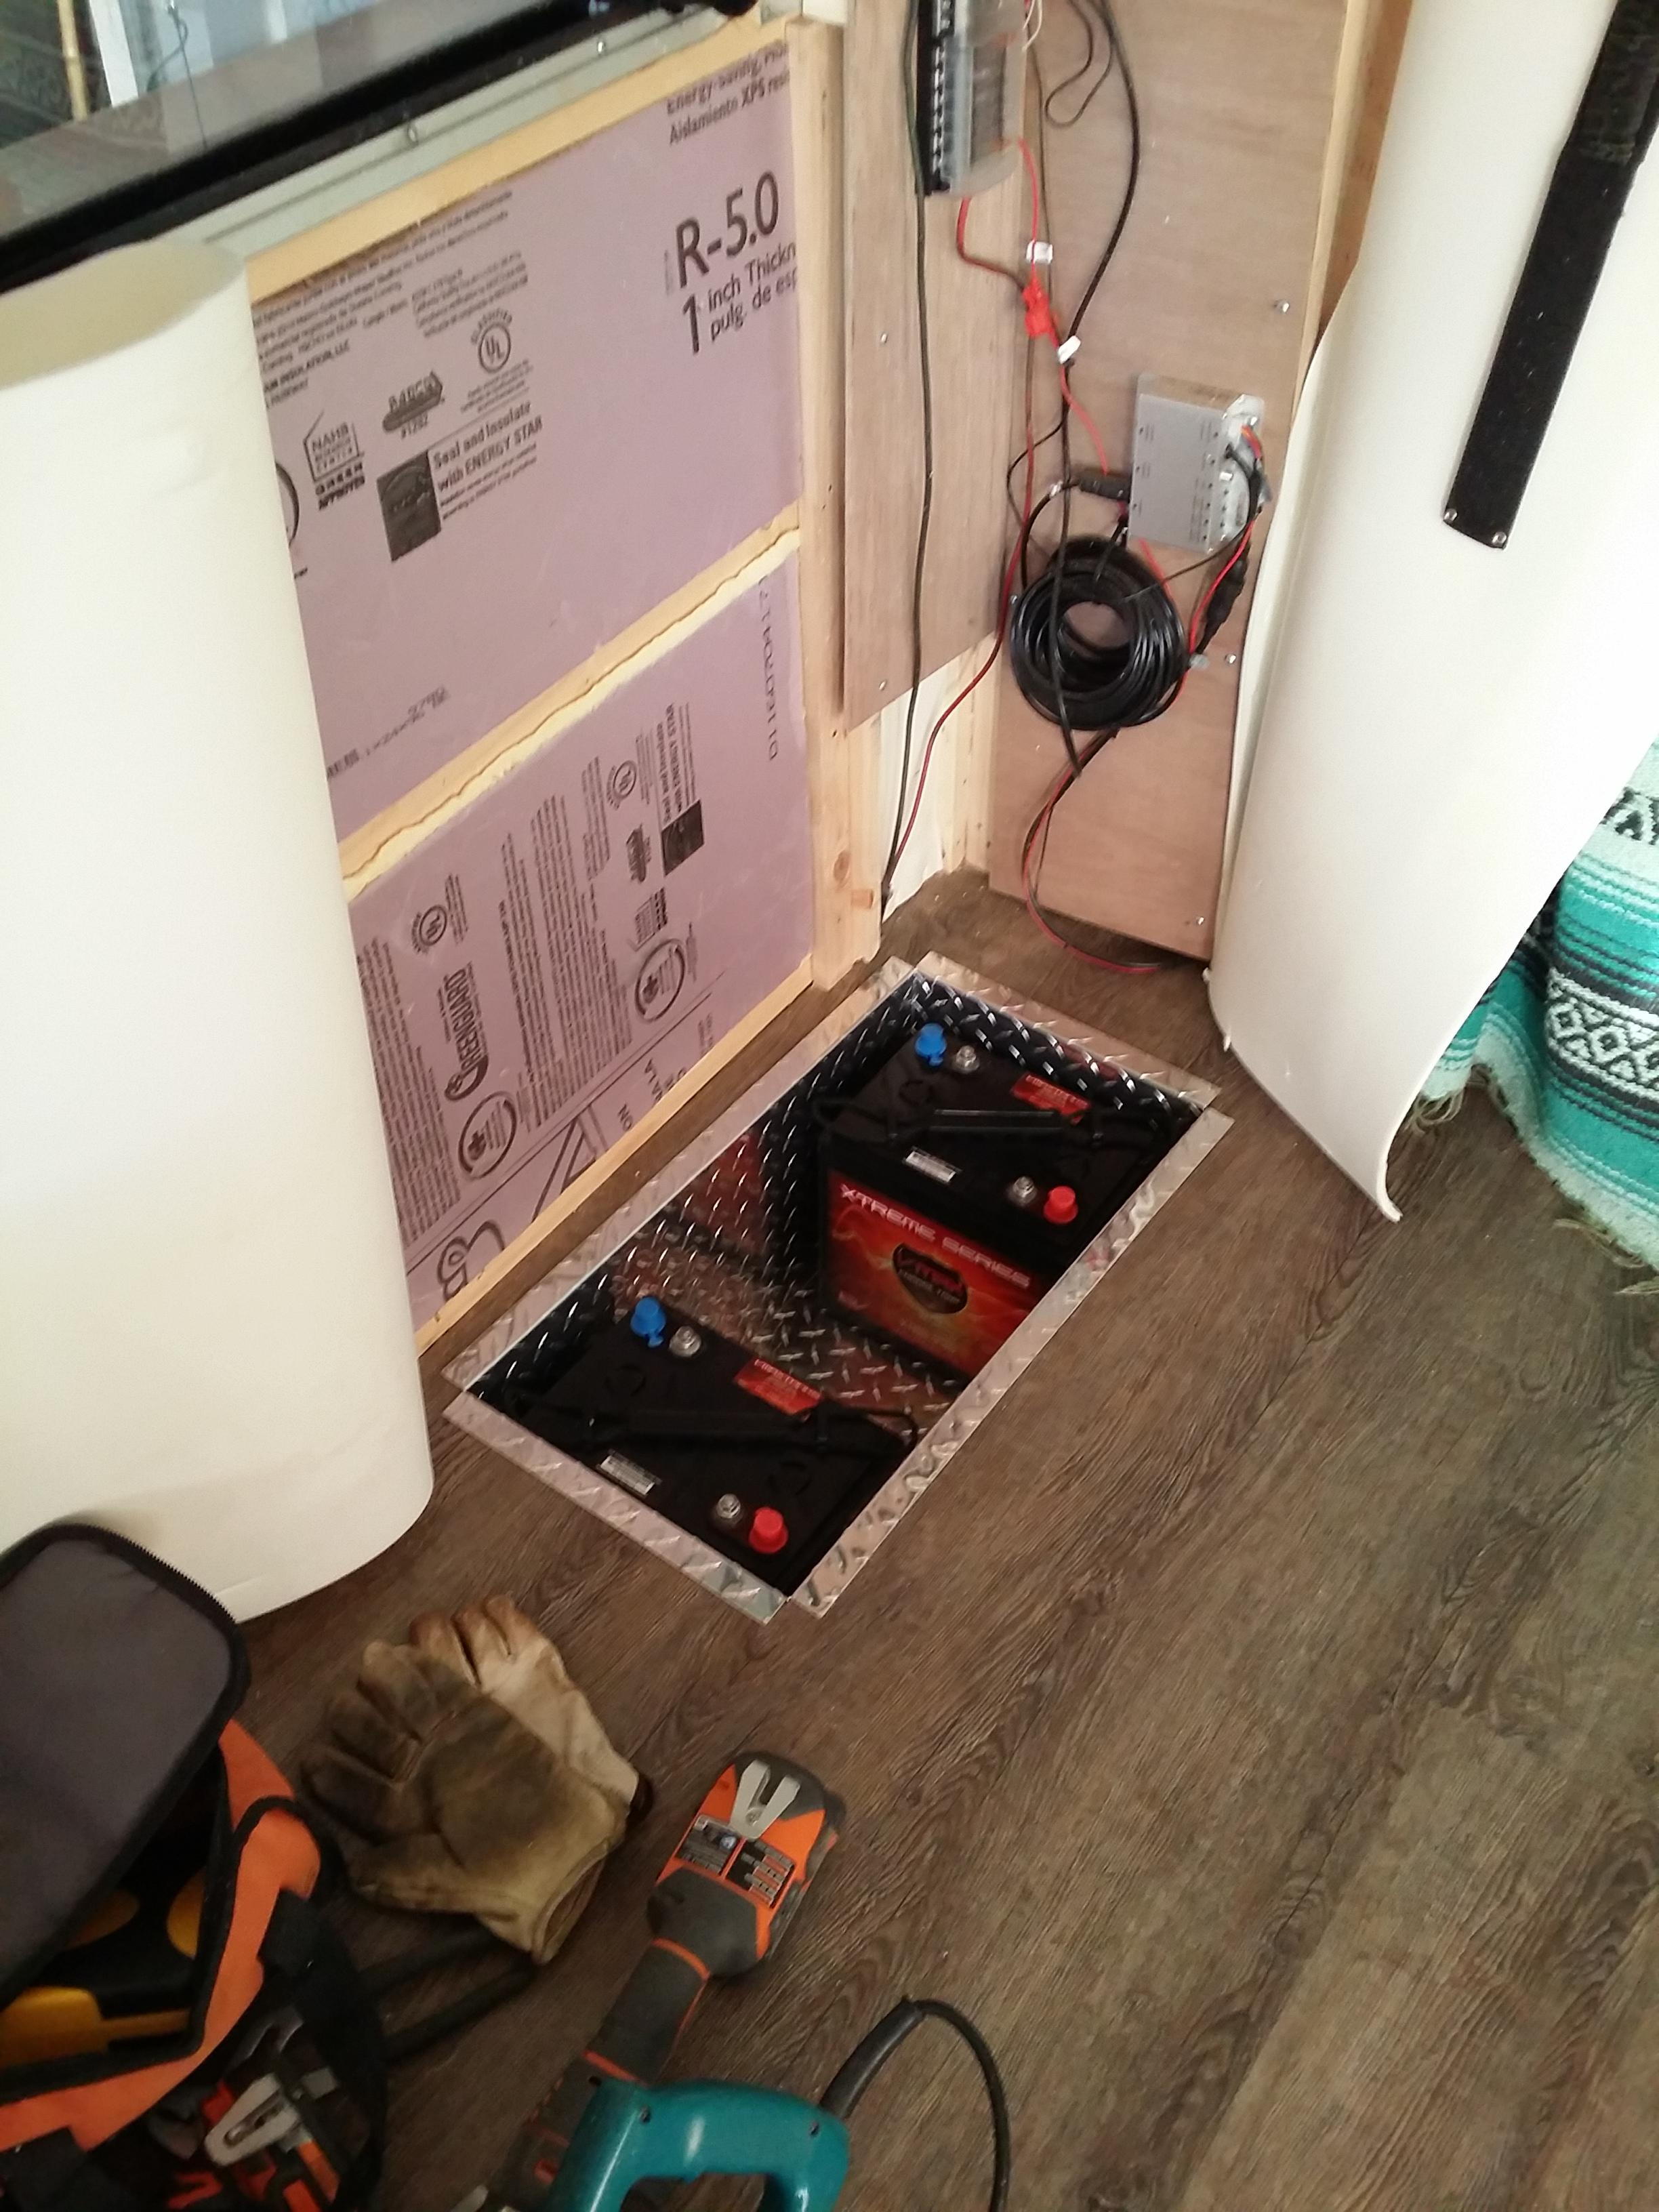
So I have added 500W of solar to the roof. A 2000W, 4000W peak pure sine inverter. I have a 40amp converter for shore power which will charge my 4 x 6V 235amp each batteries installed in the floor when I'm out of the sun or night time.
-
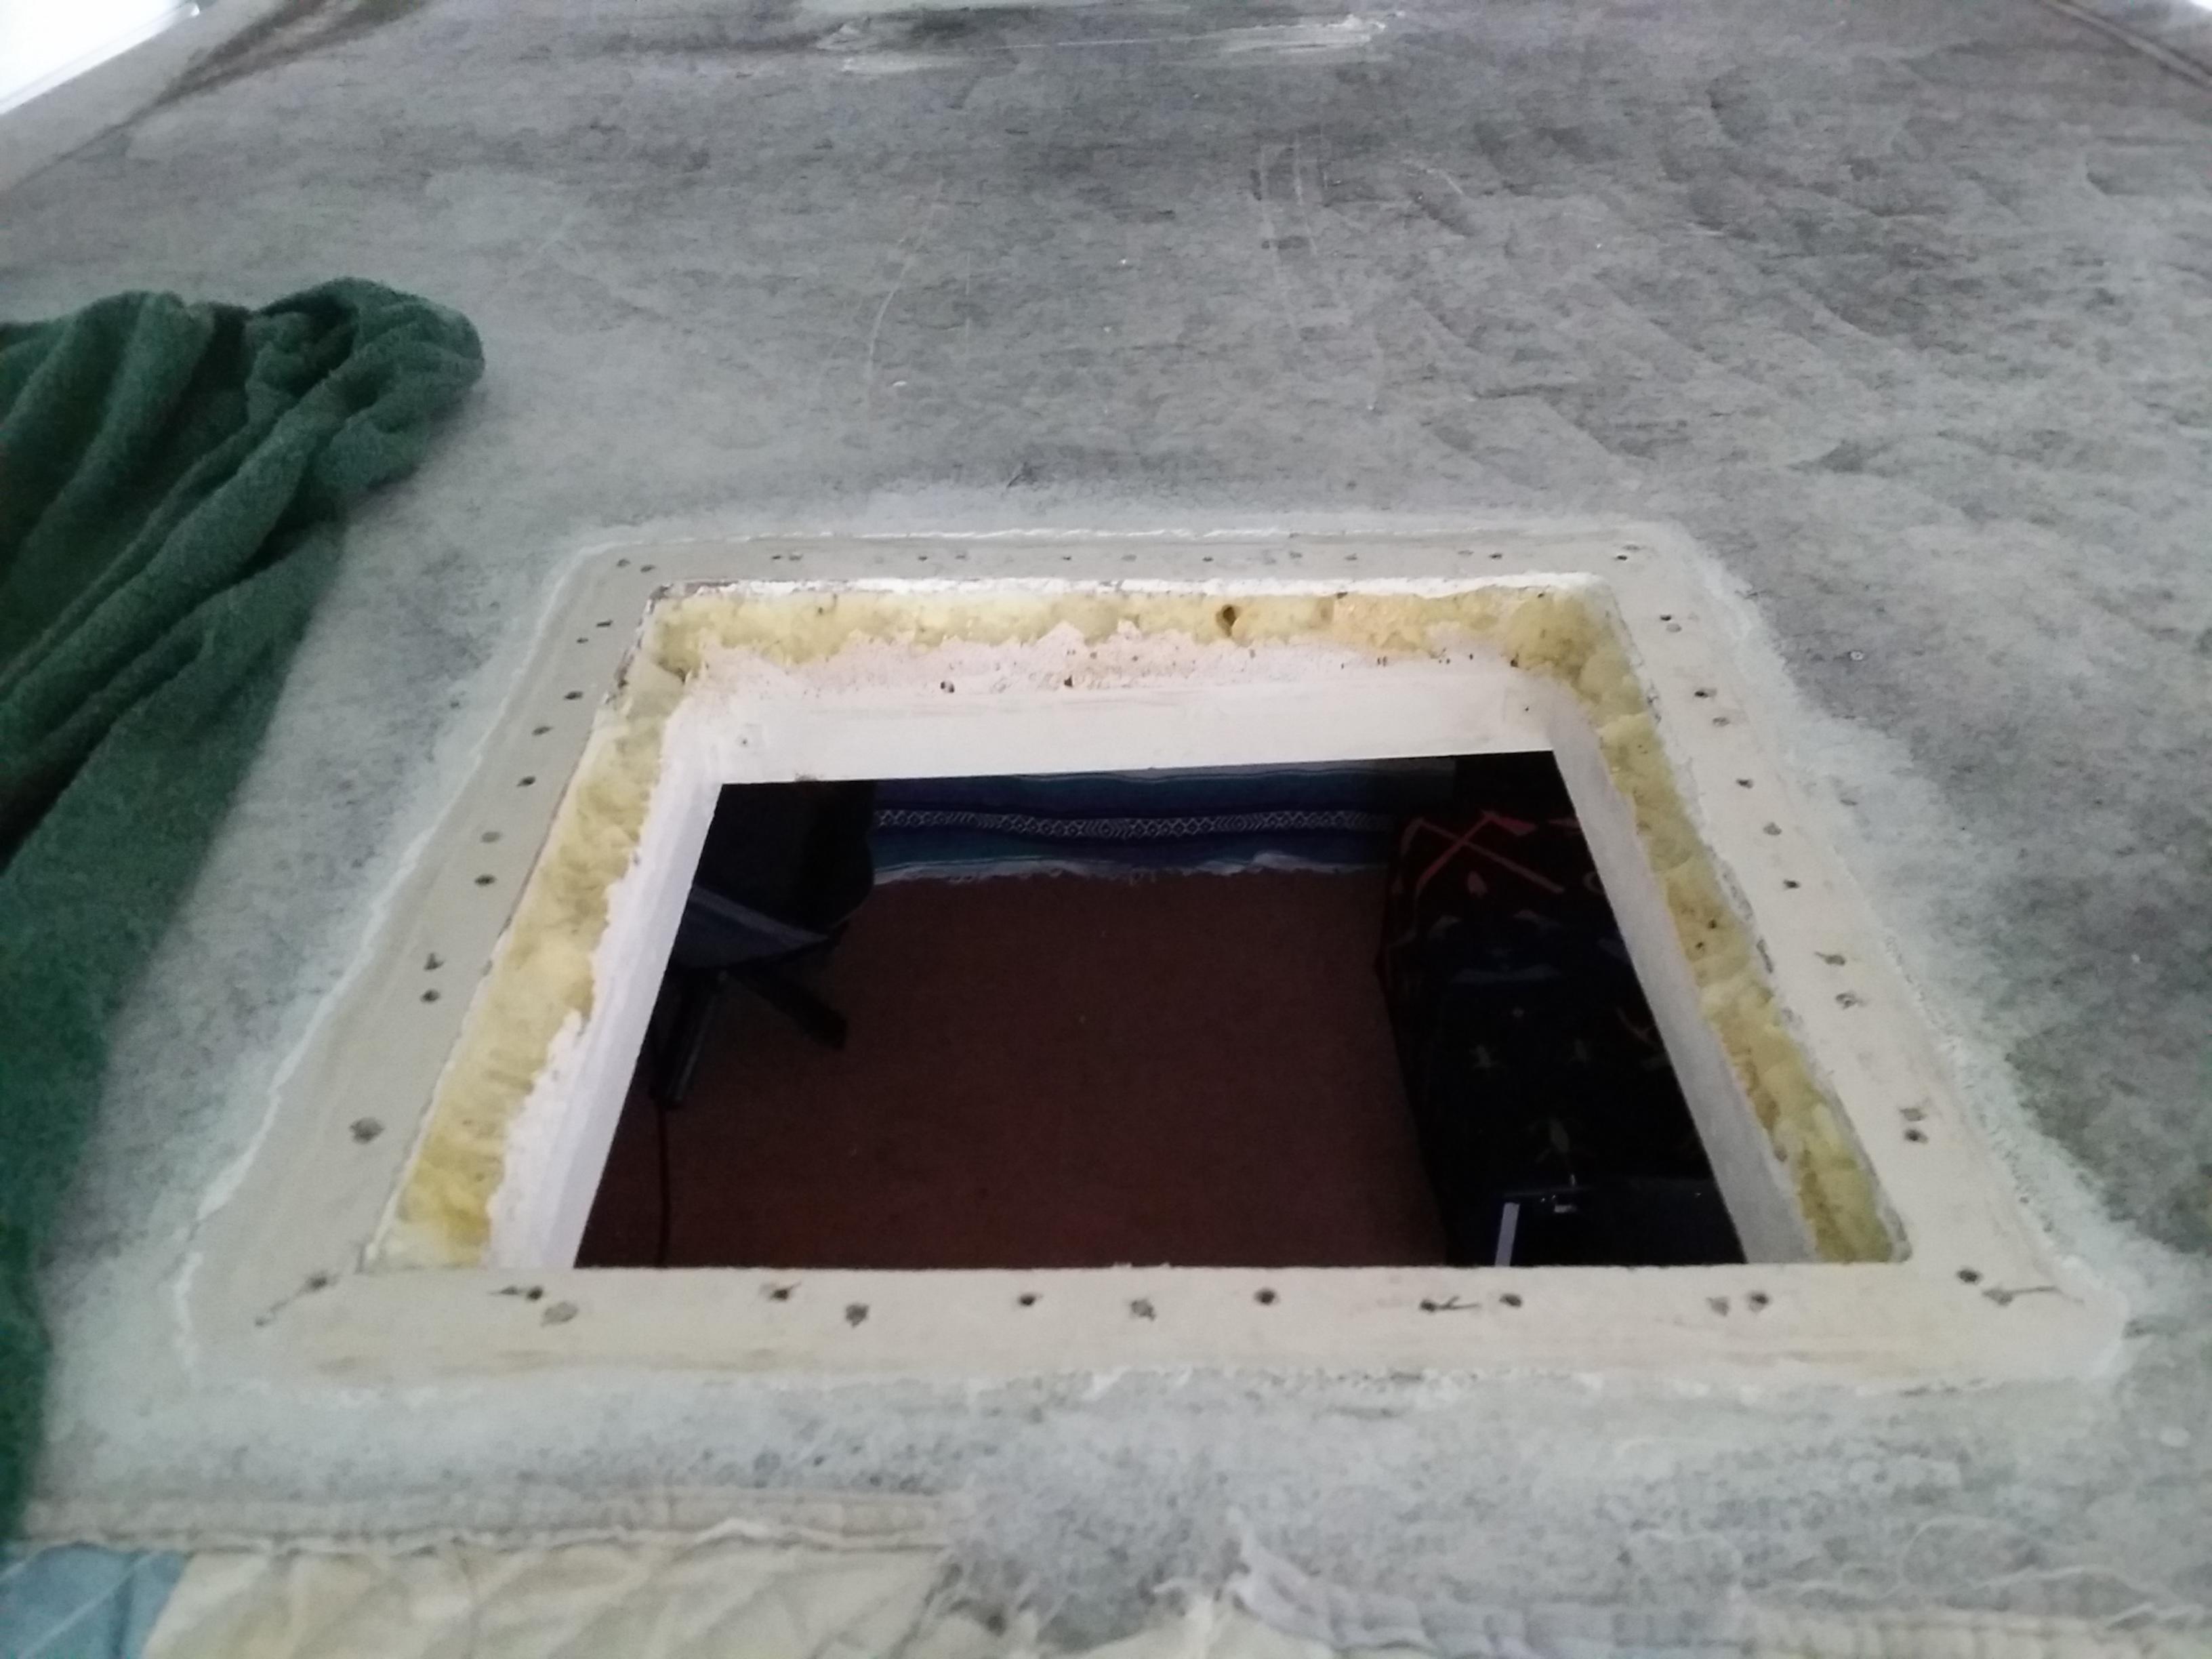
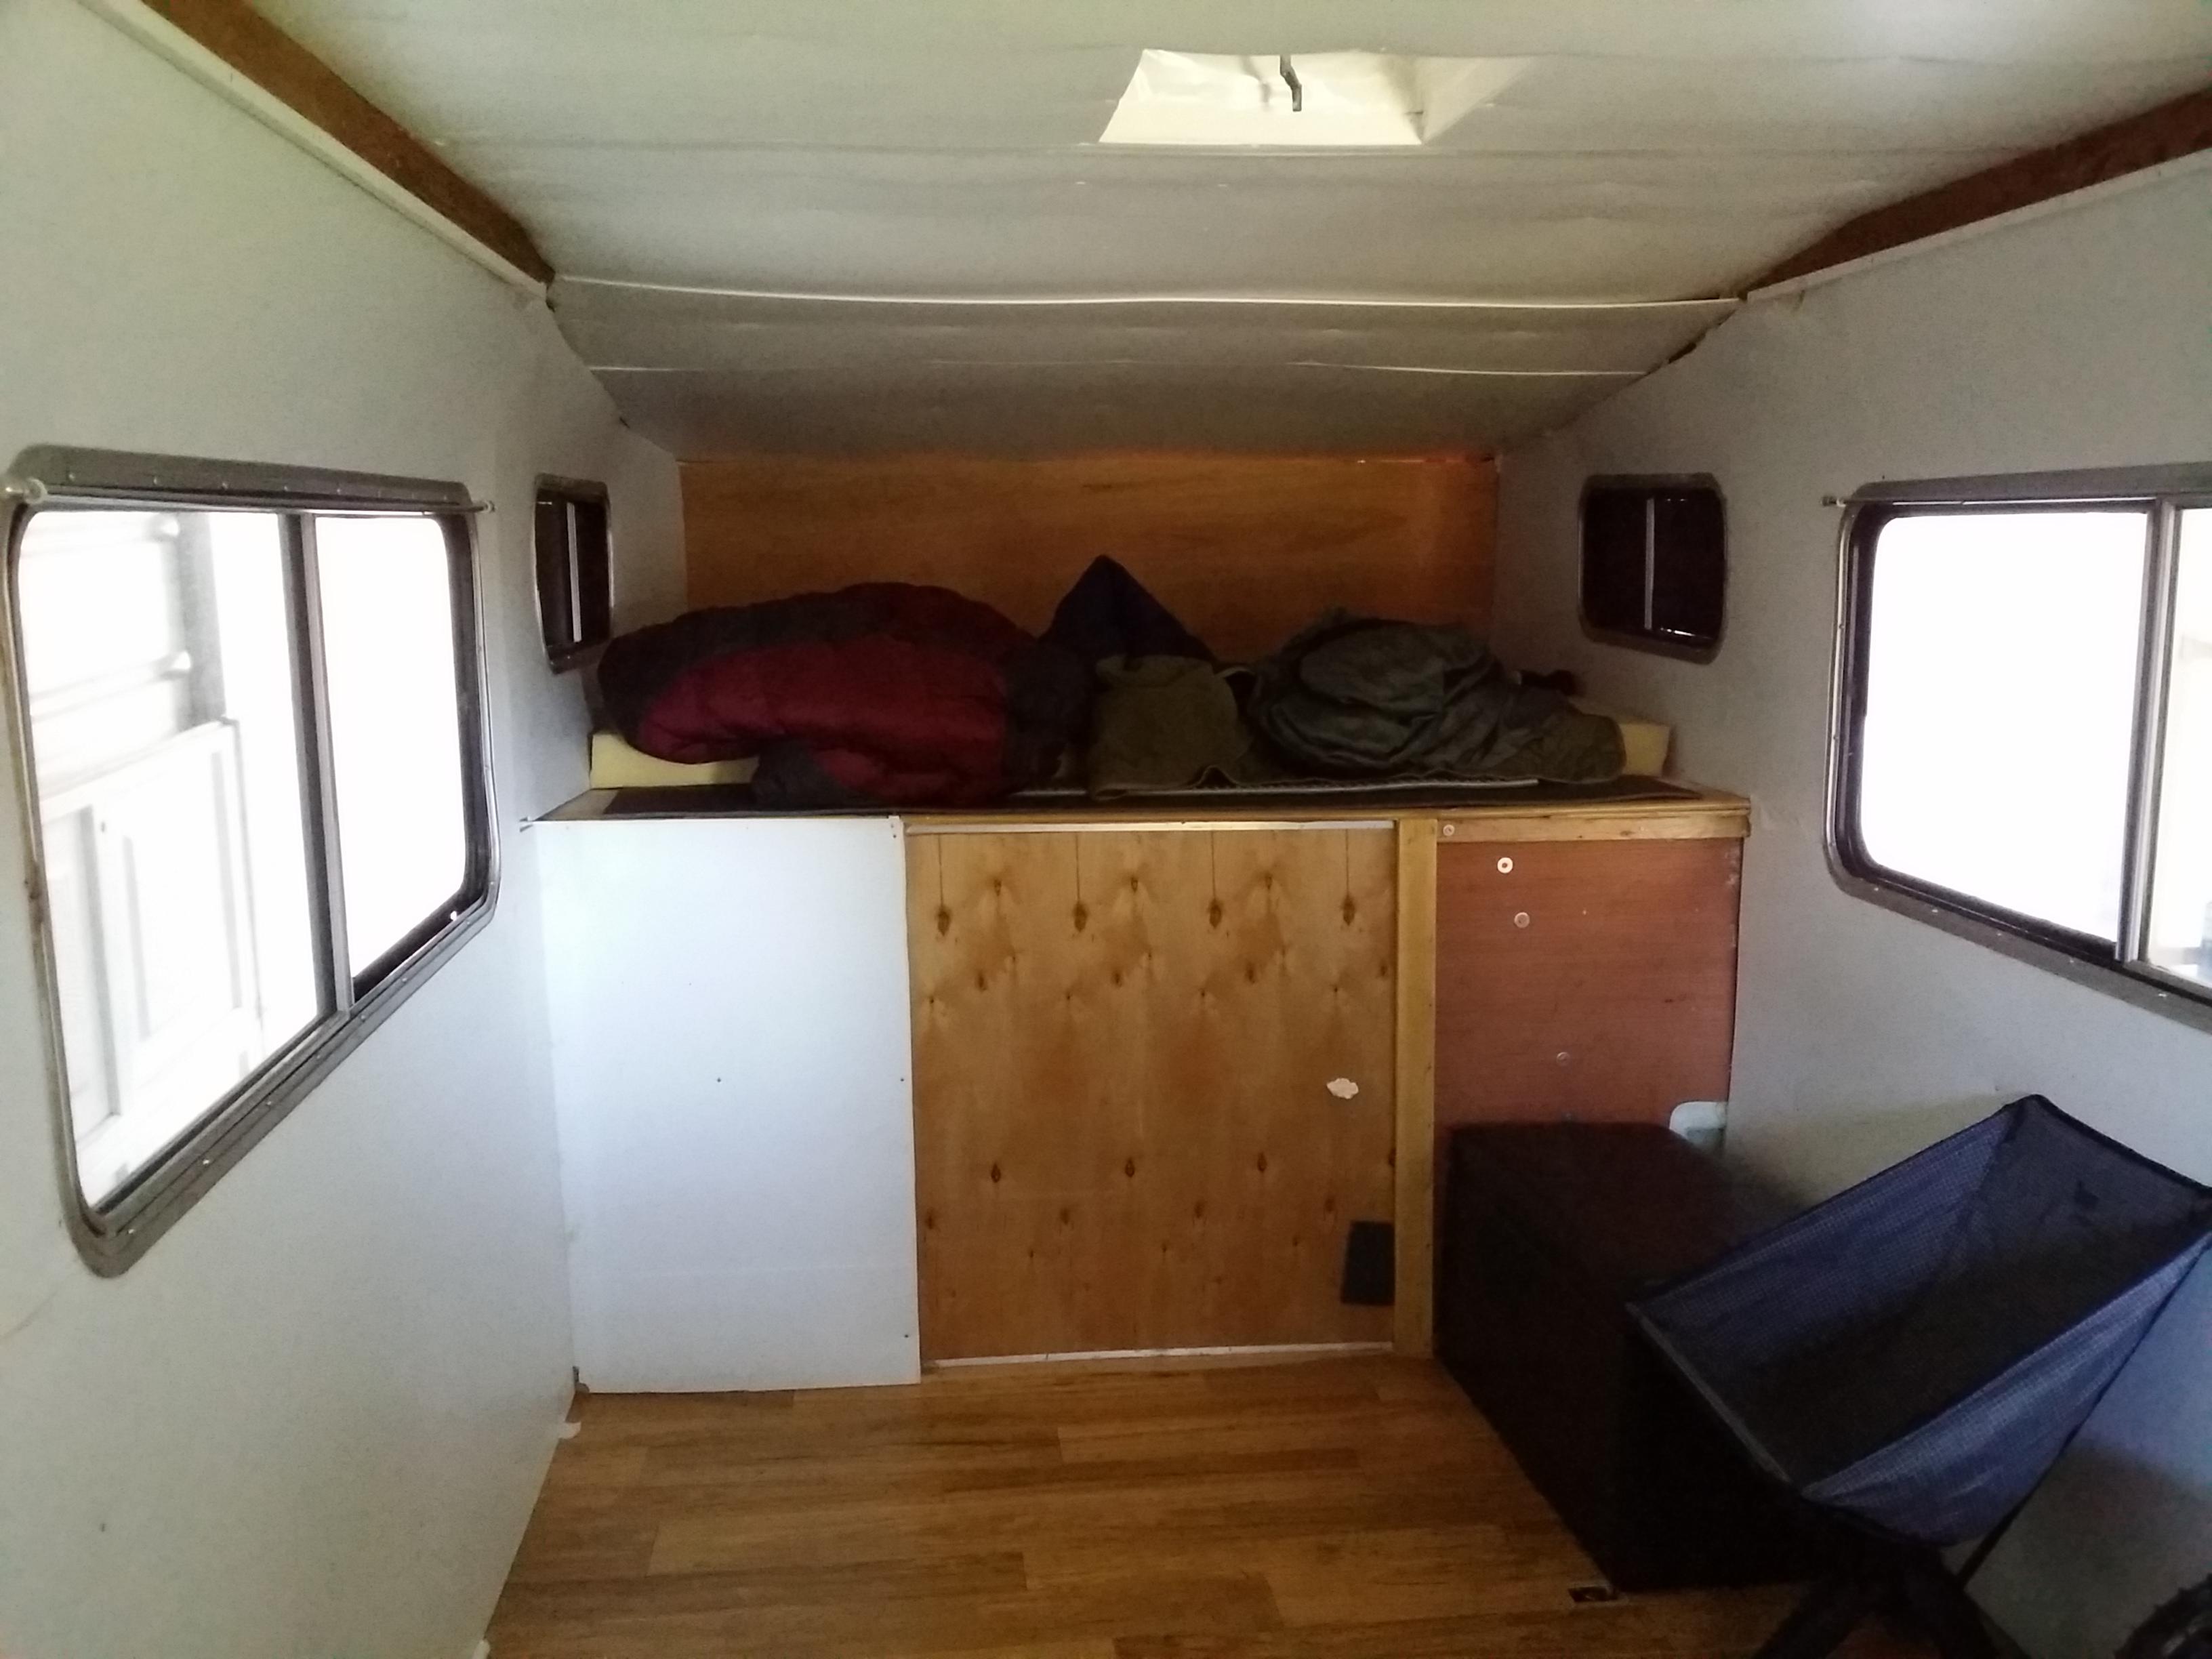
I covered the walls and ceiling prior to flooring with a 1/4" closed cell foam. I put that on the fiberglass with 3M 77. Then added 1" rigid insulation, then another layer of 1/4" foam mostly for winter weather here in the NW. It has worked well also for the heat of Idaho at 100F+ as the vents do their job, and the white glossy paint does it's. I also cut open a front hatch as there was just a horizontal sliding piece of plywood when I got it.
-
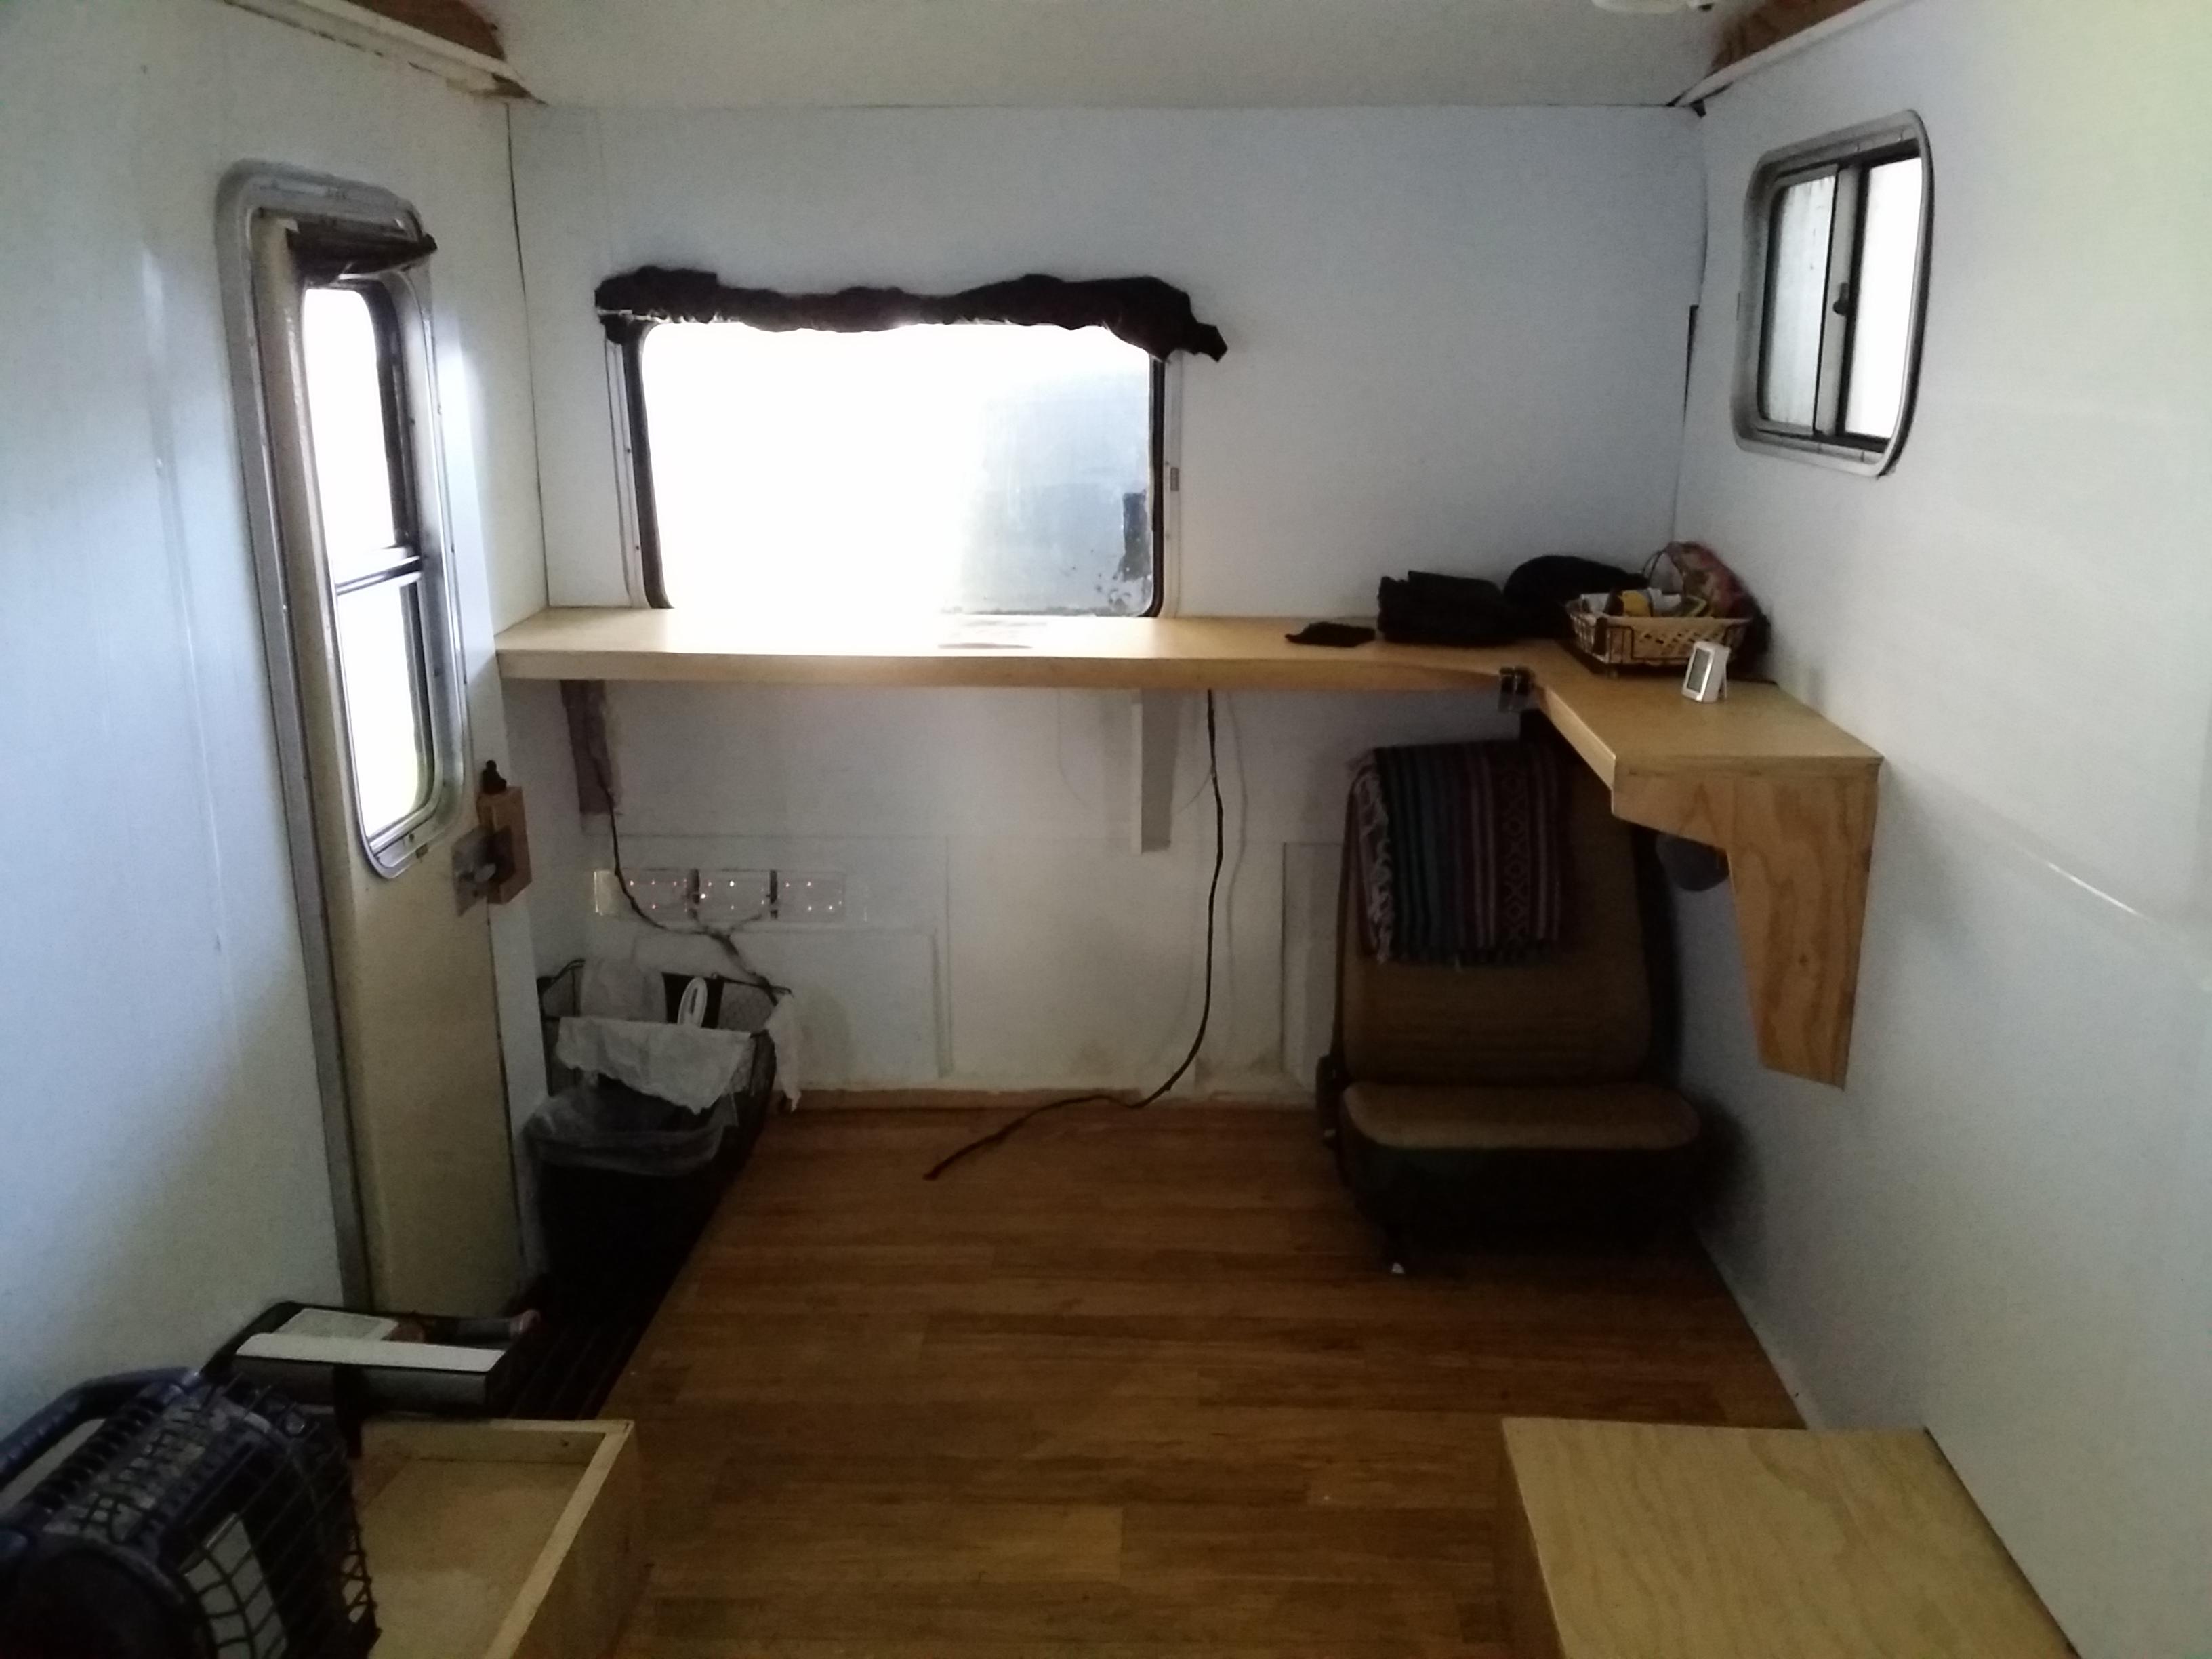
I started working on the back more. All the flooring removed as it was warping and was time. Added 6 mil. marine plywood and then new flooring. I had to laugh as I saw a post a while back of someone using the same flooring as me at the exact same time. He didn't see mine and I didn't see his, just a great color and style for the floor. Did I mention I put in 4 lodge poles to hang my hammocks by? You will see those in the following pics with more to come...
-
Found a small leak in the passenger's side floor board. Took all carpet out and patched hole. Came out great and very solid. Replaced w/new carpeting as it was time for that also. Overall was and is in very good shape.
-
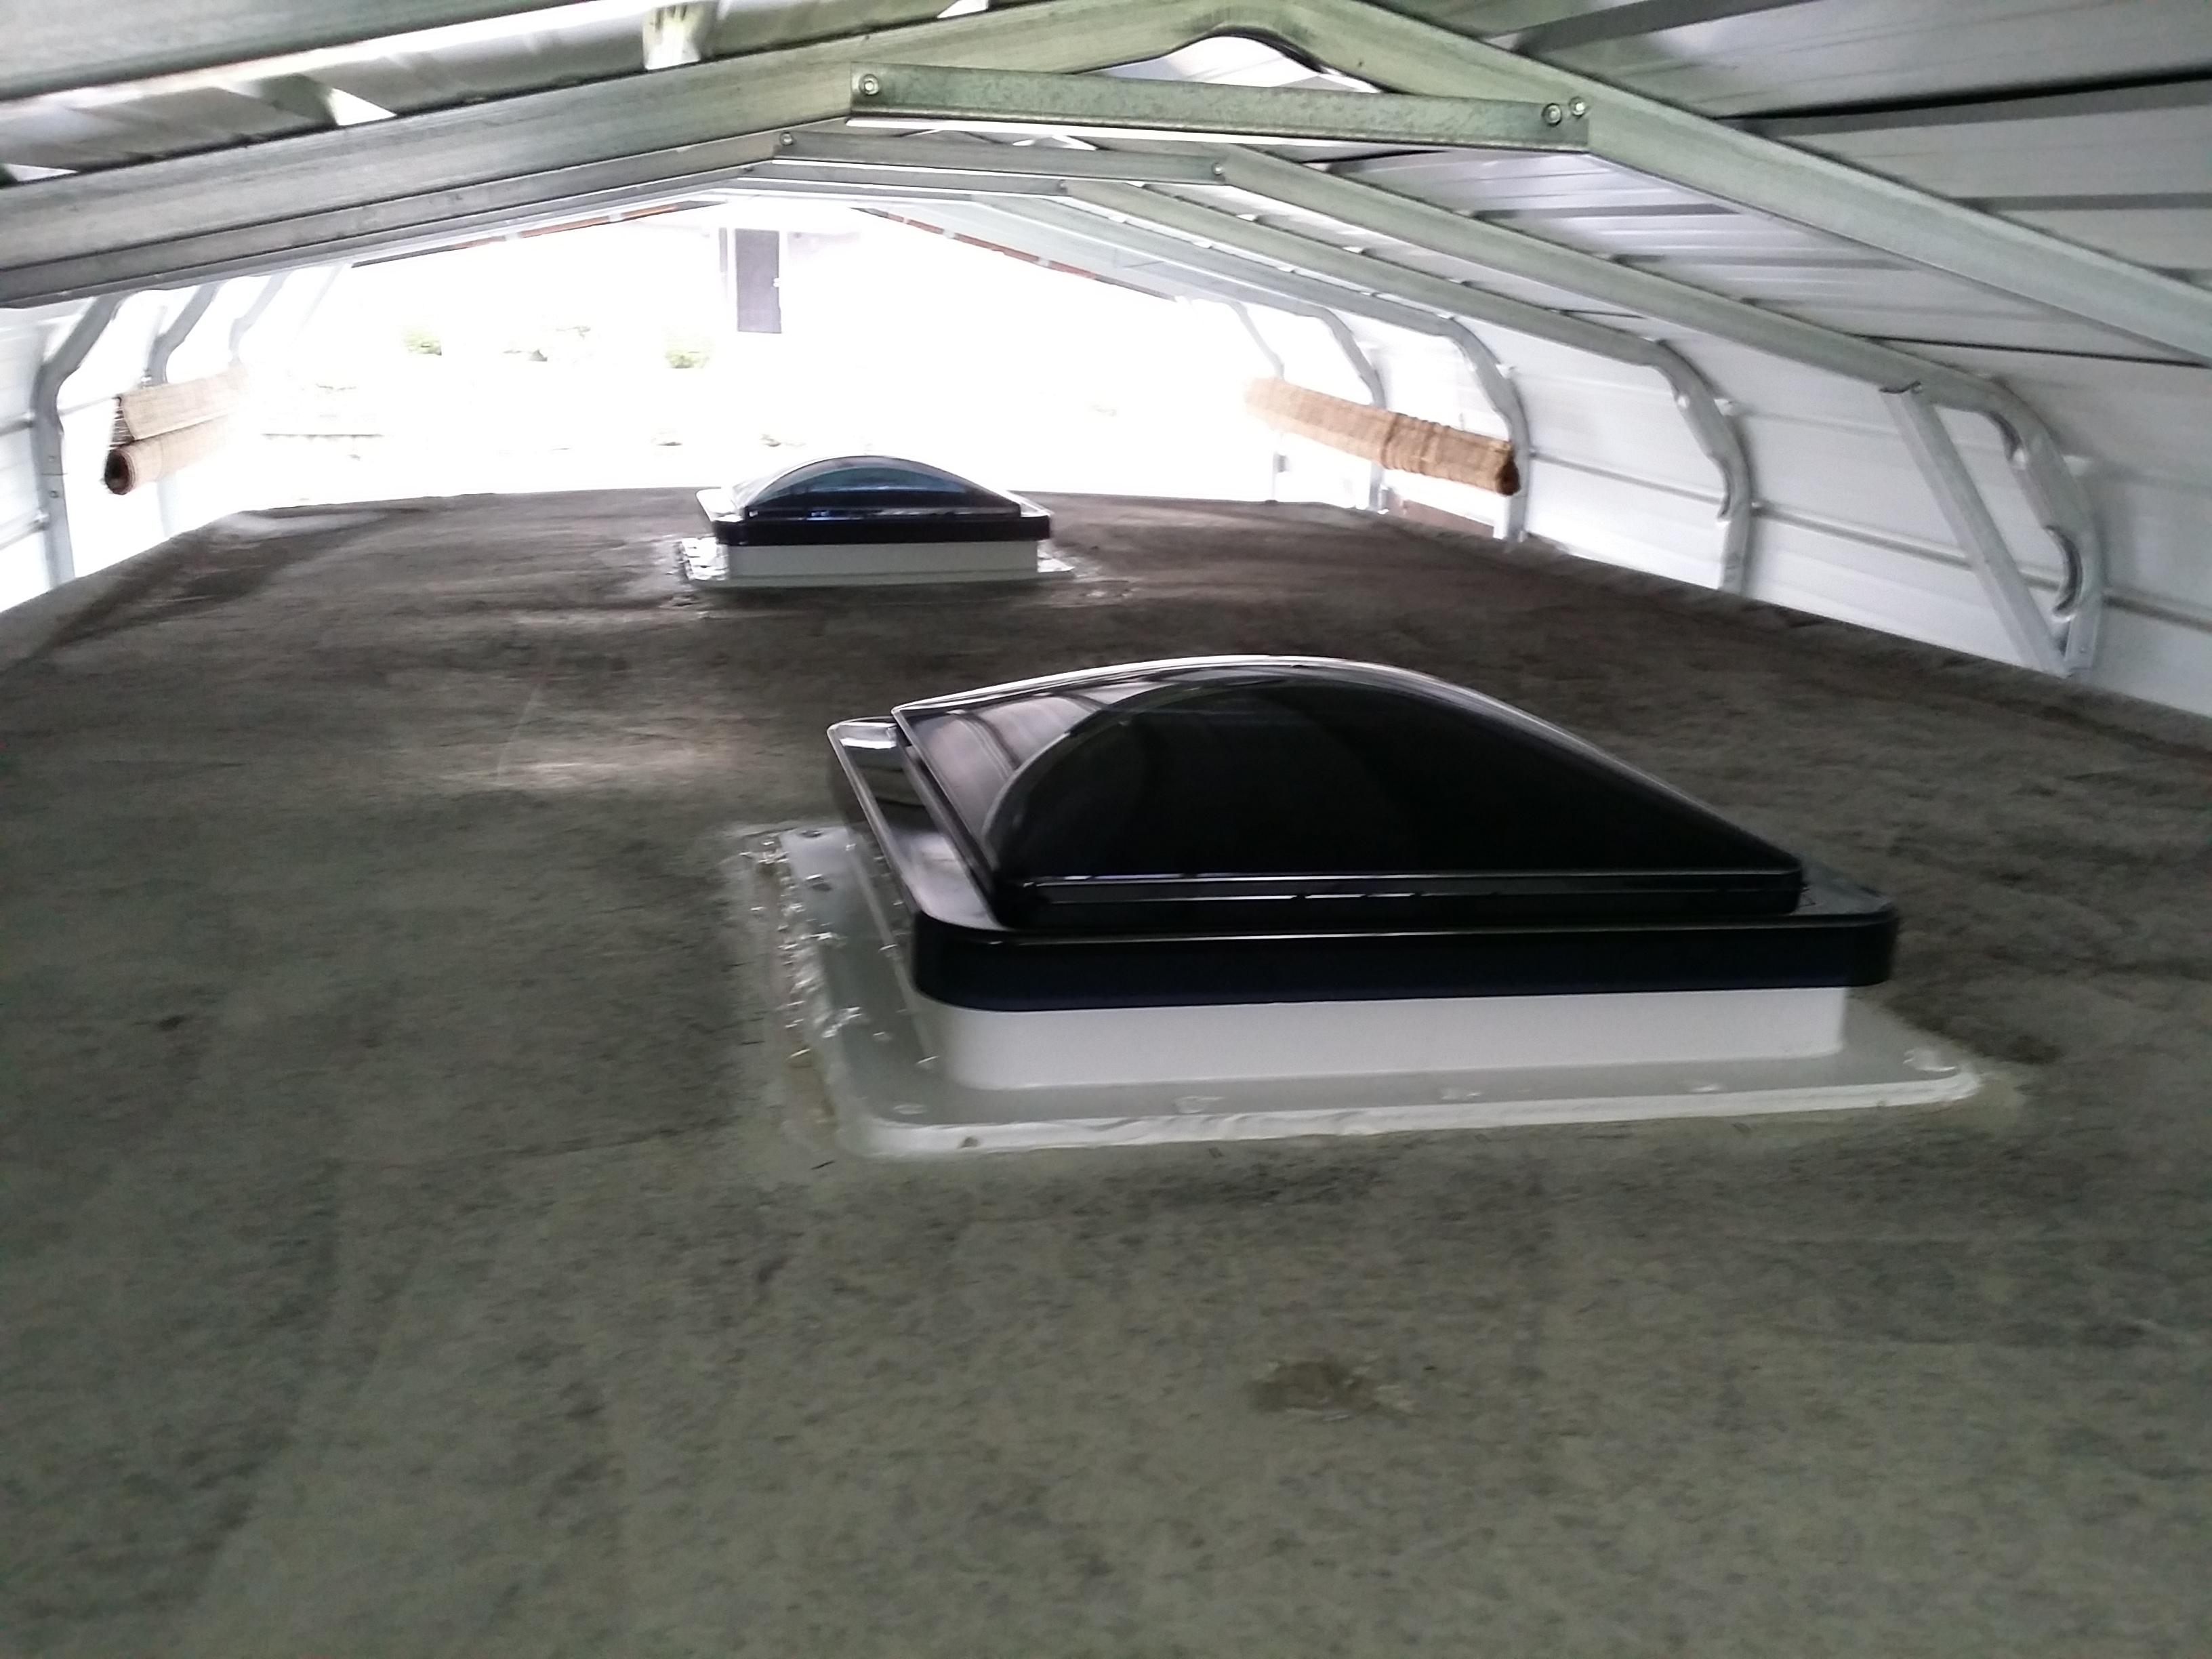
Since there were 2 leaks, I took all the cyroplastic board down. One leak from the back vent, one from the back marker light. Replaced the vents as they were original and old with very little light coming through after being painted. Sealed the marker light and checked all the others. After replacing those I washed/scrubbed the entire top and painted glossy white.
-
I'm going to keep submitting this with pics as it seems to be the easiest way to send them. What the inside looked like at first...my clean slate.
-
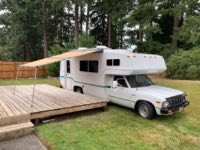
So here is my posting that is overdue, but still in the making. Bought this in Jan. of 2018. Giving myself 2 years to get it up to speed and ready for circumnavigating of the US, if that's even possible...lol. Will swing through many parts of Canada also as I love it up there and some of the most beautiful country around.
Try to take some pics along the way of before and after...you should be able to tell the difference.
These are the pics from the posting for sale...
-
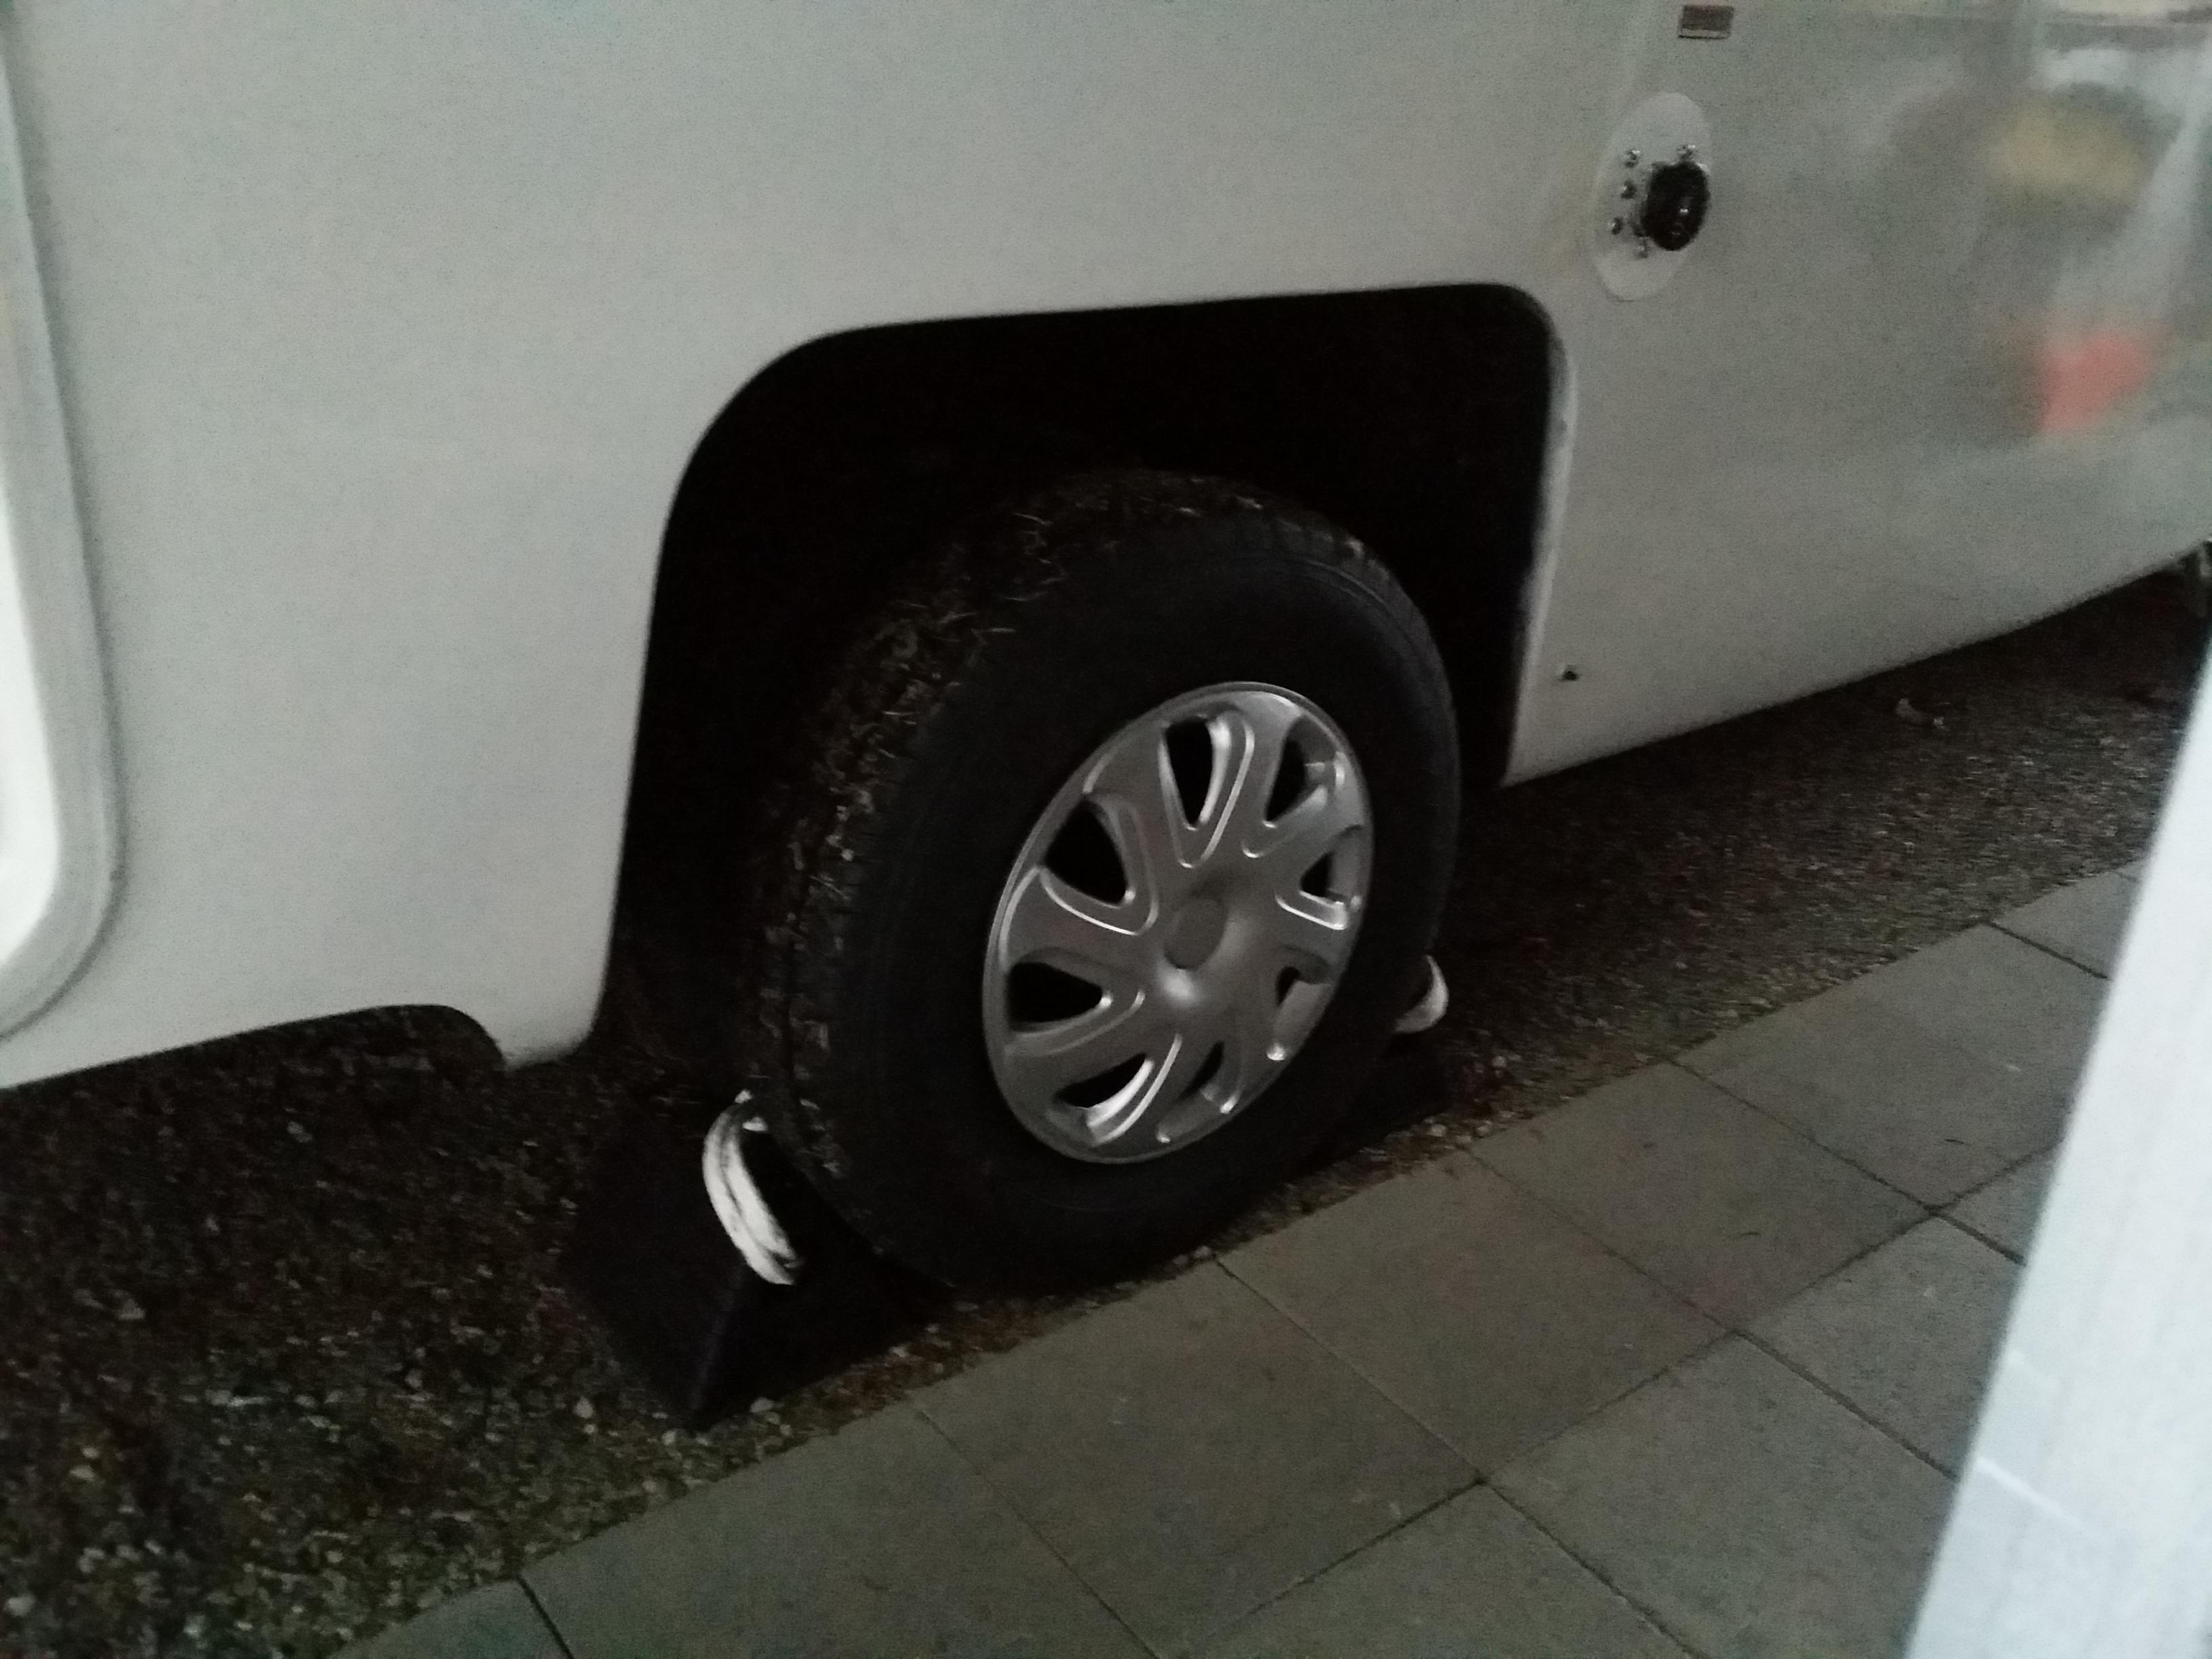
I bought a set of 4 from Hub Cap King in Pierce Co, WA for $50. They have several choices for 14" caps. Have had them on for 2K miles + and staying on fine and look better than the original nothings that came with it. Have the set of 2 for spares as the price was $10 more for all 4.
-
Found the best solution at a reasonable price. Nearby tranny shop went round and round about all the possibilities of what could be done with no final price, just a guess between $500-700. I walked away from that very quickly. A local speedo and instrument cluster shop has a small attachment to the end of your speedo cable regardless of the teeth. They put in on their dyno machine then calibrate it correctly. Works like a charm for $85 and .5 hour time. Have used it for 2K miles now and is perfect.
-
Yes Samsterid,
The strength/thickness of any roof would determine if the adhesive method would be a good choice. Hoping yours turns out great!
-
Thank you very much WME!!! Pictures are worth a 1000 words to me!
-
10 hours ago, WME said:
Your propane tanks are NOT "Blue Rhino" type BBQ tanks. They are a special RV tank. They are designed to be filled vertically and used horizontal. If you use a BBQ tank horizontally you will introduce liquid propane in to your lines. That makes big flames at your stove or even a big bang. Major Bad JuJu.
Hi WME, I searched for more info on the DOT tanks and didn't find an answer to what makes them work differently being in the horizontal position than the standard BBQ tanks. Is it a regulator that keeps the LP from flowing into the hose? Great info to remember for future reference.
RTR, Hope we can continue to assist you in repairs and such. I happen to have an extra drill, level secure parking w/garage if needed also? ?♀️ ? ?♂️
-
Hey RTR,
Super to hear you found a local mechanic that can assist when needed. If your propane tanks are the 5 gallon size, then just remove them and trade them for full ones. No certification required and should be about $20 including being full, here in WA anyways. Look for good brass fittings in the trade outs. Then you can keep those as long as you like and just refill as needed.
There is a lot to cover in your post here, so maybe others will chime in about things. Getting any leaks and moisture repaired should be top priority. At least leaks repaired and moisture dried out. Rot is not our friend on the road.
Plumbing is quite basic, if you have adequate access. Are the pipes supply, under pressure? That will make a difference in repairs and ease of replacement.
Great to hear you are not gutting Lil Putt, as we should try to keep original if that is how it is found, and functions well, and you like it. Mine was already gutted when found, so I am moving forward. I really need to post some updates as I move along, but finding the time....and this is your post...?
-
Sorry for the incorrect web address there. It should be www.mobile-solarpower.com That will get you to the great info I was referring to.
-
Hi fellow solar panellers,
Before you drill any/more holes in the roof, please check out www.solar-power.com. There is a mounting system shown which I will be using that requires no holes drilled in roof. The 3M tape I have been using for years and agree it will not be coming off when applied correctly. So many other great ideas and information also. Let me know what you think. I'll also post pics as I move along.
-
You're welcome Derek. Yes. They actually are quite knowledgeable also.
-


'83 Sunrader
in General Discussion
Posted
Hi PB,
Thanks for the kind words! I did not have any sticky glue issues with my old carpet as there was insulation under it, and very little adhesive under that. I may suggest if your glue won't leave big bumps in the floor under new carpeting, just leave it. You may also sprinkle some baby powder on the glue and rub it around with a glove as this would remove it's tackiness. I did put new insulation under my carpet and that would also take up any uneveness you may find.
Hope this helps and enjoy your build out.