Iflyfish
-
Posts
338 -
Joined
-
Last visited
Content Type
Events
Profiles
Forums
Gallery
Everything posted by Iflyfish
-

Leak Seal
Iflyfish posted a topic in Improvement and Do-It-Yourself Projects you have done to Share!
I have a friend, has owned lots of boats. Says this worked well to seal windows, cracks etc. Any experience with this? Capt Tolleys Liquid that seeks out cracks. https://www.amazon.com/s/?ie=UTF8&keywords=capt+tolley%27s+creeping+crack+cure&tag=googhydr-20&index=aps&hvadid=181886484606&hvpos=1t1&hvnetw=g&hvrand=12703429848017585389&hvpone=&hvptwo=&hvqmt=e&hvdev=c&hvdvcmdl=&hvlocint=&hvlocphy=9032826&hvtargid=kwd-43871804552&ref=pd_sl_64o2c6q9ut_e_p19 He says the following: Clean them as much as possible first using rubbing alcohol. Let it dry thoroughly. During the season rub them with some armor-all to cut down the UV damage (drying and brittleness). The alcohol is for just under where the rubber seal meets the glass. Water is opportunistic and always seeks the path of least resistance. The creeping cure will prove ameliorative as well as prophylactic. Camper Penicillin! Iflyfishwhiletracingaleak -
Thanks Derek, will see when they arrive. If they don't fit I will fabricate some from material from Home Depot. Iflyfishinmysunraderthankstomy friends
-
The set I purchased for my Winnebago came from Upscale Auto. I found these on Amazon https://www.amazon.com/dp/B00RZQ2FX2/_encoding=UTF8?coliid=I7T3CYT72XEEU&colid=1C09YYIRLCMJN https://www.amazon.com/dp/B01BE32CS4/_encoding=UTF8?coliid=IOU5O68RGVIWT&colid=1C09YYIRLCMJN I hosted a rally for 52 View owners on the Oregon Coast and decided on interior shields after seeing so many use those exterior ones that you have to store wet inside your rig after a rain/snow. This is why I decided on the interior ones with suction cups. Thanks for your response. I was going to post this today after my post yesterday. Iflyfishshaded
-
I had some nice reflective shades for my front window, passenger/driver windows in my Winnebago View. They had suction cups and mounted INSIDE of the windows. I want to find some for my '87 Sunrader. Any ideas where I might find some? Thanks, Iflyfishintheshadeofmyfriends
-
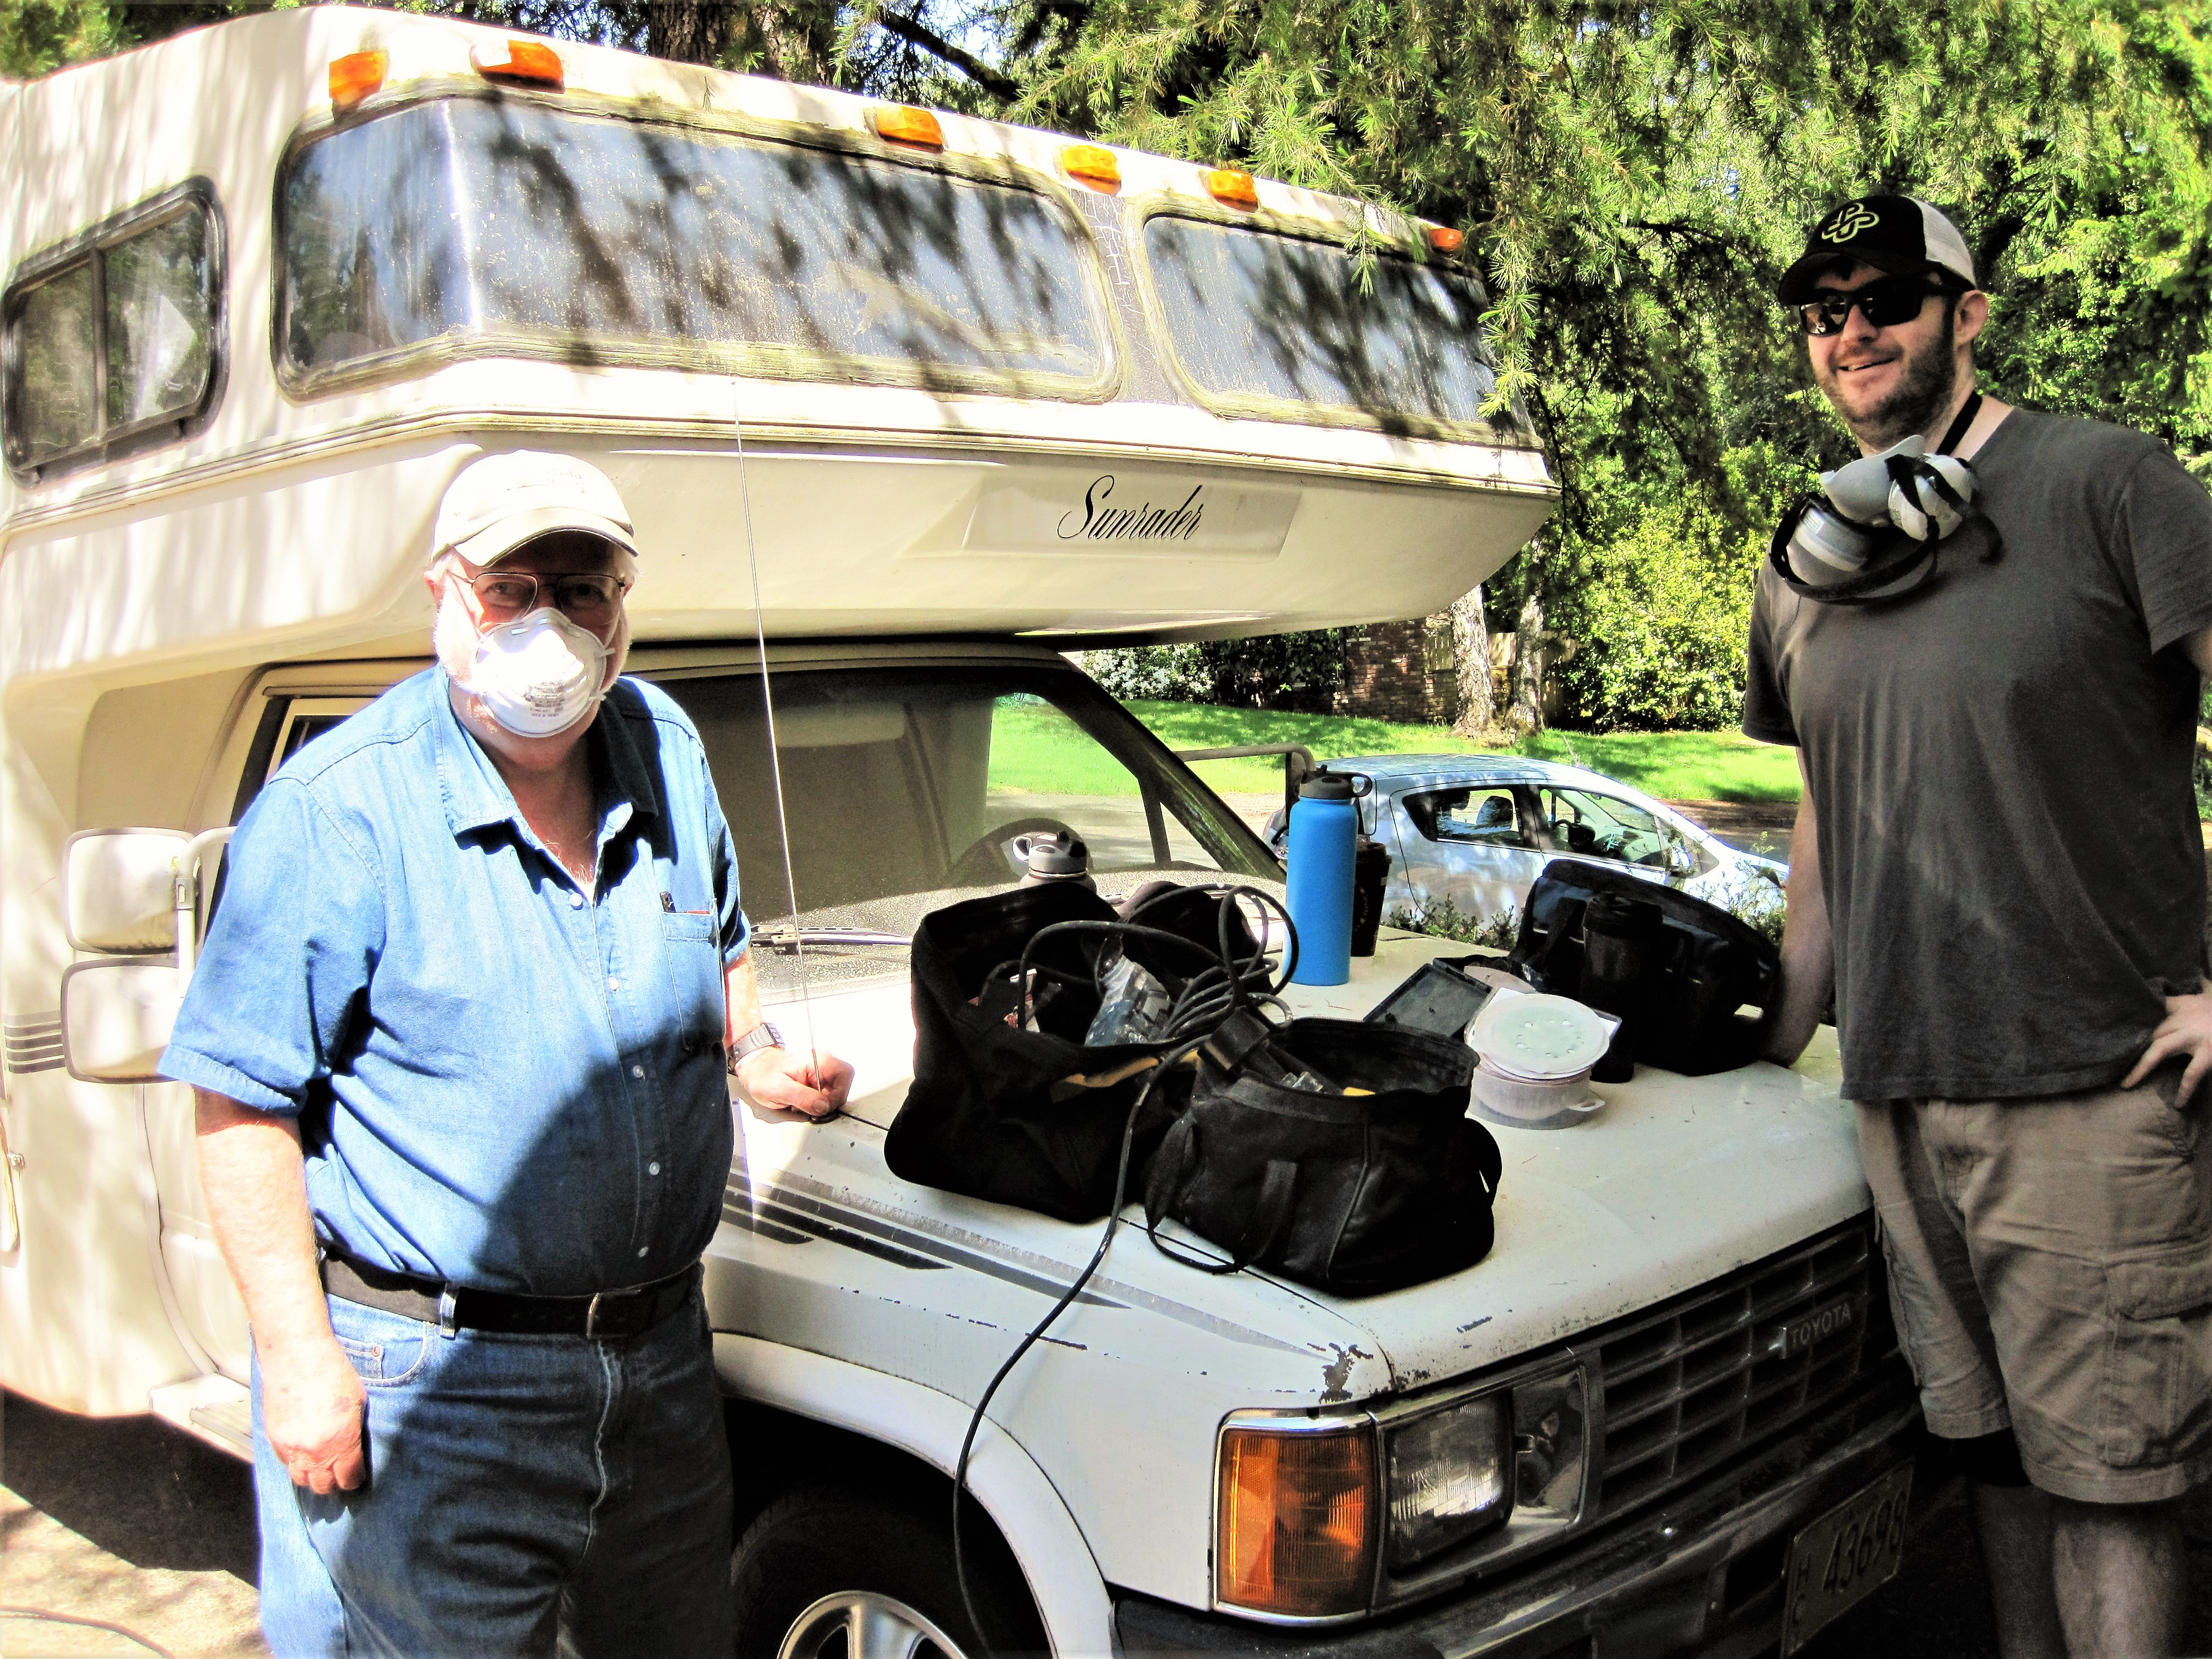
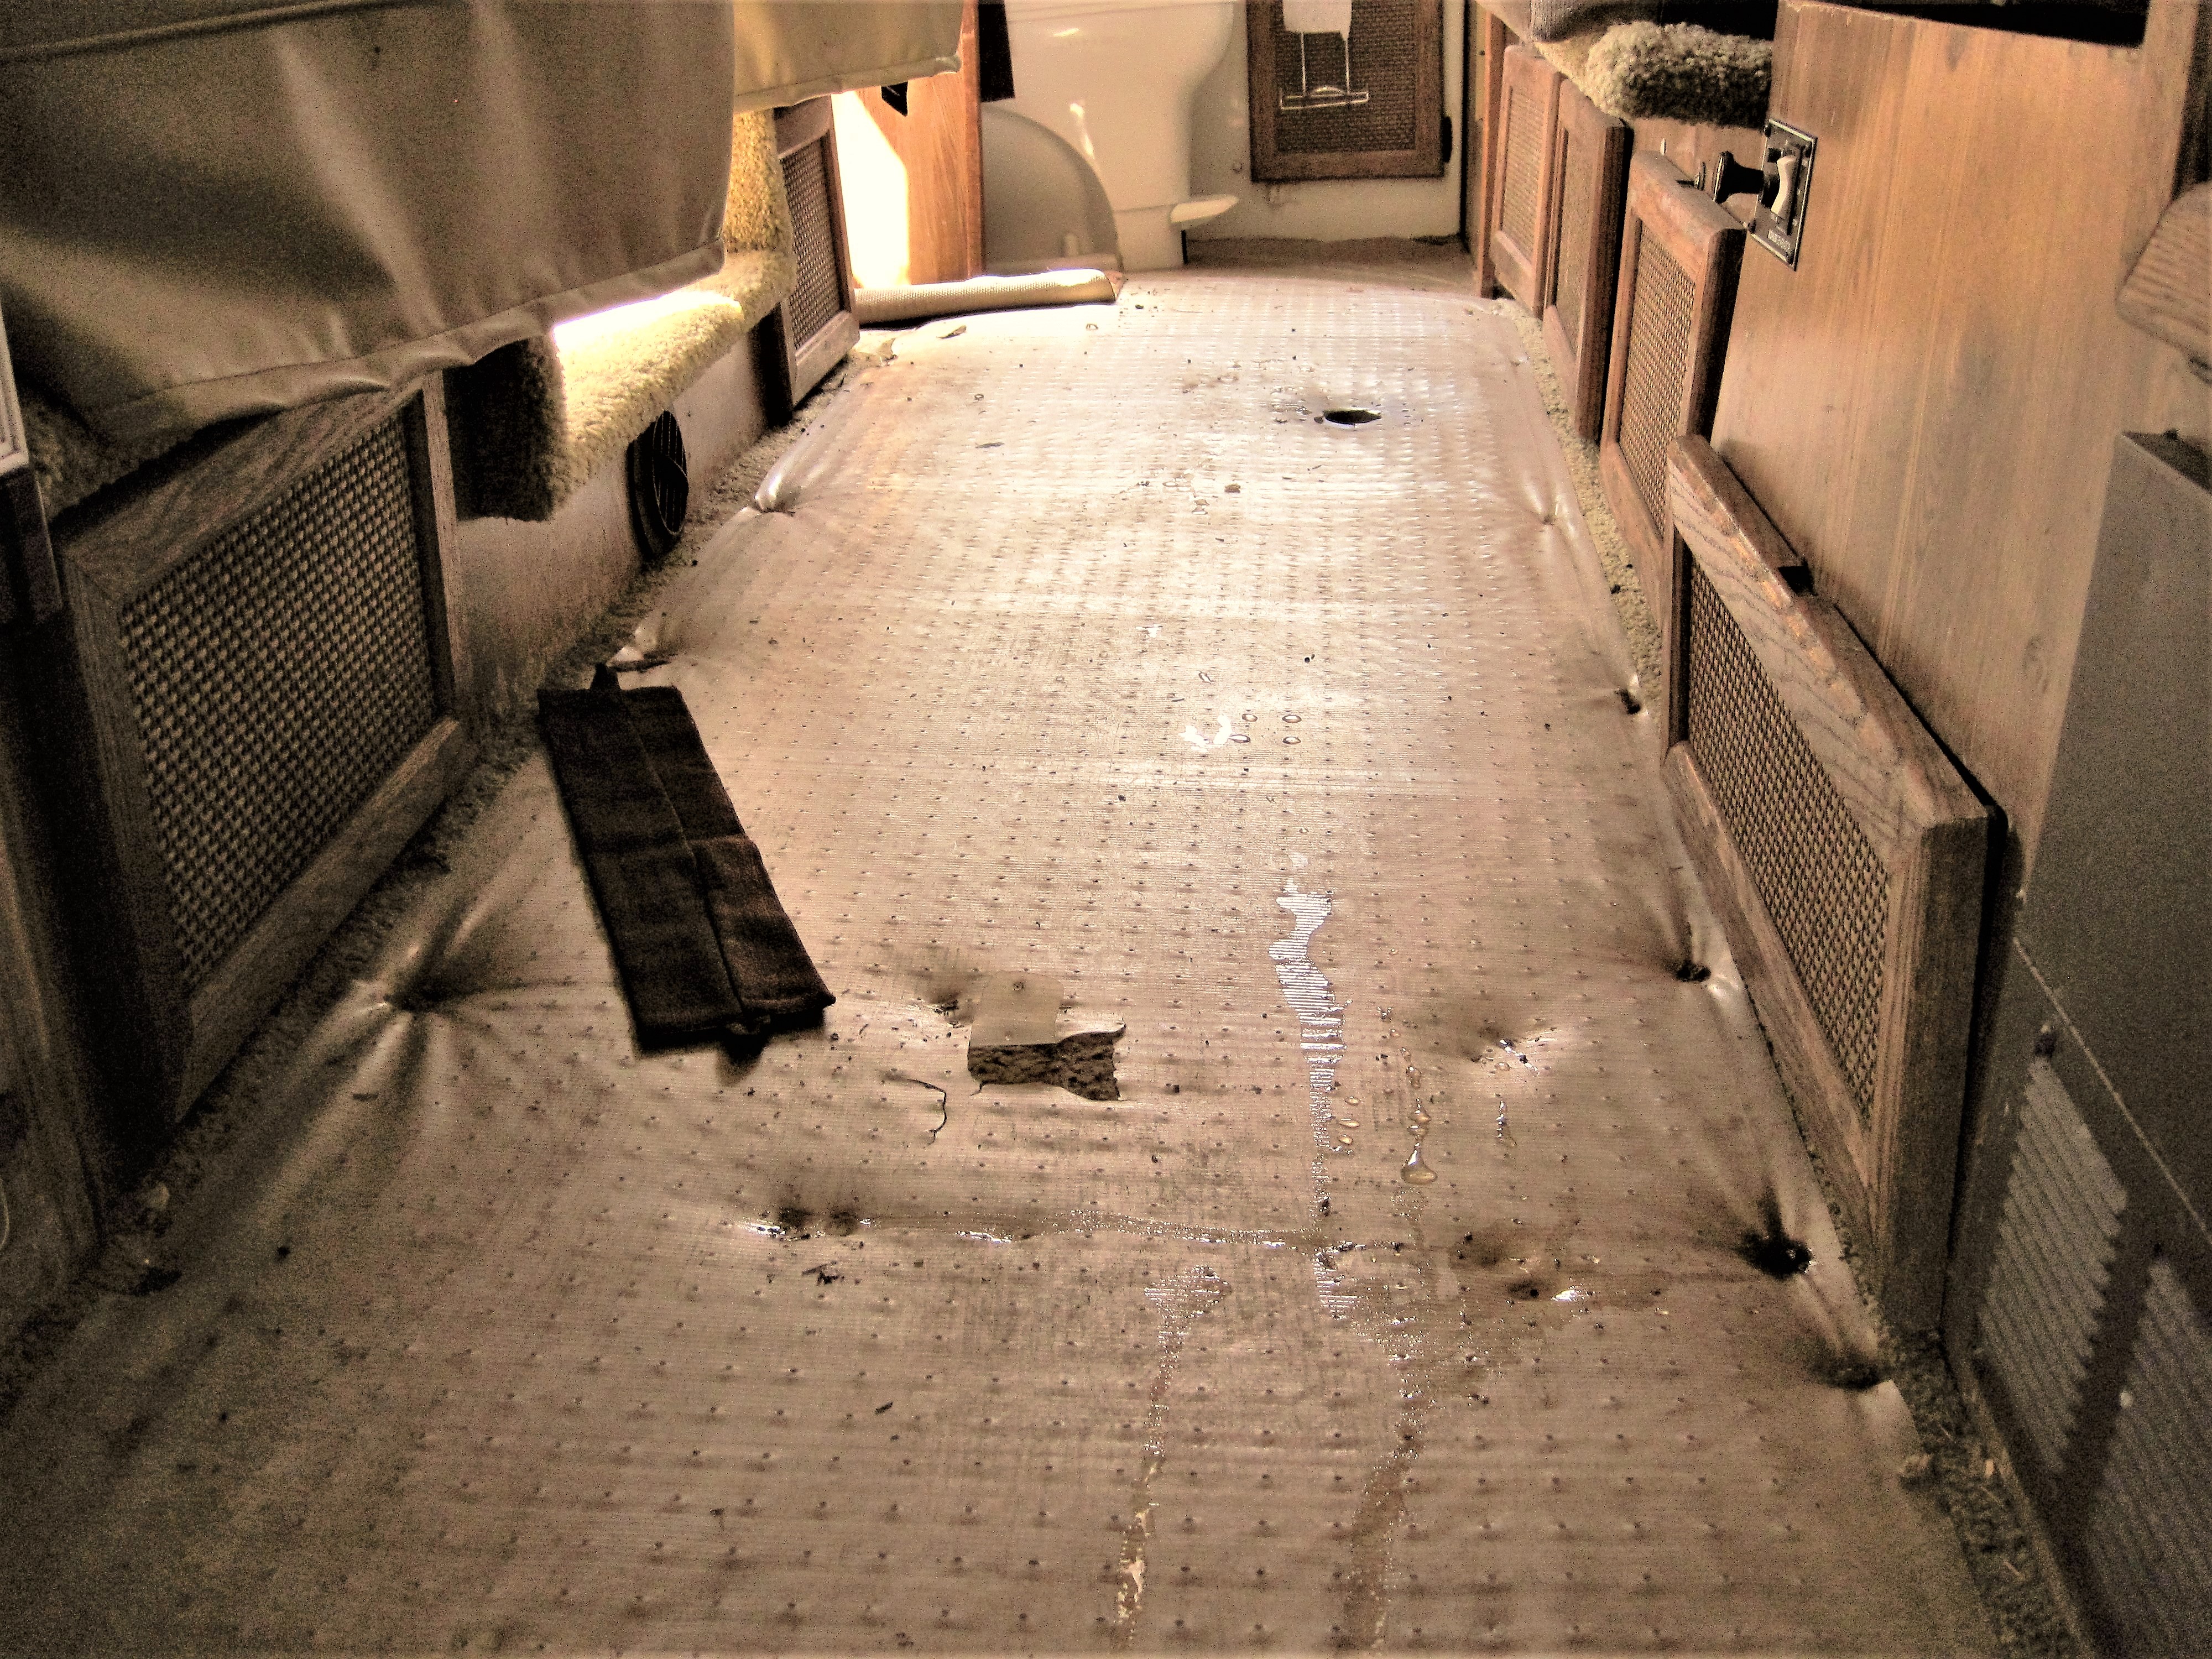
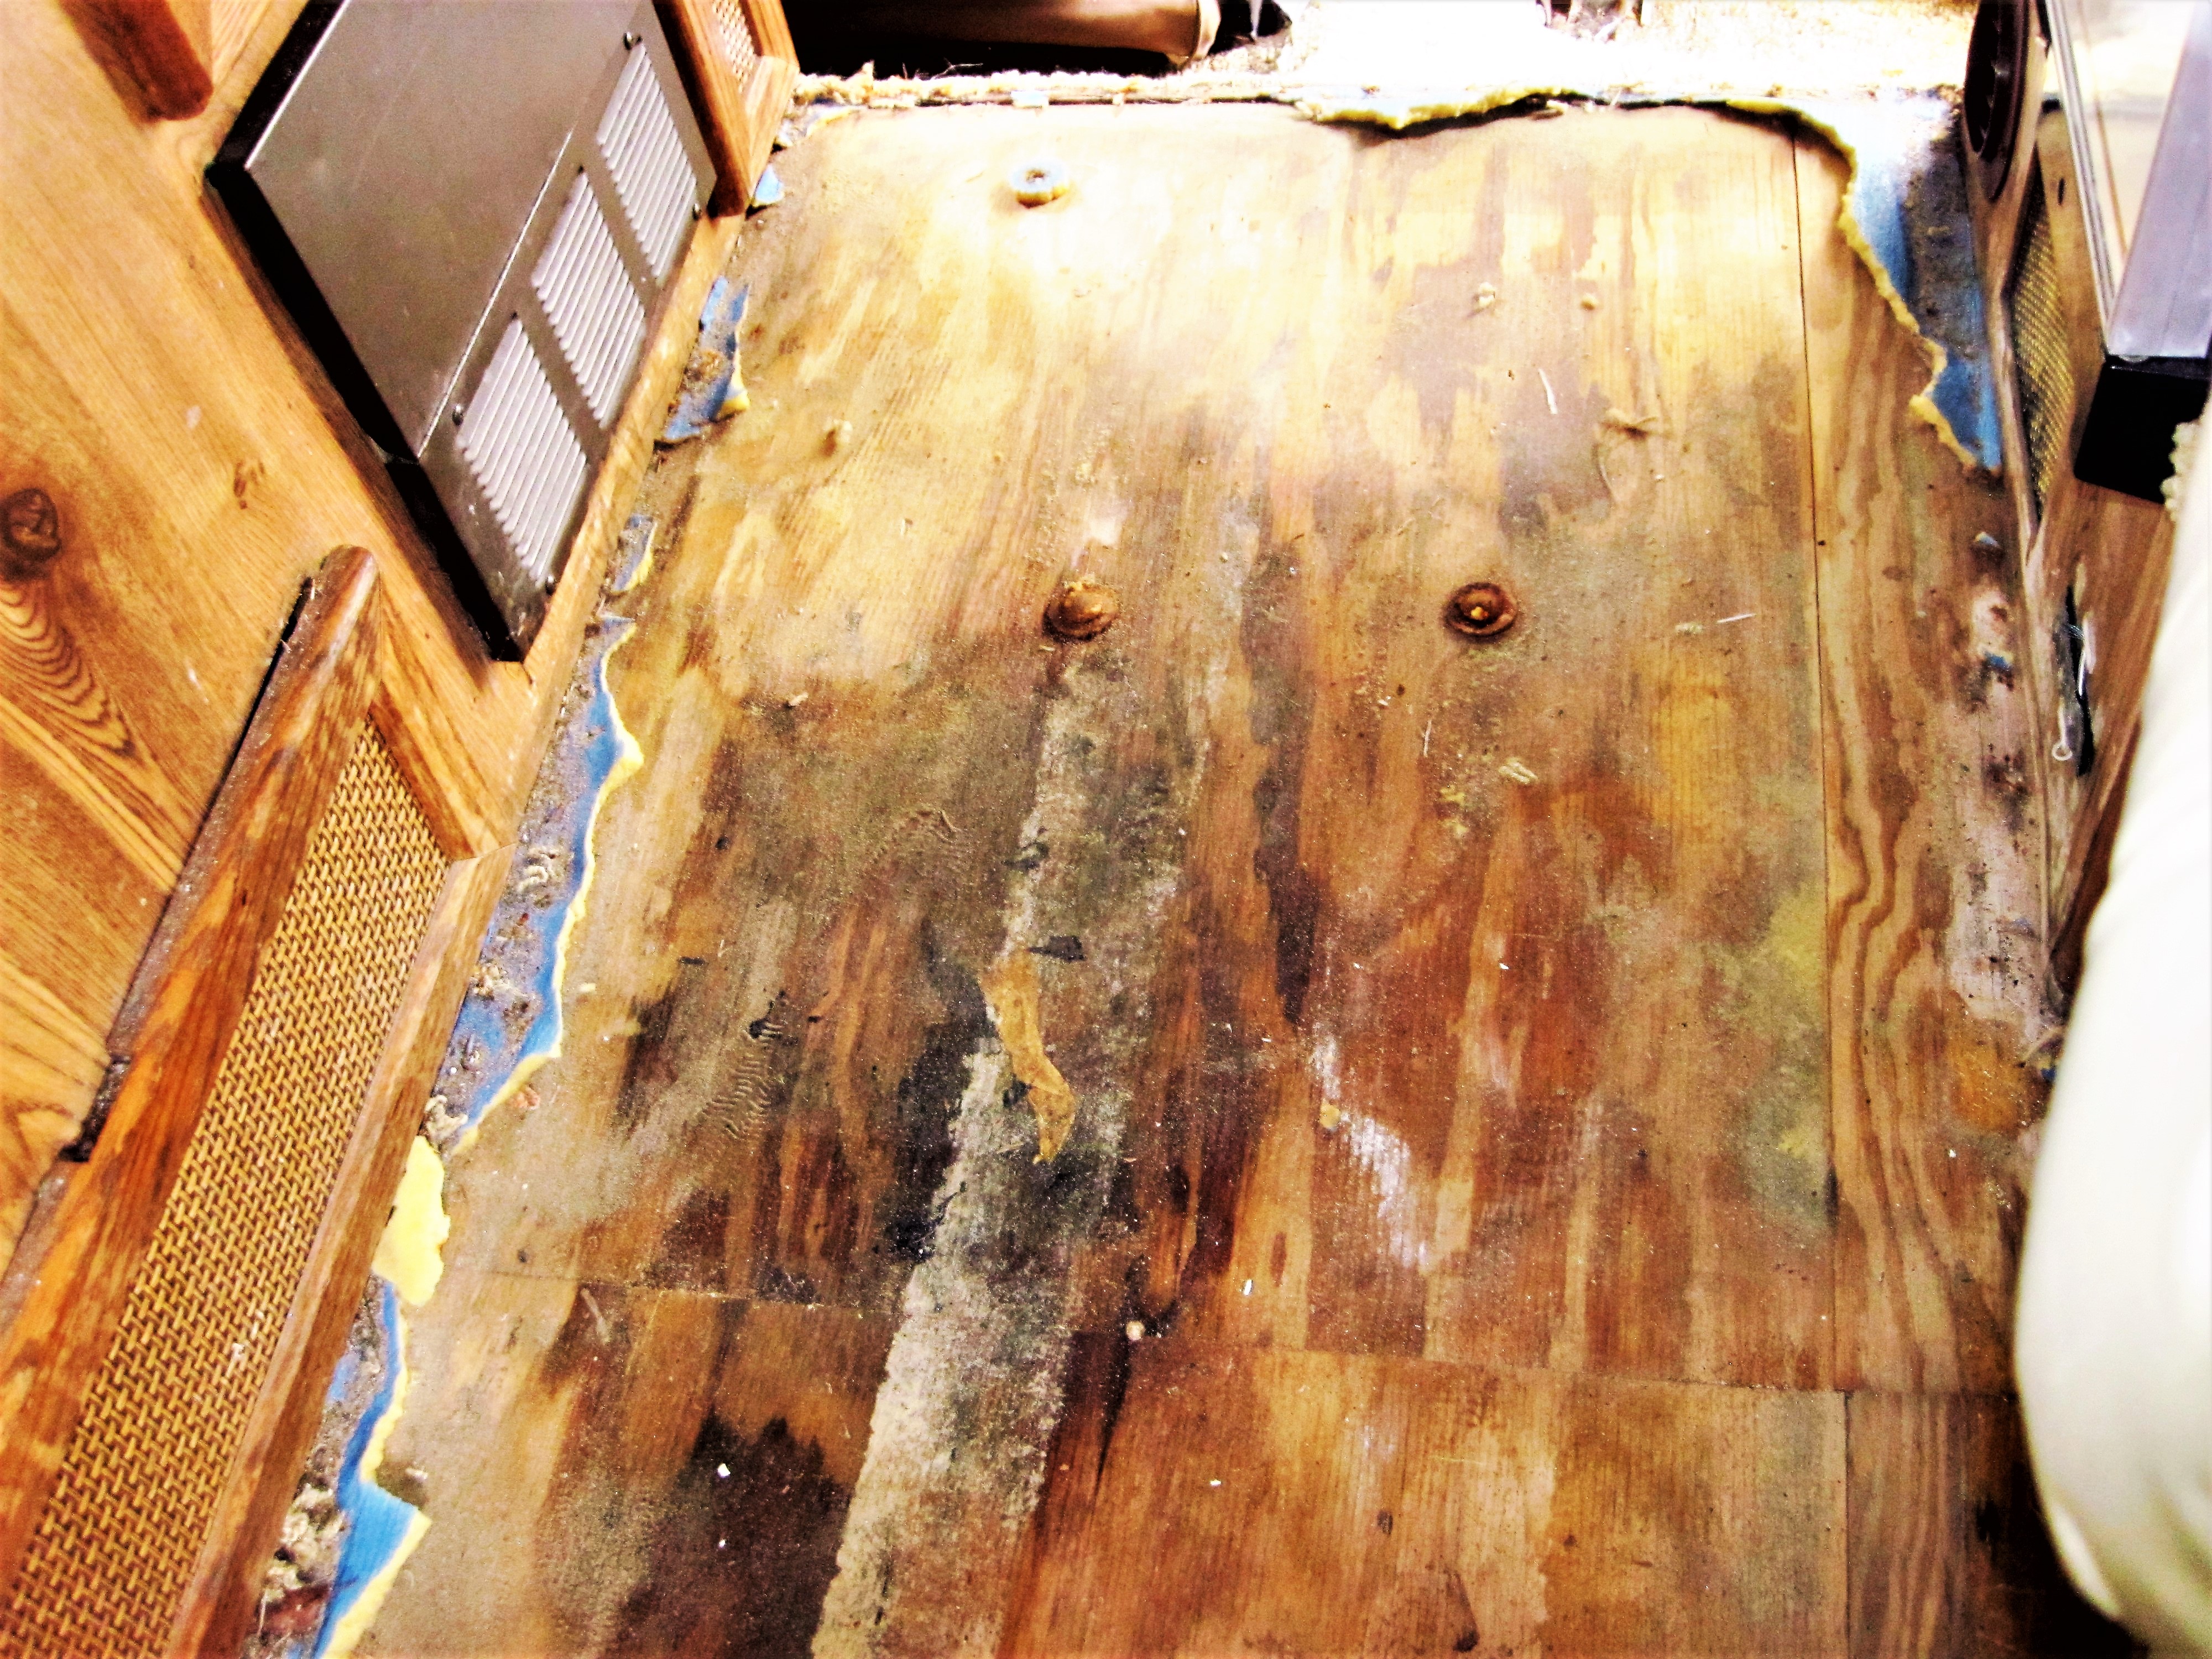
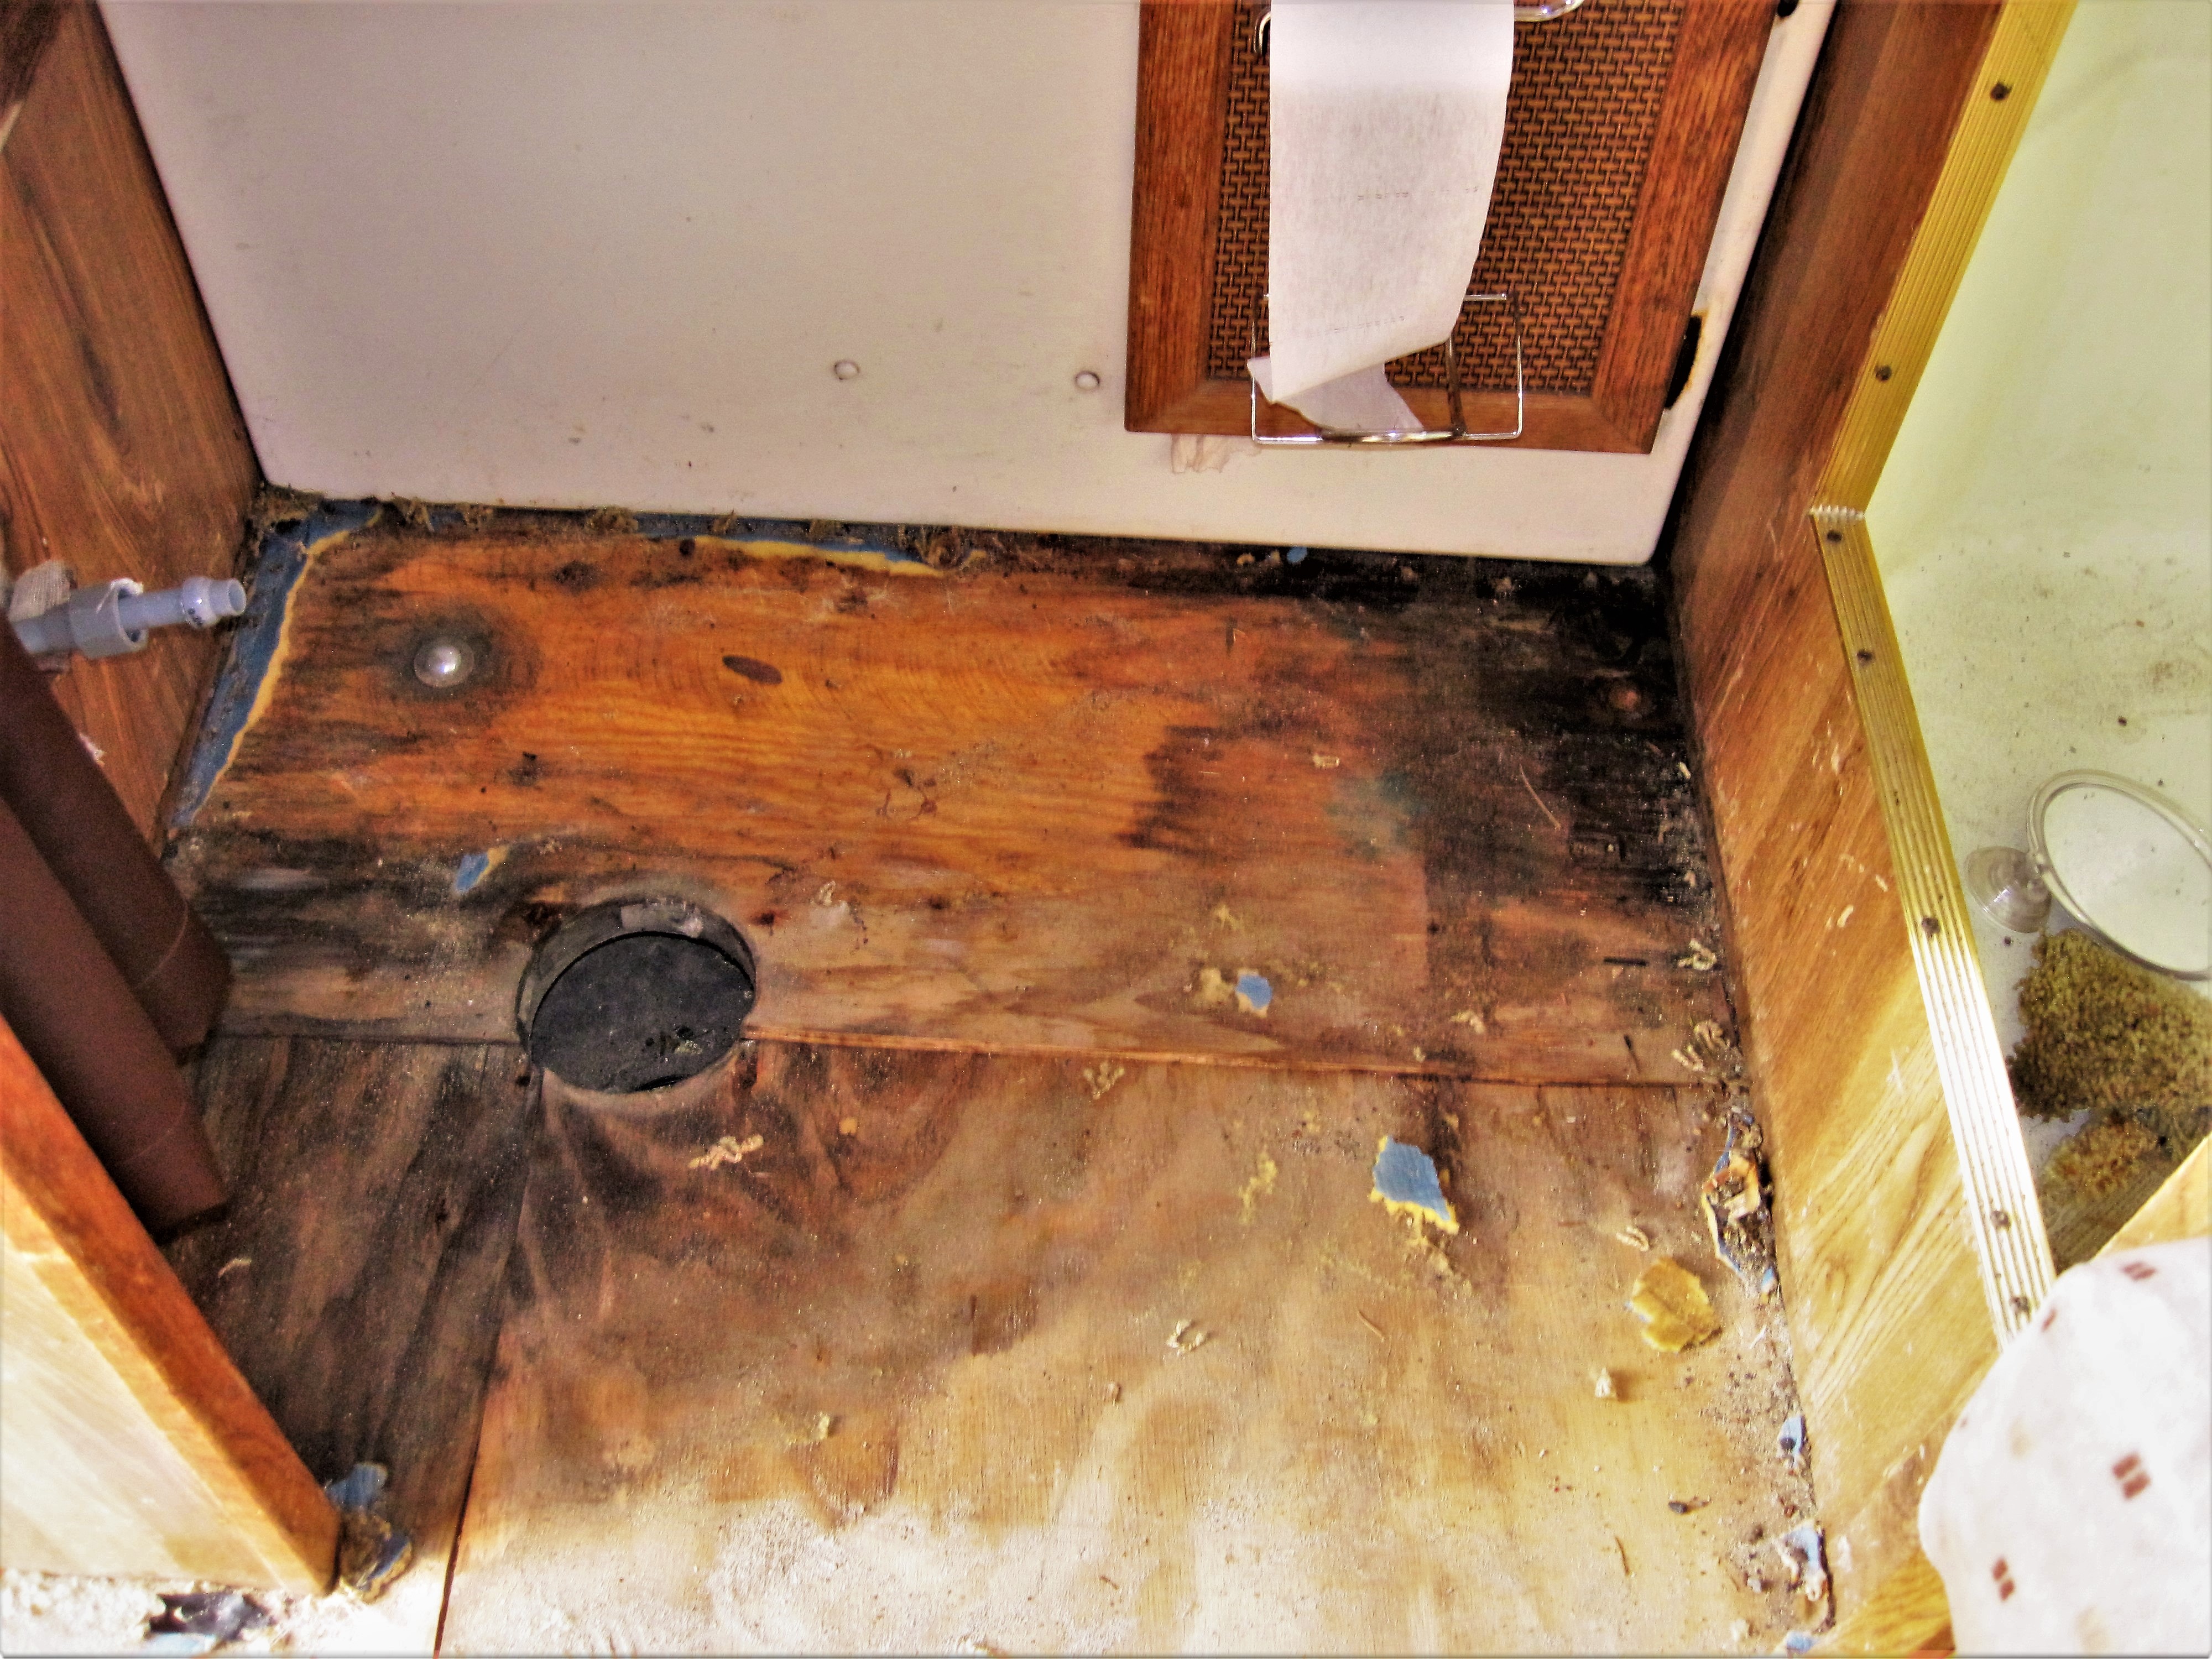
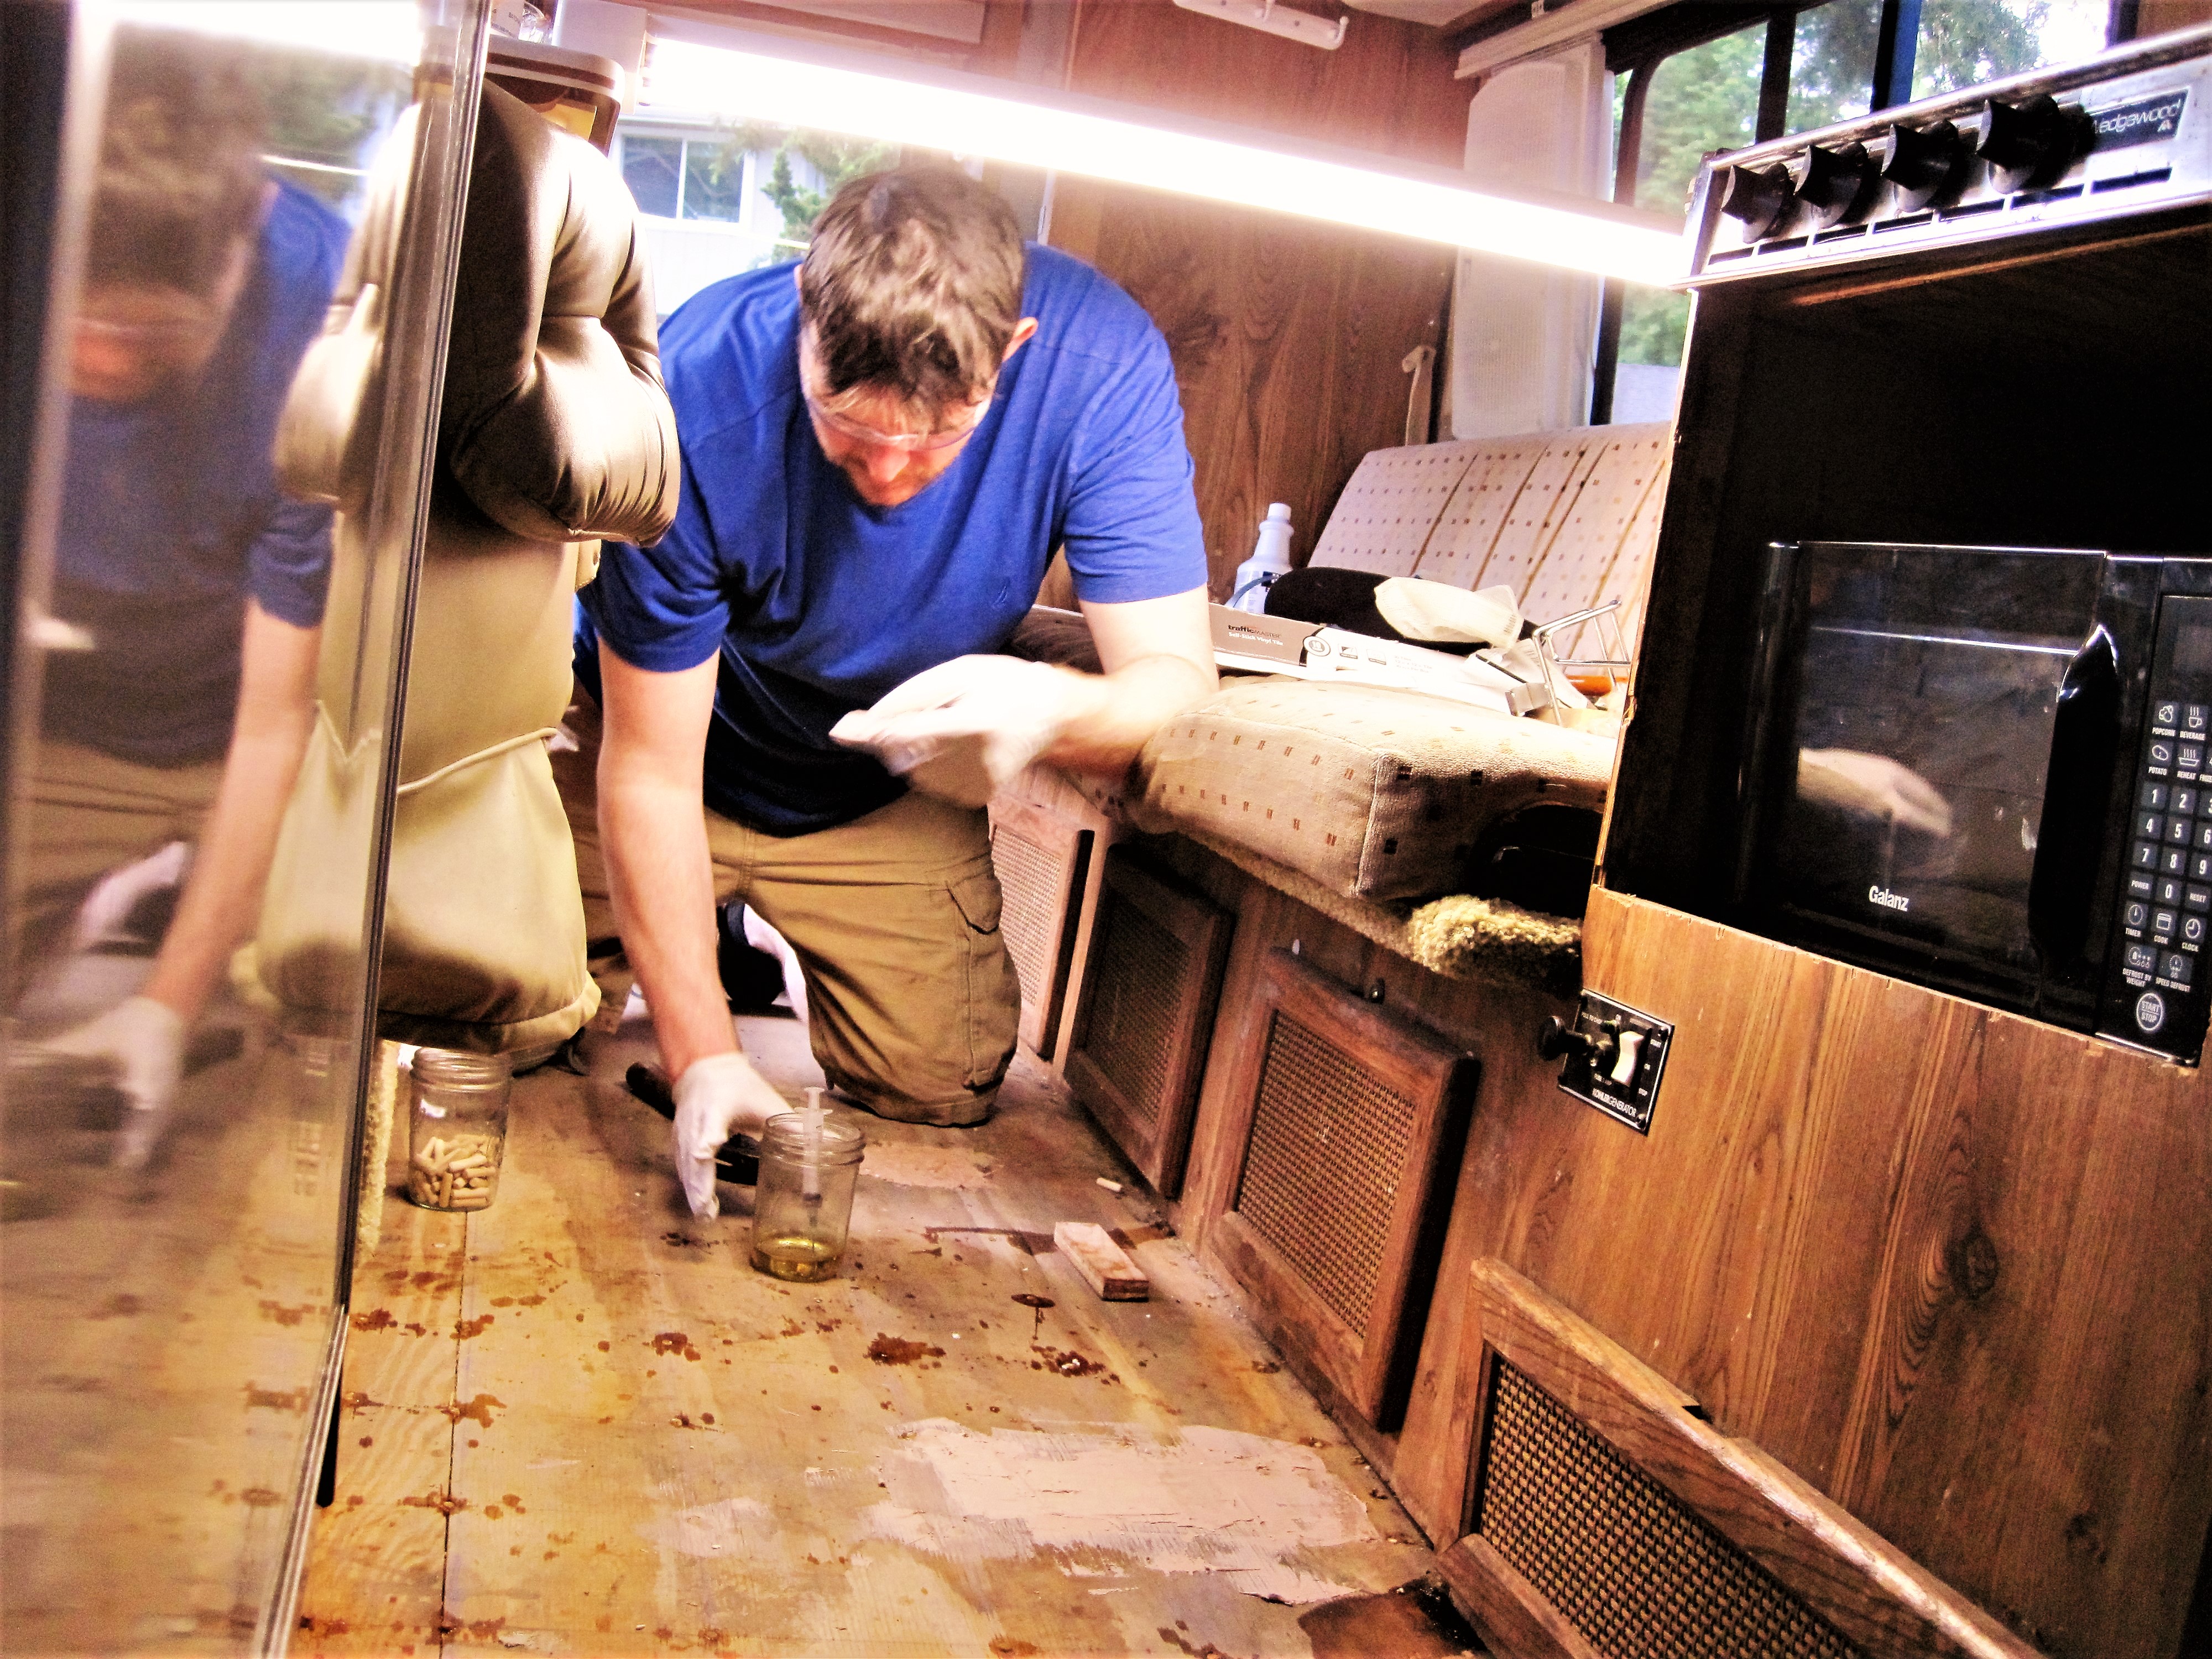
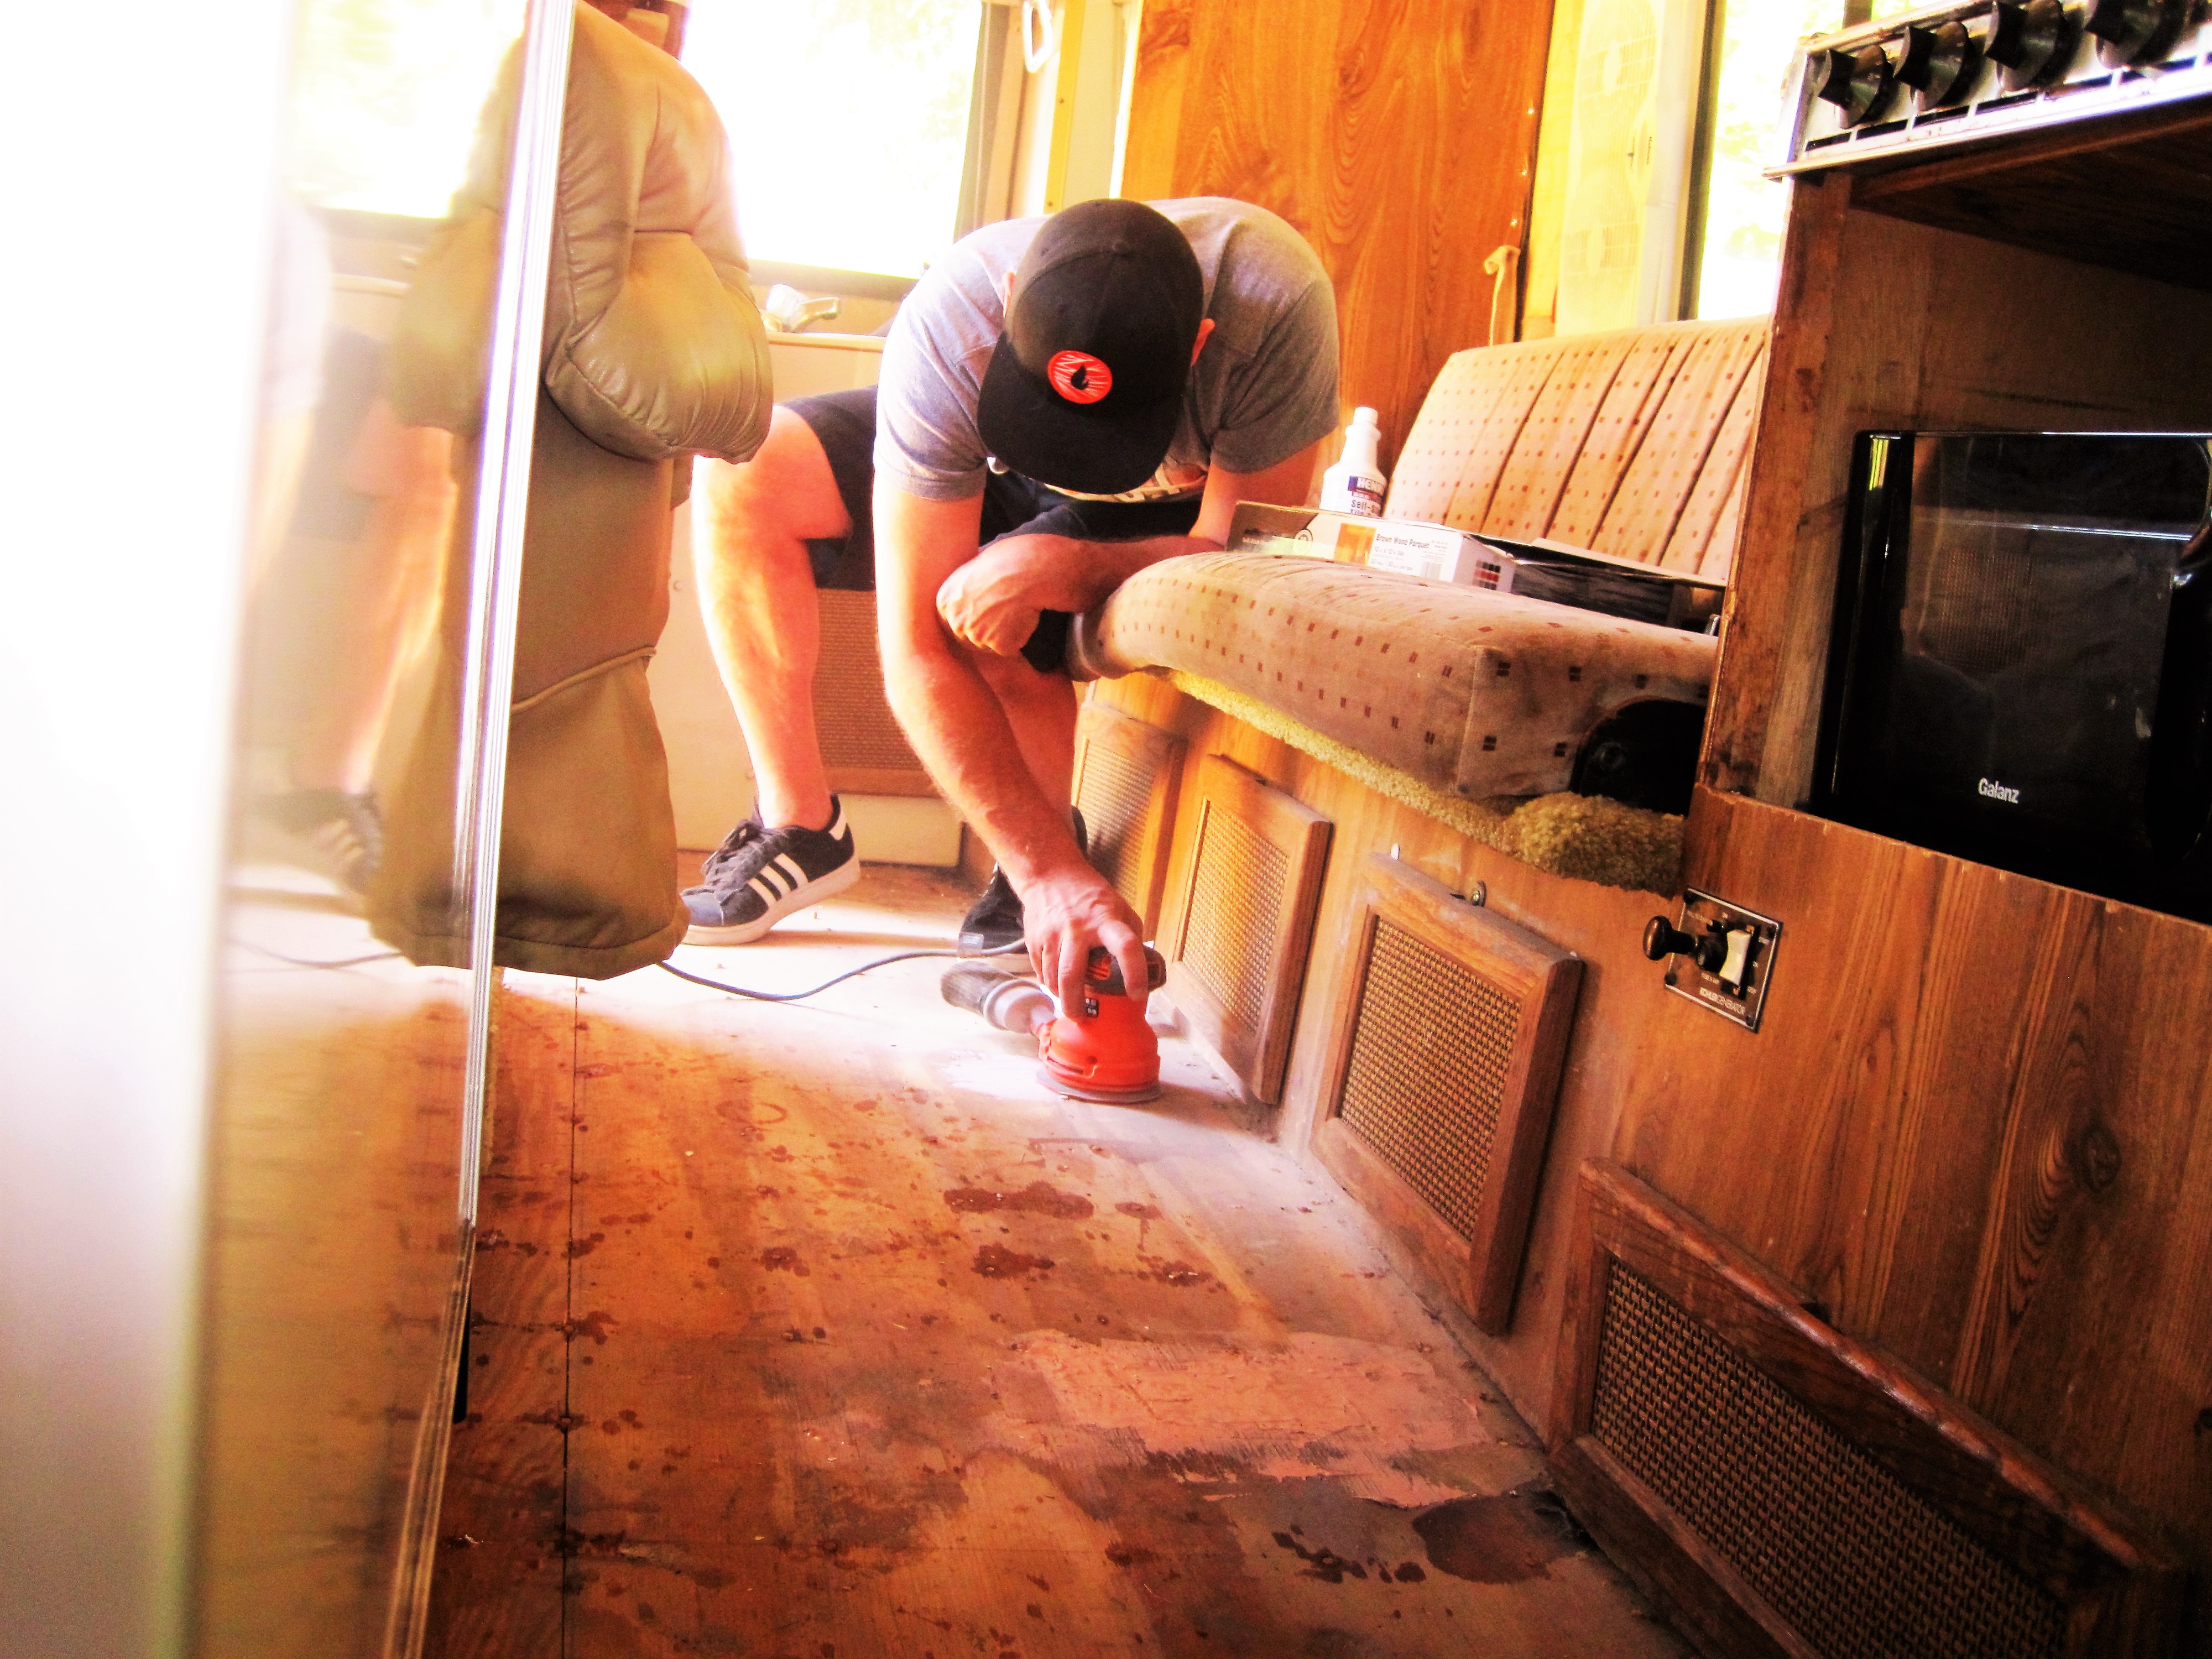
I'm happy with the outcome. I have a ton of little posts, cut off at floor level, on a six inch grid with epoxy injected into each hole. The posts force permeation of the epoxy under and around the poles and into rotten areas. I chose this method for ease and weight. I had concern that I might have to remove cabinets to replace the flooring and did not want to do that and the method used allowed epoxy to also permeate the wood under the cabinets where other rot may have existed.. The solution you describe is a good one too. I have no vested interest in others using this method, I just wanted to share my experience with this very group. I really appreciate all the help and feedback I have received from this group, including yours. If we meet you can jump up and down on the floor before we wet a fly and hoist a cool one! Iflyfishafterjumpingupanddownonmyfloor
-
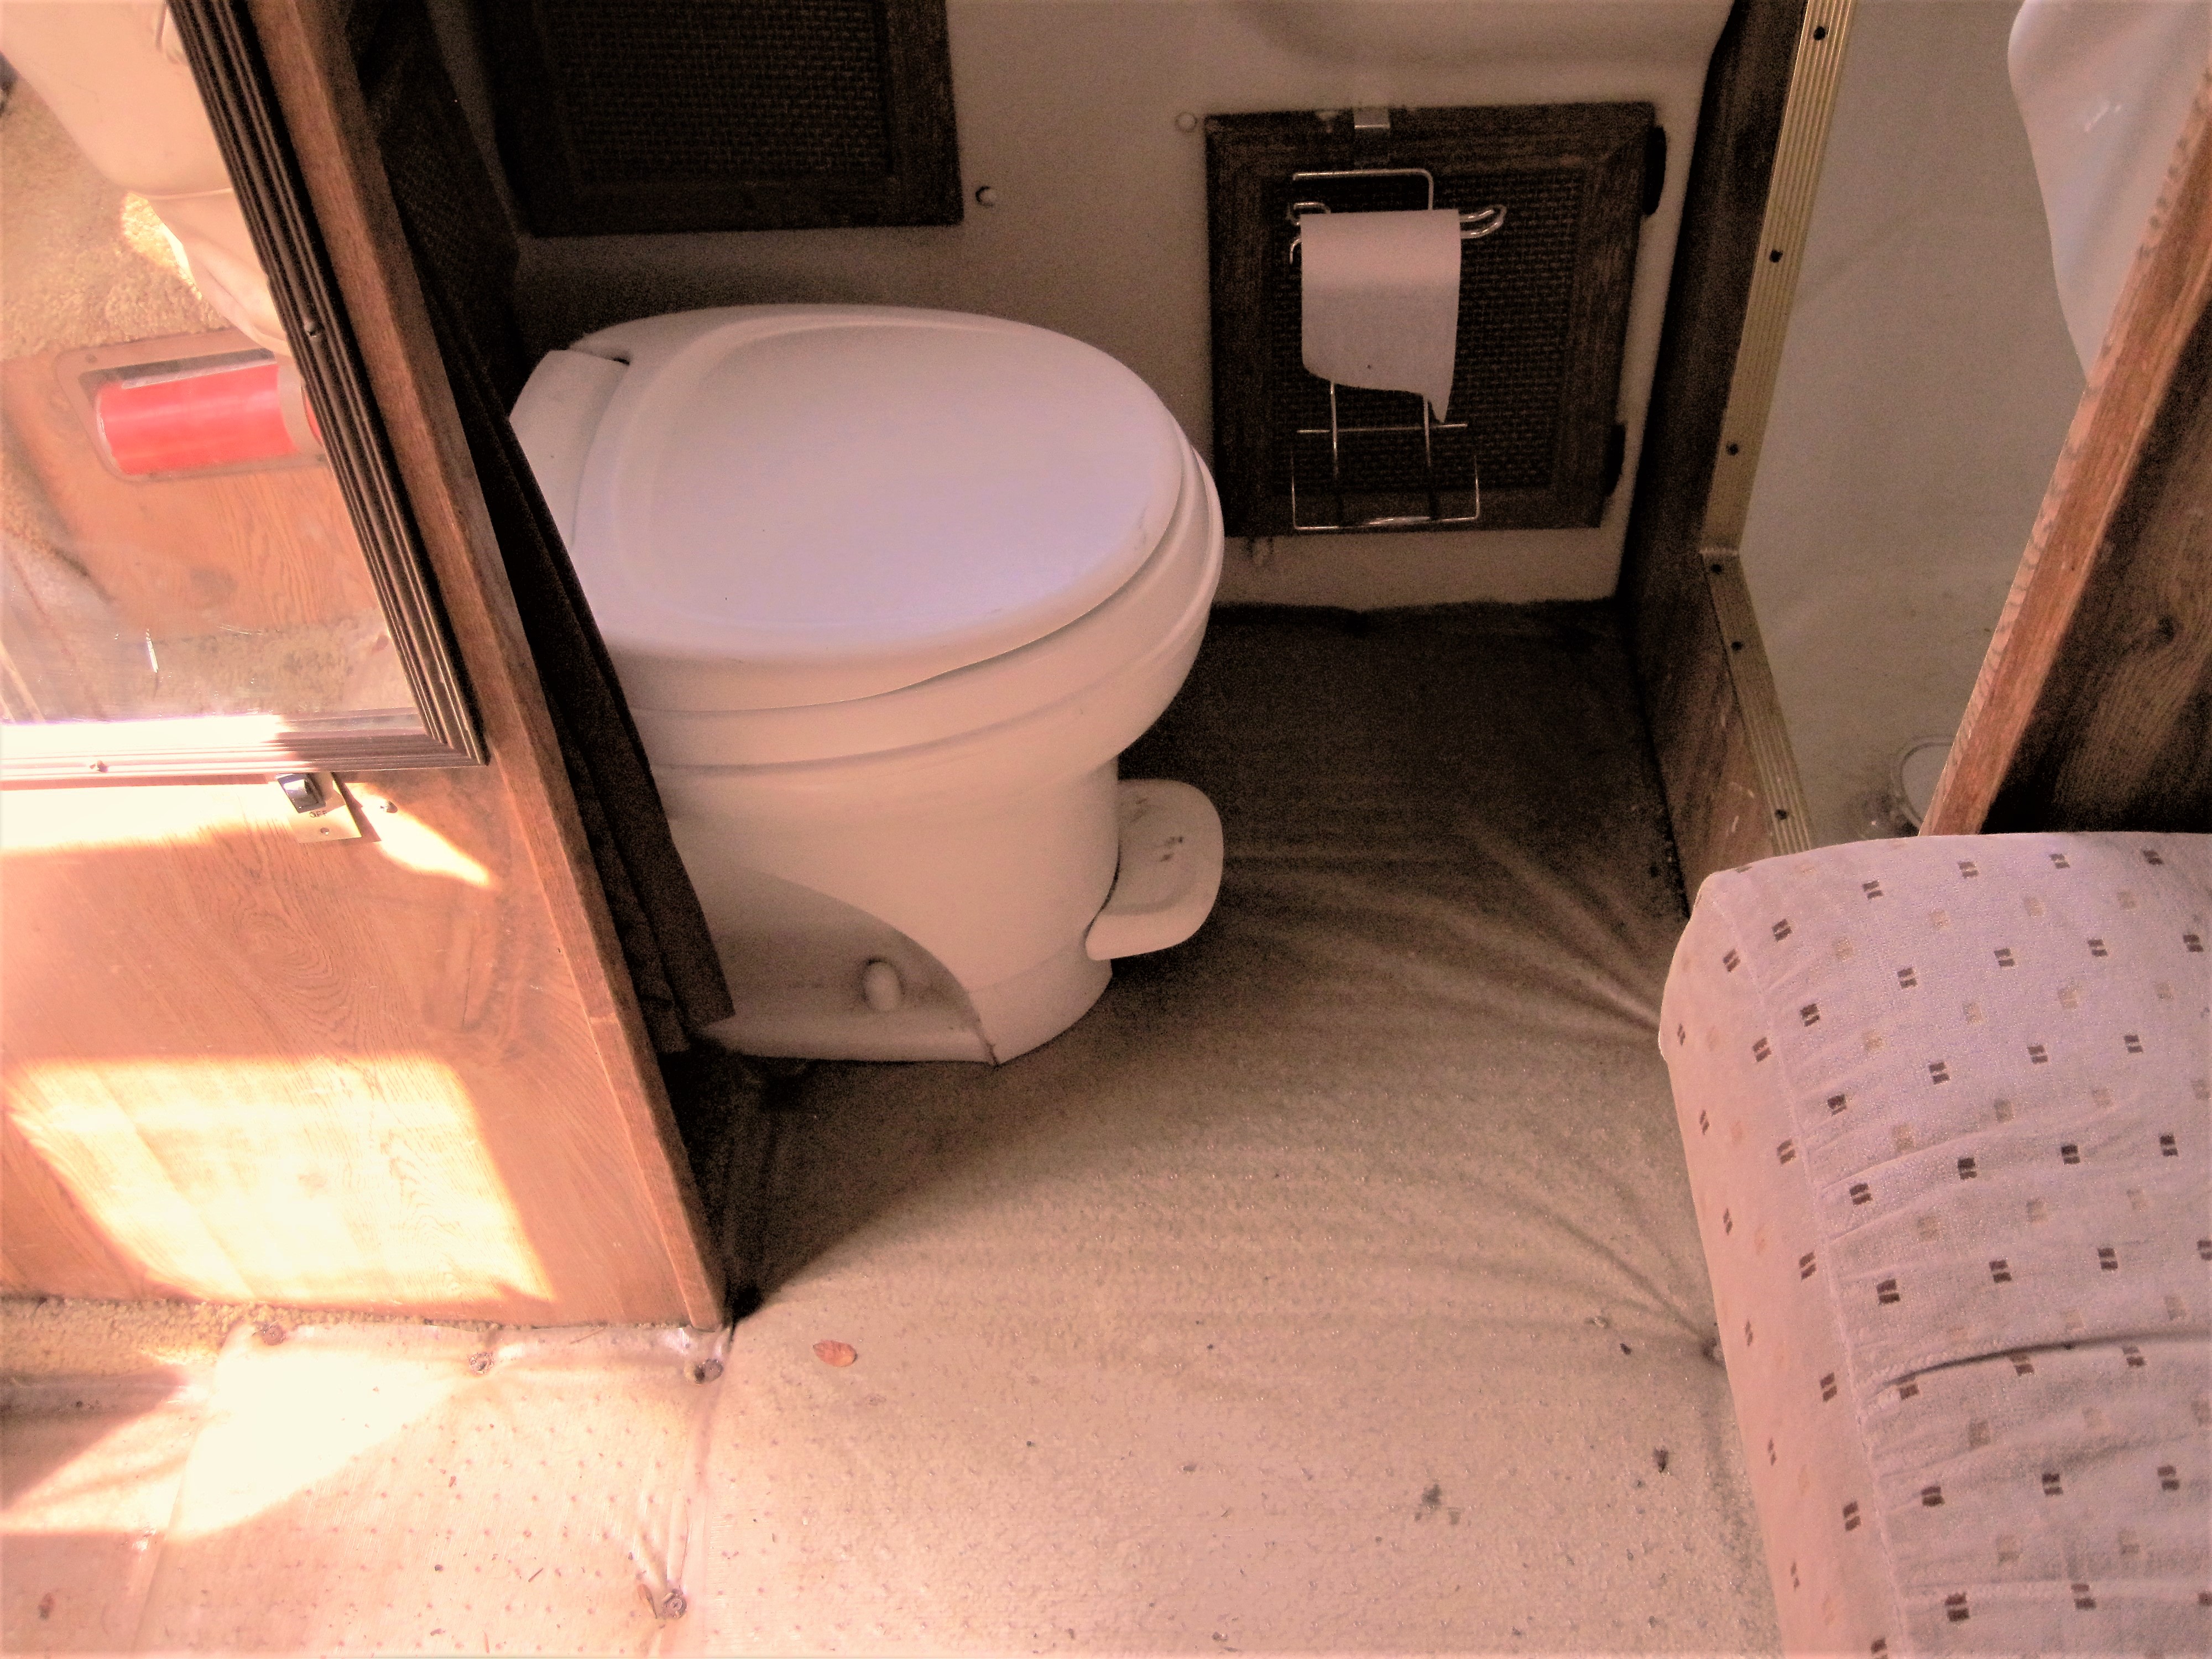
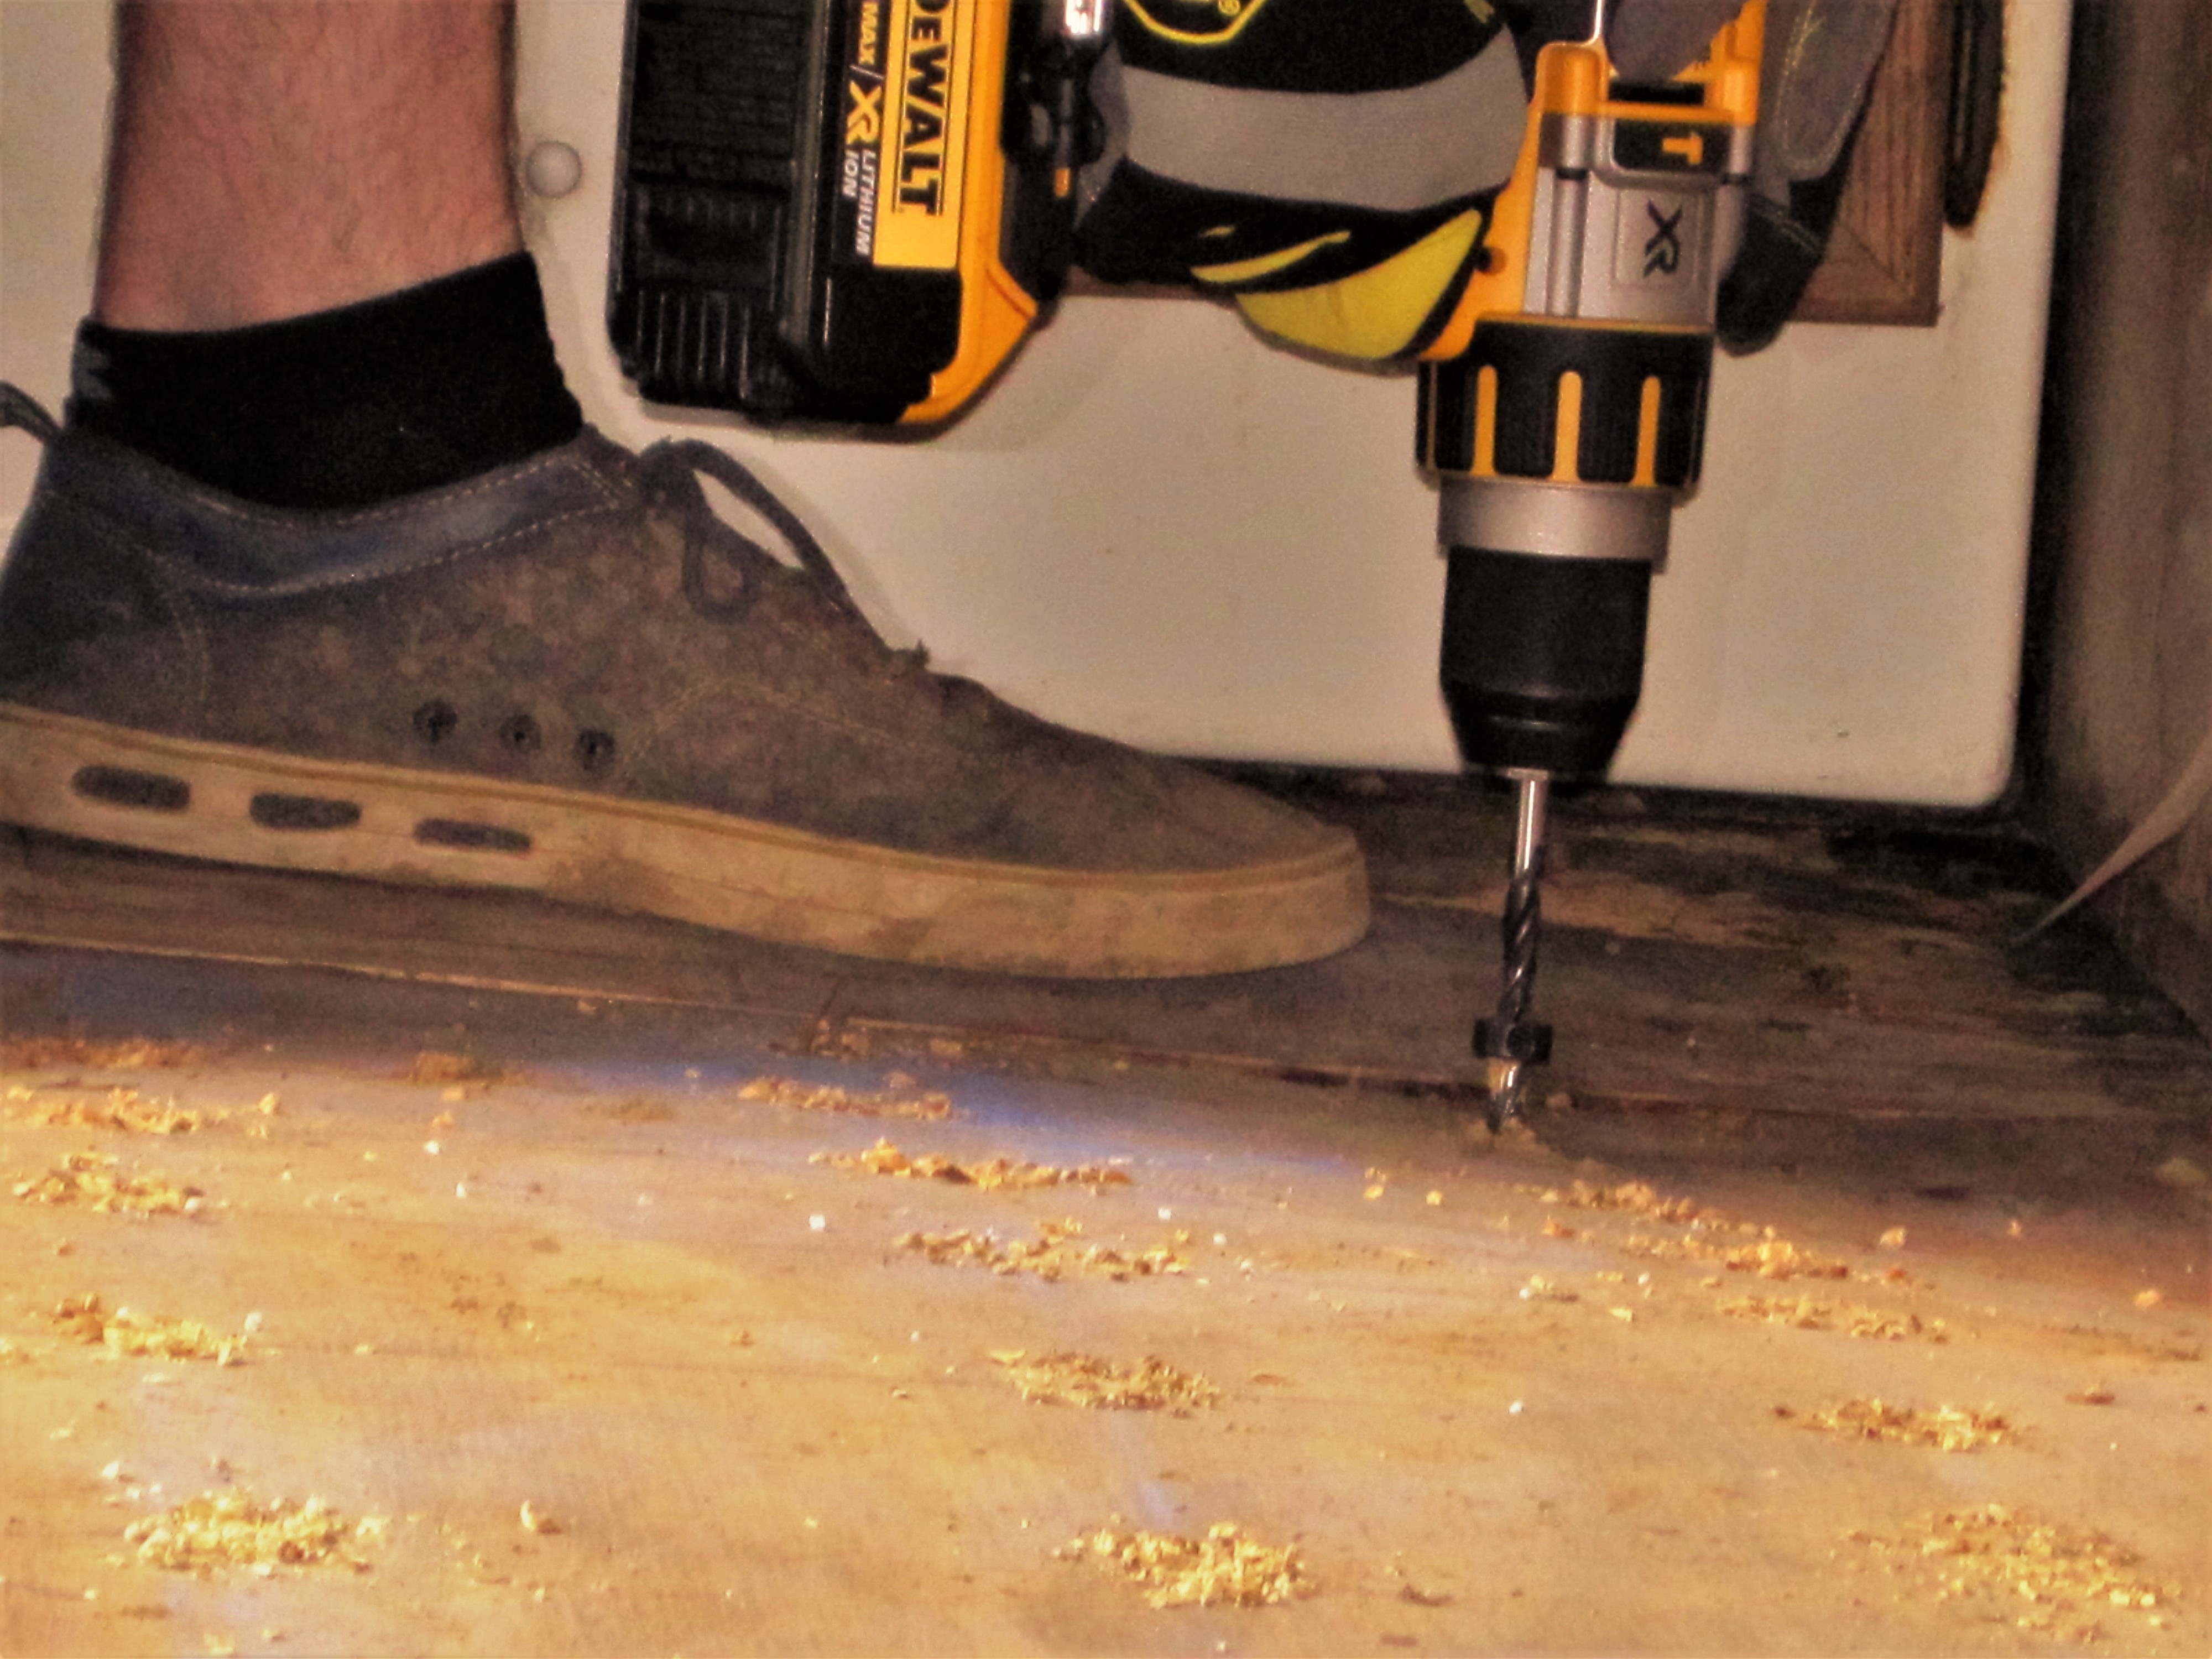
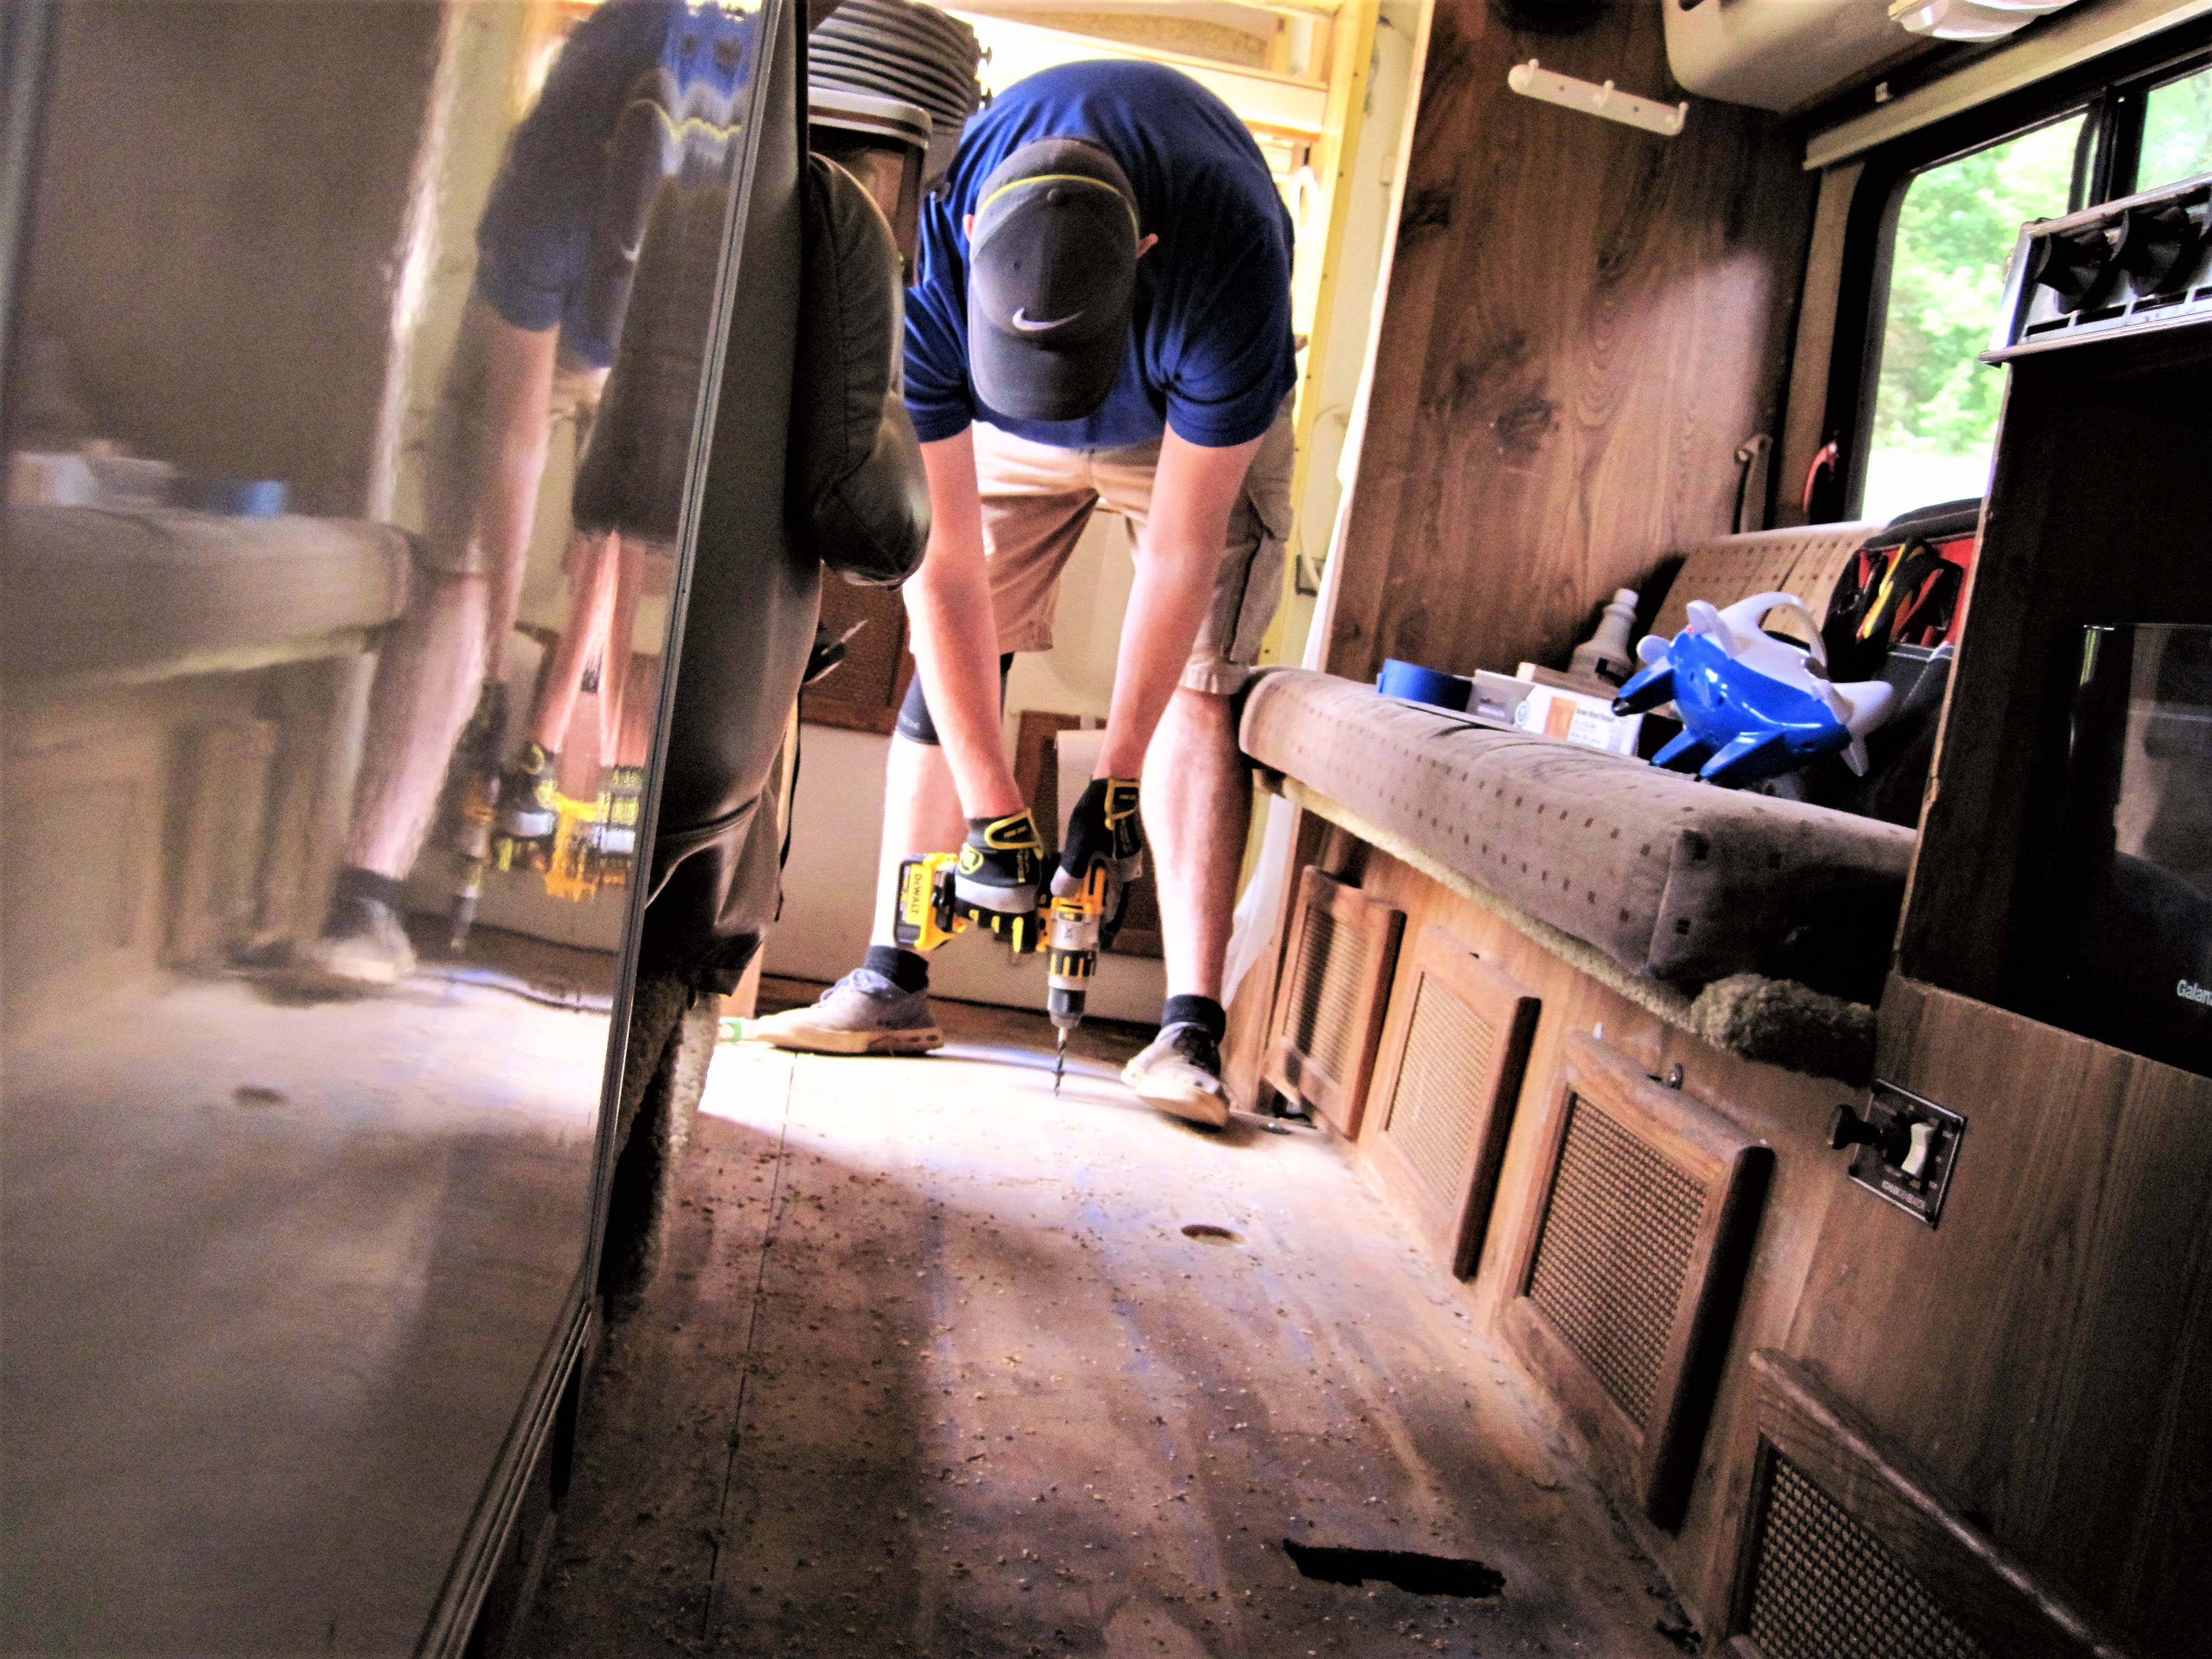
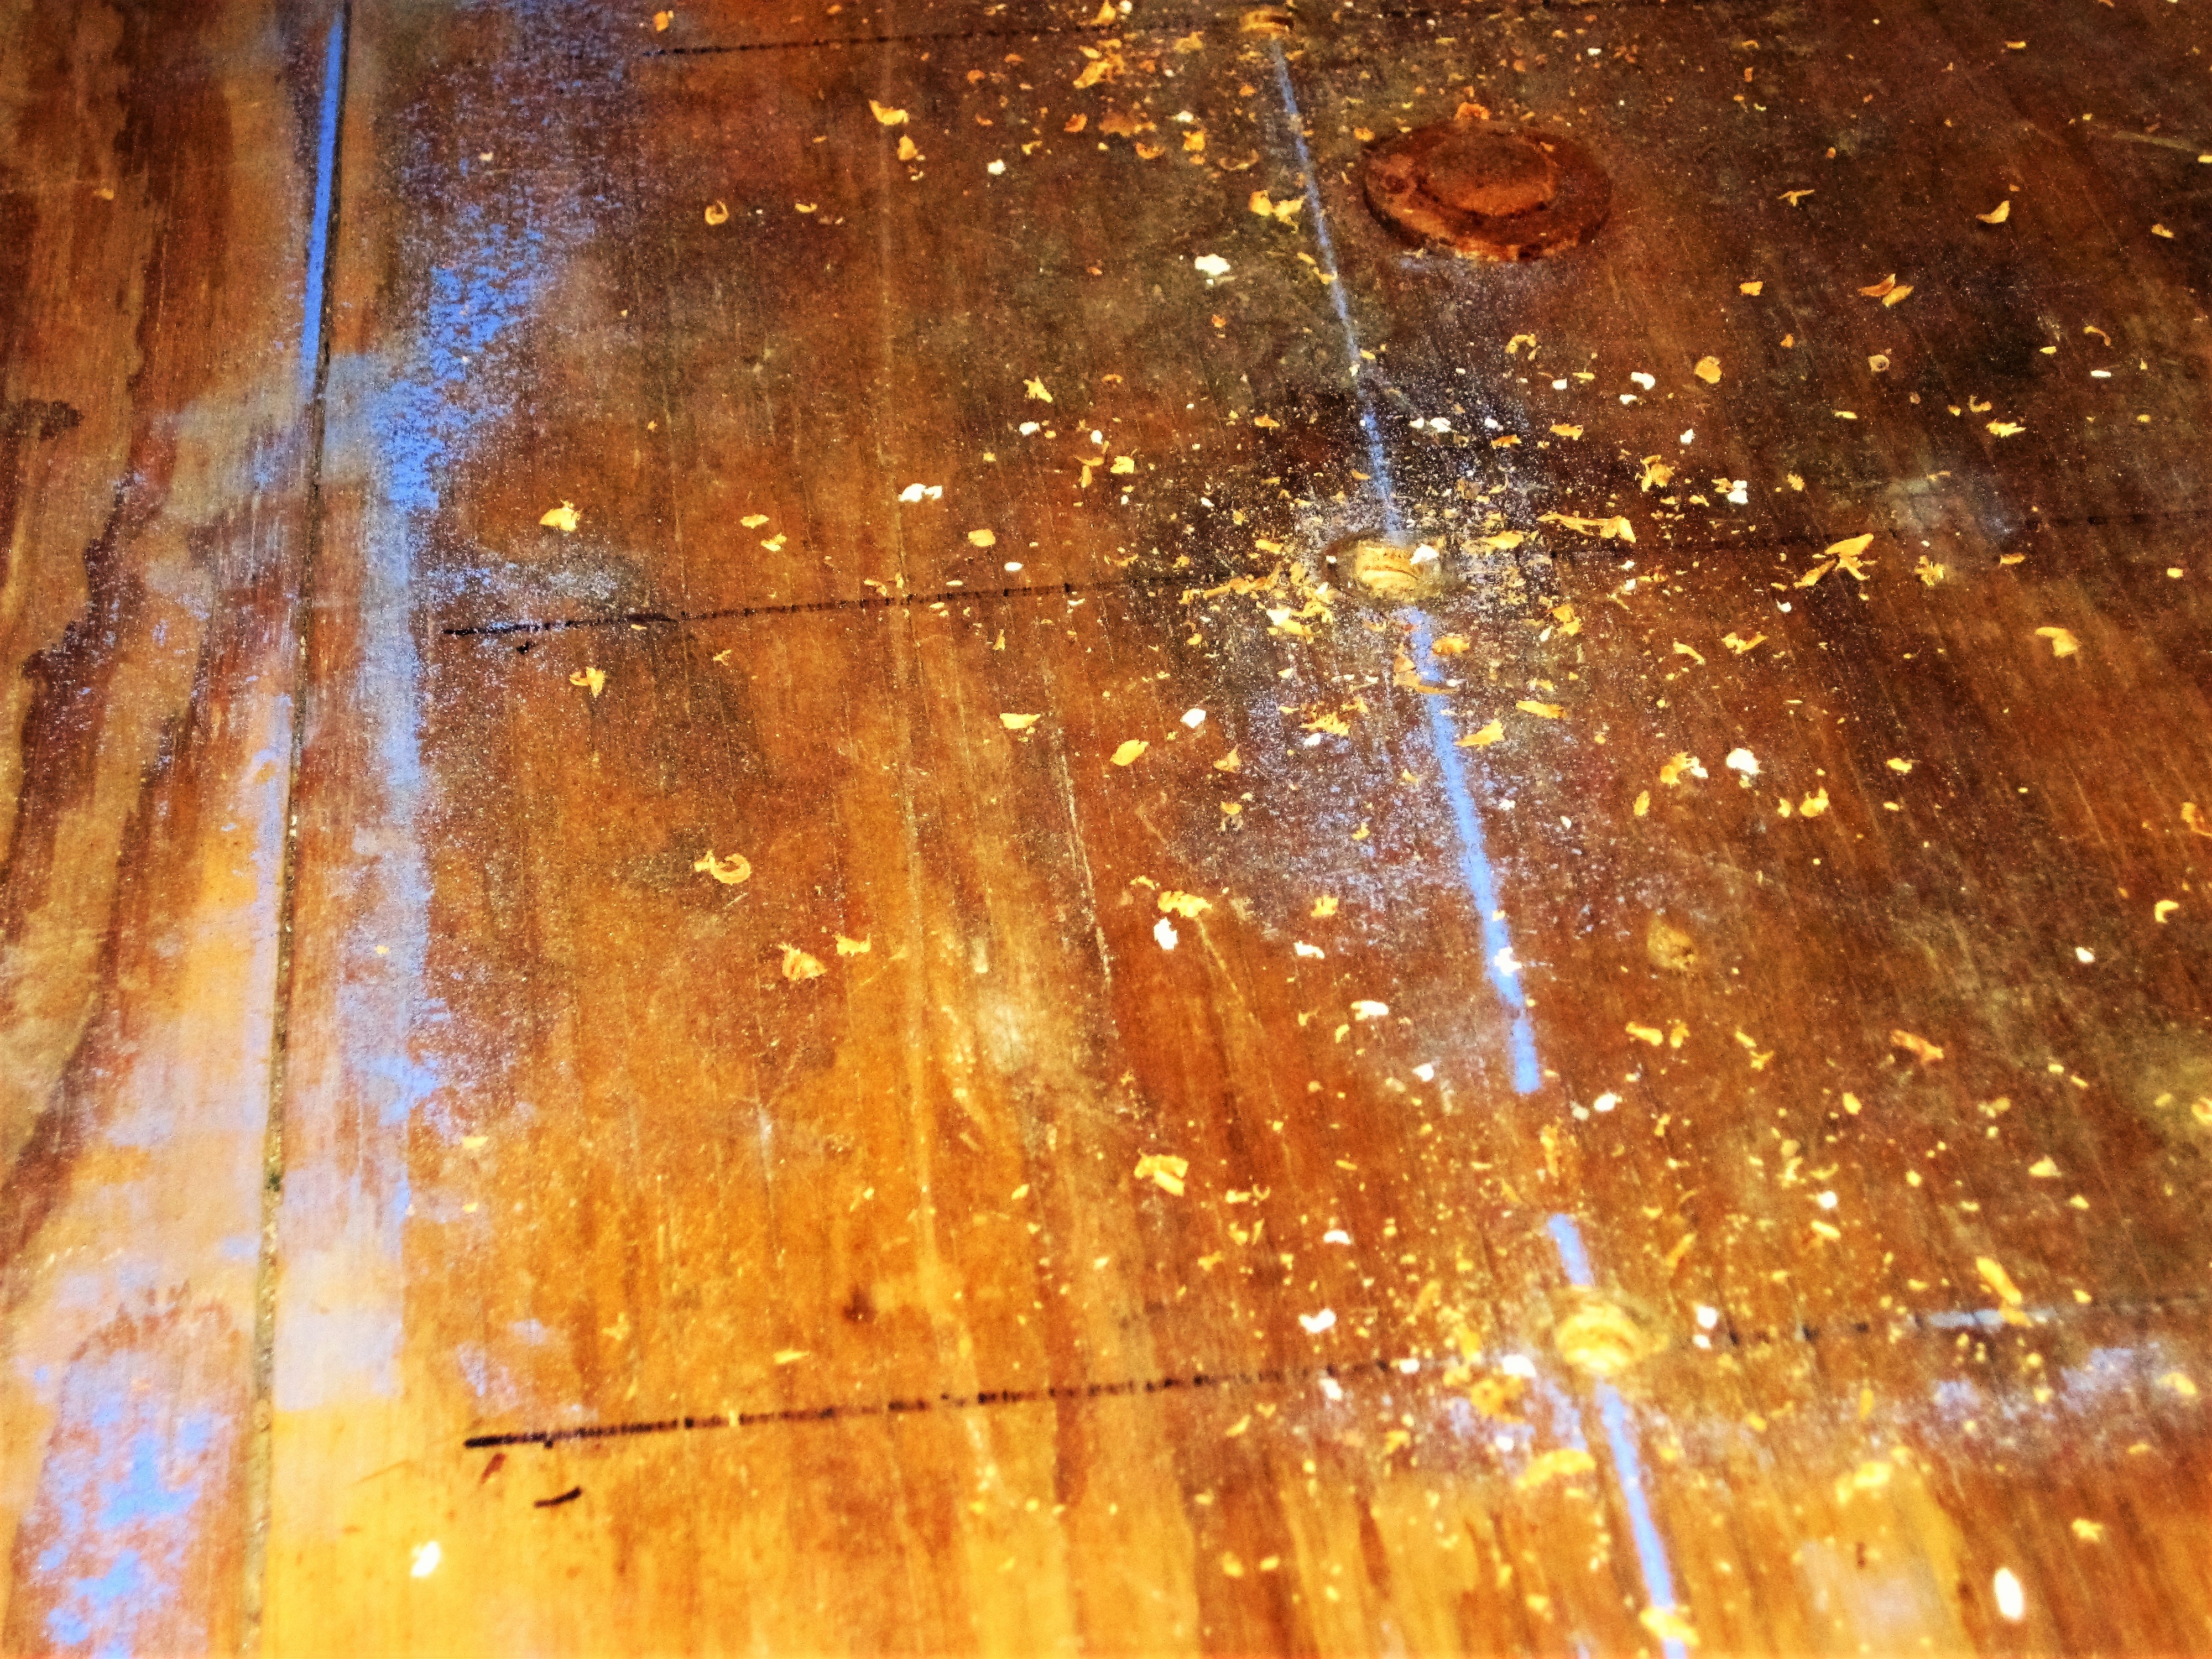
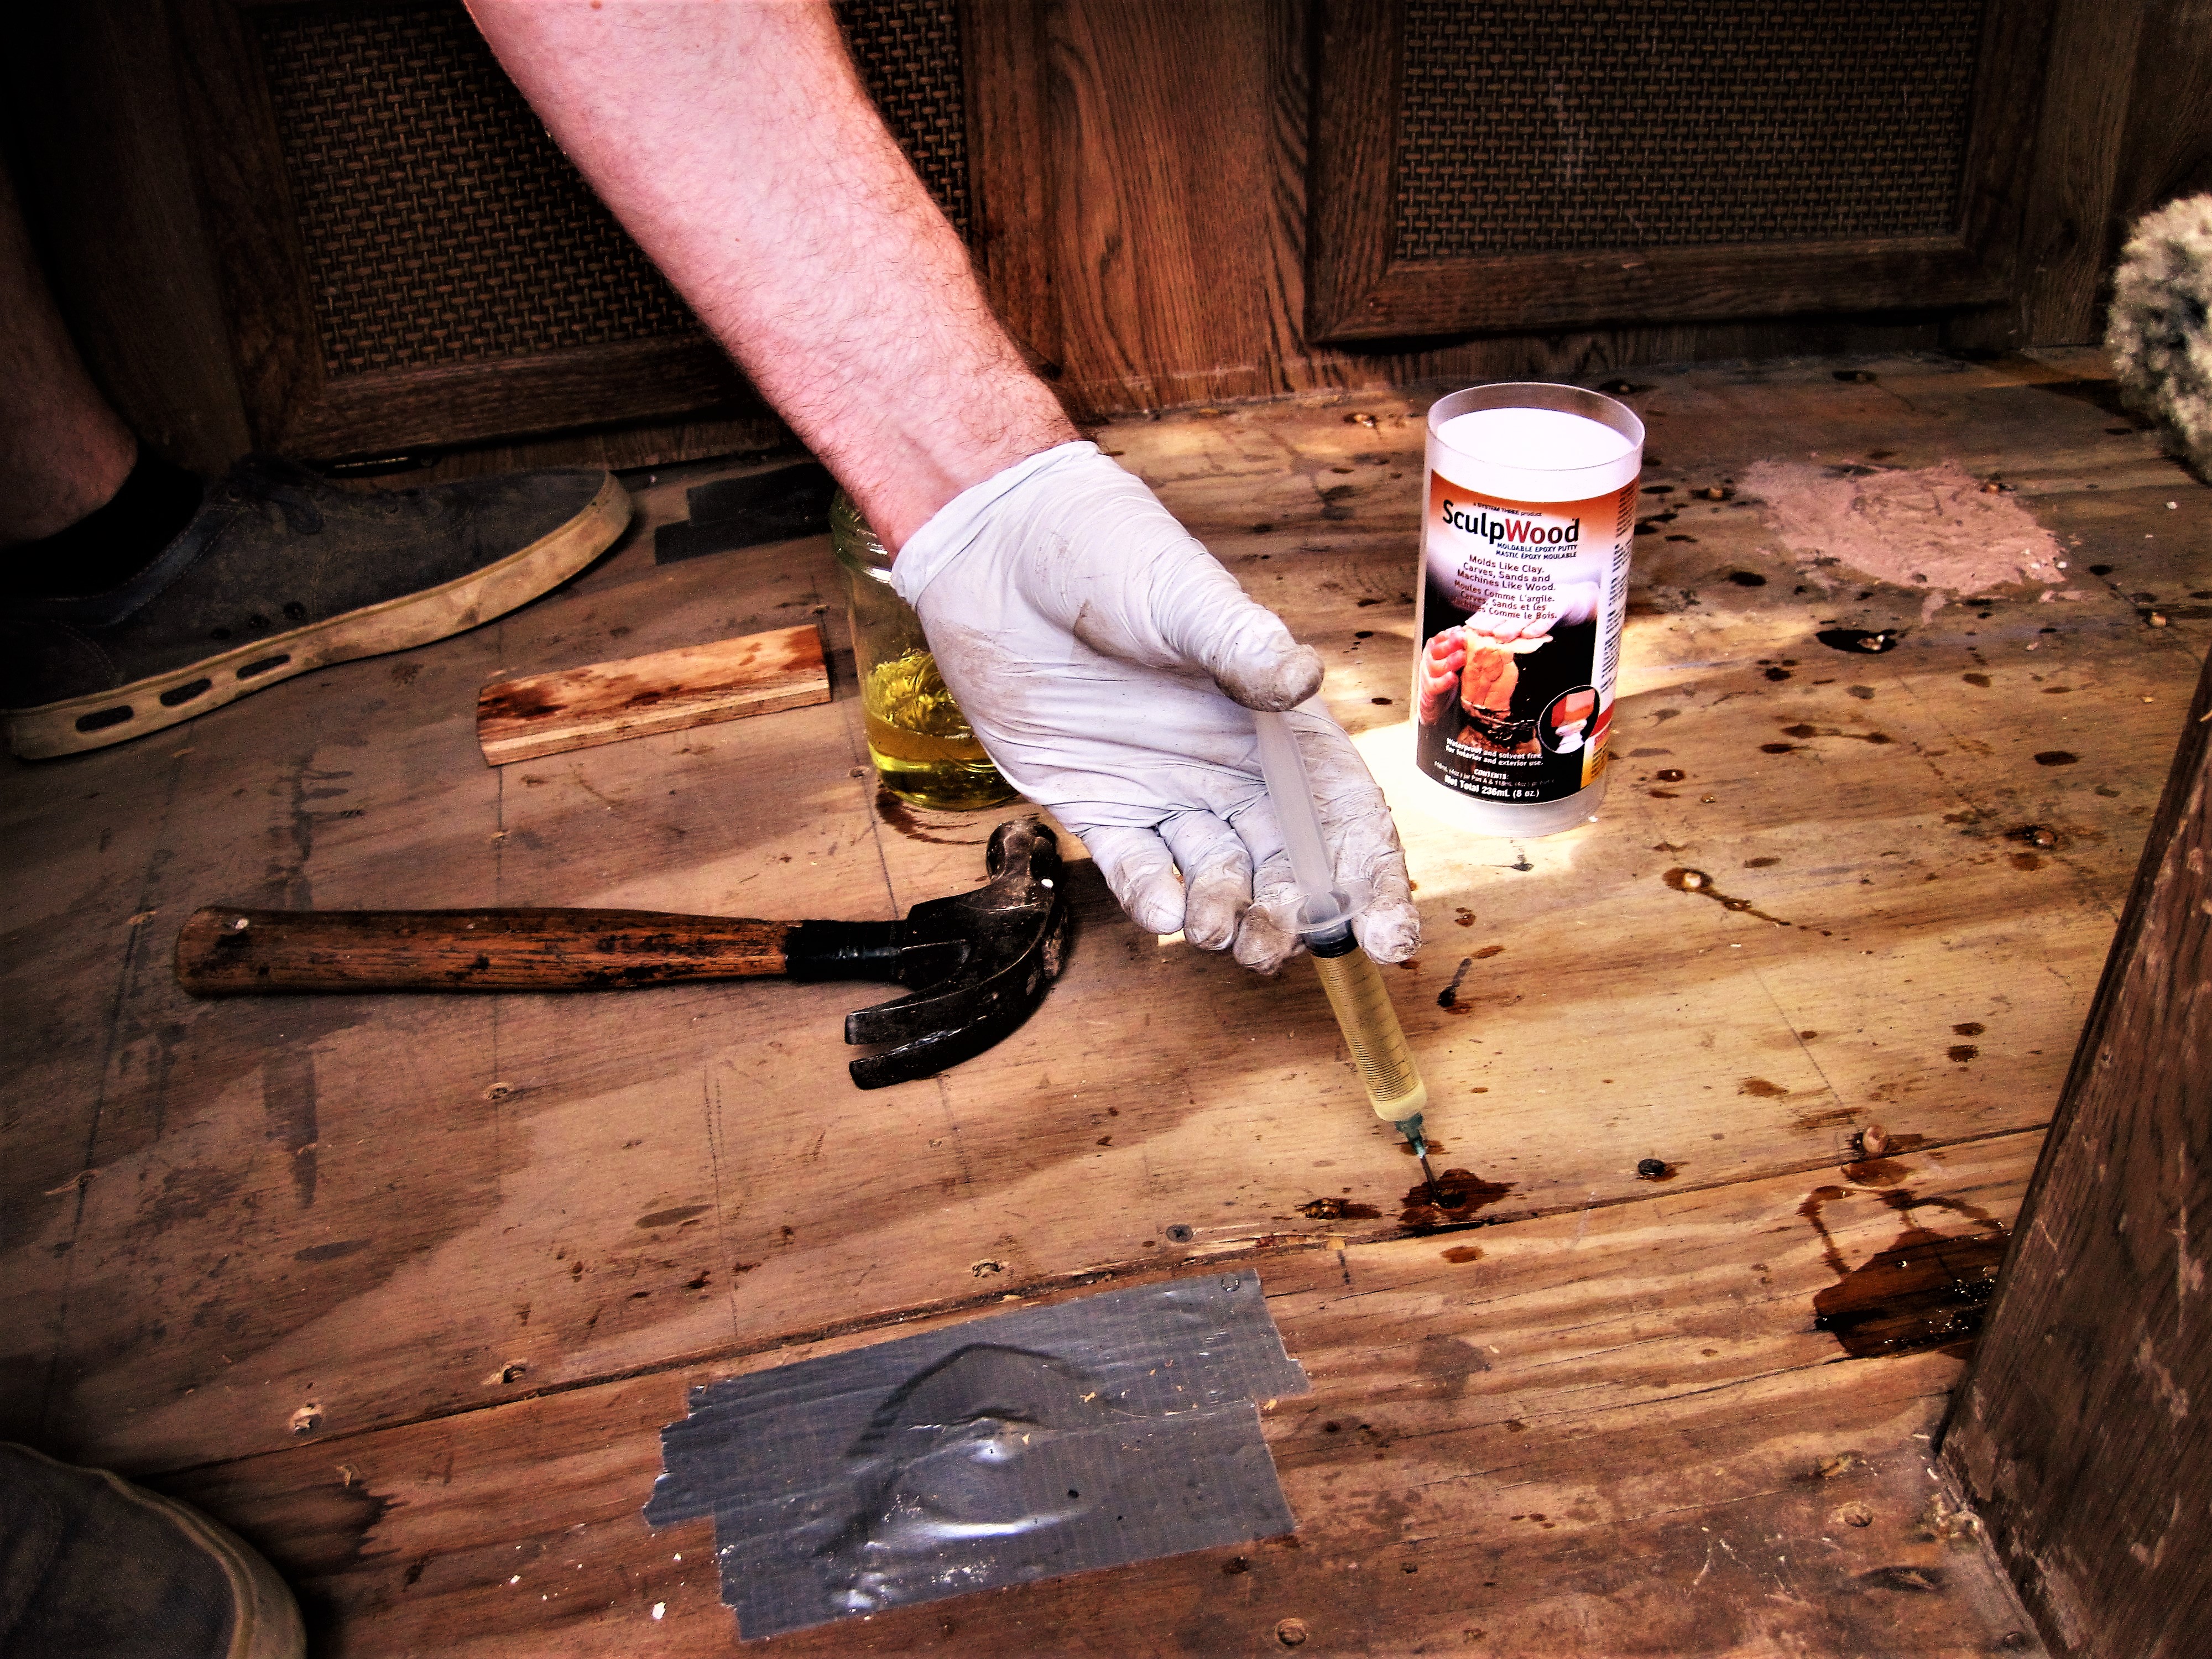
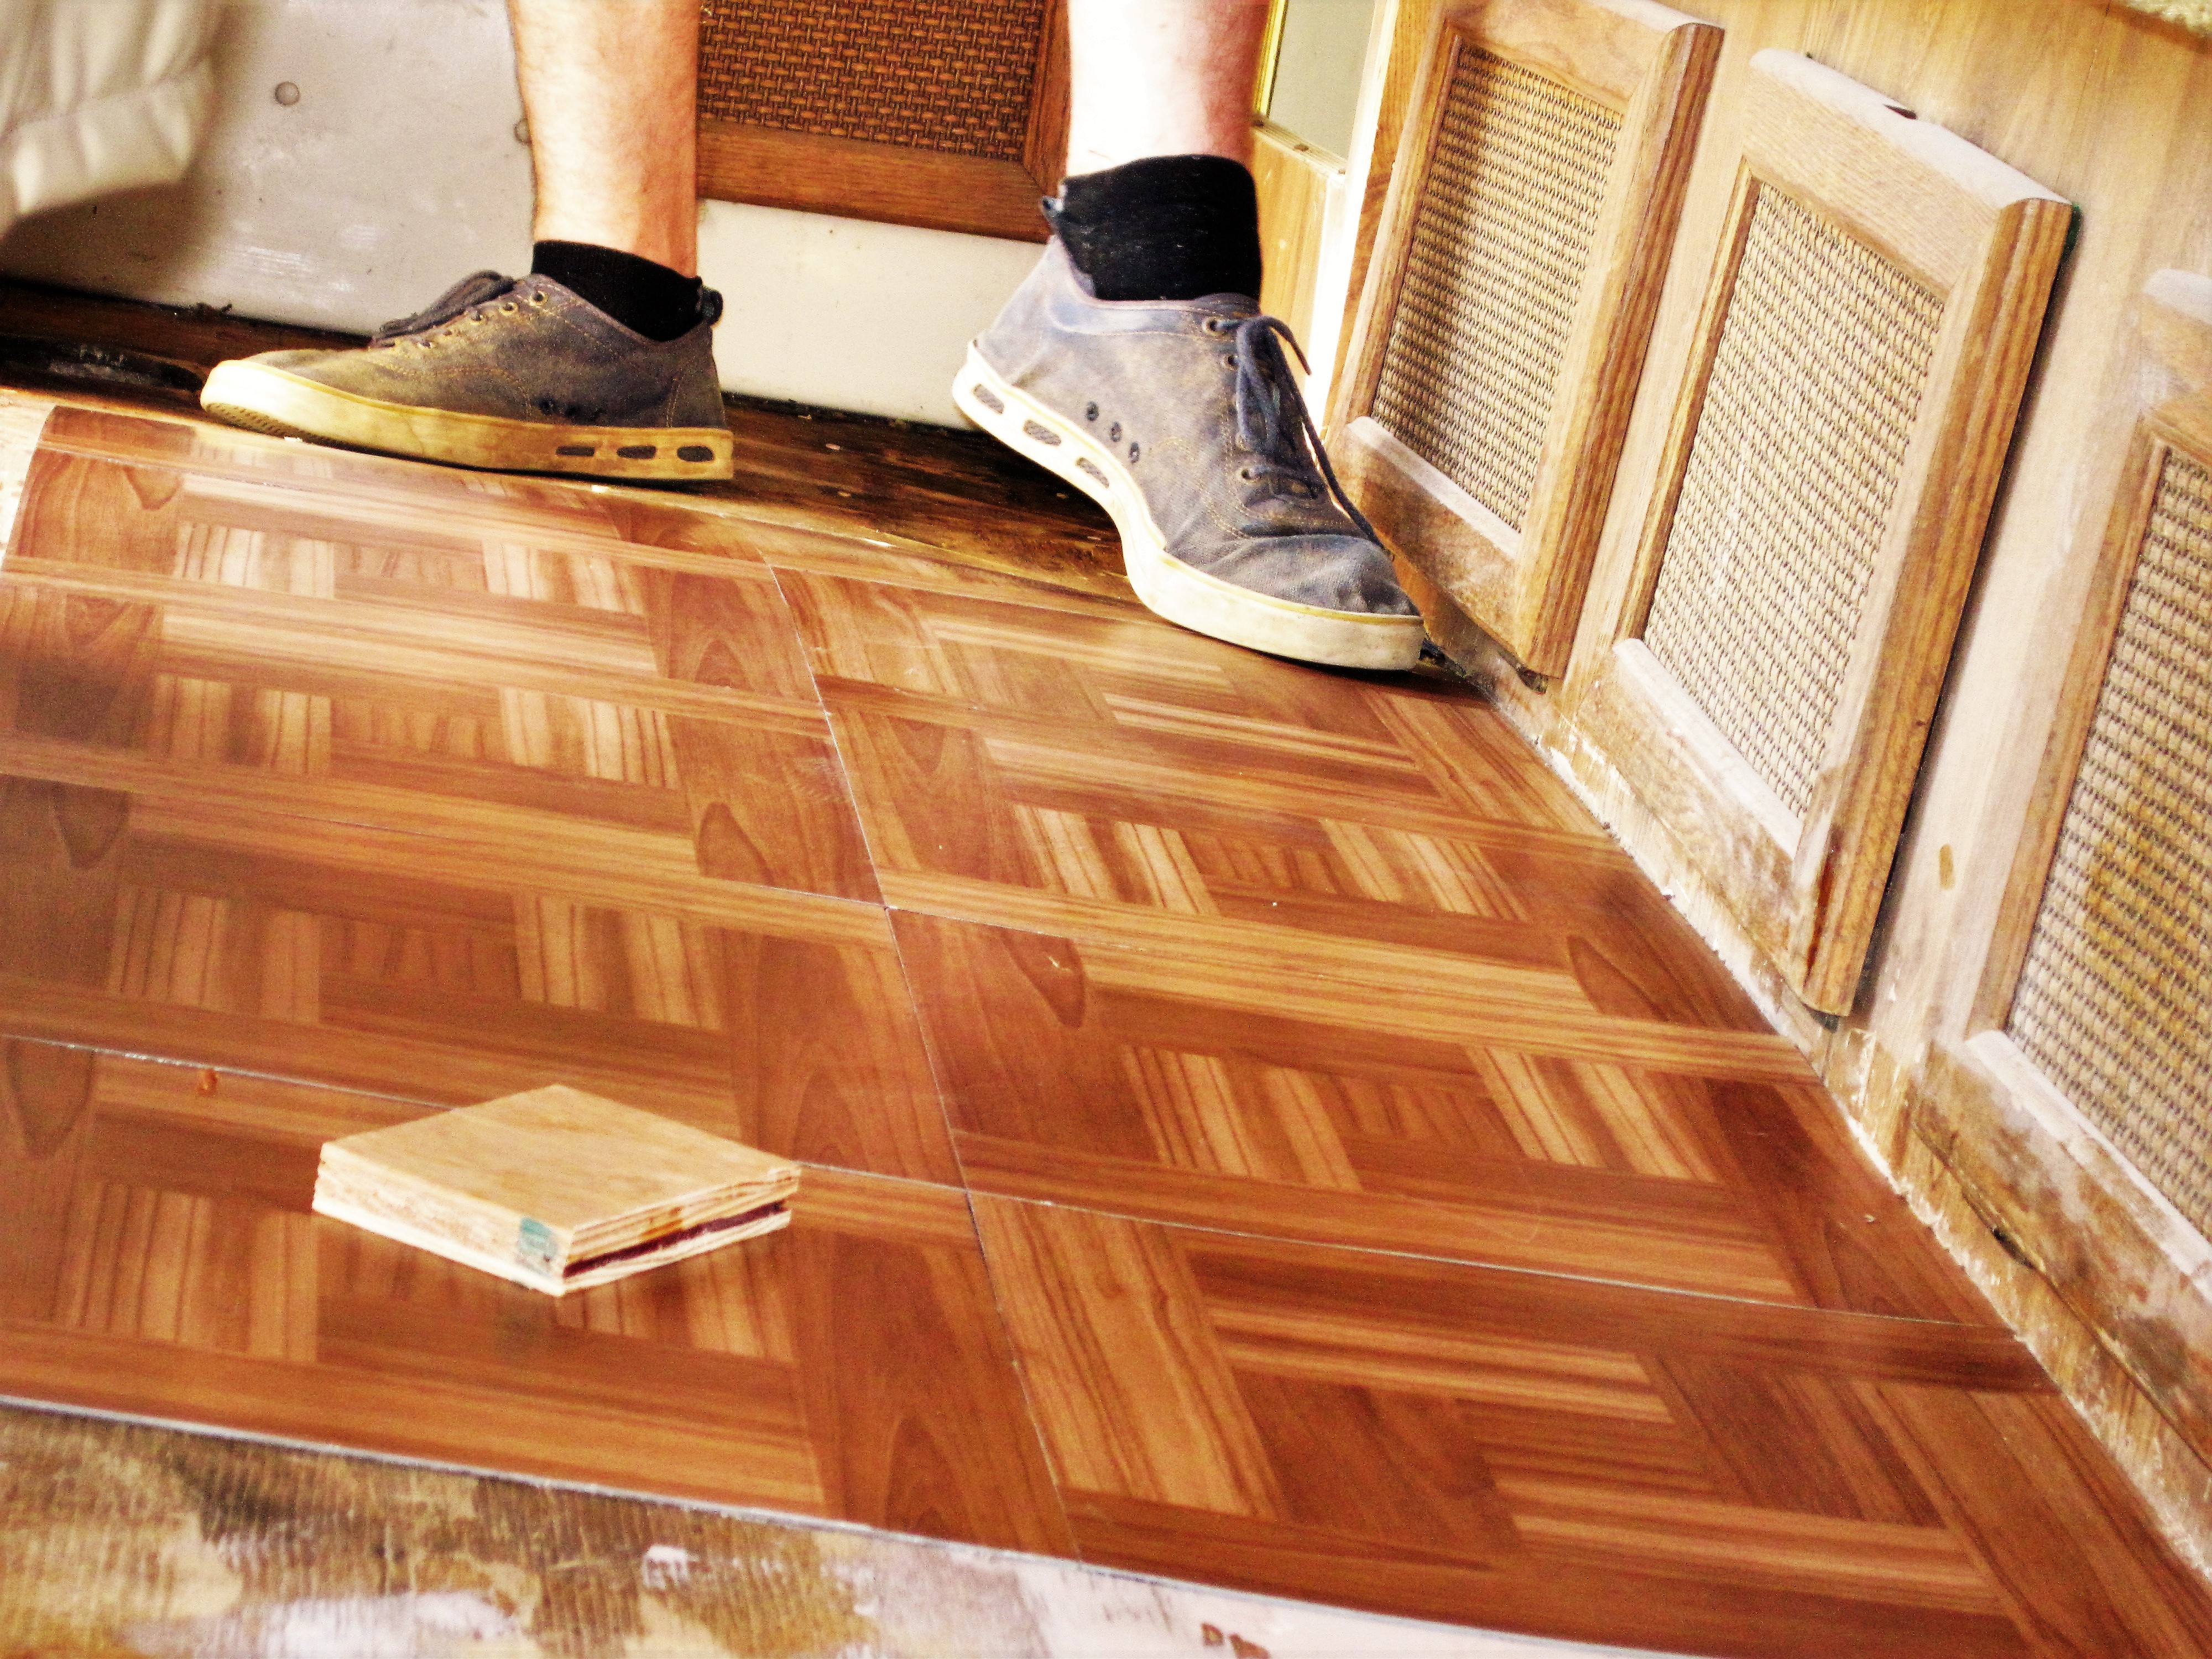
Hi Linda, thanks for the response. Good question. Notice in pic #9 you will see a stop on the drill. It is set to drill only to the bottom of the foam layer. This allows the epoxy to permeate the "sandwich" so that the center, foam area, and gaps are filled with epoxy, which hardens. I filled obvious rotten areas with filler, then epoxy to the entire floor. The holes are on a 6" grid and some took a lot of epoxy and some very little, depending upon the amount of rot. The parquet floor covering are self adhesive vinyl tiles they add no strength to the floor. The epoxy essentially creates a solid surface UNDER the top wood panel in the "floor sandwich". The entire floor is now very solid, including all areas that were soft. The floor is firmer because it has an epoxy filler where there was rot. See video's included in the post. I looked at many options and this one seemed to be the simplest way to solidify the floor and it turned out that it did. Iflyfishwithsolidfooting
-
I have always used my shower as a closet/storage area. I put a cooler in it with a plastic bucket for food and the rest for ice cubes for drinks etc. Just open drain on cooler when you need to replace the ice. Removing the toilet/shower will indeed effect resale. Iflyfishusingcampgroundshowers
-
I went online to find a way to reinforce/repair weak floor in my '87 Sunrader. I ran into this excellent YouTube site where the process is demonstrated. Essentially it involves drilling holes in the existing flooring, injecting an epoxy every 6", pounding dowels into the holes to compress epoxy, then cutting off dowels. This method worked great! https://www.youtube.com/watch?v=R-LIZN-Dtak Day 1 Flooring kit Pro Ebay https://www.youtube.com/watch?v=-HnK2X1EfF8https://www.youtube.com/watch?v=-HnK2X1EfF8 Day 2 https://www.youtube.com/watch?v=UFvx26P6fFs Drilling the floor I am very pleased with the outcome! Iflyfishwithsolidfloors!

-
I found this charging wizard online, mentioned above in a reply to this post. It looks like I will not need to replace the charger to get the power surges I need to prevent sulfur from forming on the battery plates while charging over the winter........what is your experience with this? http://www.progressivedyn.com/prod_details/charge_wizard_9105.html Iflyfishfullycharged
-
Thanks Linda, I ordered a new one for the 030. I found the number on the bracket itself. I will let you know if this works. Thanks Iflyfishwithlightshedfrommytoyotabuddies
-
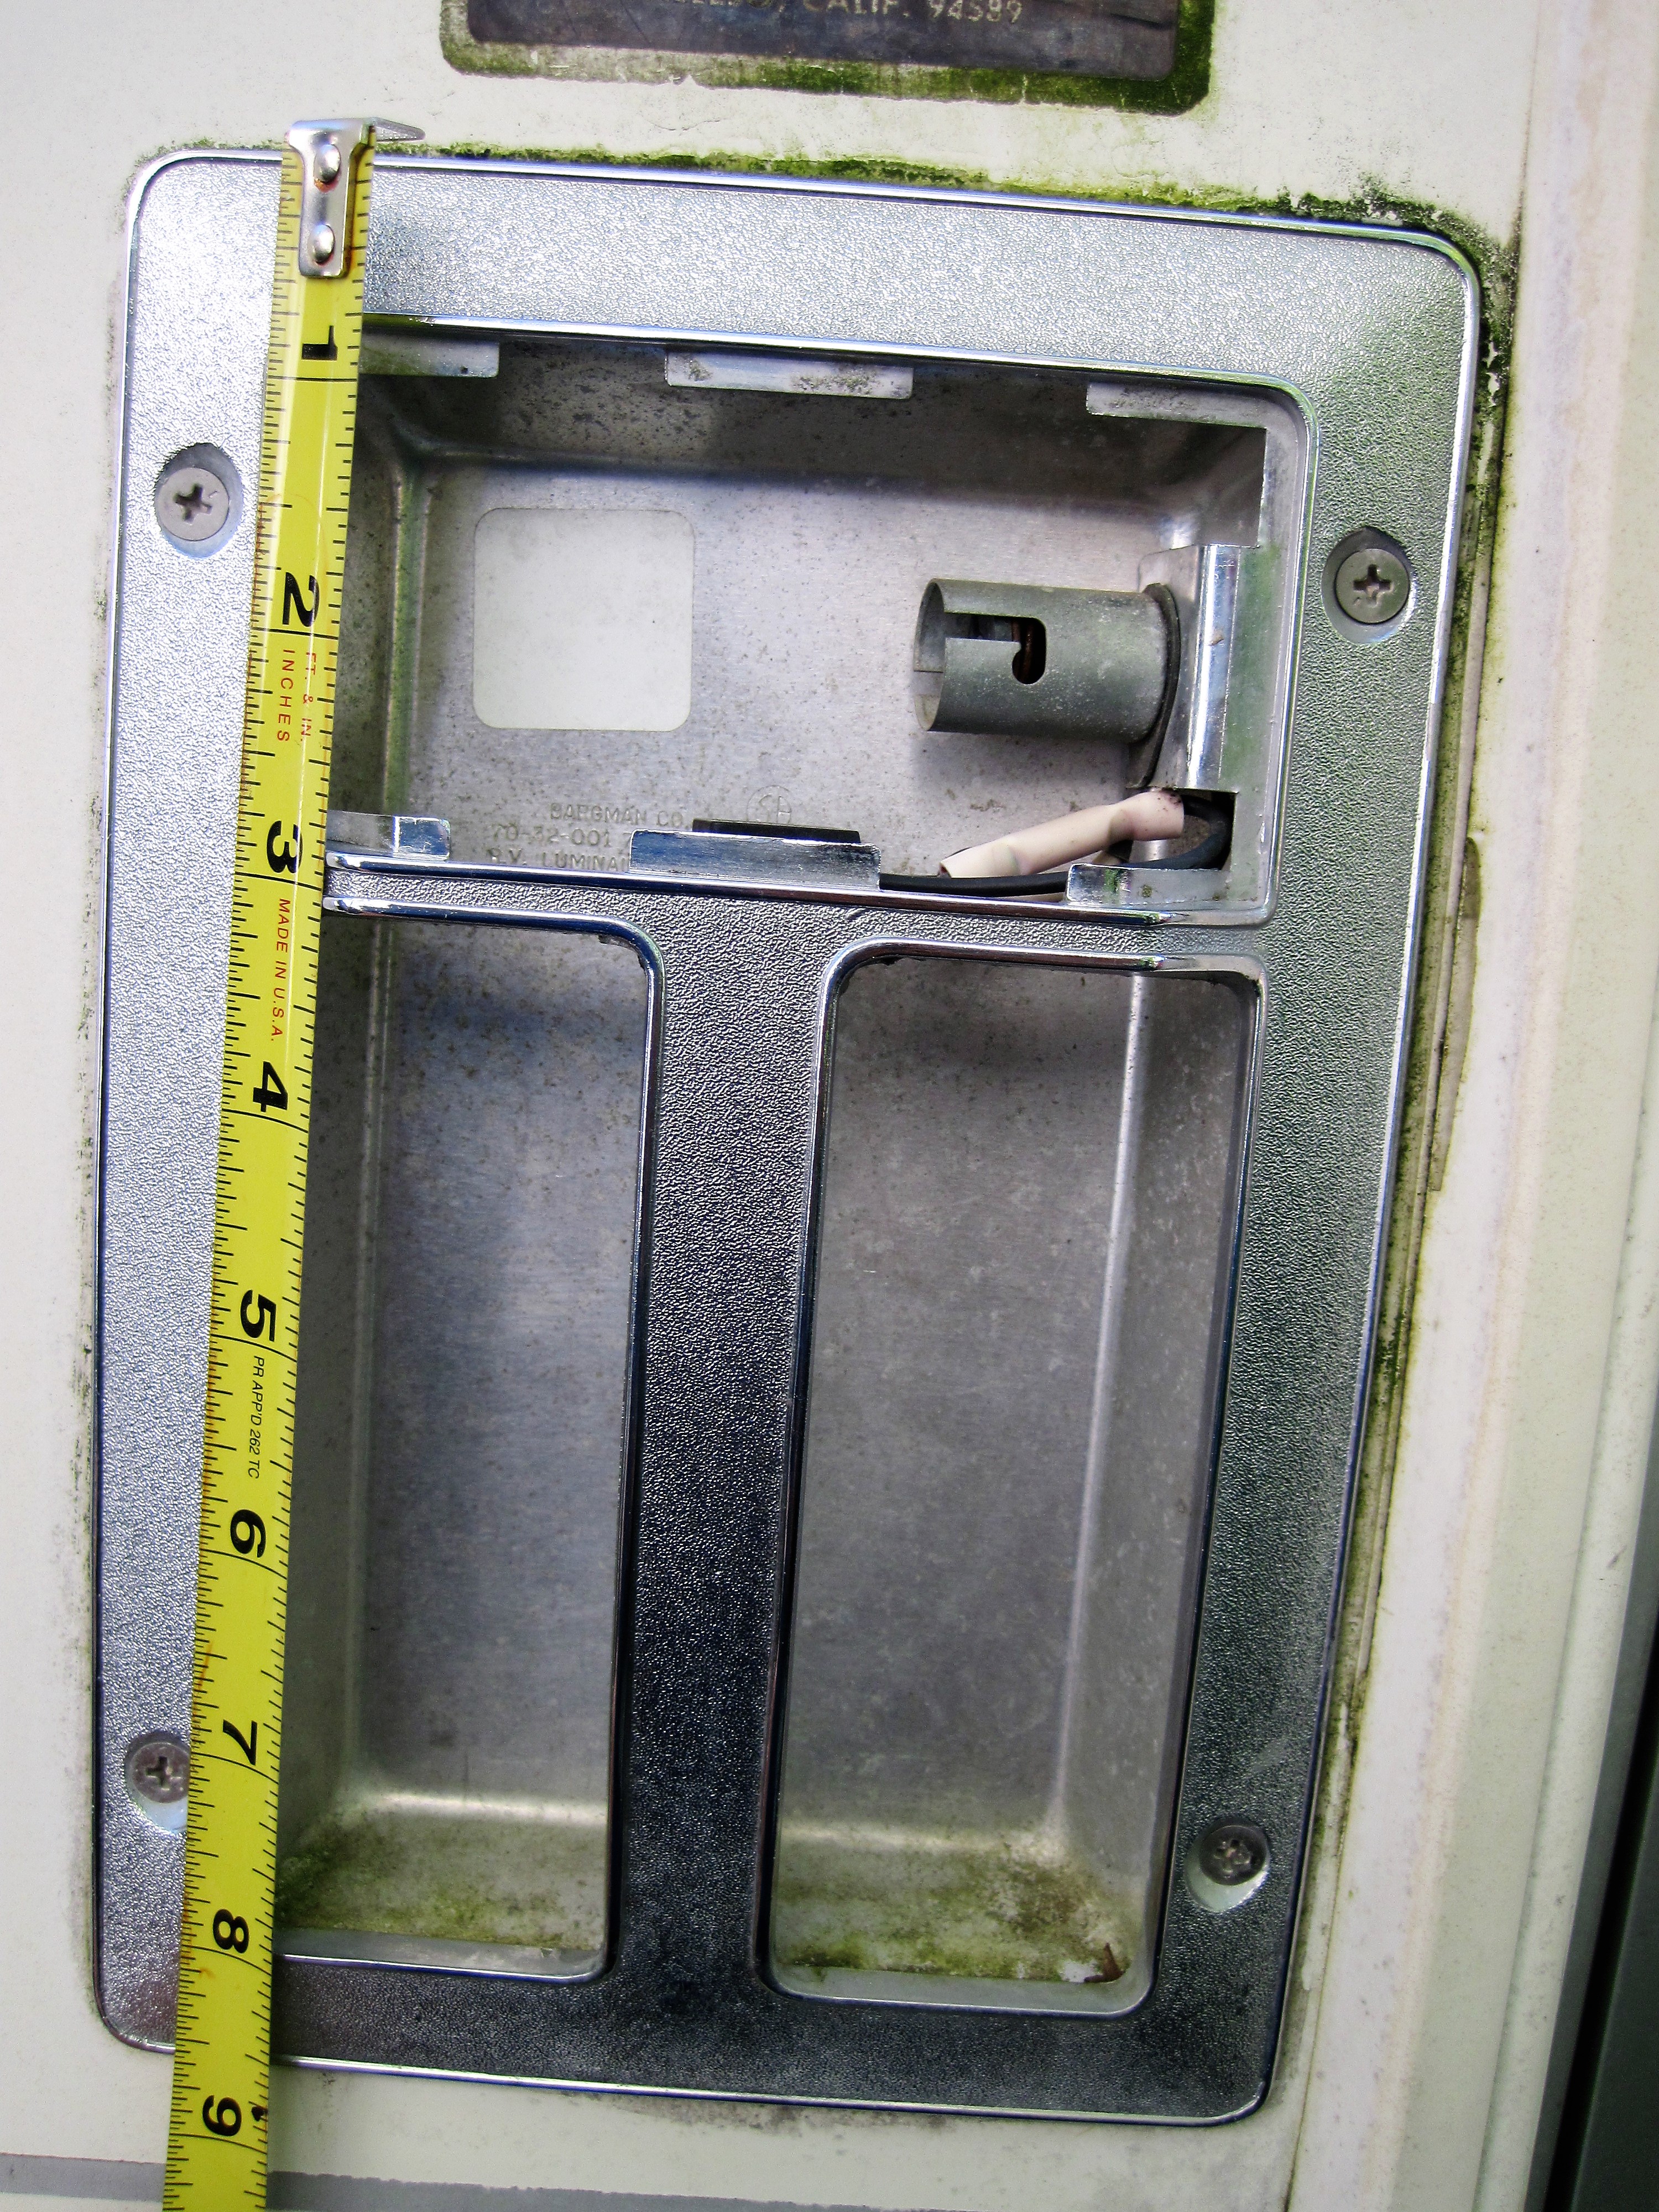
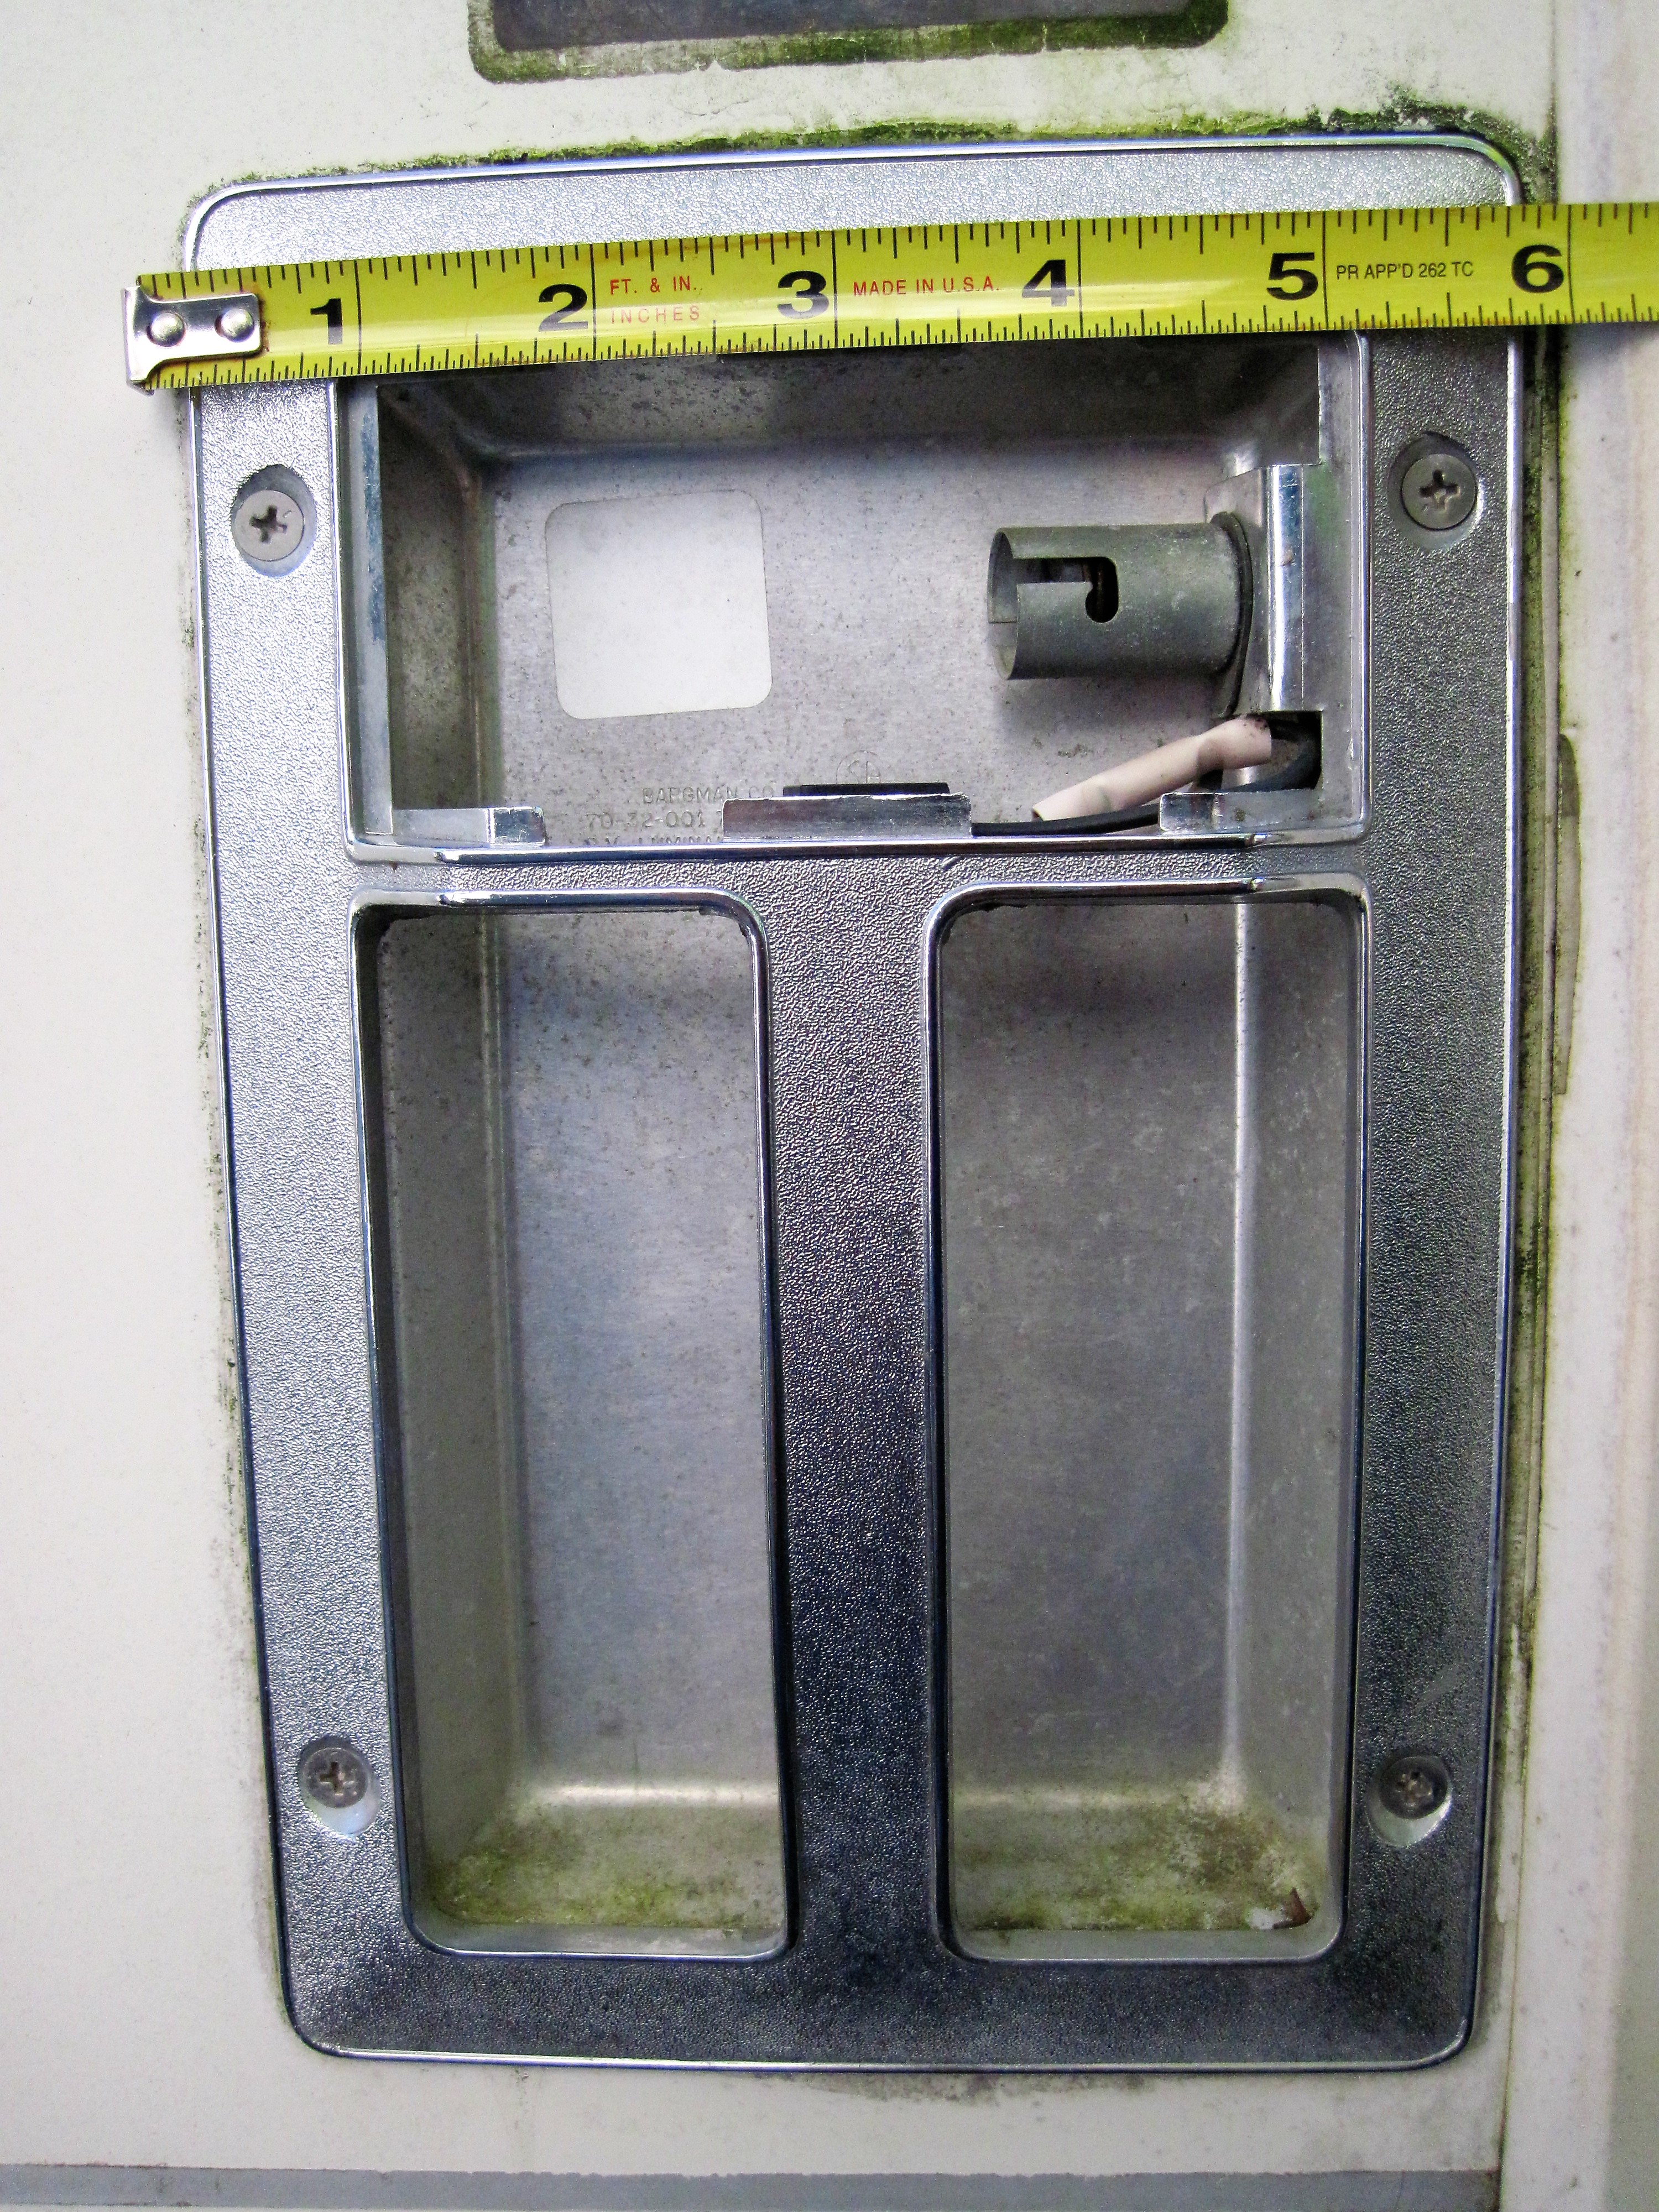
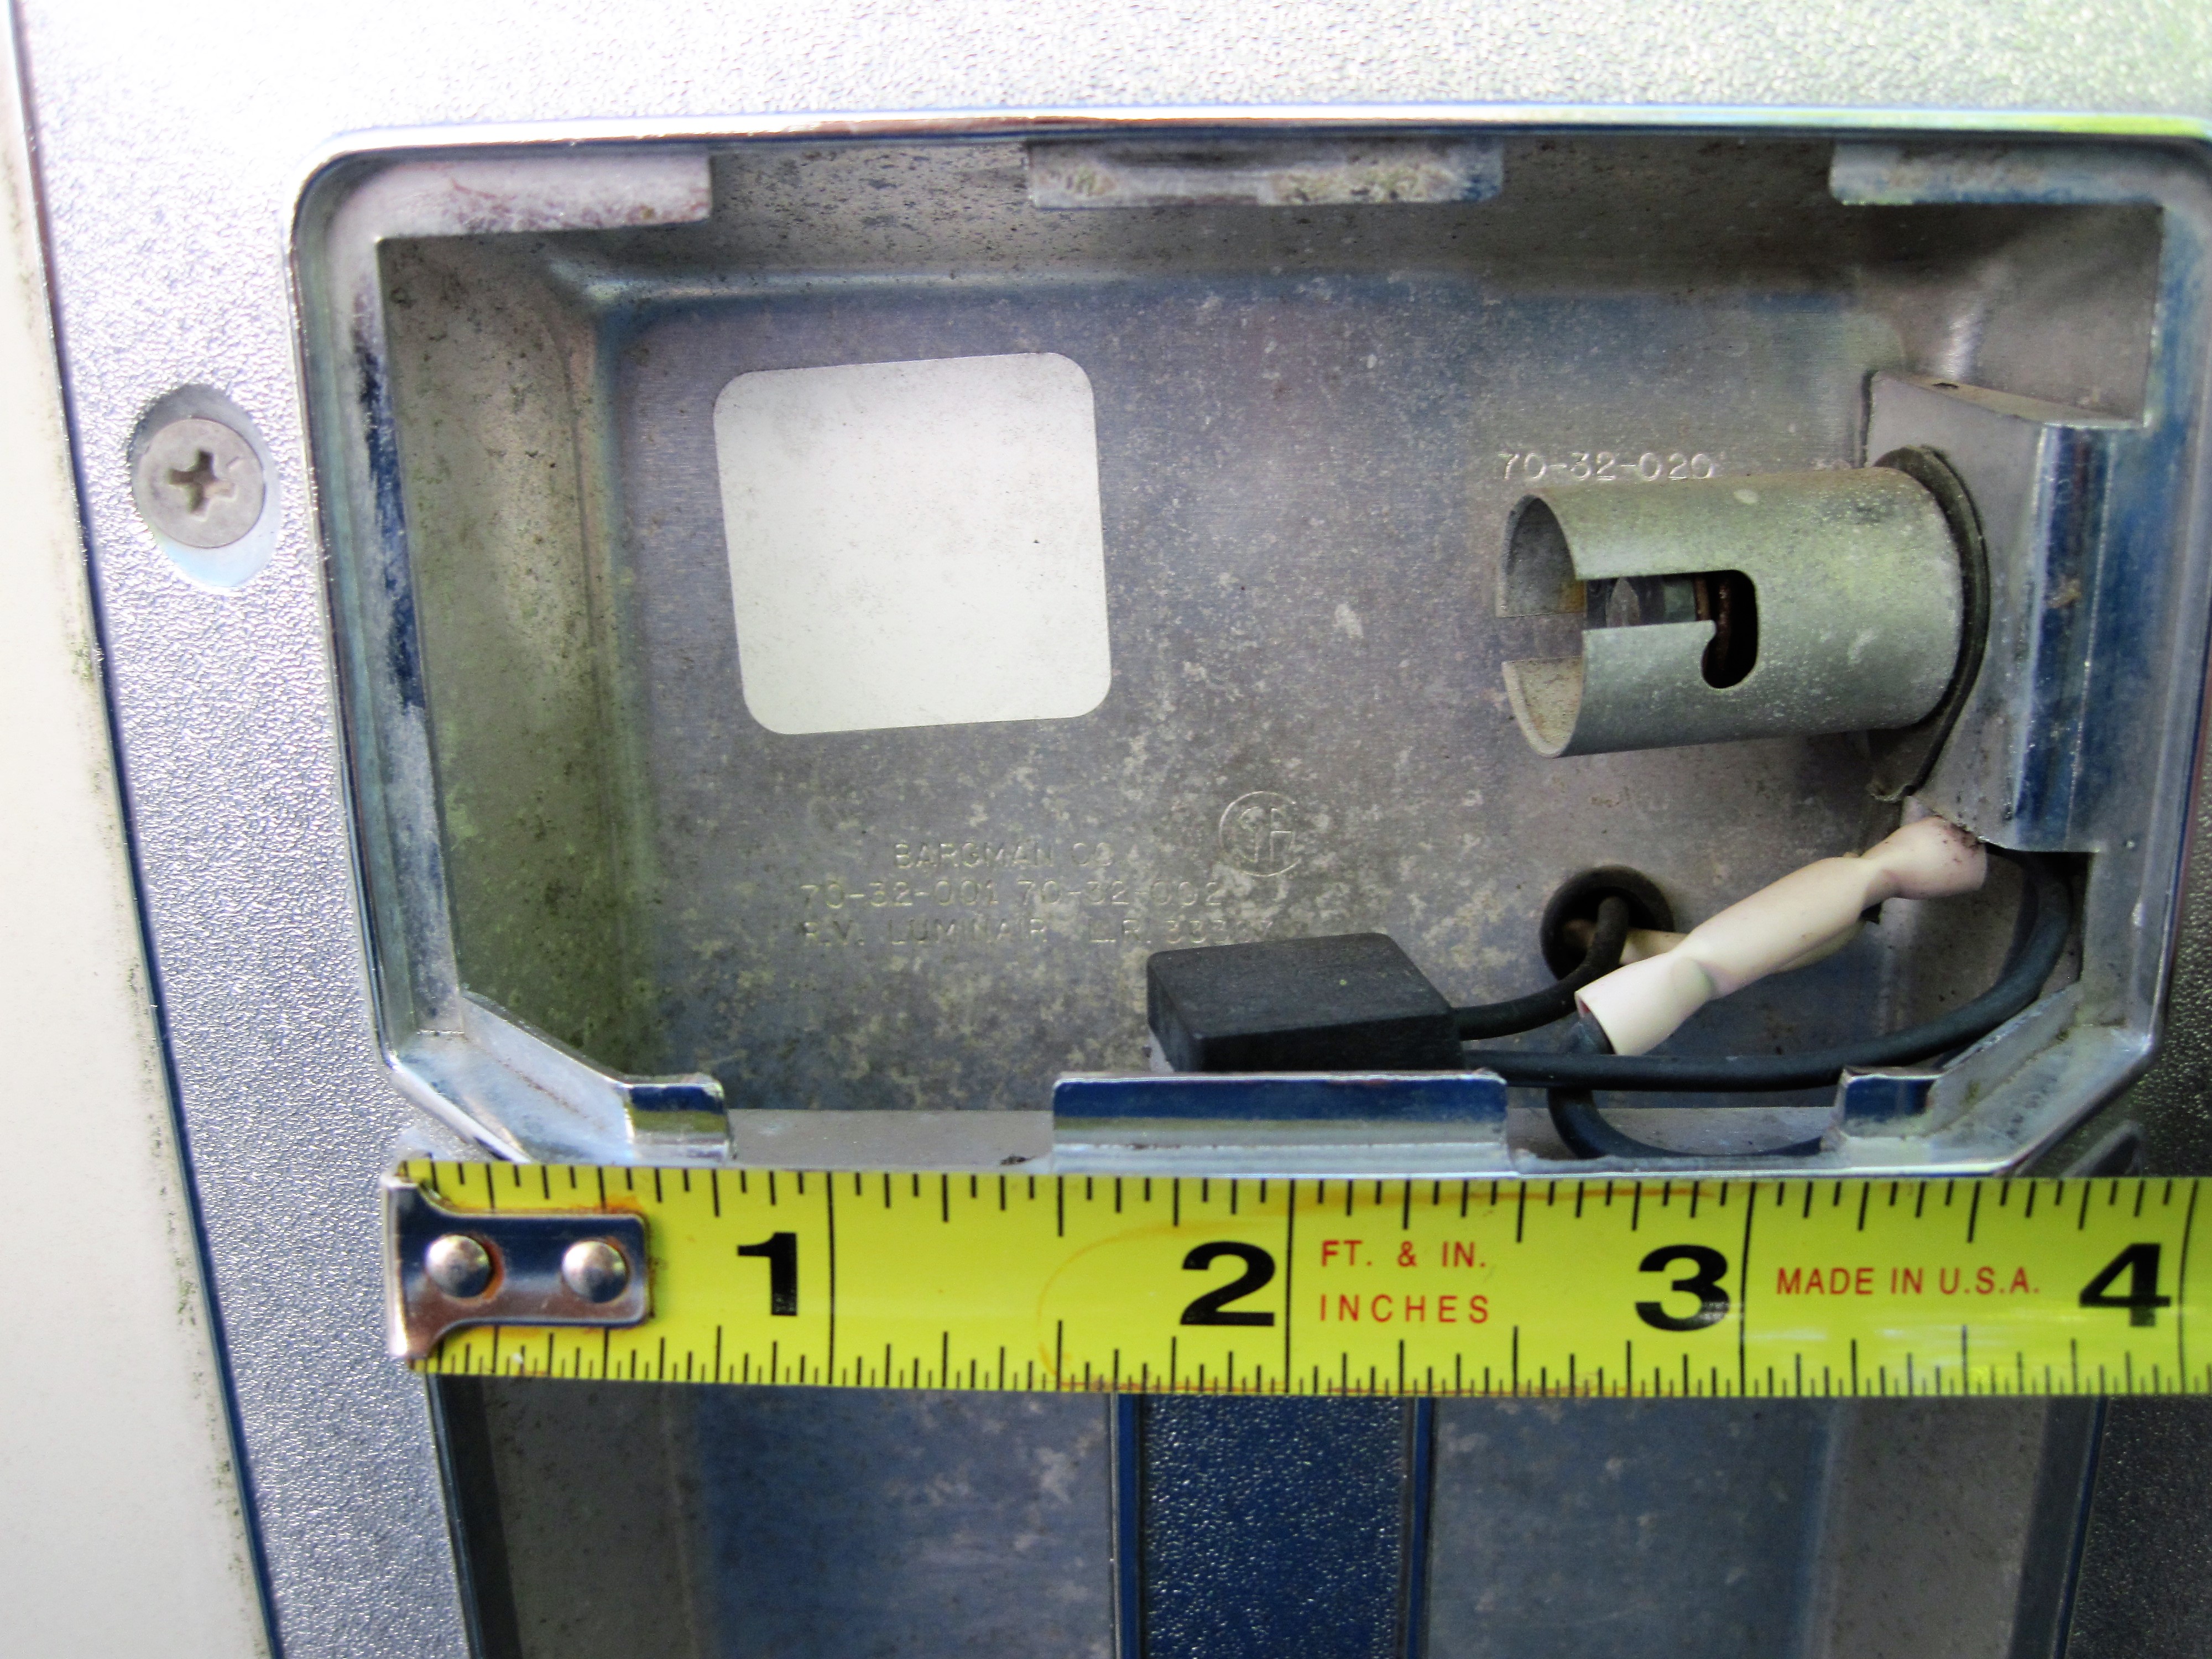
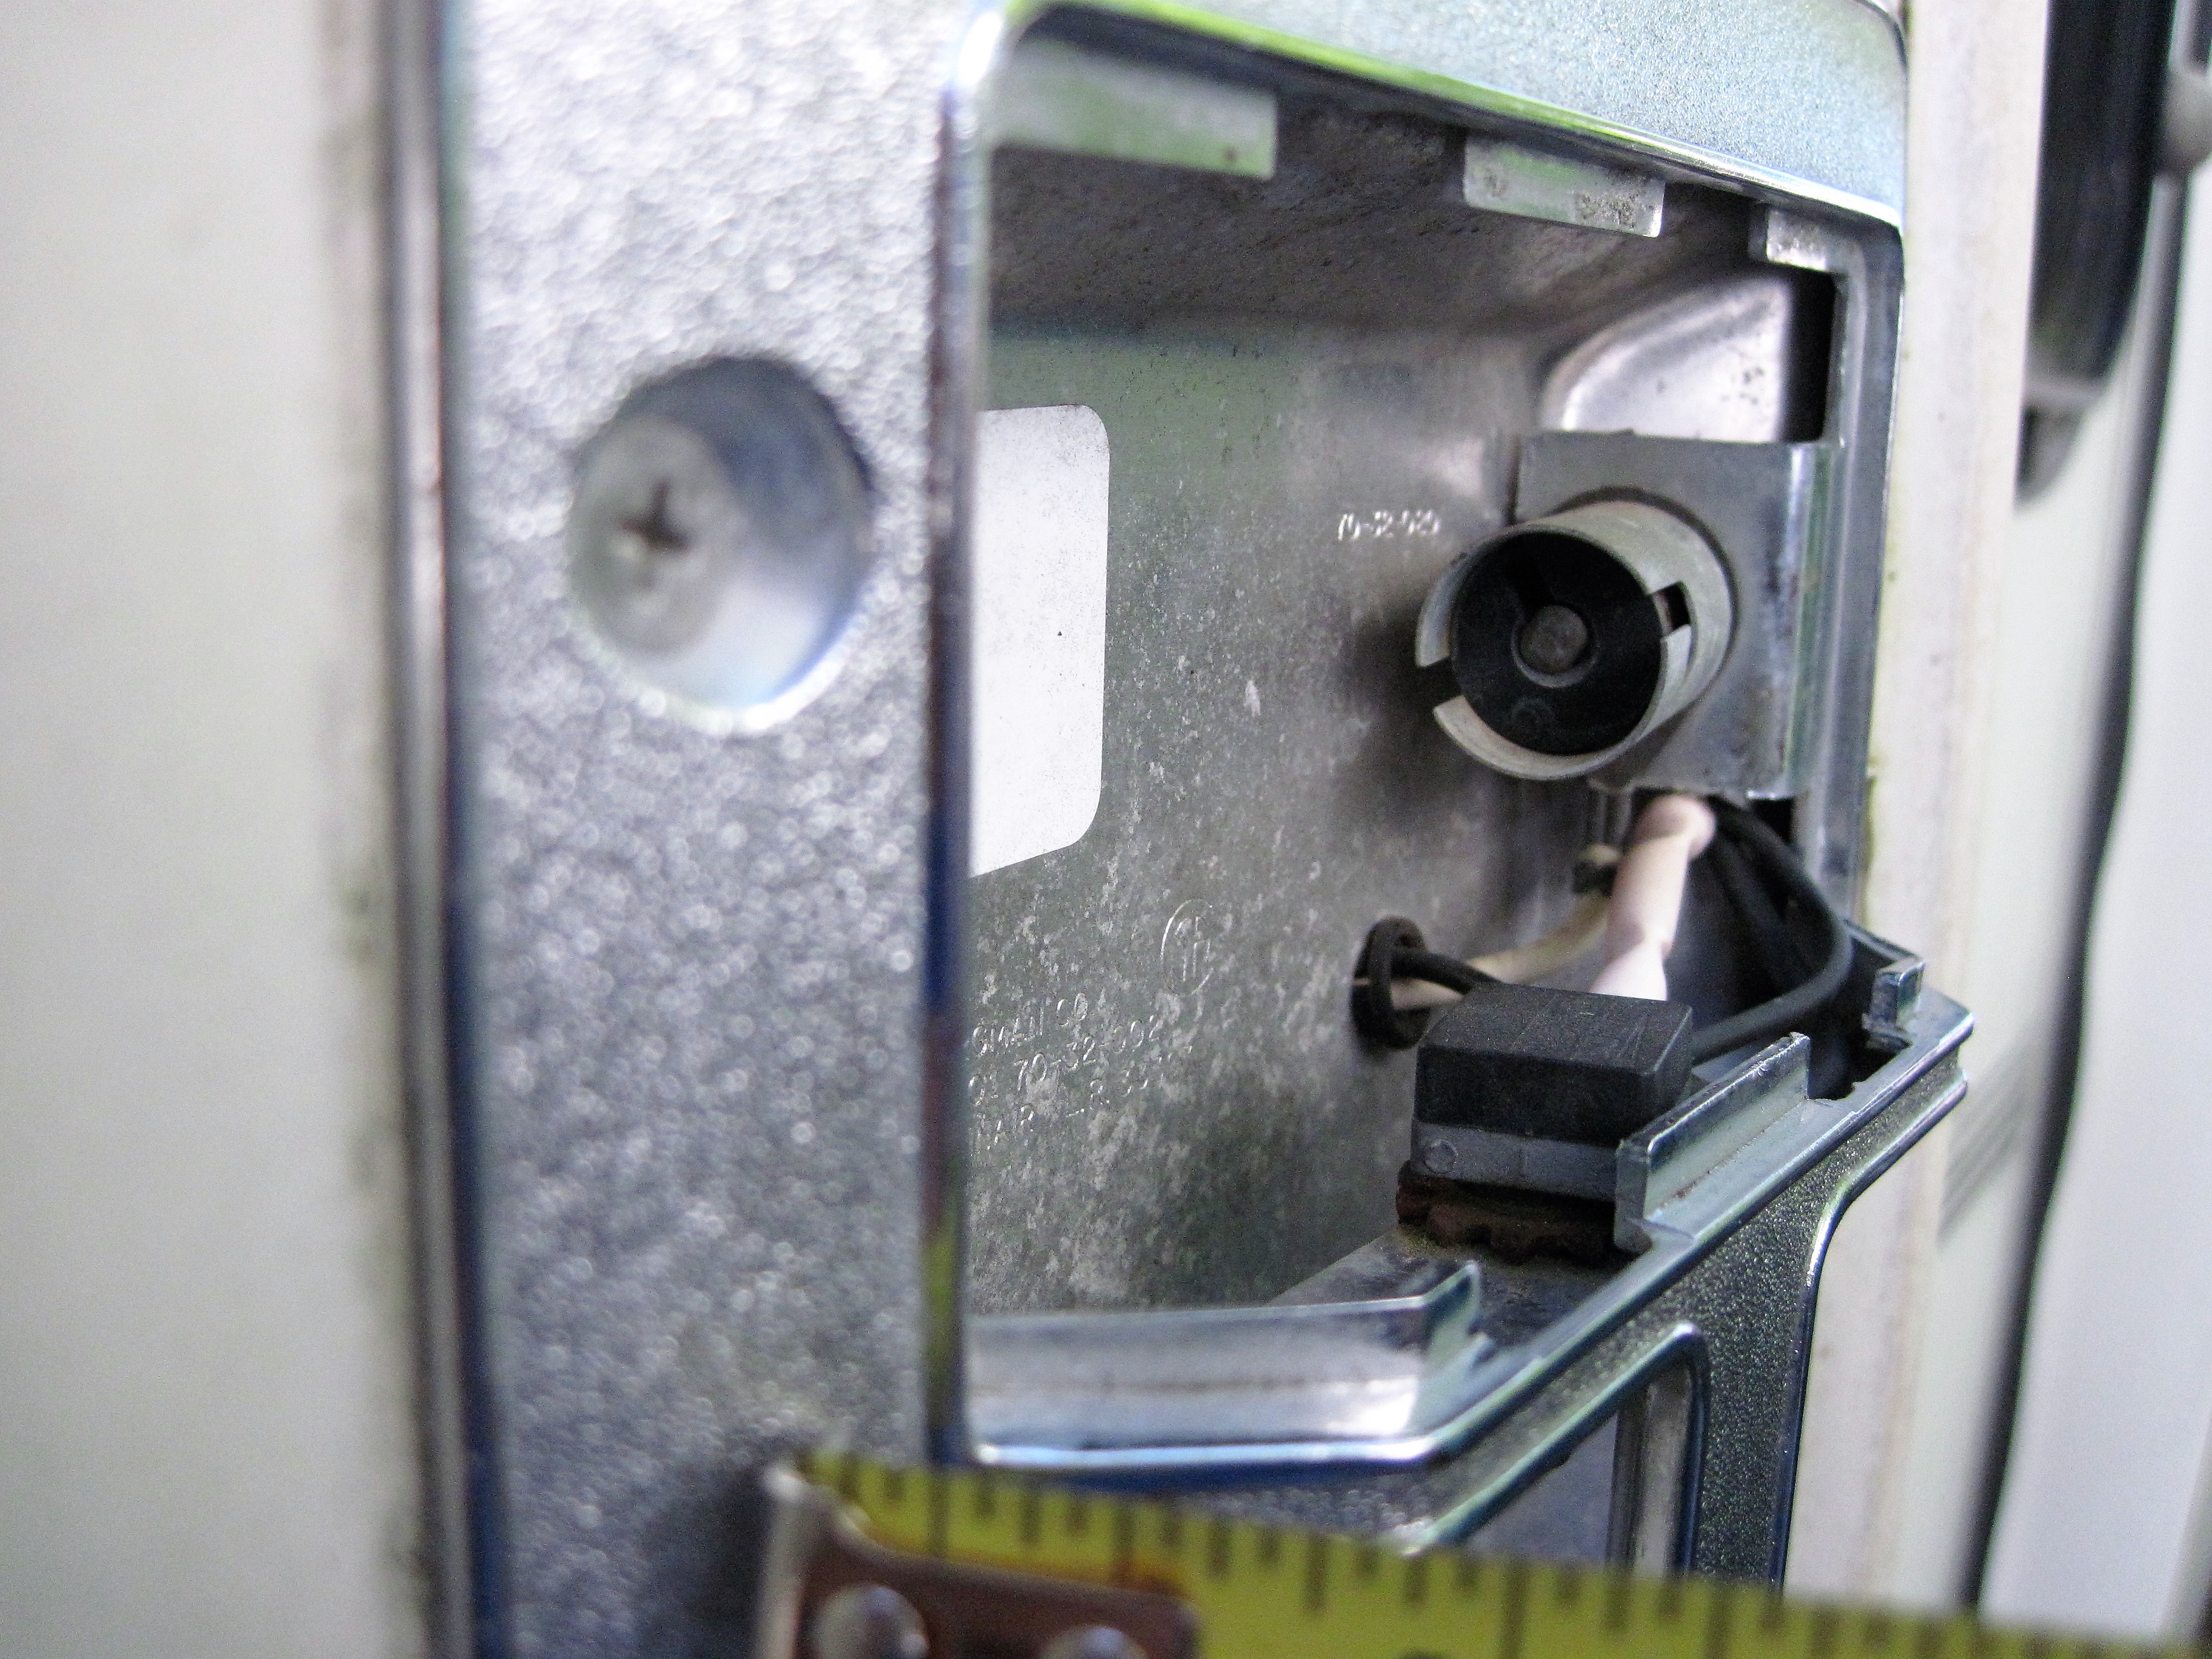
Thanks Bill. The ones I see online are model 030 and the handle on my mh is a 020. I wonder if your model has the lower "lip" like mine in pic #4 above. The 030's I have seen seem flat. Is this the one you got? https://www.amazon.com/74-32-030-Bargman-Assist-Replacement-Lens/dp/B004R35HEA If that works then it is a good deal indeed!!! Thanks, Iflyfishwithagoodhandleonit.
-
Modern Grab Handle
Iflyfish replied to Derek up North's topic in Reviews - New Products - Campgrounds - Links of Interest
Thanks, another lead to explore. I appreciate your taking the time to explore this. Iflyfihswithoutahandle -
Thank you for your help with this. Unfortunately the lens covers you and I both found are the 030 model, not the 020 that is currently on the unit. I may just have to replace the whole thing with a new 030 handle/light. Iflyfishwithoutahandle
-
My '87 Sunrader has a handle to assist in entering the motor home. It has a light bulb in it. I need to get a new cover for it or buy a new fixture. Part # 70-32-020 Any ideas? I also need to replace the rubber holder for the door jam. Click on images to enlarge. Thanks, Iflyfishinthedark
-
'87 Sunrader rear bath model where is water pump?
Iflyfish replied to Iflyfish's topic in Coach ApplianceTech Issues
thanks Iflyfishintotalignoranceattimes -
Ok, ok, I know, pretty lame question but I cannot locate my fresh water pump in my '87 Sunrader. I want to add bypasses for adding antifreeze without contaminating my fresh water tank. Thanks, Iflyfishwithmyhatinmyhandaskingstupidquestion
-
Again, excellent post and I thank you! Iflyfishtoastingmytoyofriends
-
Outstanding!!! Thank you very much! This will save a ton of effort. Well done! Iflyfishwithfreshwaterglassinhand
-
It looks like we will be boondocking in our '87 Sunrader for a while and I am looking to buy a small, portable generator to charge batteries for my cpap etc. Any ideas? What is your experience. Weight is of course a serious consideration. I know that there are lots on the market, I just wanted to check with you guys. Thanks, Iflyfishjuiceless
-
Excellent!! I appreciate your thoughtful response. I am sure this is how my View water system was configured as this is how I used to winterize. I will follow up with your great idea! Thank you. Iflyfishintaintedfreshwater
-
Thank you! I will be doing this and then upgrade water system as outlined below. It is RV anti-freeze in the fresh water tank. Great input! Iflyfishwithcleanwatertank
-
My '87 Sunrader has anti-freeze in the fresh water tank. I used to winterize my Winnebago View by putting anti-freeze directly in the system via the water pump, bypassing the fresh water holding tank. Two questions. 1. How do I clean the tank/system of anti-freeze, the color is nice for a cocktail with an umbrella in it but I'll pass on it. 2. How do I add anti-freeze to my 87 Sunrader water system without putting it in the fresh water tank. Thanks, Iflyfishwithanti-freezecocktailinhand
-
At $50 it's a bargain, just what I was looking for. Thank you and all those who posted on this topic. Iflyfishwhenchargingonmycreditcard
-
Thanks for checking in......I have not done the swap out, my jury is still out. This install looks great. Did you do the swap our? How difficult was it....I have been told "Careful Iflyfish you could hurt yourself with a wheelbarrow". It was my older brother Journeyman Machinist and Journeyman Mechanic. Does this pulse 14 amps like the Intelicharger? One of my goals is to prevent batteries sulfating over the winter. Thanks again for your response. Iflyfishpluggedinto30amp
-
In my 1987 Toyota Sunrader chassis and coach batteries are separate. I plug in the coach and the coach battery charges but the chassis battery does not. This raises a couple of questions. 1. Can I install something that will allow the chassis battery to charge when I have the coach plugged in? 2. Does that alternator charge the coach battery as it charges the chassis battery? I know in my 06 View it did Thanks, Igetachargeoutofflyfishing


.JPG.e2e03306c5bcde88cc01bf39e82c30a3.JPG)
_-_Copy.JPG.a8c1dd56095fc776e9096d82c775a4cd.JPG)
_-_Copy.JPG.b5ee91af673f62b9ba8cb8549d6a63f8.JPG)
_-_Copy.JPG.5058e6511aaca5580eb4541b5d1092c4.JPG)
_-_Copy.JPG.1e27585f5896b0bb1bbd0d7364767523.JPG)