Mrlope
-
Posts
20 -
Joined
-
Last visited
Content Type
Events
Profiles
Forums
Gallery
Everything posted by Mrlope
-
Dealing with a bit of rot in the cabover bunk base.
Mrlope replied to LittleShack's topic in General Discussion
I had the same looking bubbling of the wallpaper all over my bunk area ('91 Warrior). The problem is a lack of support under the bed, so I installed a steel plate that ran the length of the bed underneath and attached it with some steel supports to the body of the truck. Ended up stripping it down to the luan layer and replacing everything that was rotten, and fixed the seams on the outside where the water got in. Sorry to tell you that you have a good sized project ahead of you, but it seems to be a very common problem among us warriors. Here is a thread about the rebuild: Good luck! -
Now that I'm FINALLY done painting this thing, I'd like to show it off a little and give a huge shoutout to my favorite front-yard fabricator @1toyhero for hooking it up big time with the design and fabrication of the coolest addition to the ole Yoterhome, the pièce de résistance. Hit him up on Instagram if you're ever in need of some fab work done in the Phoenix area: https://www.instagram.com/1toyhero/ First off, we had to decide whether to remove the old, crusty 4x4 tube bumper or weld onto it, and I'm glad we decided to cut er off, knowing that I'd have to find a different solution for the poopoo hose storage. We fabricated the basket by welding it all up beforehand with thick steel that we had laying around that was way overkill, but at least I know that I'll win if people/ trees try to tailgate too close. While I was still trying to dust off my trigonometry and figure out the necessary angles, Kyle was already cutting, and I trusted his eyeball more than I trusted my math, so I let him do his thang. The new 2x4 base tube was welded directly onto the frame right in place of the old bumper, and there was plenty of surface area to hold whatever I need to put on there, which is mainly my (2) 6-Volt golf cart batteries and 2000W WEN Generator, totaling about 100 lbs. The ladder was welded directly to the 2x4, and bent to match the sexy curves of my old lady's behind: Once it was all welded up, I basically left for Farmington the next day without ever getting a chance to put any paint down, so I had a tad bit o' rust to deal with by the time I got around to painting the naked steel. After enough vinegar to almost make me not like pickles anymore, and hours of scrubbing and scraping with steel wool and a wire brush, I laid down 3 coats of Rustoleum Automotive Primer. Then I took 800 grit sandpaper to it for a nice, smooth finish to paint over: For the color, I wanted something that stood out, so I went with Rustoleum Metallic Oil Rubbed Bronze, and applied around four coats or so. It's basically a satin black with some bronze flake in it that only really shows in the sun, and I'm real happy with how it turned out. After the paint was dry, I applied a couple layers of spray-on protective clear coat, and that made all the difference. I like how it hardened and added a glossy finish. All in all, I'm extremely happy with how this project turned out, and have already put it to use by mounting a new pootube holder, and it bolted right up easy peasy:
-
Suburban DD17dsi Furnace Issues
Mrlope replied to DanAatTheCape's topic in Coach ApplianceTech Issues
This is EXACTLY what my furnace does. Heats up once or twice, then wake up early in the morning just to find it blowing cold air. So I'll go ahead and look at replacing the circuit board, thanks Maineah! -
I'm ashamed to say that it was at this point in my life where I actually considered giving up on the old Yoterhome. This is my second attempt at a fix to the issue of a saggy roof around the RV air conditioner, and thankfully, she's still salvageable. The water pooled so high in this spot that it actually went over the a/c gasket, into the coach, and onto my lovely carpet. The first time this happened, I went with the easy fix, and inserted some small slats of 1/8" plywood into the roof layers to raise the lip onto which the a/c sits, and replaced the gasket, in the hope that this will at least get the seal out of the water: Credit to this poster on toytoamotorhome.org: http://toyotamotorhome.org/forums/index.php?/topic/3693-my-fix-for-leaking-roof-around-ac/ Since it doesn't rain much in Phoenix, it took another six months or so to realize that this fix was not going to suffice, and I was once again left with soggy carpet after an especially monsoony season. So, I went on the hunt for another solution short of ripping the entire roof off and replacing the sagging support beams. My roof seems to be in fairly decent shape otherwise, so I didn't feel the need to go all in. Cue this fix found on IRV2.com: http://www.irv2.com/forums/f50/sagging-roof-fix-165695.html Using a variation of this method, I went and bought two 7' pieces of 3"x3" angle iron to use as support beams across the roof. Here's the distance I was attempting to make up: I placed the two angle irons where I wanted them to the front and rear of the a/c, then I drilled five holes in each of the supports and the roof to accommodate 1/4" bolts and fender washers. I cut some 3/4"x5" white oak for the inside ceiling, measured to go from cabinet to cabinet. Then I measured the center of those boards, and drilled the 5/8" hole there for the center bolt. Once the center bolt was bolted and holding the support in place, I went back up to the roof to drill the remaining 4 holes through each of the boards. I also used a floor jack to get the roof into approximately it's final position so that the holes were drilled accurately: Then, after test fitting everything, I removed the angle iron supports and gave them a good coat of paint and primer. I also took down the oak supports, hit them with a 1/4" round bevel, and gave them a coat of Danish oil (Golden Oak). After all was said and done, I'm very pleased with the results. I watched the angle iron as the jack was removed, and it looks like it didn't bend more than an 1/8 of an inch. When looking at the inside supports, it actually has a domed appearance now as opposed to an a/c hammock! Then of course I cut the remainder of the bolts, knowing that if those nuts were to ever come off, the ends of those bolts would disappear up into the roof. Another important step to consider is sealing the holes that are drilled through the roof. To accomplish this, I surrounded each of the holes with butyl tape: For more info on this project and others, please see my blog here: http://lopedog.com/ Thanks for looking!
-
I'm curious, based on people's experience, what kind of expectation should I have for running my Winnie in 105-degrees plus weather? 45mph with AC? 65mph with no AC? 35mph up hills with AC? I'm trying to decide if my expectations are too high for a 25-year old home on a little truck. Thanks for all the help, this truly is a great forum.
-
Thanks for the replies. I'll buy an OEM thermostat now, just because I'd hate for that to be the problem after dumping $1000 into the cooling system. I'll start there with a proper flush, and report back. I have a feeling that it's not the radiator because I had the same problem with the OEM radiator. Also, it may be entirely possible that I can only do 45MPH on the highway and 35MPH on hills in the summer heat here, but I'm not willing to accept that quite yet.
-
Hi all, so I have a V6 3.0 '90 Winnebago Warrior, and it looks like many of the overheating threads on this forum are dealing with the same rig, I wonder if that's just a coincidence? Anyways, I live in Phoenix, where cooling systems are tested to the max in the summertime. My system runs fine in the heat putting around town without the AC on, it's only when I reach 55 - 60 on the highway, or turn on the AC, that my rig starts sitting right on the redline. This is preventing me from leaving the valley of fire during the summer with my rig, so any help is greatly appreciated to get me out of here during the weekend. So far I've done: 1. New electric fan 2. New radiator (cheap aluminum and plastic from Autozone, single core I think) 3. New radiator hoses 4. Thermostat I read through Sherrie's post with the same issue, but I didn't glean exactly what her problem ended up being, only that she added water wetter and it seemed to solve her problem. Is the cheap aluminum and plastic radiator just insufficient for this climate and our unique rigs? Is this the proper radiator for our application?: https://www.amazon.com/CSF-Toyota-4Runner-Pickup-Radiator/dp/B000CFRKS8/ref=sr_1_11?s=automotive&ie=UTF8&qid=1467592974&vehicle=1990-76-230-234-59--8--3992--9--2282--5-0&sr=1-11&ymm=1990%3Atoyota%3Apickup&keywords=radiator I was also thinking it may be a weak or faulty water pump, but that's an expensive endeavor to just throw at it without knowing if it's the real problem. Thanks!
-
Thanks, good advice, I'll put the tape down first.
-
Hey Jaunt, sorry for taking so long to reply. I ended up finding quality FRP at a local store here with quality FRP glue, which is important. Liquid nails did not adhere to my satisfaction, but the Titebond Fast Grab worked great! Sorry, was having problems uploading pictures here, so they're on imgur: http://imgur.com/a/aqJ45
-
Thanks Dan, yep, one of the few places on the back of my coach that wasn't rotten.
-
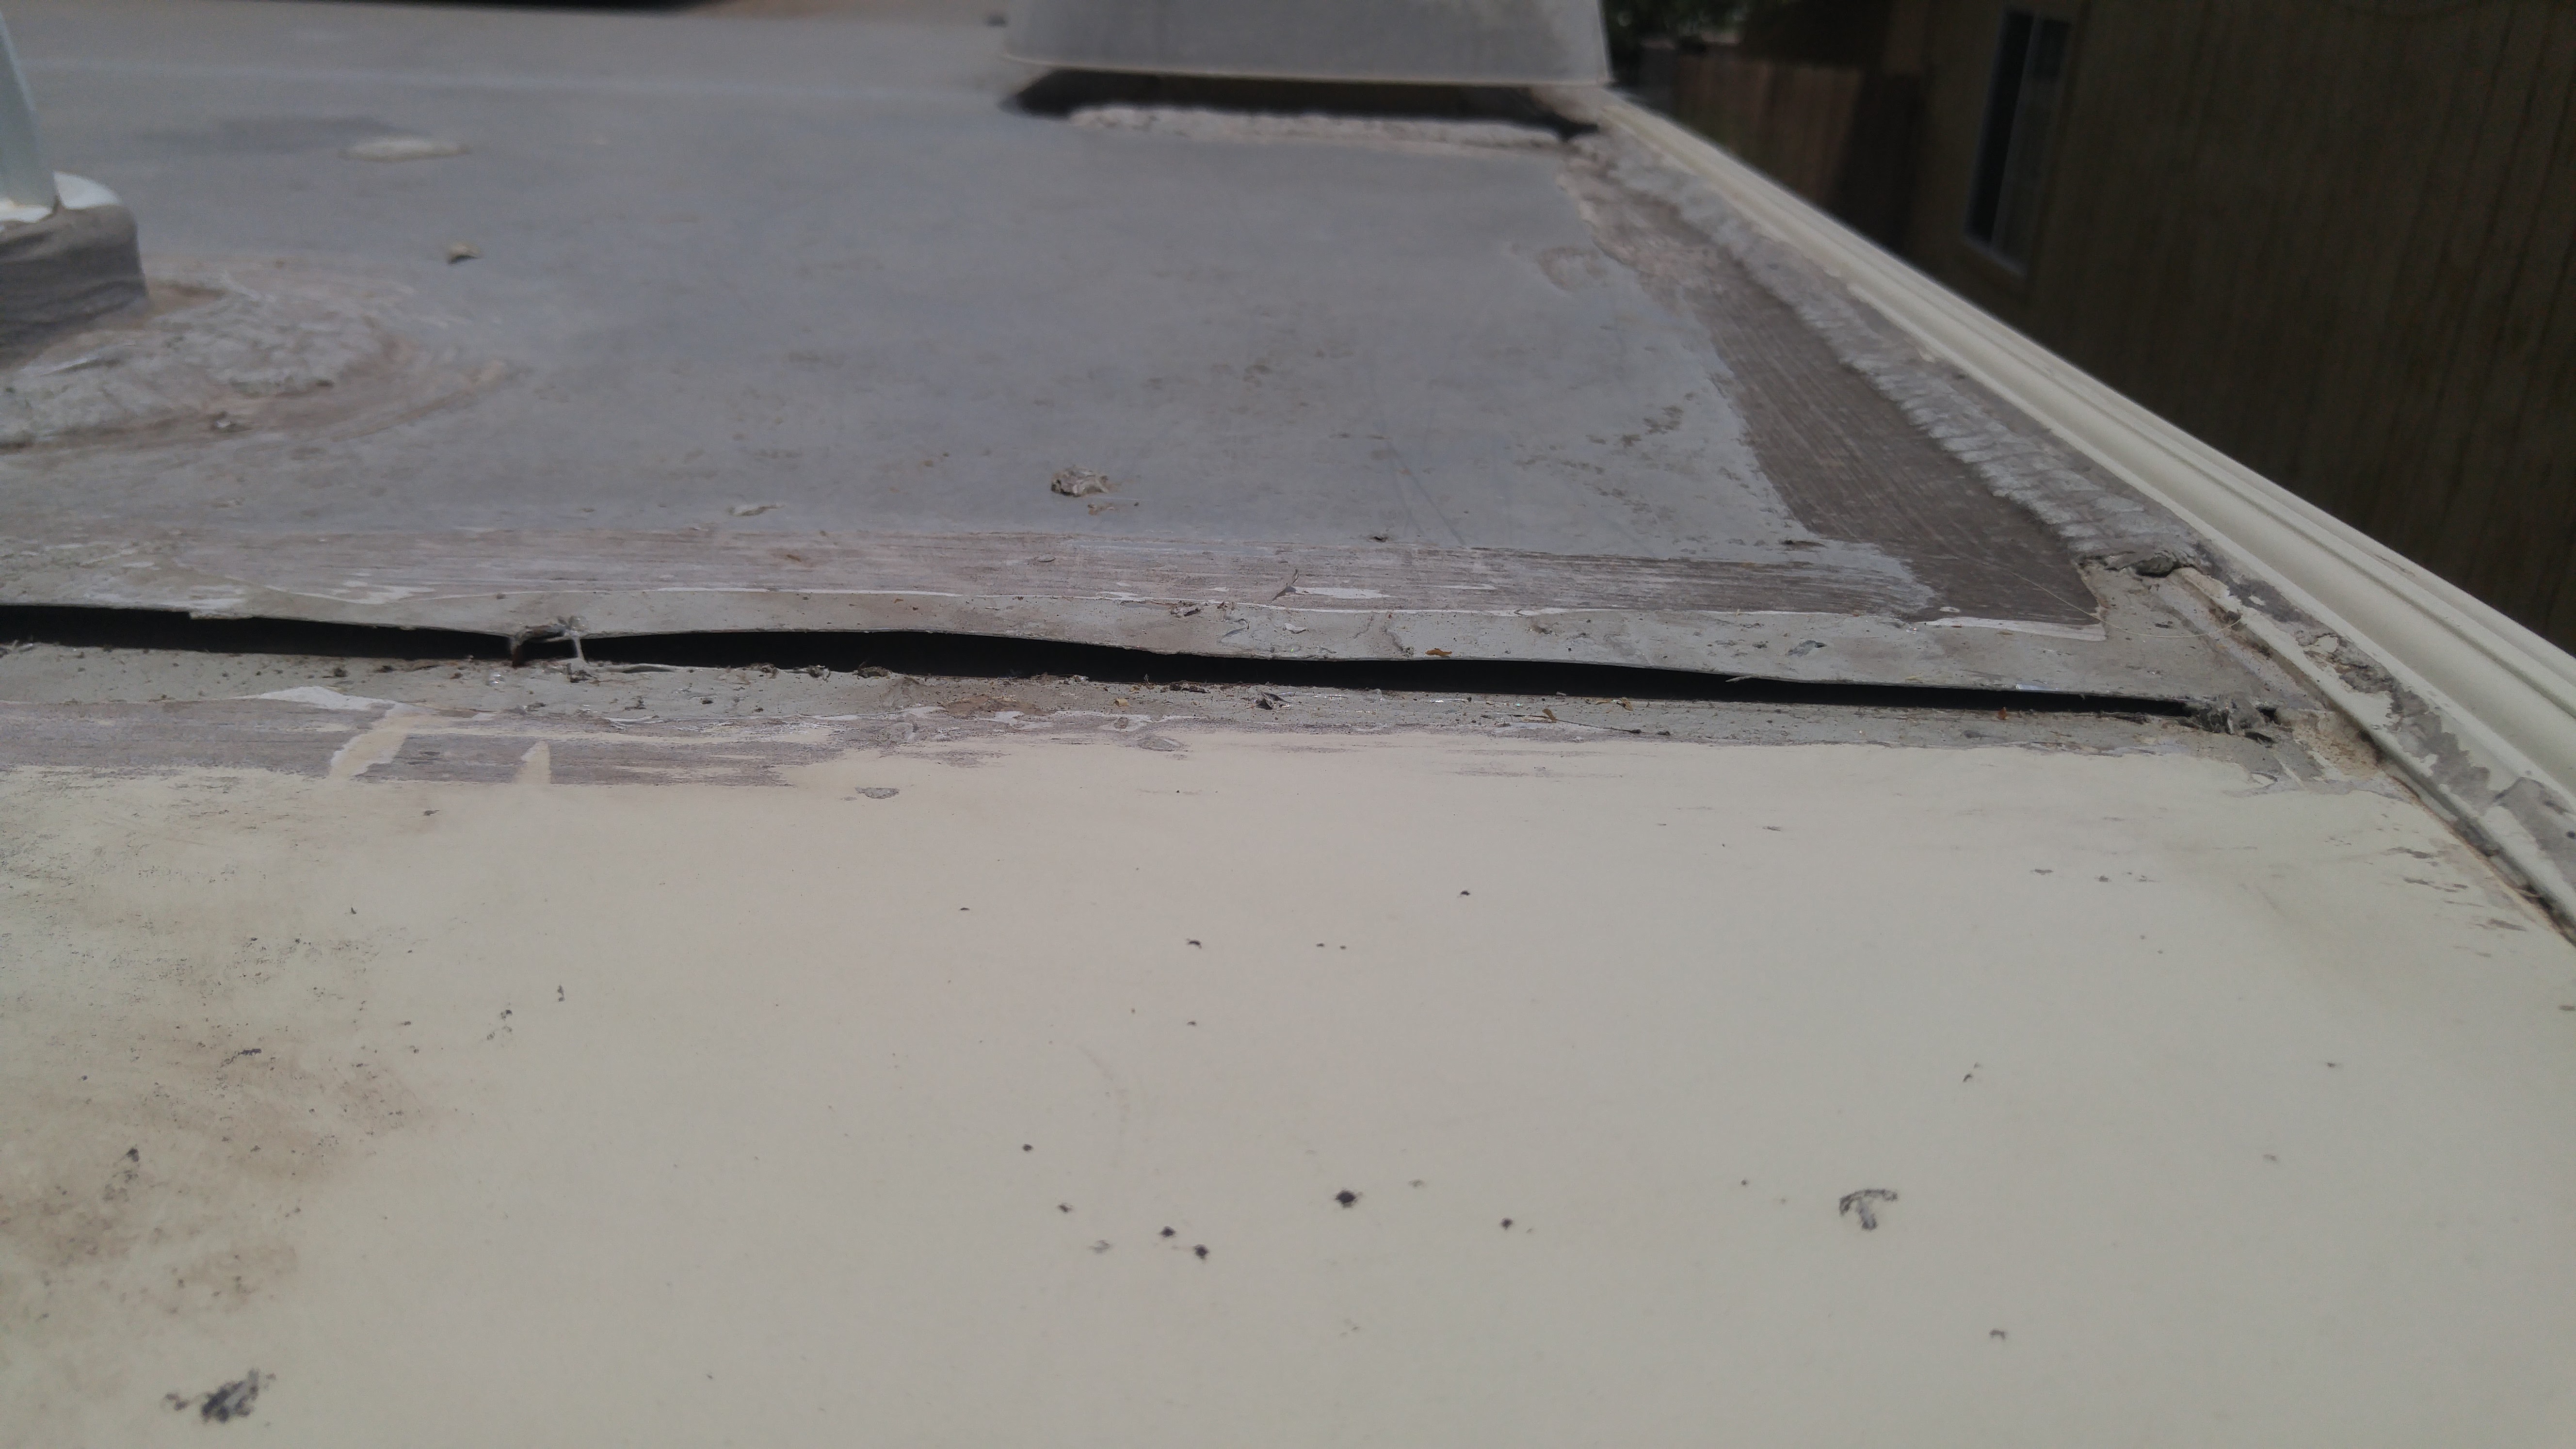
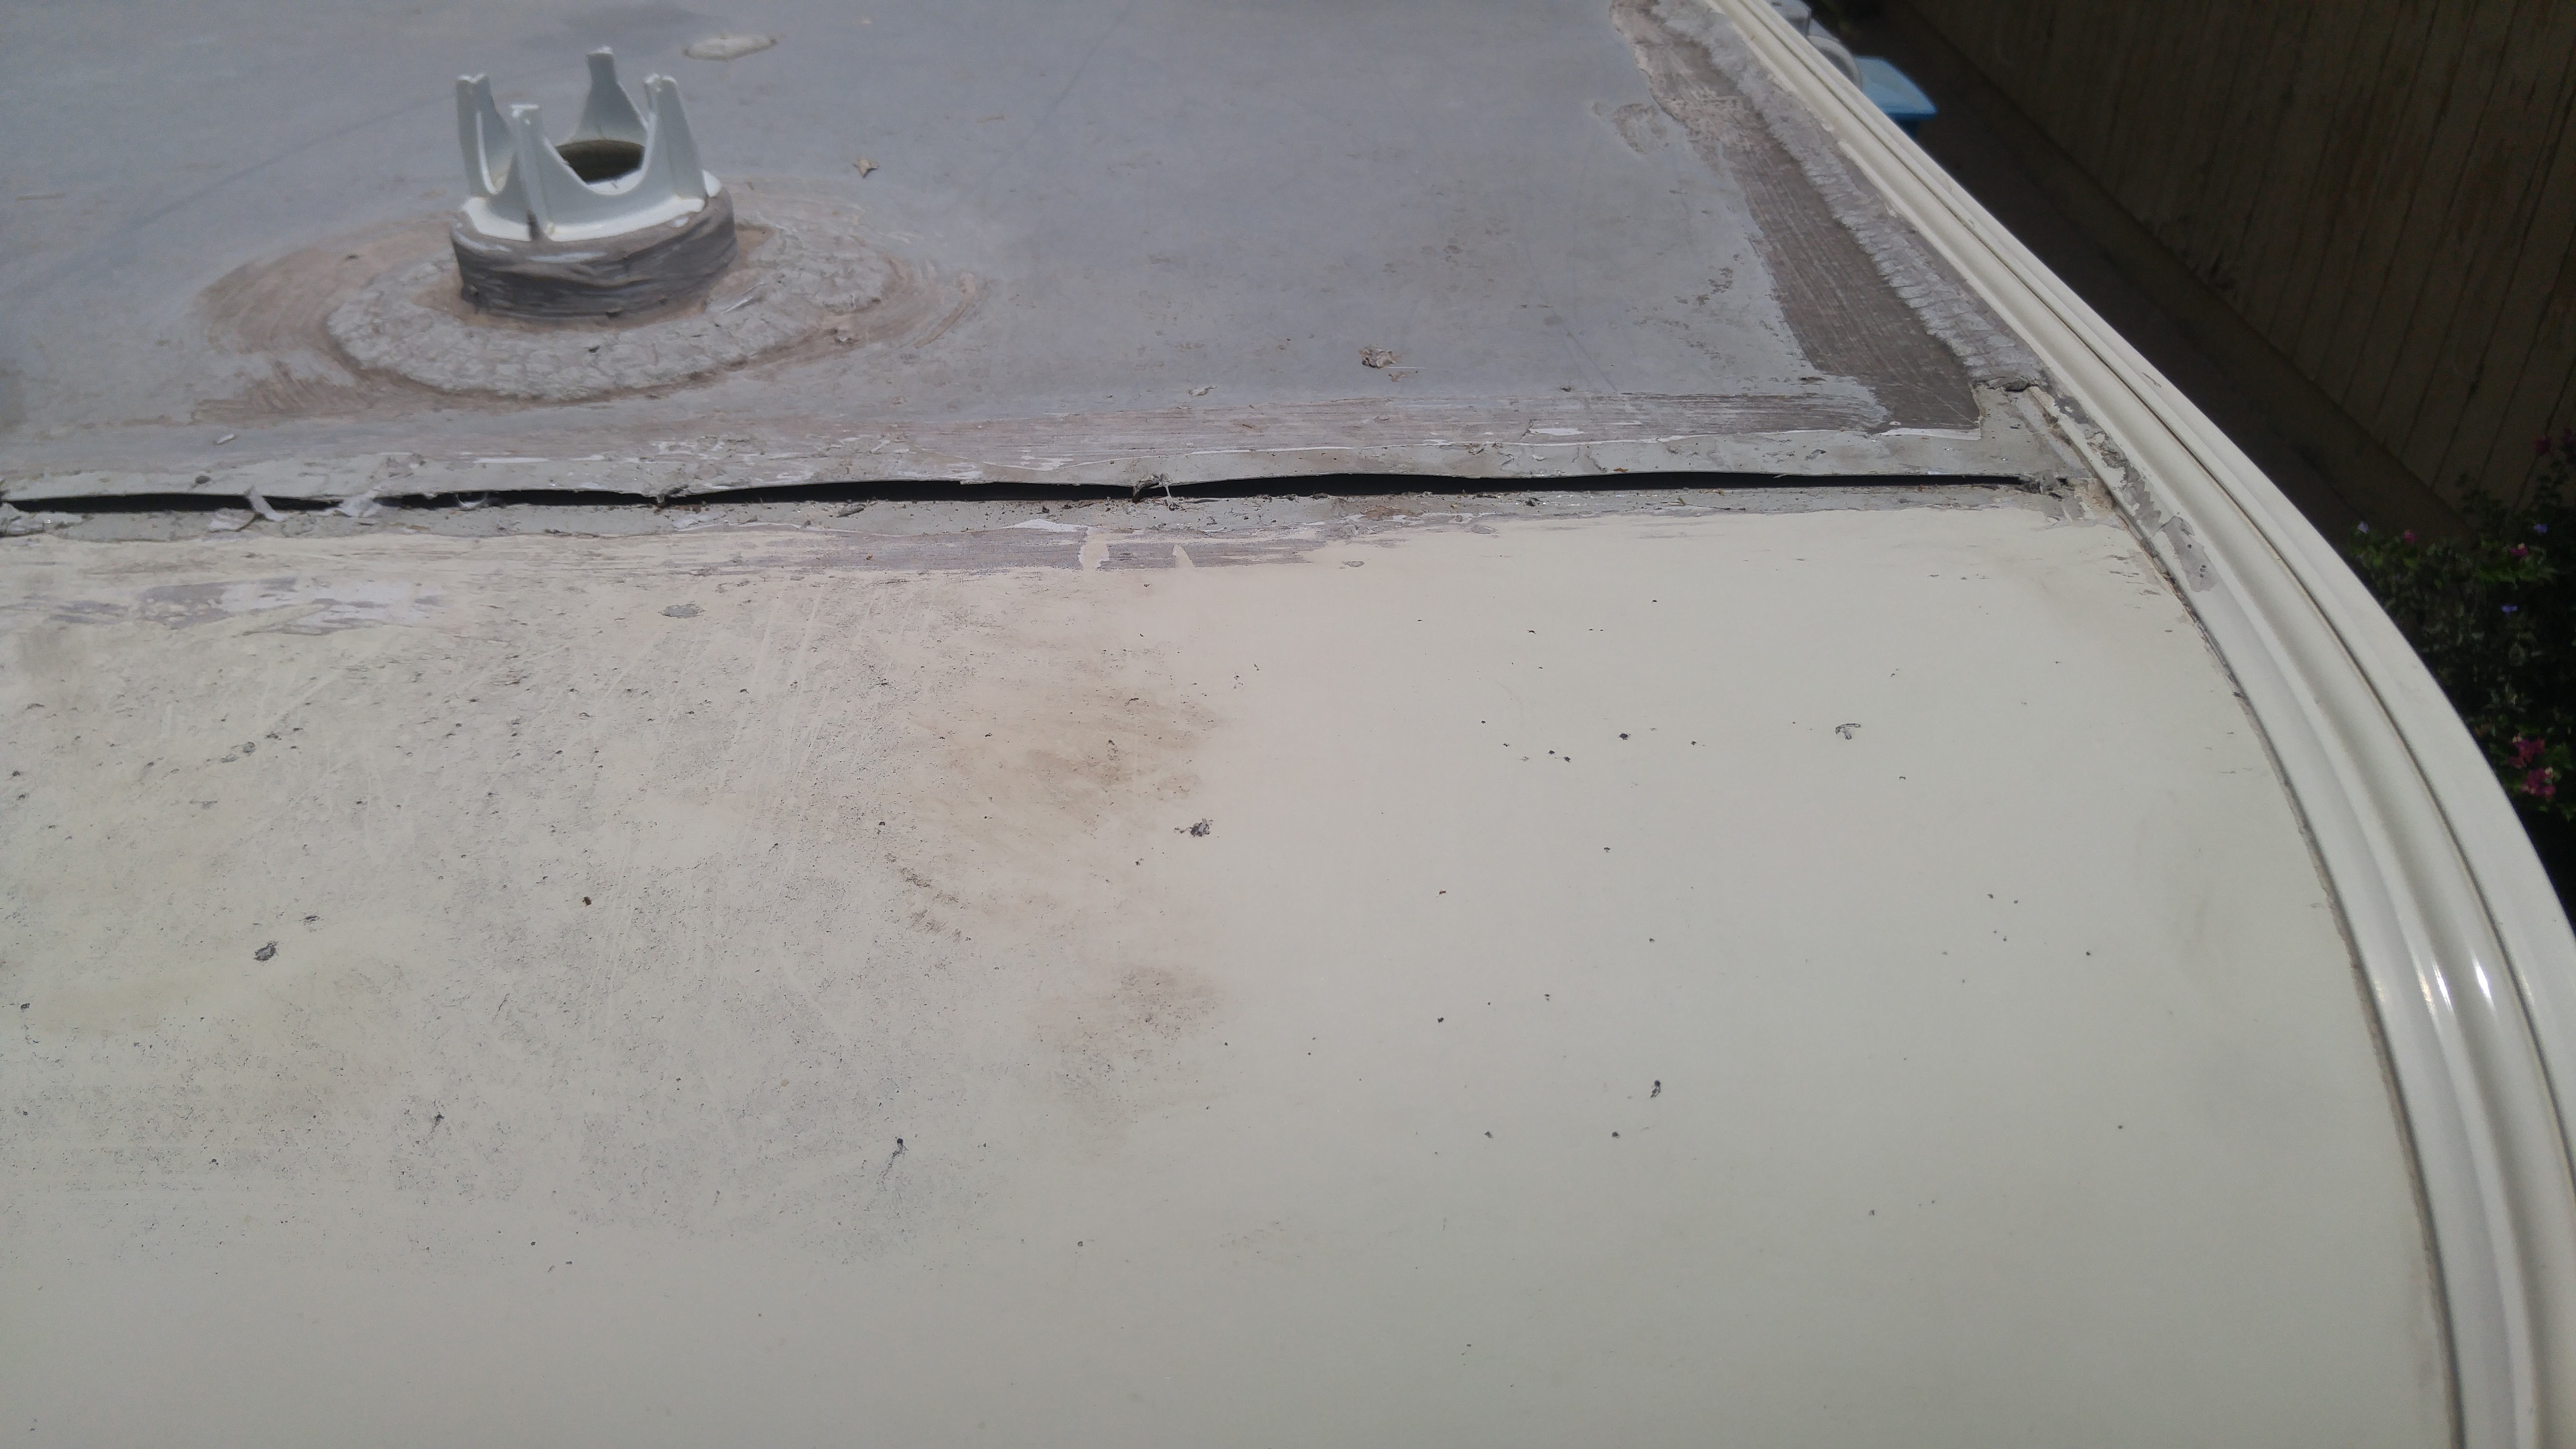
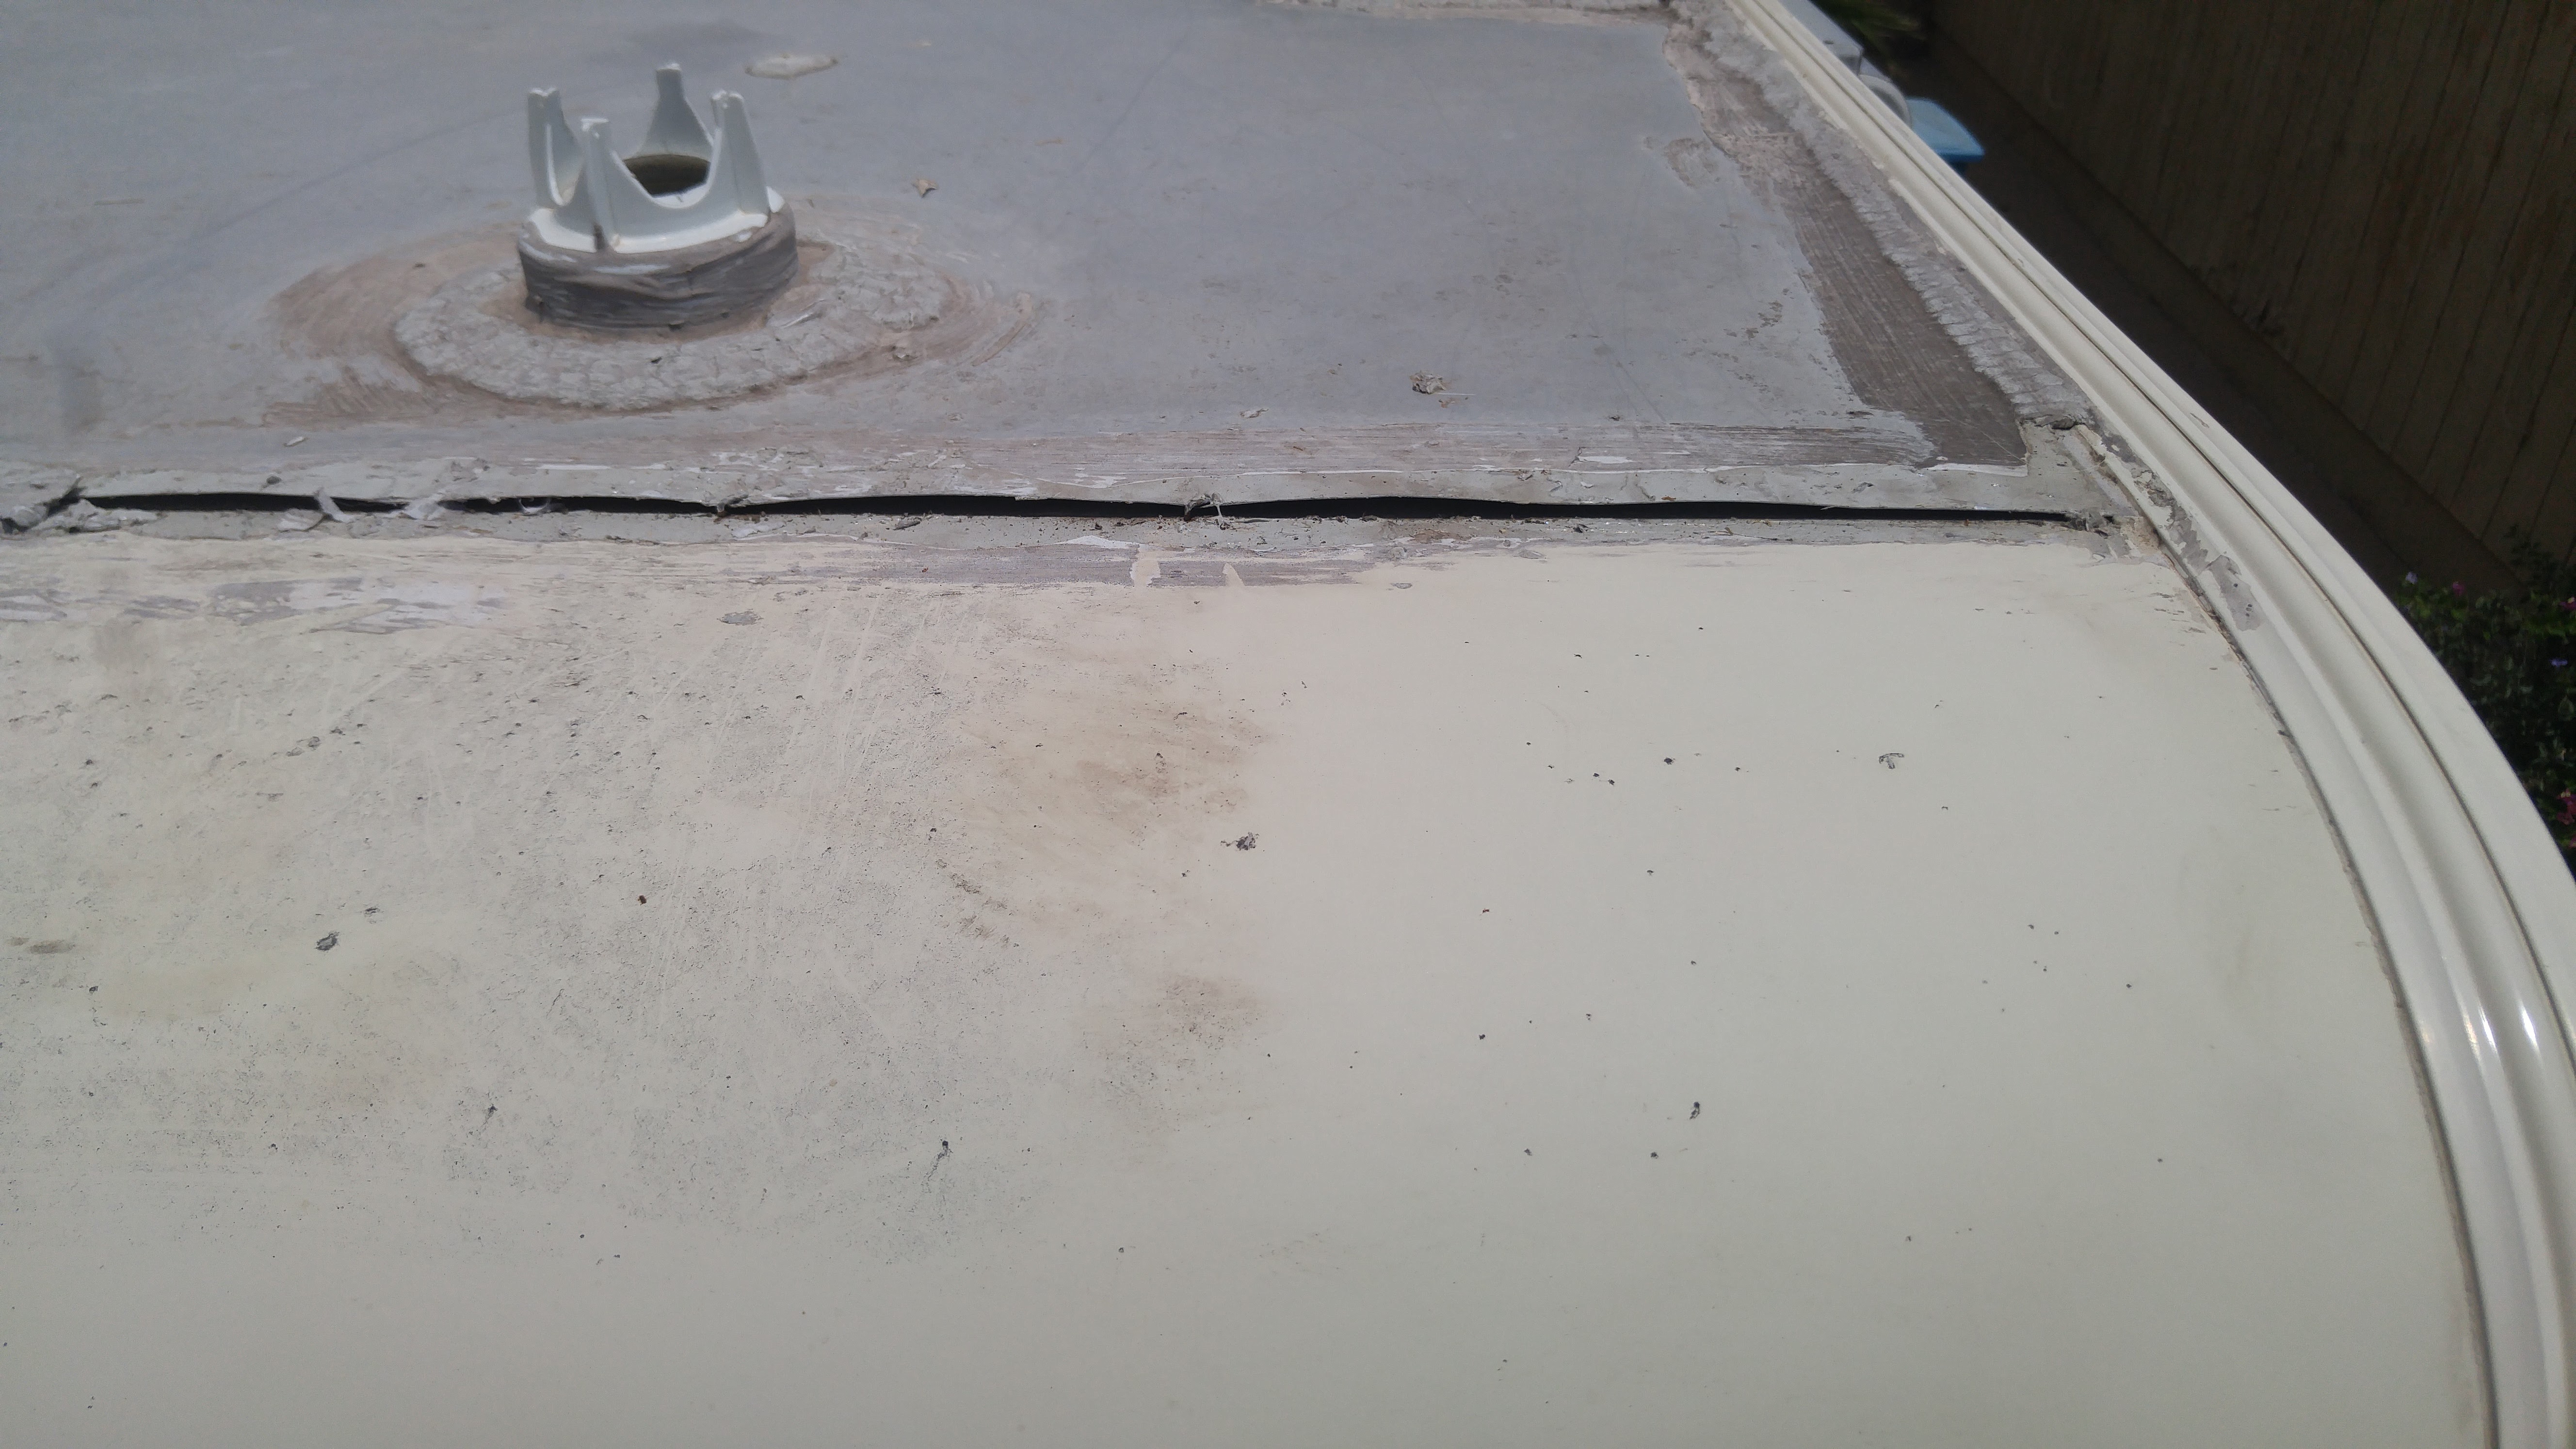
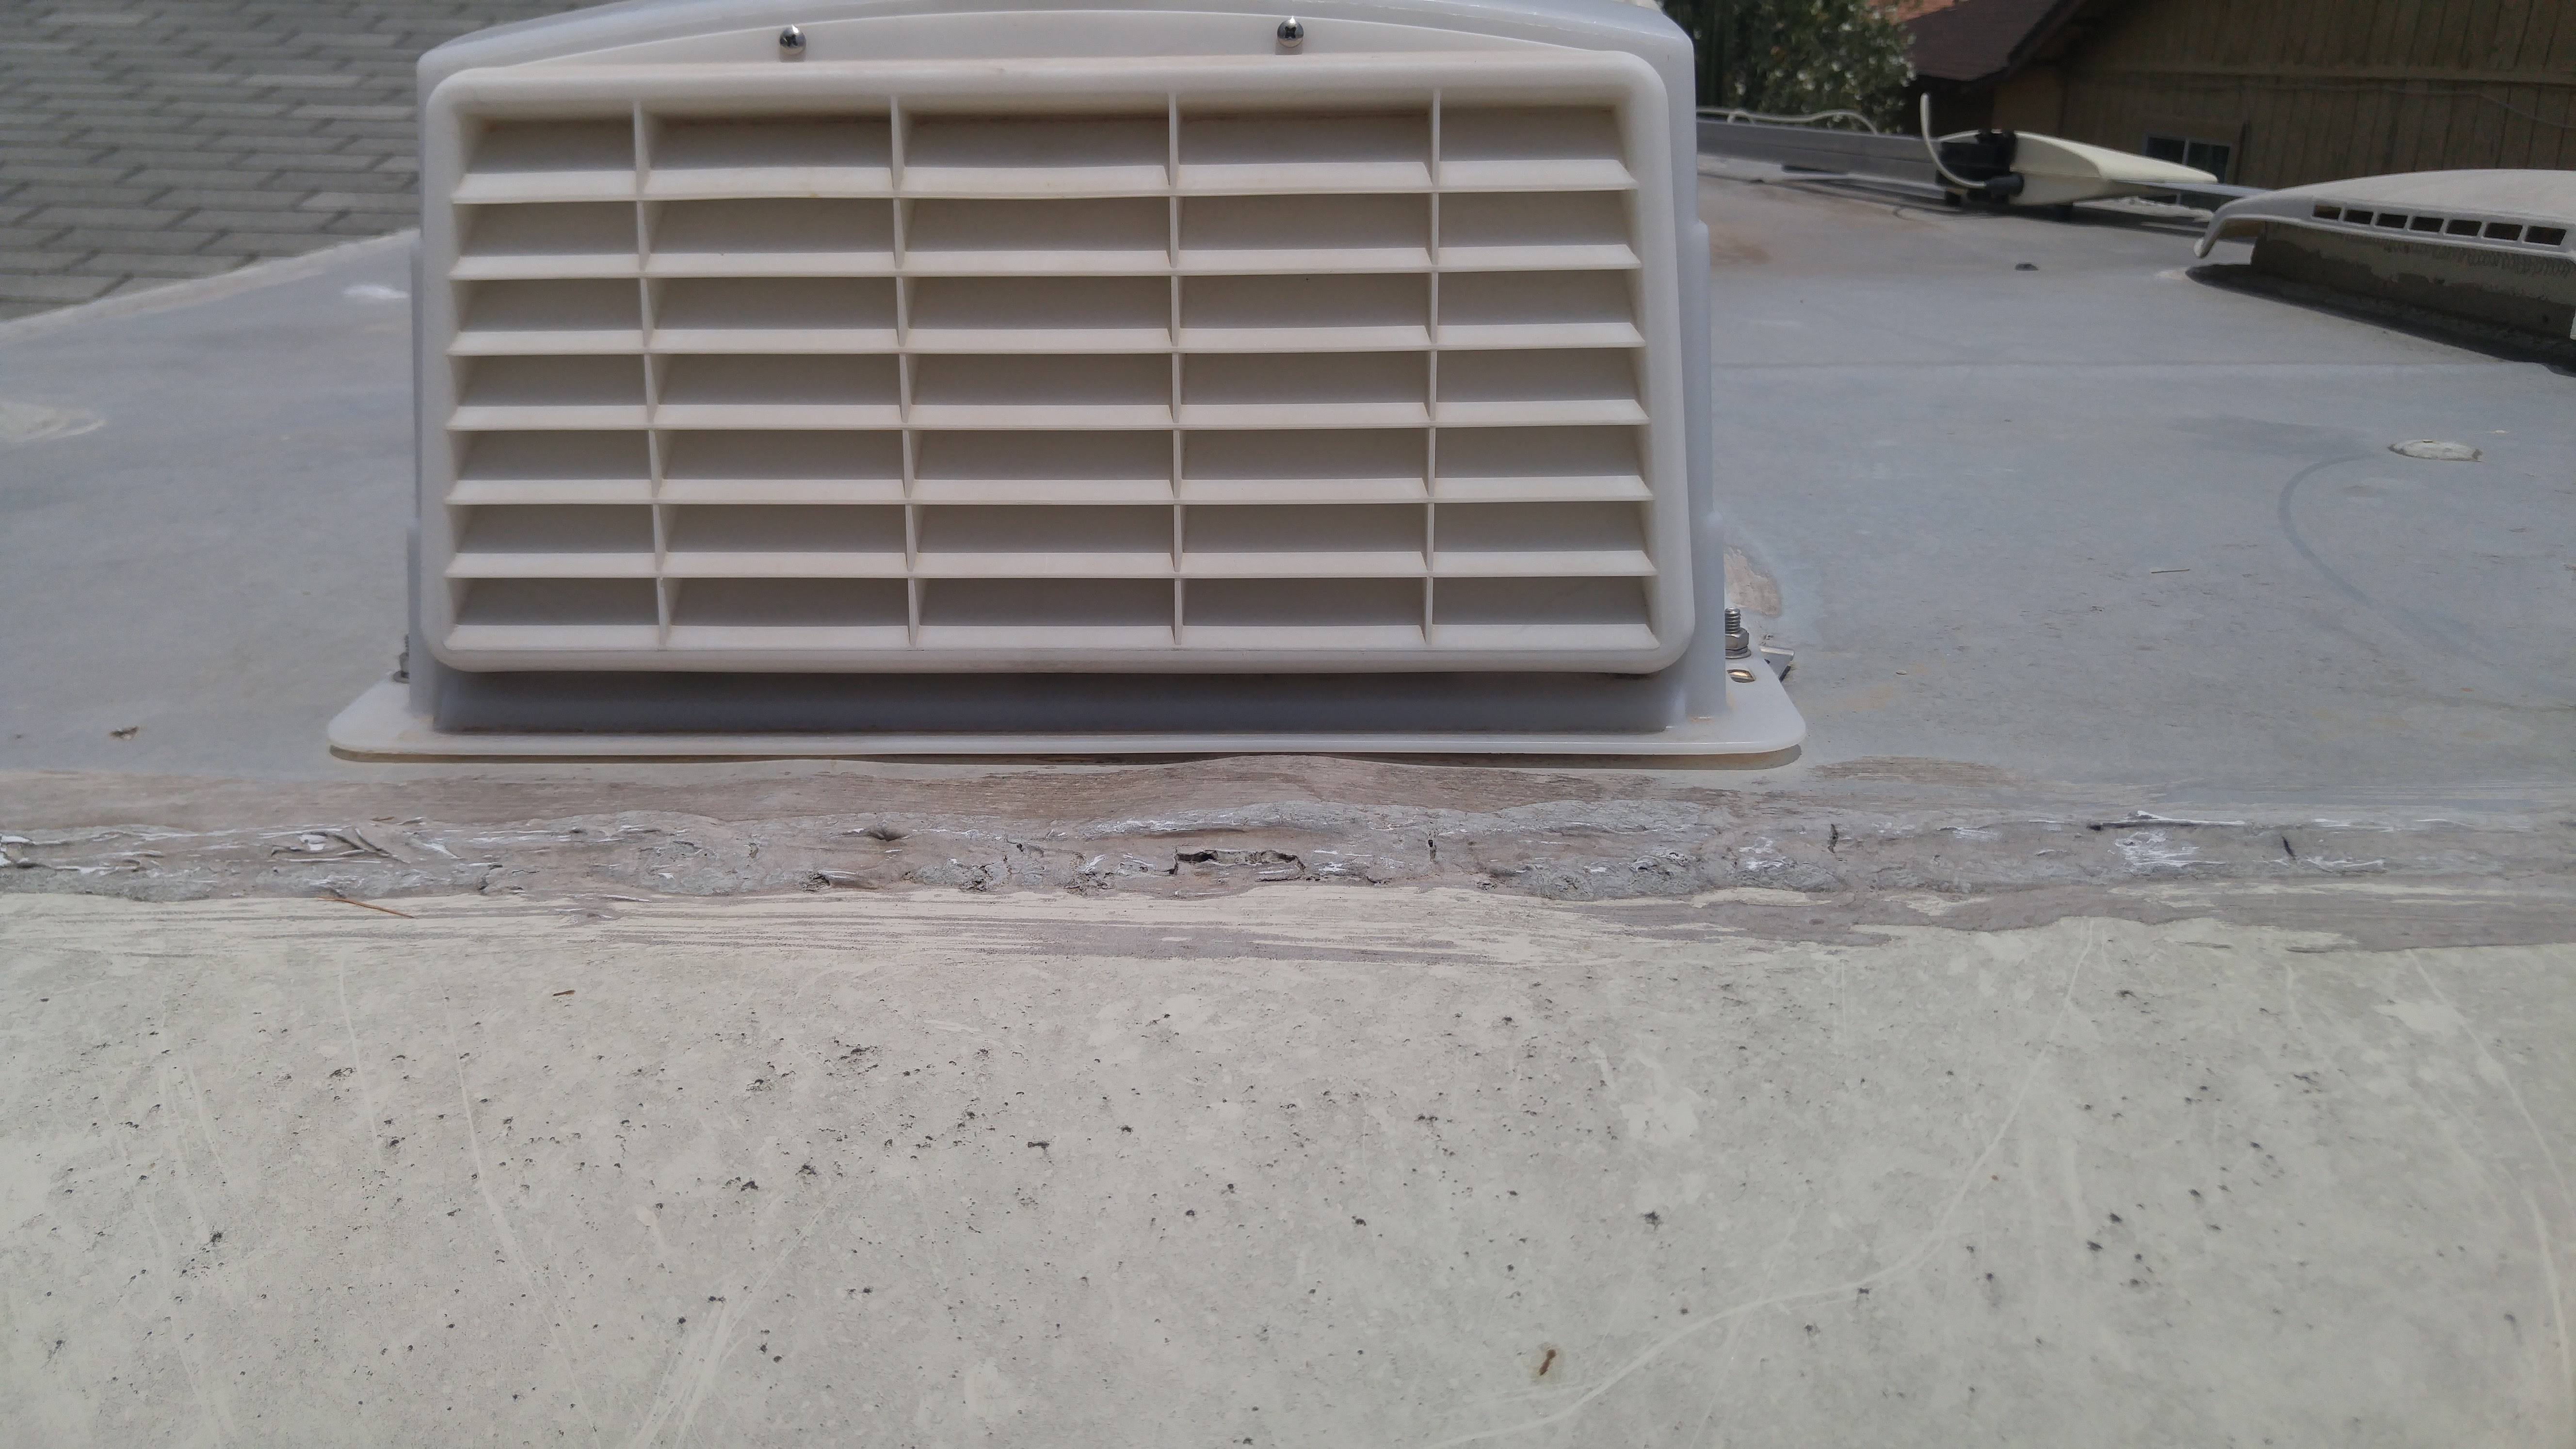
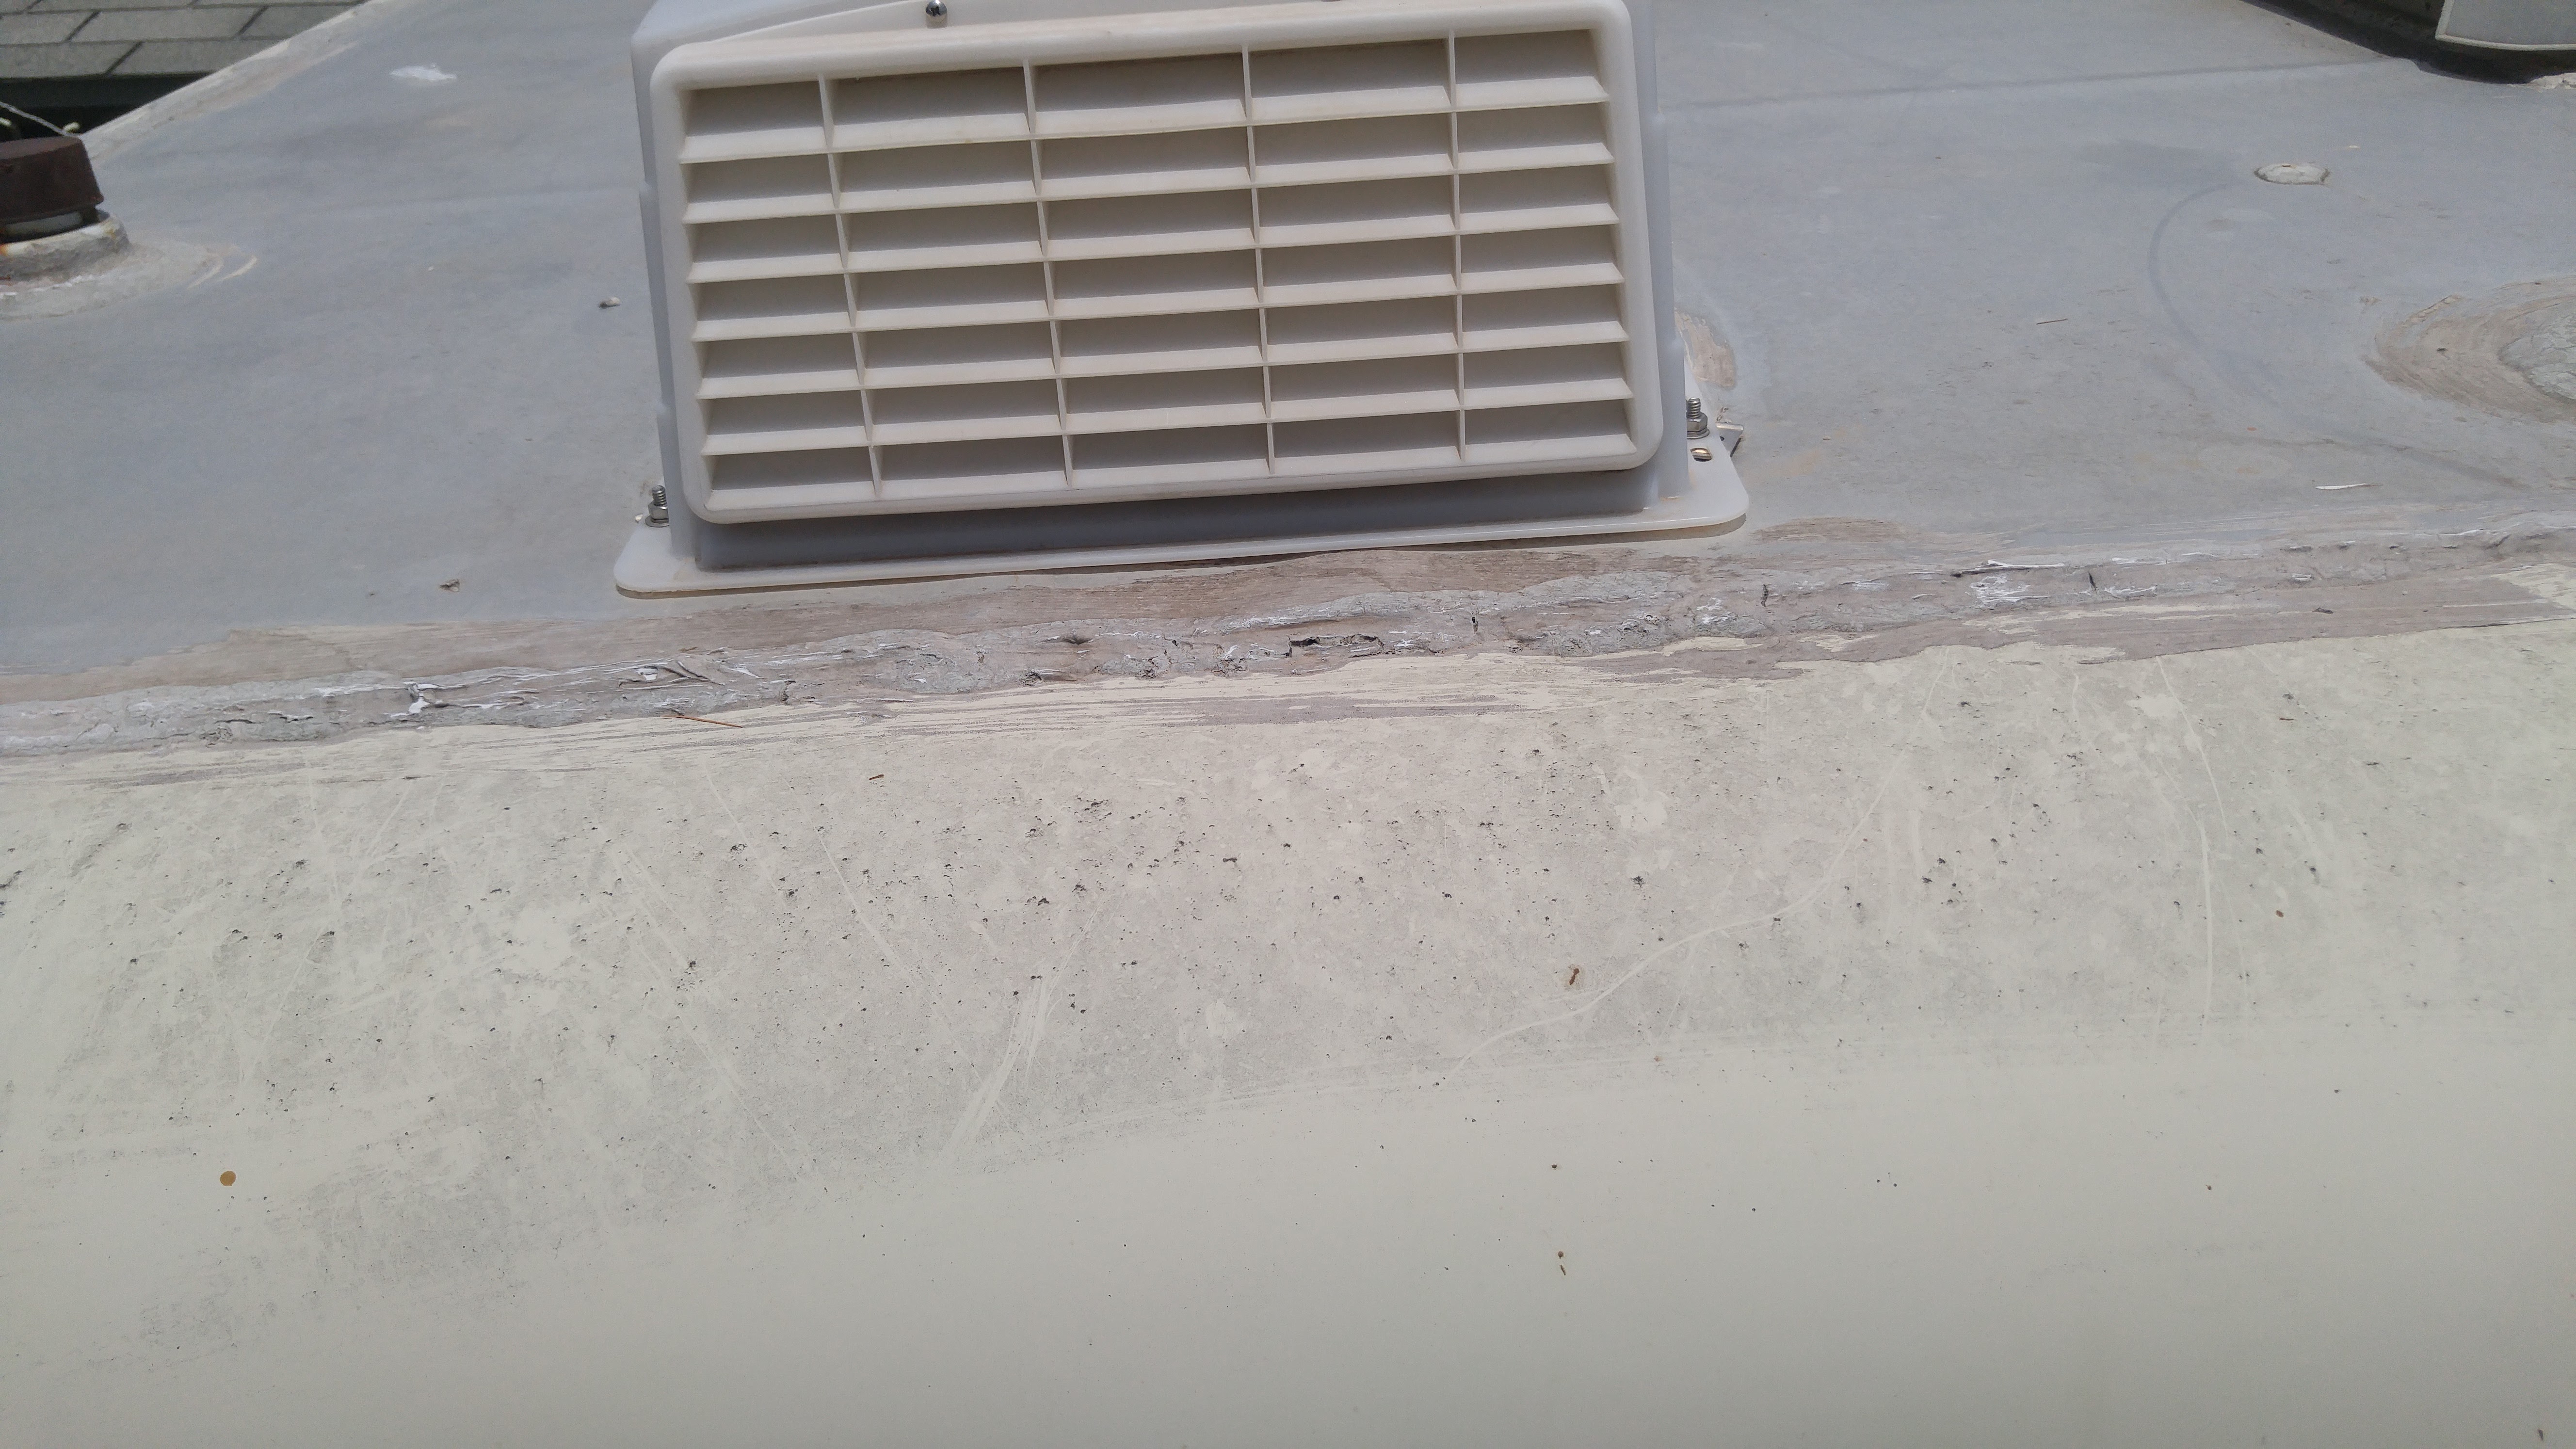
Hi all, so I've been busy redoing all of the seals on the exterior of my Minnie Winnie, and one that needs to be redone is the where my metal roof meets the fiberglass on the rear of my coach. I noticed some cracks in the original sealant so I've started scraping it all off as opposed to trying to get enough lap sealant over the top to seal down into the cracks. I'm concerned about the separation here between the sheet metal an the fiberglass. It looks like it was originally stapled together and the staples are no longer holding. There is a piece of wood that runs the width of the coach almost where the seal is, so the only solution I've come up with is to put some screws through the roof, but I know that's not ideal, putting new holes through the roof and all. Then, I will put a new layer of lap sealant over the seam, and some eternabond roof tape over the lap sealant. Does anyone else have experience with this, and/or advice? Thanks!!

-
Hello Toyota Motorhomers, In the process of fixing up my beautiful 91' Warrior, I'm currently ripping out the foam insulation and plywood in the shower area due to water damage; rot and mold. Does anyone have any tips for gluing the exterior to the interior? The only way I see to do it is to take apart the seam from the outside to be able to clamp everything down with some Gorilla glue. Also, I haven't decided what to replace the cruddy Luan stuff on the interior shower with. It obviously didn't stay too waterproof over the years. Looking for just some heavy duty plastic paneling online hasn't produced much. Thanks in advance for any help and recommendations! Lope
-
I wanted to make my Yoterhome a bit more rugged too, and was considering doing a springover axle conversion where you take the axle off and install it under the spring. Then I was hoping to do a locking differential and the 27" tires. People advised against the springover, since it would potentially raise the coach 4-5", and may become a little top-heavy. I'm still curious to see how much the lift would be once the coach is weighed down with gear. I may still do it because it's always reversible and not really all that much work. I ordered some Firestone airbags, so I'll probably do that and the differential for now to see where that gets me. My buddy who really knows tires seems to think that the 27 x 8.5R14 will fit. something like this http://www.summitracing.com/parts/gti-05684400000/overview/, but I'm skeptical. I know a guy who will let me do a test fit on my rig, so I'll be sure to report back. I think they'll be too wide and they'll rub in the back.
-
That is helpful, thanks Darrel.
-
91' Winnie Warrior Over-Cab Water Damage Repair
Mrlope replied to Mrlope's topic in General Discussion
Have you looked into composite foams? There's some pretty cool stuff out there: http://dragonplate.com/ecart/categories.asp?cID=106 -
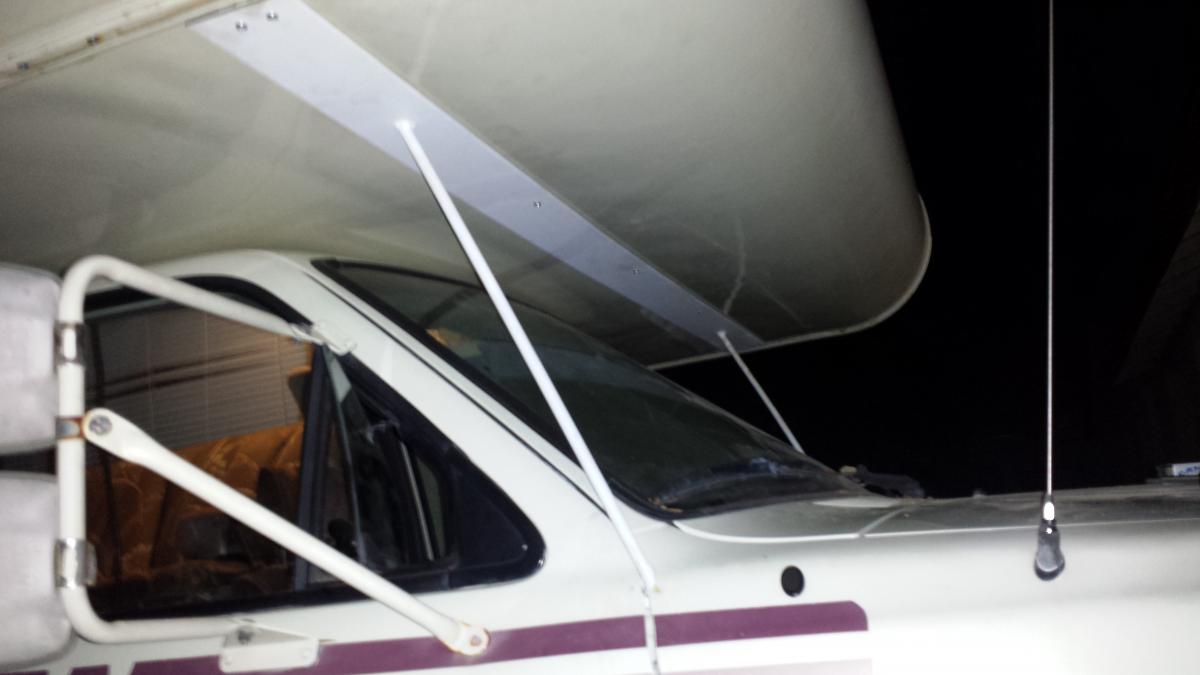
I installed a custom-fabricated support for the cab-over. Two steel rods were welded onto small brackets in the doorjam, which was then also welded to 3" steel plate. The steel plate ran the width of the fiberglass, and was screwed into the existing metal support. The wood and foam from the cab-over interior was destroyed by water damage, so it was all ripped out and replaced with new high-grade lumber, foam, and plywood. All in all, I'm very happy with the results and shouldn't ever have water problems in this area again. It's a shame that they didn't think to add more support here in the first place! I'm still not done, I could use some help in deciding what to do about the outermost layer, which is still heavily glued on. It's incredibly hard to strip off, but I was thinking about buying an electric planer to get an even surface to glue a new piece of plywood to. Thanks for looking! Here's an album of the fix: http://imgur.com/gallery/JP7aO/new
-
Today I installed a custom-fabricated support for the cab-over. Two steel rods were welded onto small brackets in the doorjam, which was then also welded to 3" steel plate. The steel plate ran the width of the fiberglass, and was screwed into the existing metal support. The wood and foam from the cab-over interior was destroyed by water damage, so it was all ripped out and replaced with new high-grade lumber, foam, and plywood. All in all, I'm very happy with the results and shouldn't ever have water problems in this area again.
-
Thanks for the help everyone, I'm definitely reconsidering the SOA conversion. I'll replace the airbags and see where that gets me. I like that Firestone kit. Is an on-board air compressor worth installing? I was thinking about one of the Firestone kits. Thanks!
-
I did think it may become top-heavy after the conversion. Maybe some extra vertical support in the coach would resolve that? I'm mostly looking for higher clearance. My springs are still in good shape, but the airbags are shot. I'll replace the airbags and see where it sits. Any recommendations on the airbags?
-
Hi Toyota Motorhomers! I'm currently remodeling my '91 Winnebago Mini Warrior, and I am curious to see if anyone out there has taken the axle and put it under the leaf springs to give the rear some lift. If so, is there a kit out there for it anywhere? It may give the rear about 5" of lift, and would allow for some bigger tires, more traction, and higher ground clearance for more capable boon-docking. Does anyone see any disadvantages this would have on my rig? Some day down the line I may even want to do a full 4x4 conversion, so this would be a good start. Thanks!